
How to Add Background Music in Riverside.fm: A Step-by-Step Tutorial
How to easily add background music using Riverside's new editor.

Adding background music to your podcast or video can greatly enhance the overall production quality and listener experience. In this tutorial, I'll walk you through how to easily add background music using Riverside's new editor feature.
Whether you want to add music for intros, outros, or throughout your entire episode, I'll show you how to do it efficiently and effectively.
Navigate the New Editor
To get started with adding background music in Riverside, you'll first need to familiarize yourself with the new Riverside editor interface.
Here's how to access it:
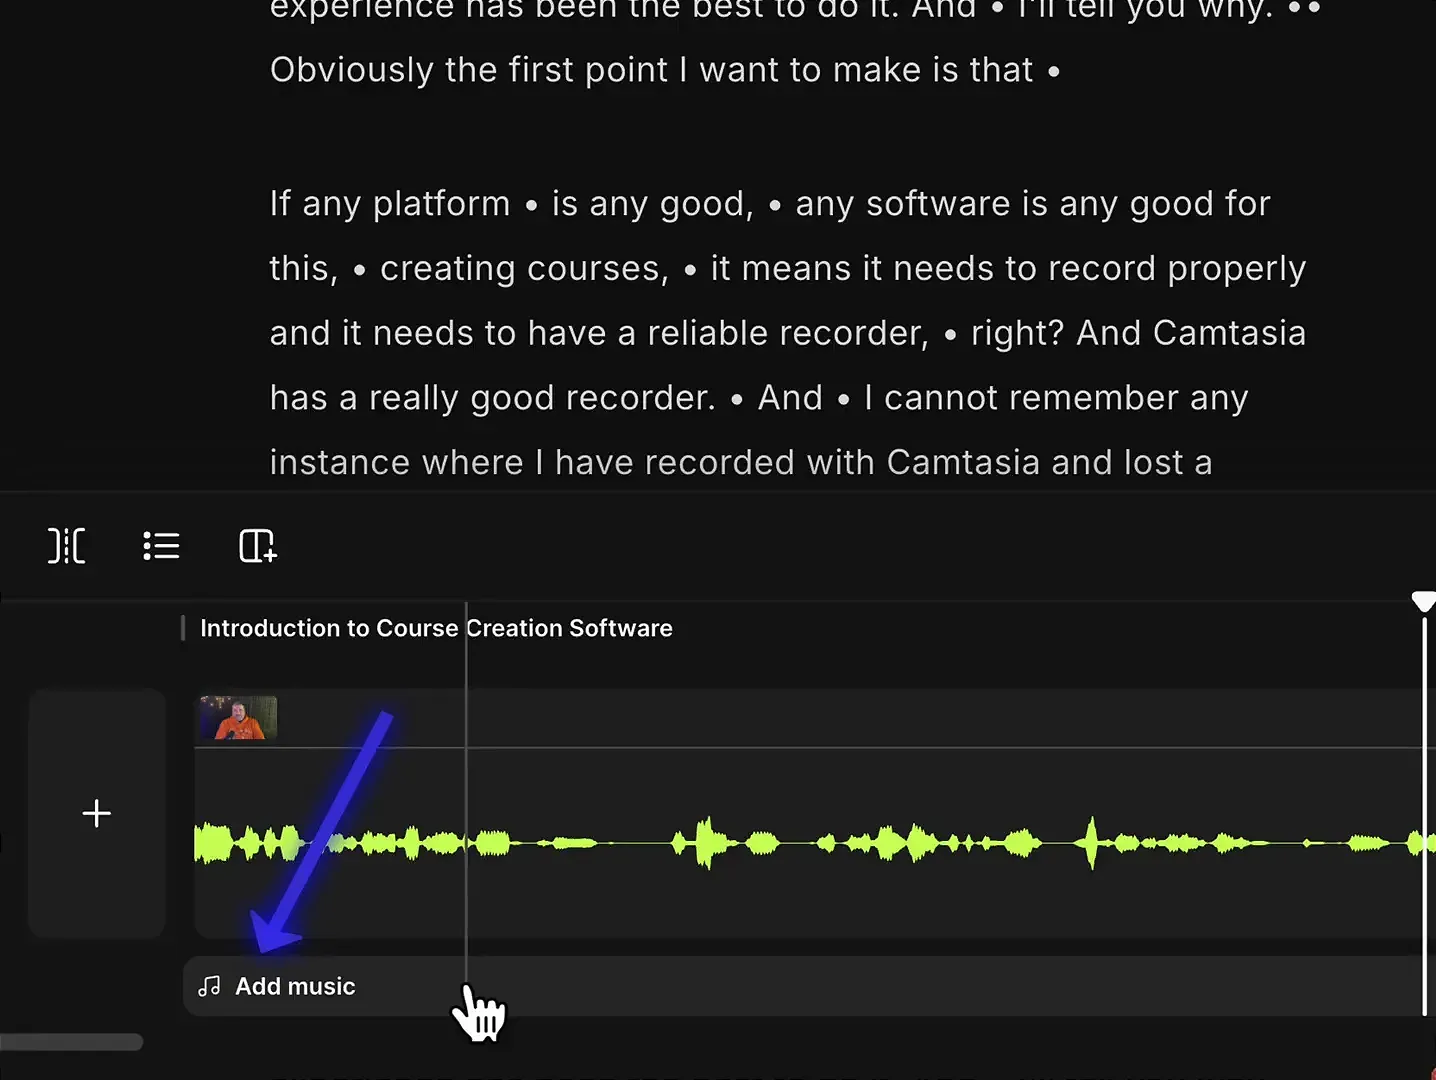
The new music track makes it simple to add and customize background audio for your recordings. Let's explore how to use it effectively.
If you’re eager to learn more about Riverside and wish to have a one-on-one Riverside coaching session, feel free to book a call with me.
I’m here to help you with any questions you have and to guide you through the best workflows, tips, workarounds, or just answer any questions you may have!
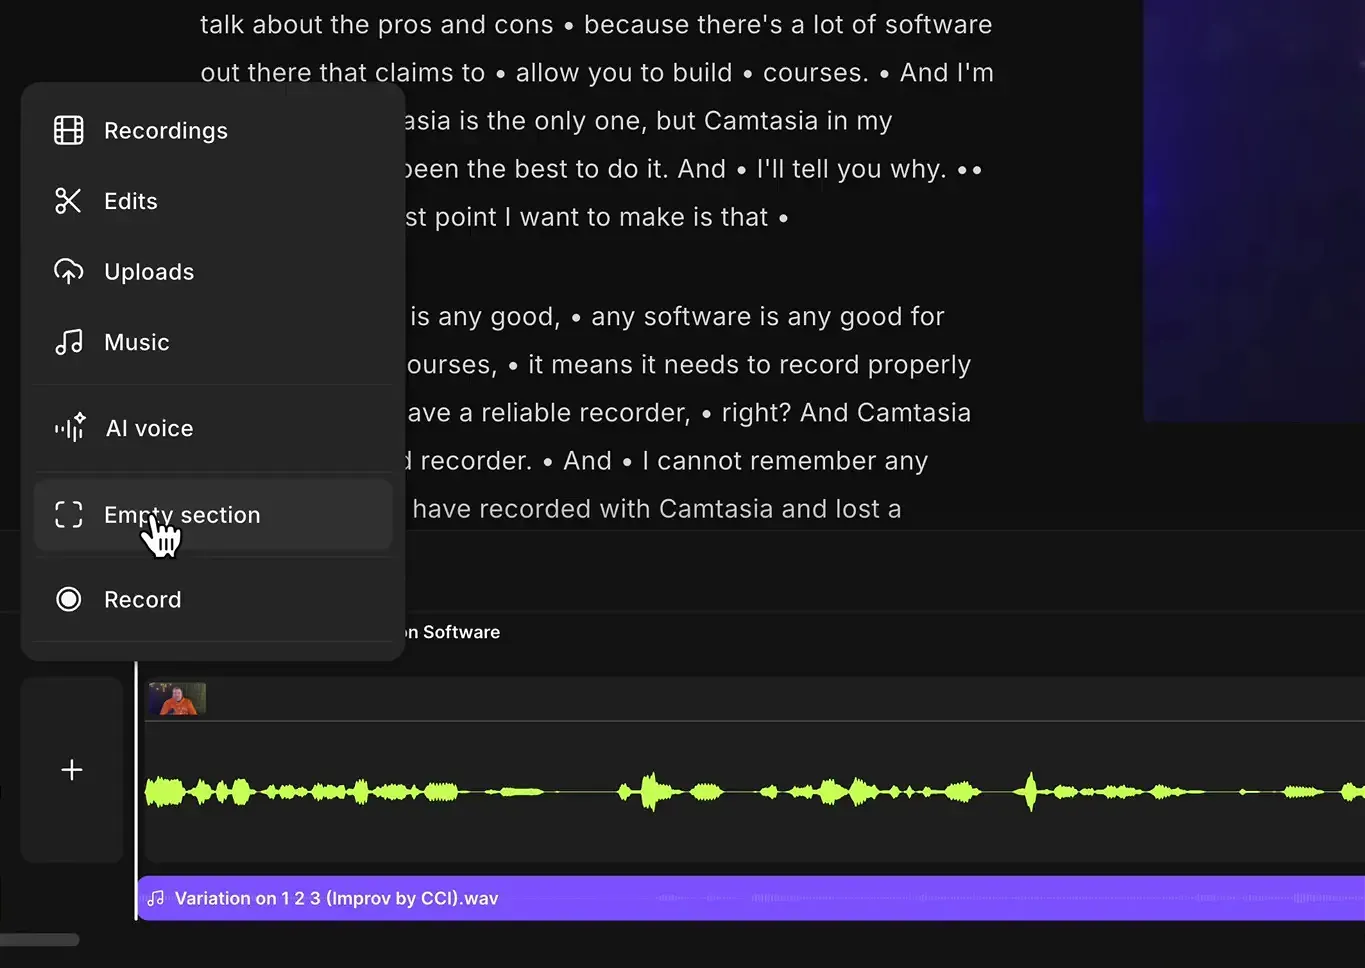
Add Stock Music to Your Project
Riverside offers a convenient library of royalty-free stock music that you can easily add to your projects. Here's how to use it:
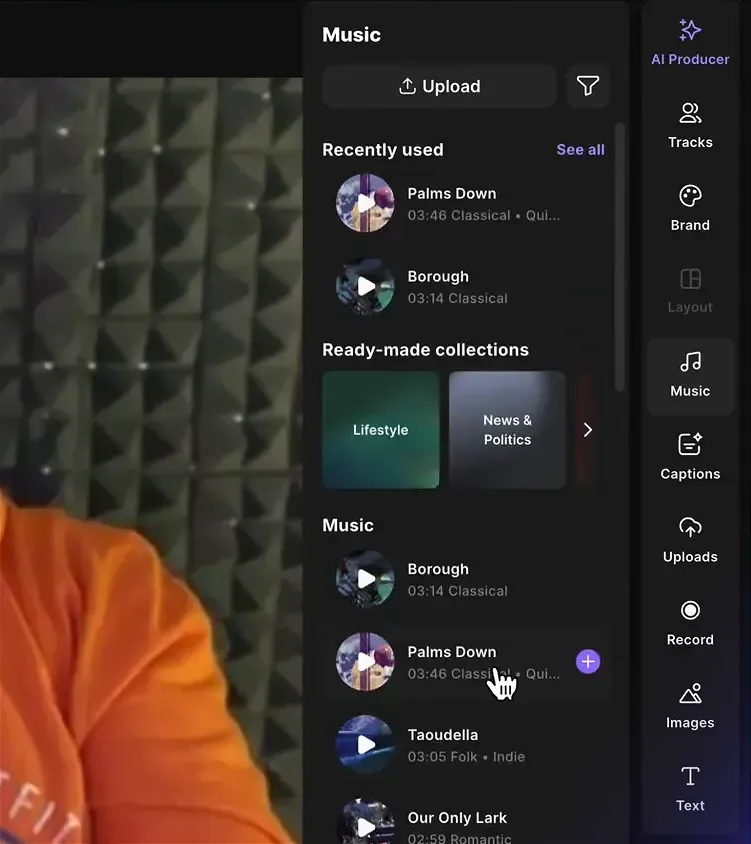
The selected music will automatically download and be placed at your playhead position on the timeline. You can then drag and reposition the music clip as needed.
Upload and Use Your Own Music
If you prefer to use your own custom music tracks, Riverside makes it easy to upload and incorporate them into your projects:
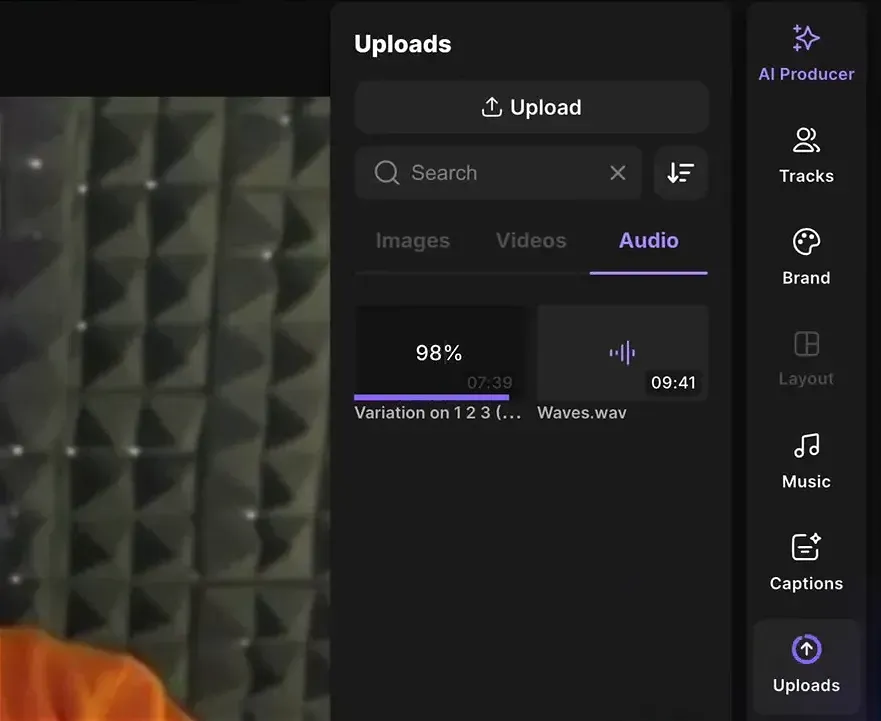
Once added, you can adjust the positioning and timing of your custom music just like with stock tracks. This gives you full flexibility to use any audio you have rights to in your productions.
Adjust Music Timing and Volume
Fine-tuning your background music is important for a polished final product. Here's how to adjust timing and volume:
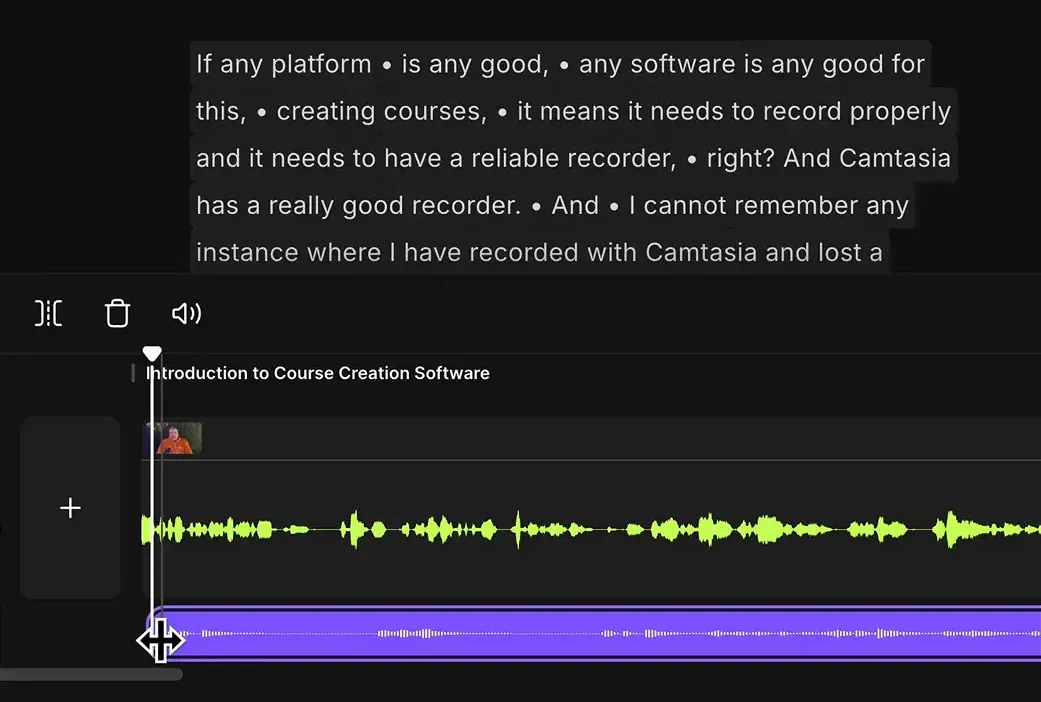
Take time to experiment with music placement and volume to find the right balance with your main audio. The goal is to enhance your content without overpowering it.
Create and Manage Intros
Adding music to your intro can set the tone for your entire episode. Here's how to create a professional intro:
This method allows you to create a consistent branded intro across all your episodes, complete with perfectly timed background music.
Fade Music In and Out
Smooth transitions are key to professional-sounding productions. Here's how to fade your background music:
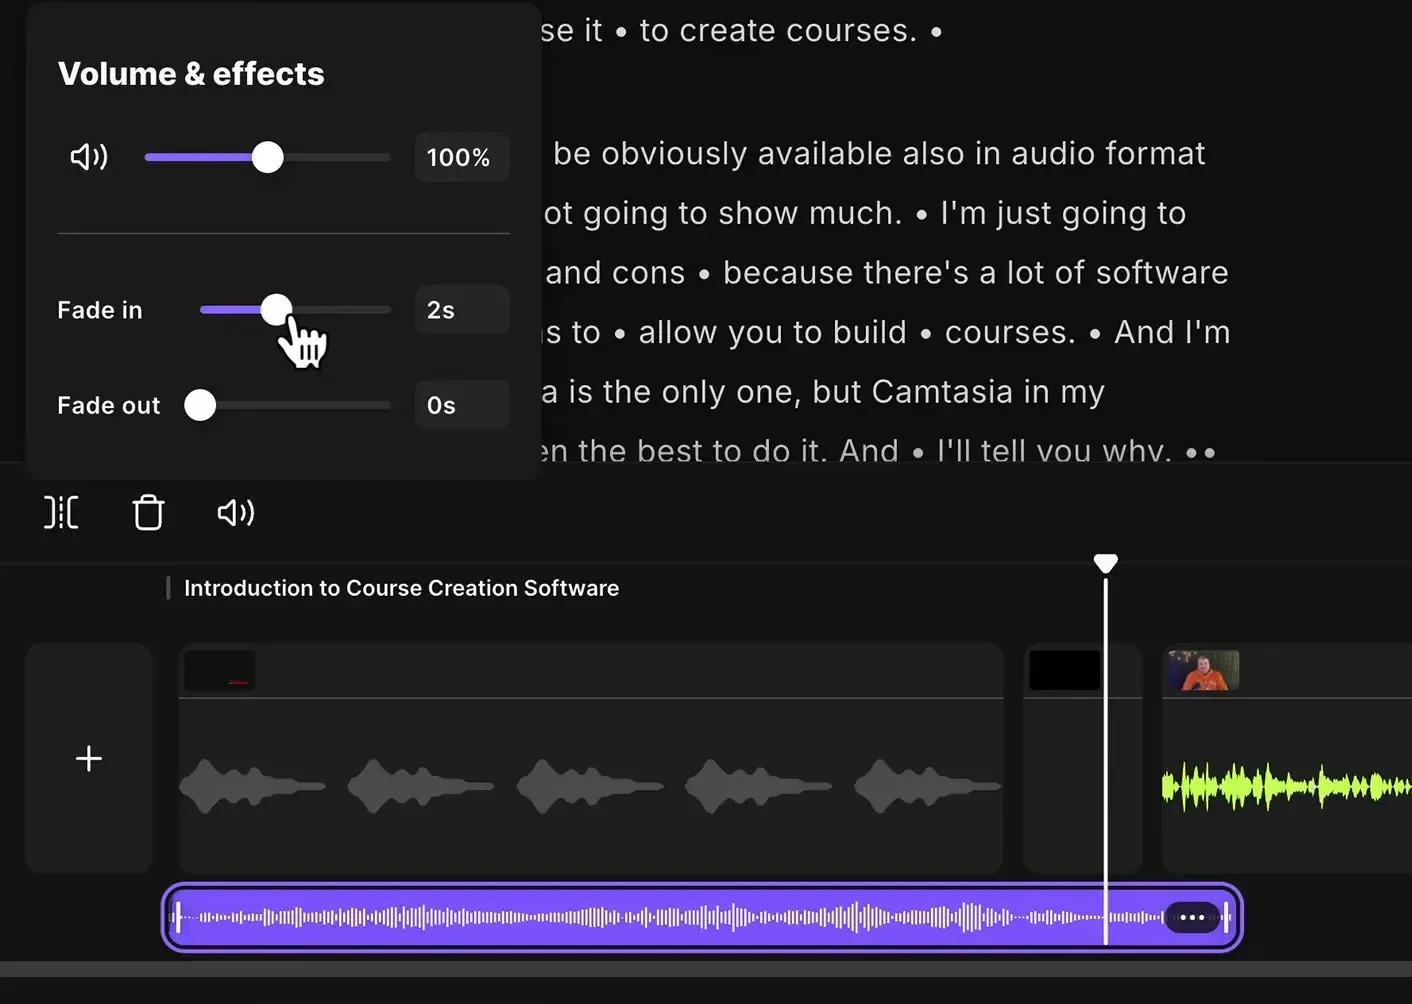
You can also access these controls by clicking the three dots at the end of the music track and selecting "Volume and Effects".
Experiment with different fade durations to find what works best for your content.
Replace Music Tracks
Sometimes you may want to swap out a music track after placing it. Riverside makes this process simple:
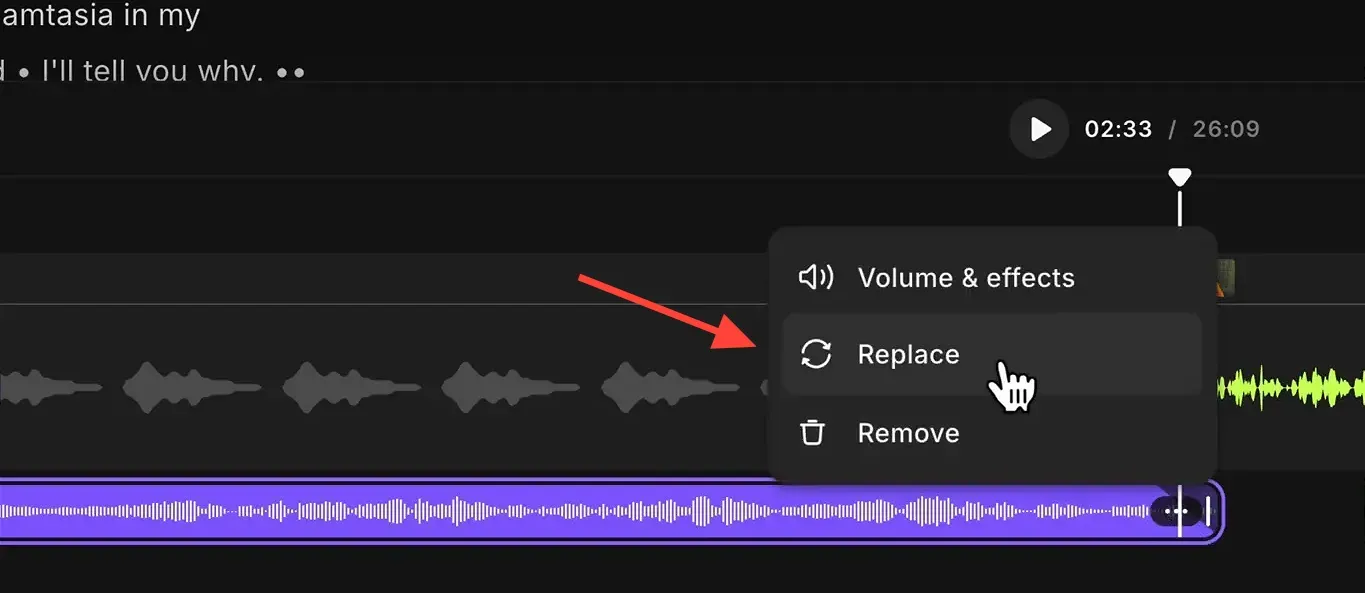
The new track will replace the old one while maintaining any fade settings you've applied. You may need to readjust the length to fit your content, but this feature saves time when experimenting with different background tracks.
Conclusion
Adding background music in Riverside is a straightforward process that can significantly enhance your audio and video productions. By following these steps, you can easily incorporate music into your intros, outros, and throughout your content.
Remember to balance your music levels carefully and choose tracks that complement rather than distract from your main content.
As Riverside continues to develop its features, we can look forward to even more advanced audio editing capabilities in the future.
Special Offer from Riverside
Ready to elevate your podcast or video production with seamless background music? Try Riverside for free today and experience their intuitive editor for yourself. As a special offer for my readers, use the coupon code "CRISTI15" at checkout to receive an exclusive 15% discount on your first three months of Riverside.
If you’re eager to learn more about Riverside and wish to have a one-on-one Riverside coaching session, feel free to book a call with me.
I’m here to help you with any questions you have and to guide you through the best workflows, tips, workarounds, or just answer any questions you may have!


