Best Settings for Your Riverside Studio: A Feature-by-Feature Guide
The best settings for your Riverside recording studio to ensure your podcasts, livestreams, and recordings are of the highest quality.


In this comprehensive tutorial, I'll walk you through my best settings for your Riverside recording studio to ensure your podcasts, livestreams, and recordings are of the highest quality.
Whether you’re a beginner or looking to optimise your existing setup, this guide will walk you through each step of the process.
Introduction
Let's explore how to effectively manage multiple studios within your account. Whether you're recording podcasts, hosting live streams, or conducting coaching calls, having the right setup is important for delivering high-quality content.
Managing Multiple Studios
Riverside allows you to create multiple studios tailored to different purposes. You can easily switch between studios, each with its own unique settings and configurations. For instance, you might have a studio dedicated to podcasting, another for live streaming, and yet another for client calls.
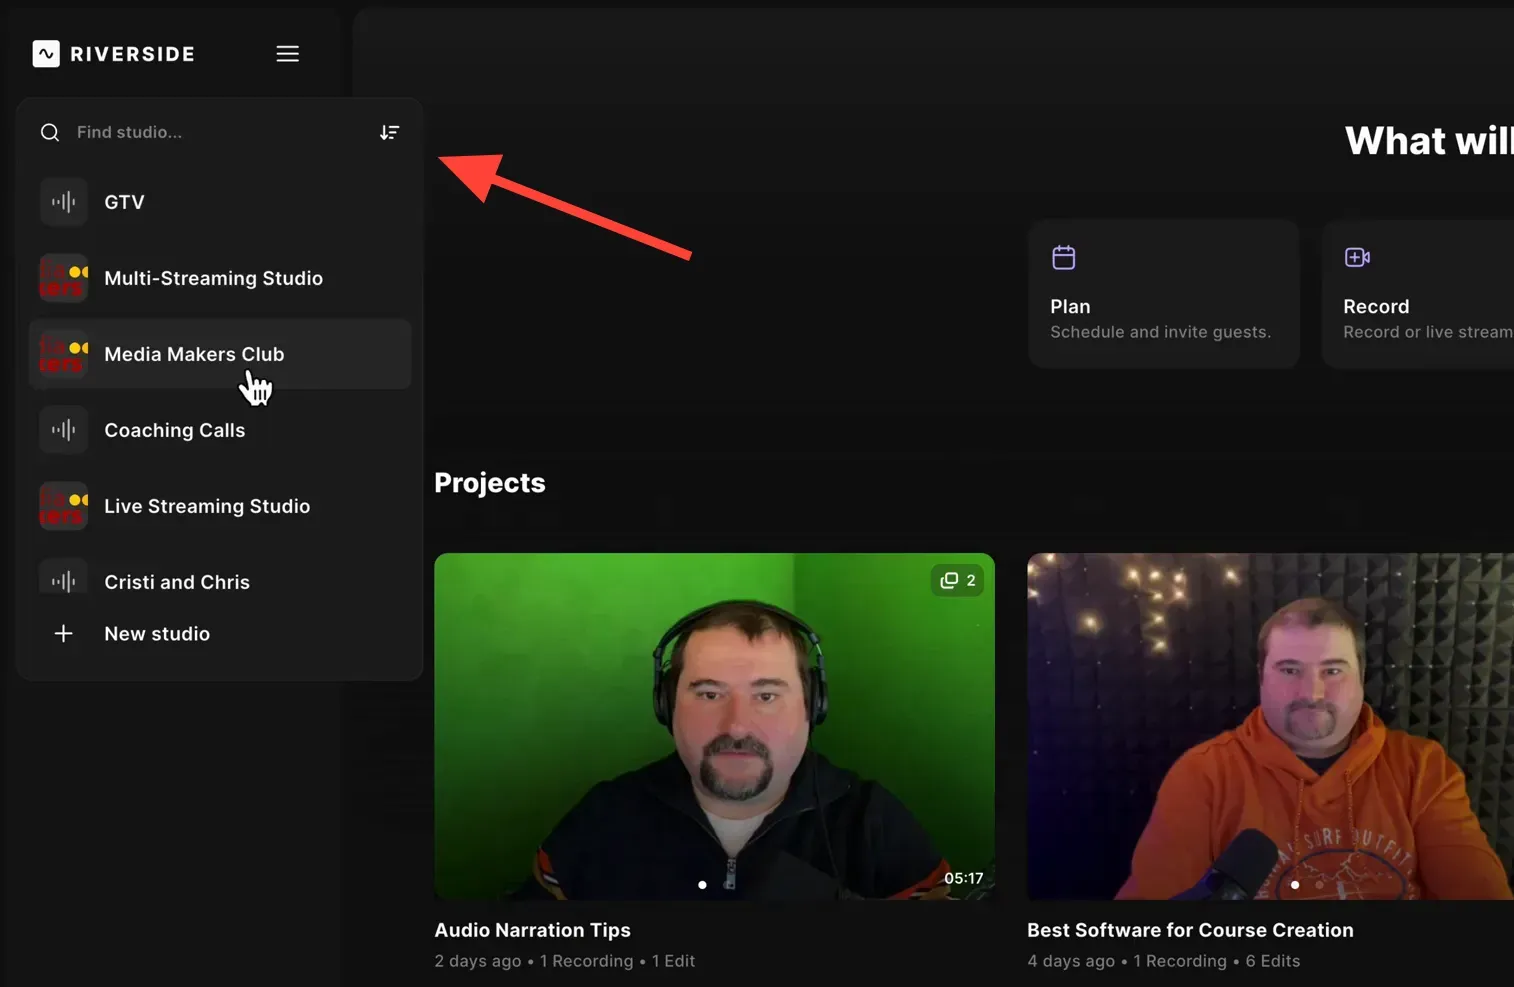
Each studio keeps its recordings organized, making it simple to find and manage your content. In addition to the settings we are about to learn about, separate studios allow you to also customize your brand colors, logo, and other elements that you can re-use in your edits.
If you’re eager to learn more about Riverside and wish to have a one-on-one Riverside coaching session, feel free to book a call with me.
I’m here to help you with any questions you have and to guide you through the best workflows, tips, workarounds, or just answer any questions you may have!
Creating a New Studio
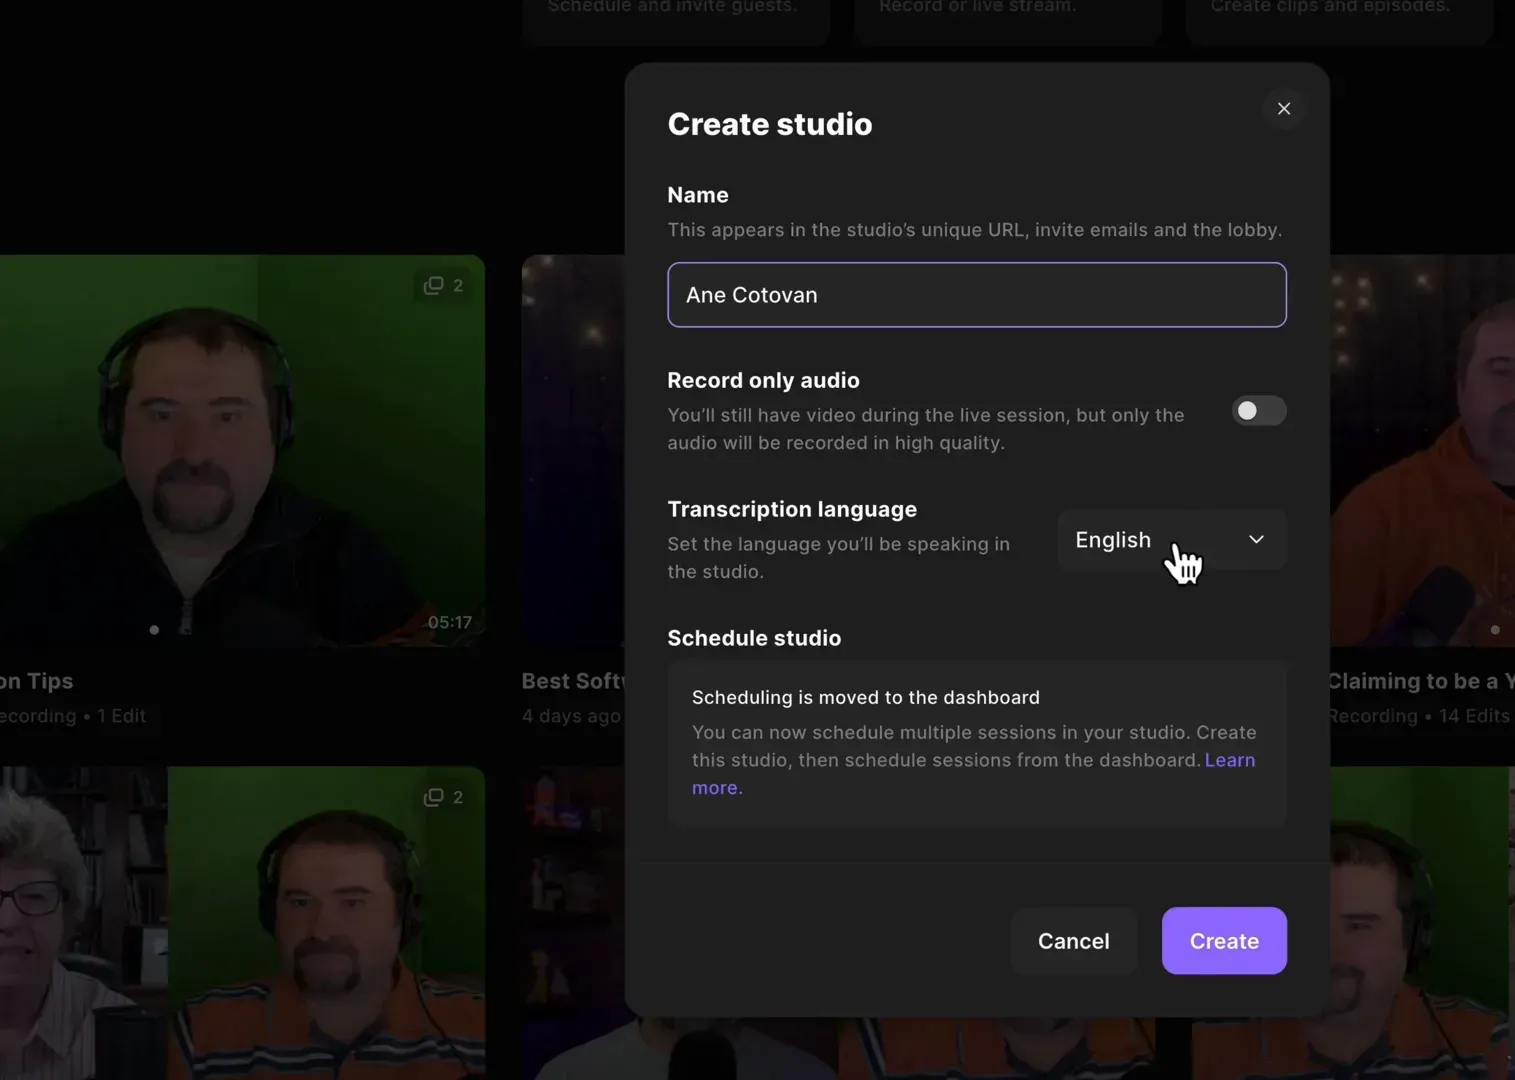
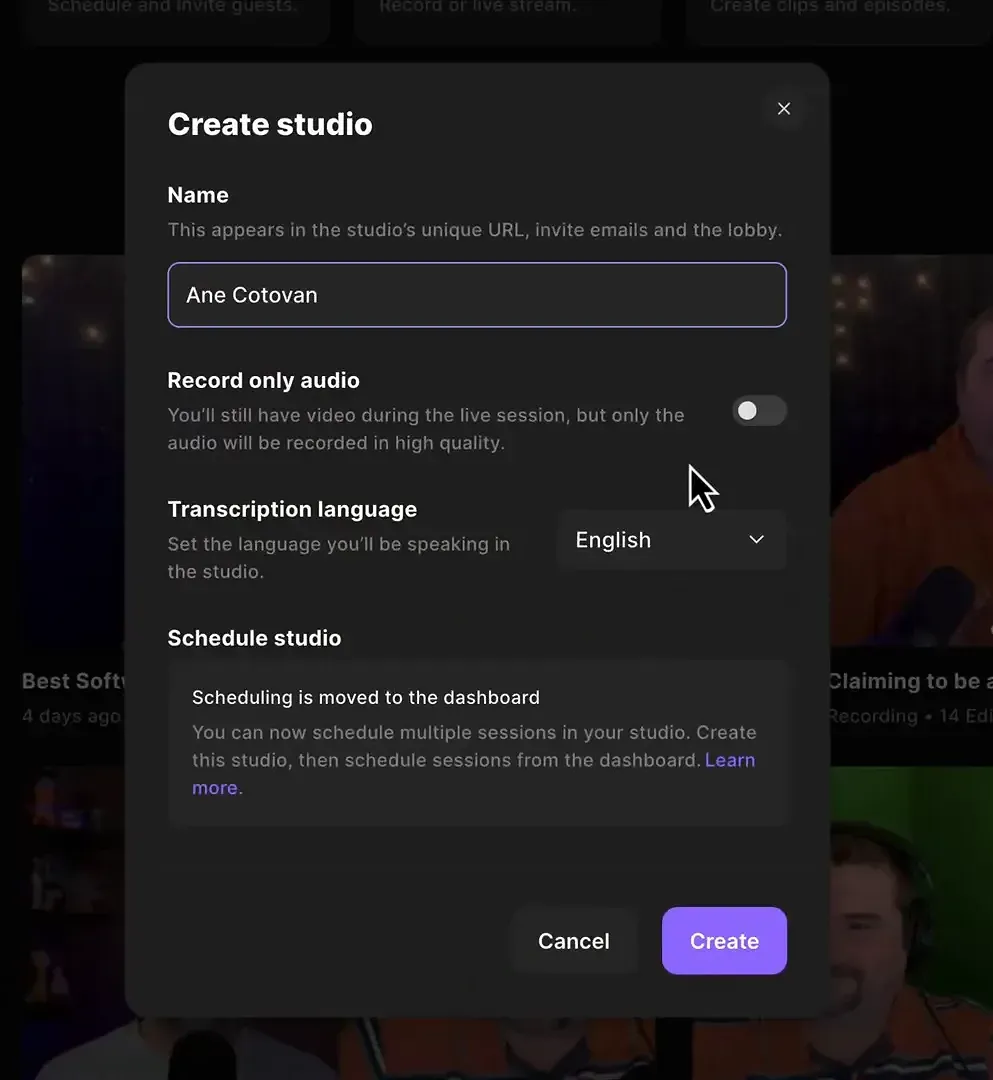
Creating a new studio is a straightforward process. Start by navigating to your Riverside dashboard. Click the plus sign to create a new studio. You’ll be prompted to choose between recording audio only or capturing both video and audio.
For most creators, selecting video and audio is the best option to capture the full experience, even if at the end you only want to create audio content.
Configuring Studio Settings
Once your studio is created, it's time to configure the settings. Start by selecting the transcription language. This ensures accurate transcriptions of your recordings.
Next, explore the recording options. You can choose to record in high resolution, which significantly enhances the quality of your videos. I recommend using the advanced settings to record in 1080p or even 4K if your equipment supports it.

Studio Settings
Now that you've configured the initial settings, let’s dive deeper into the studio settings. The recording tab allows you to control file quality, format, and other processing details. It’s essential to ensure that you’re recording in the best settings for Riverside to maximise your output quality.
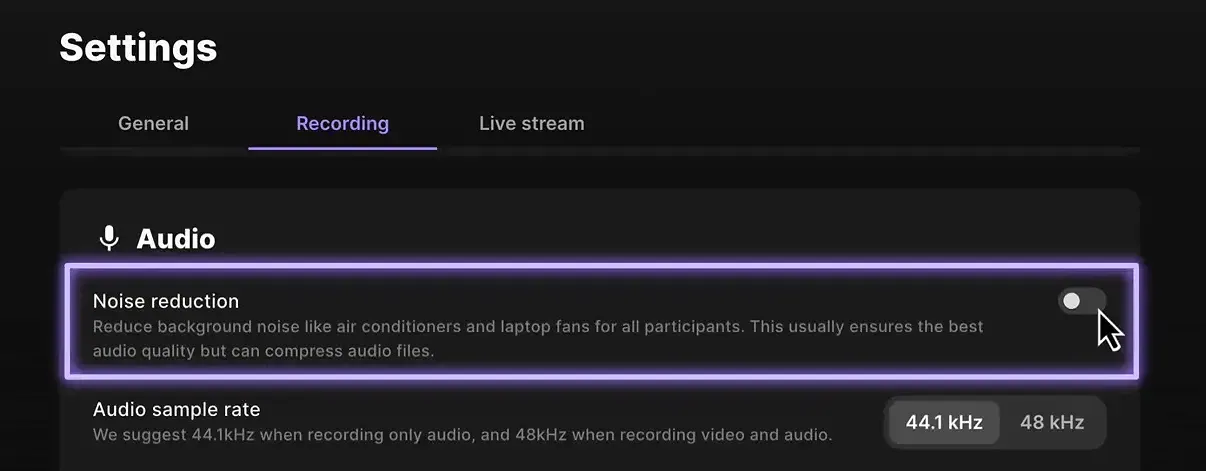
For audio settings, avoid enabling noise reduction during recording. Instead, handle any noise issues during post-production. This approach keeps your recordings raw and authentic, allowing for more flexibility in editing.
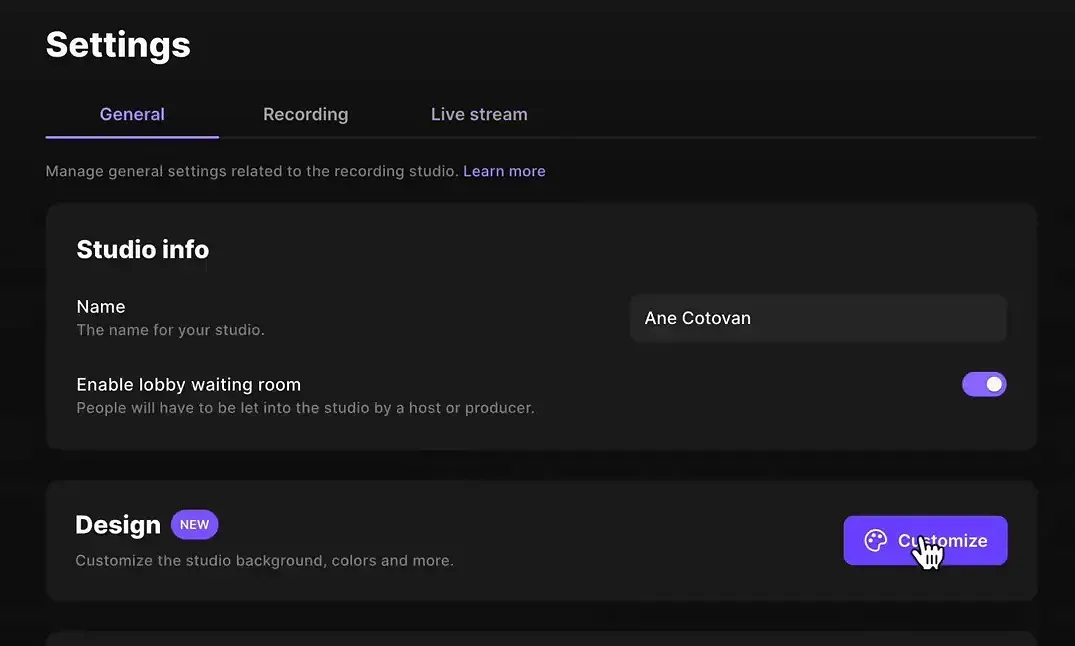
Enable Lobby
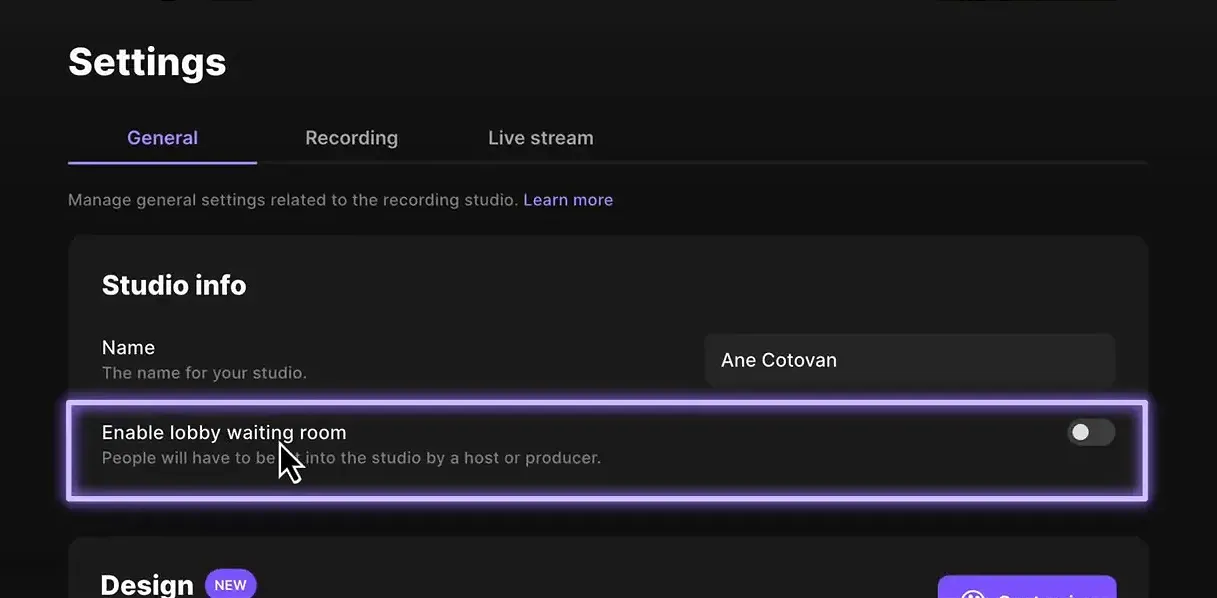
One feature I highly recommend is enabling the lobby waiting room. This allows you to manage who enters your studio and when. Guests will wait in the lobby until you're ready to start recording, preventing any interruptions during your session.
It’s a simple but effective way to maintain professionalism in your recordings. Plus, it prevents any unwelcome surprises from guests who might join early (or previous guests who click the link again!)
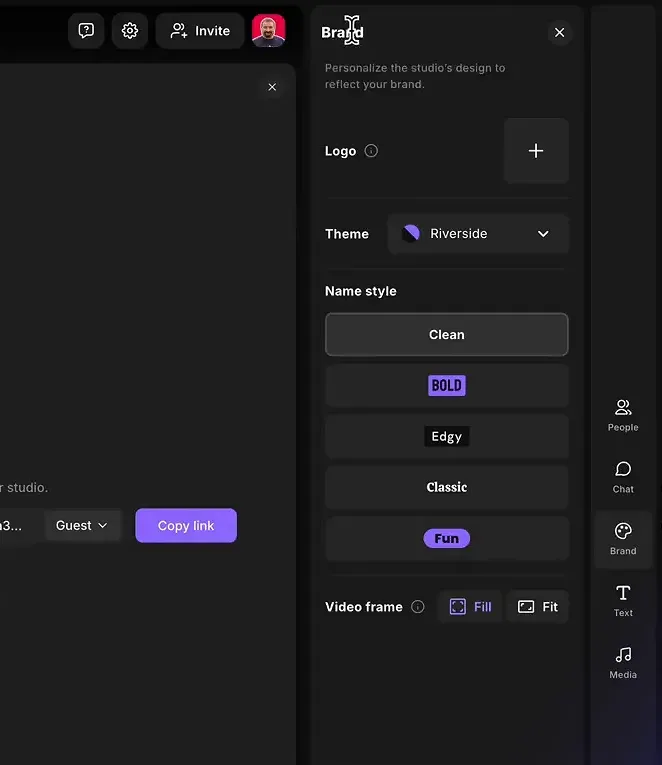
Customizing Colors and Branding
Customisation is key to making your studio reflect your brand. Riverside allows you to change background colours, logos, and other visual elements. This personal touch can enhance your brand identity and make your streams more engaging.
To customise, simply click on the ‘customize’ button in the settings. You can upload your logo and adjust the placement to suit your preference. Additionally, you can modify the style of names and titles that appear during your recordings or live streams.
Advanced Recording Settings
The first thing to consider is the resolution. By default, Riverside records at 720p, which is standard but not ideal. To enhance your output, switch to advanced settings and opt for 1080p or even 4K, depending on your camera's capabilities.
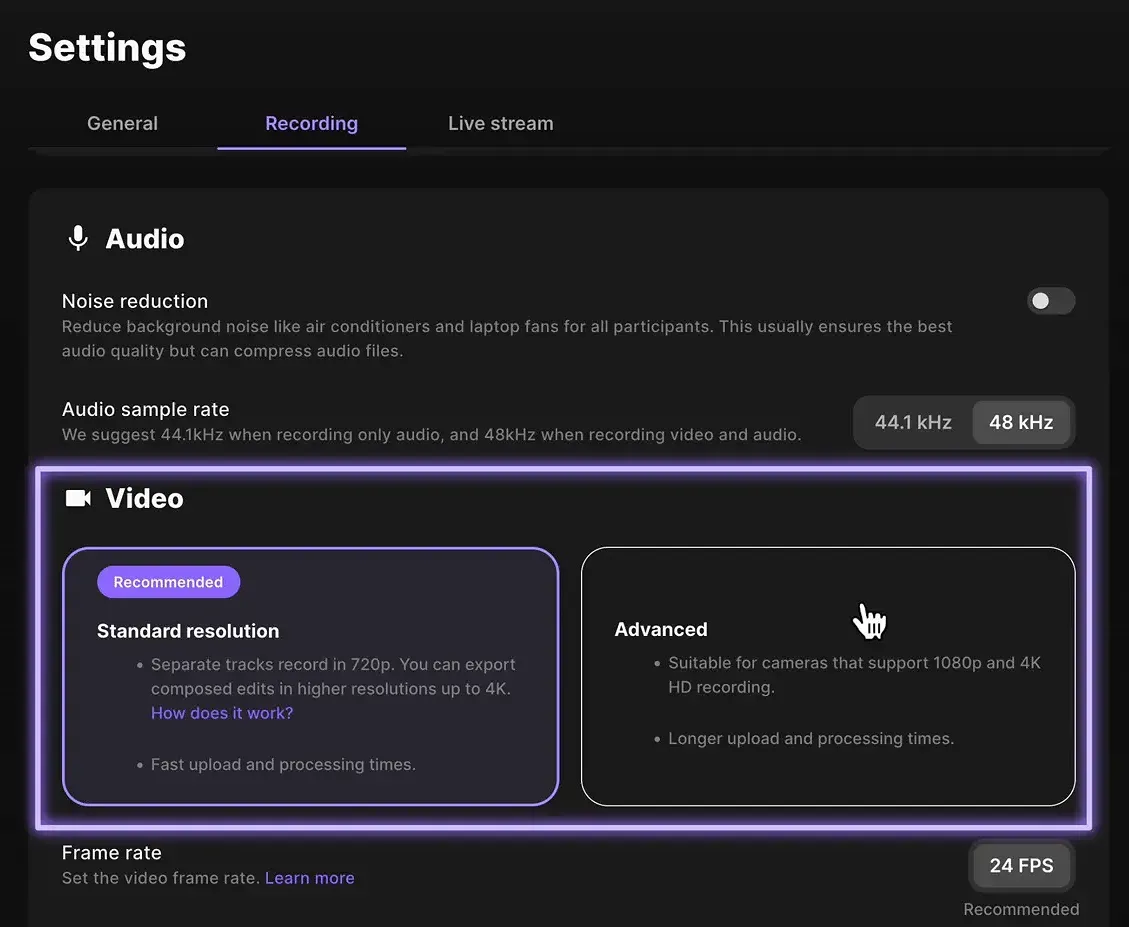
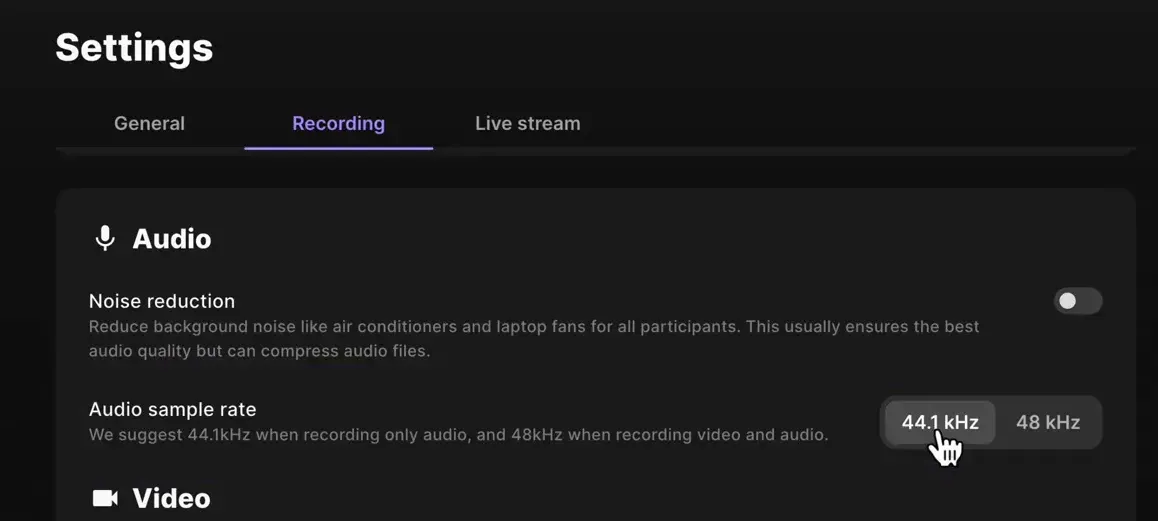
Next, consider the audio sample rate. If you're recording both audio and video, set the sample rate to 48 kHz. This ensures higher audio quality, which is particularly important for podcasts and interviews where clarity matters.
Remember, these adjustments may affect upload times, as higher resolutions and sample rates will require more bandwidth. However, the final files will be worth the wait, providing you with high-quality content ready for editing.
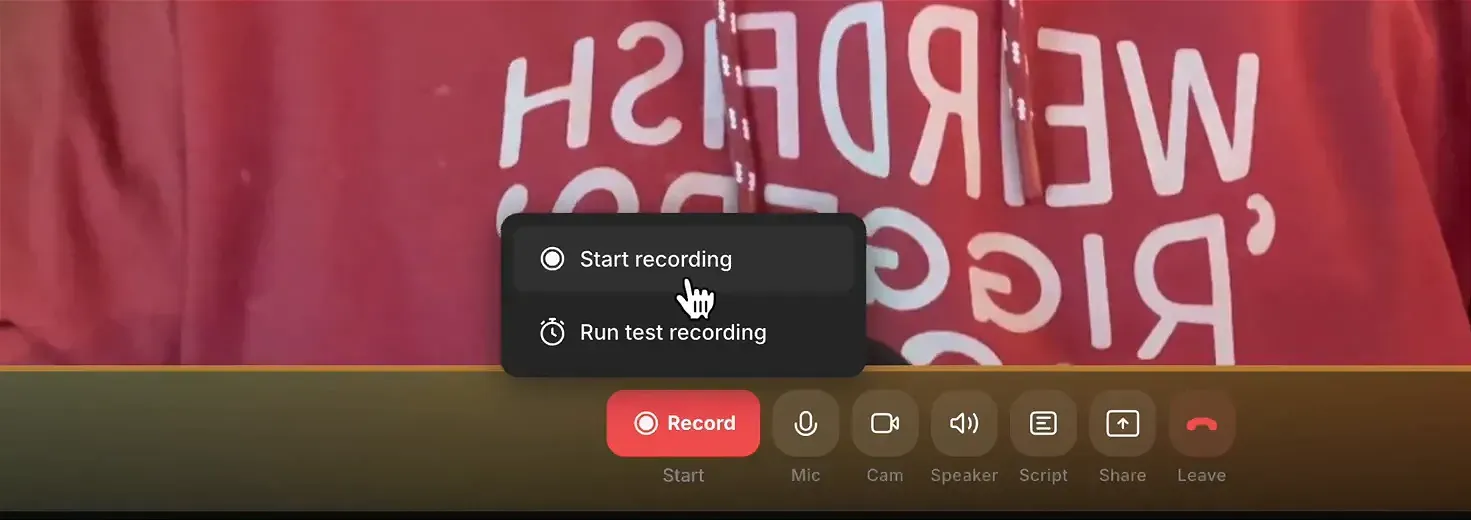
Record Modes
Riverside offers different record modes to suit your needs. You can choose between recording audio only or both audio and video. While audio-only recordings can be useful for specific podcasts, capturing both is generally the best practice.
This allows for more flexibility during editing, enabling you to create a richer experience for your audience and why not, repurpose your content to video, social media clips if you want to.
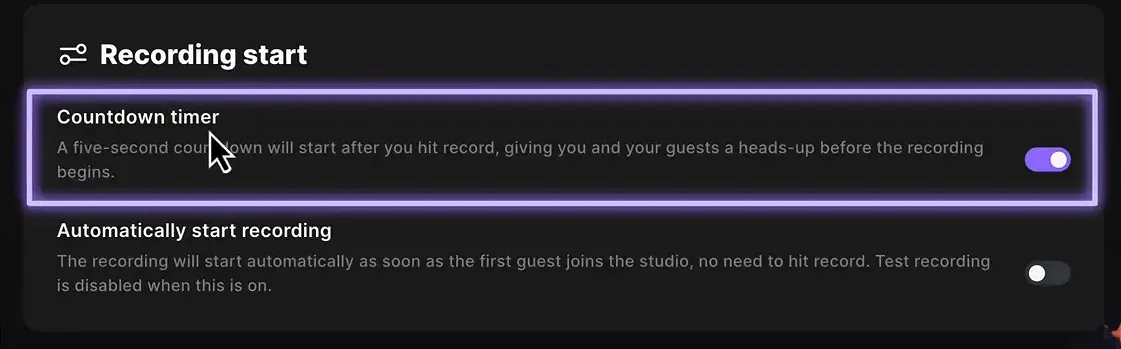
Consider enabling a countdown timer. This feature gives everyone in the studio a moment to prepare before recording begins. It’s a simple yet effective way to ensure that everyone starts off on the same page.
Noise Reduction
While Riverside provides a noise reduction feature during recording, I recommend using it with caution. Enabling noise reduction during the recording process can alter the raw quality of your audio, limiting your editing options later on.
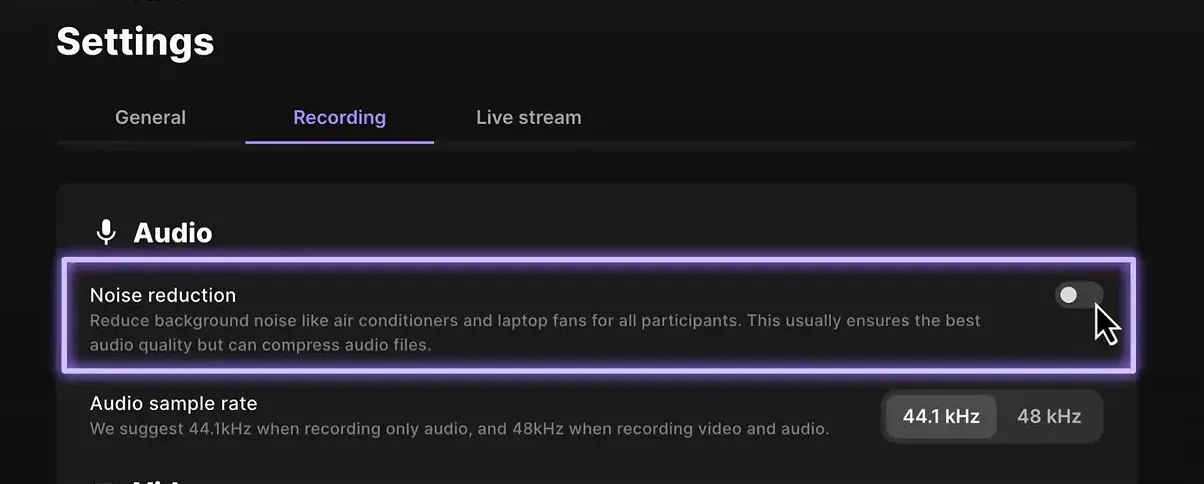
Instead, I suggest handling noise issues in post-production. Riverside's magic audio is an excellent tool for cleaning up sound after recording. It uses AI to enhance audio quality, allowing you to maintain the integrity of your original recording while still achieving a polished final product.
Audio Sample Rate
For most applications, a sample rate of 44.1 kHz is sufficient for audio-only recordings. However, if you're capturing video alongside audio, bumping it up to 48 kHz is advisable. This ensures a higher quality of sound.

Always keep in mind that higher sample rates can lead to larger file sizes. But the trade-off is worth it for the improved quality.
Frame Rate
Frame rate is another essential factor that impacts the quality of your recordings. By default, Riverside records at 24 frames per second (fps). I vaguely remember it was possible to change this in the past, but now you can't anymore. Or it's likely that it's only for the Enterprise plan, of which I am not sure because I'm not subscribed to that.

Higher frame rates can make your footage look smoother, especially during fast-paced footage. Increasing the frame rate may also affect your file sizes and upload times.
Countdown and Auto Record
The countdown feature allows everyone in the studio to get ready before recording starts.
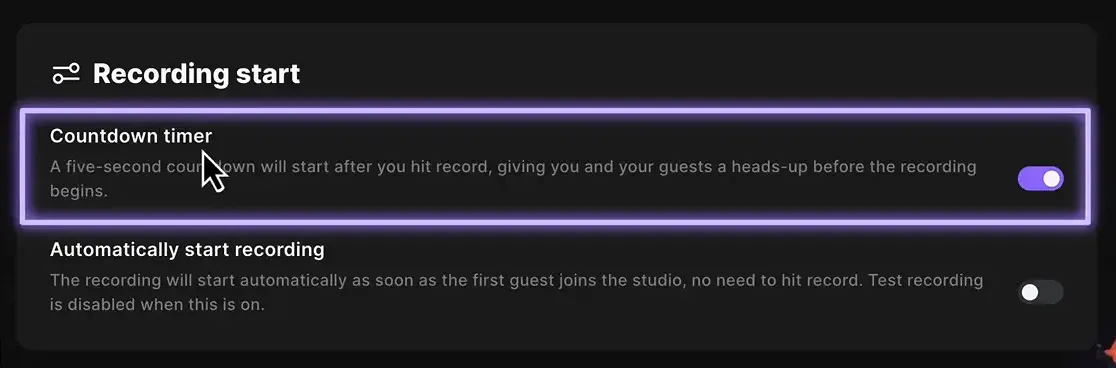
The auto record option is useful, as it automatically starts recording when the first guest joins the studio. If you often forget to hit the record button, this is for you.

Pause Uploads
Finally, the pause uploads feature can be a lifesaver during recording sessions with slow internet connections. If you or your guests are experiencing connectivity issues, this option allows you to pause the upload process while still recording. This can free up bandwidth, ensuring a smoother conversation.
However, it’s important to remember that once you stop recording, you (or the person you pause the uploads for) will need to wait for all uploads to finish before leaving the studio. This is crucial to ensure that all your recordings are safely uploaded to Riverside’s servers.
Live Streaming with Riverside
Riverside Studio isn't just for recording; it’s also perfect for live streaming (while also recording)! To get started, you'll need to ensure you have the live streaming add-on included in your plan. Once activated, you can easily set up your stream settings.
While you can stream live even on the free plan, the quality will be less than 1080p and there will be a watermark on the video.
Navigate to the live stream tab and add your streaming destinations. Riverside supports major platforms like YouTube, Facebook, LinkedIn, and Twitch. If you want to stream to a custom destination, you can use the RTMP settings to configure it.
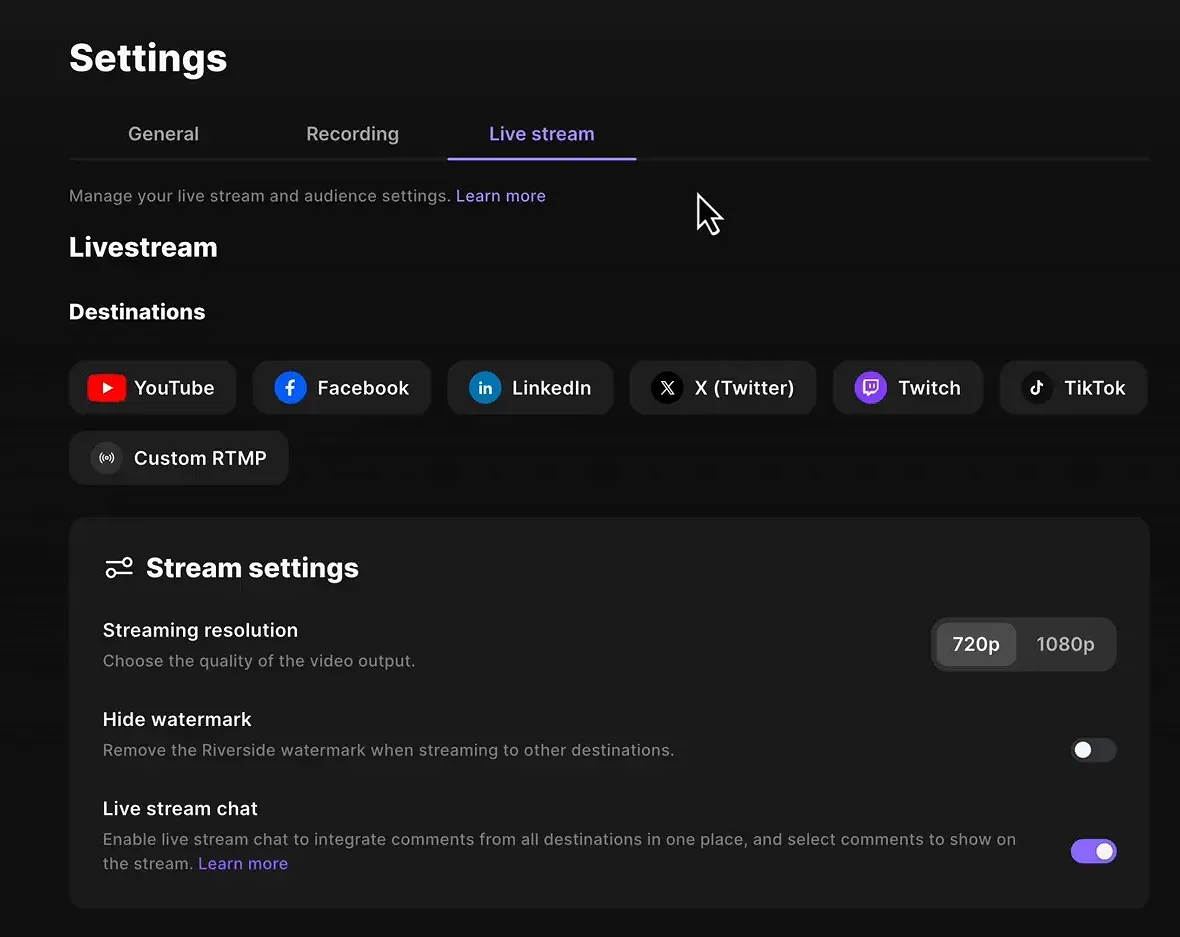
Custom RTMP
If you have a custom streaming service, Riverside allows you to input RTMP configurations. This is a common protocol used by many platforms. Simply enter the RTMP URL and stream key provided by your service. YouTube also supports this and it is what I use at the moment.
Remember to test your connection before going live. A good internet connection is crucial to ensure smooth streaming without interruptions.
Personalizing Your Studio
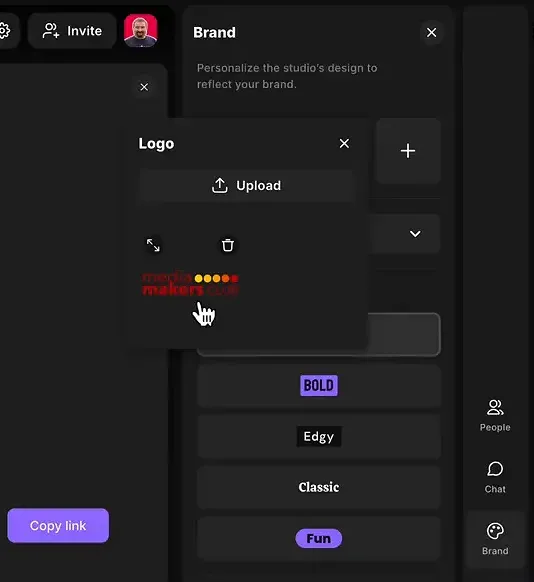
Personalisation will make your Riverside studio feel like home. After setting up your studio, head over to the customization options. Here, you can change your studio's background, logo, and other branding elements.
Upload your logo and adjust its placement to suit your style.
Customize Logo and Colors
Beyond logos, Riverside allows you to modify the colour scheme of your studio. Choose colours that align with your brand identity.
You can also adjust the style of names and titles that appear during your recordings. This feature is particularly useful for live streams, where on-screen graphics can enhance viewer engagement.
Brand Kit
Recently, Riverside introduced a new feature that allows much more control over the branding for each studio and which saves you a lot of time when you create content and edit such as personalizing intro, outro, logo, color scheme and more.
You can find a detailed look at that in this other article or video.
Recording and Going Live
When you're ready to record or go live, simply click the record button at the bottom of the studio interface. If you want to stream, ensure your destinations are selected before hitting the live button. This allows you to simultaneously record and stream your session.
Conclusion and Sponsor Message
Riverside's studio offers a comprehensive suite of features for both recording and live streaming.
Whether you’re recording podcasts, conducting interviews, or live streaming events, Riverside has you covered. If you’re looking to elevate your content creation game, consider trying Riverside, and using this coupon for a discount: CRISTI15
If you’re eager to learn more about Riverside and wish to have a one-on-one Riverside coaching session, feel free to book a call with me.
I’m here to help you with any questions you have and to guide you through the best workflows, tips, workarounds, or just answer any questions you may have!