10 things you must configure and optimise before launching your website
What are the very first things to set up on your site as soon as you’re ready to launch?

So you’ve bought a domain name and designed a website - well done! Before you push that button and start telling the world about your website, make sure you check these next aspects in order to make the most of your shiny new web presence, monitor, optimise, secure your website and help your traffic grow:
- Google Analytics
- Google Search Console
- CloudFlare for security and speed
- SSL certificate for security and visitor reassurance
- Caching for website performance
- Image optimisation and compression
- Script minification
- Check for broken links
- Check canonical URLs
- Backup your website
1. Google Analytics for monitoring your traffic
An analytics solution is very easily added onto any website and it monitors traffic on all pages of your site: it records how many visitors are coming, where are they from, what websites they’ve been referred from, what pages they are looking at, how long they spend on each page and much, much more!
Launching a website without some sort of analytics solution is like driving a car blindfold: you’re on the road but you have no idea where you’re going. You don’t know how your traffic is evolving or if your content publishing has any effect and your campaigns are bringing the right audience.
Although it doesn’t have to be ‘Google’ Analytics, it surely is one of the best and most comprehensive analytics solutions out there. And on top of that, it’s completely free!
2. Google Search Console for insight into how your website performs in search engines
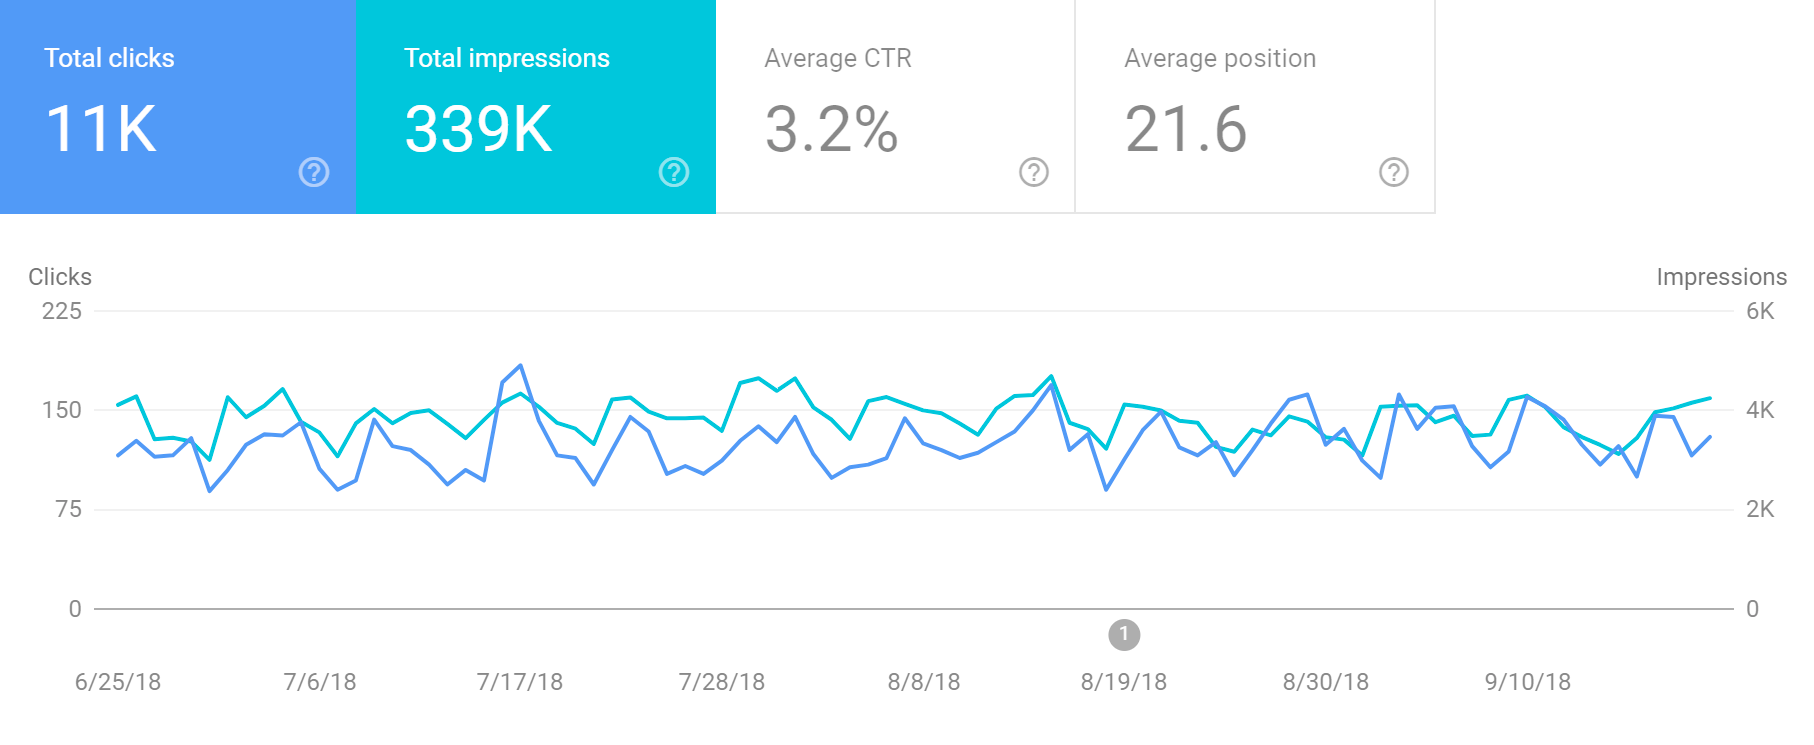
If Google Analytics tells you what happens to traffic on your website, Google Search Console (formerly Webmaster Tools) tells you how your website is performing in Google searches. It tells you how many pages has Google indexed, what keywords you appear in Google with, how many times people see your website, what are your most popular pages in terms of organic traffic and so on.
It also allows you to specify where Google might find your sitemap, in order to more easily discover and index your website.
On the technical side, as soon as you authorise your website on Google Search Console, you start receiving various notifications and alerts related to your website’s health, such as when Google notices an increase in server errors, if it finds malware on your site, it gives you insight into how mobile-friendly your website is, who links to you and on what websites. It’s an invaluable tool and you can also connect it to Google Analytics to see more detailed reports about your search engine rankings.
3. CloudFlare for speed and security
CloudFlare is a company that offers a multitude of services - all to do with website security, content delivery, speed and more. You can enable CloudFlare at DNS level and once you do (takes about 10 minutes to set up), they will be responsible for all DNS requests to your website and in return, you get:
- Protection: Because they control your DNS zone, they will effectively hide the IP address of your real server from malicious people, therefore protecting you from attacks that target your server directly. If your IP address is behind CloudFlare, the people and robots on the internet will see CloudFlare’s IP addresses when they query your domain. Also, CloudFlare mitigates a big part of attacks such as DDoS attacks and protect your machine from being flooded with requests.
- Speed: CloudFlare offers free caching of your static content (images, HTML, CSS, javascript code) on their Content Delivery Network. What this means is that you will see huge savings in bandwidth - since they will cache your static content on their servers (usually on multiple servers around the world), your visitors will seamlessly receive that content from a server that is closest to them and saves your server a TON of bandwidth. As I write this, I have more than 50 websites on CloudFlare and most of them achieve savings of about 50% or more. Look at the screenshot below for one of my sites on CloudFlare. I manage many e-commerce websites that have thousands of product images. The savings in bandwidth are huge!
- Security: CloudFlare offers a free SSL certificate for your entire domain out of the box. All you have to do is enable it in your CloudFlare account for your domain and voila! Your website can be accessed via https:// . Starting in 2017, Google declared that they will give secure websites a small ranking boost in their search engine, and starting in 2018, they are actively showing in the Chrome browser for websites without SSL as ‘insecure’. Since it’s free, it’s a no-brainer! And you don’t have to install anything on your server to do it!

There are more benefits to CloudFlare, too many to list them in this section. I’ve written a tutorial on migrating your domain name to CloudFlare if you want to move your site.
4. SSL Certificate for security
As mentioned above, Google is now favouring websites that have SSL and shows others as ‘insecure’ to visitors. Not only does it look bad, but it’s also unsafe to keep going without SSL on your website, particularly when you can have it for free.
There is no more excuse in 2018 to not have SSL on your website! If you’re not migrating to CloudFlare, you can get a free SSL certificate installed by most respectable hosts, using Let’s Encrypt’s free SSL certificates, or you can still buy SSL from any seller just like before. After you install it, make sure to redirect all non-SSL pages to the SSL version so that all visitors will see the secure version of every page.
5. Caching for speed
You can lighten the load on your server by taking advantage of caching. If your website was built on Wordpress, there are many caching plugins you can install and save on CPU cycles (Total Cache, WP Rocket and more), database queries, etc. by pre-generating the pages and serving them from a static cache. This is done automatically for you behind the scenes so that each page loads as fast as possible.
6. Image optimisation and compression
It’s always a good idea to work properly with images from the website build phase - that way, you will save a lot of time when the time comes to go live. You should always only load optimised images, at the right size for the place you use them and not load huge images for example, if you need it to cover only a quarter of a column on a page.
It’s also a good idea to pre-optimise and compress images before loading them to make sure they are at their best size vs. quality. There are many Wordpress plugins that will optimise and compress images for you afterwards, but it’s best if you have a good idea where each image will be used, how large it needs to be and resize it accordingly before uploading.
Images can seriously increase the loading time of your website as well as consume a lot more bandwidth than necessary. If your hosting account has a bandwidth limit, you can easily chew through that with a few unoptimised images, particularly if you have decent traffic.
If you mostly use JPEGs, which is a lossy format, I’ve found that adjusting the compression by just a little bit, can give you drastic savings in bandwidth. I’ve recently made a study on a number of e-commerce websites I operate and I found the optimal image compression for product images. See below the difference in size it makes to alter the compression from 90 (default) to 70 and then 50. Since for 50, for the specific type of images I needed (product images) the quality ended up too low and impacted it visually, I settled on 70. But even that, brought the bandwidth used by images down by almost half! Multiply that by thousands of products and the savings (and loading speed) differences are enormous!
As you can see, once you go over the 70 quality setting, the size increases dramatically and from quality 50 to 90, the file size more than doubles!
| Size at 90 quality (KB) | Size at 70 quality (KB) | Size at 50 quality (KB) |
| 35.6 | 20.0 | 15.0 |
| 34.4 | 19.3 | 14.5 |
| 35.8 | 20.1 | 15.0 |
| 24.7 | 13.3 | 9.9 |
| 37.3 | 22.0 | 16.9 |
| 27.4 | 15.3 | 11.5 |
| 27.1 | 15.2 | 11.4 |
| 61.2 | 34.9 | 26.3 |
| Total: 283.5 | Total: 160.1 | Total: 120.5 |
I've recorded a video showing how to optimise images in Photoshop and export them for the web:
7. Minification for reducing useless data in scripts
Minification is the process by which you can reduce the size of scripts that your website needs to load in order to function properly.
You may have CSS stylesheets and Javascript files on your website to provide styling, animation, interaction and so on. When you develop your website, these scripts usually have the code arranged nicely with indentation, line breaks, comments, long variable names and spaces for readability, but web browsers don’t need those in order to render your page and perform the tasks. By minification, you can automatically remove those spaces and indents for deployment. This will make the scripts much smaller and consequently, load faster.
In order to be efficient, this process happens on the server-side (there are plugins for Wordpress, you can do it on your development environment when you save the files and CloudFlare offers it out of the box too). Minifying your script files will ensure you get extra points on page speed tests such as Google Page Speed, GTMetrix, YSlow and others.
Here's an example of the Cloudflare configuration that automatically minifies all the static files on your site:

8. Check for broken links
When I work on a website I'm pretty disorganised. I create most pages as drafts before going into each one of them and adding content, making them pretty. Many times I leave links in my content leading nowhere, with the intention to go back later, before launch, and fix them with the appropriate destination. That doesn't always happen so in some situations I may end up with broken links.
In other situations, I don't get content in time from clients so I just put placeholder pages and draft links in place, just to keep things going, and I forget to fix them or the client changes her mind. Regardless of the reason, every website can have broken links. It's doesn't make a good impression to have your shiny new website with broken links and missing pages and it certainly isn't a good idea from a Search Engine Optimisation standpoint.
That's why, before going live (and at regular intervals after going live), I check for missing links on my website. For this task you need a software or service called a 'crawler' - some software that will take your homepage and try to visit that, then find all the links on your website and visit each one of them, and do the same for the links on those pages and so on, until it's scanned your entire website. When it finds broken pages or errors, it will provide a report so you can go and fix them.
My two favourites for this task are:
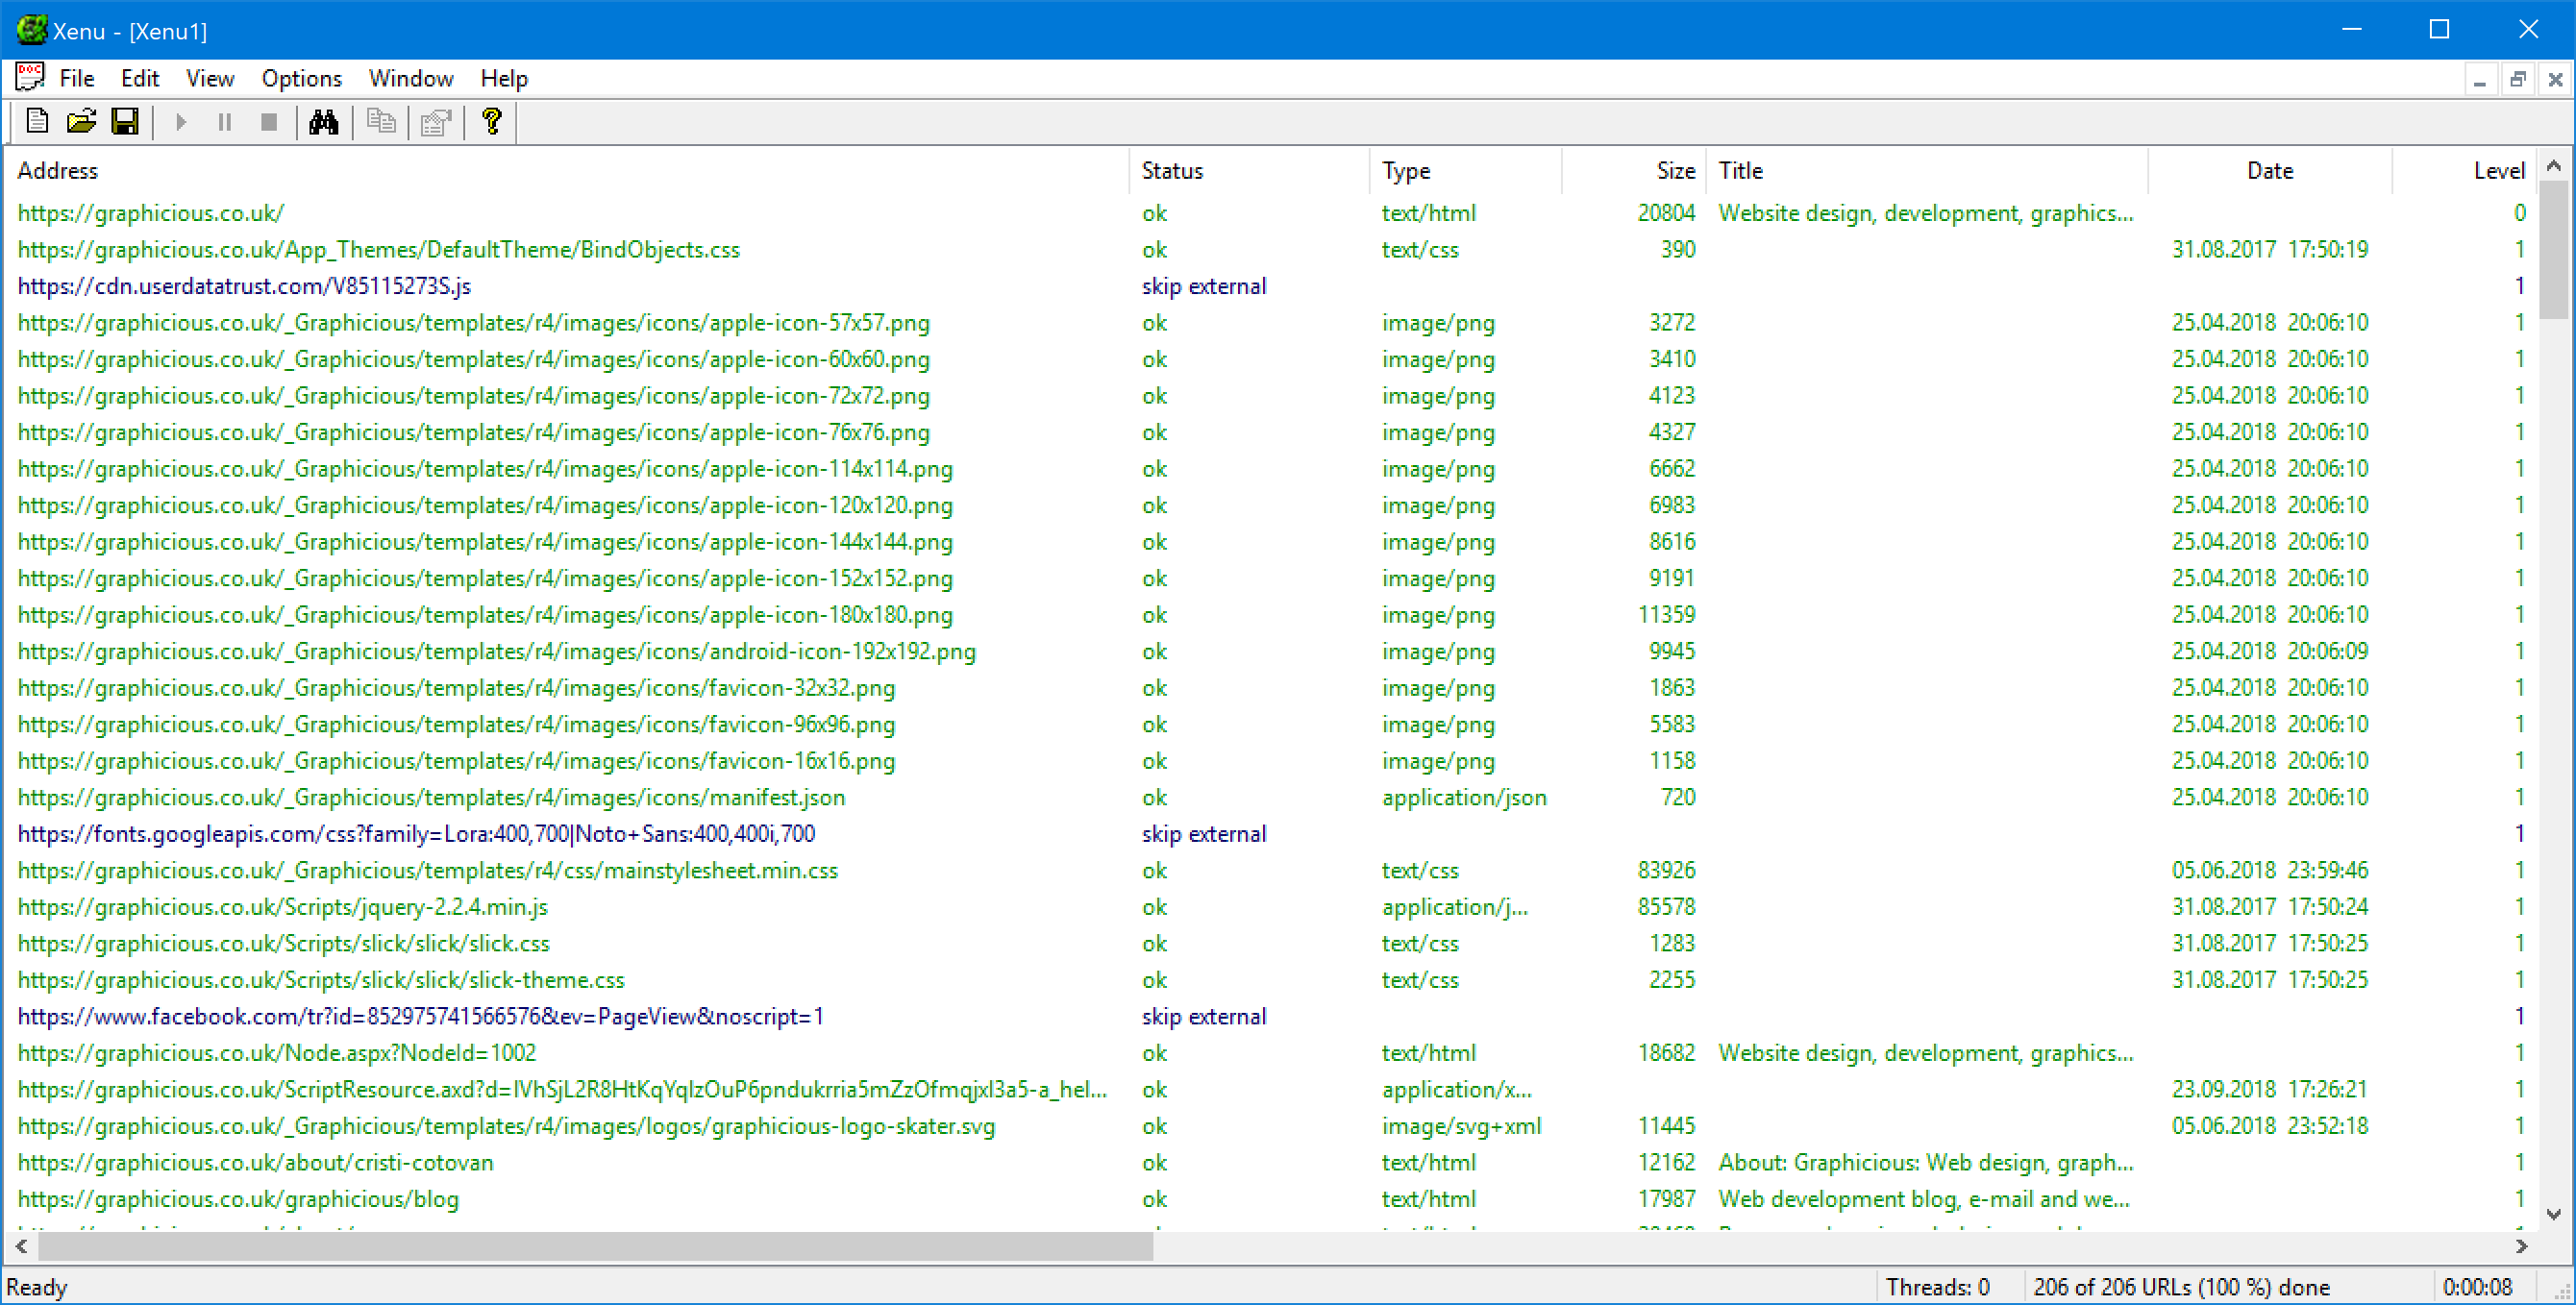
- Xenu link sleuth - a free Windows program that will check any link on your site - pages, images, frames, plug-ins, backgrounds, stylesheets and more. It generates a report in real-time, as it scans and also at the end, you can save the report or email it. Works on secure websites as well. The program is very small and works on Windows 95 all the way to Windows 10.
- Screaming Frog - this is an online tool, which provides more services than just checking for broken links. The free version offers scans for up to 500 URLs (which might be ok for you if your website is not too large). They also help with some SEO tasks such as finding duplicate content, analysing meta and title tags, generating XML sitemaps and more.
Here's an example of a Xenu link sleuth scan result:
Watch this video for a quick tutorial on using Xenu to scan your website for missing links:
9. Check canonical URLs
A common mistake many webmasters make is to not consider their URL structure. This can hurt their SEO and they lose search engine ranking because of that. While it's great to have search-engine-friendly URLs, such as '/my-page/my-subpage' and so on, there's also a sneaky little aspect that is easily overlooked but which could have huge impact on your rankings: canonical URLs.
What are 'canonical URLs'?
If there is a page on your website that can be accessed at different URLs, or there are different pages on your site that have the same content, search engines might view those pages as 'duplicate content'. Even if the page is the same, simply being able to access it with different URLs is bound to mark one of them as a duplicate and exclude it from the index.
For example, let's say you have a contact page, accessible at:
http://www.yoursite.com/contact
and also
This is the same page but you can browse it at the 'www' version of your domain and also without 'www'. To Google, that is a duplicate page. If you don't tell Google exactly which is your canonical (or 'preferred') version of the page, Google will choose for you, treating one as the canonical and ignoring the other, or even considering them both of equal importance.
That's when canonical URLs are helpful - even if your website is creating multiple pages that are essentially the same, just accessible with different URLs, you can specify in each page's meta tags which one is the version you prefer, using the canonical tag, like so:
<link rel="canonical" href="http://yoursite.com/contact" />
This way, you tell Google that the version without 'www' is the one you prefer. Along with this, if you've set up your website in Google Search Console (mentioned above), you have to also go there and tell Google what is your 'preferred domain'.
You can read more here about canonical URLs and other related topics on making your website as easy as possible to index and understand by search engines. If you're using Wordpress, a great tool for this is the Yoast plugin, which in addition to providing a lot of information and assistance with your SEO, also generates canonical URLs, sitemaps and more for you.
10. Backup
All that hard work you've done on your website can go down the drain if you have not set up some backup solution. You've loaded all those images, created the pages, configured all of your plugins, and sometime later some hacker gets into it, the server crashes or you break something yourself - if you don't have a recent backup, you're in for a sleepless night or two!
That's why it's advisable to have a backup in place for your website even before you go live.
Each host might offer some sort of backup included (or at an extra cost), depending on how much you pay them. Some of them offer daily backups, but it's a good idea to have your own copy. You can backup websites via FTP, using various tools, such as Syncback SE or Syncback PRO (my go-to backup tool), or even setting up an account with ManageWP and connecting your site (if you're using Wordpress). This tool will assist you with installing updates, backup and restore, moderating comments and more - all from one place, and for free! However, if you're on the free plan, you only get one backup a month - which might not be ideal. For daily backups, you can set them up on Amazon S3, for example, or on a remote FTP server. There are multiple backup plugins for Wordpress that will back up your entire site to remote servers or even cloud storage providers, such as Dropbox, Google Drive or others.
I prefer to do daily backups to Amazon S3, using Syncback PRO. You can even set up separate backups for every day of the week so that if something goes wrong, you can go back to up to 7 different versions of the site. There's a solution for every situation.
Bonus: Mailing list subscription
Finally, his is more like a marketing or strategy tip, rather than a technical one: If you're launching a website for any other reason than just posting photos of cats, you should consider starting to build a mailing list. Many website owners, myself included, regret not doing this from the very first day. Some of them do it even before they even launch their site.
If you start building a mailing list now, you will build an audience that is YOURS - people who are interested in YOUR content, want to receive YOUR updates. When the time comes, maybe you will want to sell something or provide a private area and build a community, or even notify them of new content - there's nothing more direct (apart from face to face), that can reach your visitors immediately. A very easy way to start is to just sign up with an Email Service Provider, add a subscription form on the website and you're set! Read my article about what to look for in an email service provider for help in choosing one.
Conclusion
There are of course much more things you could do to maximise the impact of your website upon launching it, but the ones described in this article are the most obvious, crucial and relatively easy to implement. Don't leave these as an afterthought for 6 months after! It should take less than a couple hours to get through all of them. You'll be glad you did!