
Master Audio Transitions and Keyframes in Camtasia


Getting clean audio transitions in Camtasia is essential for professional-sounding videos. Whether you need a smooth fade in at the start, a fade out at the end, or precise volume control throughout your project, Camtasia's audio tools make it straightforward.
Setting Up Your Audio
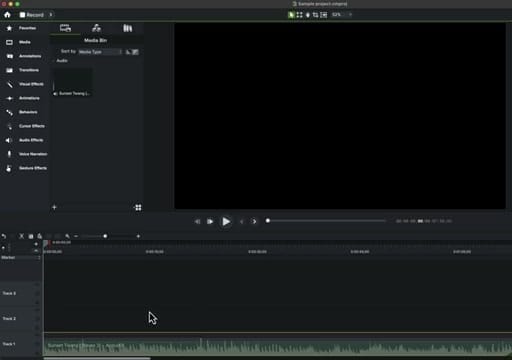
Start by importing your audio file into the Media Bin and placing it on the timeline. Techniques work with any audio: narration, music, sound effects, or podcast recordings.
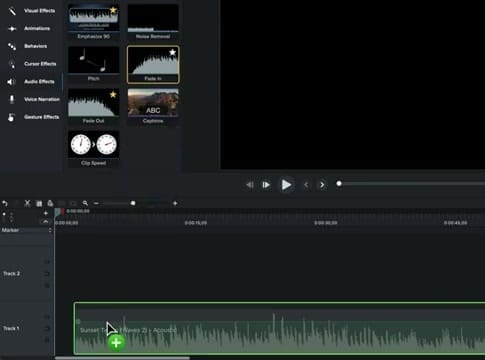
Audio Effects Panel
Open the Audio Effects panel from the left sidebar. Here you'll find all the audio effects available in Camtasia: Emphasize, Noise Removal, Pitch, Fade In, Fade Out, Captions, and Clip Speed.
For audio transitions, the two you'll use most are Fade In and Fade Out.
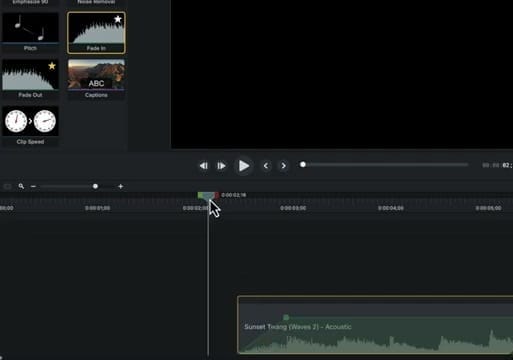
Applying a Fade In
Drag the Fade In effect from the Audio Effects panel onto your audio clip in the timeline. The effect attaches to the beginning of the clip. You'll see the waveform gradually increase from silence to full volume over the fade duration.
Applying a Fade Out
Similarly, drag Fade Out onto the end of an audio clip. This creates a gradual decrease from full volume down to silence. You can apply Fade Out to any track — if you have music on Track 1 and narration on Track 2, each can have its own independent fade.
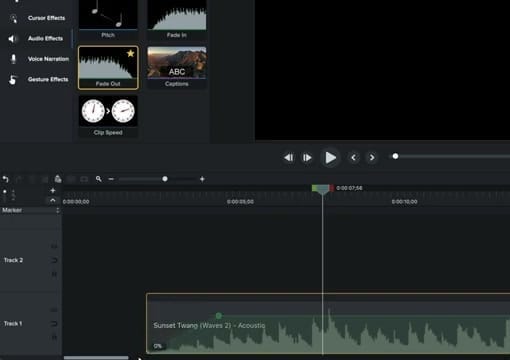
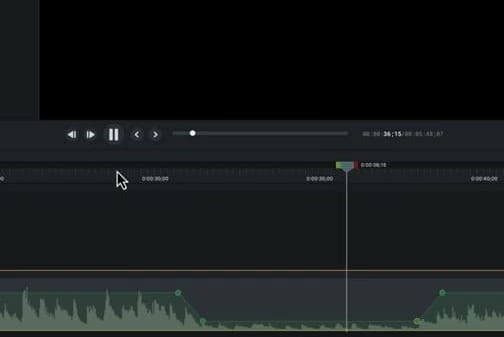
Working with Audio Keyframes
For more precise control, use audio keyframes. When you apply a fade effect, Camtasia creates keyframe points on the audio clip's volume line. You can see these as small dots on the green volume line that runs along the audio waveform. The "0%" label indicates where volume drops to zero.
You can also add keyframes manually by clicking on the volume line. Drag keyframe points up or down to adjust volume at any specific point in the timeline. This gives you frame-accurate control over your audio levels.
Manual Volume Curves
Beyond the built-in fade effects, you can create custom volume steps by placing multiple keyframes along your audio clip. Click on the green volume line at the point where you want to change volume, then drag the keyframe up or down. This is useful for:
- Ducking music under narration — lower the music volume during speech, bring it back up during pauses, although Camtasia has a specialized "ducking" effect called "Emphasize"
- Emphasizing specific moments — boost volume at key points
- Creating custom transitions — build complex fades that aren't a simple linear ramp
Tips for Clean Audio Transitions
- Default fade duration works well for most cases — adjust by dragging the keyframe points if needed
- Zoom in on the timeline for precise keyframe placement
- Always Fade Out music at the end of your video — an abrupt stop sounds unprofessional
- Combine with Emphasize for automatic ducking instead of manual keyframes
Audio transitions and keyframes in Camtasia give you everything from quick one-click fades to fine-grained volume control. Start with the built-in Fade In and Fade Out effects, and move to manual keyframes when you need more precision.
If you’re wish to learn more about Camtasia and wish to have a one-on-one Camtasia coaching session, feel free to book a call with me.
I’m here to help you with any questions you have and to guide you through the best workflows, tips, workarounds, or just answer any questions you may have!


