
Picture in Picture (PIP) in Camtasia

The Picture in Picture (PIP) effect lets you show two videos at the same time — a smaller overlay on top of a larger background clip. It is one of the most useful techniques in Camtasia for tutorials, presentations, and reaction-style videos.
This post walks through how to set up PIP from scratch: importing clips, positioning and scaling the overlay, adding transitions, and polishing with drop shadows and animations.
Watch the full tutorial
Importing Clips and Setting Up the Timeline
The foundation of any PIP effect is having two video clips on separate timeline tracks, playing simultaneouslt.
The clip on the lower track serves as the full-screen background, while the clip on the upper track becomes the smaller overlay window. Import both clips into the Media Bin, then drag them onto the timeline so they stack vertically — one above the other.
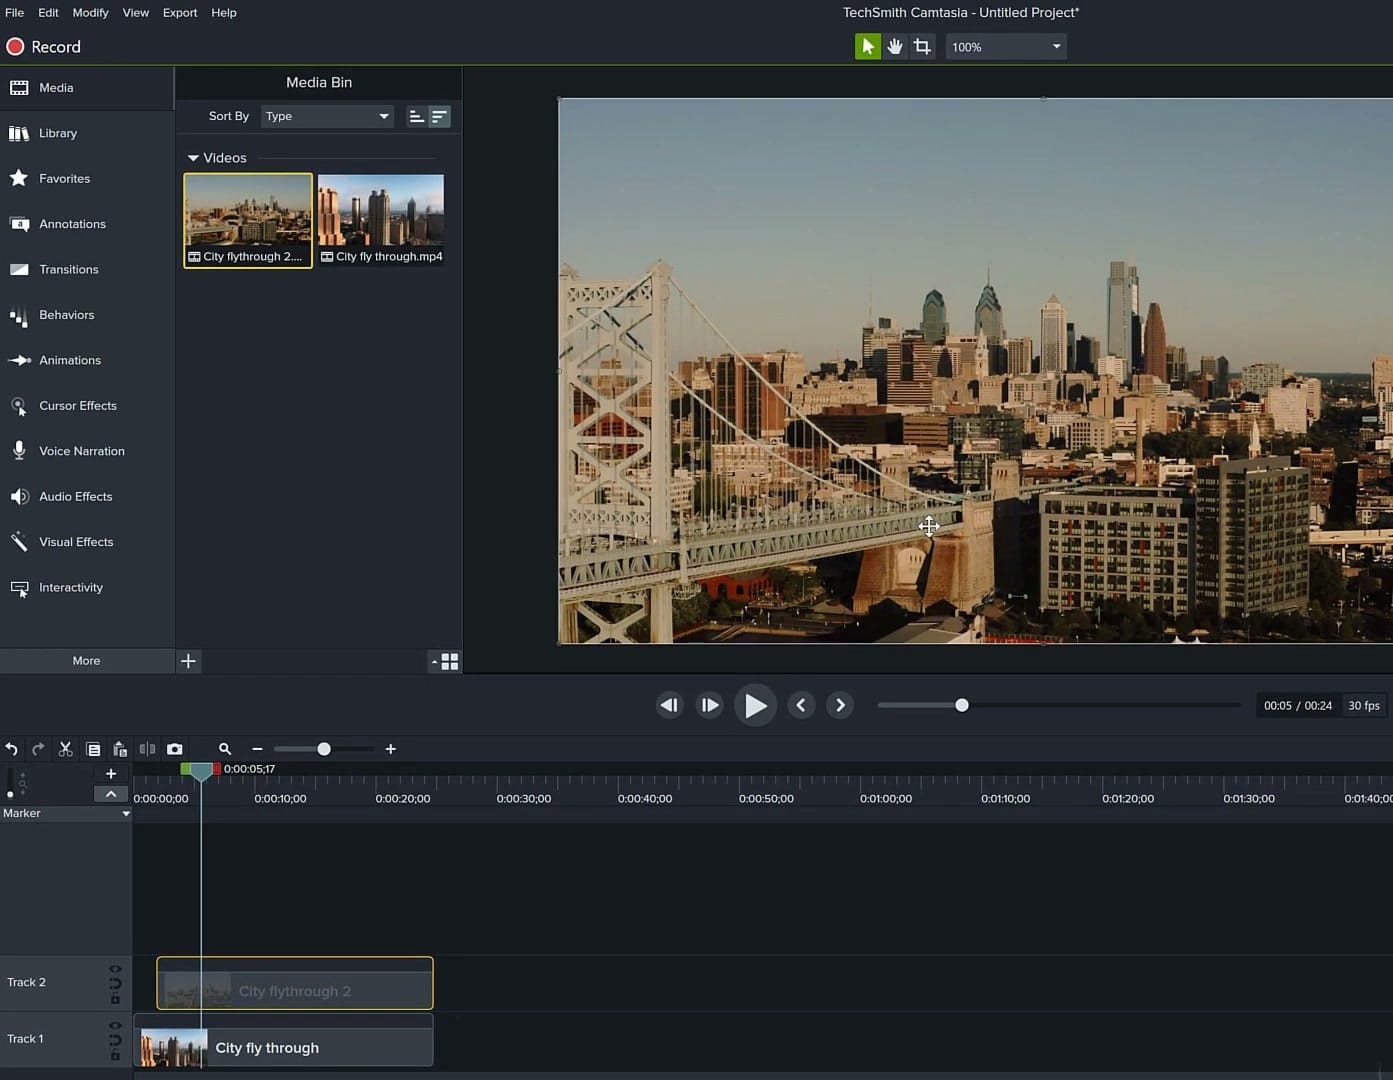
Make sure the overlay clip is on the track above the background. Camtasia renders tracks from bottom to top, so anything on a higher track appears in front of what is below it. If your overlay is behind the background, simply drag it to a higher track number.
Scaling and Positioning the Overlay
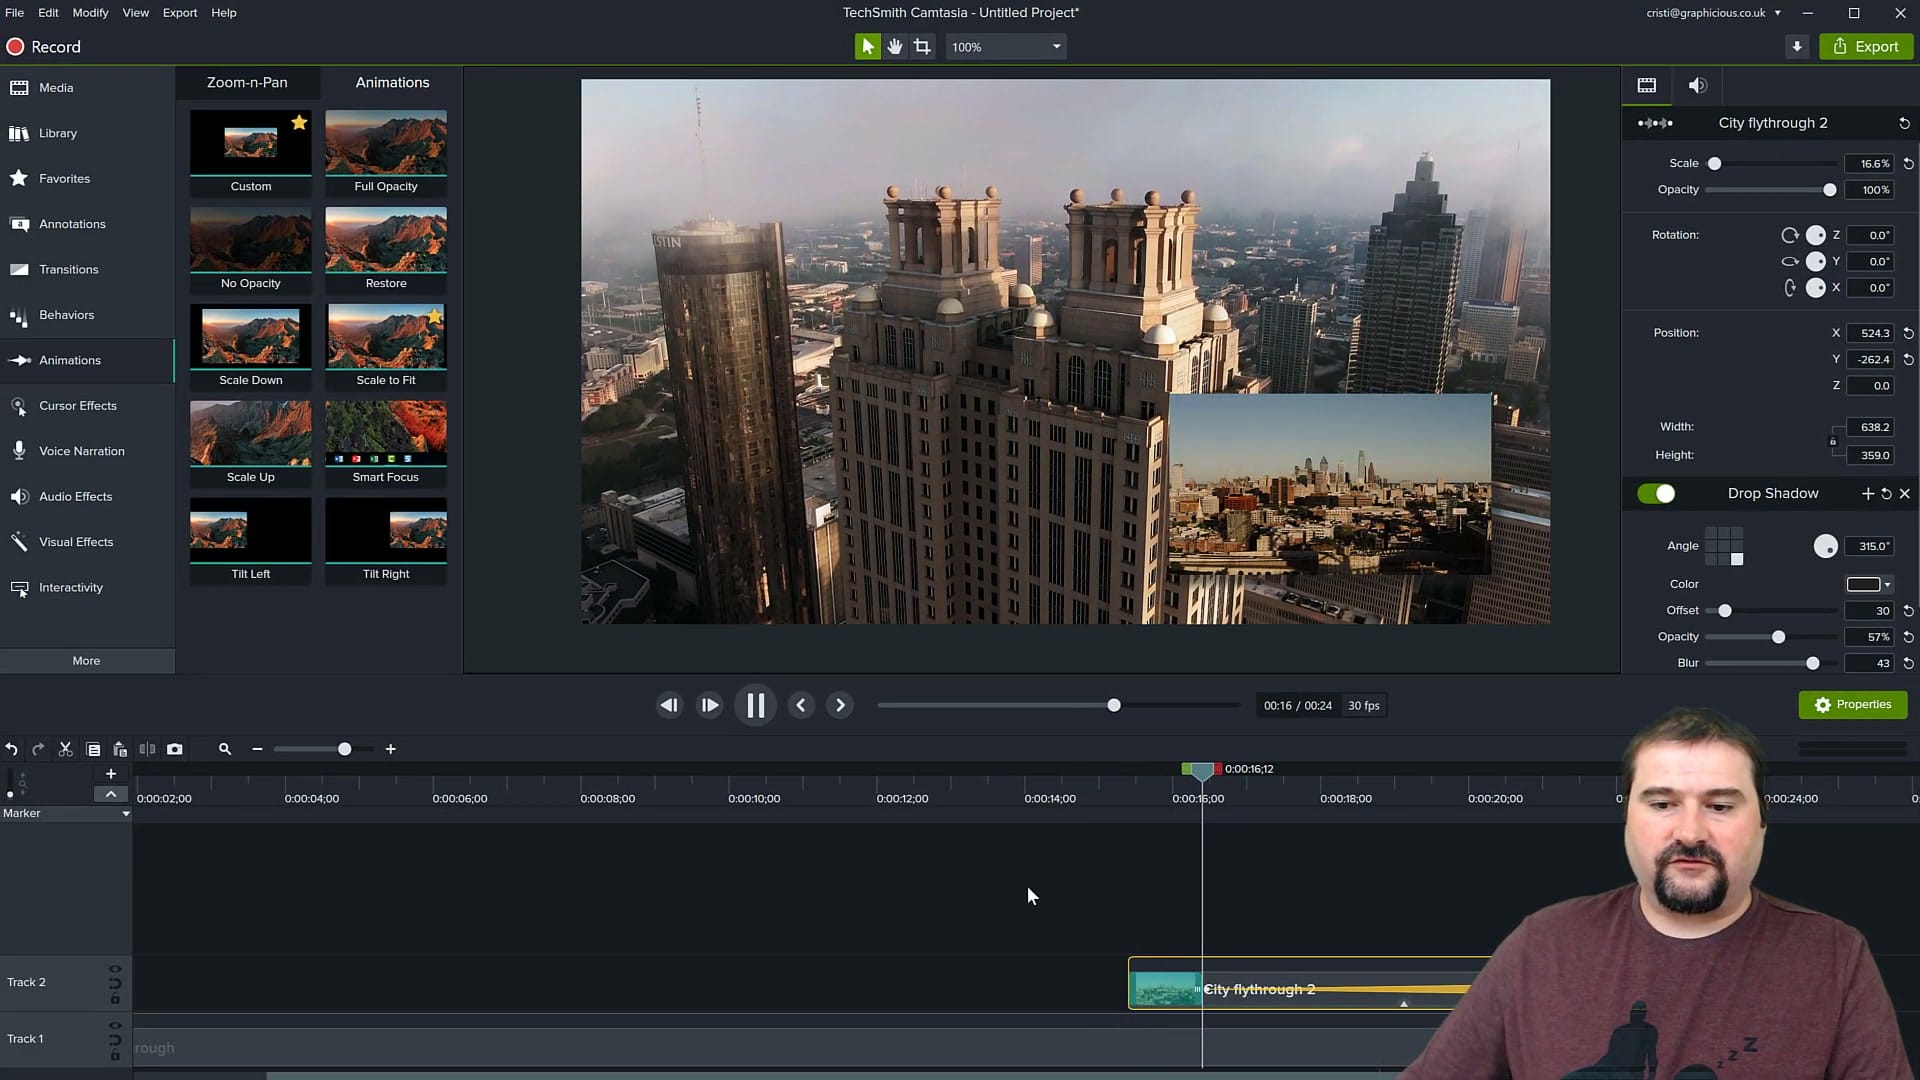
With the overlay clip selected on the timeline, open the Properties panel. Here you control the size and placement of the PIP window. The key properties are:
- Scale — reduce this to make the overlay smaller. A value around 30-40% works well for most PIP layouts.
- Position (X and Y) — move the overlay to a corner of the canvas. Common placements are bottom-right or top-right.
- Width and Height — you can also set exact pixel dimensions if you need precise sizing.
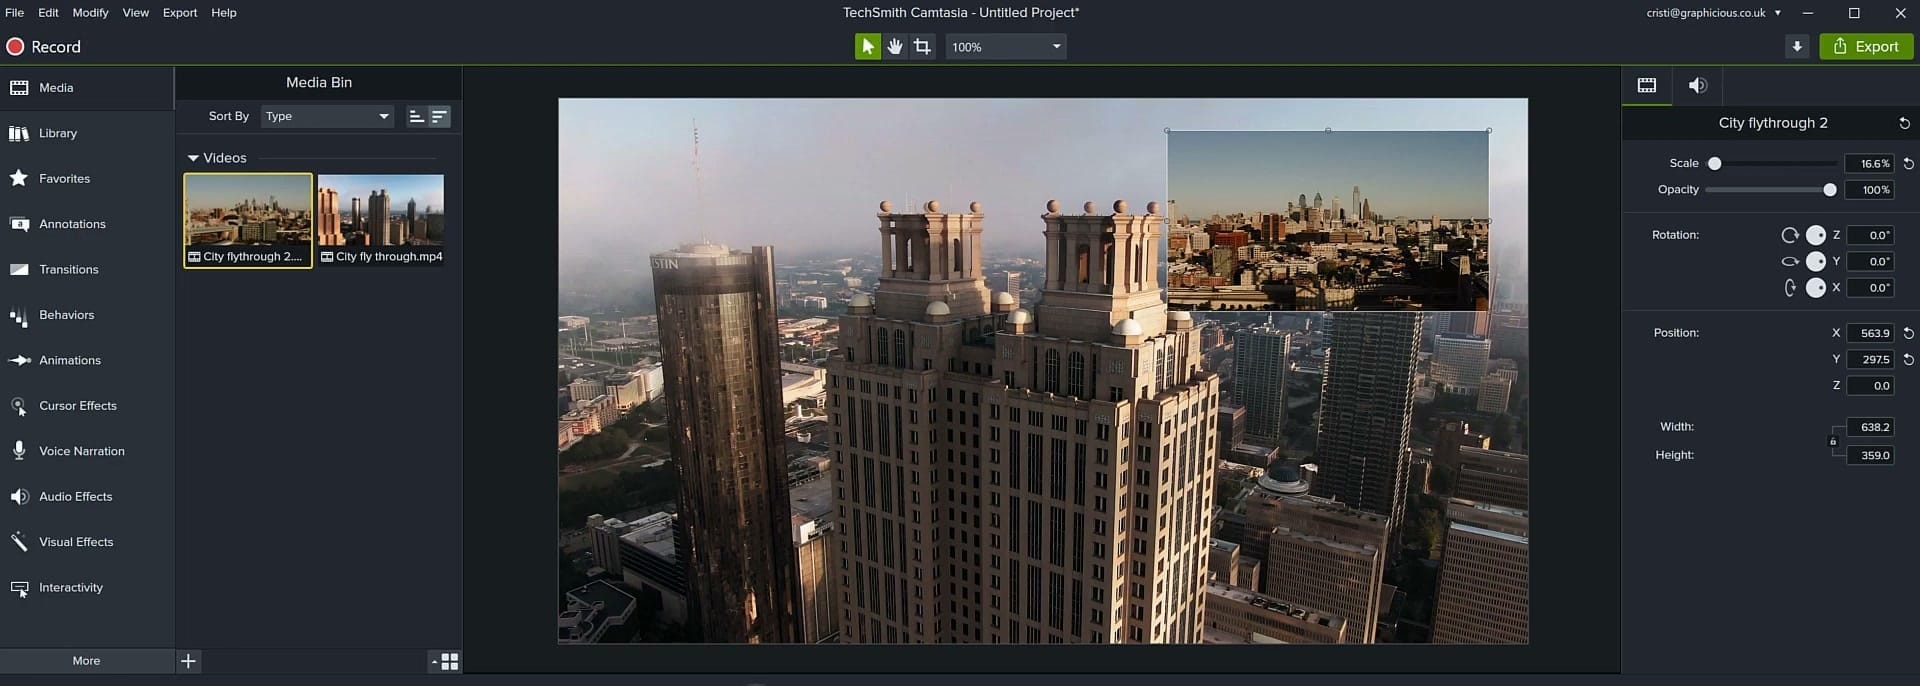
You can also click and drag the overlay directly on the canvas to reposition it, and use the corner handles to resize. The Properties panel gives you exact numbers when you need pixel-perfect placement.
Adding Transitions to the PIP Clip
A PIP window that pops in and out abruptly can feel jarring. Adding a transition — especially a fade — makes the overlay appear and disappear smoothly. Open the Transitions panel, find the Fade transition, and drag it onto the beginning and end of the overlay clip on the timeline.
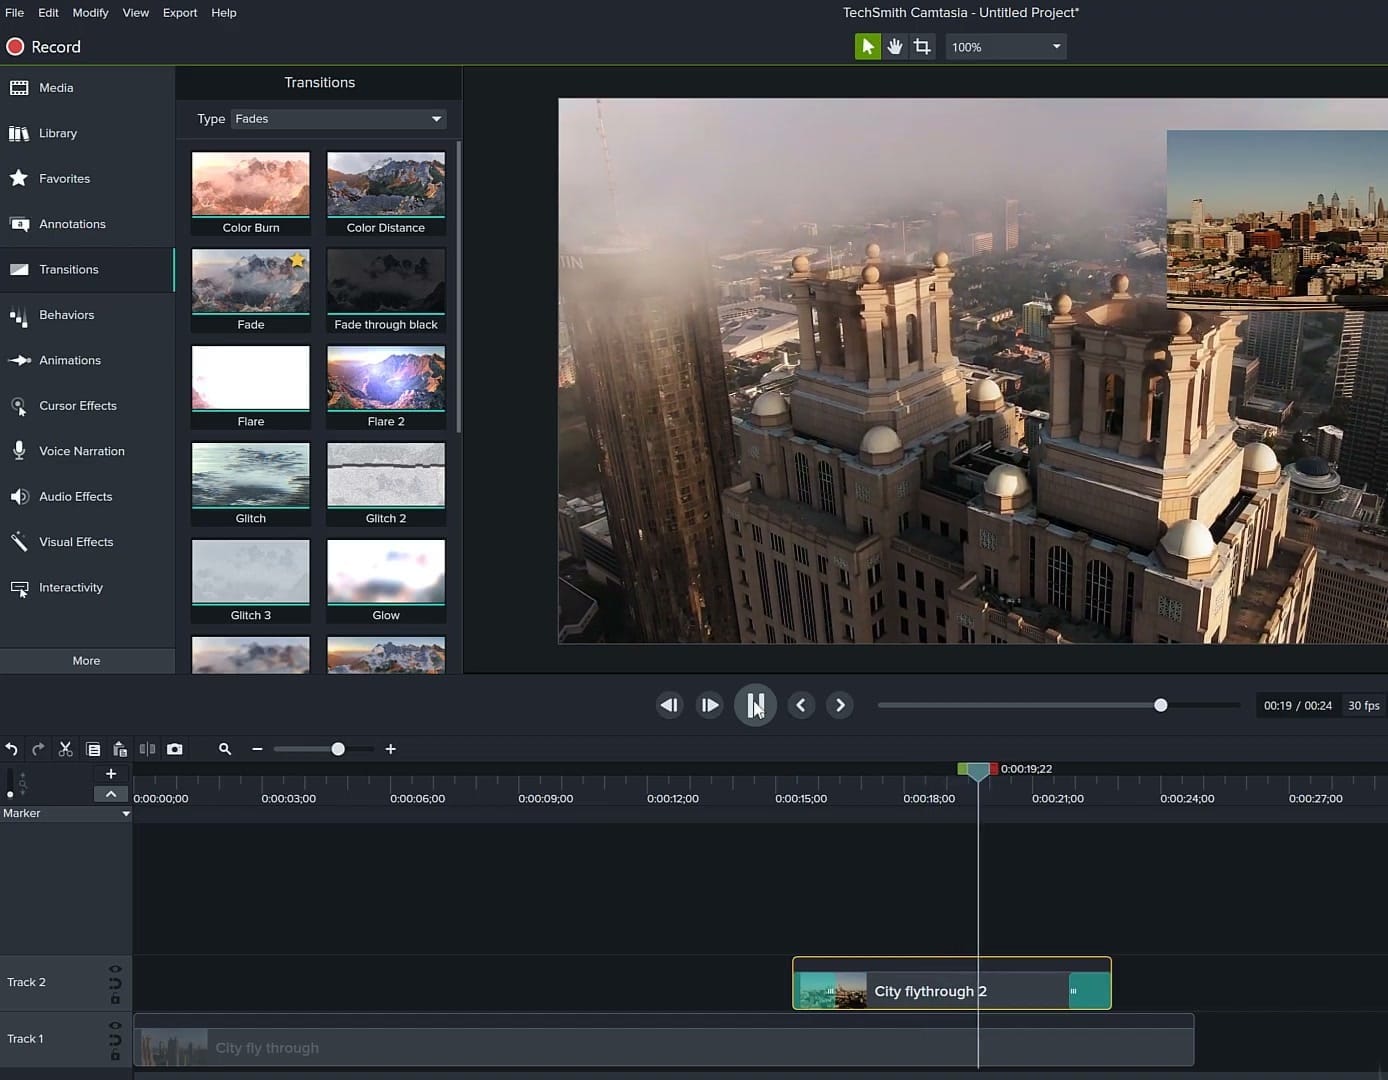
You can adjust the duration of the transition by dragging its edges on the timeline. A half-second to one-second fade usually looks natural. Other transitions like Slide or Wipe can also work depending on the style you are going for, but Fade is the most commonly used for PIP.
Polishing with Drop Shadow and Animations
To make the PIP overlay stand out from the background and look professional, add a Drop Shadow effect. This creates a subtle shadow behind the overlay window, giving it depth and separating it visually from the main video. You can find Drop Shadow in the Visual Effects panel.
For additional polish, the Animations panel lets you add movement to the PIP window. You can animate the overlay to zoom in when it appears, adjust opacity over time, or move it to a different position during the video. This is useful for drawing attention to the PIP at key moments or moving it out of the way when important content appears in the background.
Tips for Better PIP Results
- Keep the overlay small enough — if the PIP window is too large, it competes with the background rather than complementing it. 25-35% scale is a good starting range.
- Choose a consistent corner — pick one corner for the PIP and keep it there throughout the video unless there is a reason to move it.
- Match the content — PIP works best when the two videos relate to each other. A webcam overlay on a screen recording, a detail shot over a wide shot, or a reaction alongside the main content.
- Use the drop shadow — it is a small detail that makes a significant difference in how professional the result looks. Also helps the picture-in-picture video 'pop'
- Test different transition lengths — too fast feels abrupt, too slow feels sluggish. Preview and adjust until it feels right.
Next Steps
Picture in Picture is a technique you will use constantly once you know how to set it up. Whether you are creating tutorials with a webcam overlay, comparing two video sources, or adding context to a presentation, the workflow is always the same: stack the clips, scale and position the overlay, add transitions, and polish with effects.
If you’re wish to learn more about Camtasia and wish to have a one-on-one Camtasia coaching session, feel free to book a call with me.
I’m here to help you with any questions you have and to guide you through the best workflows, tips, workarounds, or just answer any questions you may have!


