
Talking Head 2.0 Effect in Camtasia: Two Ways to Create Video in a Circle


The circular talking head effect is one of the most popular overlays in tutorials, presentations, and vlogs. Instead of a rectangular camera feed taking up screen space, your face appears inside a clean circle that can float over any background. In Camtasia, there are two ways to achieve this — both using built-in tools, no plugins required.
This tutorial covers both methods step by step: using the Media Matte visual effect with an ellipse shape as the mask, and a second approach with a twist. By the end, you will have a professional circular talking head with optional border and shadow effects.
Watch the full tutorial:
What Is the Talking Head Circle Effect
The talking head circle effect places your camera footage inside a circular mask, hiding everything outside the circle. This is different from cropping — the masked area becomes transparent, allowing you to layer the circle over screen recordings, slides, or video backgrounds. You see this effect constantly in YouTube tutorials where the creator appears in a small circle in the corner while demonstrating software on screen.
The effect works by combining two elements: your camera footage and a shape that defines the visible area. Camtasia handles the masking through its Media Matte visual effect, which uses one track as the mask for another. The result is a clean, resolution-independent circular cutout that you can resize, reposition, and animate just like any other element on the timeline.
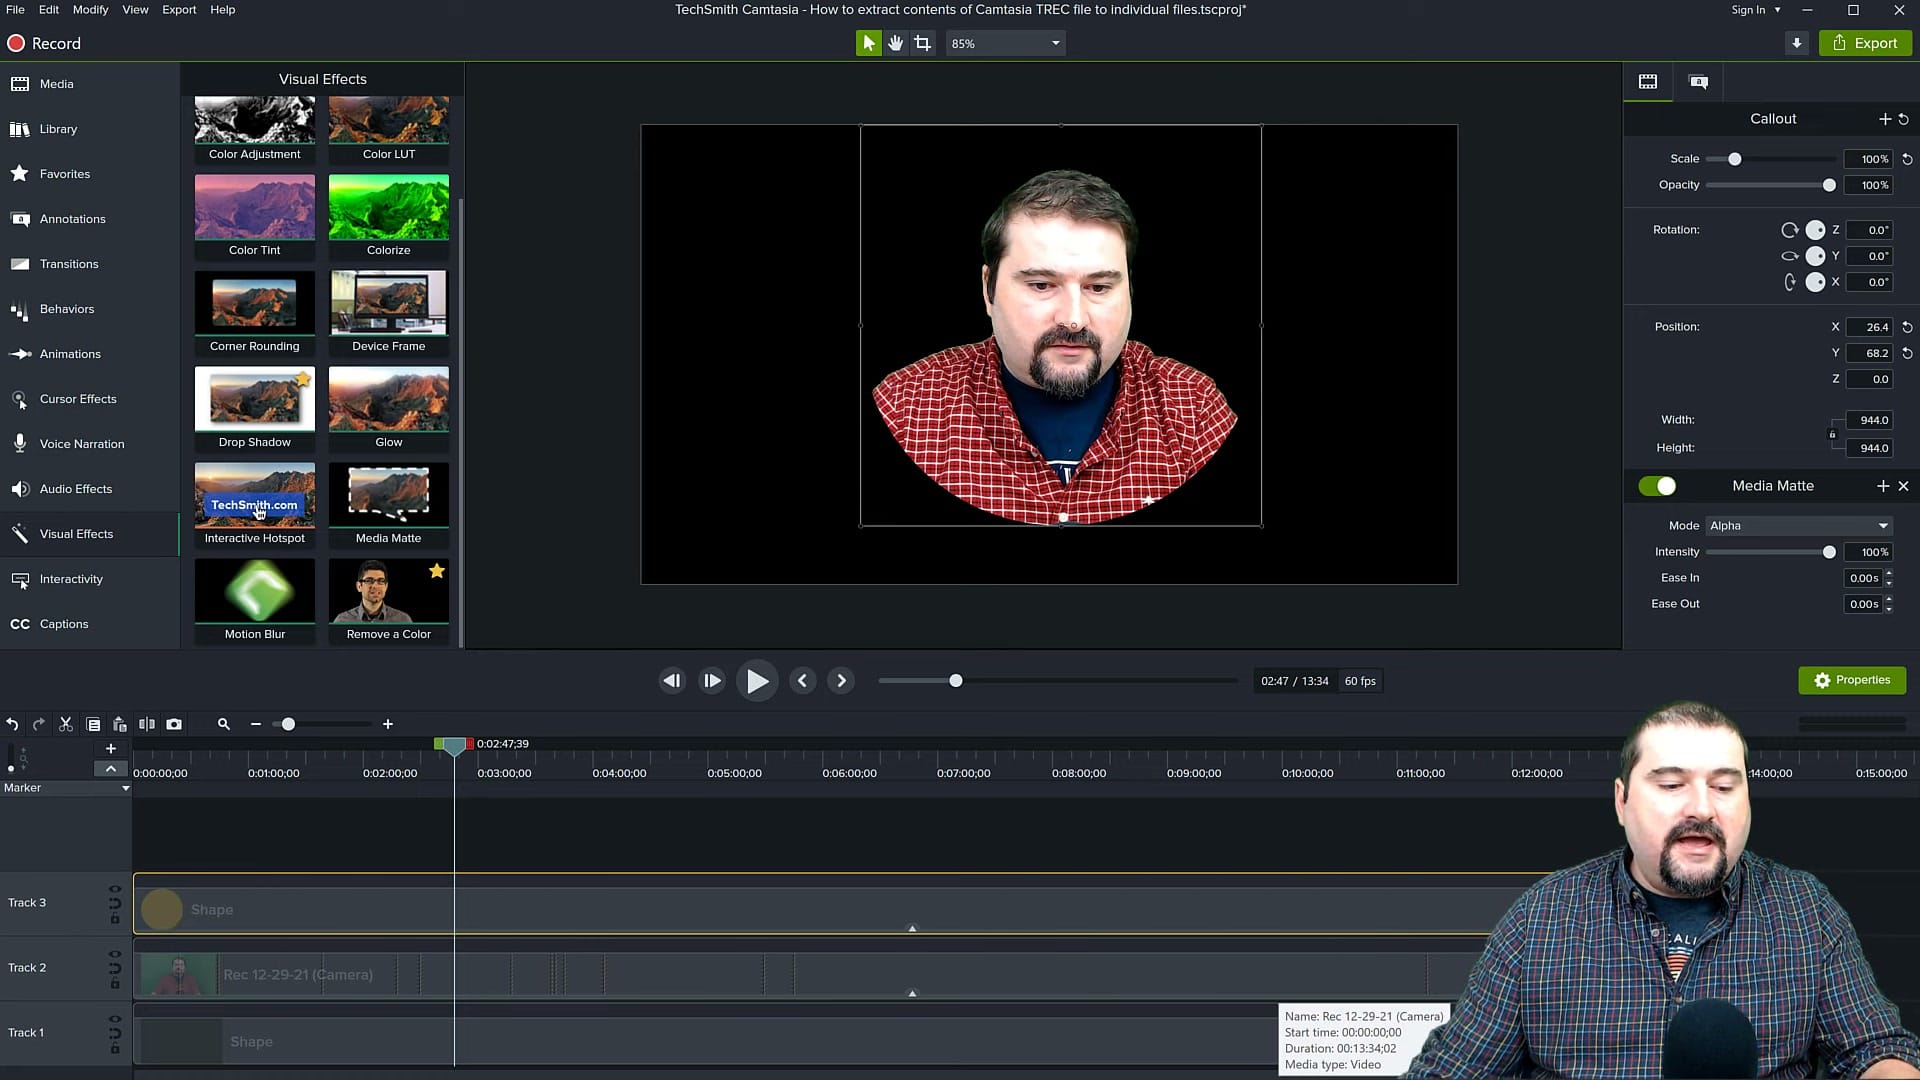
Method 1: Media Matte with Alpha Mode
The primary method uses Camtasia's Media Matte effect, which is the most flexible and produces the cleanest results. Media Matte works by using the content on one track to define the visible area of content on another track.
Here is how it works:
- Place your camera footage on a track in the timeline (for example, Track 2).
- Add an ellipse shape from the Annotations or Shapes panel to the track below (Track 1). - This will serve as the background.
- Add another ellipse shape above, this will serve as the mask
- Apply the Media Matte effect to your shape above — find it in the Visual Effects panel and drag it onto the clip.
- Set the mode to Alpha — this tells Camtasia to use the shape on the track below as the transparency mask.
- Resize and position the ellipse to match the area of your face you want visible.
The Alpha mode is the key setting. It tells Media Matte to make your camera footage visible only where the ellipse shape exists on the track above. Everywhere the ellipse is not present becomes transparent.
Setting Up the Shape Mask
The shape you place below the camera track defines the exact boundary of the circle. Getting this right is what makes the difference between a rough cutout and a professional-looking effect.
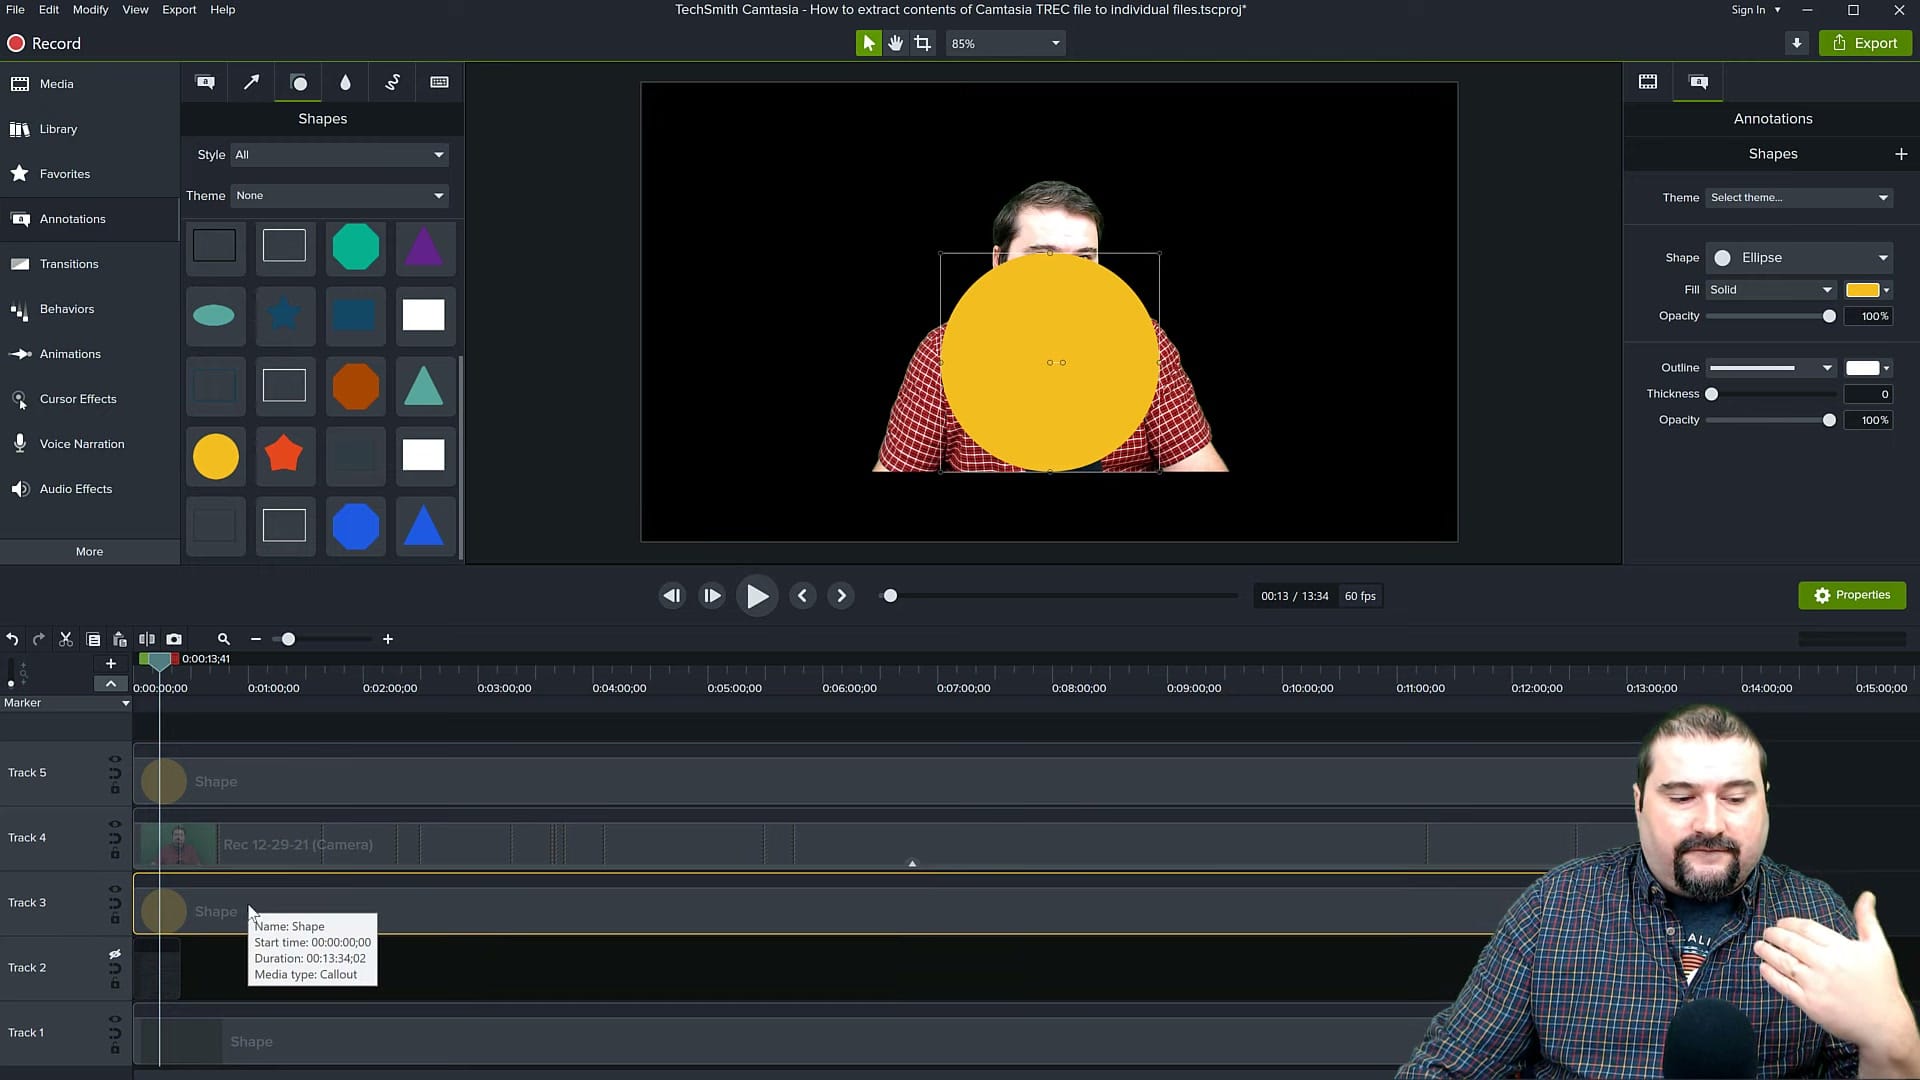
When adding the ellipse shape:
- Hold Shift while resizing to constrain the shape to a perfect circle — without this, you may end up with an oval.
- Match the duration of the shape to your camera clip — the mask only works where both clips overlap on the timeline.
- Center it on your face — position the ellipse so your head is centered within the circle, with enough room for natural head movement during recording.
- The shape colour does not matter — Media Matte in Alpha mode only cares about the shape boundary, not its fill colour. Yellow, blue, red — the result is identical.
- Adding another ellipse, above, higher than the main mask and grouping it with the mask (then applying media matte to the group), can show your head popping out of the shape, which will make for this novel talking head effect.
If you need to adjust the circle size or position after applying Media Matte, select the ellipse shape on the lower track and move or resize it. The mask updates in real time on the canvas.
The Finished Circle Effect
Once the Media Matte is applied and the ellipse is positioned, you have a clean circular talking head that is ready for compositing.
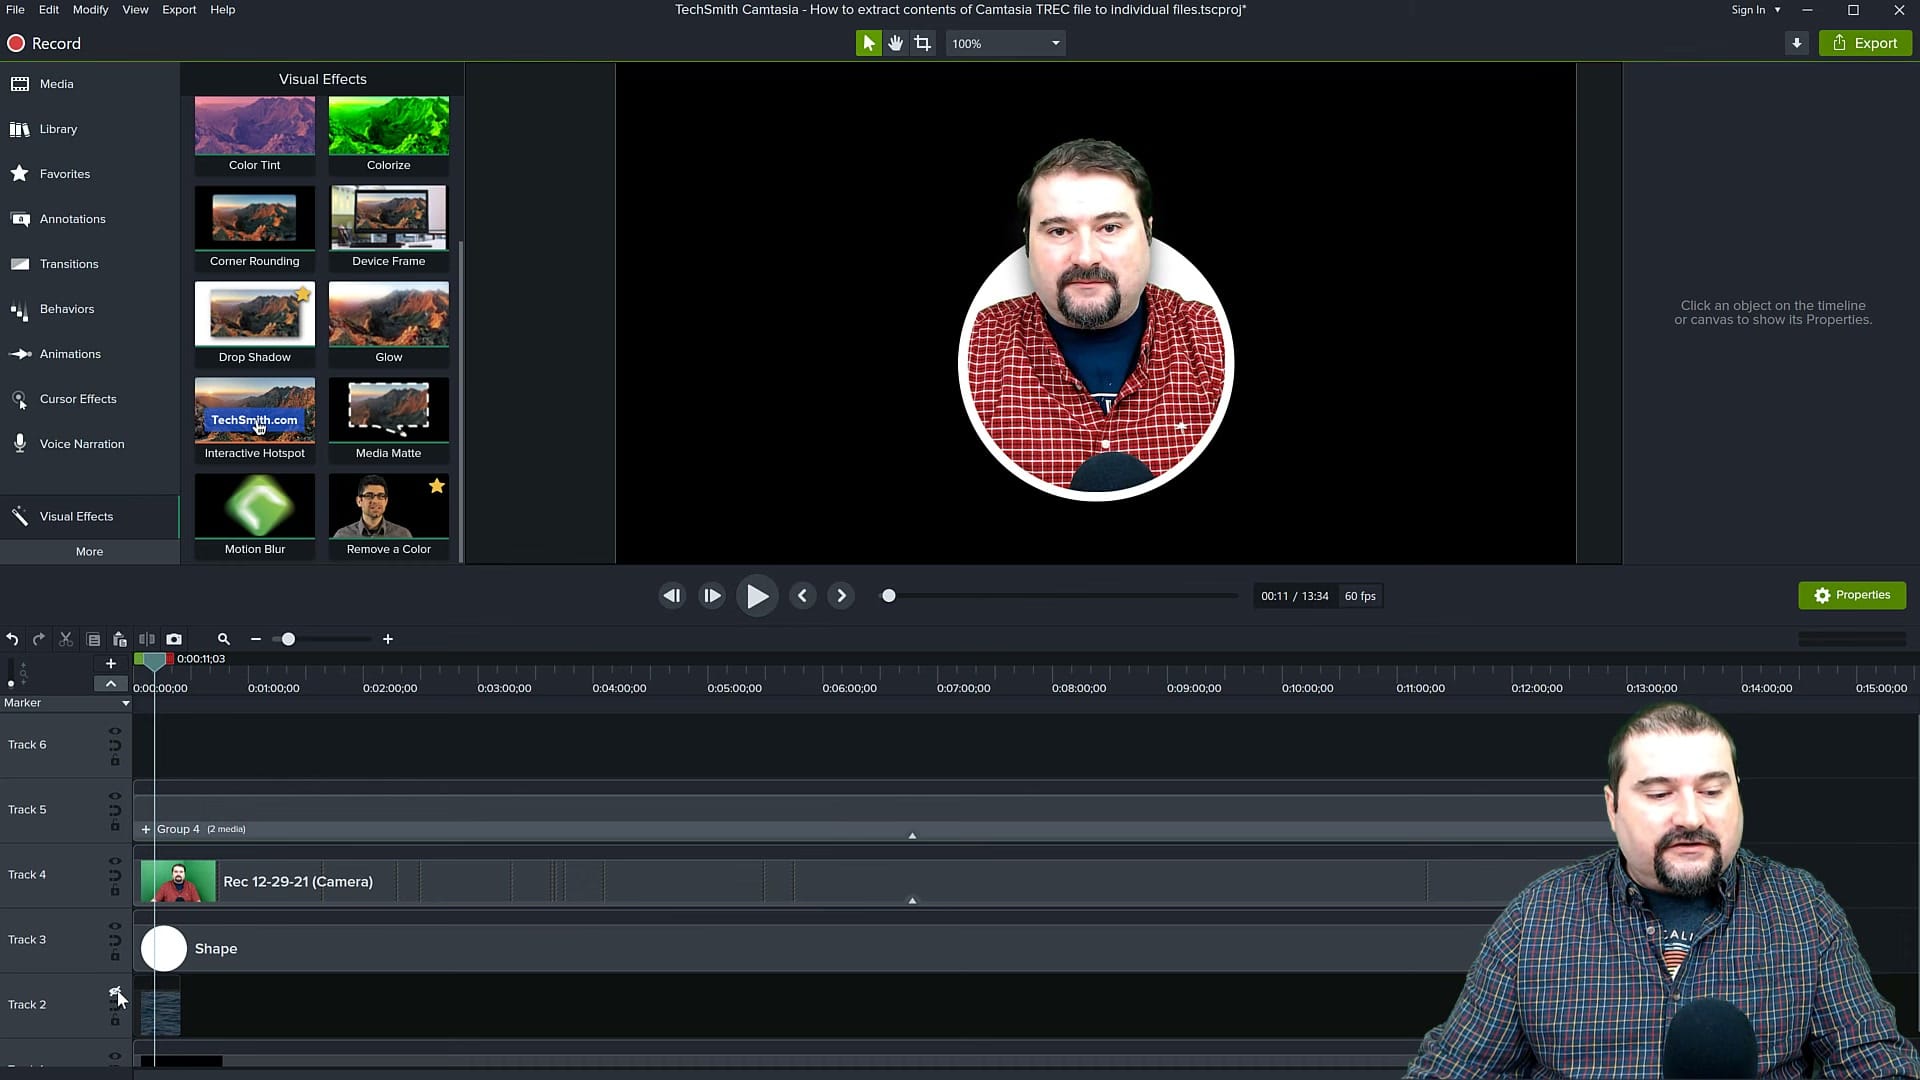
At this stage, you can enhance the circle with additional visual touches:
- Add a border — the circle shape behind the masked footage (on a track below both the camera and mask tracks), can be larger, with a visible outline or fill colour. This creates a coloured ring around your talking head.
- Add a drop shadow — apply the Drop Shadow effect to give the circle depth and separate it visually from the background.
- Scale it down — select both the camera clip and the ellipse mask, group them if needed, and resize the entire circle to fit in a corner of the screen.
The border is particularly effective because it provides a clear visual boundary between your circular camera feed and whatever background content appears behind it.
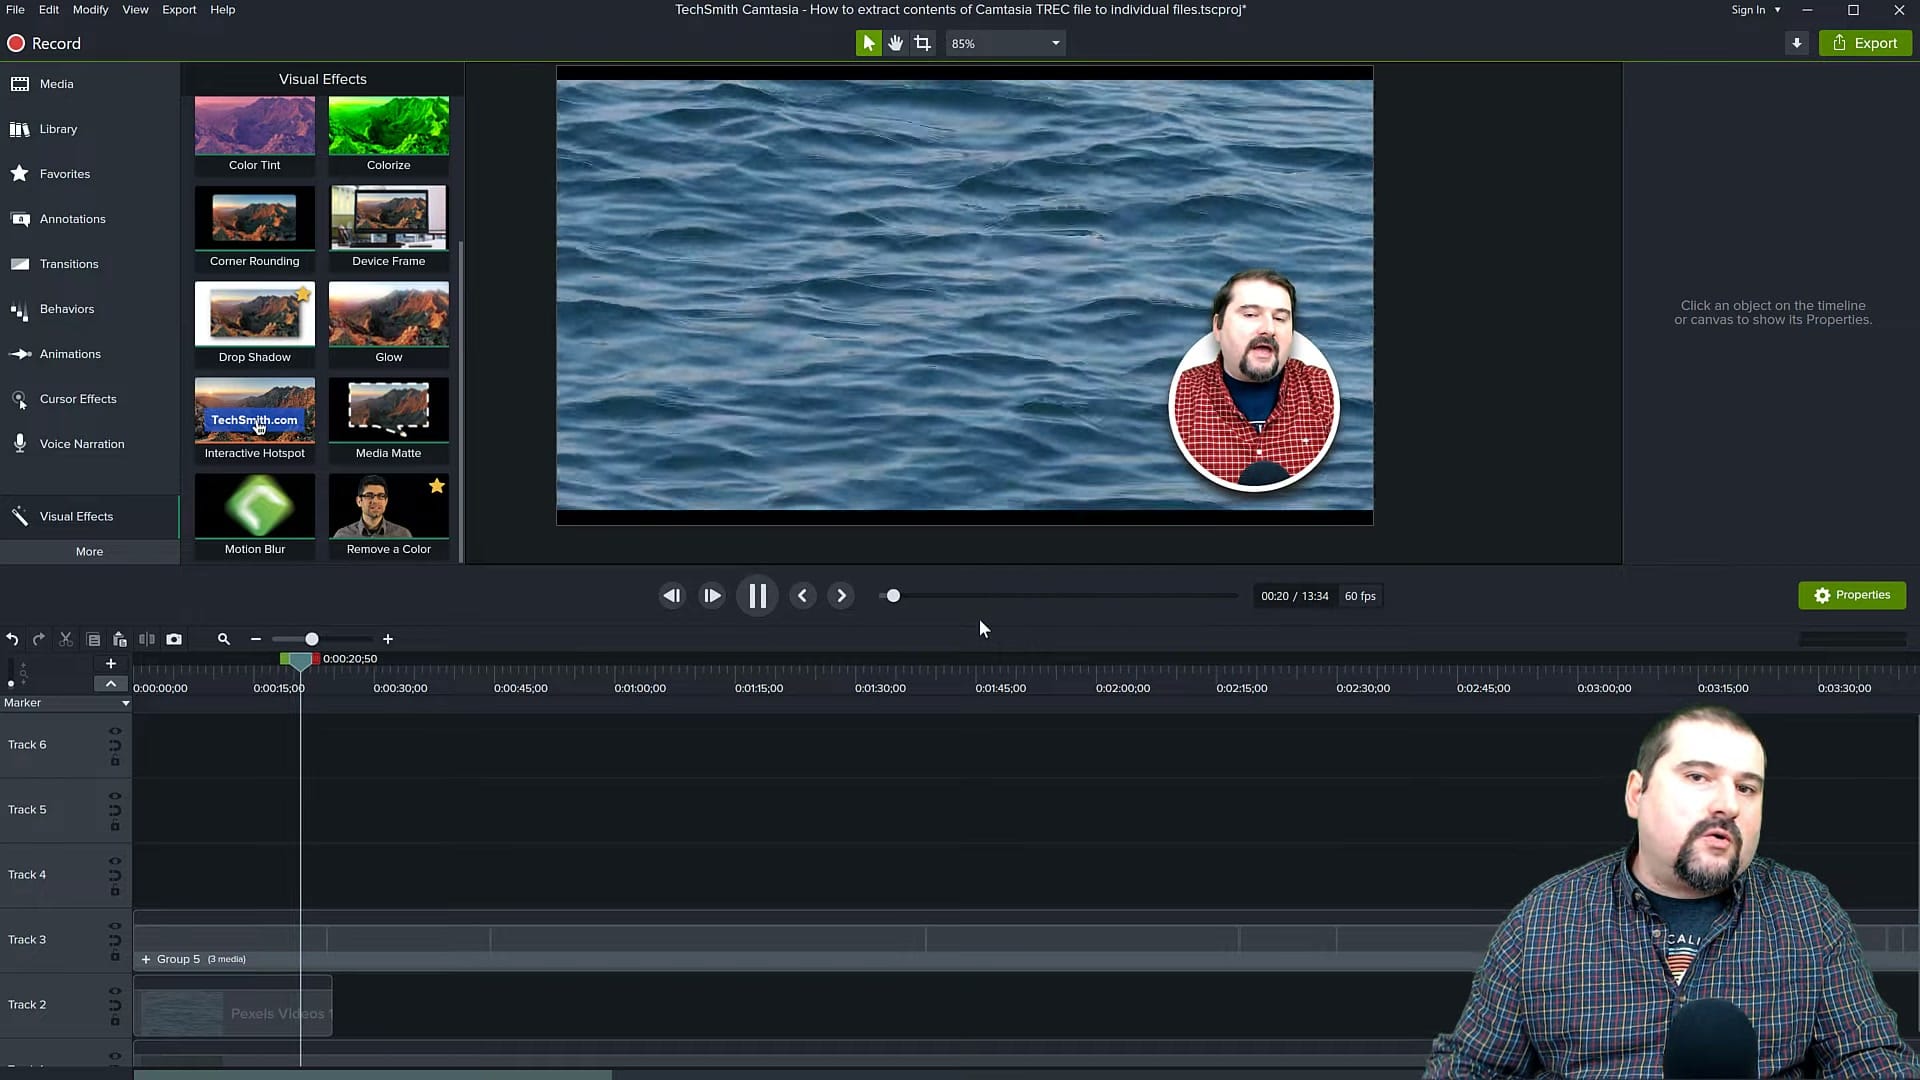
Compositing Over Video Backgrounds
The real power of the circle talking head becomes apparent when you layer it over other content. Because the area outside the circle is transparent, the talking head floats naturally over any background.
Common use cases for the circular talking head overlay:
- Software tutorials — your face in the corner while demonstrating an application full-screen.
- Presentation recordings — the circle overlaid on your slides, keeping a personal connection with the audience.
- Vlog intros — a stylish circular introduction before transitioning to full-frame footage.
- Course content — consistent presenter presence without occupying too much screen real estate.
To composite, simply add your background content (screen recording, video, image, or slides) on a track below all the circle elements. The transparent areas of the masked camera footage let the background show through.
Adding a Border and Shadow
A border and shadow take the circle from looking like a simple cutout to a polished, professional element. Here is the approach:
- For the border — duplicate the ellipse shape and place the copy on a track below the mask. Make it slightly larger than the masking ellipse and give it a visible fill colour (white, black, or your brand colour). The size difference between the two ellipses creates the border width.
- For the shadow — apply a Drop Shadow effect to the border ellipse. Adjust the offset, blur, and opacity until the shadow looks subtle but effective. A 3-5 pixel offset with 50-60% opacity is a good starting point.
- Keep it consistent — if you use this effect across multiple videos, save your project as a template or note down the exact sizes and positions so every video has the same look.
Tips for a Professional Look
A few practical tips to get the most out of the circular talking head effect:
- Record with the circle in mind — frame yourself centrally in the camera with some headroom. Avoid sitting too close or too far, as extreme positions make it harder to fit naturally inside the circle.
- Use consistent lighting — the circle effect draws attention to your face, so even, flattering lighting matters more than with a full rectangular frame.
- Keep the circle small enough — the purpose is to maintain a personal presence without dominating the screen. Typically 15-25% of the canvas width works well.
- Position in a corner — bottom-left or bottom-right are standard positions. Avoid placing the circle over important content in your screen recording or slides.
- Lock the position — once you have the circle where you want it, lock the tracks to avoid accidentally moving elements while editing other parts of your project.
Next Steps
The circular talking head effect is one of those techniques that immediately makes your videos look more polished and professional. Whether you are creating tutorials, course content, or presentations, it keeps your face visible without competing with the main content on screen. Both methods covered in this tutorial work entirely within Camtasia — no external tools or plugins needed.
If you’re wish to learn more about Camtasia and wish to have a one-on-one Camtasia coaching session, feel free to book a call with me.
I’m here to help you with any questions you have and to guide you through the best workflows, tips, workarounds, or just answer any questions you may have!


