How to Add Intros, Outros, Hooks, and Music in Riverside


In this tutorial, I walk through the complete workflow for adding intros, outros, hooks, background music, and YouTube end screens to a podcast episode in Riverside.
Whether you record your intro directly in the studio, import an external file from a client, or use AI-generated hooks, Riverside handles all of it — and with the Brand Kit, you can even automate the process.
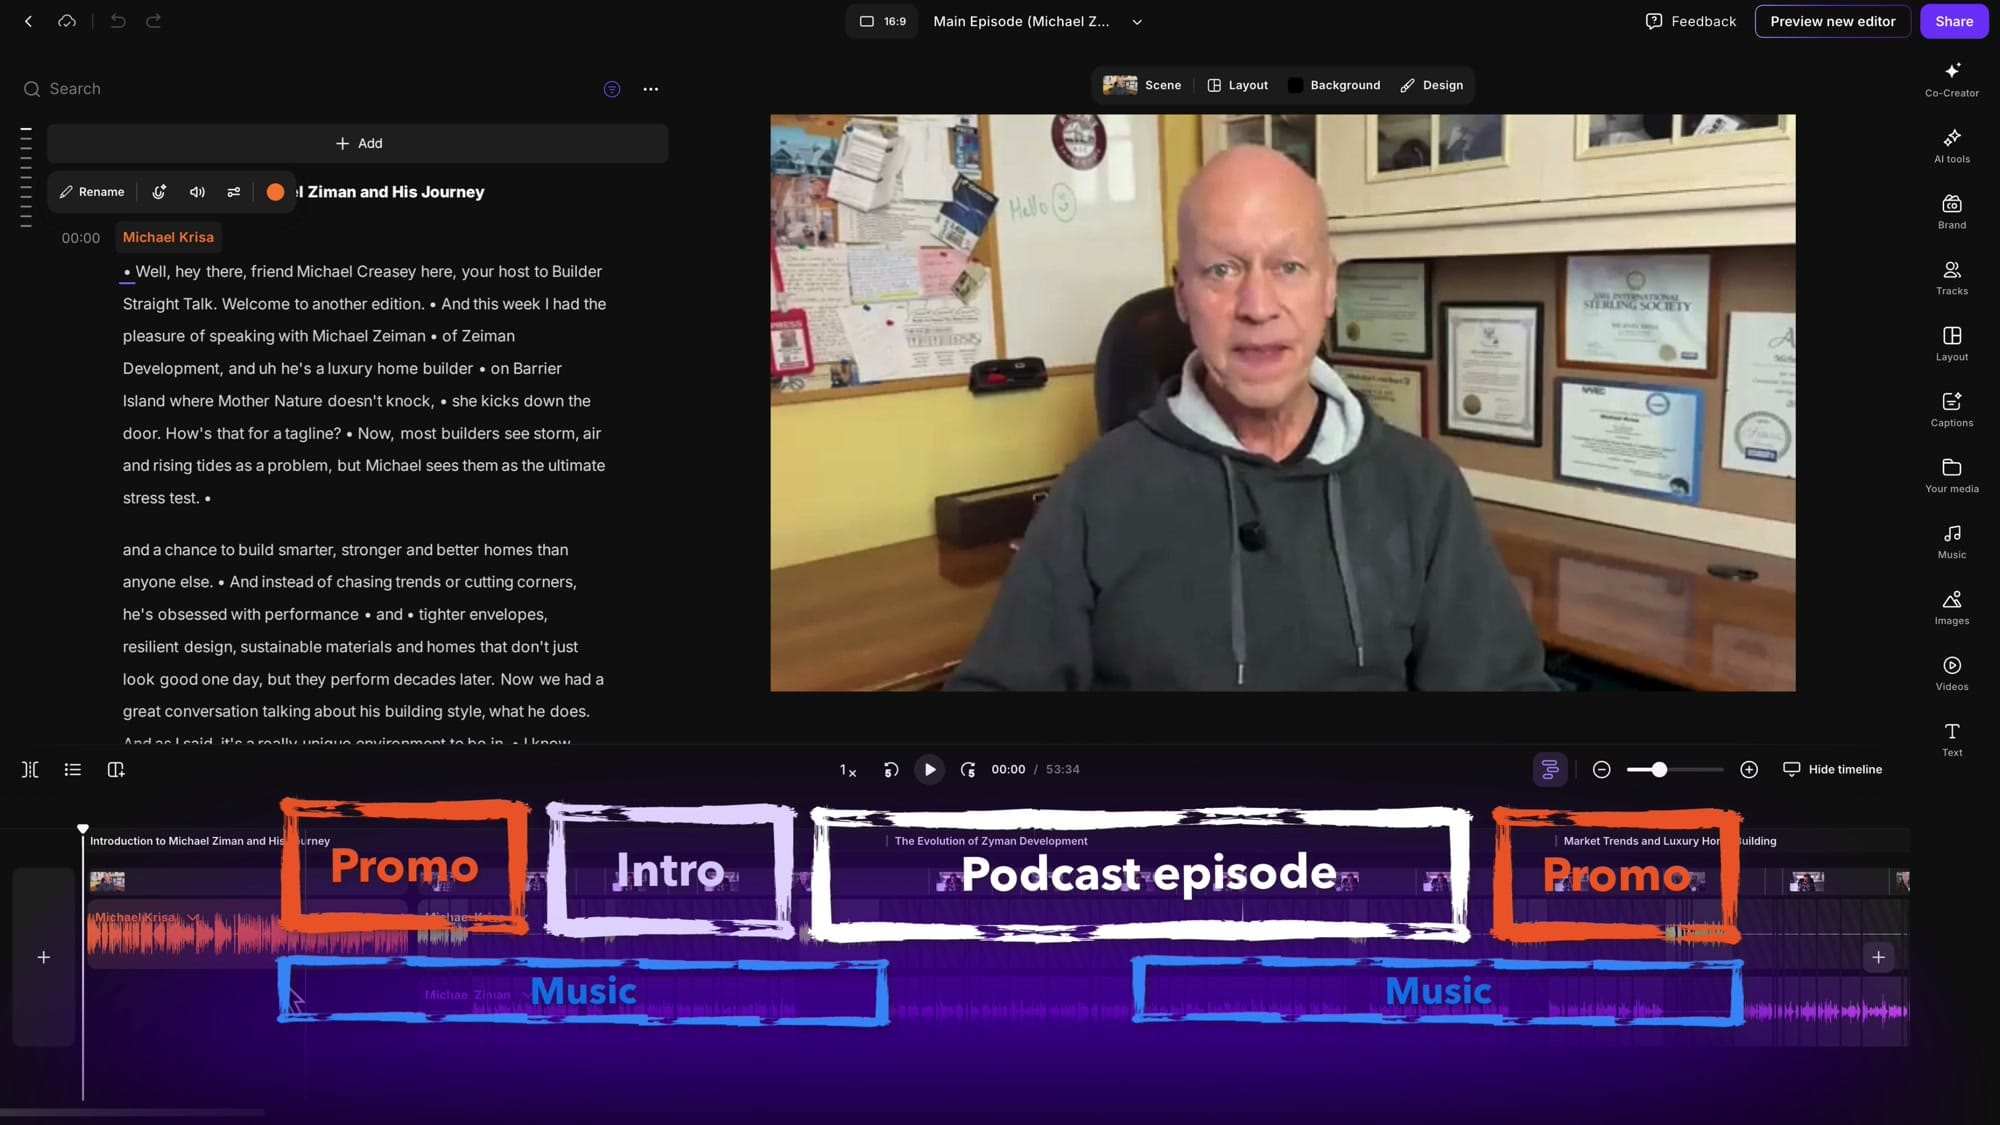
I'll be working with a real client episode from the Builders Straight Talk podcast to demonstrate everything. The typical layout for this show is: a hook at the beginning, a company promo segment, the host's personal intro, the main episode, an outro promo, and finally a YouTube end screen.
That sounds like a lot, but Riverside makes it manageable. Let me show you how.
Method 1: Record Your Intro Directly in Riverside
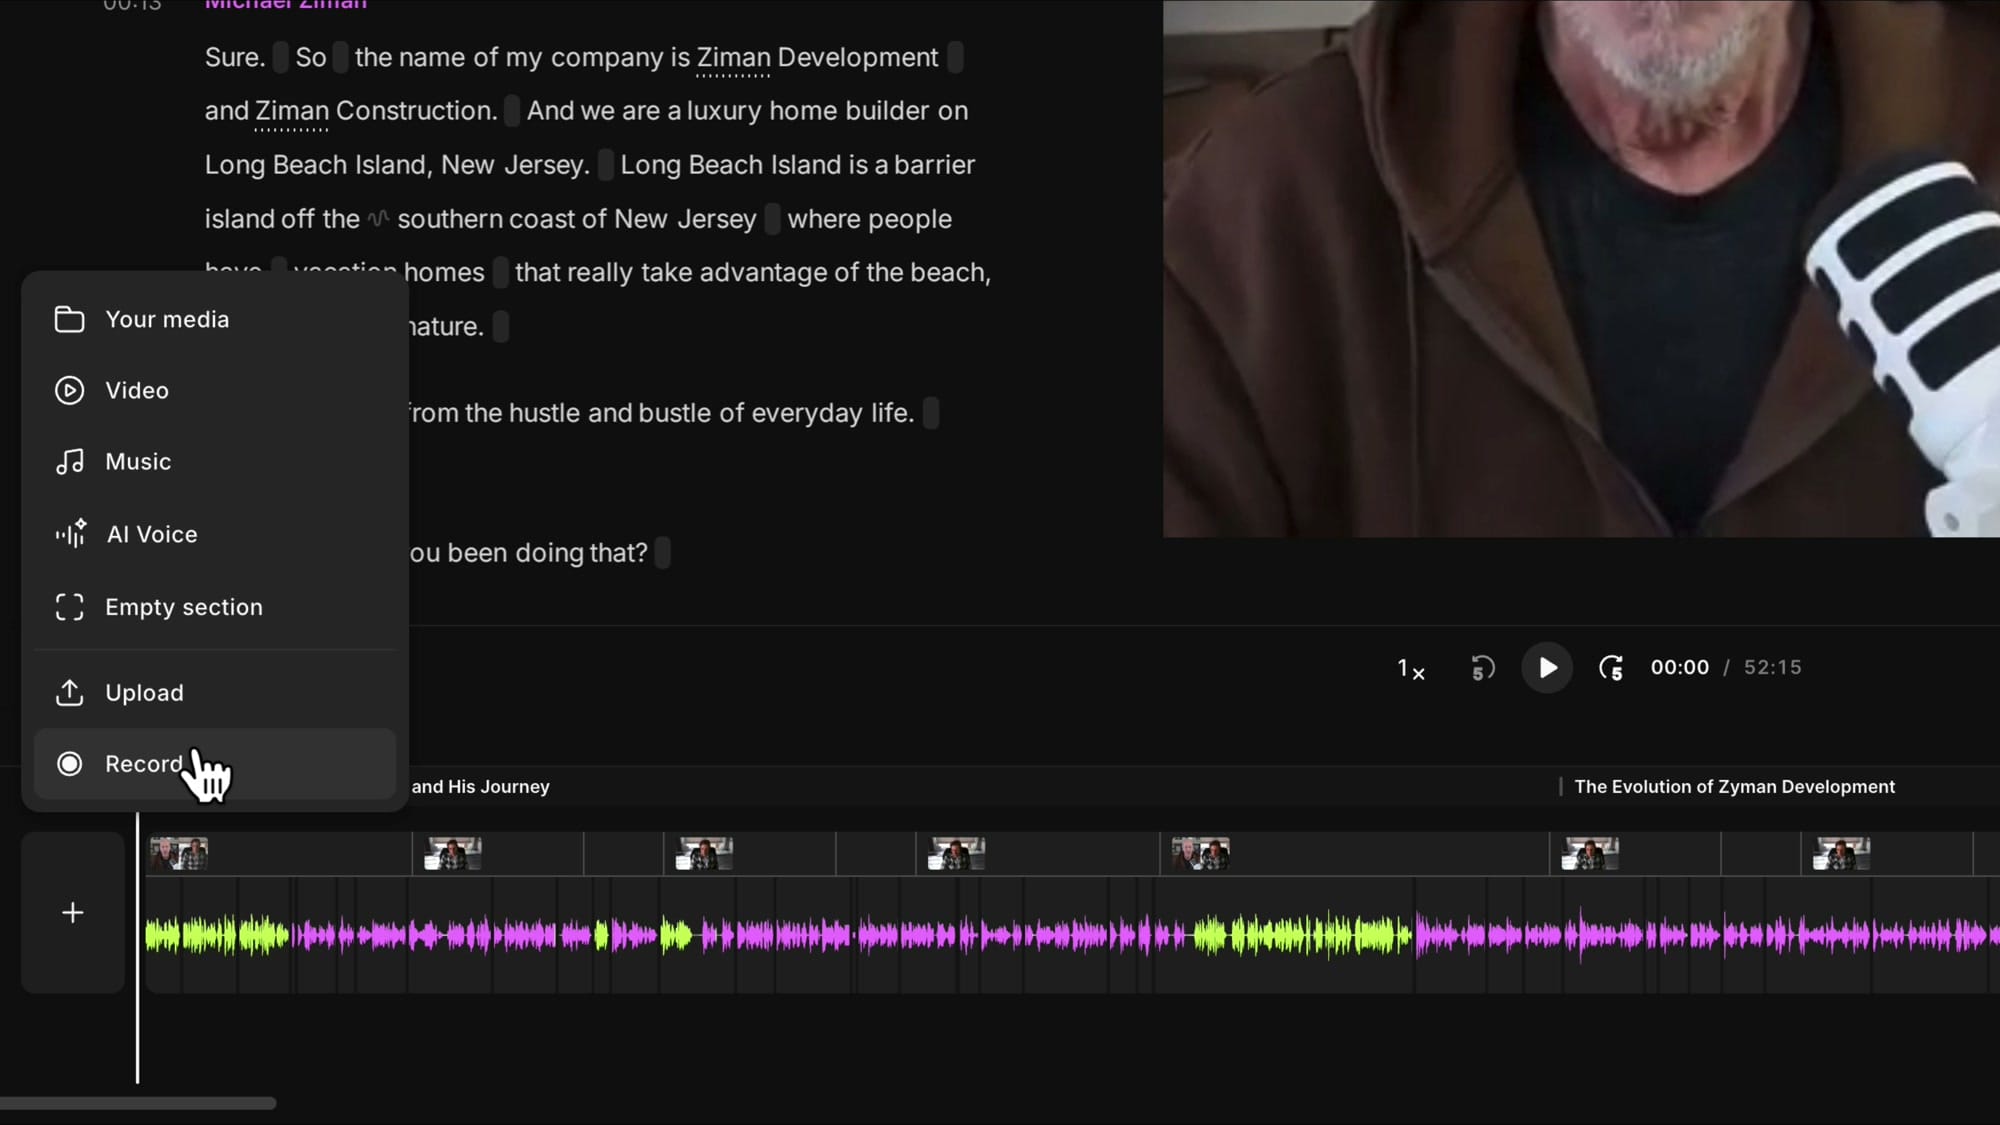
If you're the host and want to record a quick intro without leaving the editor, this is the fastest option. In the timeline, click the + button at the position where you want the intro — typically at the very beginning. From the menu, select Record.
This takes you out of the current edit and into the Riverside studio, where you can record yourself on camera. Make sure your microphone and camera are set correctly, then hit Record.
When you're done, stop the recording and Riverside will process and transcribe it. You'll see a Continue Editing button — click it, and you're right back in your edit with the new intro already inserted at the beginning of the timeline.
The recording is automatically transcribed, so you can immediately edit it using the text-based editor — trim silence from the beginning and end by collapsing the tracks and dragging the handles. Riverside keeps this recording under the project's Recordings tab, so you can reuse it later or create a standalone edit from it.
Method 2: Import an External Intro File
Often, you'll have a pre-recorded intro — maybe the host sends you a separate file for each episode, or you have a standard intro video from a client. The key here is how you upload the file.
Important: Do not upload the file through the Uploads area (B-roll). If you do, Riverside won't transcribe it, meaning you won't be able to use the text-based editor on that segment. Instead, go to the project's Recordings tab and click + Create → Import.
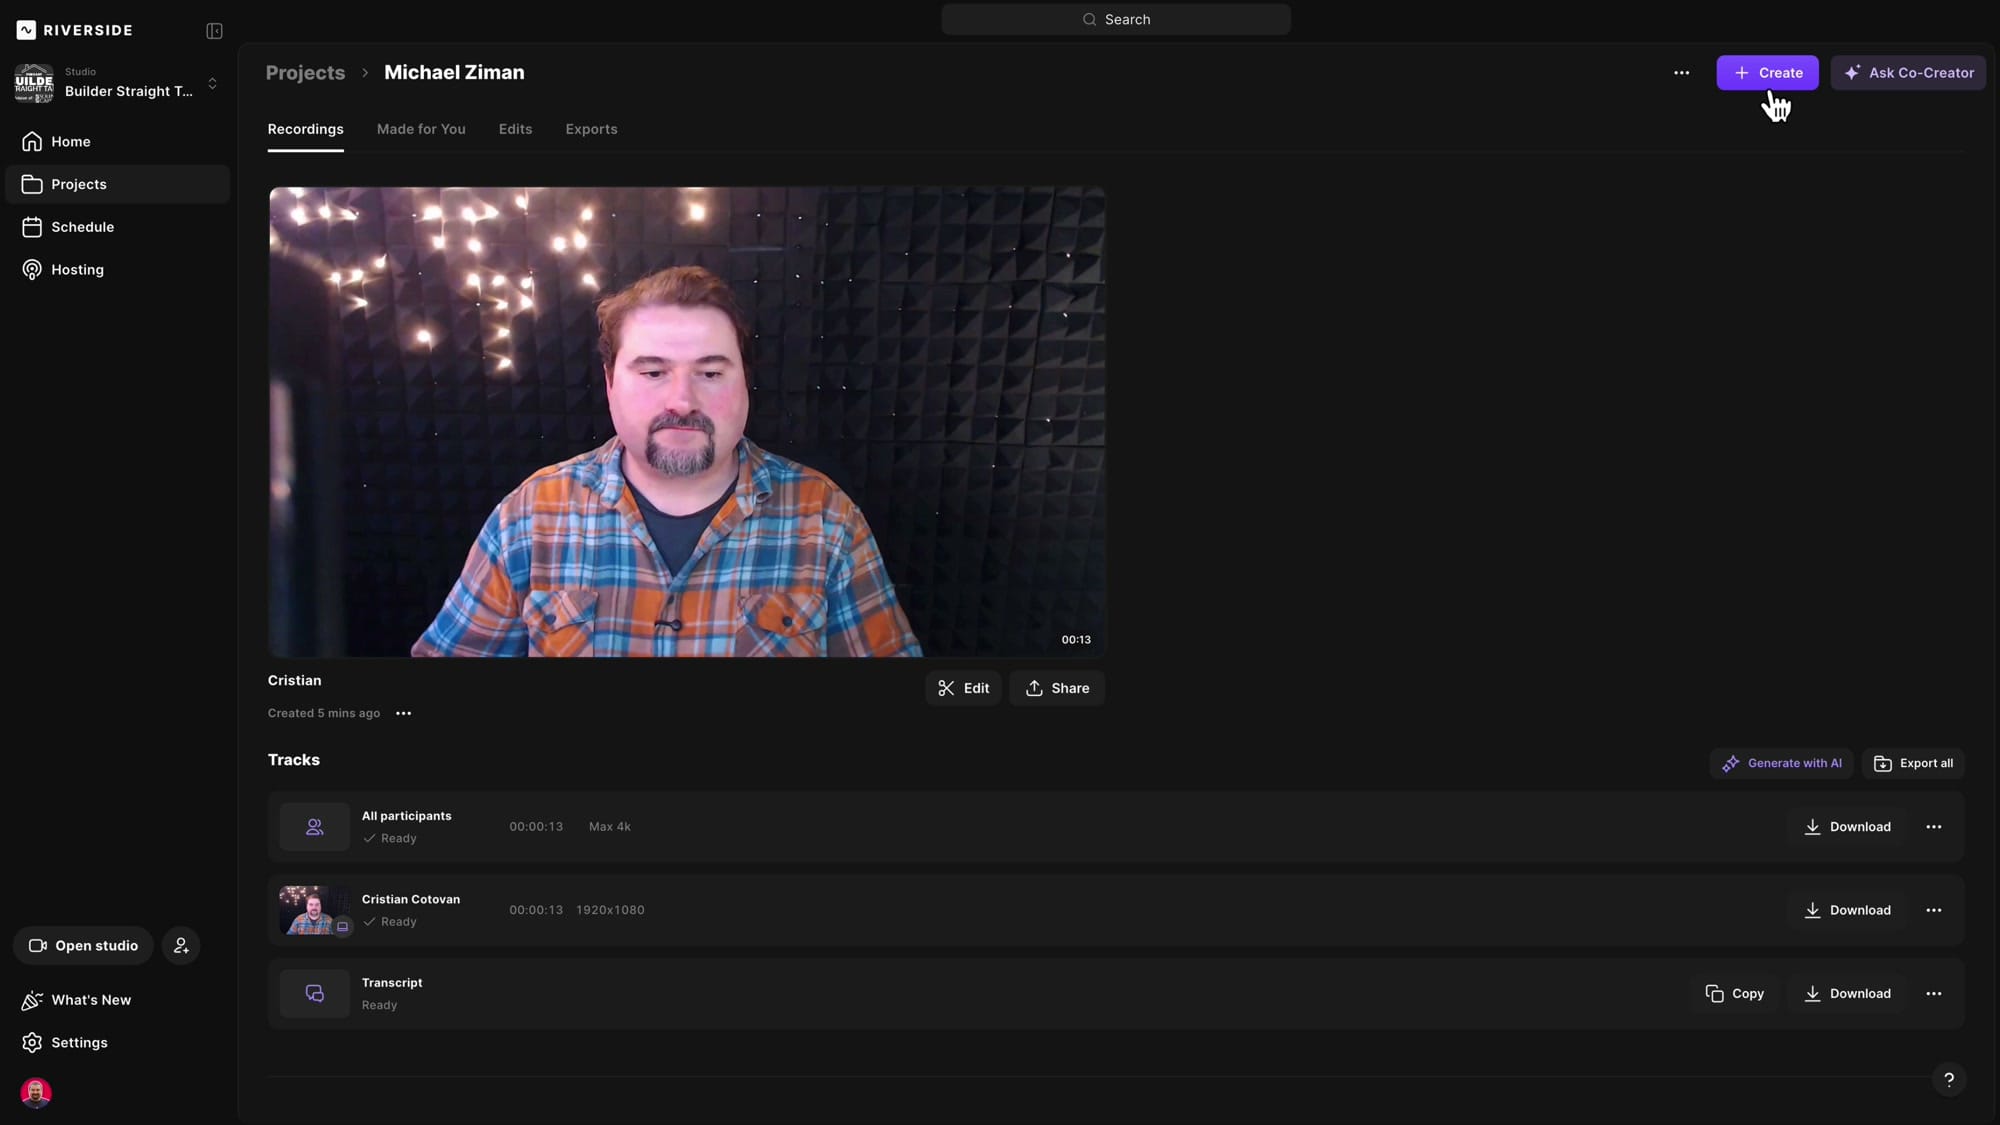
This opens an upload dialog where you can drop your MP4, MP3, or WAV file. Riverside will ask how many speakers are in the file — select the correct number and click Upload.

Riverside processes the file, transcribes it using the studio's default language, and makes it available as a full recording with transcript. You can now create a separate edit from this recording, clean it up (remove filler words, trim dead air), and have it ready to insert into the main episode.
Give Your Edits Descriptive Names
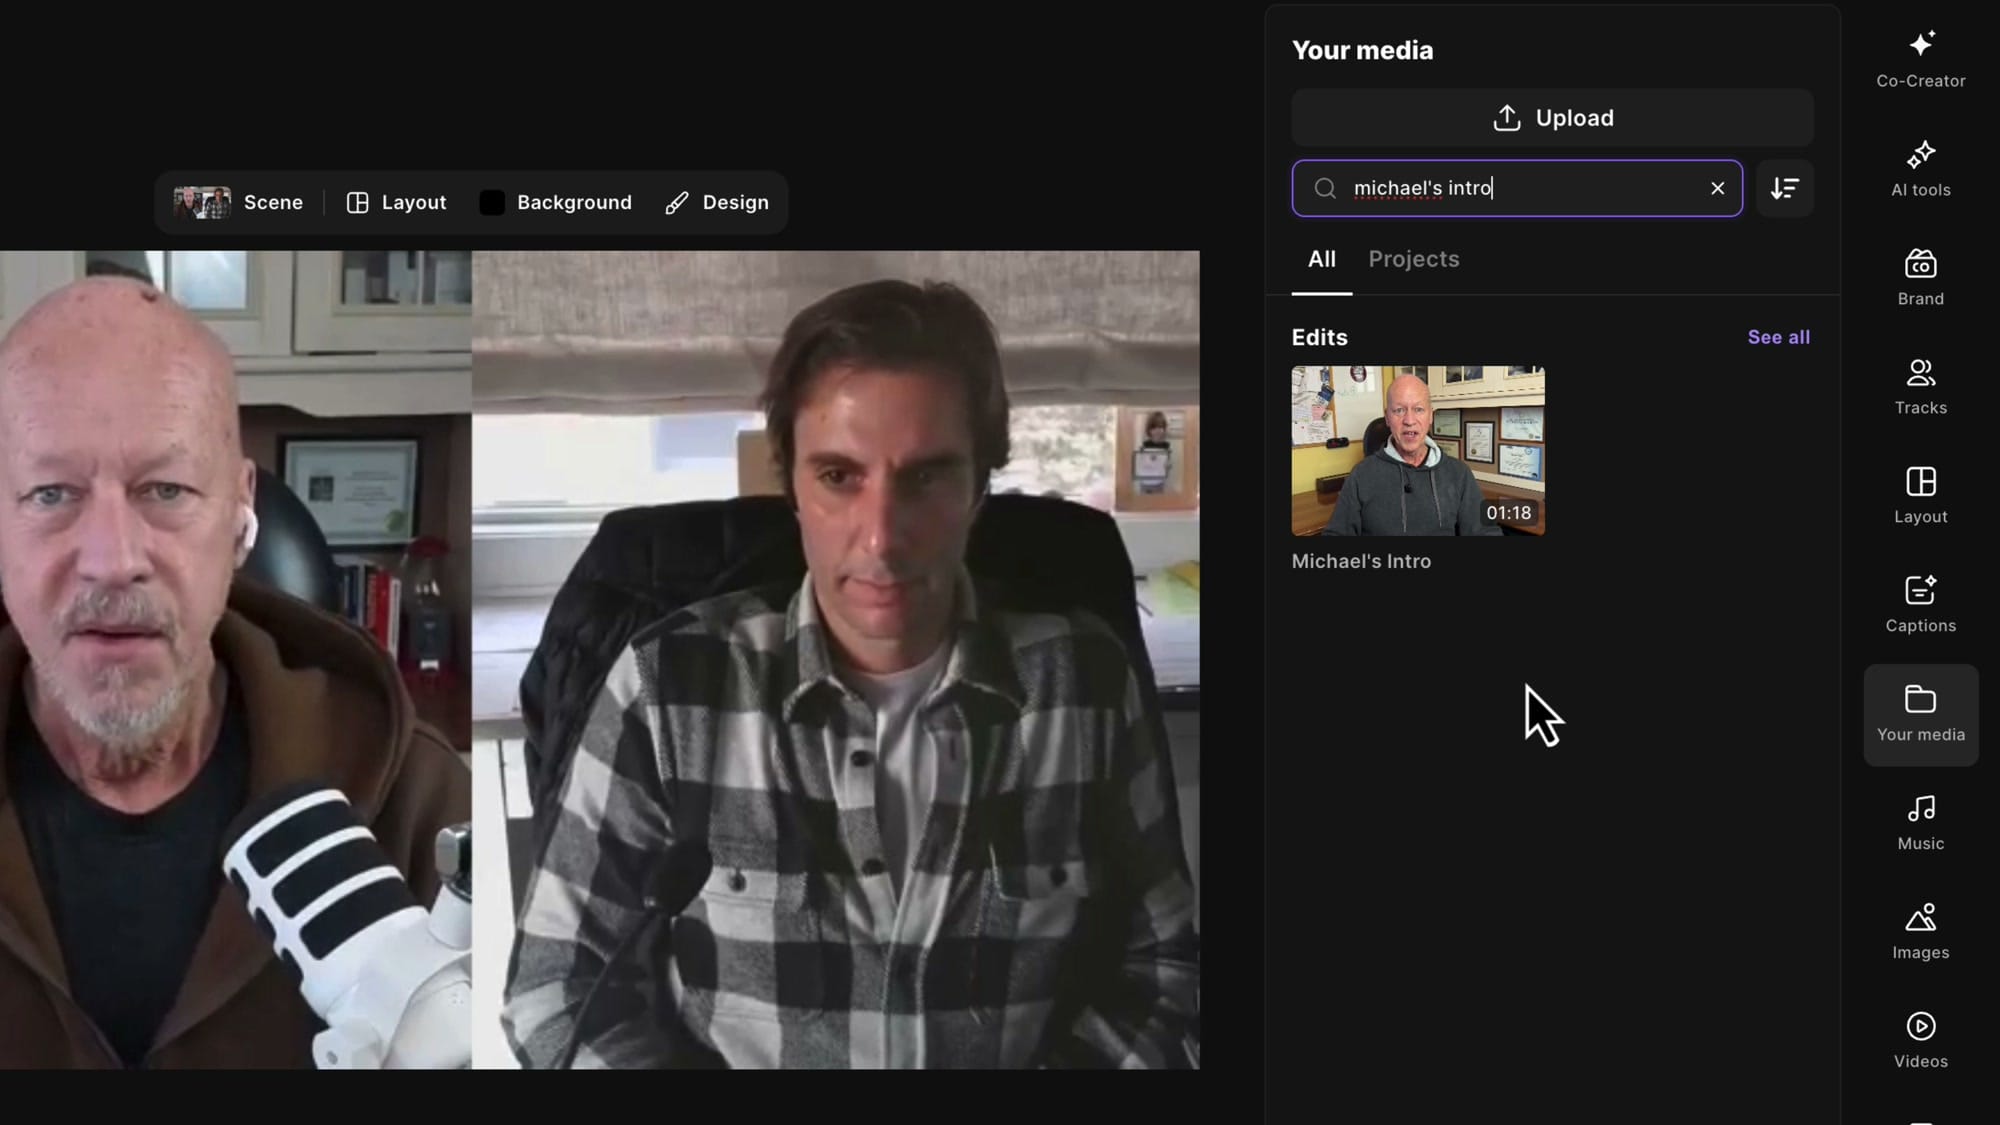
Before inserting the intro, rename it — click the name at the top of the editor and type something clear like "Michael's Intro." This matters because you'll be searching for it later in Your Media.
Navigating Between Edits
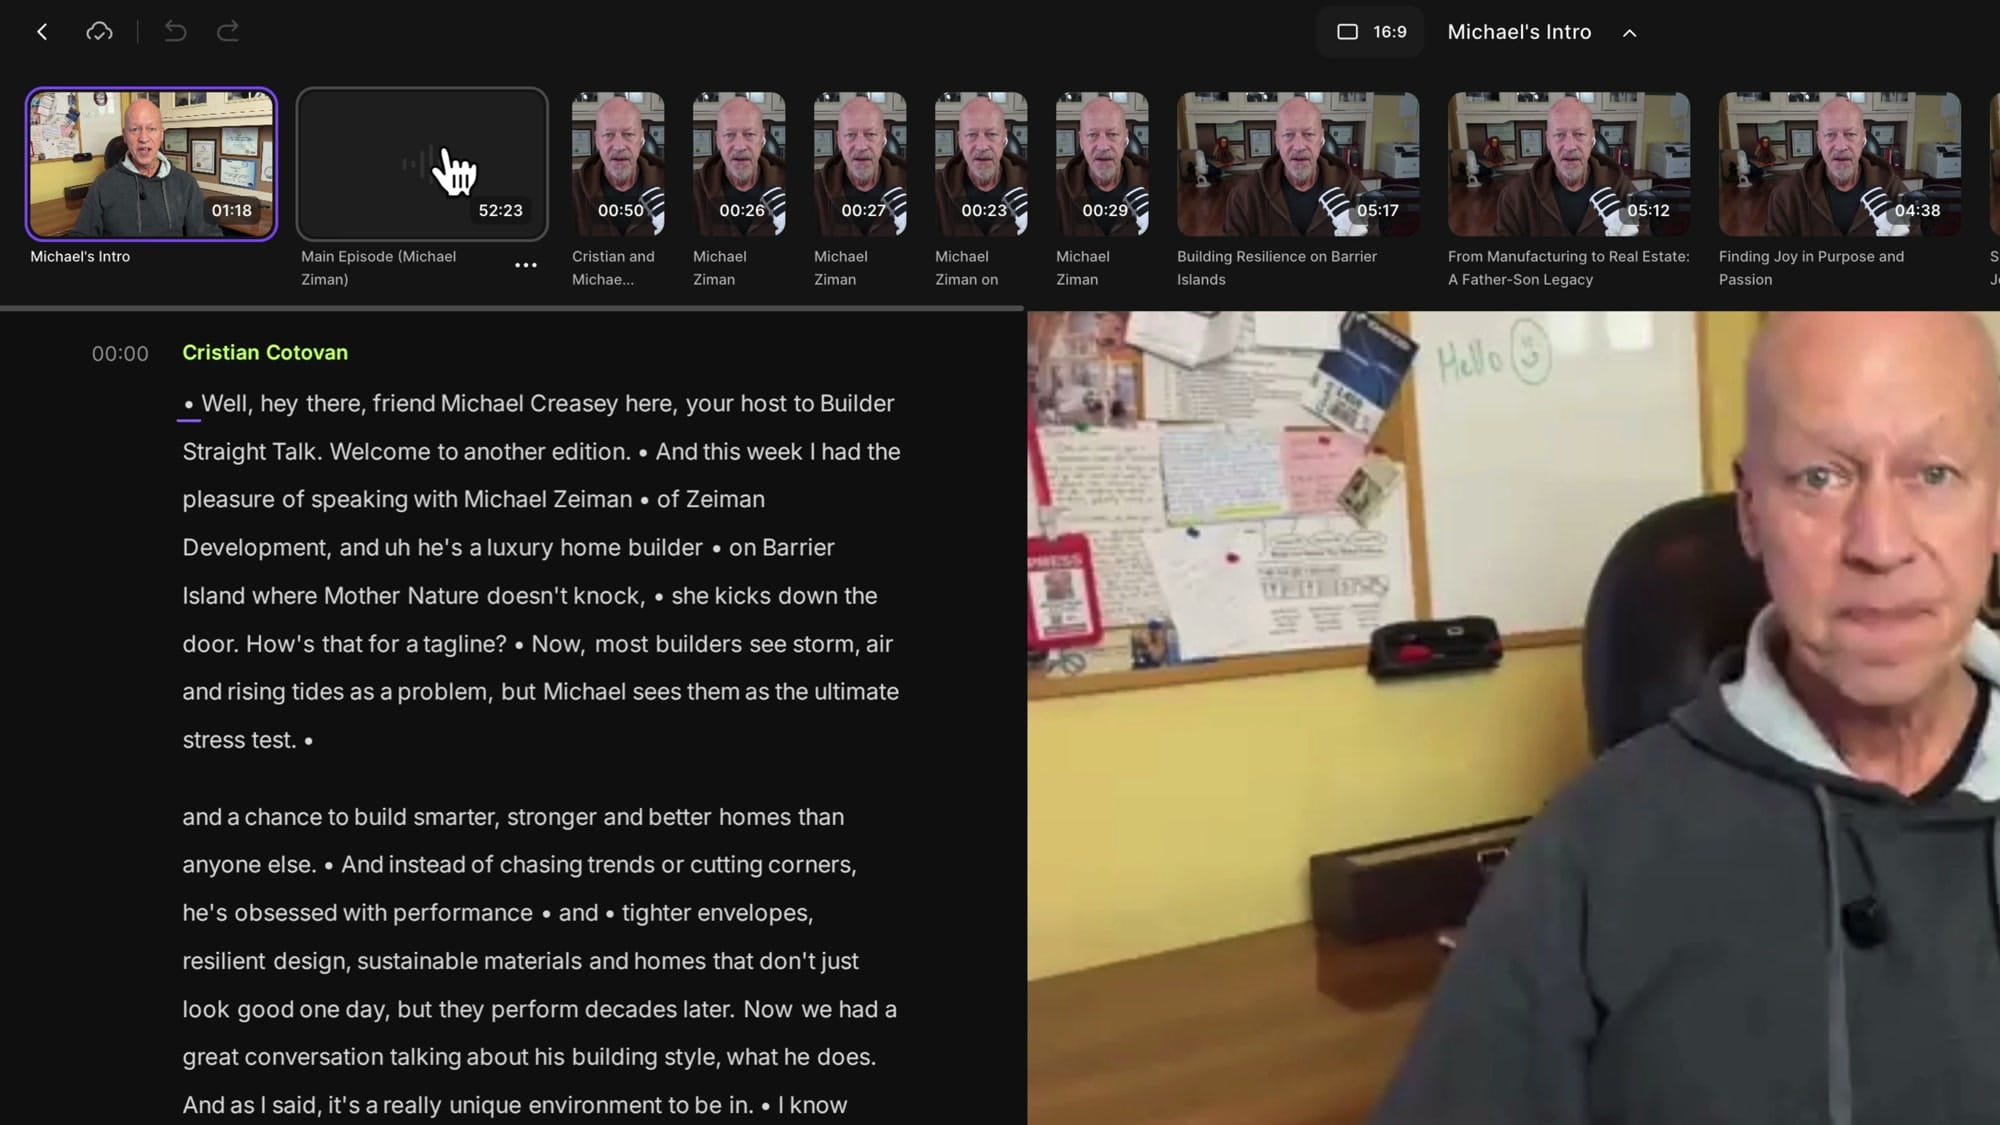
One of the most convenient features is the edit dropdown at the top of the editor. Click it to see every edit in the current project — your main episode, your intro, social media clips, Magic Segments, and anything else Riverside generated. You can jump between them instantly without leaving the studio.
Inserting Content with Your Media
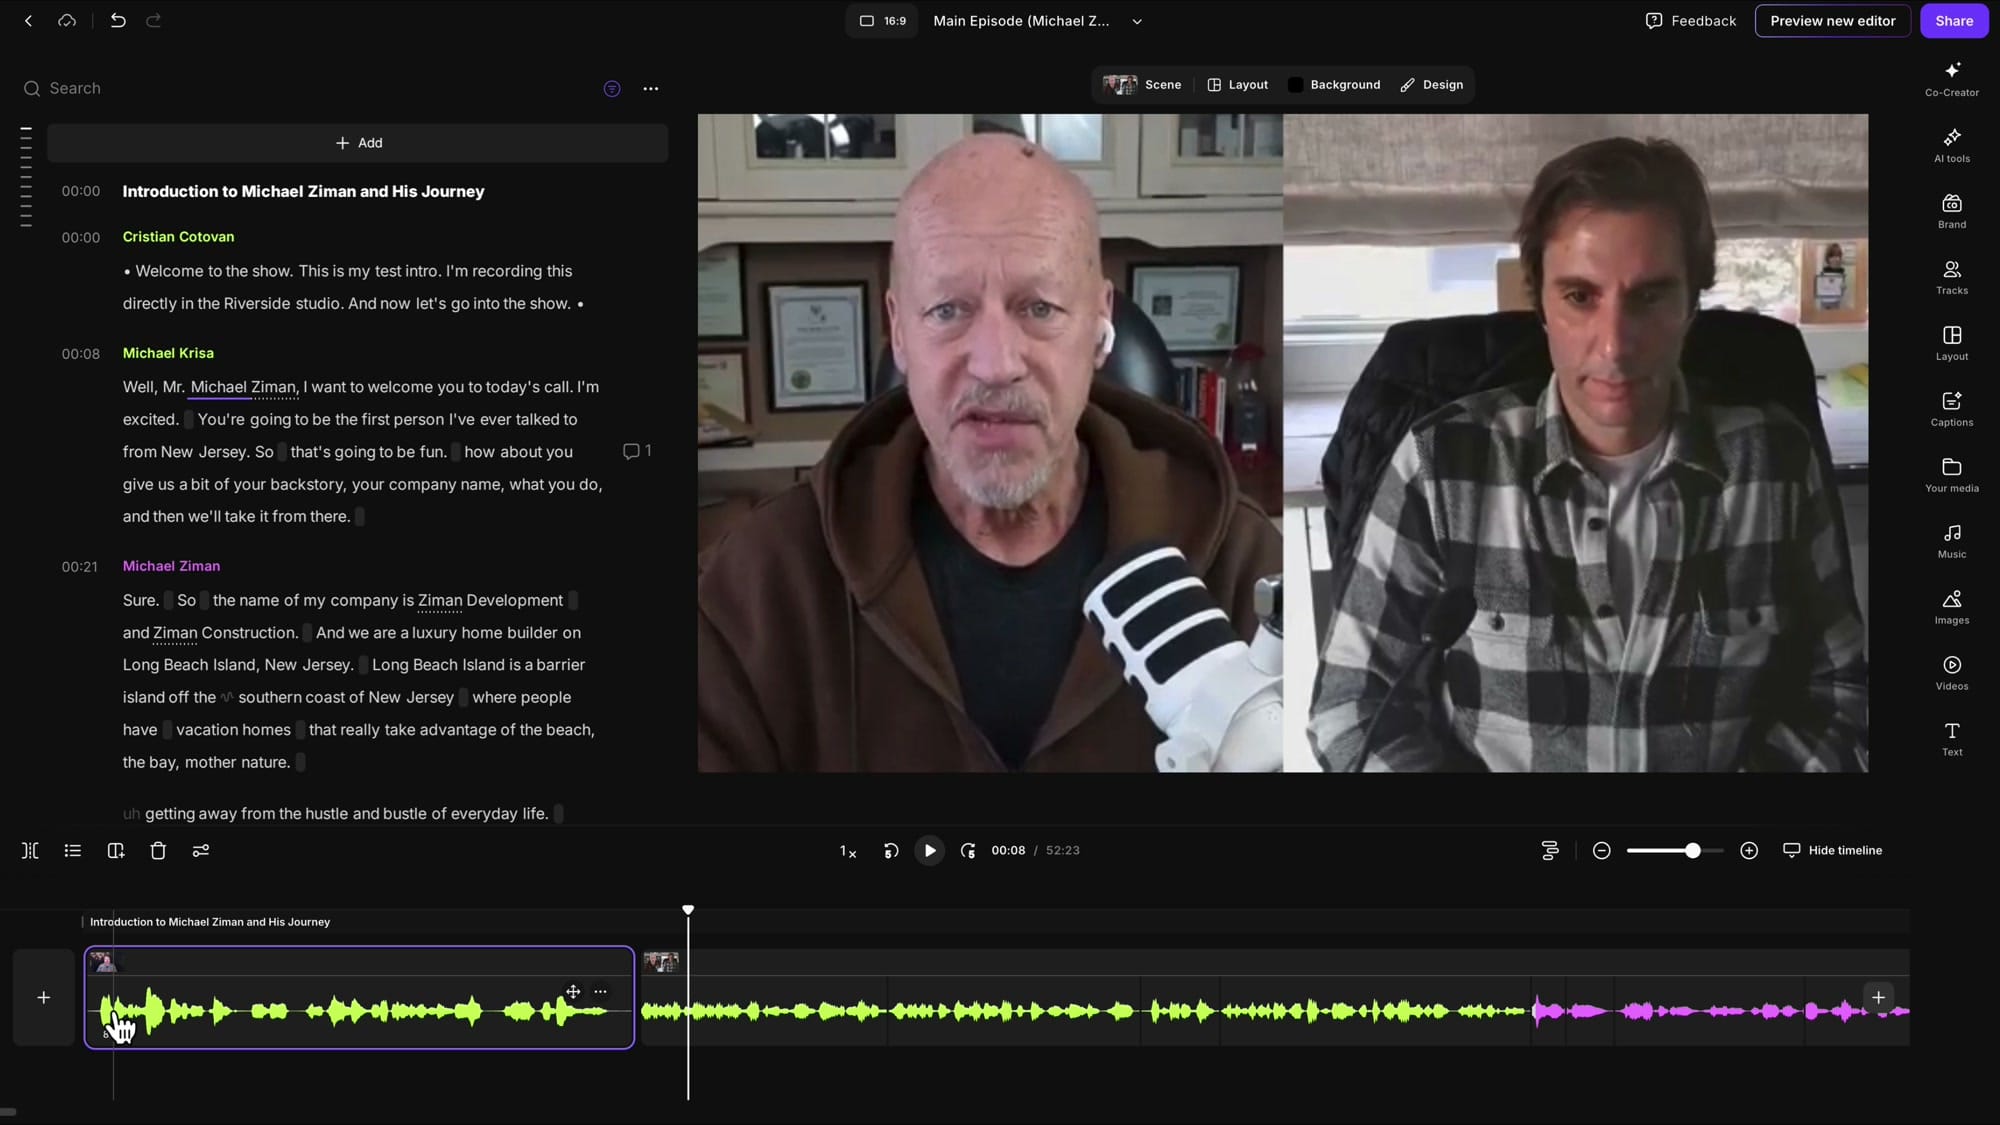
To add your prepared intro (or any other content) to the main episode, click the + button at the position where you want it inserted. Then select Your Media. This panel gives you a unified view of everything in your account — Recordings, Edits, Videos, Images, and Audio files.
The fastest way to find what you need is the search bar. Type the name of your edit (e.g., "Michael's Intro") and it appears immediately. Click it, and it's inserted at the position you selected.
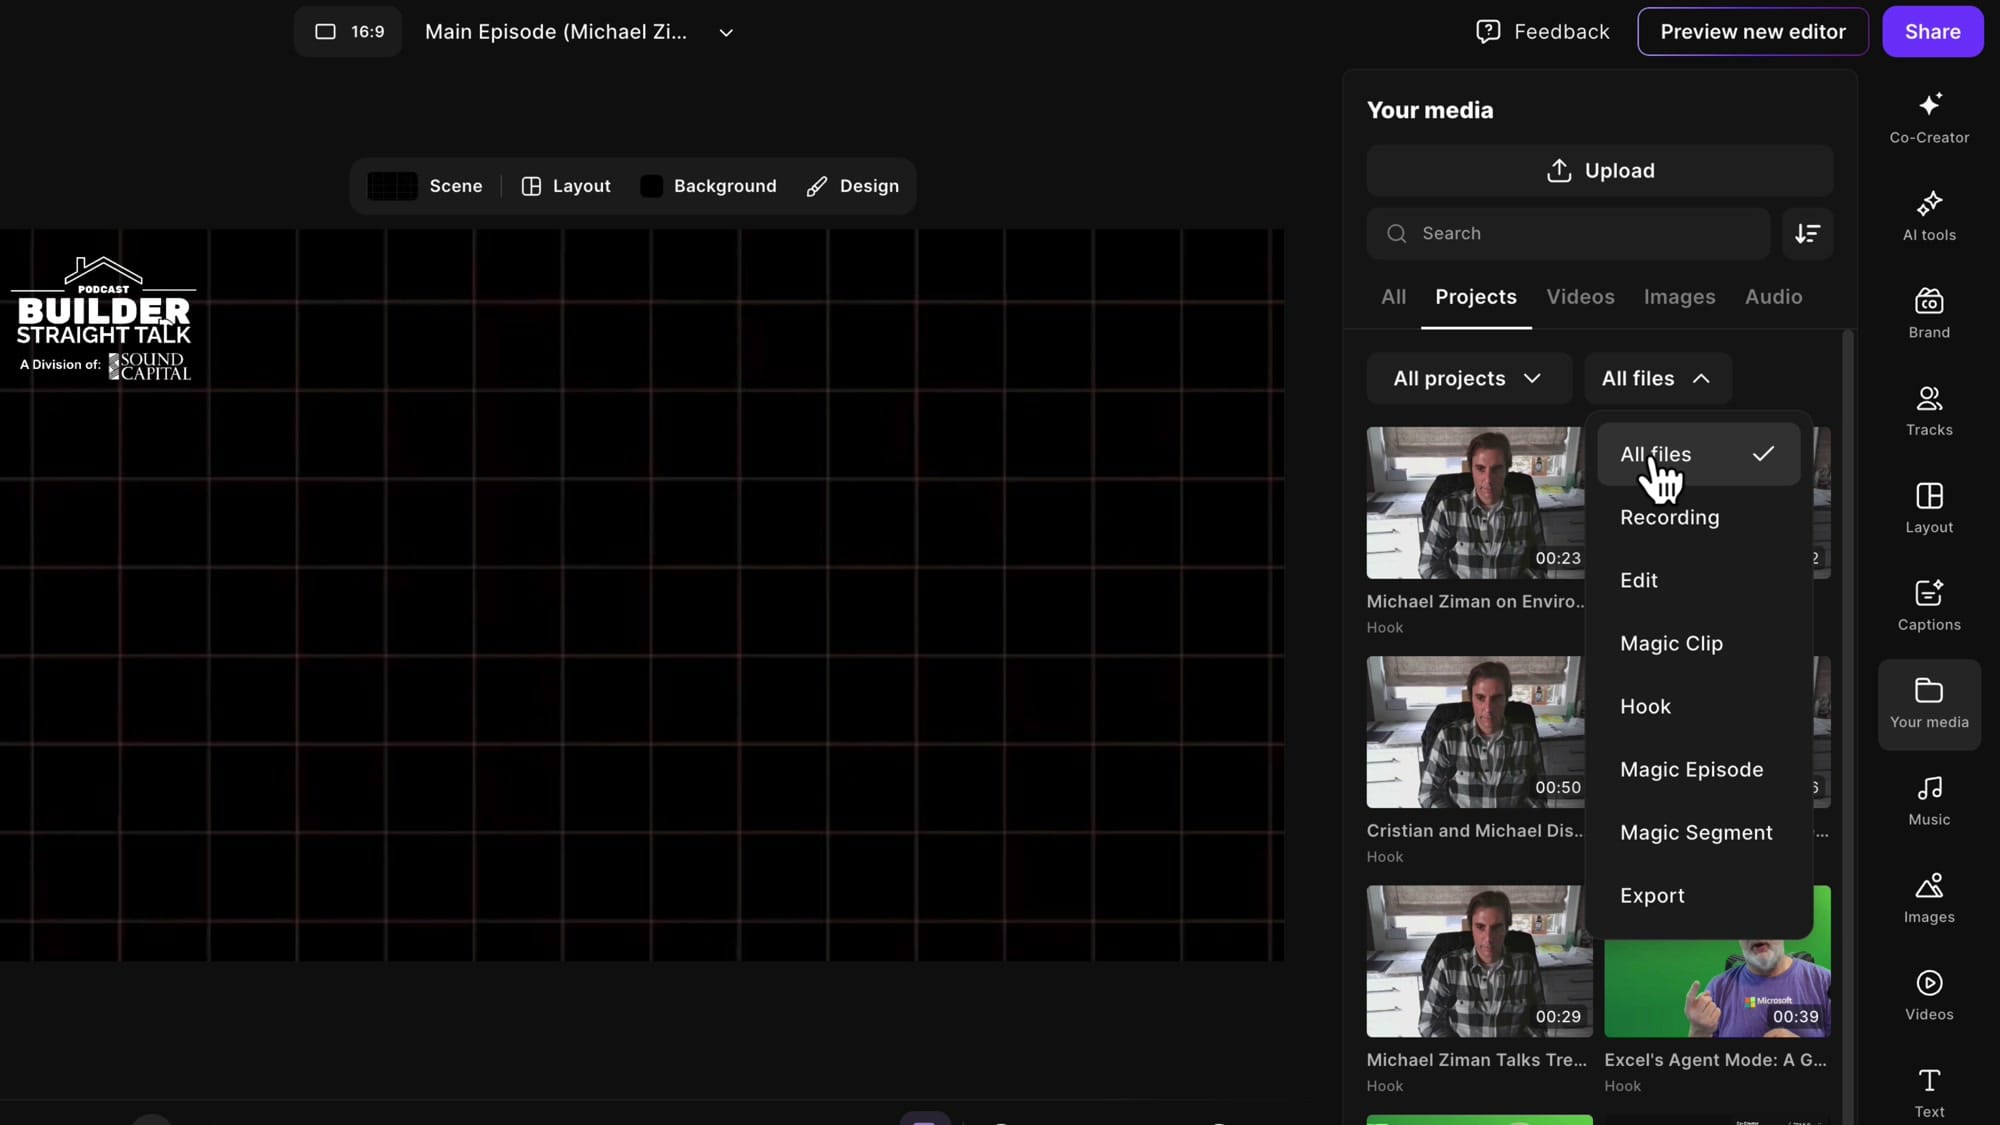
If you prefer browsing, use the file type filter. Under Projects, you can filter by All files, Recording, Edit, Hook, Magic Clip, Magic Episode, Magic Segment, or Export. You can also narrow down by project to stay within the current one.
Renaming Speakers
When you import a file through your own account, Riverside assigns your name as the speaker. To fix this, click on the speaker name in the transcript and select Rename. Type the correct name — this updates it throughout the edit.
Adding Promo Segments
For recurring segments like company promos, you can upload video or audio files and reuse them across episodes. Click the + button at the desired position (beginning or end of the episode) and select Upload. Choose your file, and once Riverside processes it, click to insert it.
Use Shift + mouse wheel to quickly scroll through the timeline to the end of the episode, where you can add the outro promo the same way.
If you’re eager to learn more about Riverside and wish to have a one-on-one Riverside coaching session, feel free to book a call with me.
I’m here to help you with any questions you have and to guide you through the best workflows, tips, workarounds, or just answer any questions you may have!
Brand Kit: Auto-Apply Intros and Outros
If your intro and outro are the same for every episode, you can save time with the Brand Kit. Open the Brand panel from the right sidebar. Along with logos, color palettes, fonts, and captions, you'll see sections for Intro and Outro.
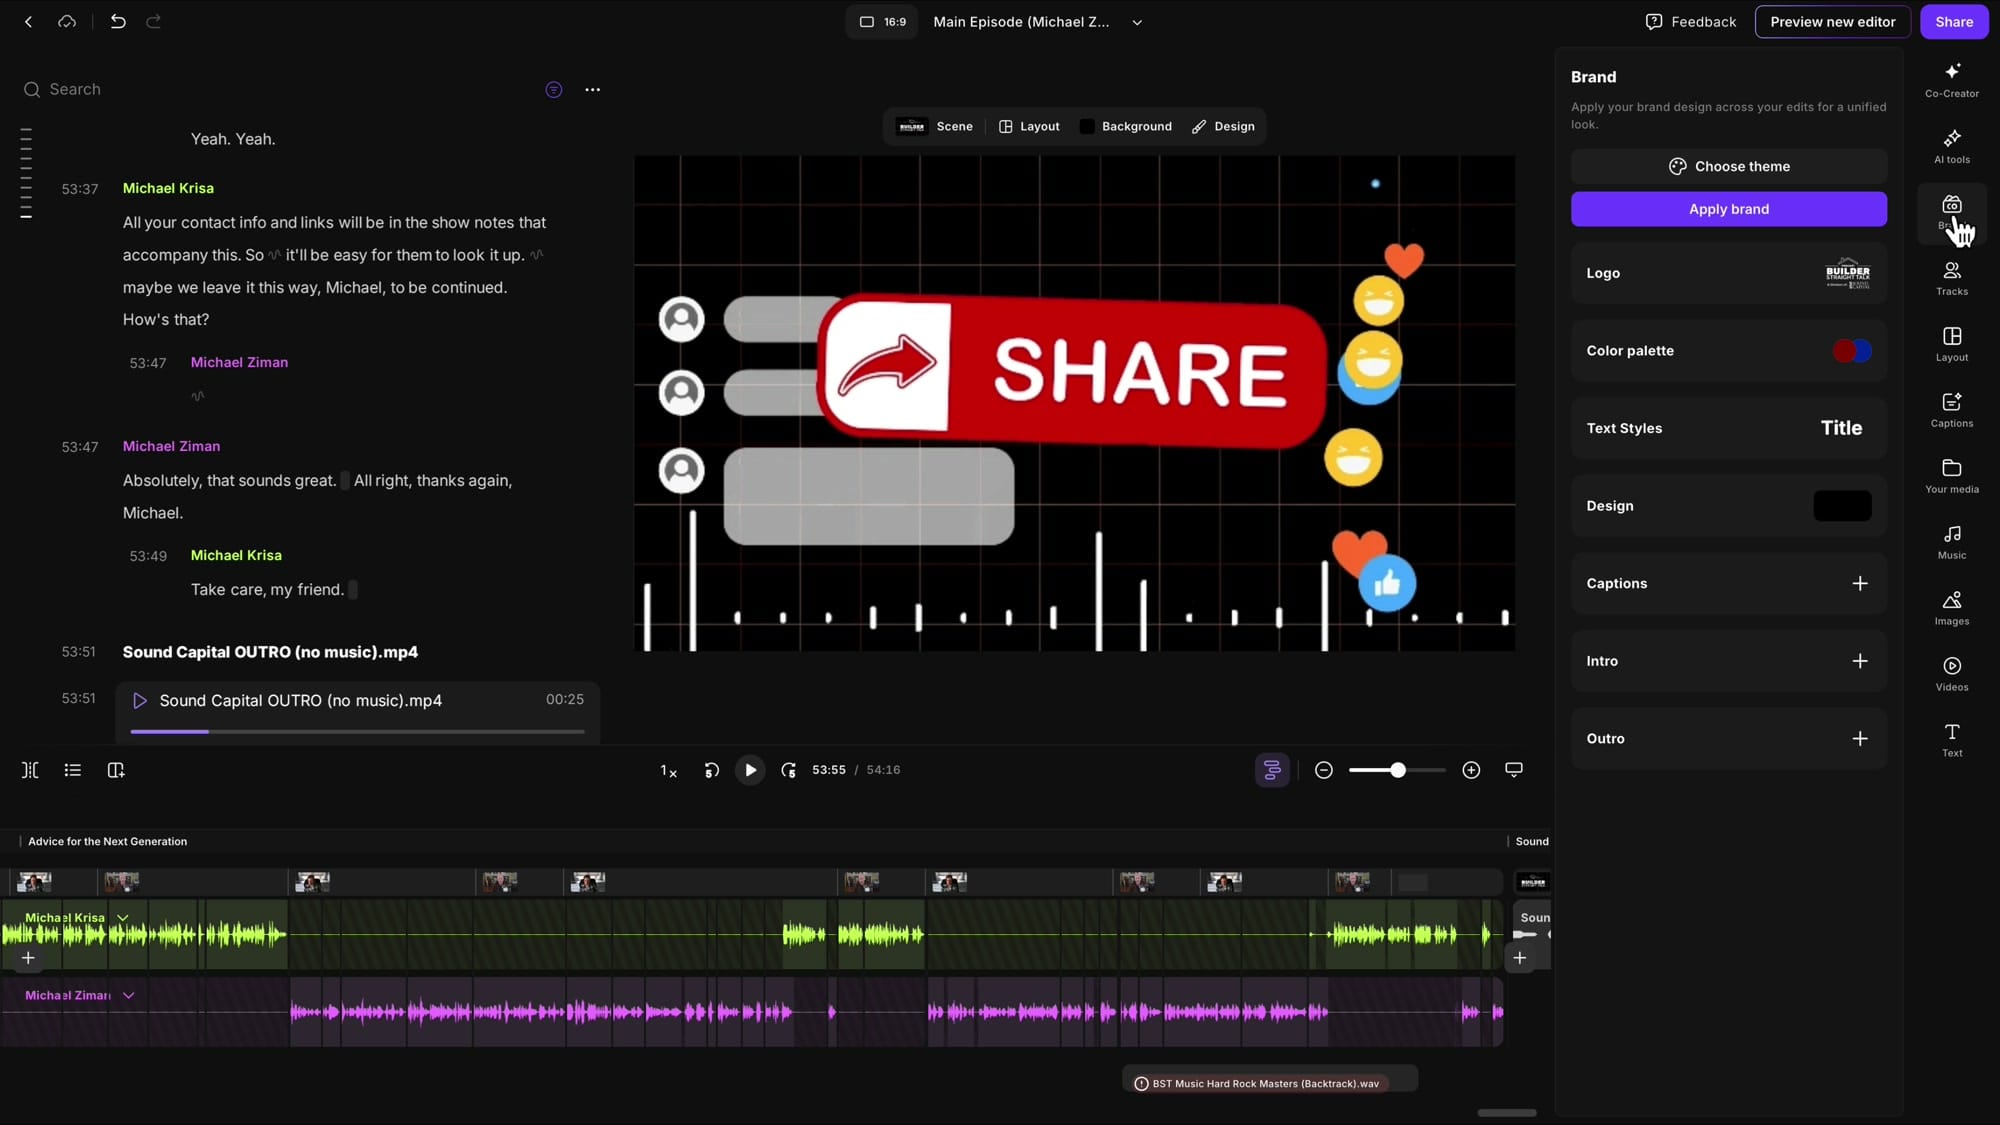
Click the + button next to Intro and select the format — 16:9 for landscape, 9:16 for vertical clips, or 1:1 for square. Choose your intro file from Your Media. Do the same for Outro. You can set different versions for each format.
Now, whenever you click Apply Brand, your designated intro and outro are automatically placed at the beginning and end of the edit. This also applies when Riverside generates Magic Clips, Magic Segments, and the Magic Episode.
Using AI-Generated Hooks from Made For You
Riverside automatically creates hook clips from your recording as soon as you finish. Find them in the project's Made for You tab under Hooks. These are short, attention-grabbing moments selected by AI.
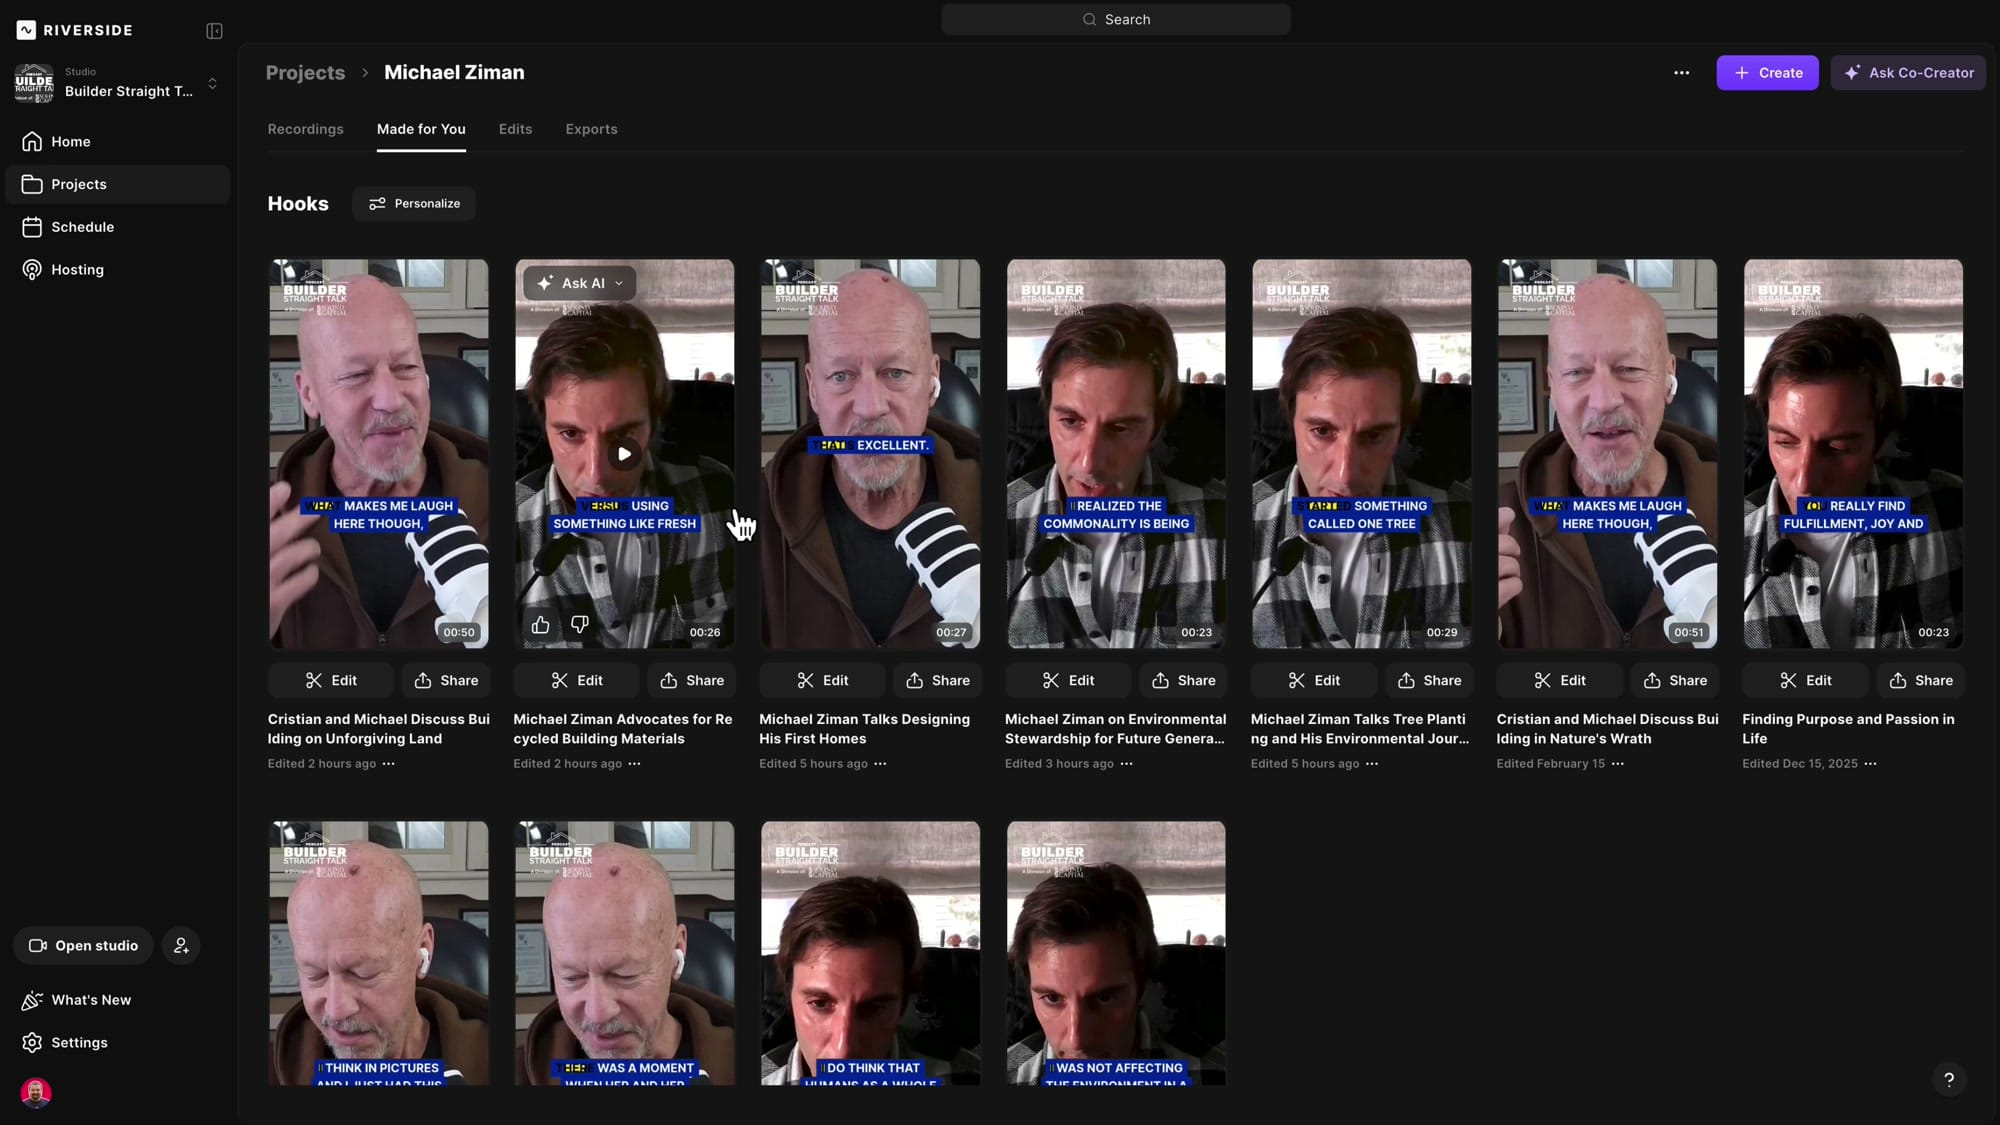
These hooks are vertical by default (9:16). To use one in your landscape episode, open it in the editor and change the orientation to 16:9 using the format selector at the top. You'll also want to remove any auto-applied captions and logos that the Brand Kit may have added.
Give the hook a descriptive name (like "Hook 1") so you can find it easily. Then jump back to your main episode using the edit dropdown, click + at the very beginning, open Your Media, and search for your hook by name. Click it to insert.
Adding a YouTube End Screen
YouTube allows a 20-second end screen where you can place clickable elements like "Subscribe," related videos, or playlists. To include this, design or use a pre-made 20-second video and upload it at the end of your episode the same way — + at the end → Upload → select file → click to insert.
Adding Background Music
Look at the bottom of the timeline for the Add Music button. Clicking it opens the Music panel, which has two tabs: Stock Media (Riverside's built-in library) and your own uploaded files.
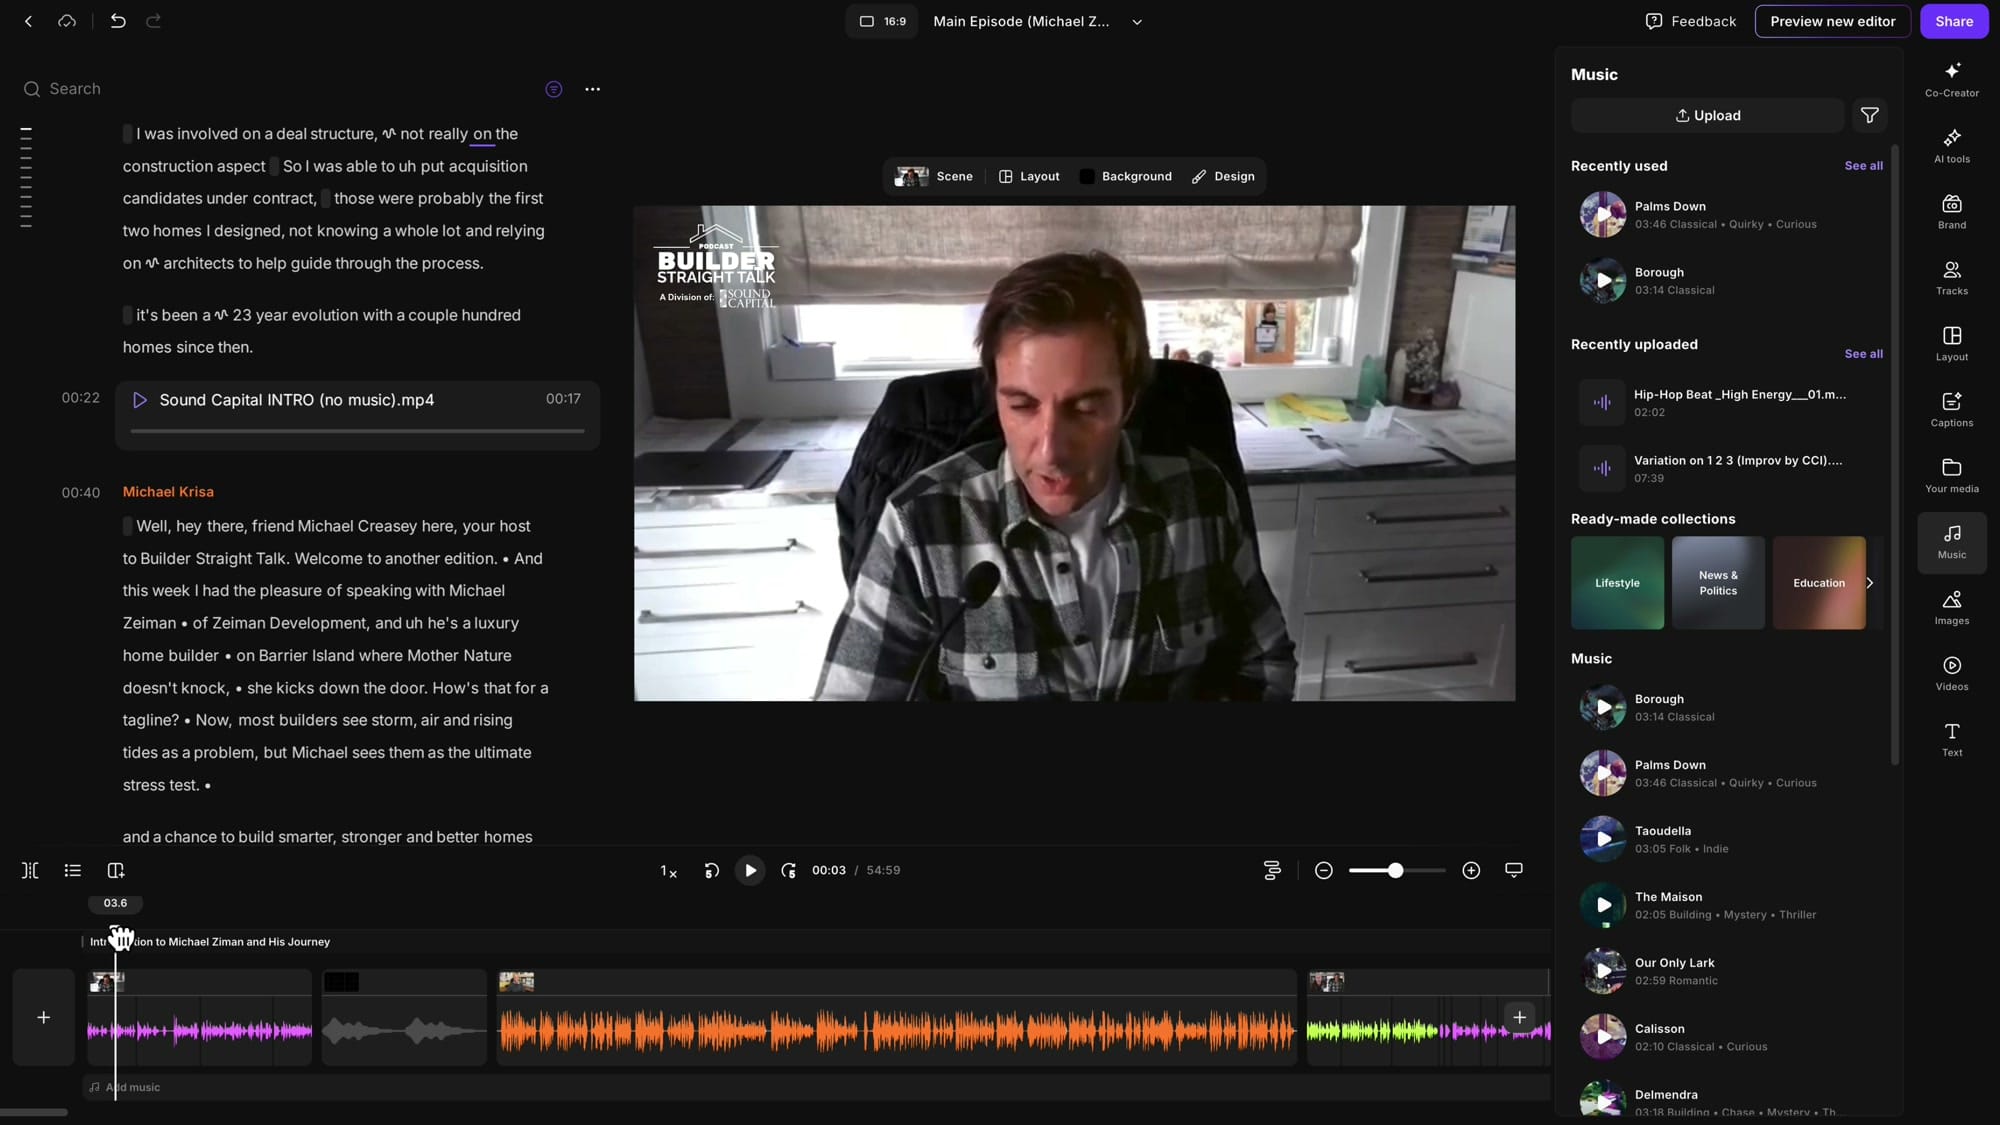
Move your playhead to where you want the music to start — typically the very beginning of the episode. Click Upload in the Music panel, select your audio file, and once it's processed, click it to add. The music appears on a dedicated purple track below the main audio tracks.
You can also access your music files through Your Media → Audio if you prefer that path.
Setting the Right Volume
Click on the music in the timeline to select it, then look for the Volume & effects button. This opens a popup with a volume slider and fade controls.
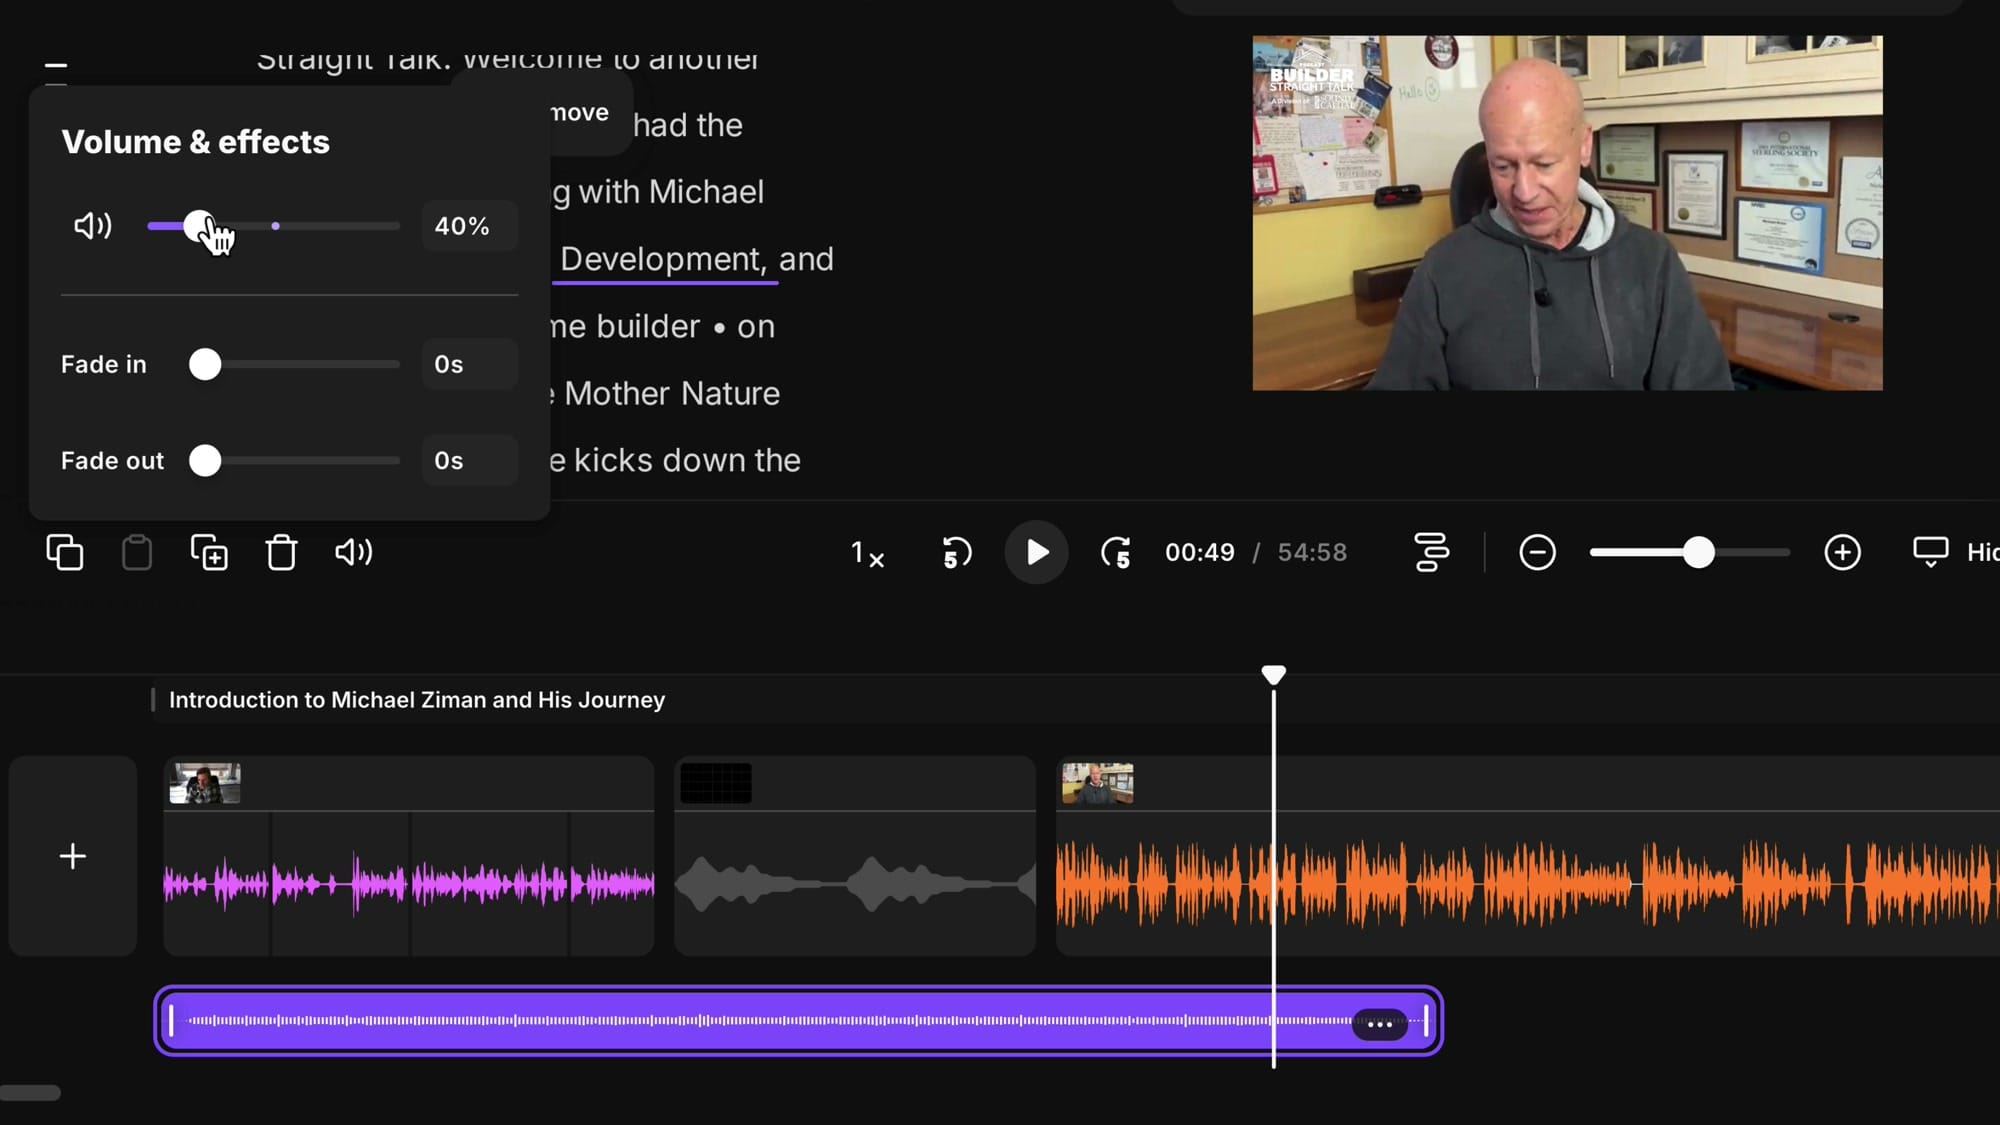
For background music playing under dialogue, around 40% volume works well as a starting point. Play the section back and adjust while listening — the music should complement the voices without overpowering them.
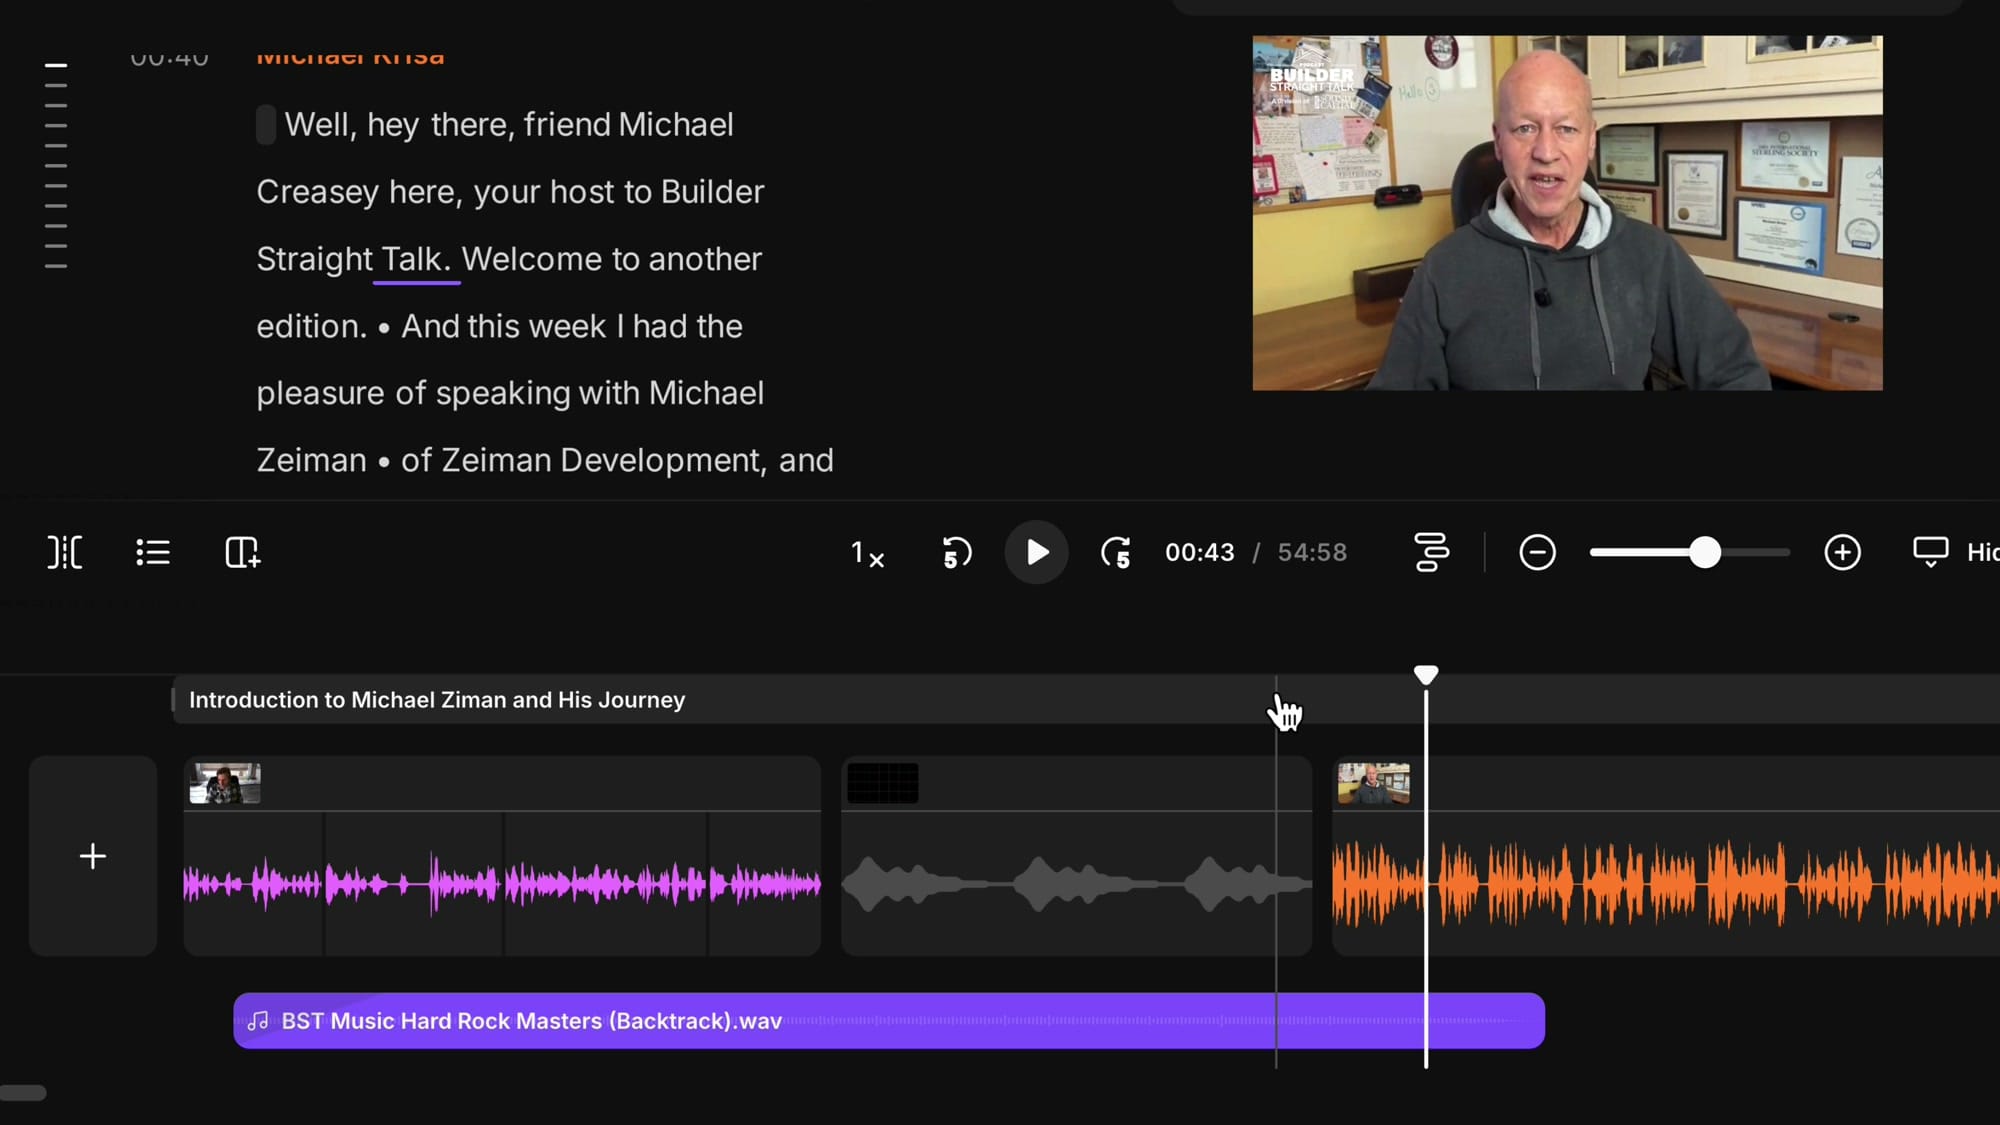
Synchronizing Music with Transitions
Here's a technique I like to use: find the final beat or "release" of your music track — in this case, a guitar twang at the end of a rock track — and align it with a key transition point, like the moment the host starts speaking after the intro segments. This creates a satisfying audio cue that signals the main episode is beginning.
To do this, grab the music clip with your mouse and slide it left or right along the timeline until the ending aligns where you need it. If the music extends too far before the beginning of the show, trim the start by dragging the left edge inward.
Fade In and Fade Out
To avoid an abrupt start, add a fade in. Select the music, open Volume & effects, and set the fade in to about 5 seconds. The music will gradually rise instead of starting at full volume. Do the same with fade out at the end of the outro music.
Current Limitation: No In-Track Volume Automation
At the moment, Riverside doesn't support volume automation within the music track — you can't have the music get louder and quieter at different points. The only controls are the overall volume, fade in at the start, and fade out at the end. Hopefully this will come in a future update of the editor.
Adding Music to the Outro
Repeat the same process for the end of the episode. Place your playhead near the end of the conversation, add the same music file again from the Music panel, and position it so the ending of the track aligns with the start of the YouTube end screen. Set the volume to 40%, add a fade in, and the goodbyes and final words will have music playing softly underneath.
Wrapping Up
That covers the complete workflow for building out a podcast episode in Riverside with all the polish — hooks, intros, promos, music, and end screens. Between the direct recording option, external file imports, Your Media panel, Brand Kit automation, and the dedicated music track, Riverside gives you multiple paths to assemble professional episodes without needing a separate DAW.
If you have questions about a specific workflow, let me know in the comments!
If you’re eager to learn more about Riverside and wish to have a one-on-one Riverside coaching session, feel free to book a call with me.
I’m here to help you with any questions you have and to guide you through the best workflows, tips, workarounds, or just answer any questions you may have!
Related guides