
How to Correctly Assemble Multi-track Sequence in Descript
This tutorial covers the correct way to create a multi-track sequence in Descript.

When you record a podcast or interview with separate tracks for each participant, assembling them correctly in Descript is crucial. Get it wrong and you end up with overlapping audio, mismatched timecodes, or missing speakers. Get it right and you have a perfectly synchronized multi-track project with per-speaker editing controls.
Selecting Your Files
Start by importing your separate track files into Descript. In the Project > Files panel, select the video or audio files for each participant. The important step here is to select all the files you want in the sequence before creating it. Descript needs to know which files belong together so it can properly synchronize and arrange them on the timeline.
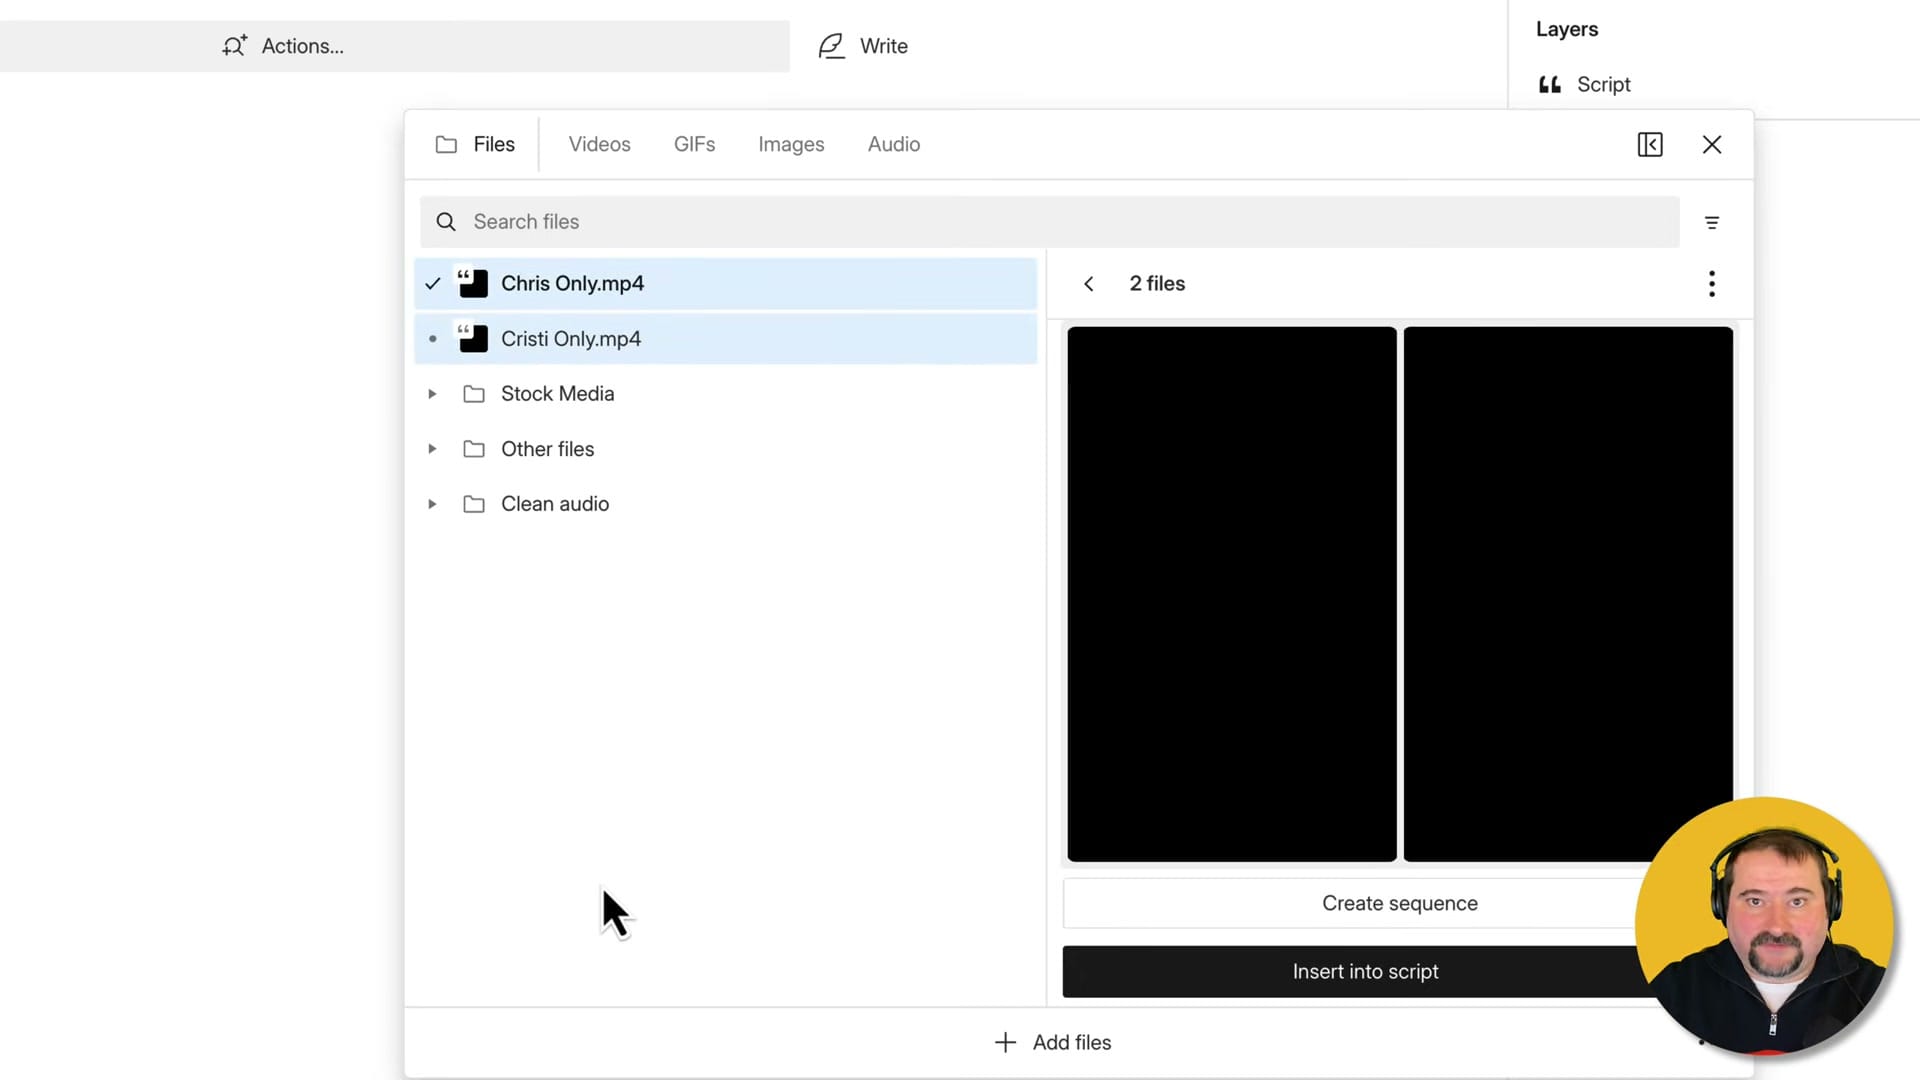
Once your files are selected, click the "Create sequence" button. This tells Descript to treat these files as synchronized tracks that should be edited together, rather than creating separate compositions for each file.
The Multi-Track Timeline
After creating the sequence, Descript opens the sequence editor with a proper multi-track timeline. Each speaker gets their own track with separate audio waveforms, making it easy to see who is speaking at any point. The tracks are automatically aligned based on their timecodes or content matching.
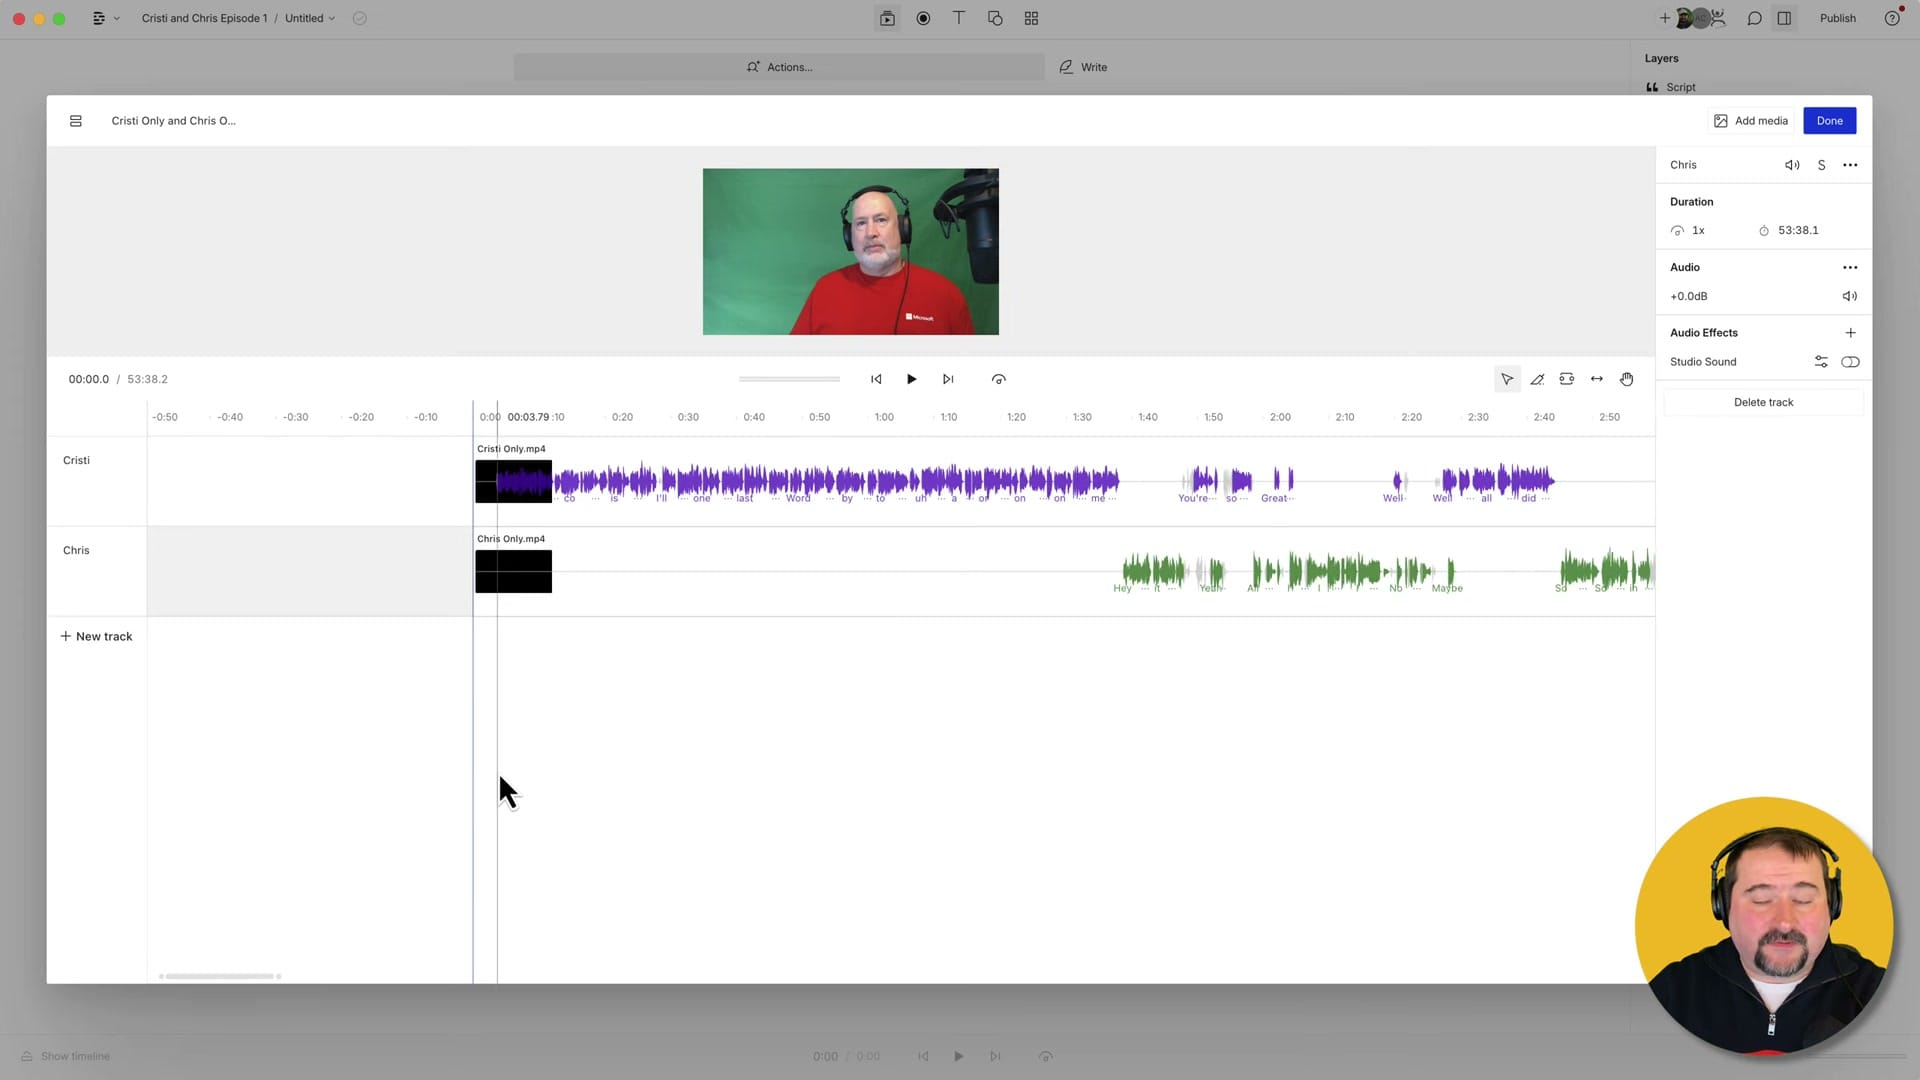
The multi-track timeline gives you individual control over each speaker's audio. You can adjust volume levels, apply effects, or mute tracks independently. This is essential for podcast editing where one speaker might be louder than the other or where you need to remove background noise from only one track.
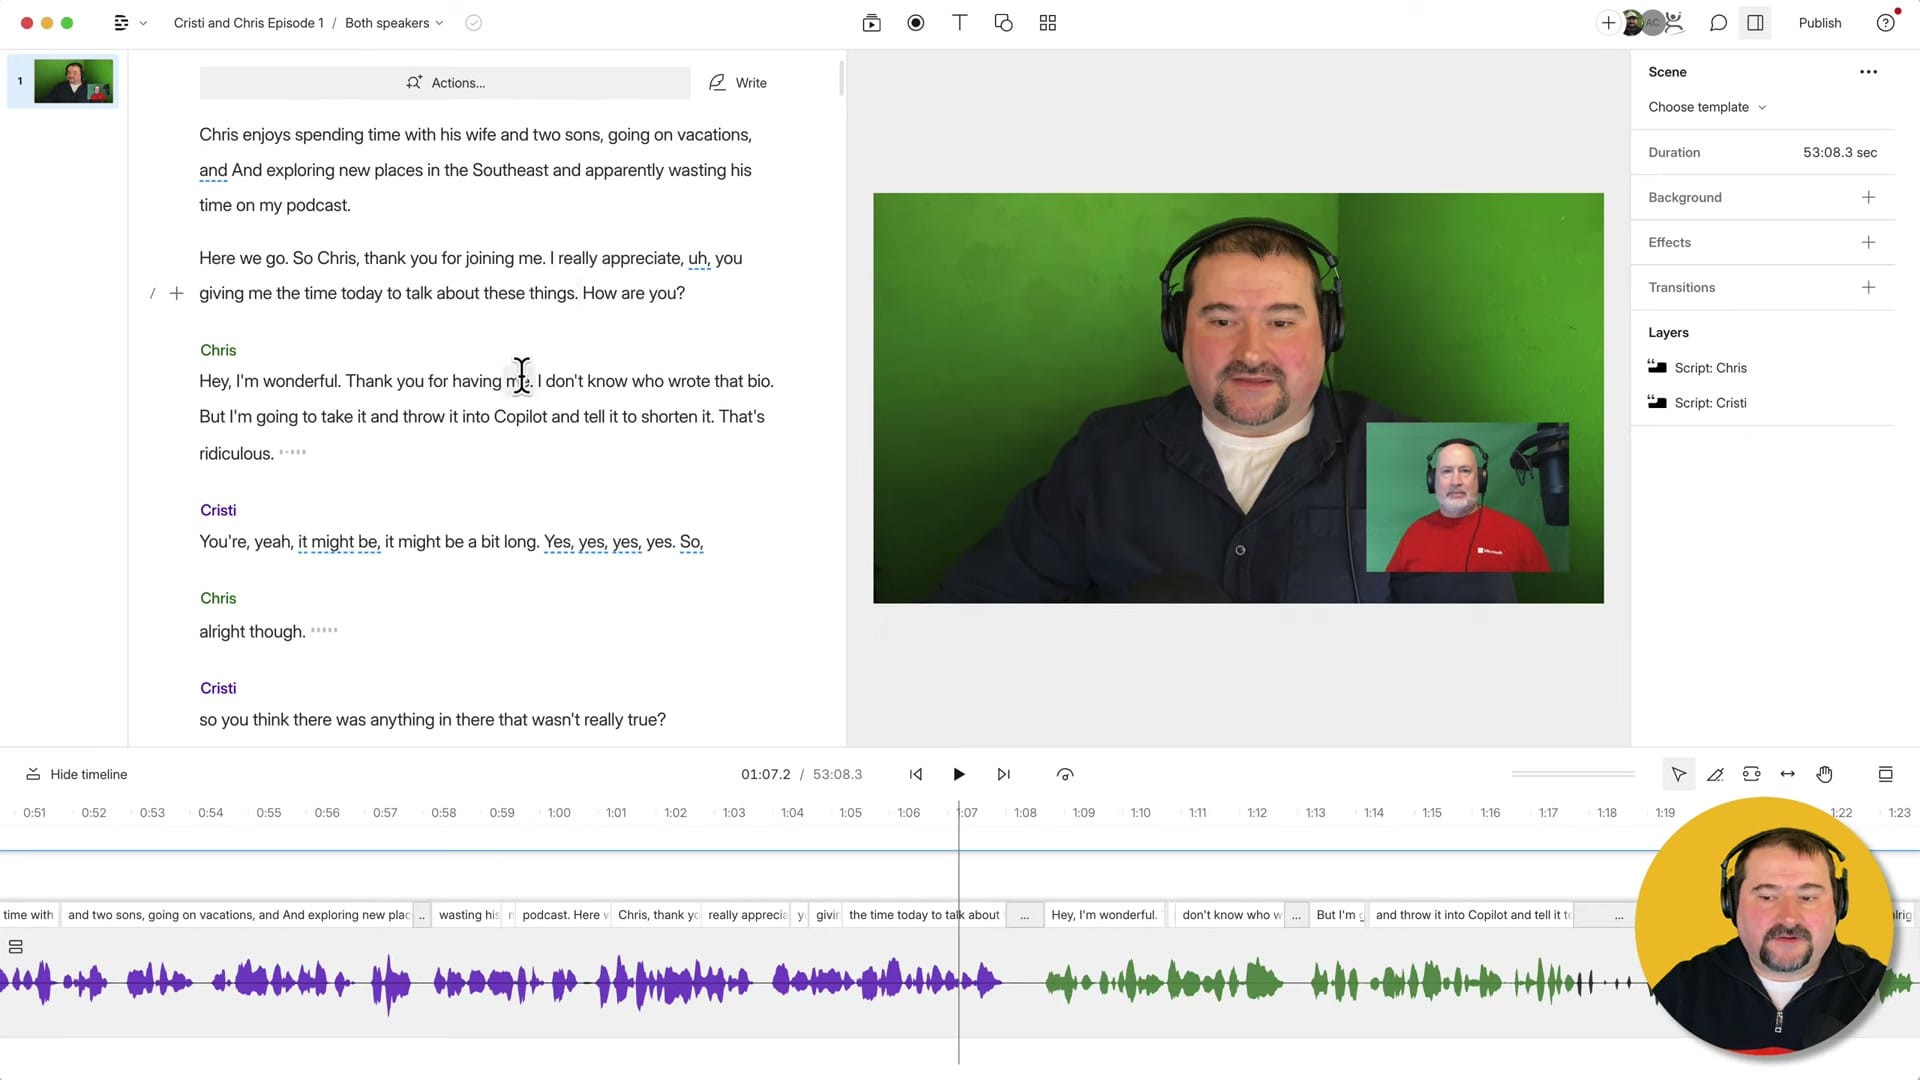
Understanding Layers
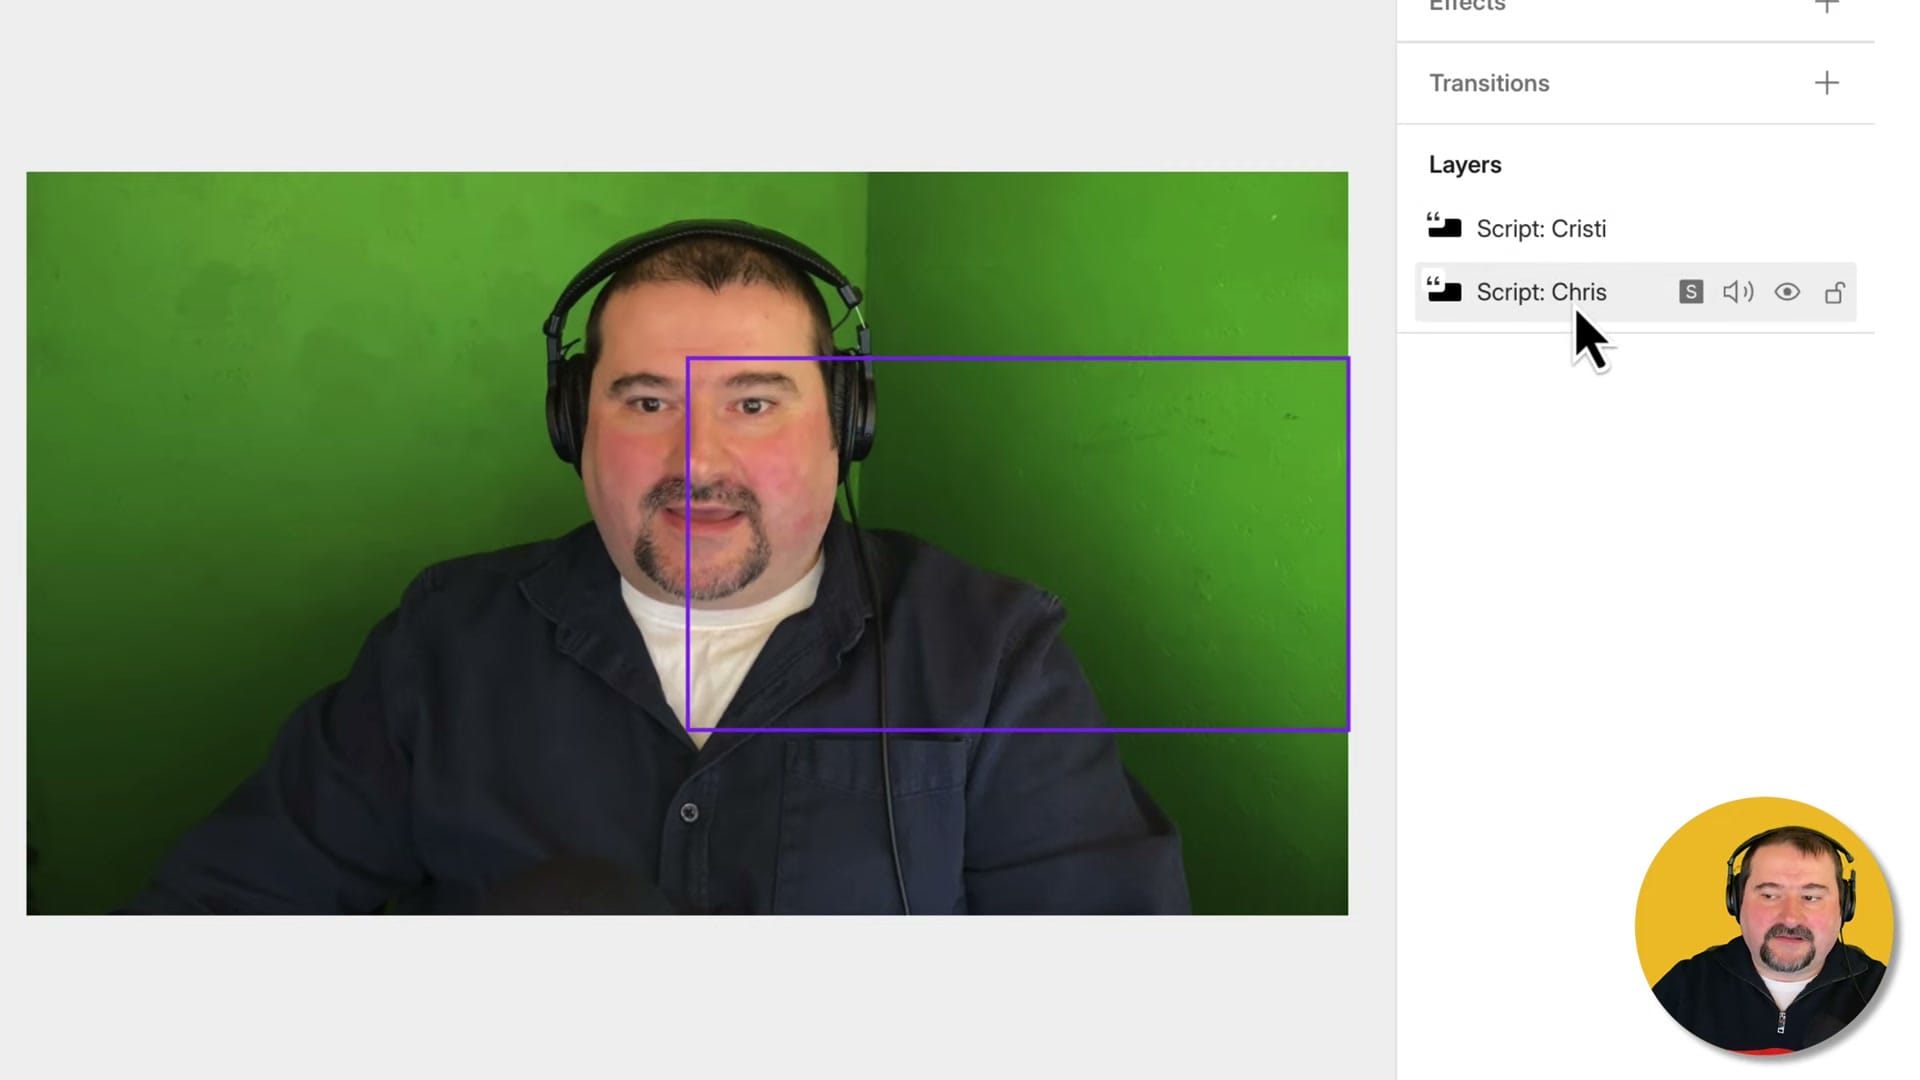
Outside of the sequence, the Layers panel is where you manage the visual and audio components of each speaker. Each participant appears as a separate layer with their script track, video, and audio. You can control visibility, solo audio tracks, adjust volume per layer, and lock layers you do not want to accidentally modify.
Understanding layers is key to effective multi-track editing in Descript. When you delete text from the transcript, it removes that content from all synced tracks. But when you adjust volume or apply effects, you can target specific layers. This separation gives you both the convenience of text-based editing and the precision of traditional multi-track tools.
The Complete Editor View
With your sequence properly assembled, the full Descript editor gives you everything in one view: the multi-speaker transcript on the left with labeled speaker sections, the video preview showing your layout, the Layers panel for per-speaker control, and the audio timeline at the bottom. This is your primary workspace for editing the multi-track project.
Common Mistakes to Avoid
- Do not create separate compositions — If you import each file into its own composition, they will not be synchronized. Always use "Create sequence" and then create a composition from that sequence, to keep tracks linked.
- Do not use drag-and-drop for multiple files — Dragging files directly into the script area creates separate entries. Use the Files panel workflow instead.
- Check file alignment — After creating the sequence, play it back and verify that speakers are in sync. If tracks drifted, you may need to use aligned files from your recording platform or synchronise them manually.
- Name your speakers — After transcription, make sure each speaker is correctly identified and named. This makes text-based editing much easier.
Sequence vs Composition
Descript has two types of core structures: sequences and compositions. The key differences for multi-track work:
- Sequence — Multi-track container with separate tracks for each file. Maintains individual audio control. Use this for interview and podcast projects with separate recordings per speaker.
- Composition — Single-track container. It can be created from a single file but also from a sequence, so that you can edit files in sync.
For any project with multiple speakers recorded on separate files, always start with a sequence.
Wrapping Up
Properly assembling a multi-track sequence in Descript sets the foundation for everything that follows — editing, mixing, multicam switching, and export. Take the time to use the correct workflow from the start. Select your files in the Files panel, create a sequence, verify sync, and you will have a clean multi-track project that is a pleasure to edit.
Do you need help or wish to learn Descript the right way? Join me on a one-on-one Descript coaching session. Book a call with me.
I’m here to help you with any questions you have and to guide you through the best workflows, tips, workarounds, or just answer any questions you may have!


