
How to Create 3D Objects and Text in Xara Designer Pro X

Xara Designer Pro X isn't a full 3D program, but it includes a surprisingly capable 3D extrusion tool that lets you create 3D shapes and text without leaving the application. If you need a quick 3D effect for a logo, heading, or graphic element, this tool handles it in seconds.
Finding the 3D Tool
The 3D tool is grouped with the Mold and Bevel tools in the left toolbar. Hold your mouse on the tool group (look for the small flyout arrows) and select 3D Tool. The cursor changes to a crosshair with a small 3D cube icon.
Applying the 3D Effect
Create any shape — a star, rectangle, circle, or custom path. Select it, switch to the 3D tool, and simply click and drag on the object. It instantly transforms from a flat shape into a 3D extruded object with depth, glossiness, and natural light/shadow.
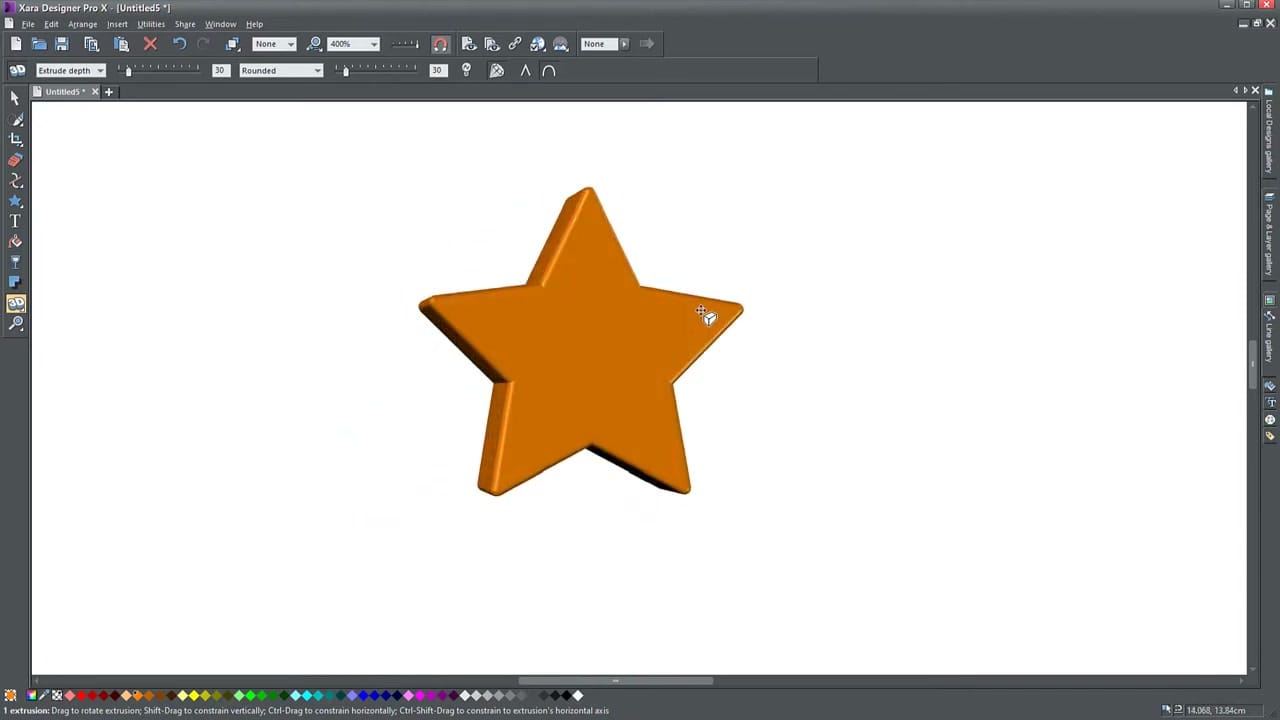
Drag the object to rotate it in space — left, right, up, down. The toolbar provides numeric control over the extrude depth (slider goes to 250, but you can type higher values like 450) and the viewing angle.
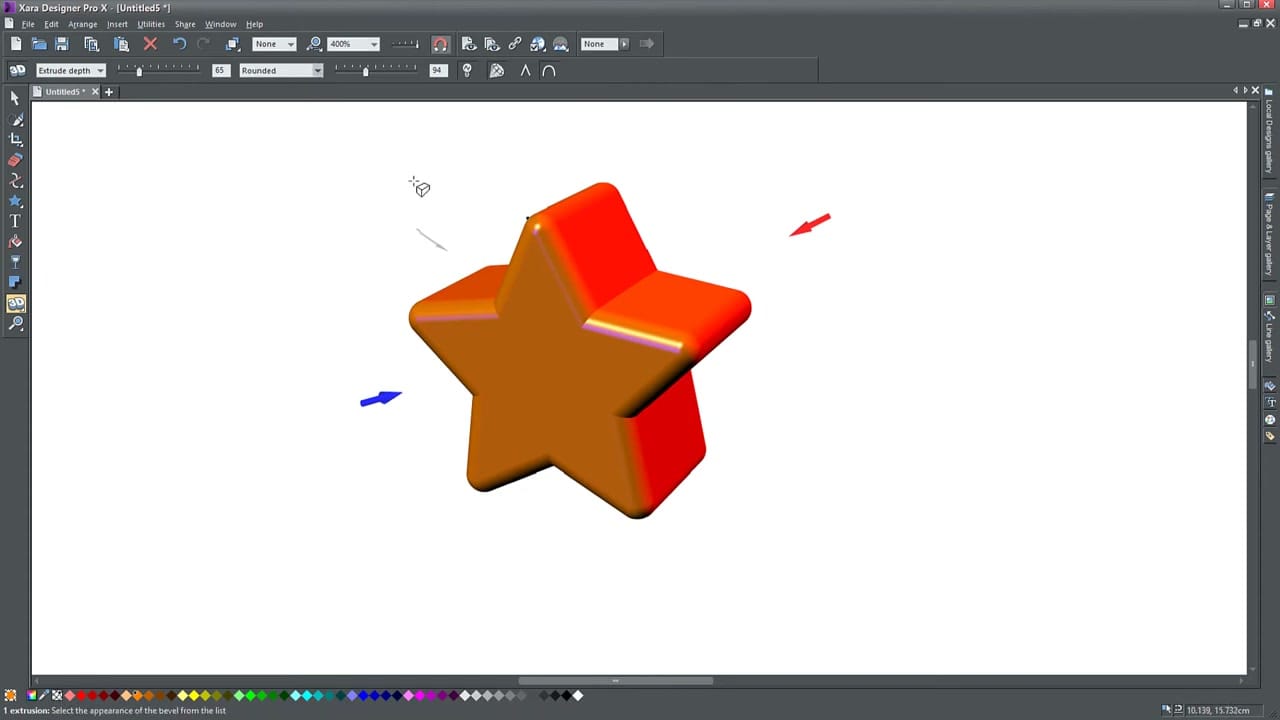
Controlling the Lights
Click the Light button in the toolbar to reveal the light sources — small arrow icons positioned around the object. Each light can be independently controlled:
- Reposition a light by clicking and dragging it around the object. Drag farther from the object for finer adjustments.
- Change light color by dragging a color from the palette directly onto a light source. The cursor changes to indicate you're coloring the light.
- Whichever face of the 3D object points toward a colored light takes on that light's color.
Bevel and Edge Options
A secondary dropdown in the toolbar provides bevel controls for the extrusion edges:
- Rounded — smooth, soft edges
- 45-degree bevel — angled edges for a sharper look
- Square-faced — flat, geometric edges
Each bevel type gives a distinctly different character to the extrusion. Experiment with different combinations of depth and bevel to find the right look.
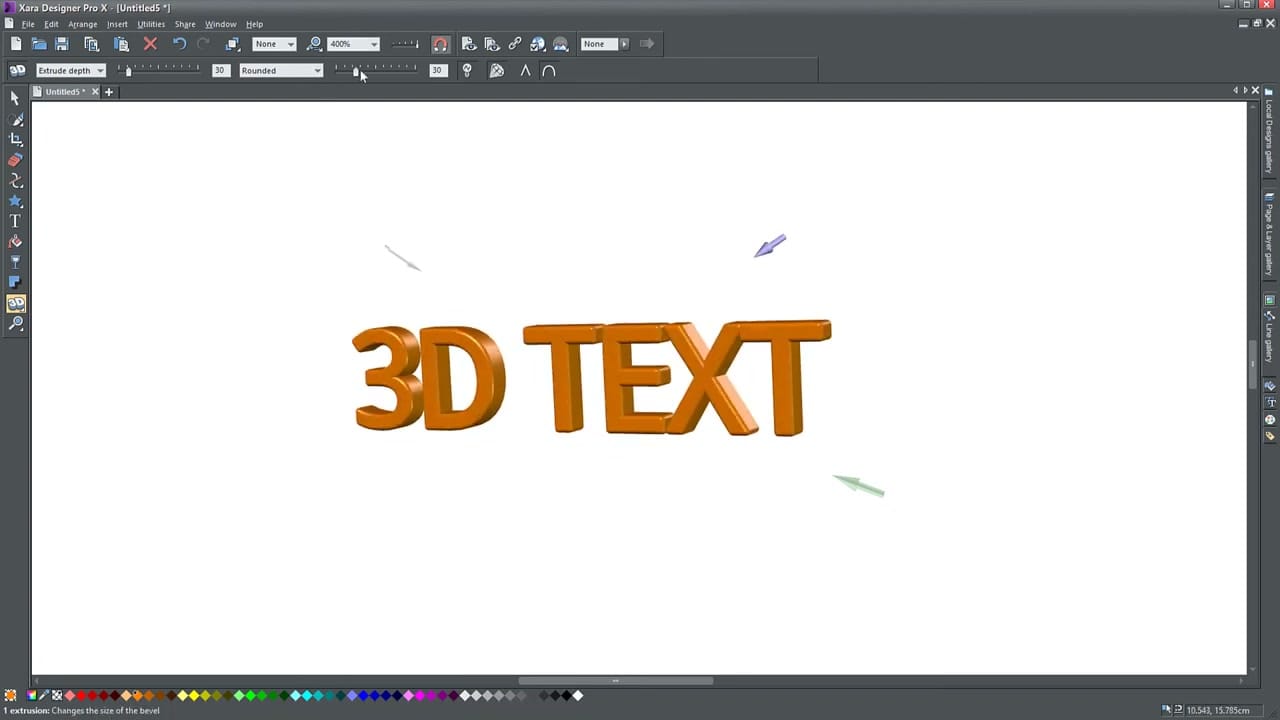
3D Text
The same tool works on text. Type your text, select it, switch to the 3D tool, and drag. All the same controls apply — lighting, depth, bevel types, rotation.
You can also change the corner type for text — pointy corners for sharp lettering or rounded corners for a softer feel.
Tips for Using 3D in Xara
- The 3D tool has been in Xara since version 1.2 — much of the rendering code is in assembly language, making it very fast for real-time visualization
- Clicking on the front face rotates the object; clicking on the side changes the extrusion depth — Xara anticipates what you want to adjust
- Modern design trends favor flat design, so use 3D effects sparingly and intentionally


