
How to Create Flowing Text and Linked Text Boxes in Xara Designer Pro

Creating magazine-style multi-column layouts in Xara Designer Pro is straightforward once you understand how text boxes link together. This tutorial covers everything from inserting large blocks of text to defining columns, linking text across boxes, and making text flow around objects.
Simple Text vs. Multi-Column Text
When you use the Text tool and click on the page, you create a simple text block. This is fine for titles or short paragraphs, but it doesn’t support columns or text flow. For magazine-style layouts, you need text areas (also called text boxes).
Creating Text Areas and Columns
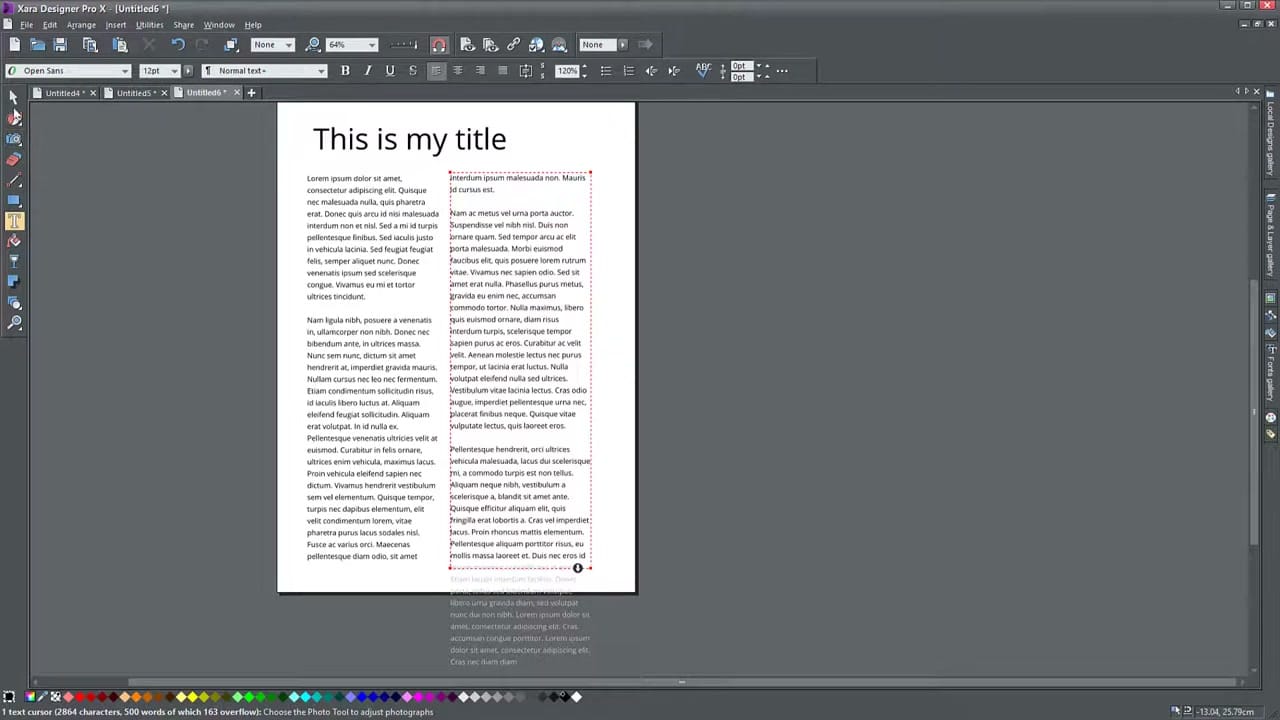
To create a text area, use the Text tool and click and drag to define a rectangular area. Once created, you can paste or type large amounts of text into it. To split this into columns, go to the text formatting options and set the number of columns. The text will automatically reflow to fill the columns equally.
Linking Text Boxes Across the Page
For more control over your layout, create separate text boxes and link them together. When the first box overflows (indicated by a small arrow icon), click the overflow indicator and then click on the next text box. The overflow text will flow into the linked box automatically.
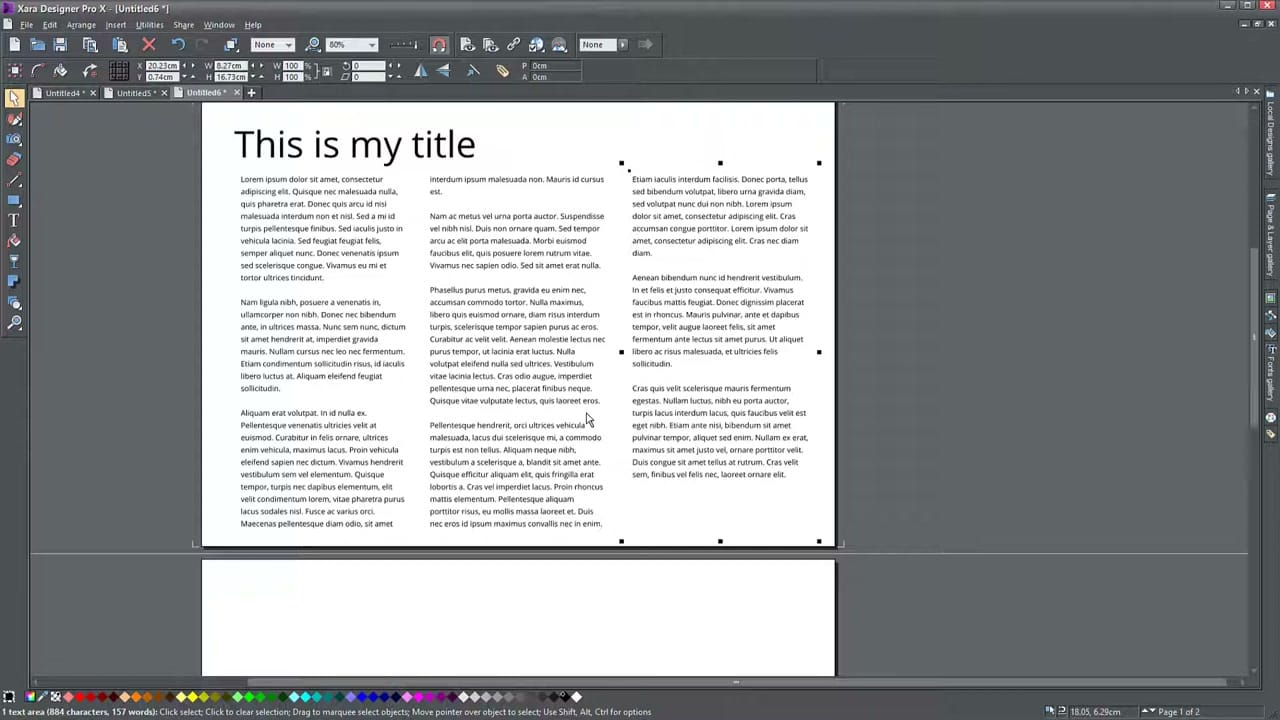
You can chain as many text boxes as you need, even across multiple pages. This is the same principle used in professional desktop publishing for creating newspaper and magazine layouts.
Text Flow Around Objects (Repelling)
When you place an image or shape over a text area, the text doesn’t automatically wrap around it. To enable text wrapping, select the object and use the Repel option. You can choose between:
- Rectangular repelling — text wraps in a rectangular boundary around the object.
- Contour repelling — text wraps closely following the object’s shape.
Anchoring Objects in Text
You can also anchor objects within a text flow, so they move with the text as content is added or removed. This keeps images positioned relative to the paragraphs they illustrate, just like in a word processor.


