How to Place Captions Differently Per Scene in Riverside

When you're editing a video in Riverside that switches between layouts — solo speaker, two-person interview, screen share — you probably don't want captions in the same position for every scene. A caption that looks great centered on a solo shot might overlap someone's face in a side-by-side layout.
Riverside lets you reposition captions on a per-scene basis, so each layout gets the right placement. Here's how it works.
The Editor Overview
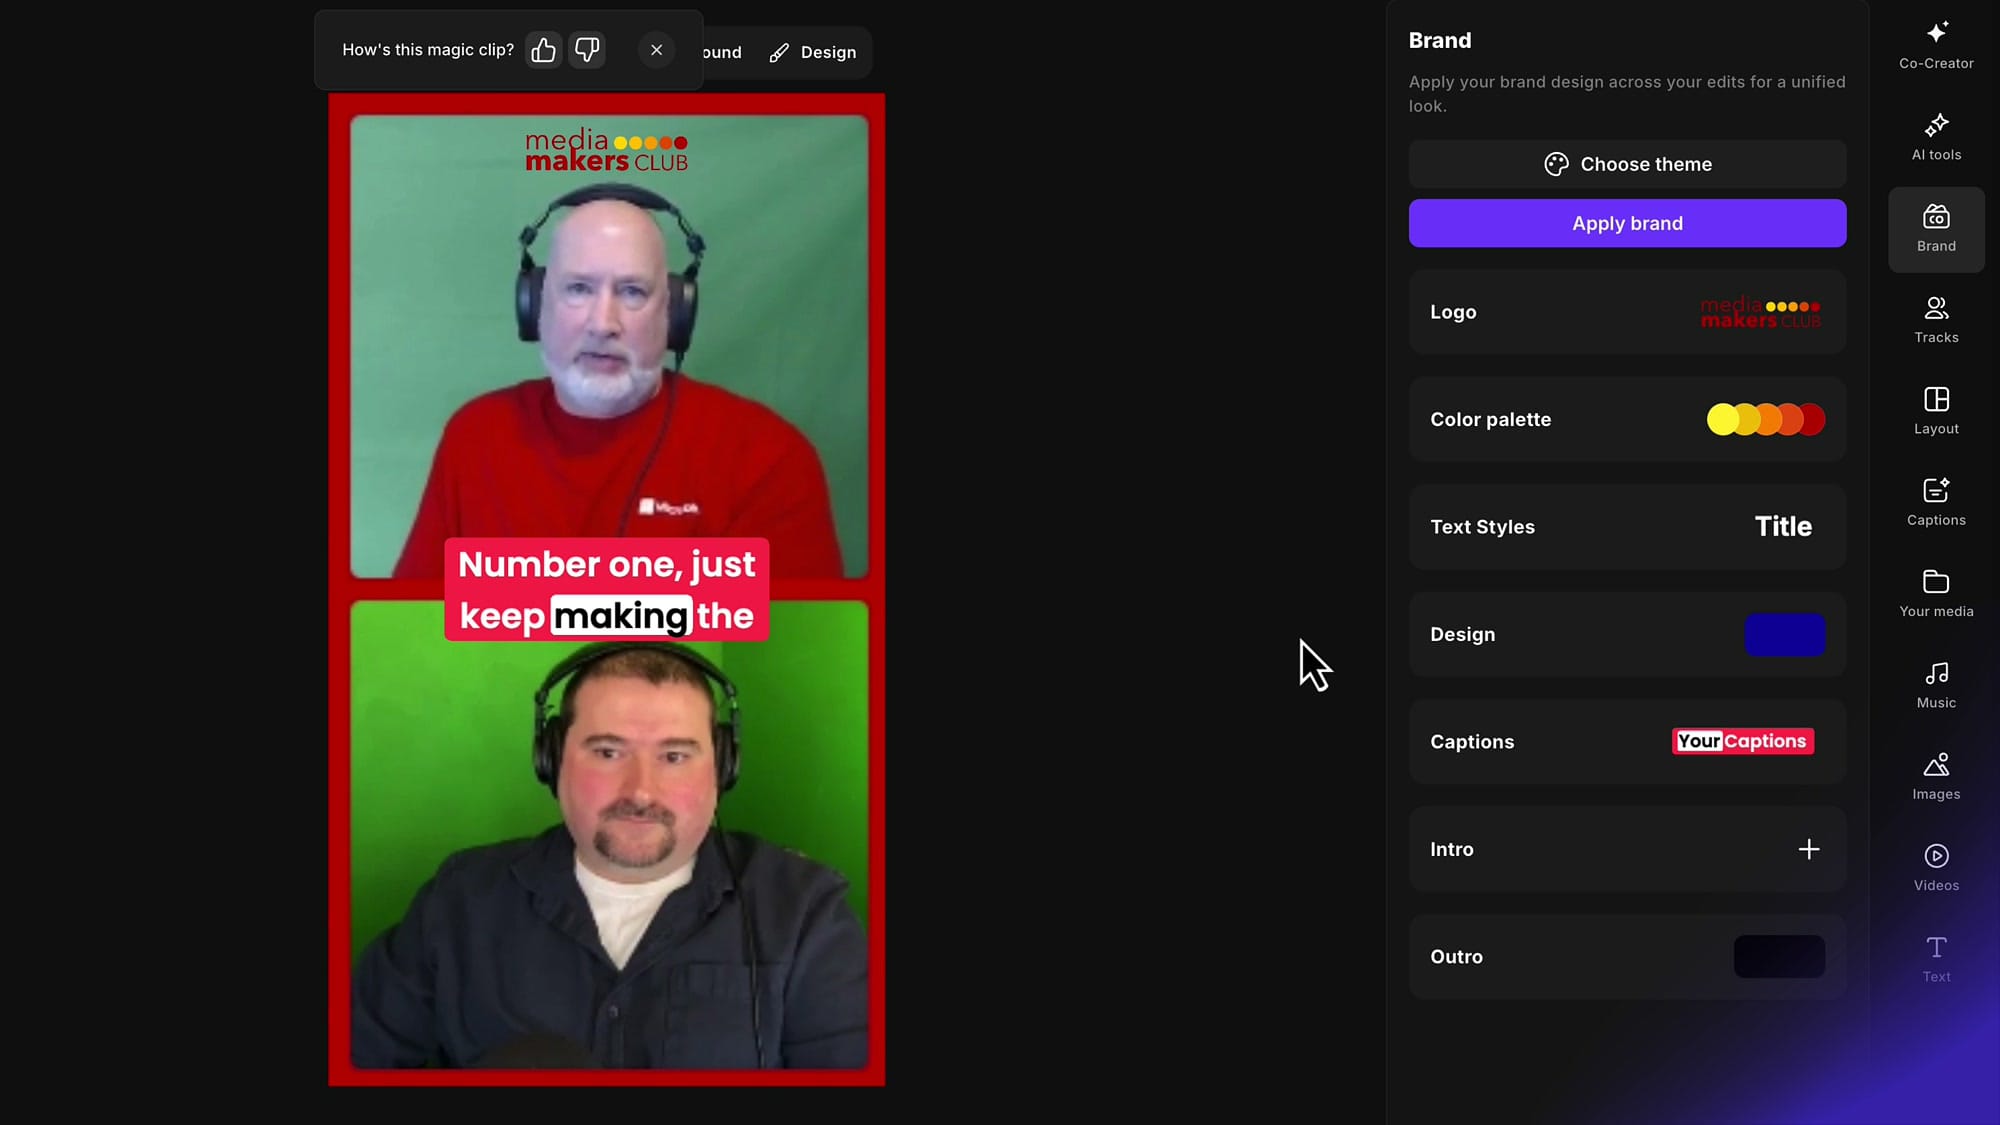
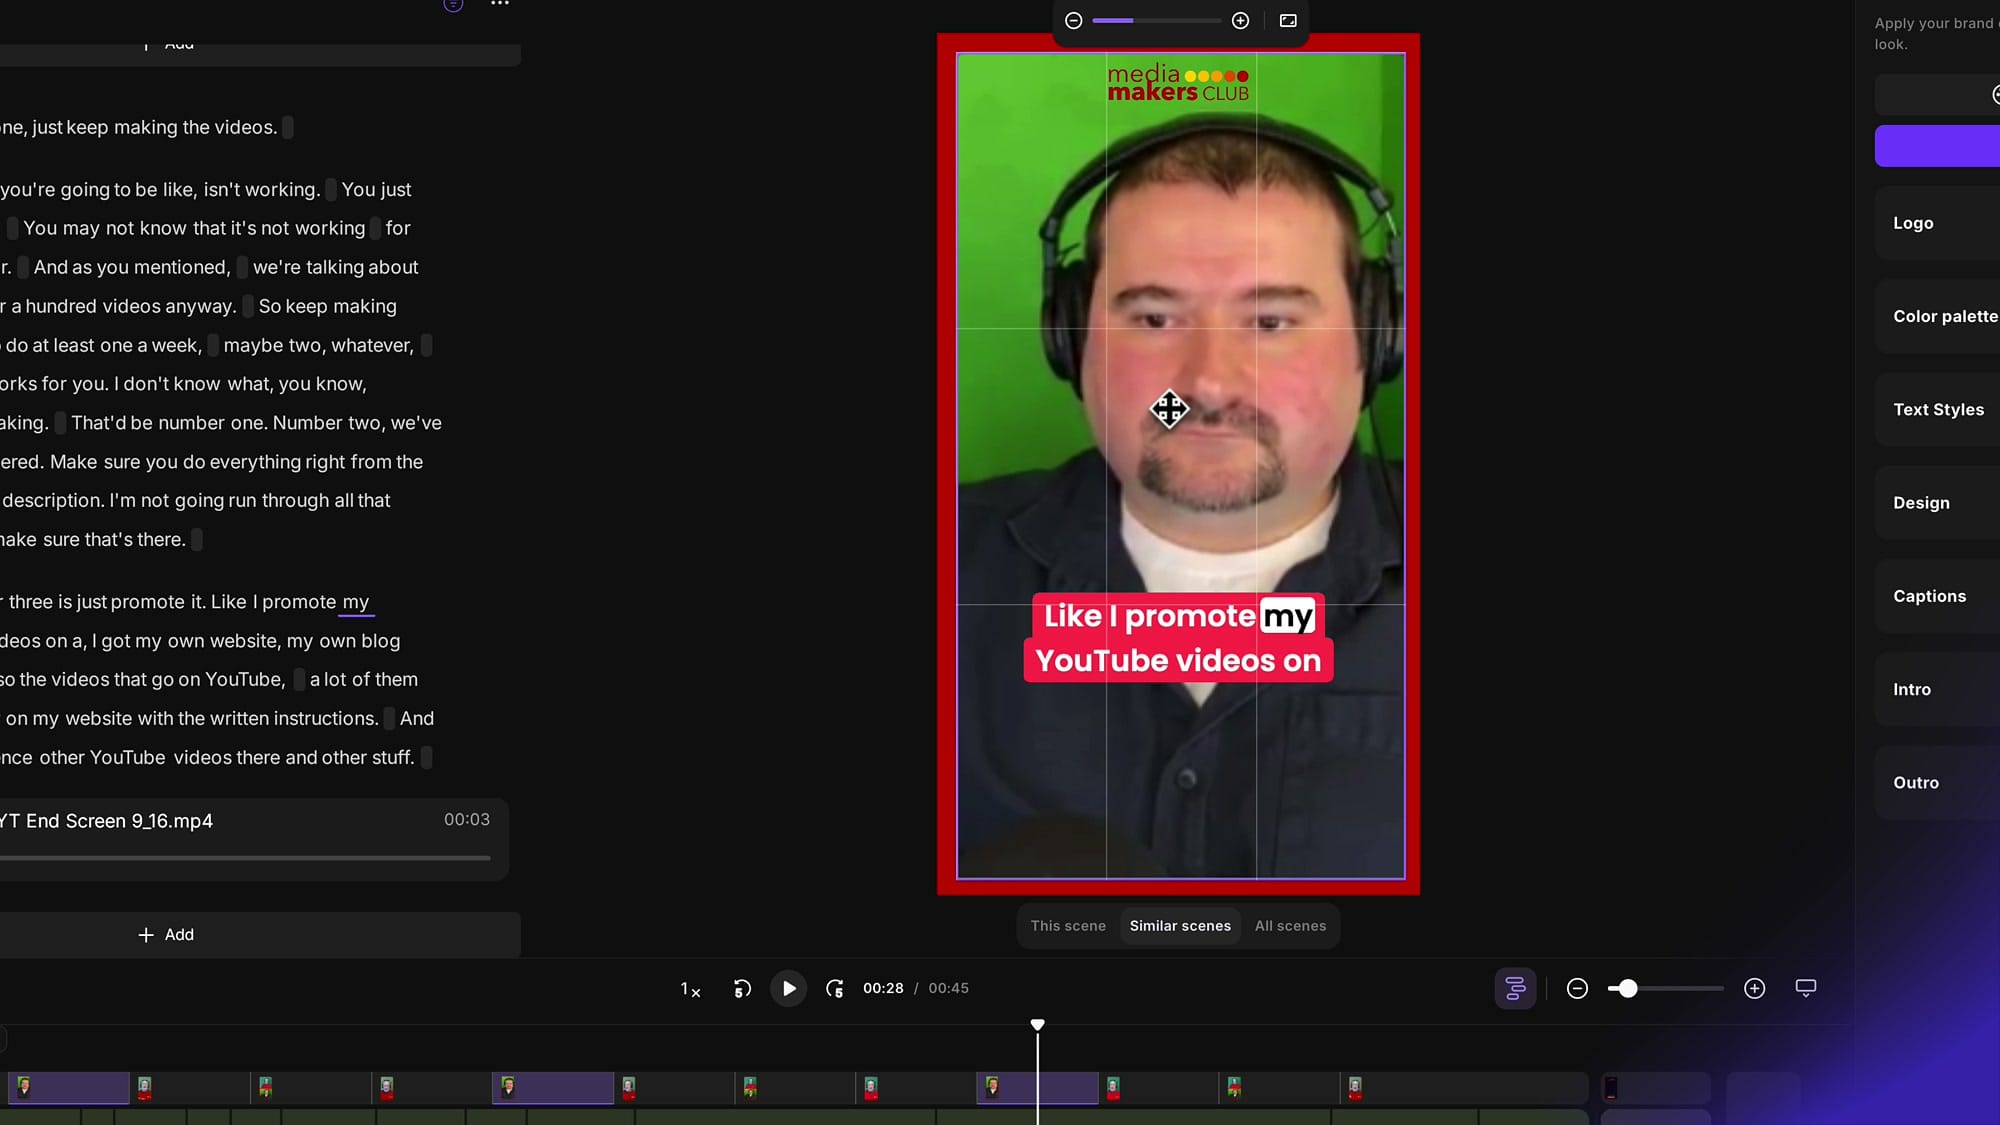
When you open an edit in Riverside, the right sidebar gives you access to the Brand panel, which includes your logo, color palette, text styles, design, and — importantly — Captions. The video preview shows your current scene with captions overlaid, and the timeline at the bottom displays all your scenes.
Understanding Scene Scope: This Scene, Similar Scenes, All Scenes
This is the key feature. When you make changes to captions (or other design elements), Riverside asks you which scenes should be affected. At the bottom of the video preview, you'll see three options:
- This scene — changes apply only to the current scene
- Similar scenes — changes apply to all scenes with the same layout (e.g., all solo speaker scenes)
- All scenes — changes apply everywhere
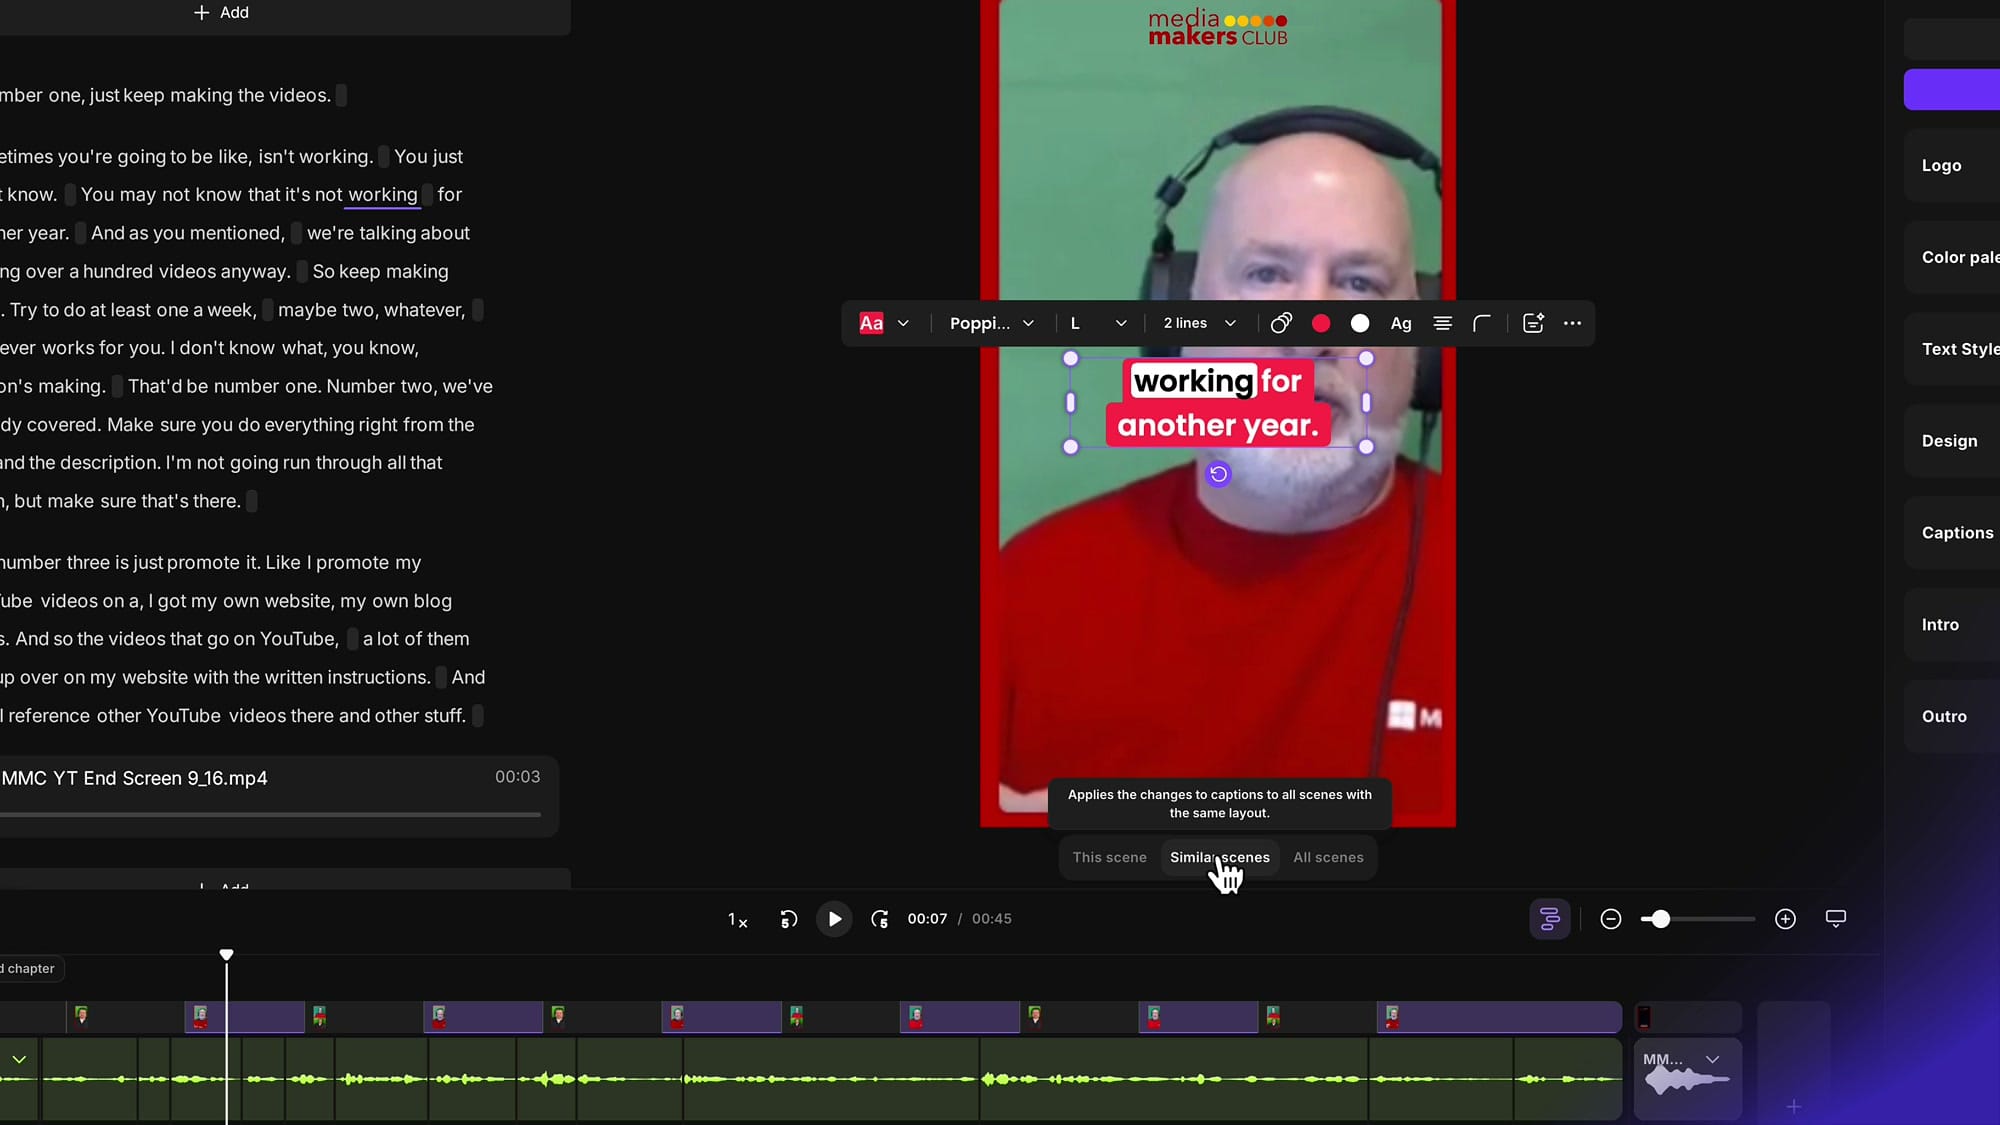
This is what makes per-scene caption placement work. You select "This scene" or "Similar scenes" before repositioning, and the change only affects the scenes you intended.
Repositioning Captions
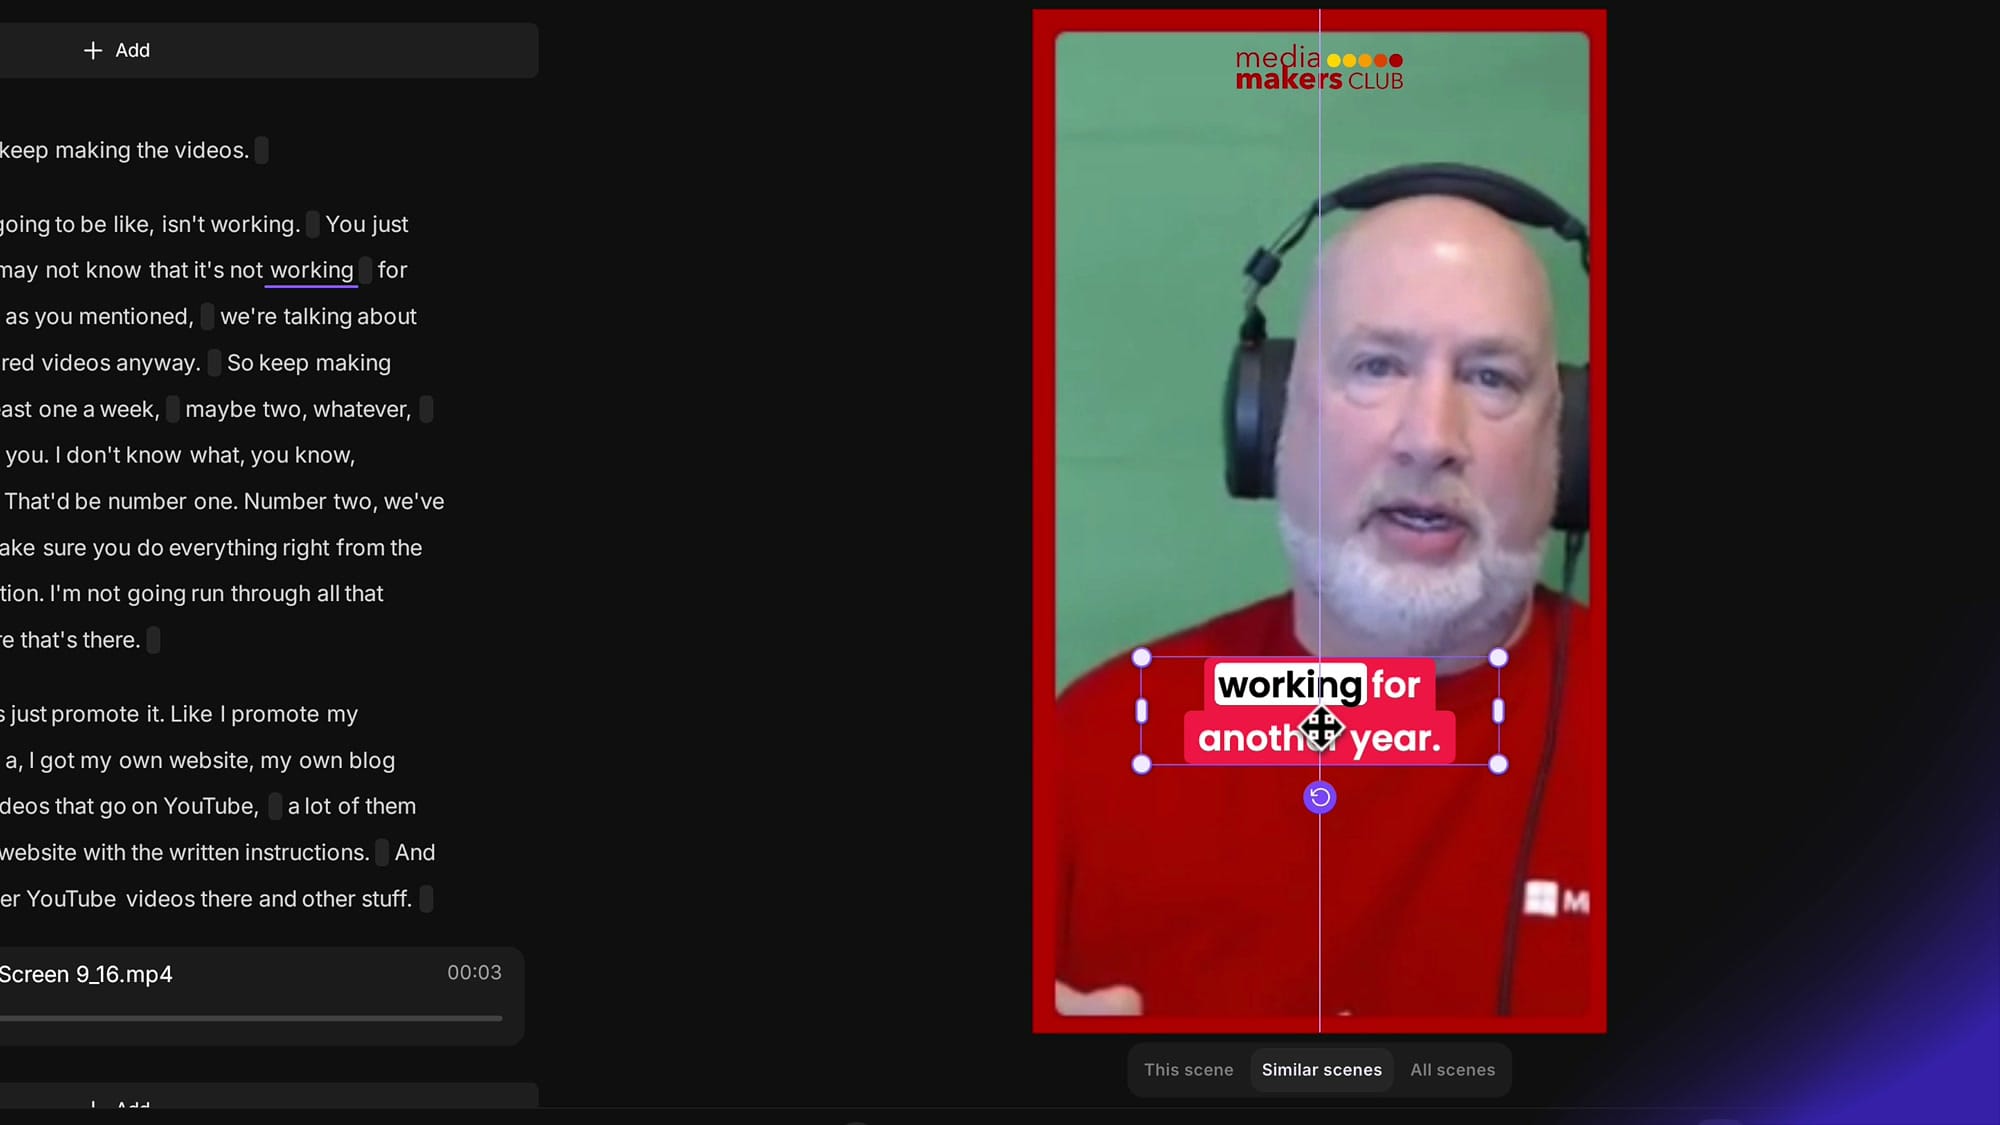
To move captions on a specific scene:
- Navigate to the scene in the timeline
- Click on the captions in the video preview — they become selected with drag handles
- A styling toolbar appears with options for font, size, color, line count, alignment, and more
- Drag the captions to your desired position
- Choose the scope: This scene for just this one, or Similar scenes to apply the position to all scenes with the same layout
Different Positions for Different Layouts
The real power shows when your video has multiple layouts. For example:
- Solo speaker scene — place captions in the lower third, centered
- Two-speaker scene — move captions to the middle so they don't cover either person's face
- Screen share scene — position captions at the top or bottom, wherever they don't obstruct the content

The Workflow
Here's the recommended approach for multi-layout videos:
- Start with "All scenes" — set your baseline caption style (font, color, size) across the entire video
- Switch to "Similar scenes" — navigate to each distinct layout type and reposition captions for that layout
- Use "This scene" sparingly — only for one-off adjustments where a specific scene needs unique placement
This way, you set the global style once, then fine-tune position per layout type — efficient and consistent.
Tips
- Use the Layout panel to see which layout types exist in your video — Solo speaker, One-on-one, etc.
- The Brand panel lets you save caption styles as part of your brand kit, so your preferred look carries across projects
- If captions overlap a logo or other element, reposition for just that scene type using "Similar scenes"
- Caption styling (font, color, background) can also be scoped per scene, not just position
Related Riverside Guides
If you're eager to learn more about Riverside and wish to have a one-on-one Riverside coaching session, feel free to book a call with me. I'm here to help you with any questions you have and to guide you through the best workflows, tips, workarounds, or just answer any questions you may have!
Ready to create professional-looking videos with properly placed captions? Get started with Riverside.