How to Save and Reuse Scene Layouts in Riverside


When you're editing a podcast or video interview in Riverside, the layout determines how speakers are arranged on screen. But you don't have to stick with the same layout for the entire episode. You can save custom scene layouts and reuse them across projects — building a personal library of go-to arrangements.
This tutorial covers how to change layouts per scene, save your favorites, and apply them consistently across episodes.
Watch the Full Tutorial
How to Save and Reuse SCENE LAYOUTS in Riverside:
Understanding Layouts vs. Scenes
In Riverside's editor, Layouts and Scenes work together but serve different purposes:
- Layout — Controls how speakers are arranged on the canvas (side-by-side, solo speaker, picture-in-picture, etc.)
- Scene — A section of your timeline that can have its own layout, overlays, and styling, in addition to the layout set up
Think of scenes as chapters in your episode, and layouts as the visual arrangement within each chapter.
Changing the Layout
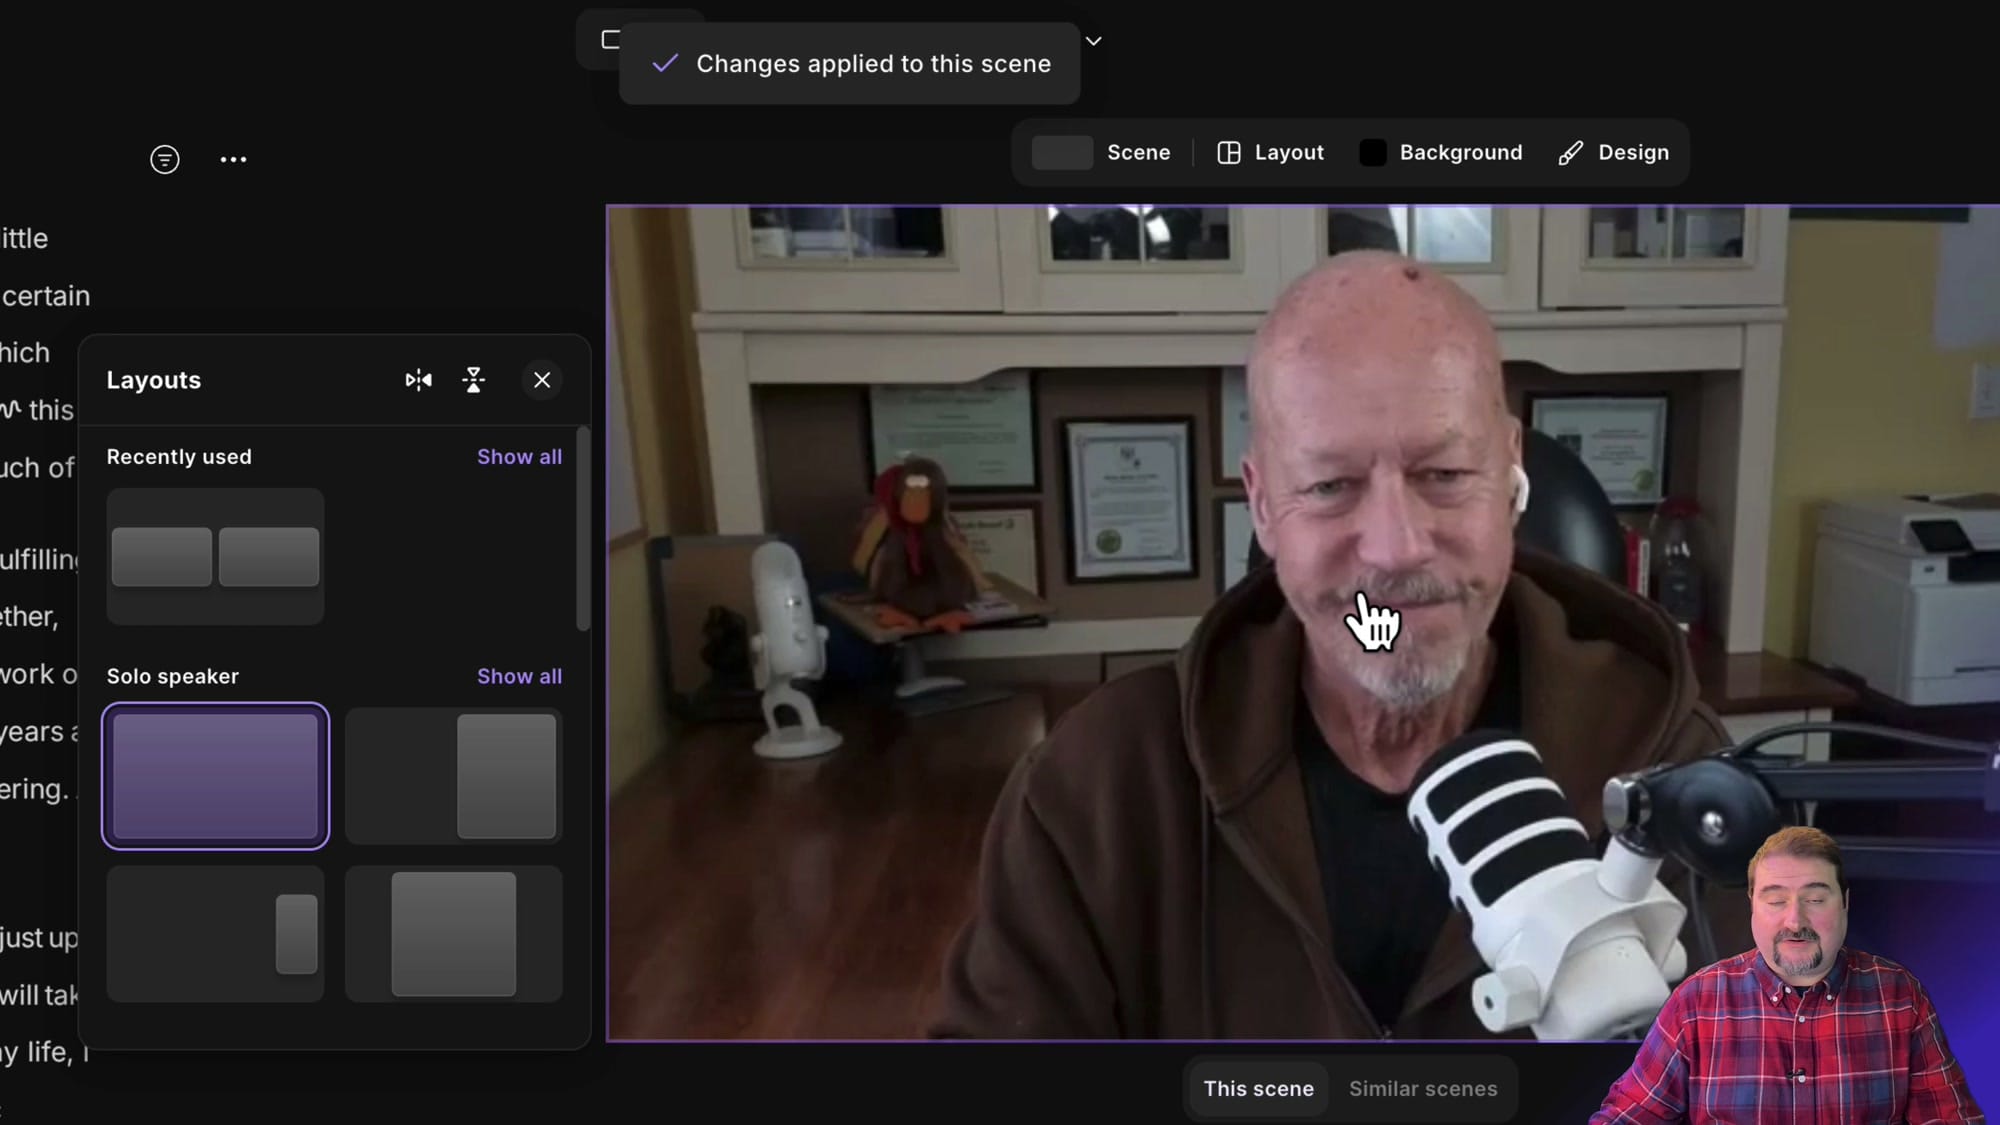
Click the Layout tab at the top of the canvas area. The Layouts panel opens showing your options organized by category:
- Recently used — Quick access to layouts you've applied before
- Solo speaker — Full-screen views of a single speaker
- Side-by-side — Two or more speakers shown together
Click any layout thumbnail to apply it. You'll see the "Changes applied to this scene" confirmation.
Controlling Speaker Visibility with Tracks
The Tracks panel (in the right sidebar) lets you toggle individual speakers on or off for each scene. This is how you create solo speaker moments — turn off one track so only the other speaker appears.
Changes to tracks apply to the whole track, even if split into sections. This keeps your speaker visibility consistent throughout the episode.

Saving a Custom Scene
Once you've set up a scene with your preferred layout, overlays, speaker names, and positioning, you can save it for reuse:
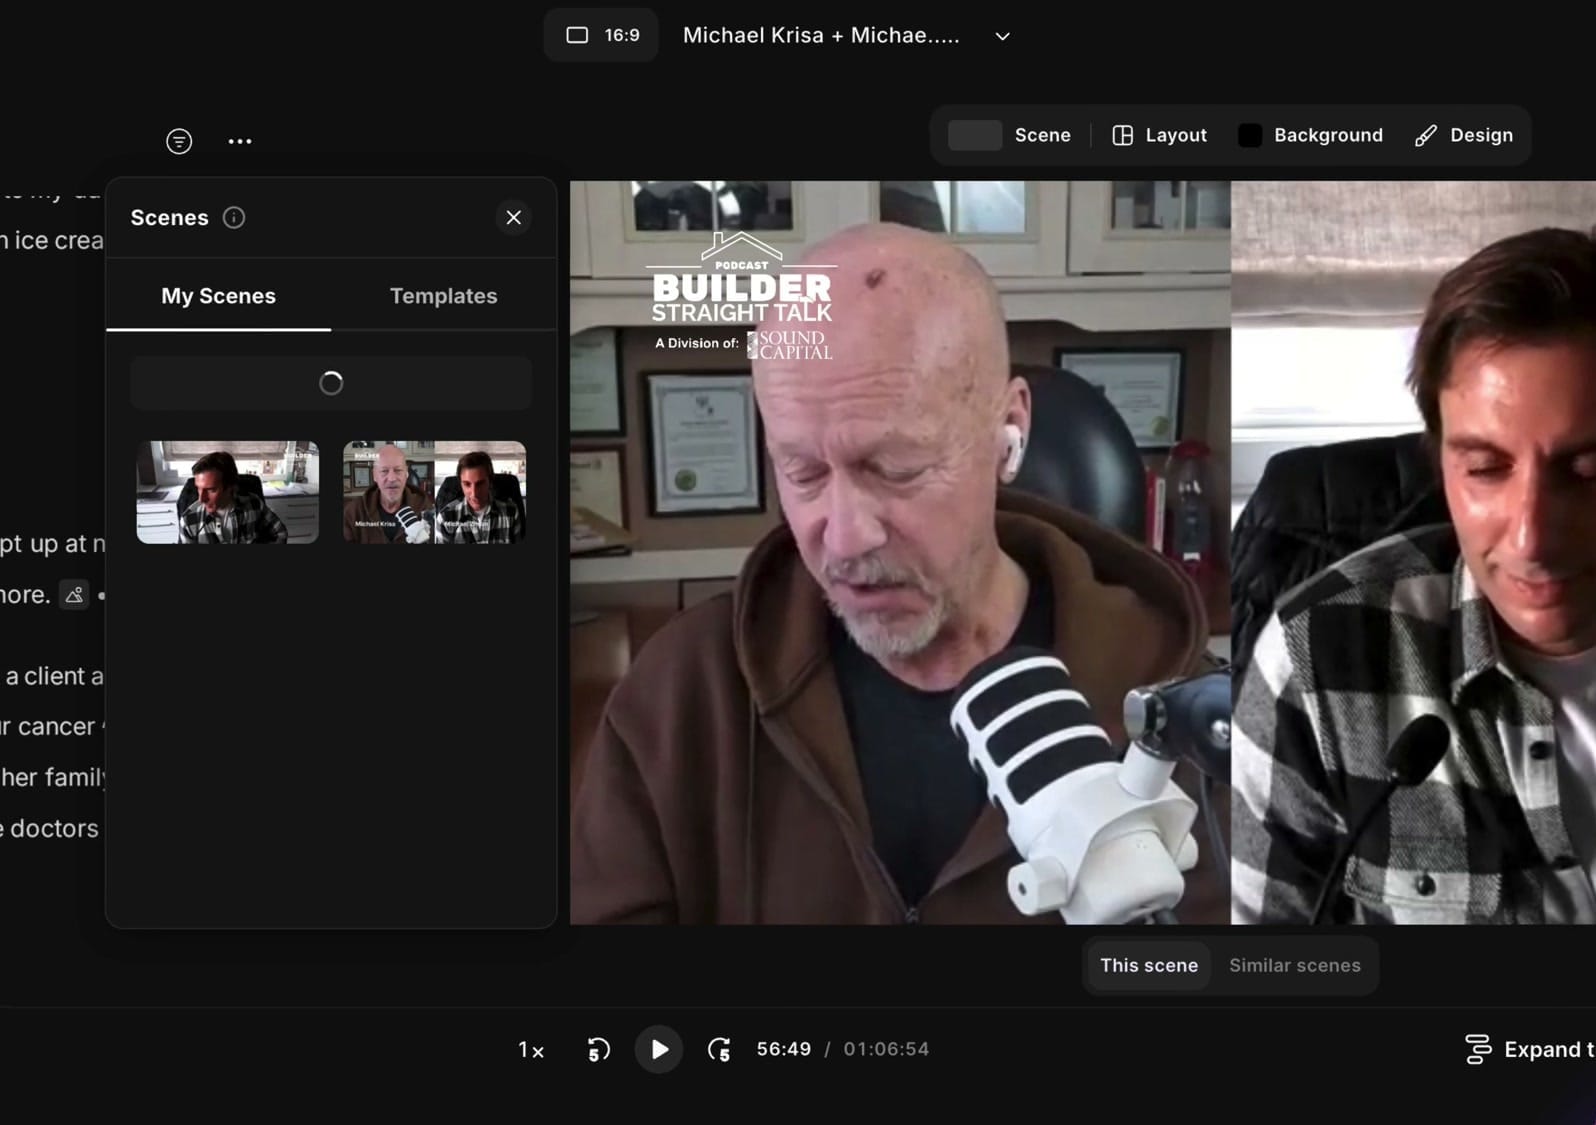
- Click the Scene tab to open the Scenes panel
- Switch to the My Scenes tab
- Click "Save scene"
- Your current scene setup is saved as a thumbnail in your library

Reusing Saved Scenes
Your saved scenes appear in the My Scenes tab. Click any saved scene thumbnail to apply it to your current timeline position. This is how you maintain a consistent look across episodes without rebuilding layouts from scratch.
Applying Changes to This Scene vs. Similar Scenes
When you change a layout, Riverside shows "This scene" and "Similar scenes" options at the bottom of the canvas. This lets you decide whether the change applies to just the current scene or to all scenes with the same layout.

Splitting Scenes at the Playhead
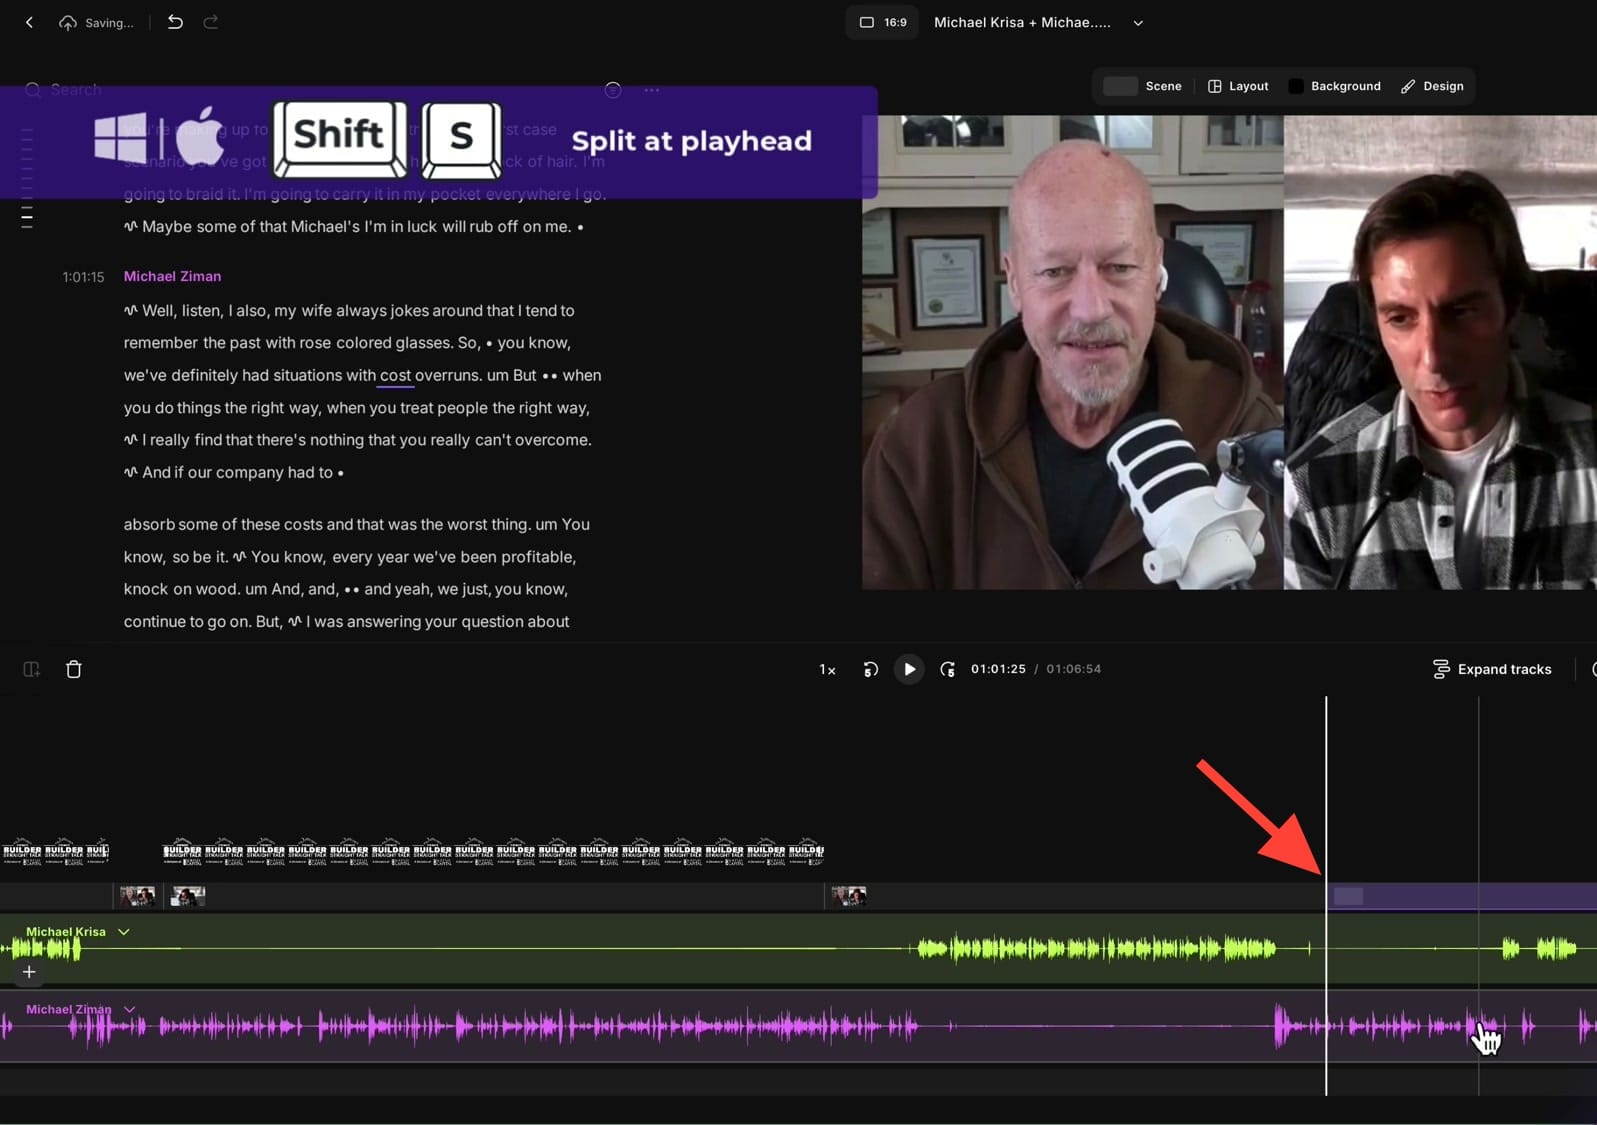
To create a new scene break at a specific moment, position the playhead and use Split at playhead (keyboard shortcut: Shift + S). This creates a new scene at that point where you can apply a different layout.
On the timeline, you'll see scene elements — speaker title overlays, logos, and other elements — displayed as colored blocks that you can drag to adjust timing.
Workflow Tips
- Build a standard set — Save 3-4 layouts you use every episode (intro, interview, solo guest, outro)
- Use with scene templates — Combine your saved scenes with Riverside's built-in templates for maximum variety
- Pair with per-scene captions — Different layouts may need different caption positioning
- Keep it consistent — Use "Similar scenes" to update all matching scenes at once when you refine a layout
Try It Yourself
Saving and reusing scene layouts eliminates repetitive setup work. Build your library once, and every new episode starts with your proven layouts ready to apply. Try Riverside and start building your layout library.
If you’re eager to learn more about Riverside and wish to have a one-on-one Riverside coaching session, feel free to book a call with me.
I’m here to help you with any questions you have and to guide you through the best workflows, tips, workarounds, or just answer any questions you may have!