How to Turn an Audio Podcast into a Video in Riverside

If you have an audio-only podcast and want to post it on YouTube or other video platforms, Riverside makes it straightforward. Upload your audio, add a cover image, and export as video — all in a few clicks. Here is the full workflow.
Upload Your Audio File
Start by uploading your audio file to a project in Riverside. You can upload separate audio tracks for different speakers, or upload a single file and tell Riverside how many speakers are on it. Riverside will automatically analyze the audio, separate the speakers, and transcribe everything.
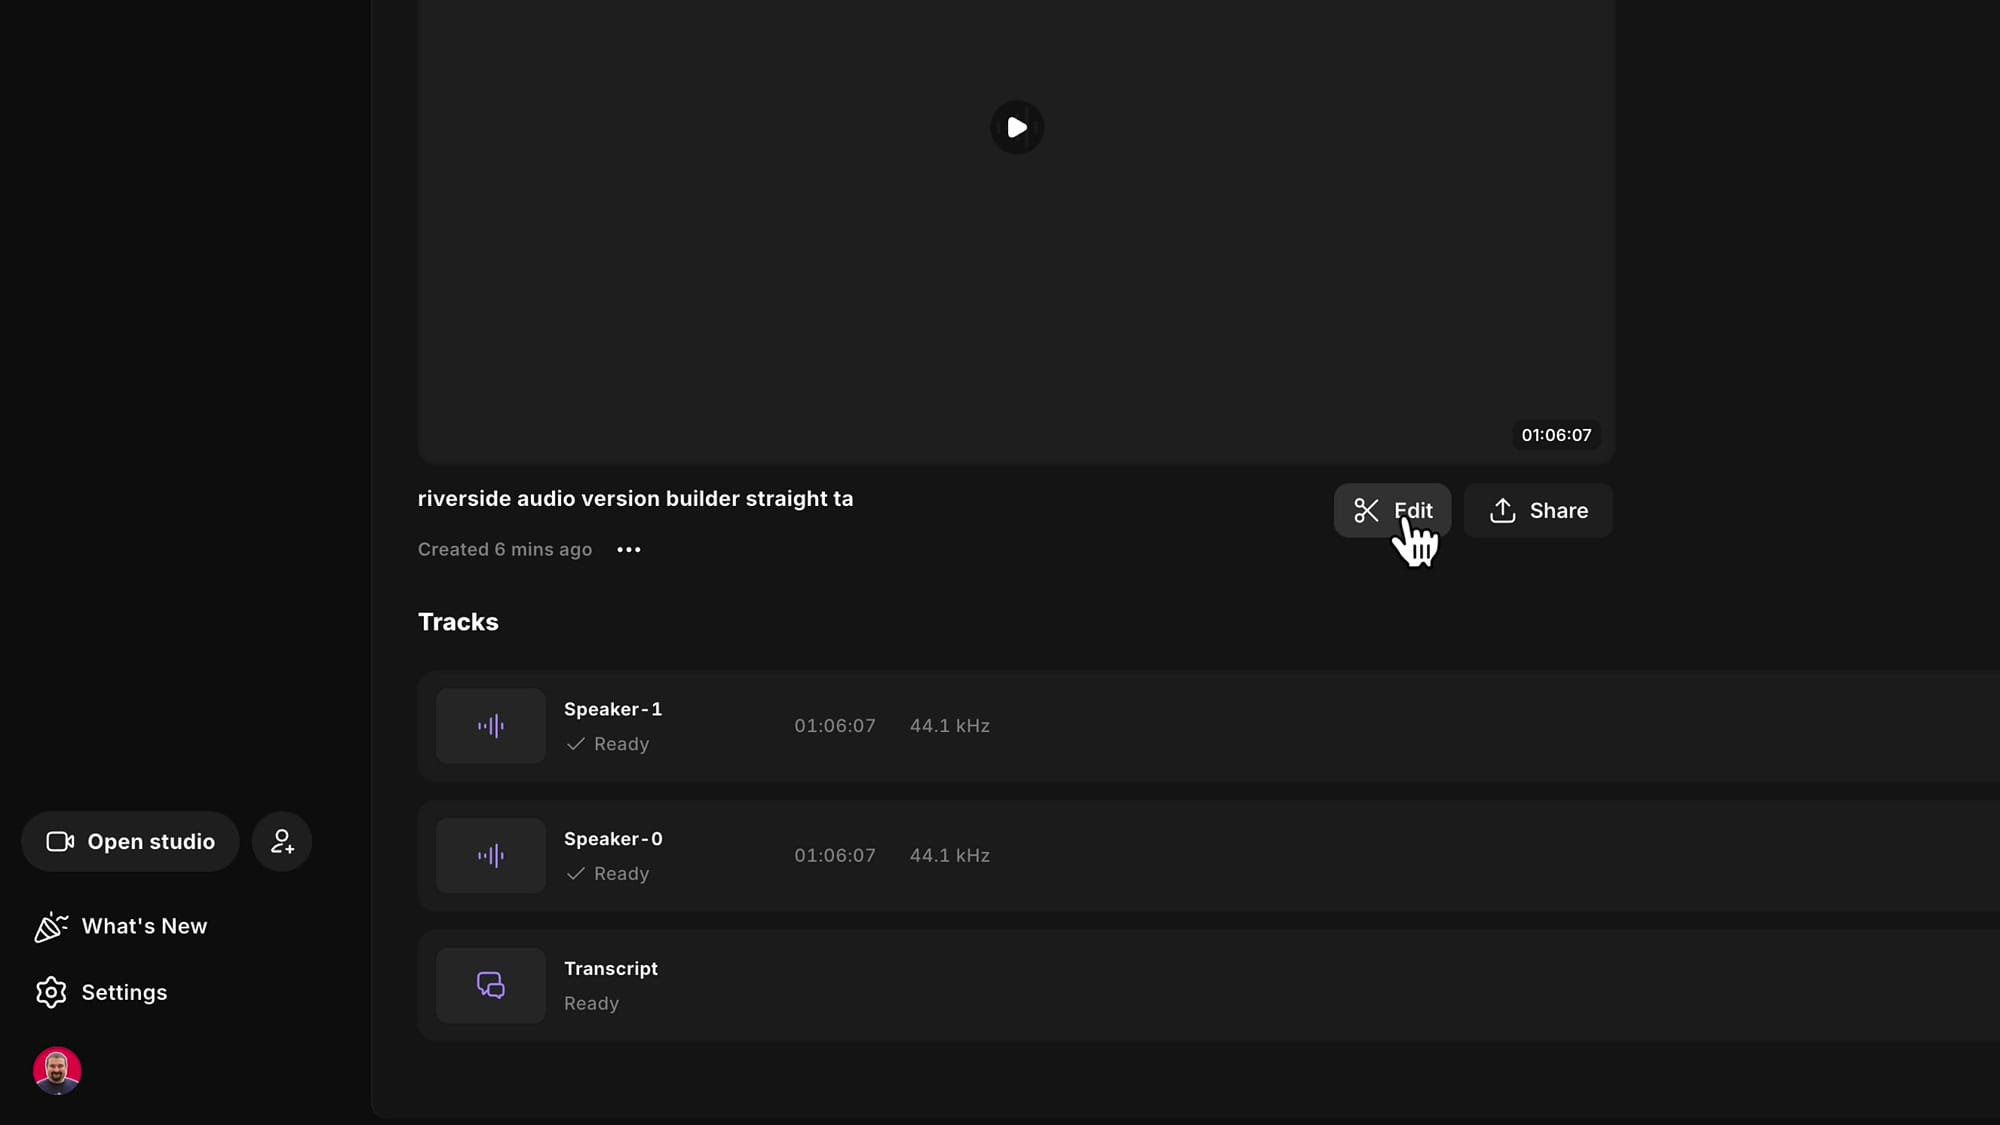
Once processing finishes, go to the Recordings tab. You will see the separated speaker tracks listed as Speaker-0 and Speaker-1 (or however many speakers were detected), each marked as "Ready."
Click Edit to start a new edit from these files.
Rename the Speakers
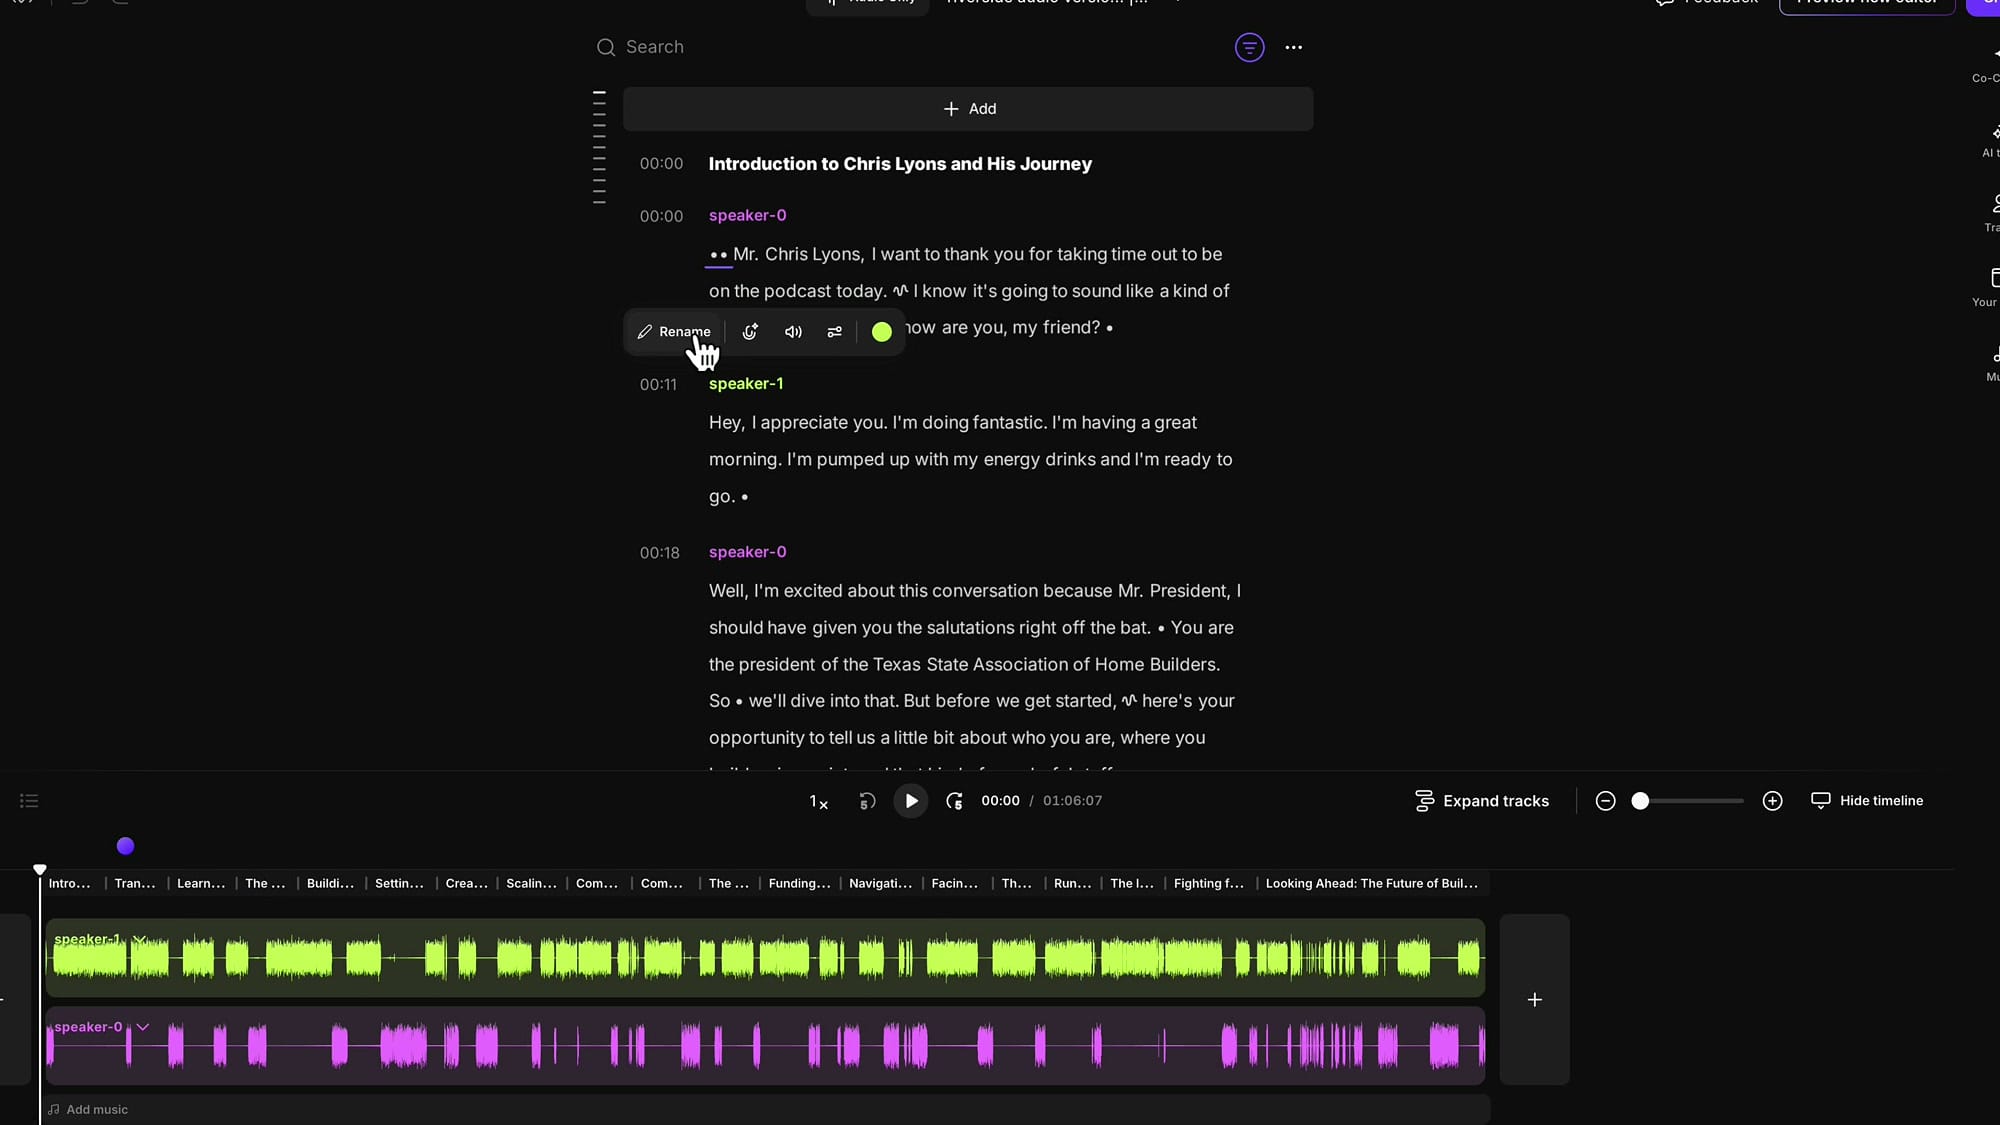
In the editor, the speakers show up with different colors in the transcript. Click on each speaker's name and select Rename to give them proper names. This makes the transcript easier to follow and is important if you plan to add captions later.
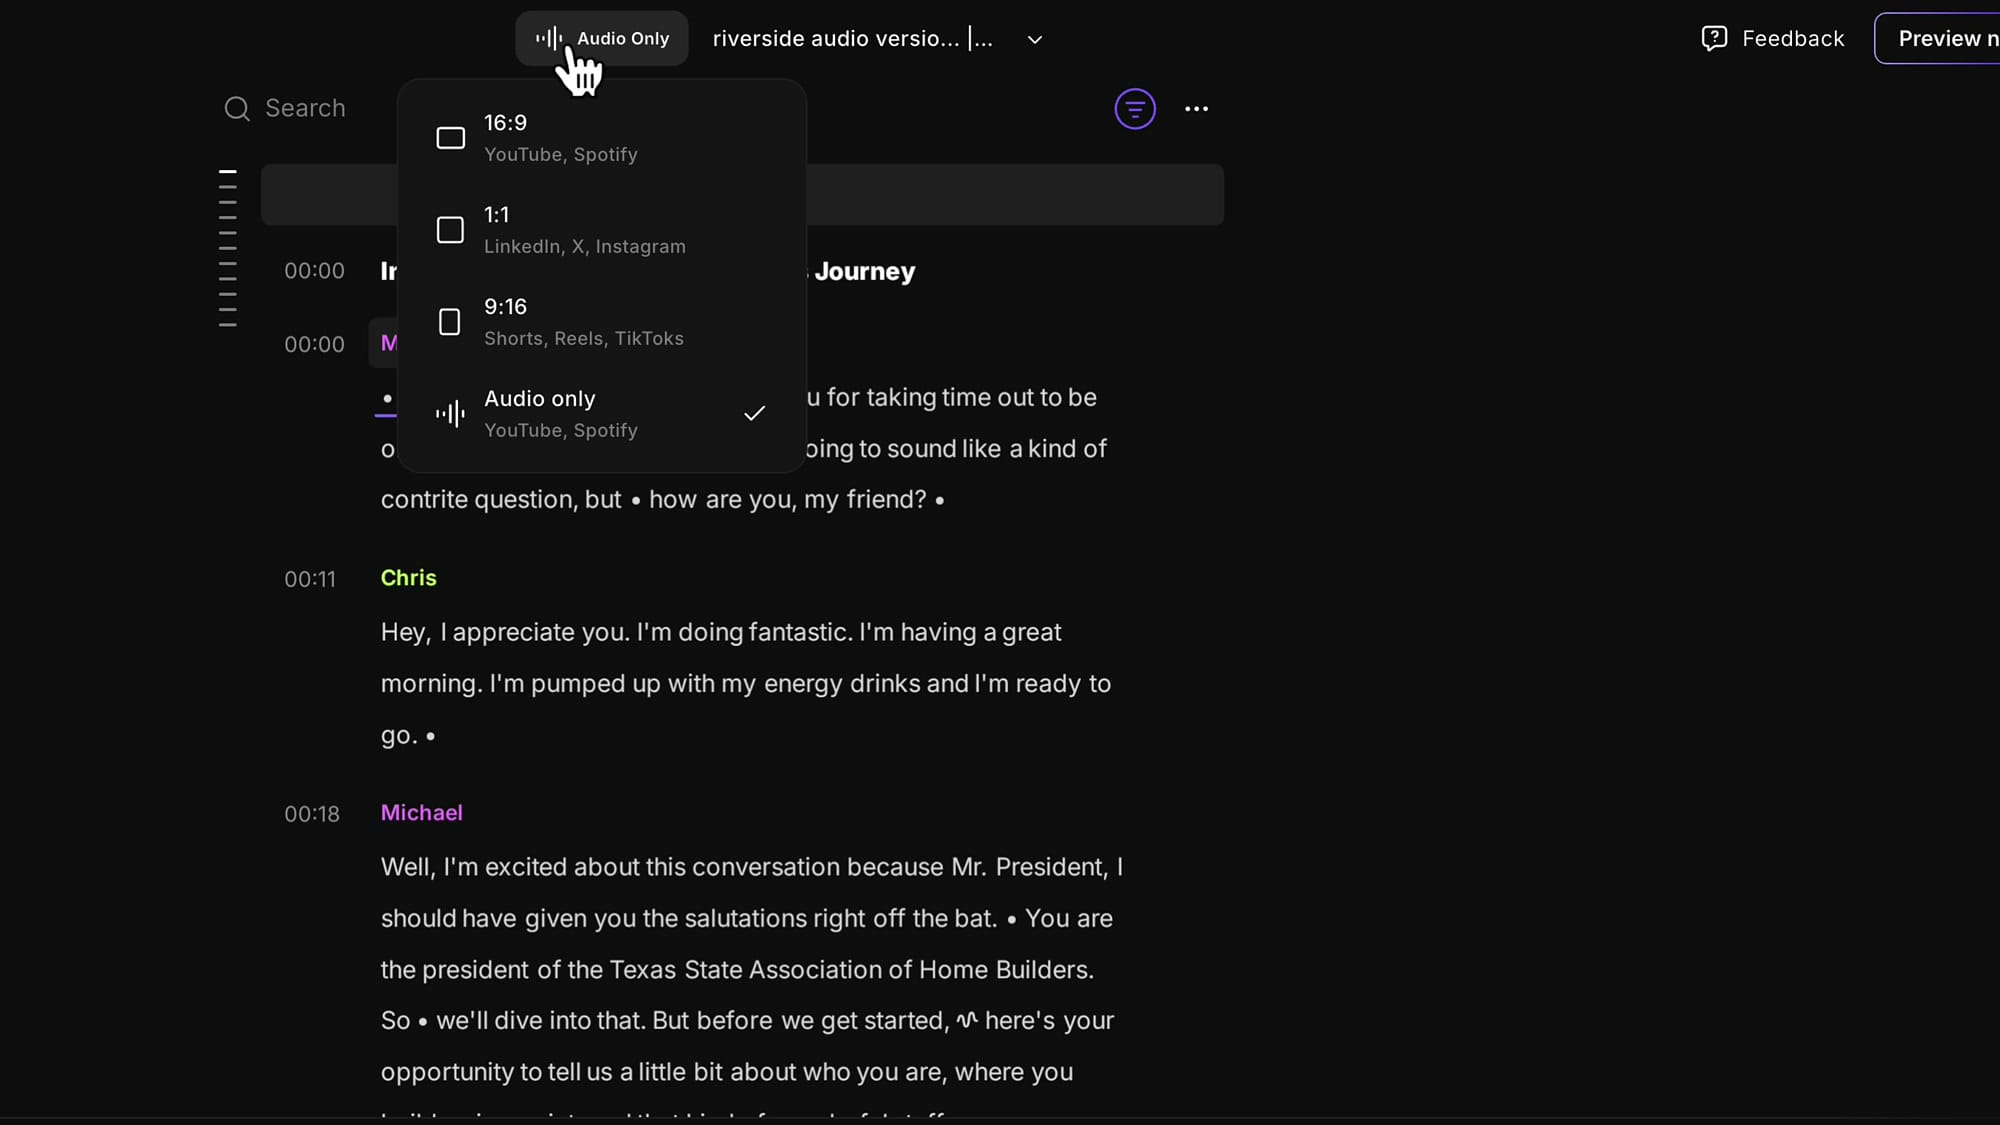
Switch from Audio Only to Video Format
By default, the edit opens in Audio Only mode. To turn it into a video, click the format selector at the top left where it says "Audio Only." A dropdown appears with format options:
- 16:9 — YouTube, Spotify (widescreen)
- 1:1 — LinkedIn, X, Instagram (square)
- 9:16 — Shorts, Reels, TikToks (vertical)
- Audio only — the current setting
Select 16:9 for YouTube. The editor immediately switches to video mode with a preview area where you can add visual elements.
Add a Cover Image
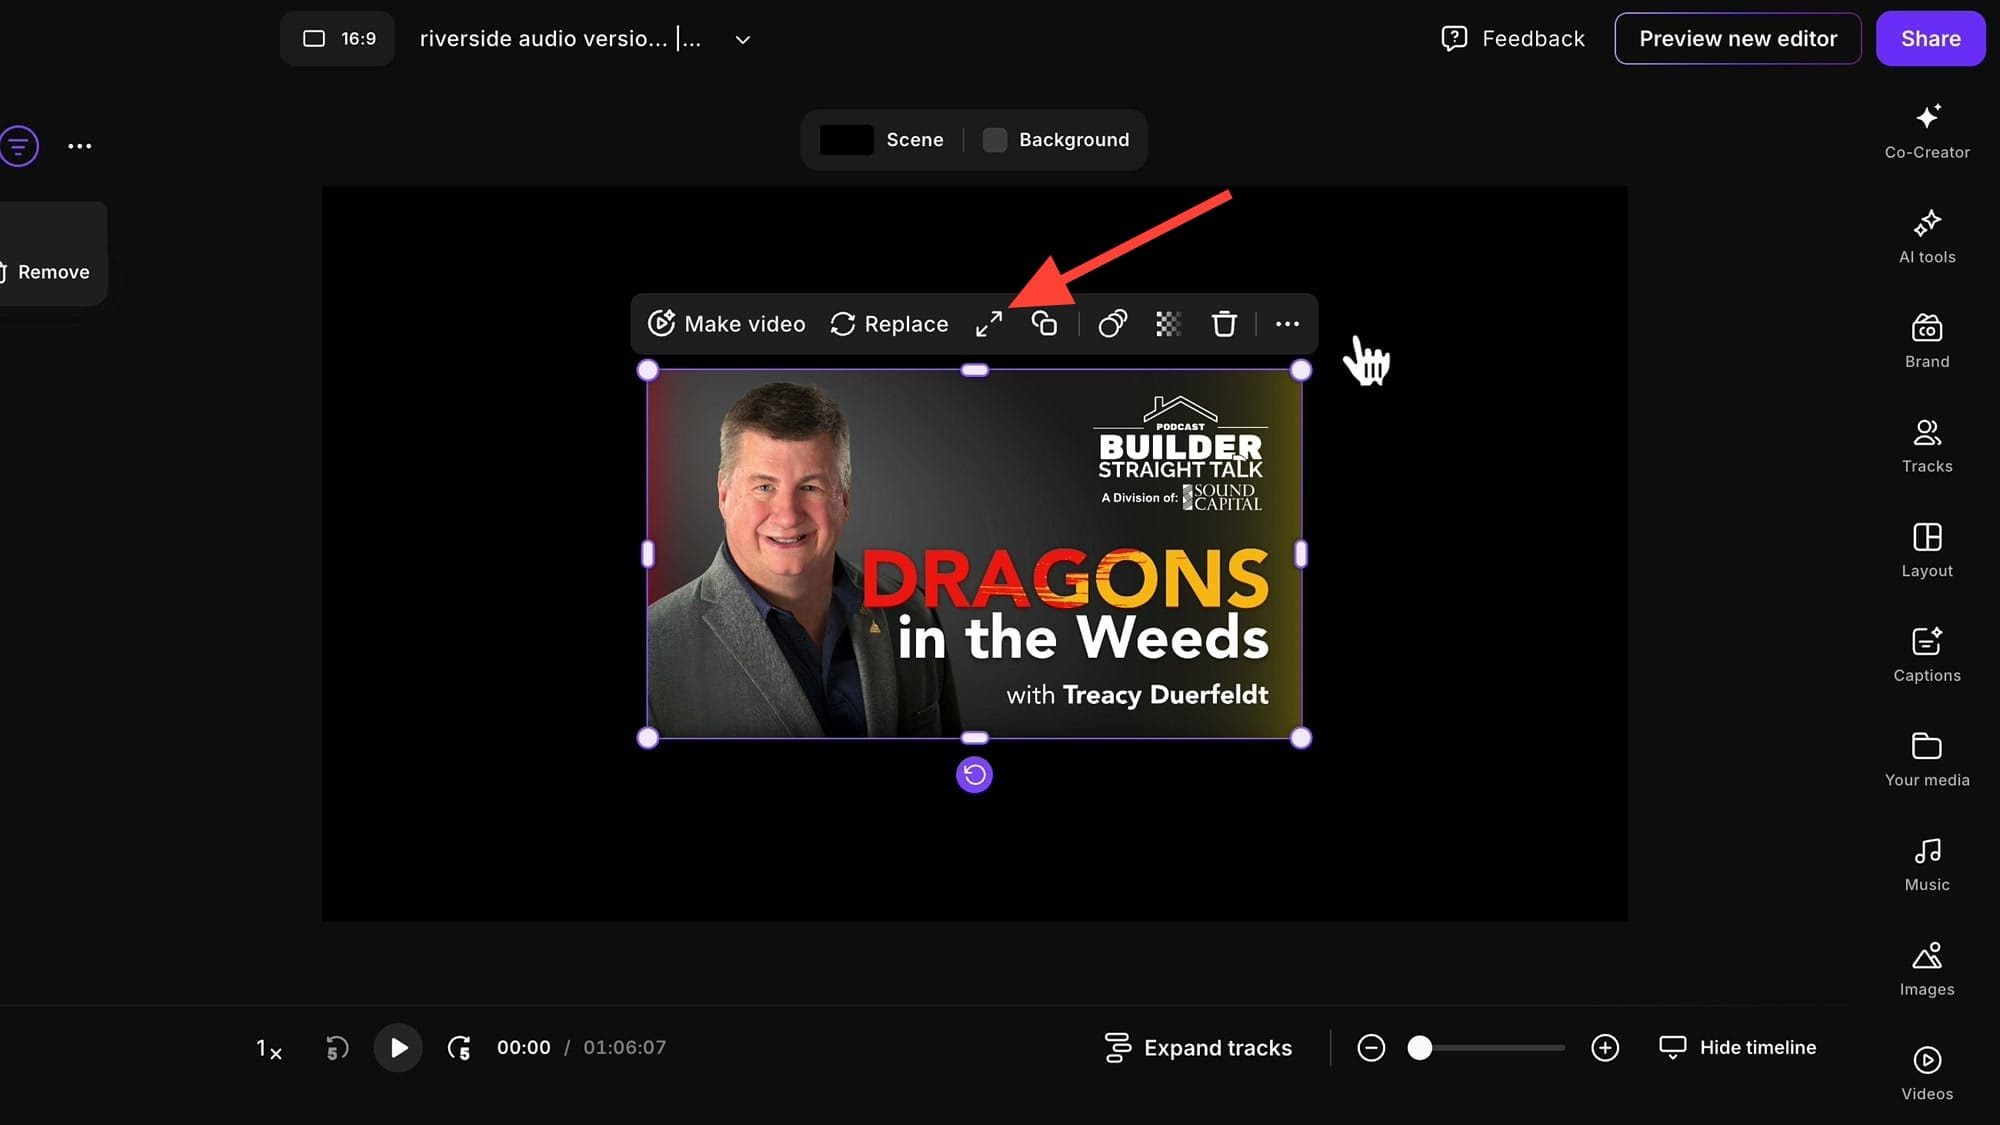
With the video canvas active, open the Images panel from the right sidebar. Click Upload to add your own image — a podcast thumbnail, a Canva design, or any cover artwork you have prepared.
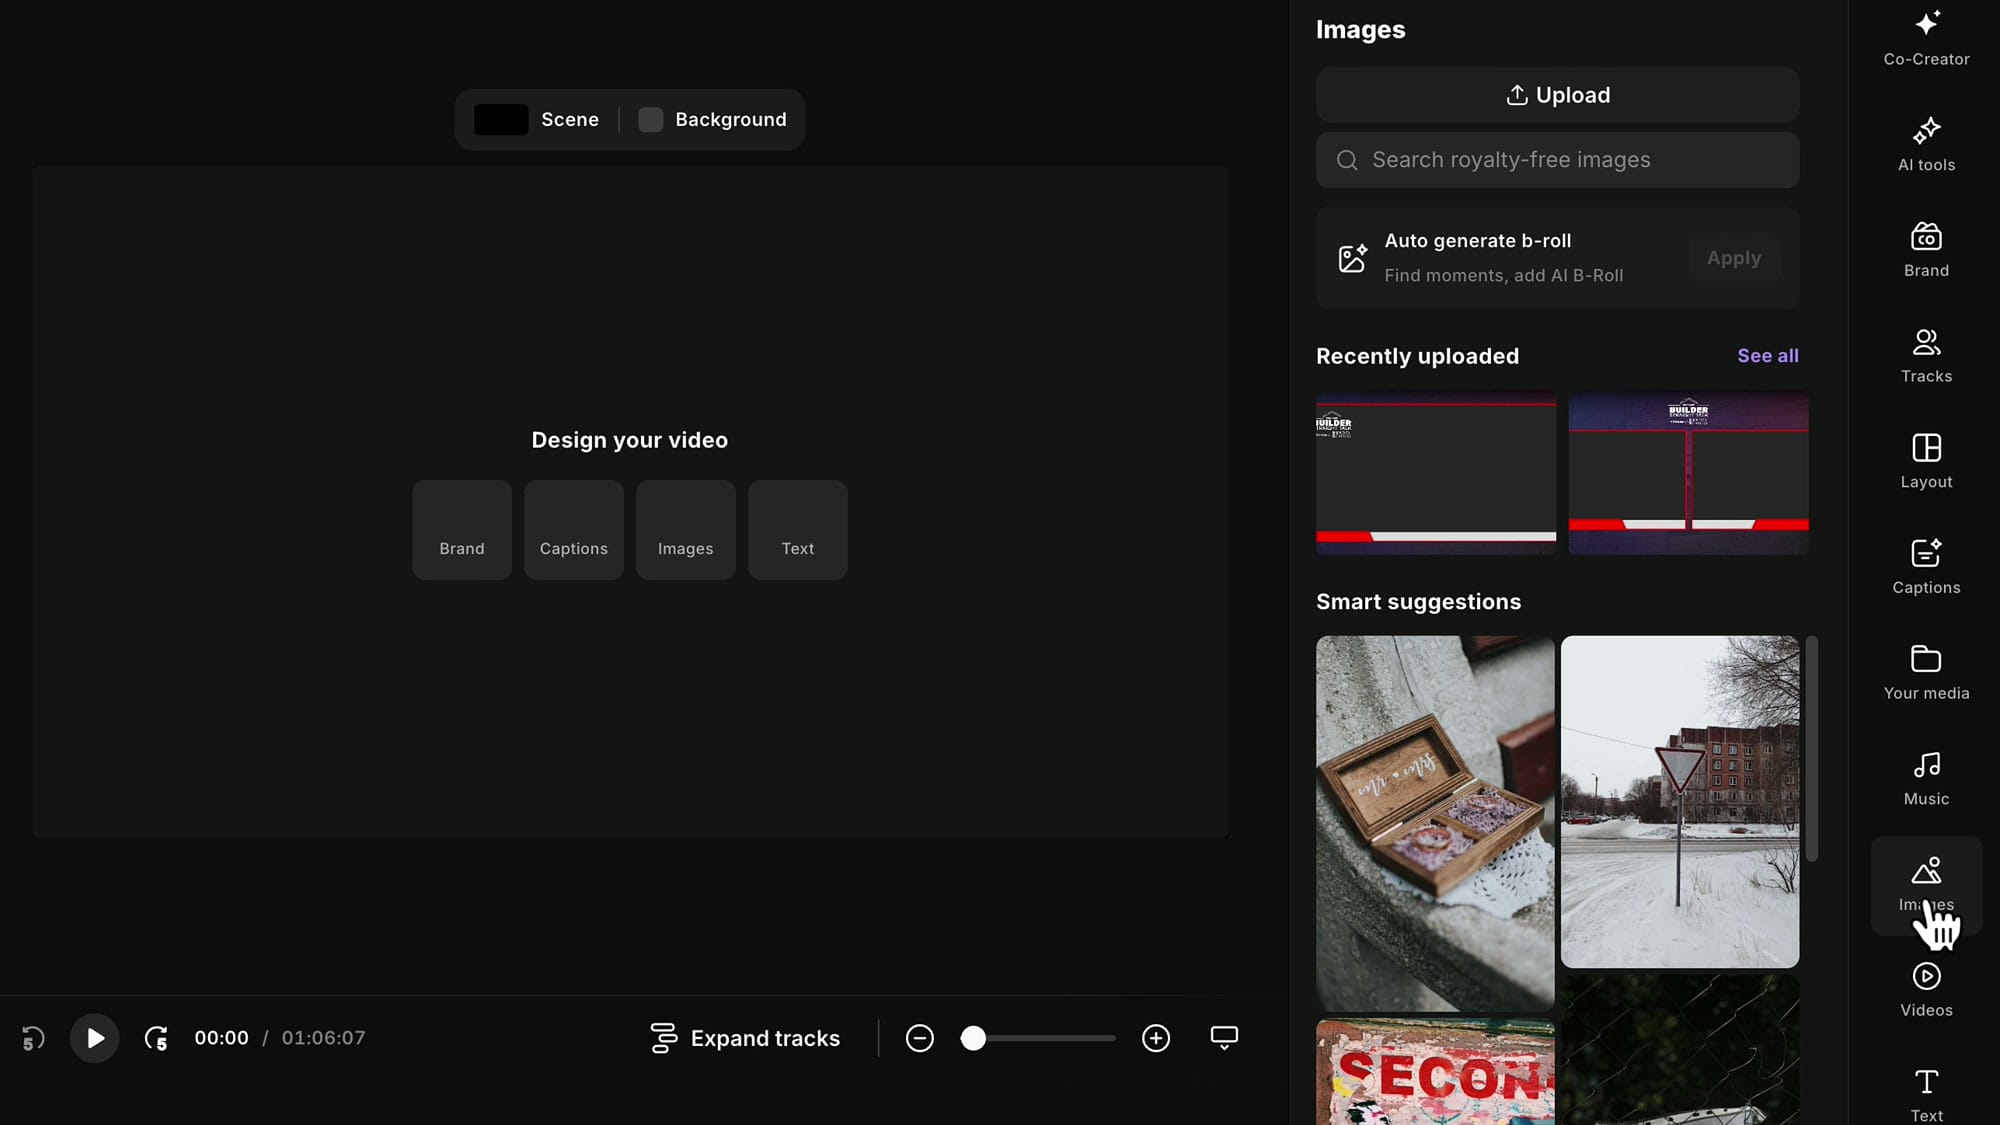
Once uploaded, click the image to add it to the canvas. If it is a landscape image that does not fill the entire preview area, use the Fill Video button (the expand icon in the toolbar above the image) to make it fit the full screen.
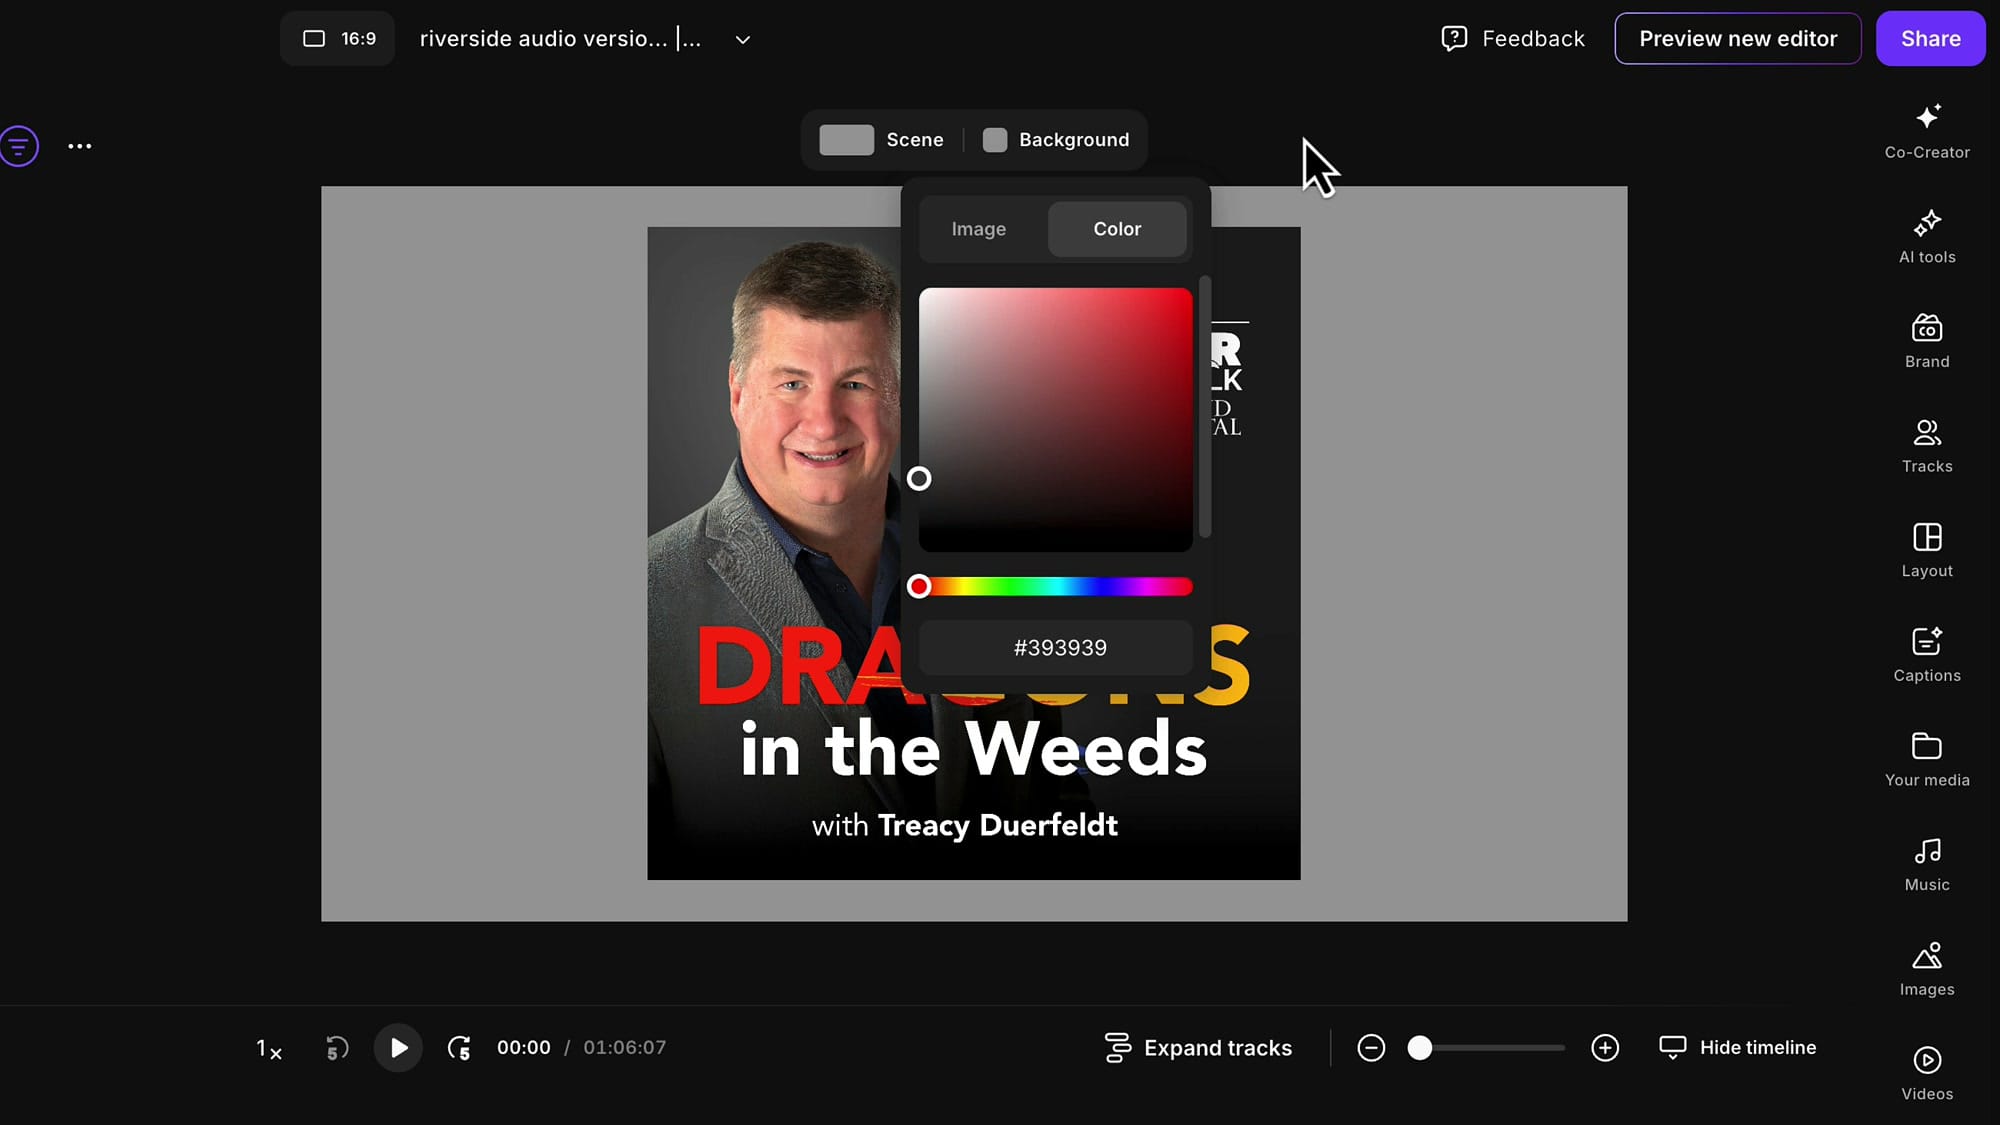
Handling Square Images
If your cover image is square rather than widescreen, it will not fill the entire 16:9 canvas. You have two options: leave the surrounding area black, or set a custom background color to blend with your design.
To set the background, deselect the image and click Background at the top of the preview. Use the color picker to choose a color that matches your artwork — typically a dark shade works well.
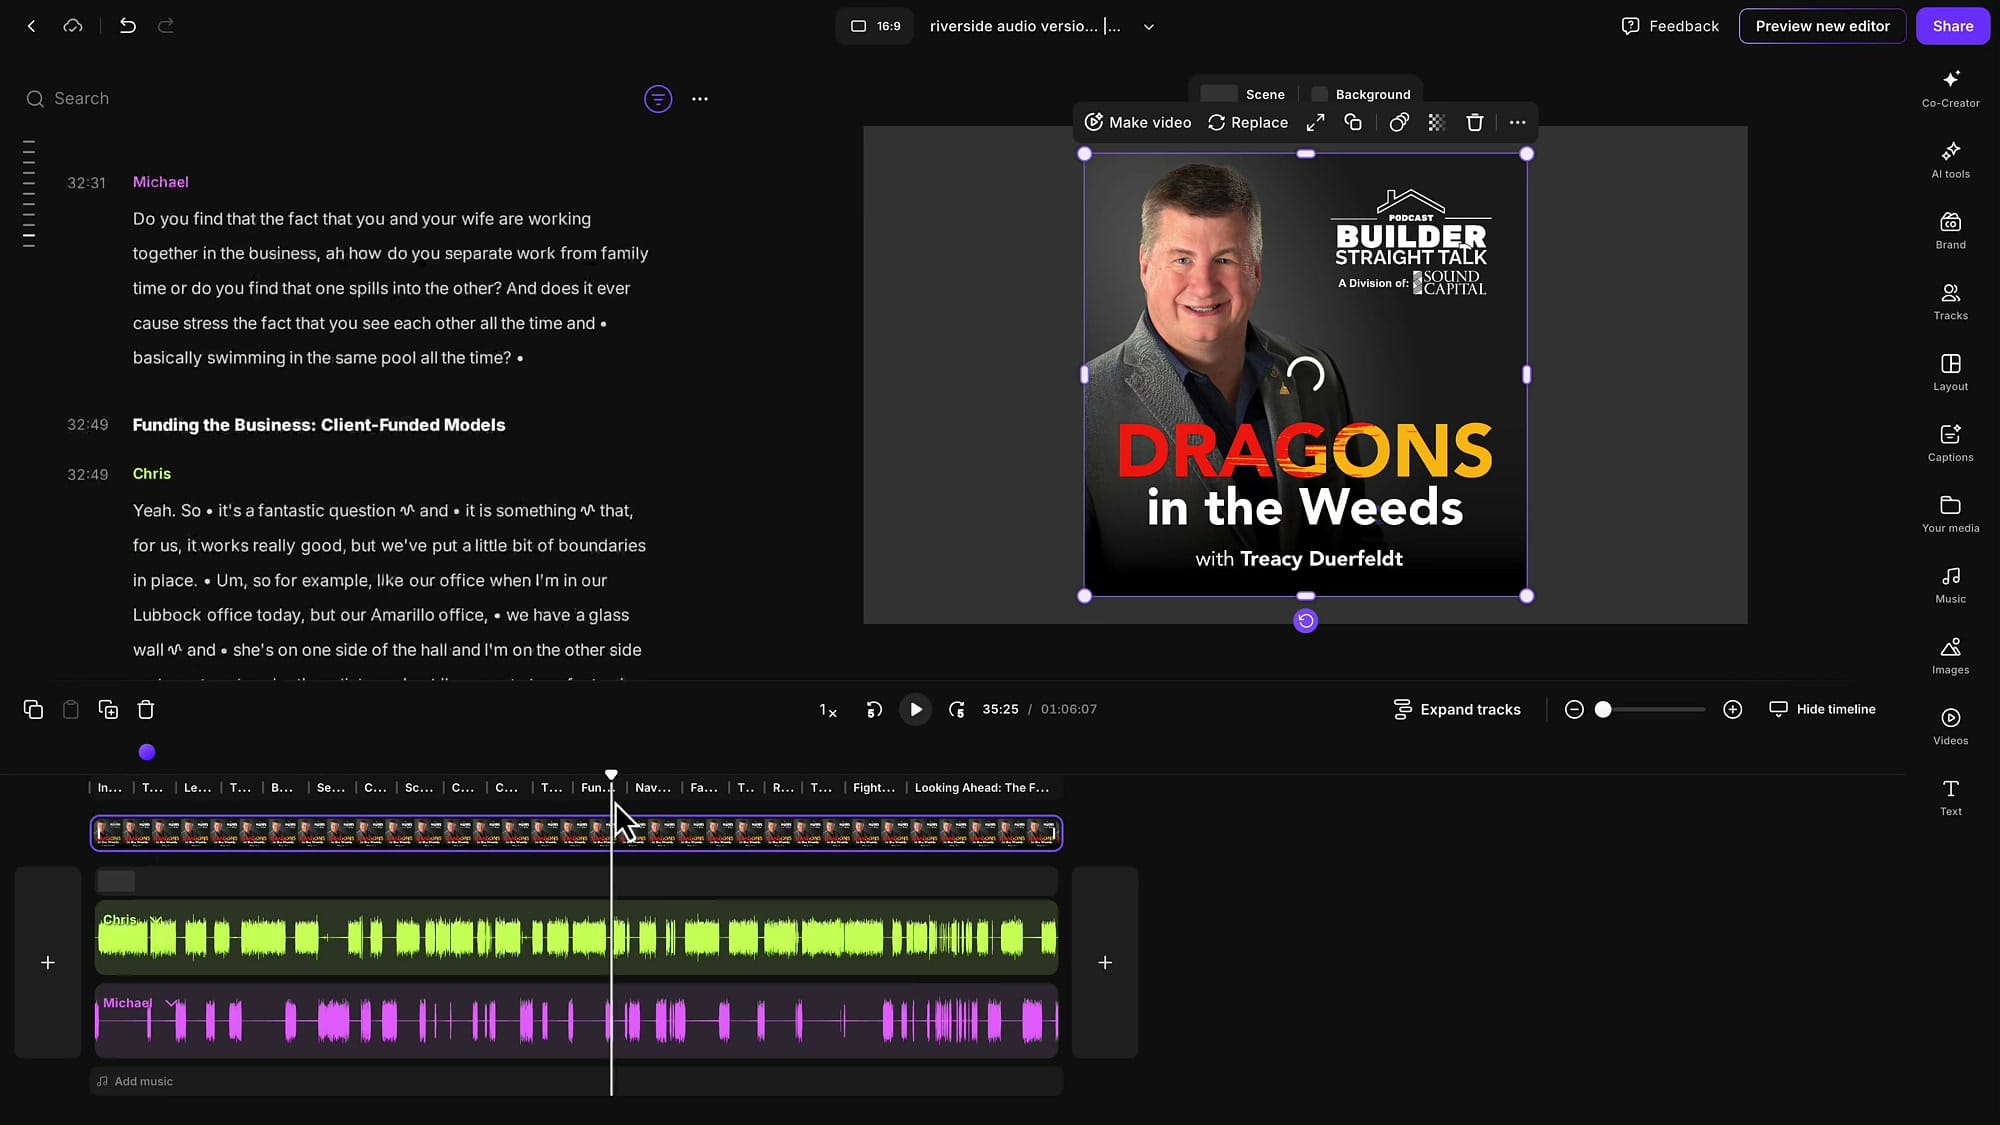
Extend the Image to the Full Episode Duration
By default, Riverside adds the image for only about five seconds. For a static cover that should stay on screen the entire episode, you need to extend it manually.
Zoom into the timeline using Ctrl + mouse wheel (Windows) or Cmd + mouse wheel (Mac). You will see the image as a thin slice at the beginning of the timeline. Select the image, then drag the right edge to extend it. Keep zooming out and dragging until the image snaps to the end of the timeline.
Export as Video
When everything looks right, click Share in the top right corner and go to Export. Set the file type to Video, choose your quality (1080p HD is fine for a static image), and optionally enable Normalize audio levels or Remove background noise. Click Export Video to render and download your file.

Tips
Related Riverside Guides
If you're eager to learn more about Riverside and wish to have a one-on-one Riverside coaching session, feel free to book a call with me. I'm here to help you with any questions you have and to guide you through the best workflows, tips, workarounds, or just answer any questions you may have!
- My recommendation is to record with video if possible, but if you have audio-only episodes, this workflow gets them onto YouTube quickly.
- You can also add captions, brand elements, and text overlays before exporting to make the video more engaging.
- If you have multiple speakers on a single audio file, Riverside can automatically separate them — just specify the number of speakers during upload.