Working with Layers in Photoshop: A Beginner's Guide

When Photoshop introduced layers, it revolutionized photo editing. Layers let you stack elements on top of each other while keeping them separate — you can move, edit, or remove any layer without affecting the rest of your design.
In this beginner's guide, I'll walk you through the fundamentals of working with layers in Photoshop: creating them, managing them, and using essential operations like duplicating, merging, grouping, and adjusting opacity.
Opening the Layers panel
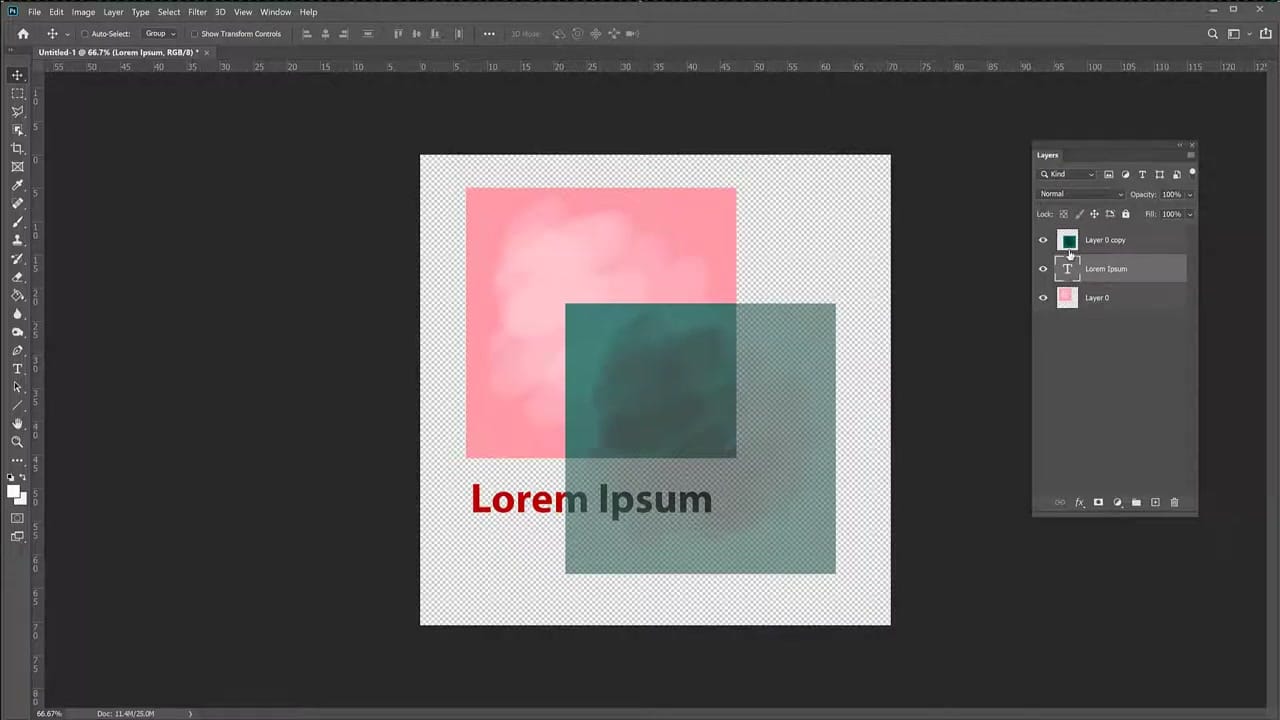
The Layers panel is your control center. If you don't see it, go to Window → Layers or press F7. The panel shows all layers in your document as a vertical stack — the top layer in the panel appears on top in your canvas.
Background vs. regular layers
Every new Photoshop document starts with a Background layer. This is a special locked layer — you can't move it or change its stacking order. To convert it into a regular layer, right-click it in the Layers panel and choose Layer from Background. Give it a name (or accept the default "Layer 0") and click OK.
Once converted, the background behaves like any other layer. You can move it, transform it, and reorder it. The checkered pattern that appears behind it indicates transparency — areas with no image data.
Adding layers
Any new element you create — text, shapes, pasted images — automatically goes onto its own layer. For example, selecting the Type tool and clicking on the canvas creates a new text layer. The Layers panel shows it as a separate entry from the background.
This separation is the core power of layers: your text and your background are independent. Move the text without touching the background. Change the background color without affecting the text.
Essential layer operations
Duplicate a layer
Right-click the layer and select Duplicate Layer. Photoshop creates an identical copy. This is useful when you want to experiment with changes while preserving the original.
Transform a layer
Press Ctrl+T (Cmd+T on Mac) to enter Free Transform mode. You can scale, rotate, or skew the selected layer. Press Enter to confirm the transformation.
Change opacity
Click the Opacity slider at the top of the Layers panel and drag it down. Reducing opacity makes the layer semi-transparent, allowing layers below to show through.
Merge layers
Select multiple layers (hold Shift to select a range, or Ctrl/Cmd to pick individually), then press Ctrl+E (Cmd+E). The selected layers combine into a single layer. Warning: merging is destructive — you can't separate the layers again without undoing.
Group layers
Select multiple layers and press Ctrl+G (Cmd+G) to put them in a group. Groups act like folders — they organize layers without merging them. You can expand a group to see individual layers, move or transform the group as a unit, and rename it by double-clicking the group name.
Alternatively, drag selected layers onto the folder icon at the bottom of the Layers panel to create a group.
Merging vs. grouping
This is an important distinction:
- Merging (Ctrl+E) — Combines pixel data permanently. The layers become one. You lose the ability to edit them separately.
- Grouping (Ctrl+G) — Organizes layers in a folder. Each layer stays independent and editable. You can collapse/expand the group and move it as a unit.
Use grouping when you want to keep things organized but still flexible. Use merging only when you're certain you no longer need separate access to the individual layers.
Layer visibility
Click the eye icon next to any layer in the panel to toggle its visibility. This is useful for checking how your composition looks without certain elements, or for temporarily hiding layers while you work on others.
Related guides