How to Customize Logo and Brand in Riverside: Step-by-step Guide
Let me show you how I customize logo and brand in Riverside so your podcast or show consistently displays the right logo, colors, and placement across recordings and edits.

This walkthrough covers where to add a logo in Riverside, how to export a transparent PNG in Affinity and Canva, and how to apply and position your branding inside the studio and edit workspace.
Where to add your logo in Riverside
Start in your Riverside account and open the studio you want to brand. You can add a logo from two places: the Studio Settings (Design > Customize) or from an Edit (open a recorded file and go to the Brand panel). Both paths lead to the same branding options, so use whichever fits your workflow.
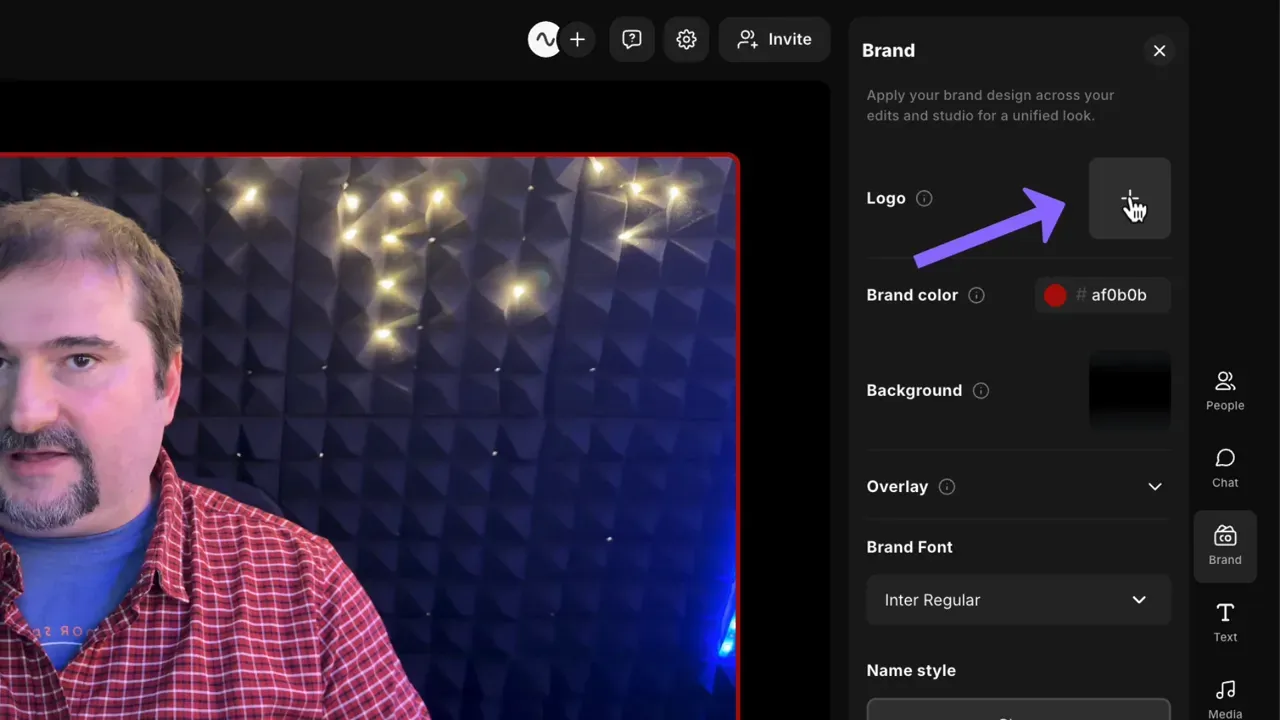
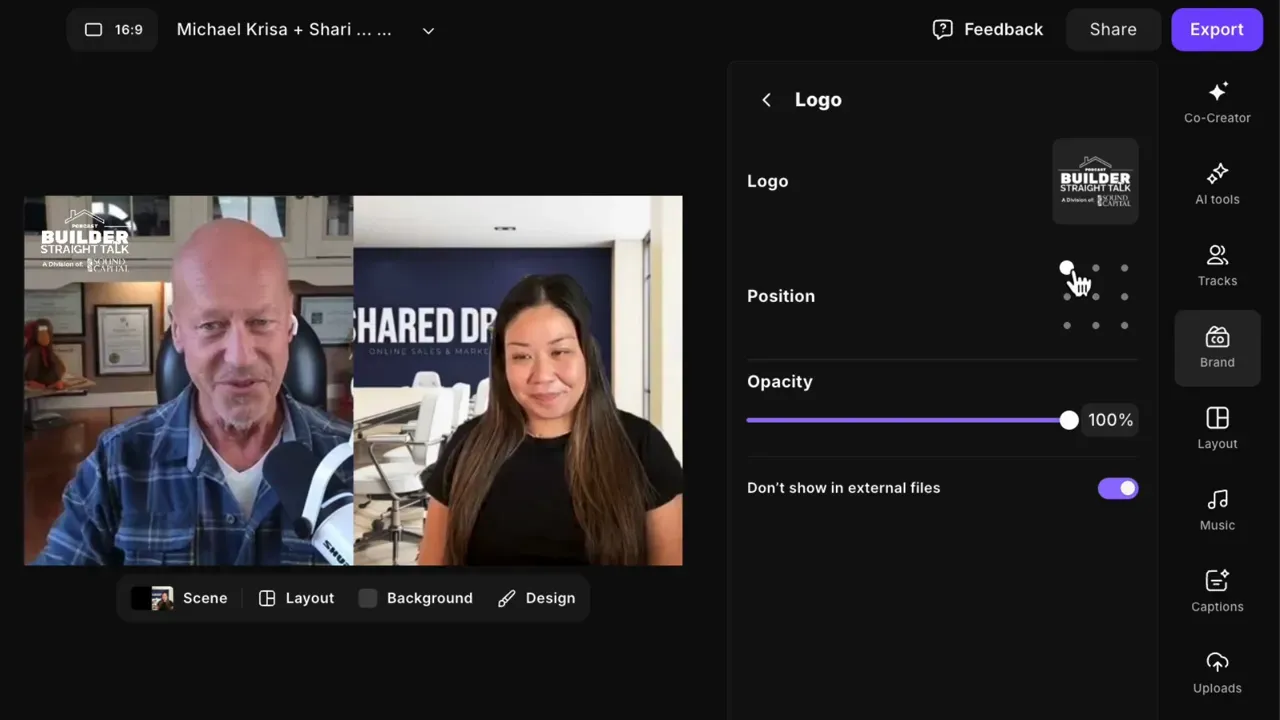
In the Riverside recording studio, you’ll find a Brand sidebar with options to add a logo, brand color, overlays, etc. Click the plus icon next to Logo to upload an image.
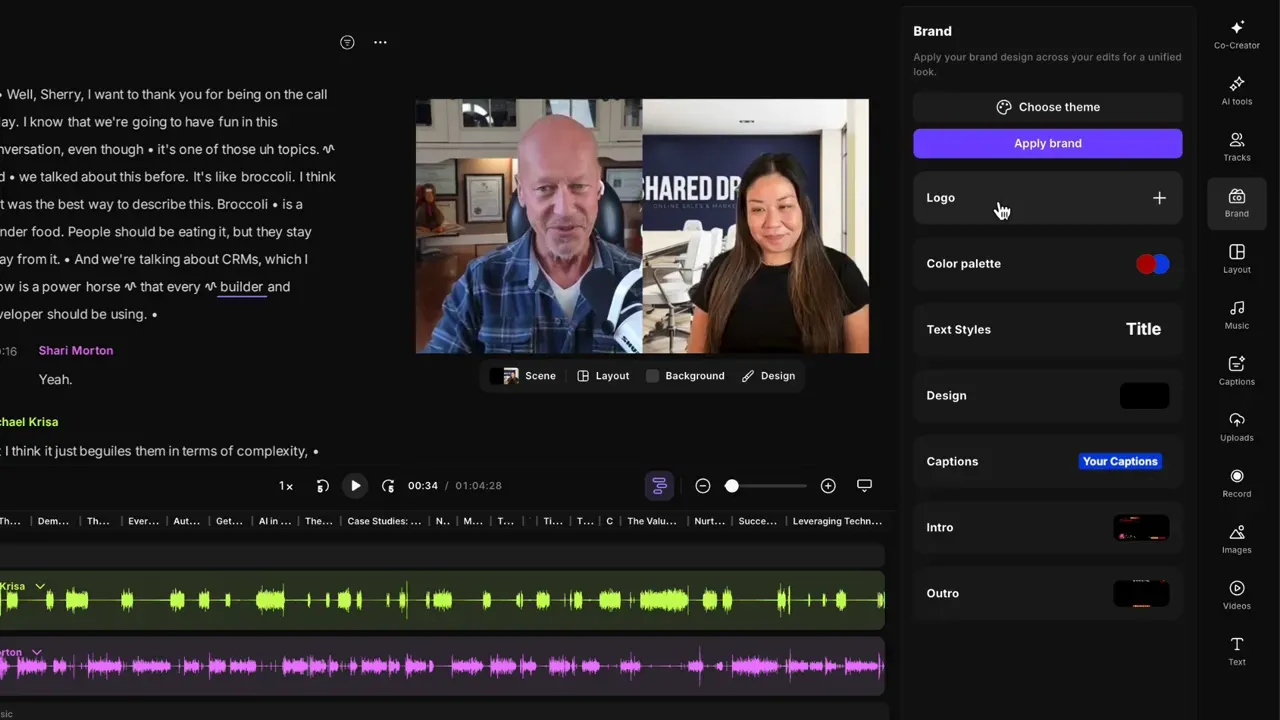
In the Riverside editor, there are even more options, in addition to adding the logo.
Why you should export a transparent PNG
For clean overlays on top of video, export your logo with a transparent background. Riverside accepts logos with a white or colored background, but a PNG with transparency looks more professional and adapts to different video shots - especially when guests sit against light or dark backgrounds.
Two practical tips:
- Keep a light and a dark version of your logo so it stays visible against varying footage.
- Export at a large size (for example 3000×3000 px) so Riverside can scale it without losing quality.
If you’re eager to learn more about Riverside and wish to have a one-on-one Riverside coaching session, feel free to book a call with me.
I’m here to help you with any questions you have and to guide you through the best workflows, tips, workarounds, or just answer any questions you may have!
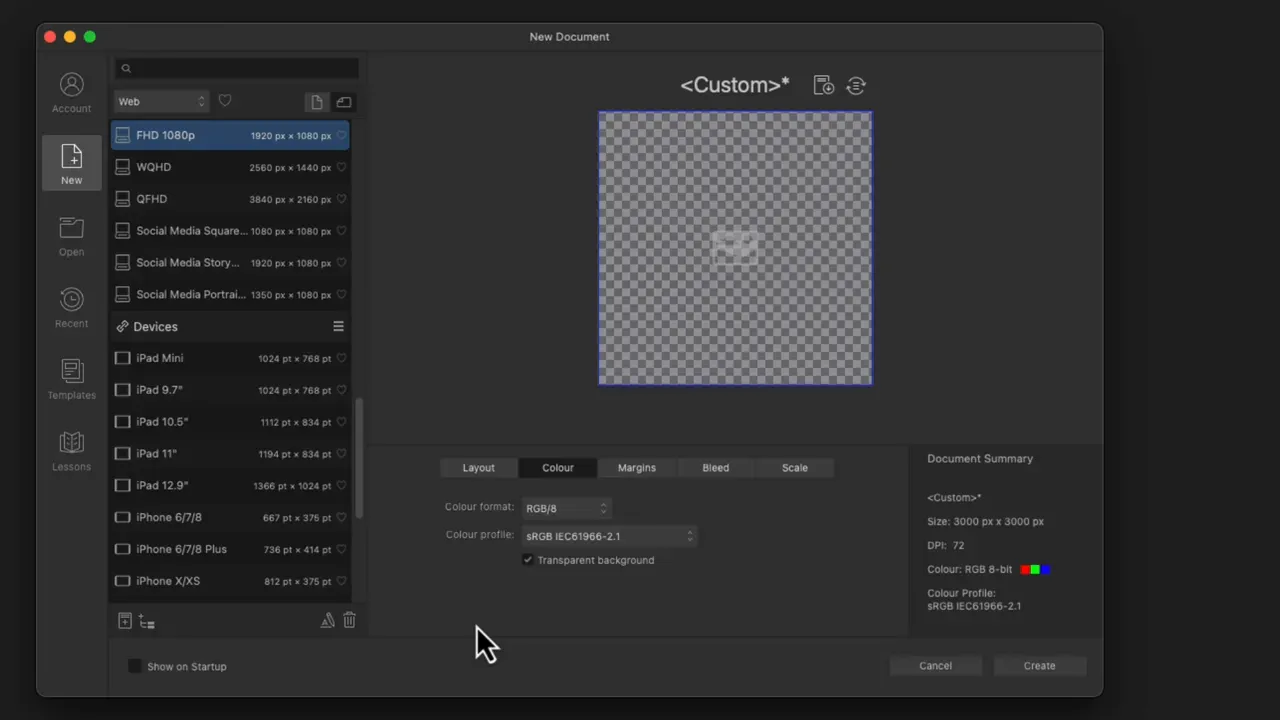
Exporting transparent PNGs - Affinity Designer
I use Affinity Designer to create and export transparent PNGs. Create a new document with a transparent background, place or design your logo, then export as PNG.
When exporting, choose PNG (not JPEG) and confirm the export region — export the selection or full document depending on whether you want a tight crop or a square canvas around the mark.
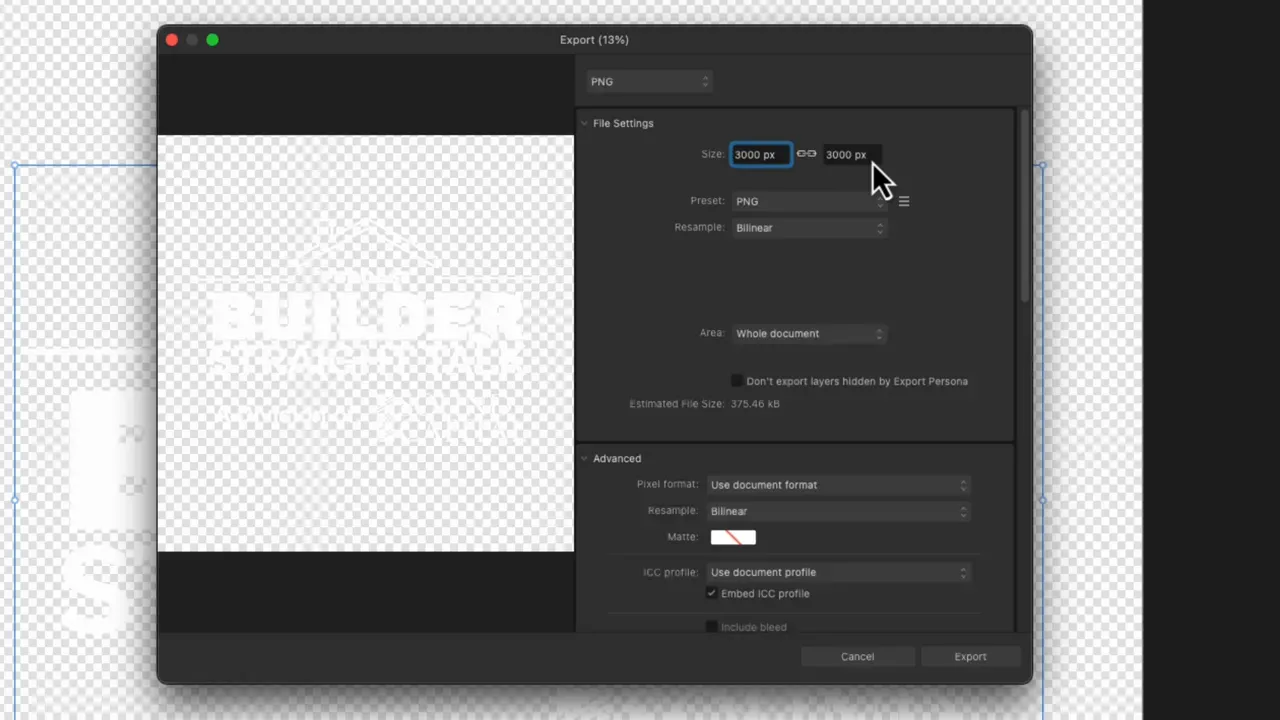
Export settings I use:
- Format: PNG
- Canvas size: 3000×3000 px (or large square)
- Background: Transparent (alpha channel)
Exporting transparent PNGs - Canva
If you prefer Canva, create a custom design (for example 3000×3000 px), upload or build your logo, then download as PNG and check “Transparent background.”
Note that transparent downloads require a Canva Pro account.
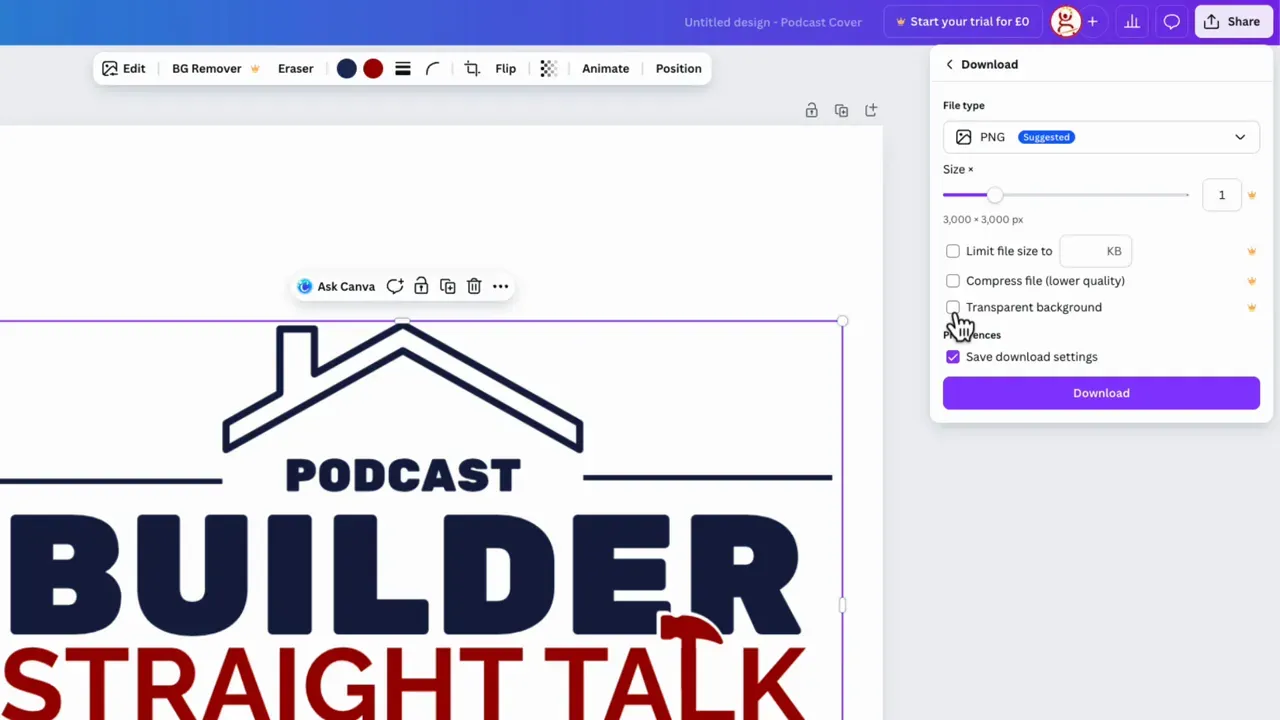
Make sure you select PNG and confirm the transparent background option before downloading.
Uploading and positioning your logo in Riverside
Back in Riverside, upload your PNG from the Brand > Logo panel. Once uploaded, the logo joins your brand assets and you can set a default placement (top left, top right, bottom right) in the studio.
If you need multiple versions, upload both light and dark PNGs to your account assets and swap them as needed for different episodes.
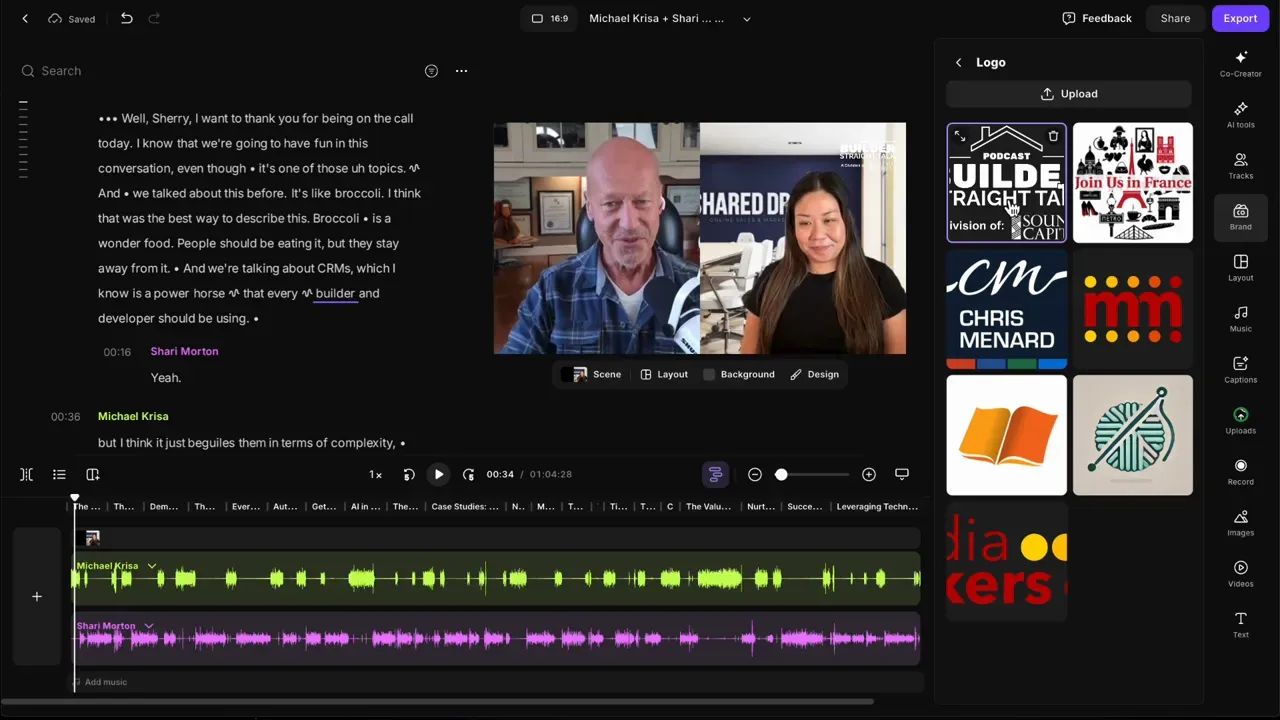
You can also change placement live in the studio - useful when streaming or recording - so the logo doesn’t overlap lower-thirds or guest name plates.
Apply brand kit to edits and new recordings
When you apply your brand kit to an edit or new recording, Riverside automatically adds the logo, applies your color palette to captions and graphics, and inserts any intros/outros you’ve defined. This keeps exports and short clips consistent without editing the same elements manually each time.
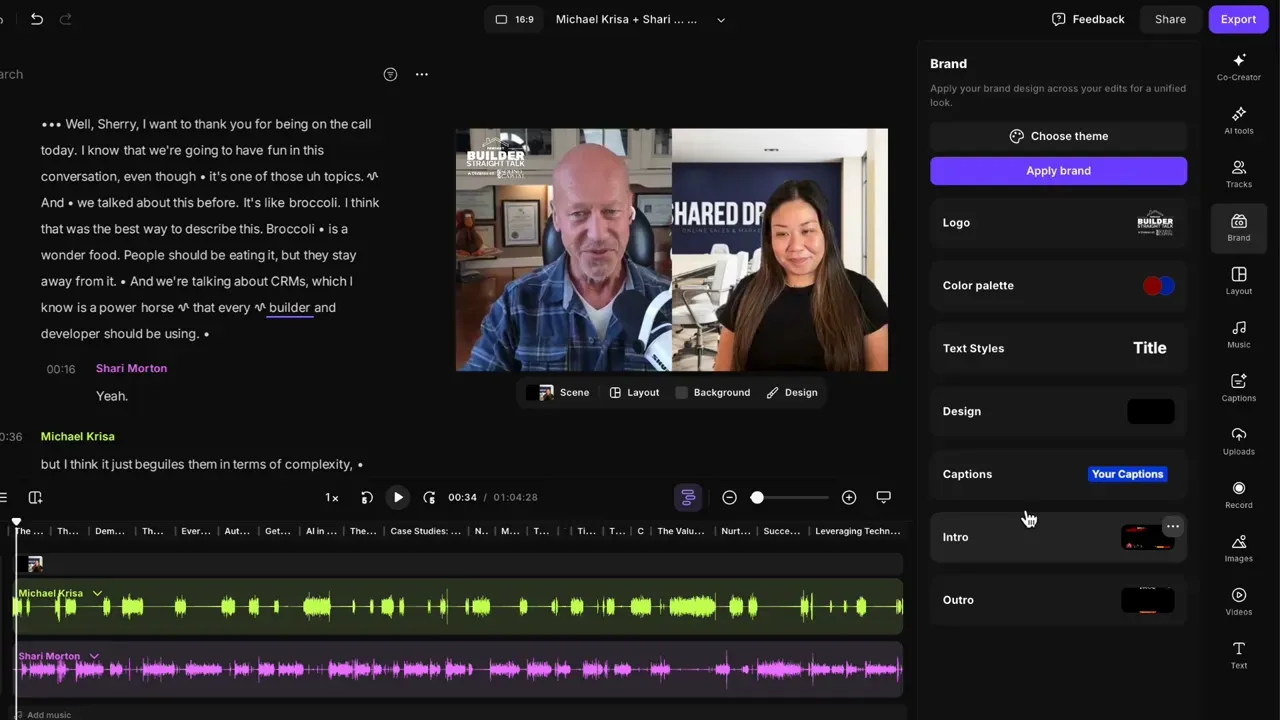
If you manage multiple podcasts or clients, on Business plan, you can keep separate studios or saved brand kits so you can quickly apply the correct logo and color set for each show.
I’ll cover creating overlays, intros, and outros in follow-up guides - but this gets your logo into Riverside correctly and cleanly.