Dynamic Zoom Edits in Riverside for Polished Podcasts

Have you ever watched a podcast where the camera zooms in on the speaker making a point, then pulls back to the wide shot, and thought they had a camera operator doing it live? They almost certainly did not. It is all done in post-production, and if you use Riverside, you can do it in a couple of minutes.
In this tutorial, I will walk you through two techniques that give your podcast or interview that polished, dynamic look: zooming in and out on a single speaker and switching between different camera layouts.
I use both in every episode I produce, typically making eighty to a hundred camera changes per show. It sounds like a lot, but once you learn the workflow, it goes fast.
Why Static Shots Lose Viewers
A single static shot running for forty-five minutes is hard to watch. Nothing moves, there is no visual cue telling the viewer who to pay attention to, and people click away.
Adding zoom changes and layout switches does two things: it breaks the visual monotony so your audience stays engaged, and it signals who the focus is at any given moment.
There is also a very practical benefit. You can use zoom changes to hide bad cuts. When you trim out a mistake or a long pause, the jump cut can look jarring – the speaker's head snaps from one position to another. A zoom or angle change at that exact point makes the cut invisible. Professional podcasters and YouTubers use this all the time, and most of the time they only have one camera.
The Two Techniques
Before we dig in, here is the overview of what we are working with:
- Zoom in and out on a single speaker using the Crop and Zoom tools. This gives you a simulated second camera angle from a single recording.
- Switch between different camera layouts -- going from a side-by-side wide shot to a single-speaker close-up and back. This works when you have two or more speakers.
You combine these two, and you get that polished, multi-camera look without ever needing a second camera.
How to Add Scenes and Change the Layout
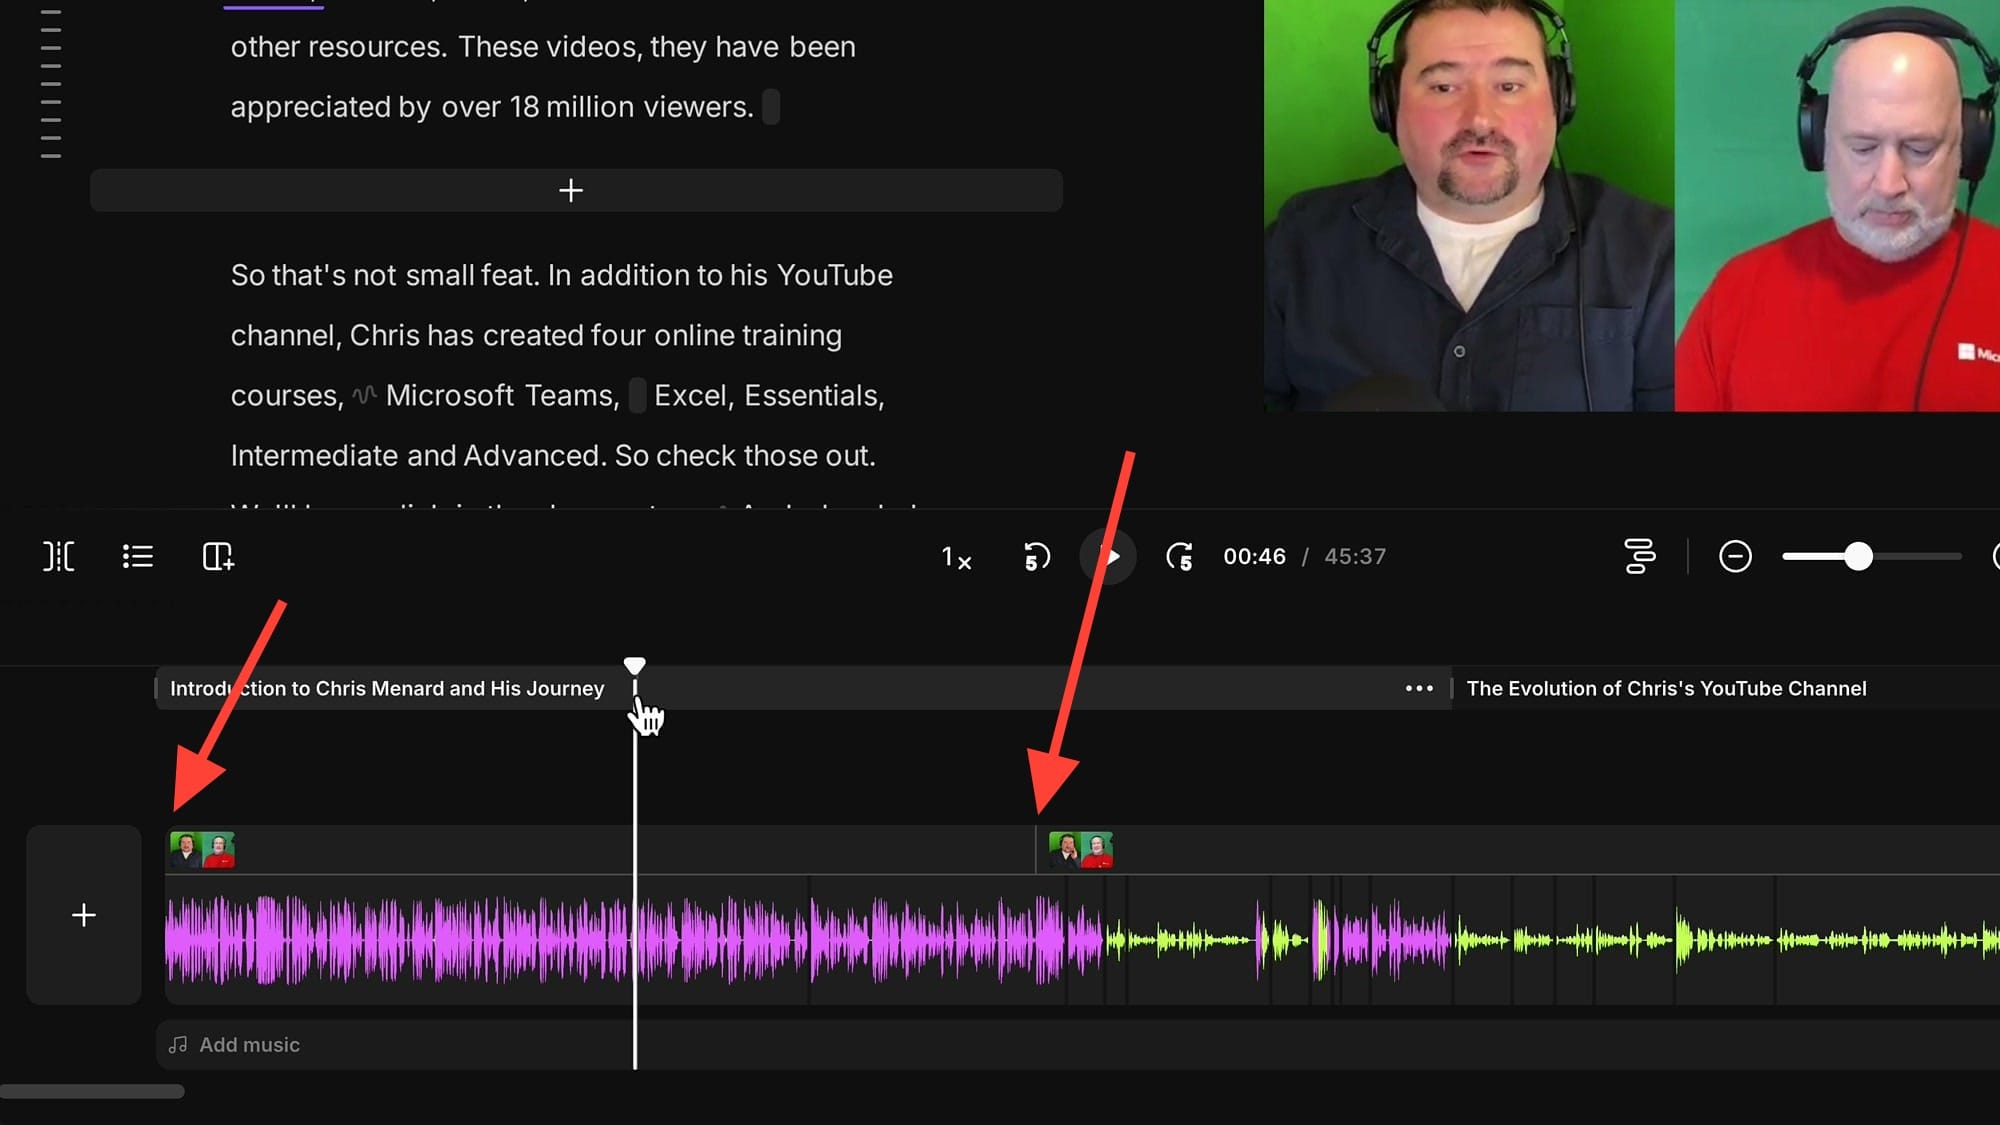
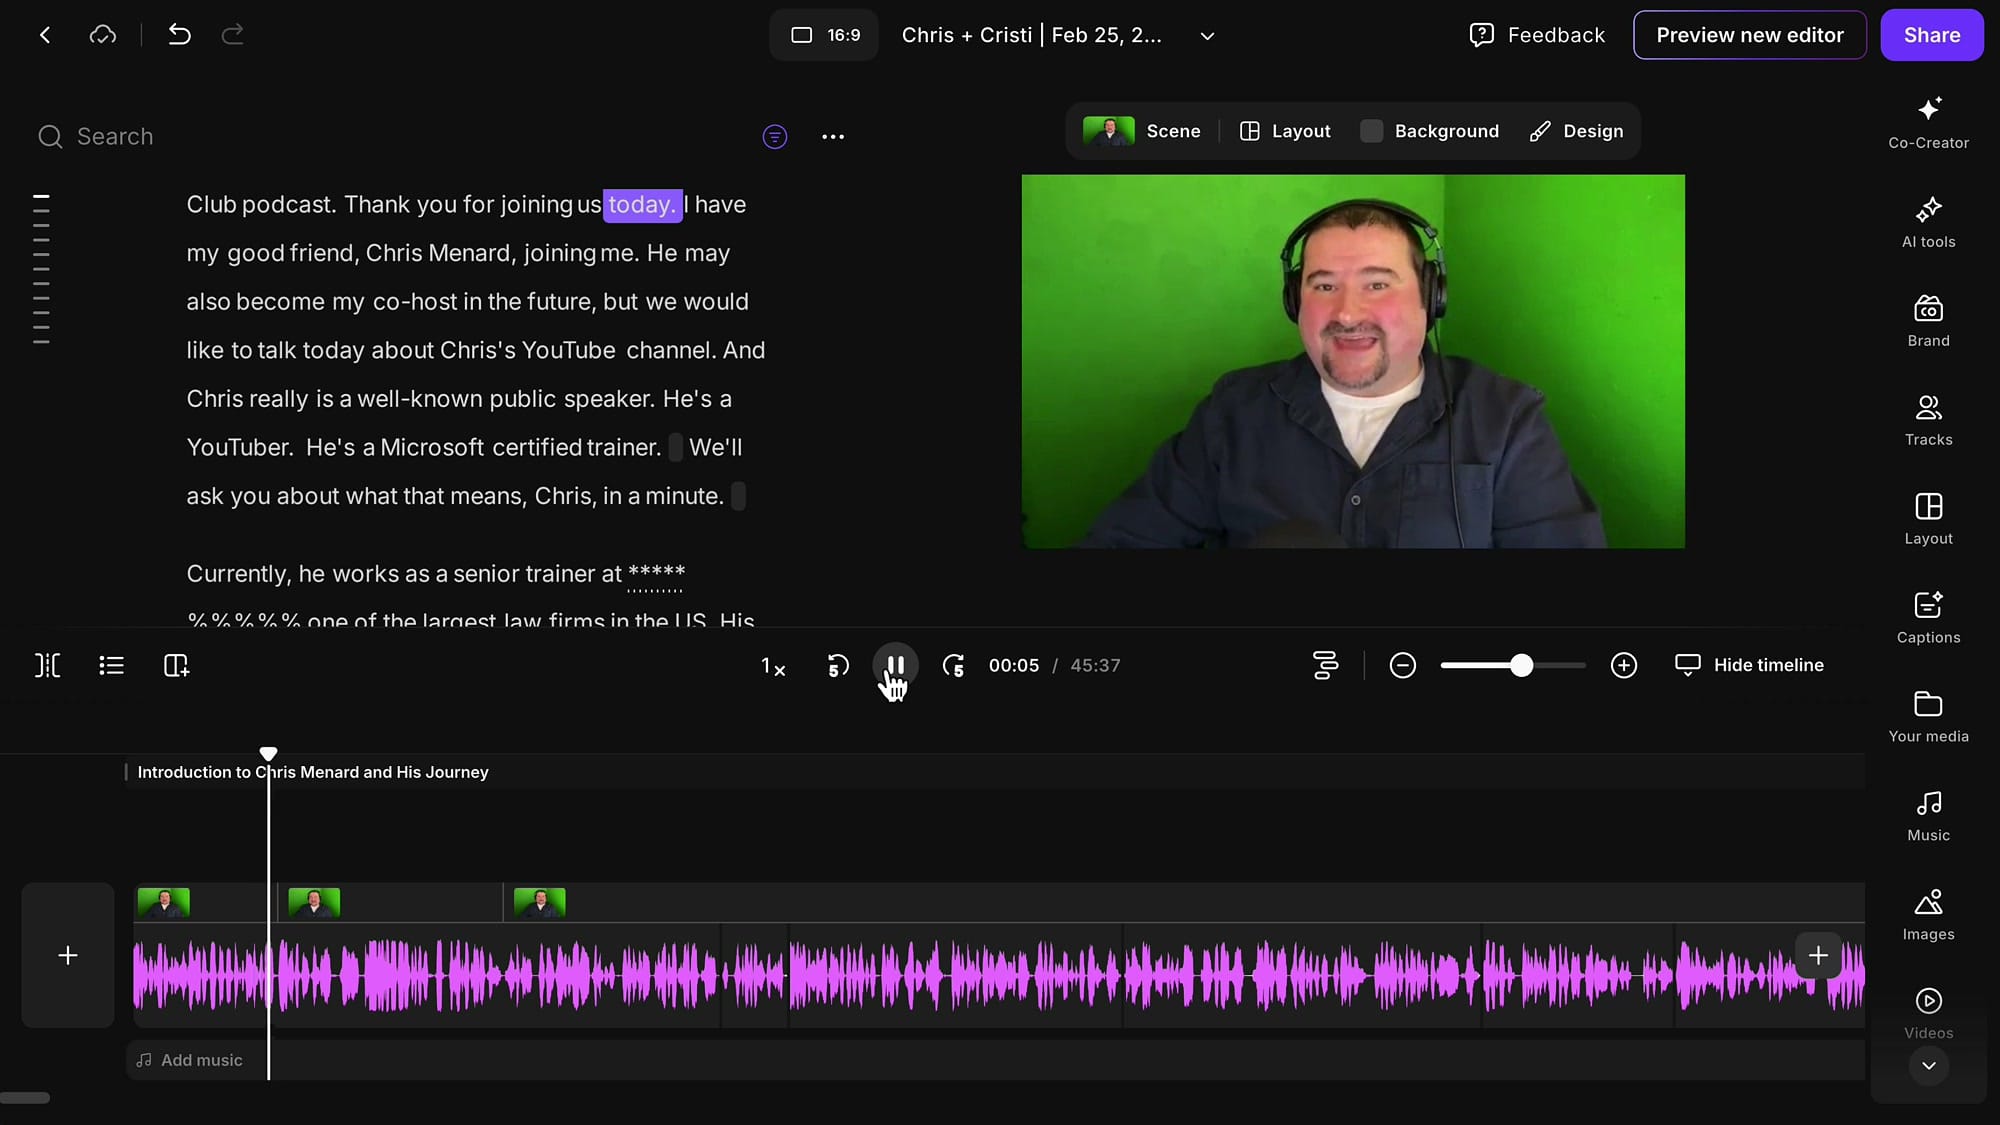
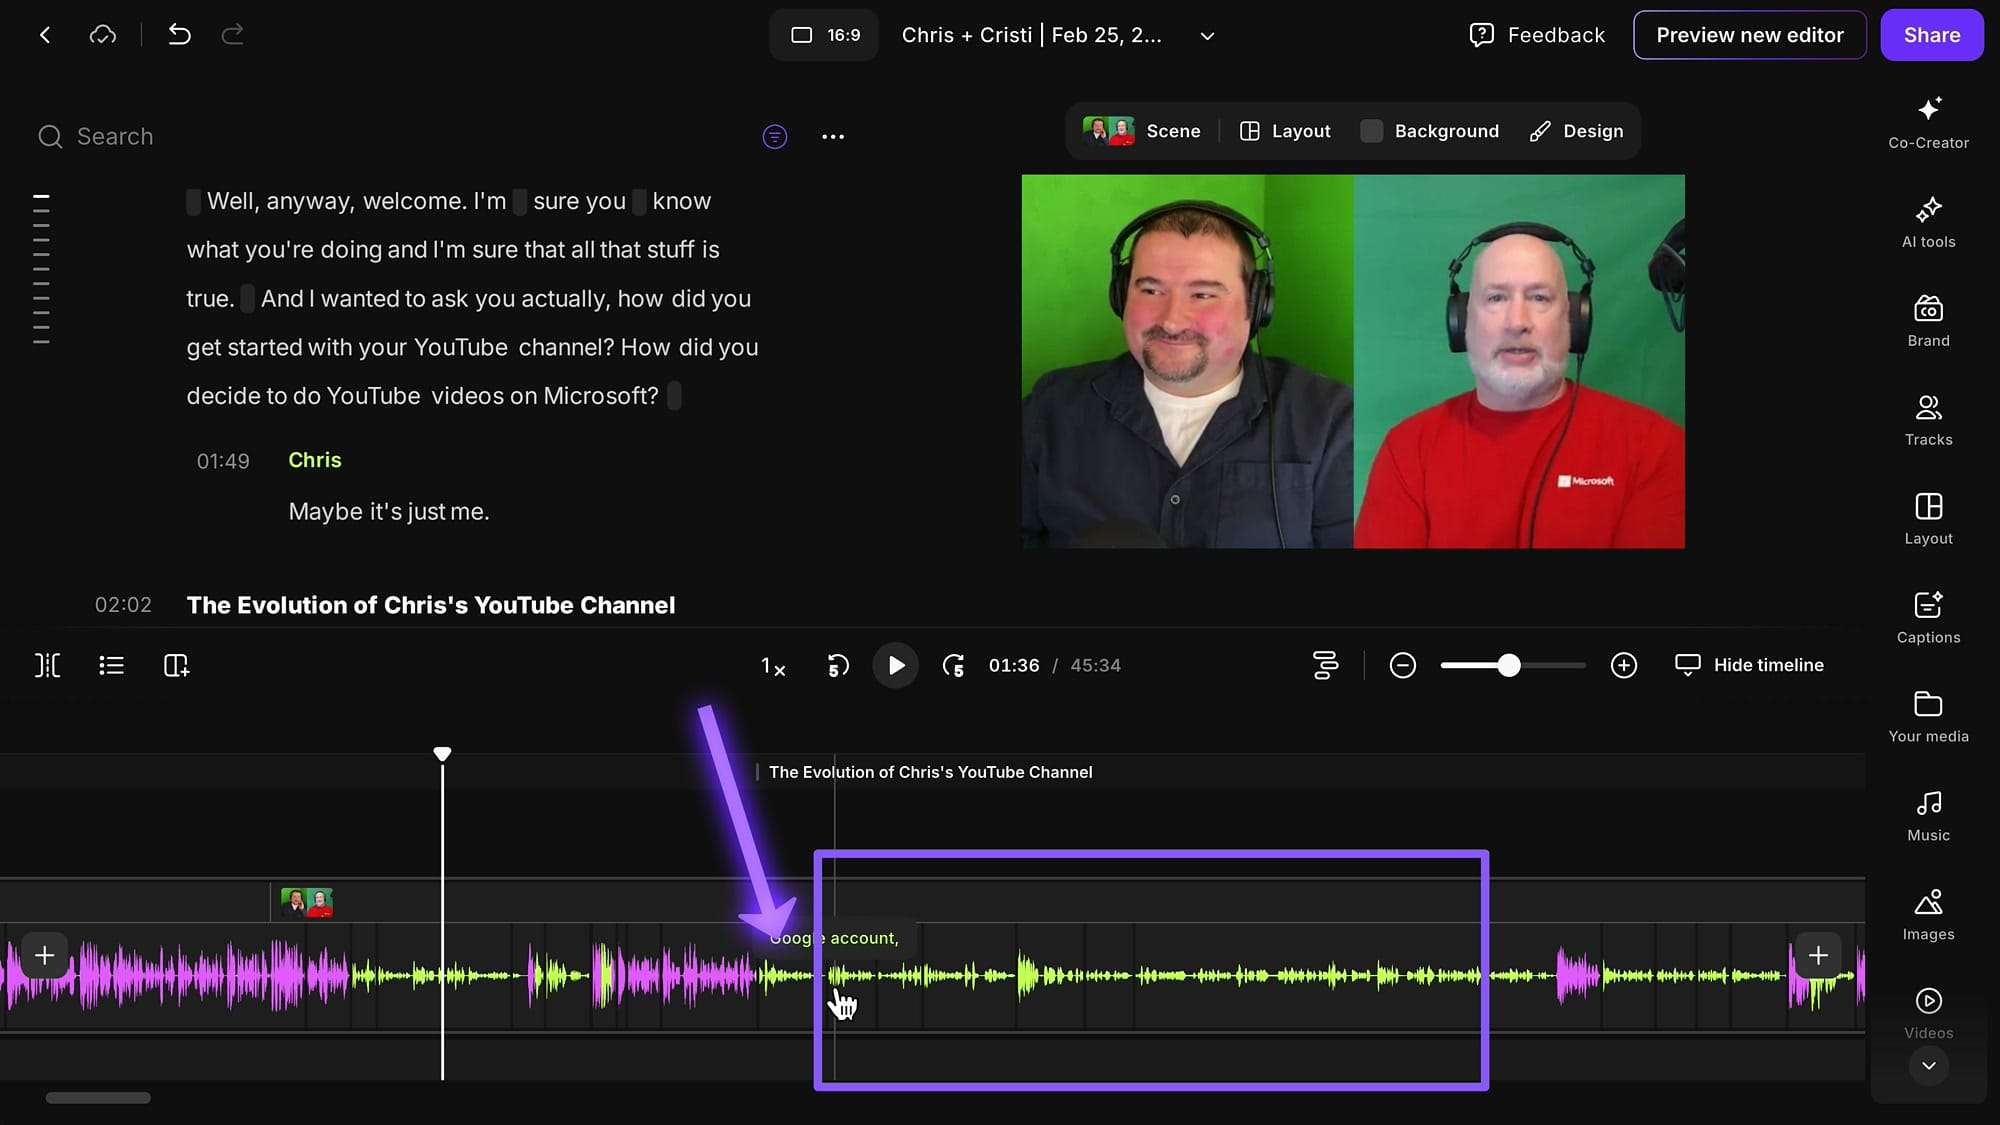
Everything in Riverside starts with scenes. A scene is a segment of your video where you can apply a different layout, zoom level, or crop. The timeline at the bottom shows your scenes, and you can add new scene breaks wherever you want.
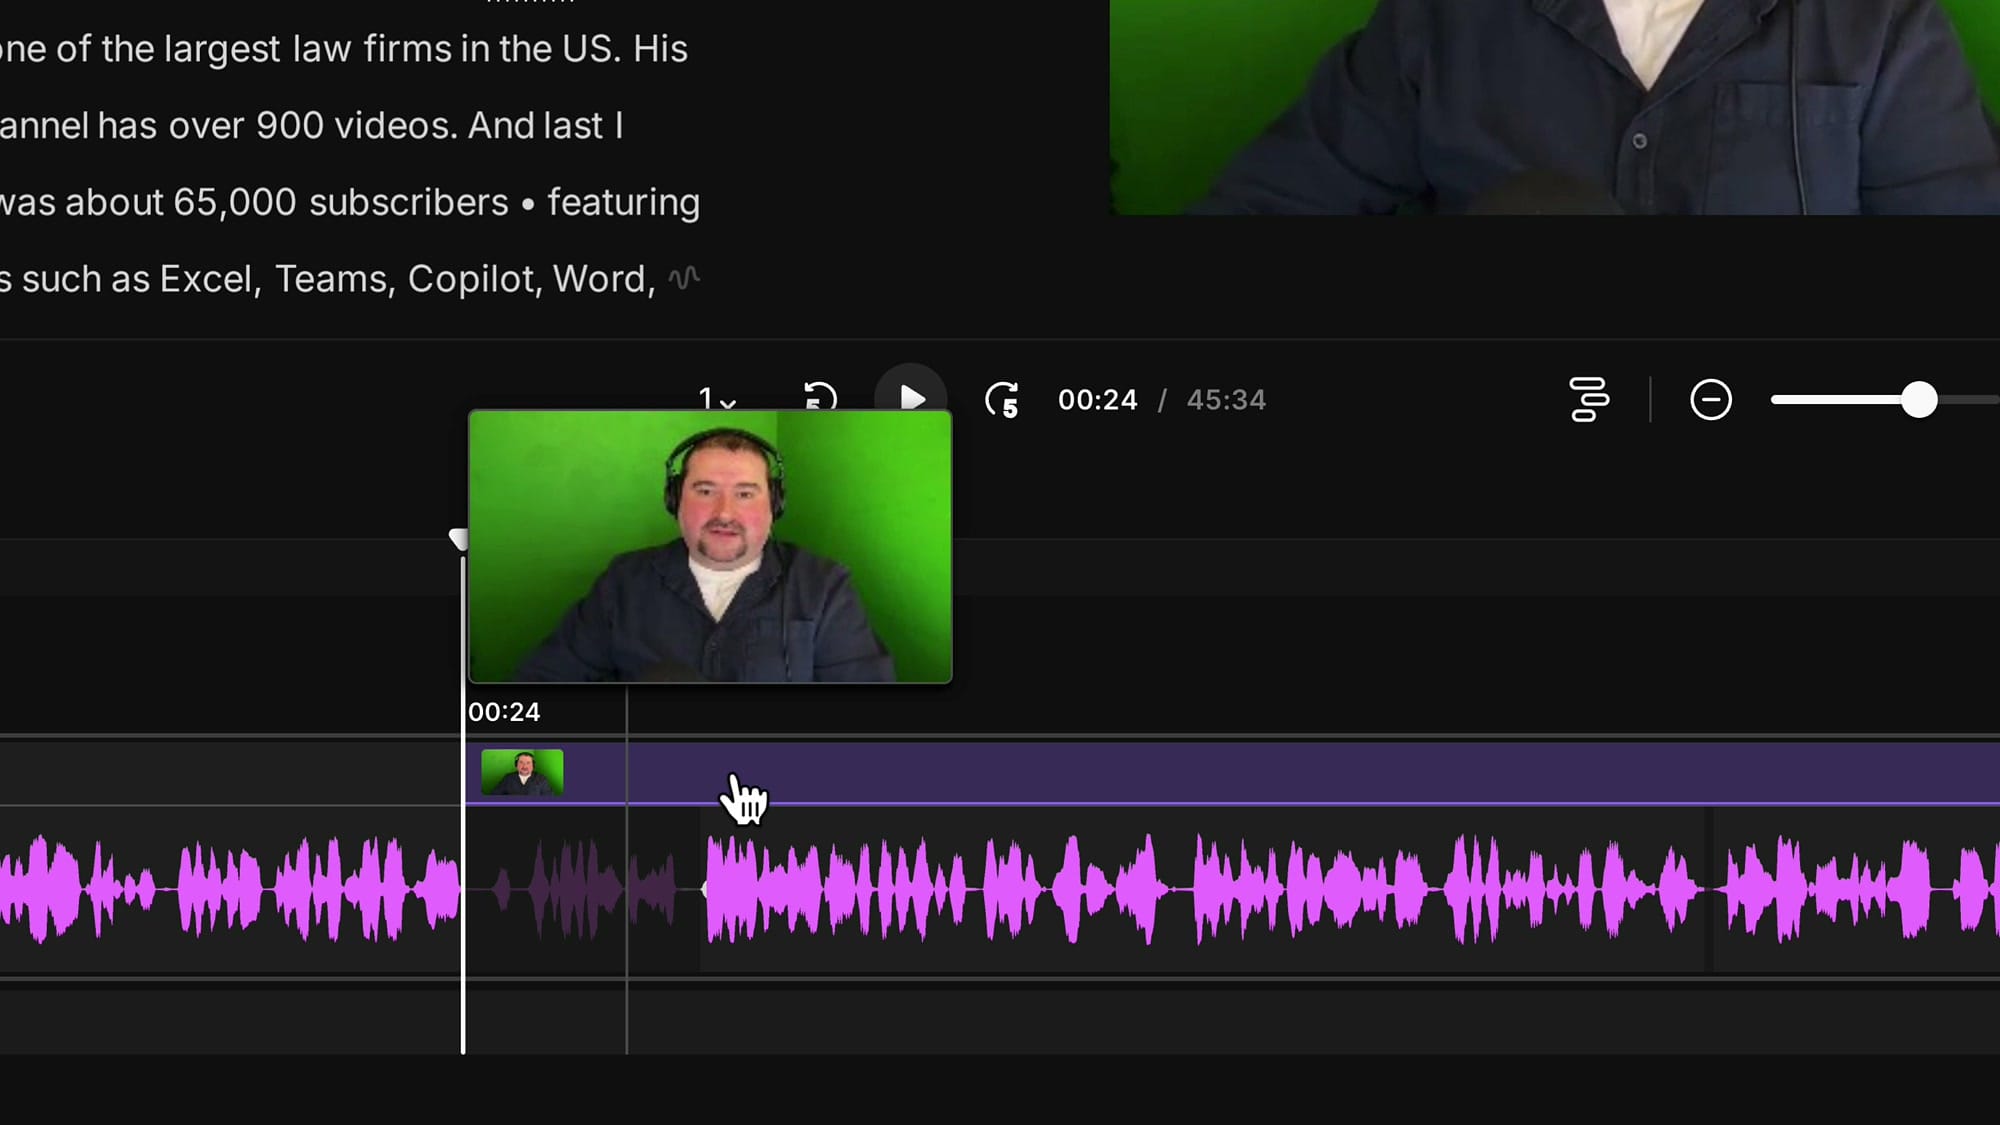
To create a scene break, bring your playhead to the position where you want a change and click the Add Scene button (or press Shift + S). You will see a vertical divider appear in the timeline, splitting your video into separate segments.
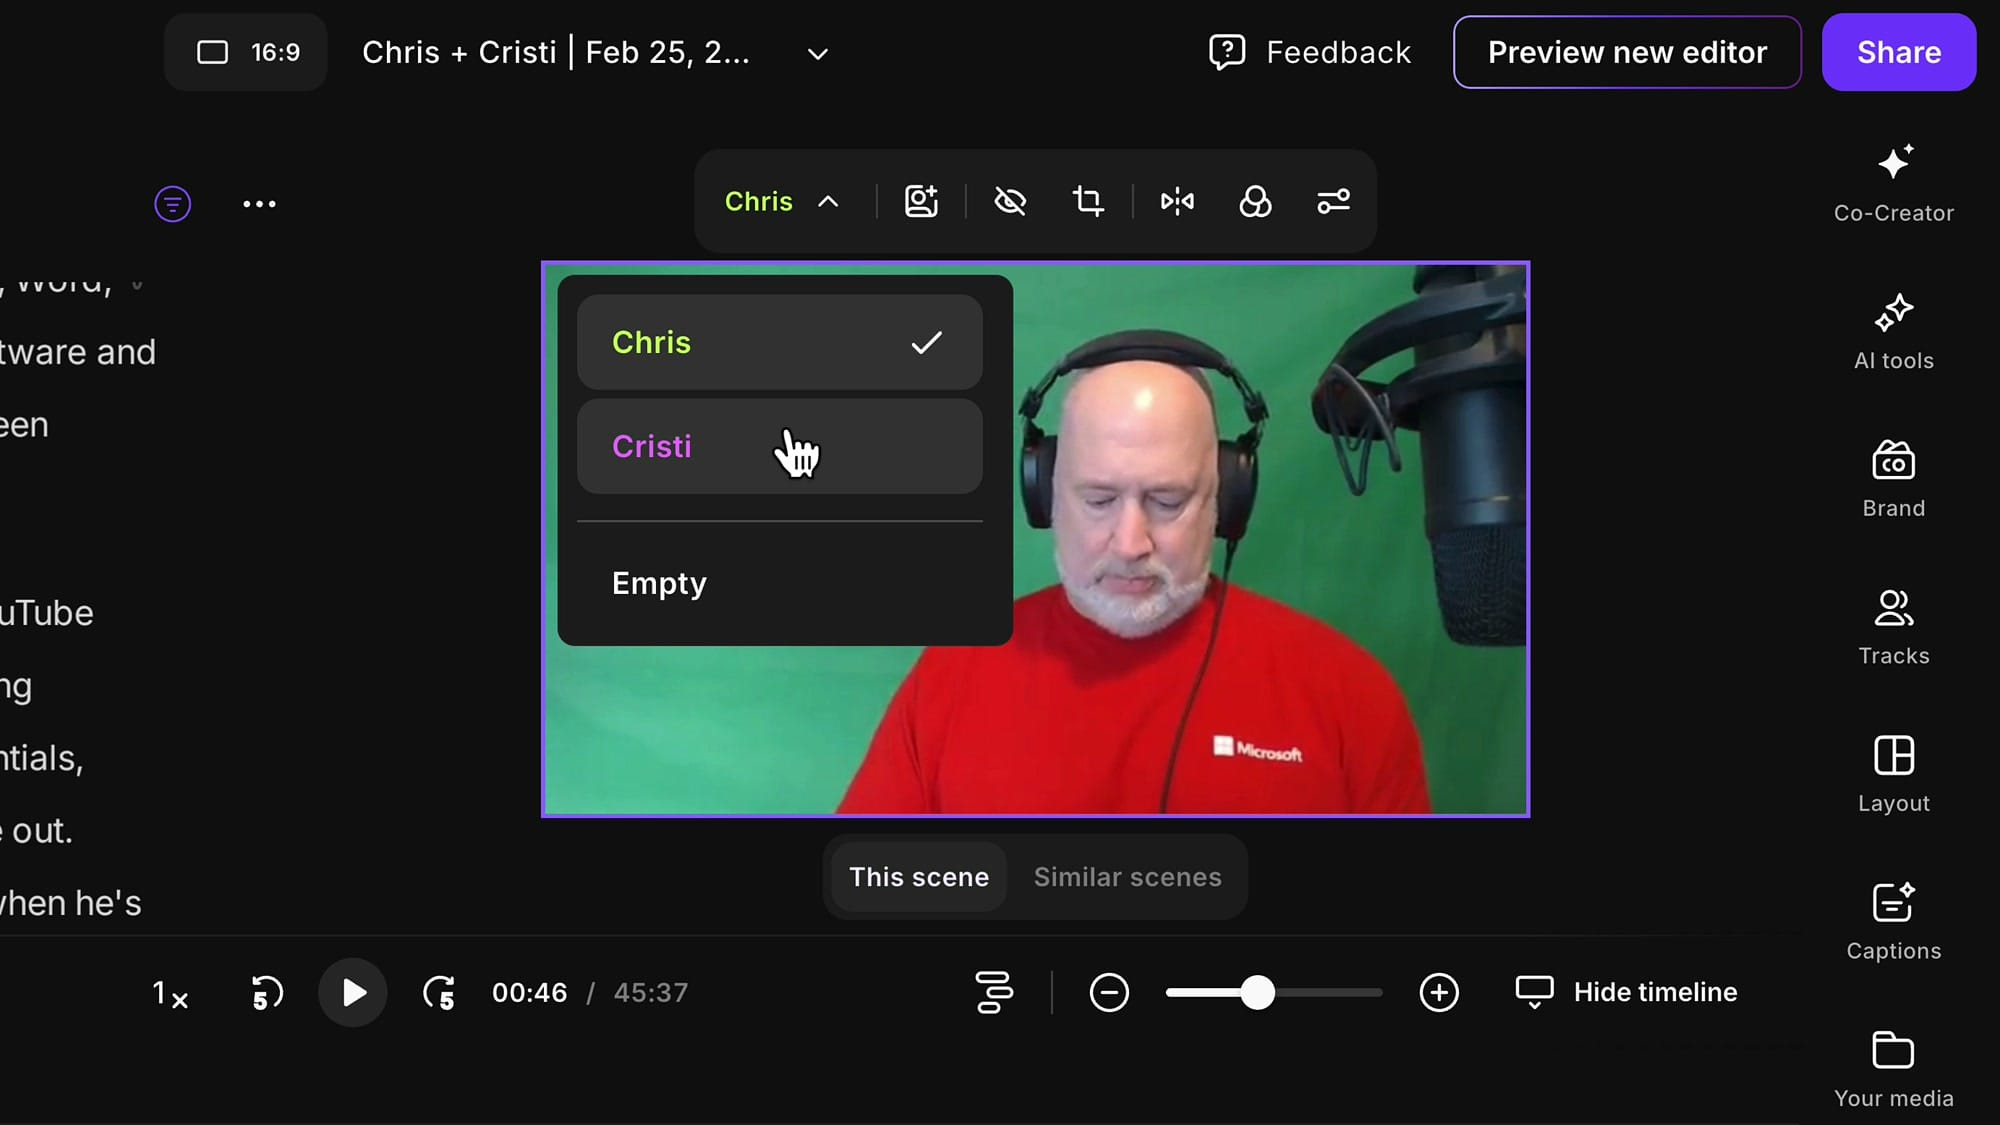
Once you have isolated a scene, you can change its layout independently. Click Layout at the top of the editor, and you will see pre-built layout options including Solo Speaker views and multi-speaker grids. Select the one you want for that scene.
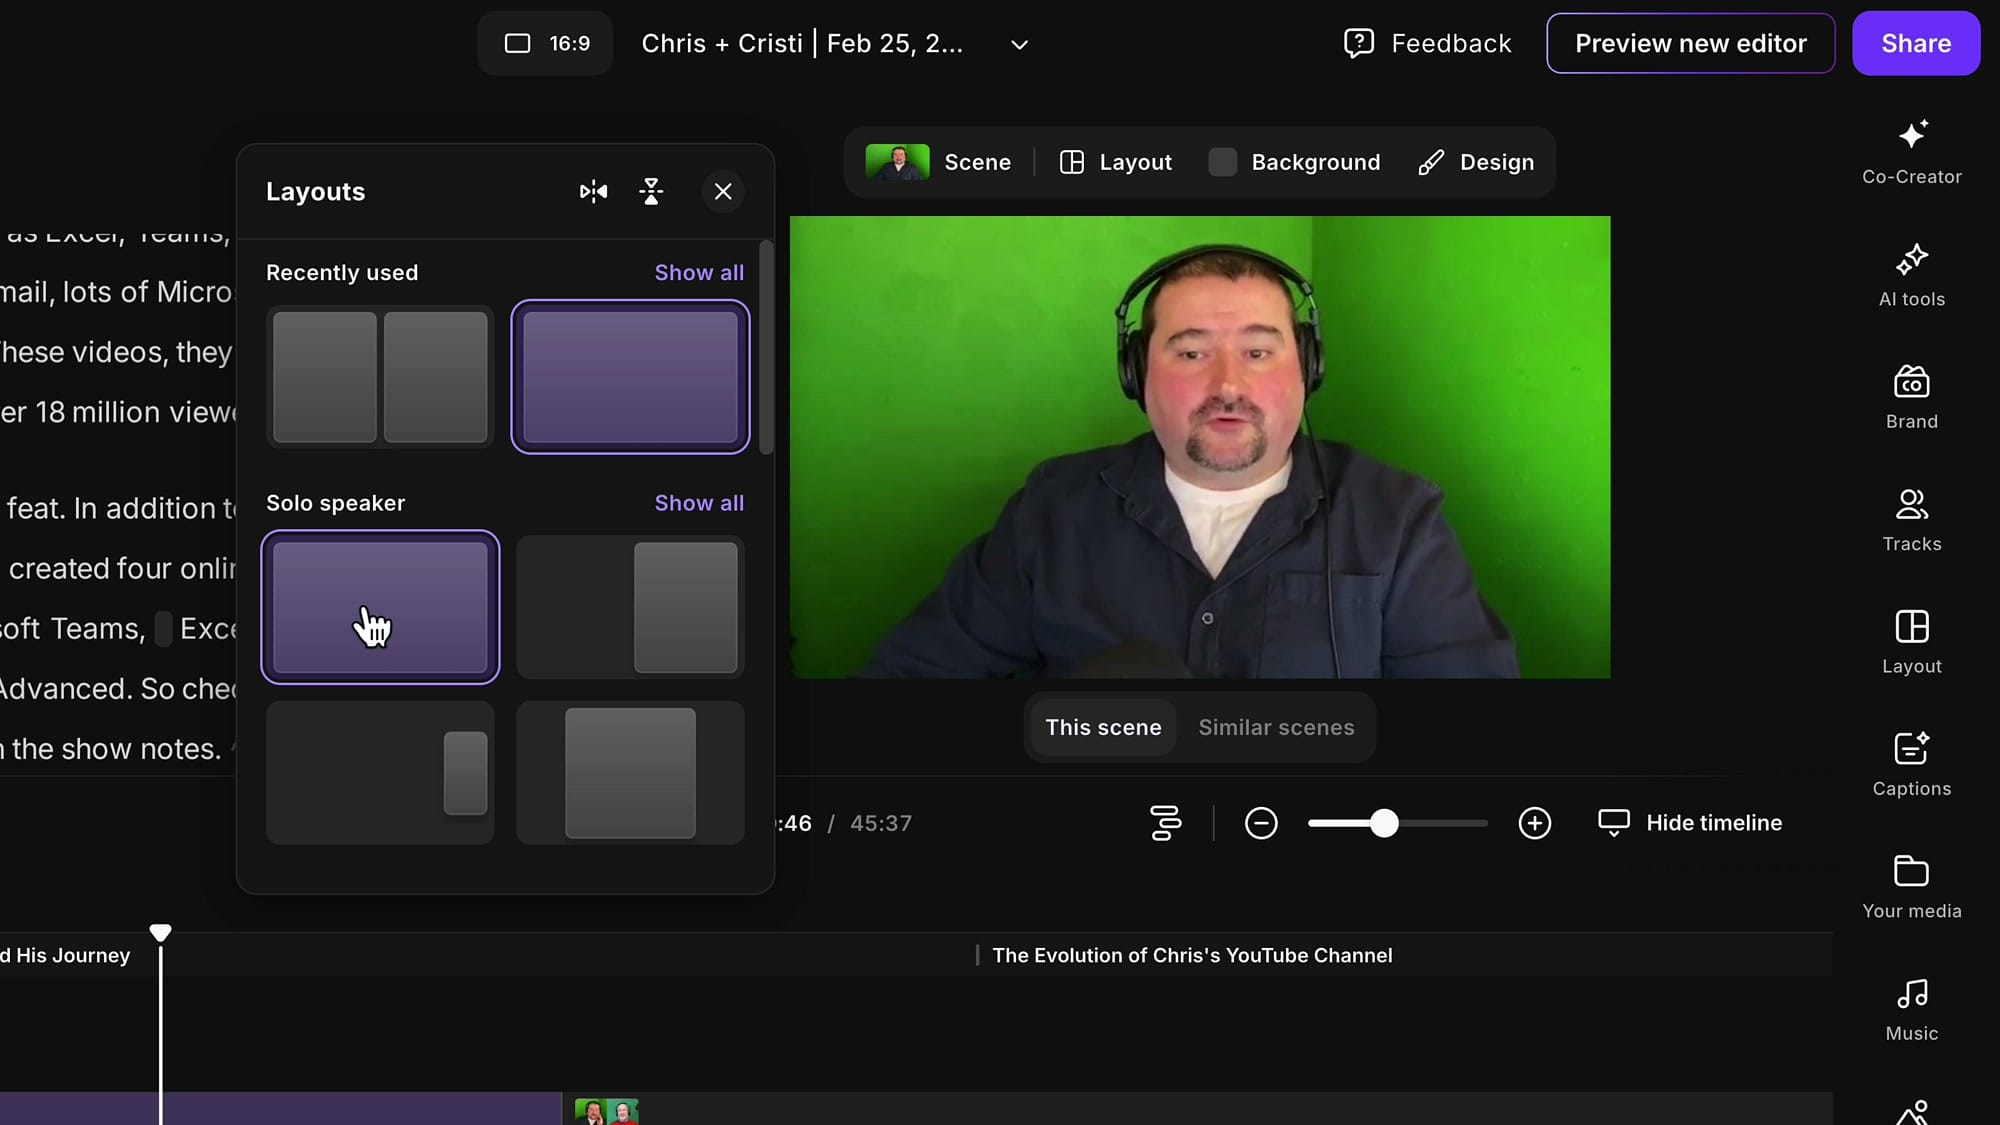
If the layout shows the wrong person, click on the video itself and use the dropdown at the top to switch which speaker is displayed. You can toggle between any participant in the recording.
How to Zoom In and Out
The zoom effect is where the real production value comes in. Here is the step-by-step process:
- Navigate to the point where you want the zoom to begin.
- Create a scene break at that point (Shift + S or the Add Scene button).
- Navigate to the point where you want the zoom to end.
- Create another scene break there. You have now isolated the segment you want zoomed in.
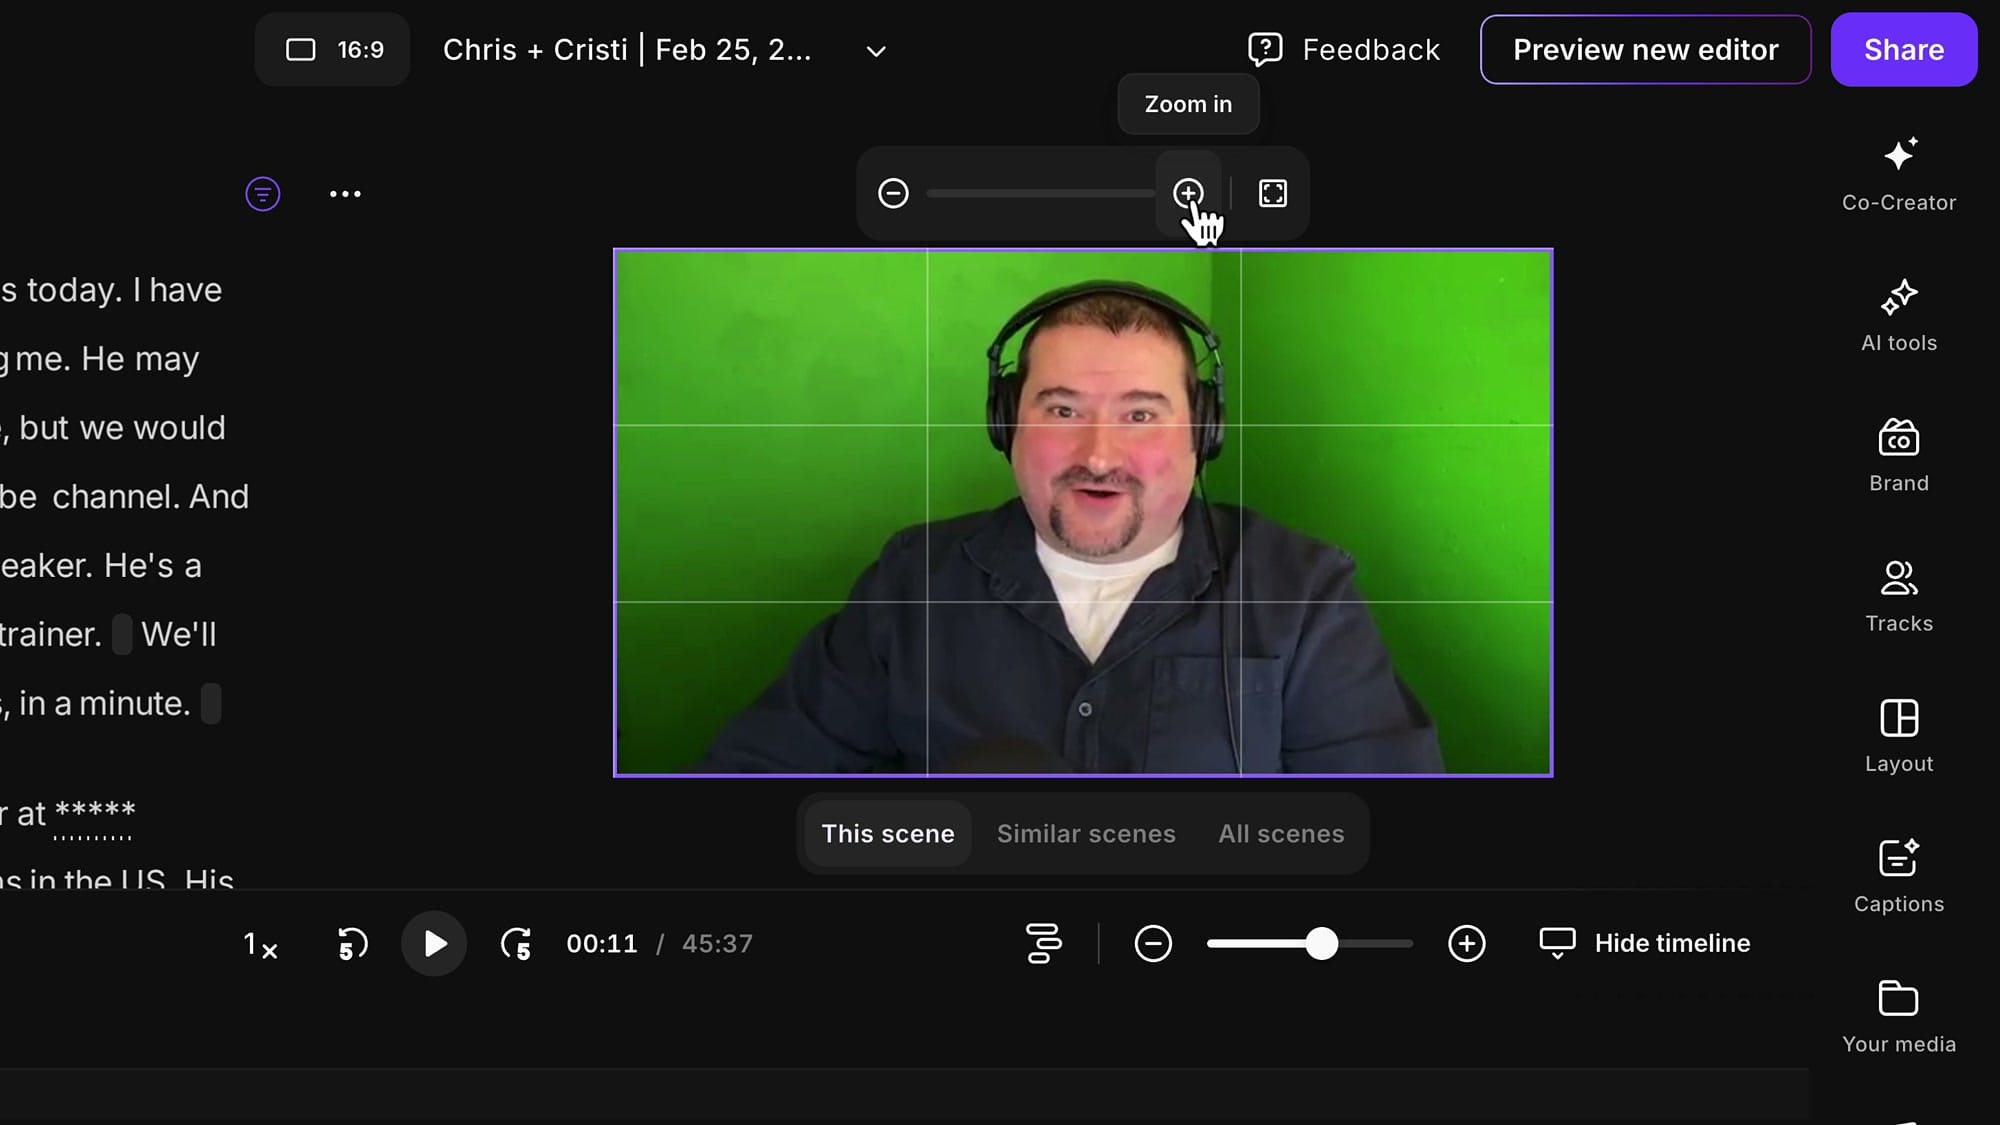
- Click on the video in that scene, then click Crop at the top.
- Use the plus and minus buttons to zoom in or out. One or two clicks is usually enough -- you want the movement to feel subtle, not dramatic.
- Drag the video to reframe it. You will see alignment grid lines to help you keep the speaker centered.
- Click outside the video area to apply the crop.
When you play back across the scene boundary, you will see the video smoothly jump between your normal framing and the zoomed-in framing. The scene after will return to the original zoom level.
Keep your zoom changes subtle -- fifteen to twenty percent in or out at most. You want the viewer to feel the movement rather than be distracted by it. If you are zooming in too much, it starts to look pixelated and unnatural.
Using Zoom to Hide Jump Cuts
This is where the technique becomes genuinely useful for editing, not just aesthetics. When you cut out a mistake, a stutter, or a long pause, you are left with a jump cut. The speaker's head position shifts, their expression changes mid-sentence, and it looks off.
The fix: place a zoom change right at the cut point. Go from your normal framing to a slightly tighter crop (or vice versa). The viewer reads it as an intentional camera move rather than a bad edit.
Here is my approach: I look at the transcript in Riverside and find the edit points where content was removed. At each cut, I insert a scene break and change the zoom level. I alternate between my normal framing and my punched-in framing throughout the video. Every cut becomes a zoom change, and every zoom change becomes invisible.
This is the same technique YouTubers use when they shoot with two cameras – except you are creating the second angle in post with the Crop tool, rather than recording from a separate camera.
If you’re eager to learn more about Riverside and wish to have a one-on-one Riverside coaching session, feel free to book a call with me.
I’m here to help you with any questions you have and to guide you through the best workflows, tips, workarounds, or just answer any questions you may have!
Switching Camera Layouts in Interviews
When you have two or more speakers, you get a third creative tool: switching between layouts entirely. Instead of just zooming in on one person, you can go from the side-by-side wide shot to a full-screen close-up of whoever is speaking.
This gives you three angles to work with:
- The wide shot -- both speakers side by side
- Your close-up -- just you, full frame
- The guest close-up -- just your guest, full frame
Three angles from a single recording, switched between throughout the episode. That is your multi-camera look.
When to Switch to a Close-Up
Timing matters. Here is the workflow I recommend:
Do not switch the moment someone starts talking. Let them begin speaking with both of you still on screen. After a sentence or two, switch to their close-up. Then, when they are about to finish, switch back to the wide shot before they are done -- let them finish their point with both speakers visible.
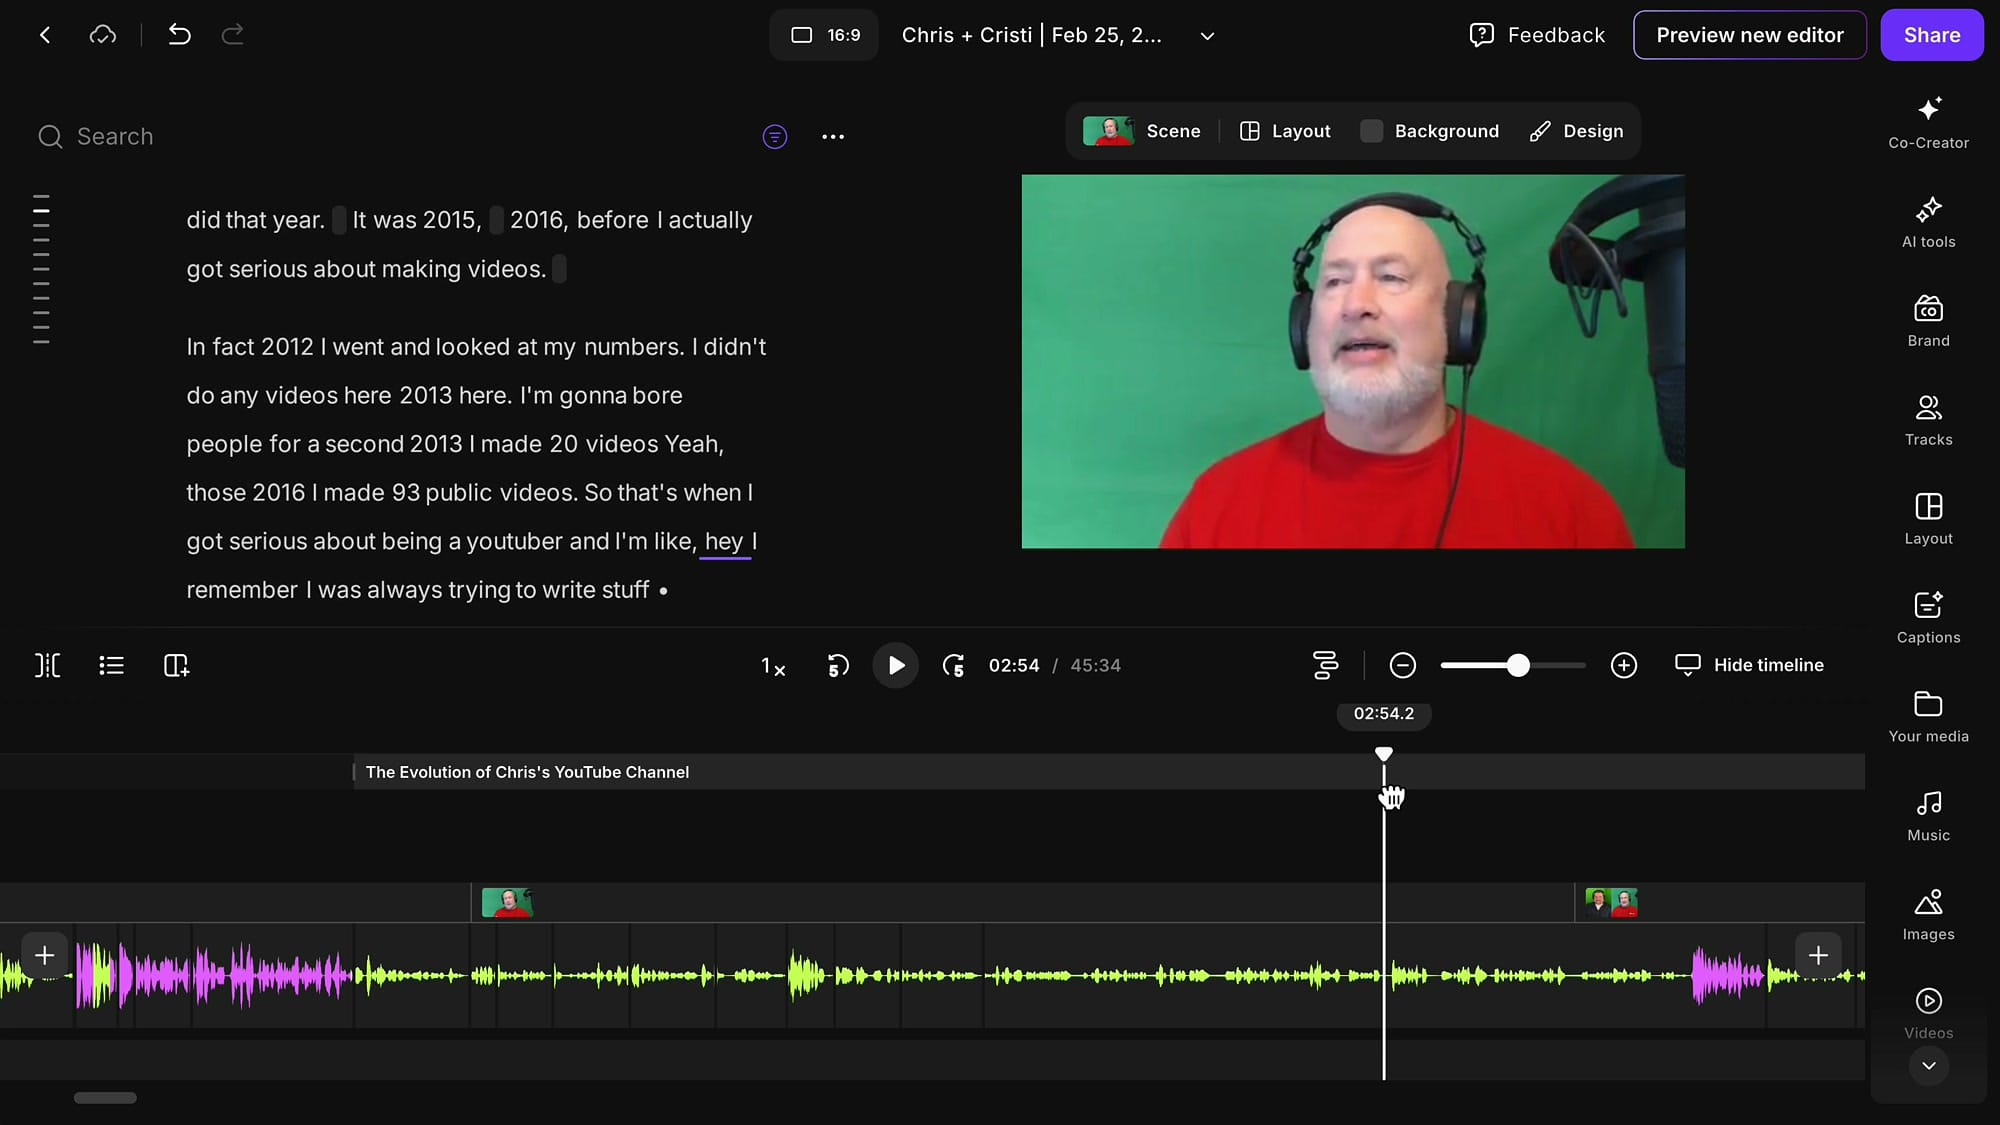
This feels less jarring than cutting right on the dot. The color-coded waveforms in the Riverside timeline help enormously here. Each speaker's audio is a different color, so you can see at a glance who is talking and for how long.
My rules of thumb:
- Use the wide shot when both speakers are in a quick back-and-forth exchange
- Switch to a close-up when one person is telling a longer story or making an extended point
- Cut to your close-up when you are making a key point as the host or a reaction shot
- Let each scene breathe for fifteen to twenty seconds minimum – if you are changing every five seconds, it feels frantic
If you’re eager to learn more about Riverside and wish to have a one-on-one Riverside coaching session, feel free to book a call with me.
I’m here to help you with any questions you have and to guide you through the best workflows, tips, workarounds, or just answer any questions you may have!
Combining Both Techniques
Here is where it all comes together. You are on your guest's close-up and they stumble over a word. You cut out the stumble, and right at that cut point, you switch back to the wide shot. The angle change hides the edit completely.
Or: stay on the guest's close-up, but punch in tighter right at the cut point using the Crop tool. Either way, the jump cut disappears.
You can layer both techniques throughout an entire episode. Layout switches for the bigger transitions, zoom changes for the subtle movement within a single speaker's segment.
A Practical Episode Structure
Here is a formula you can follow for every episode:
- Open with you full screen. If you are the host, start with a Solo Speaker layout for your intro.
- Switch to side-by-side when you introduce your guest.
- Cut to close-ups when either person speaks for an extended stretch. Use the waveform colors to guide your decisions.
- Add zoom changes within close-up shots to create movement. Push in for emphasis, pull back out for context.
- Use every edit point as a zoom-change opportunity. Every time you remove a mistake, change the zoom level at that cut.
- Do not overdo it. Let each scene breathe. Subtle, fifteen to twenty percent zoom changes work better than dramatic pushes. You must also make peace with the fact that you won't be able to hide all the cuts.
Adjusting Captions Per Scene
One thing to watch out for: if you are creating social media clips with captions enabled, changing the camera layout can cause the captions to overlap with the speaker's face.
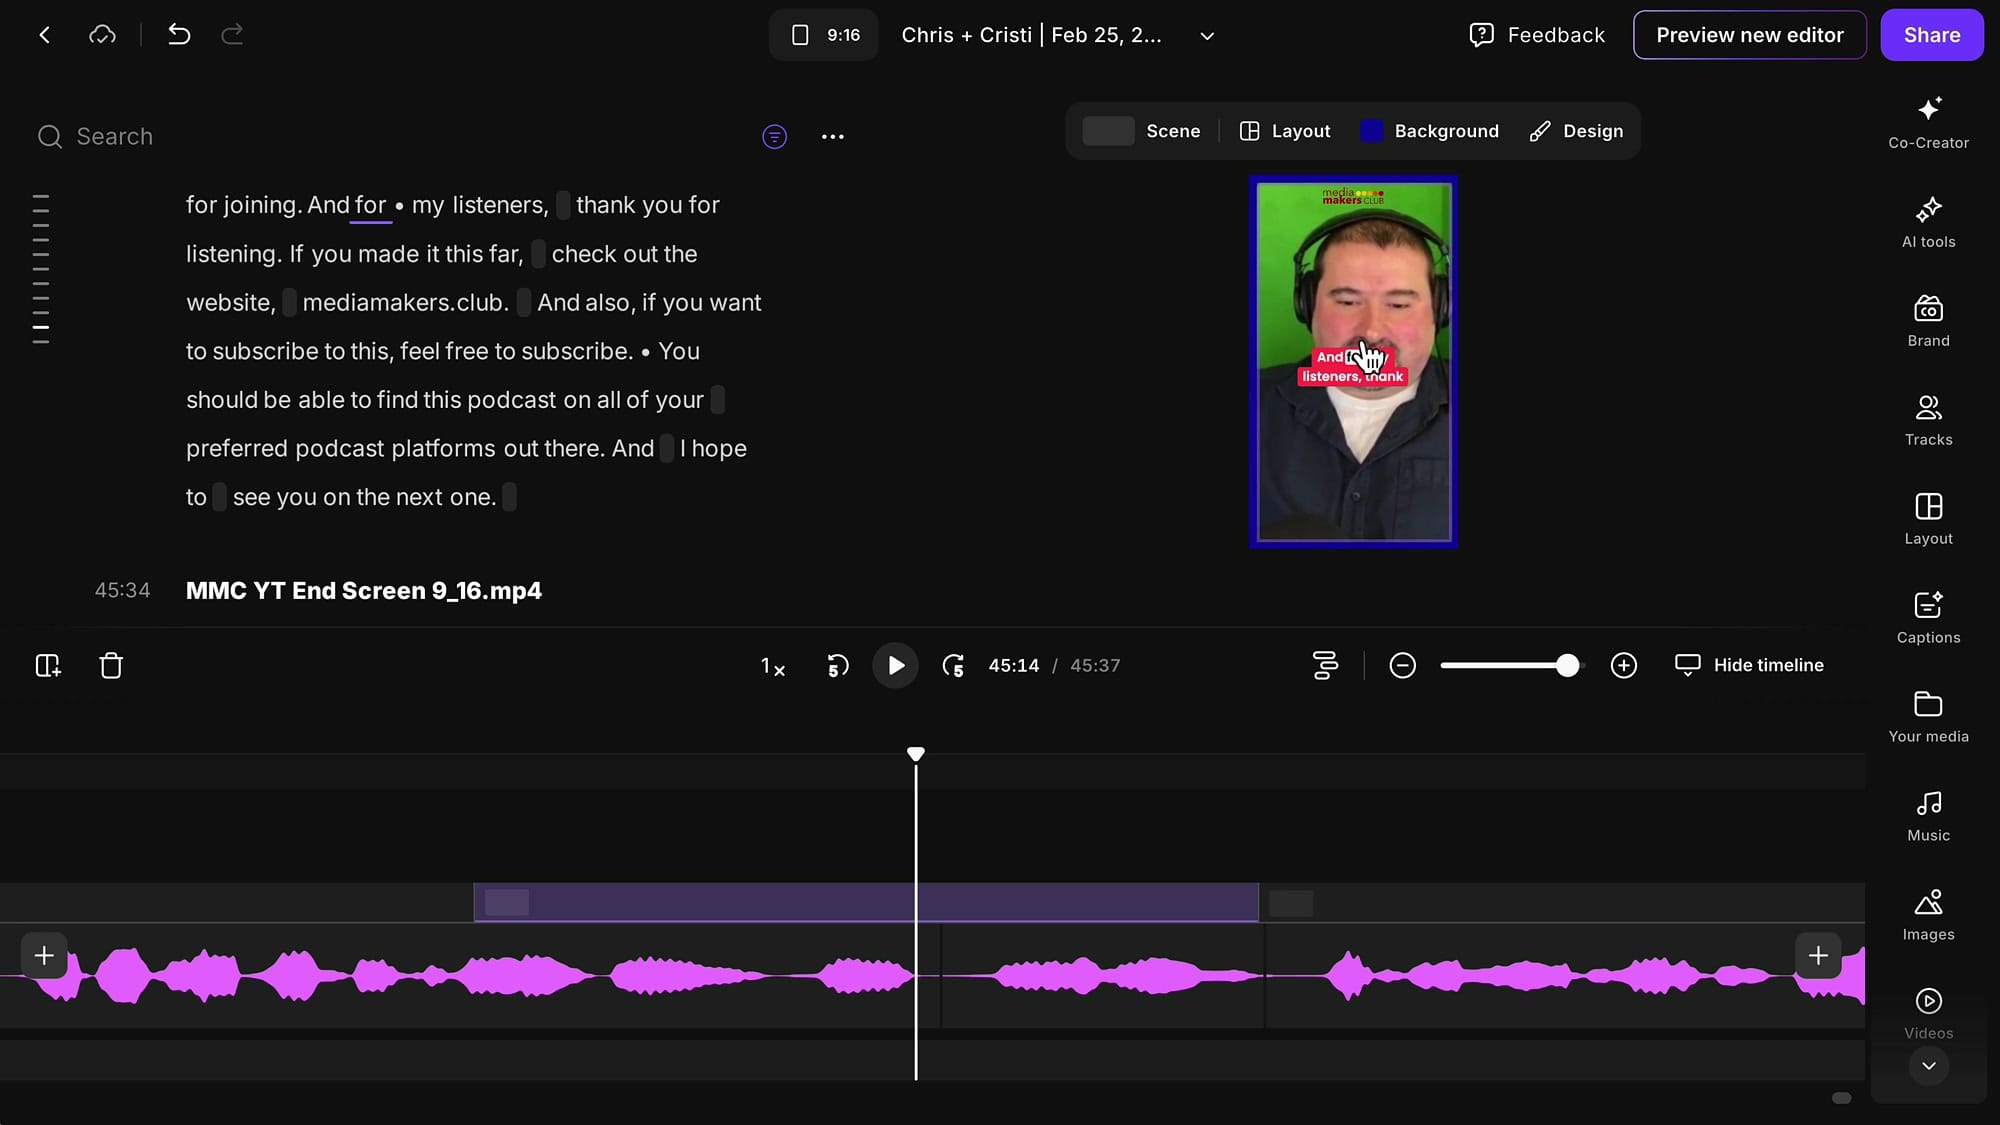
In the wide shot, your captions might sit nicely in the center of the frame. But when you switch to a solo speaker close-up, those same captions could land right on their face.
The fix is simple: select the scene, click on the captions, and make sure you select "This Scene" (not "All Scenes") before repositioning them. Drag the captions down to where they belong. The change only applies to that specific scene -- the scene before and after will keep their original caption position.
Riverside lets you position captions independently per scene, which is exactly what you need when switching between layouts that frame the speaker differently.
Fixing Off-Center Framing After Zoom
Sometimes when you zoom in, the speaker ends up off to one side. This happens when they were not centered in the original recording -- they were leaning to one side, or their camera was not positioned squarely.
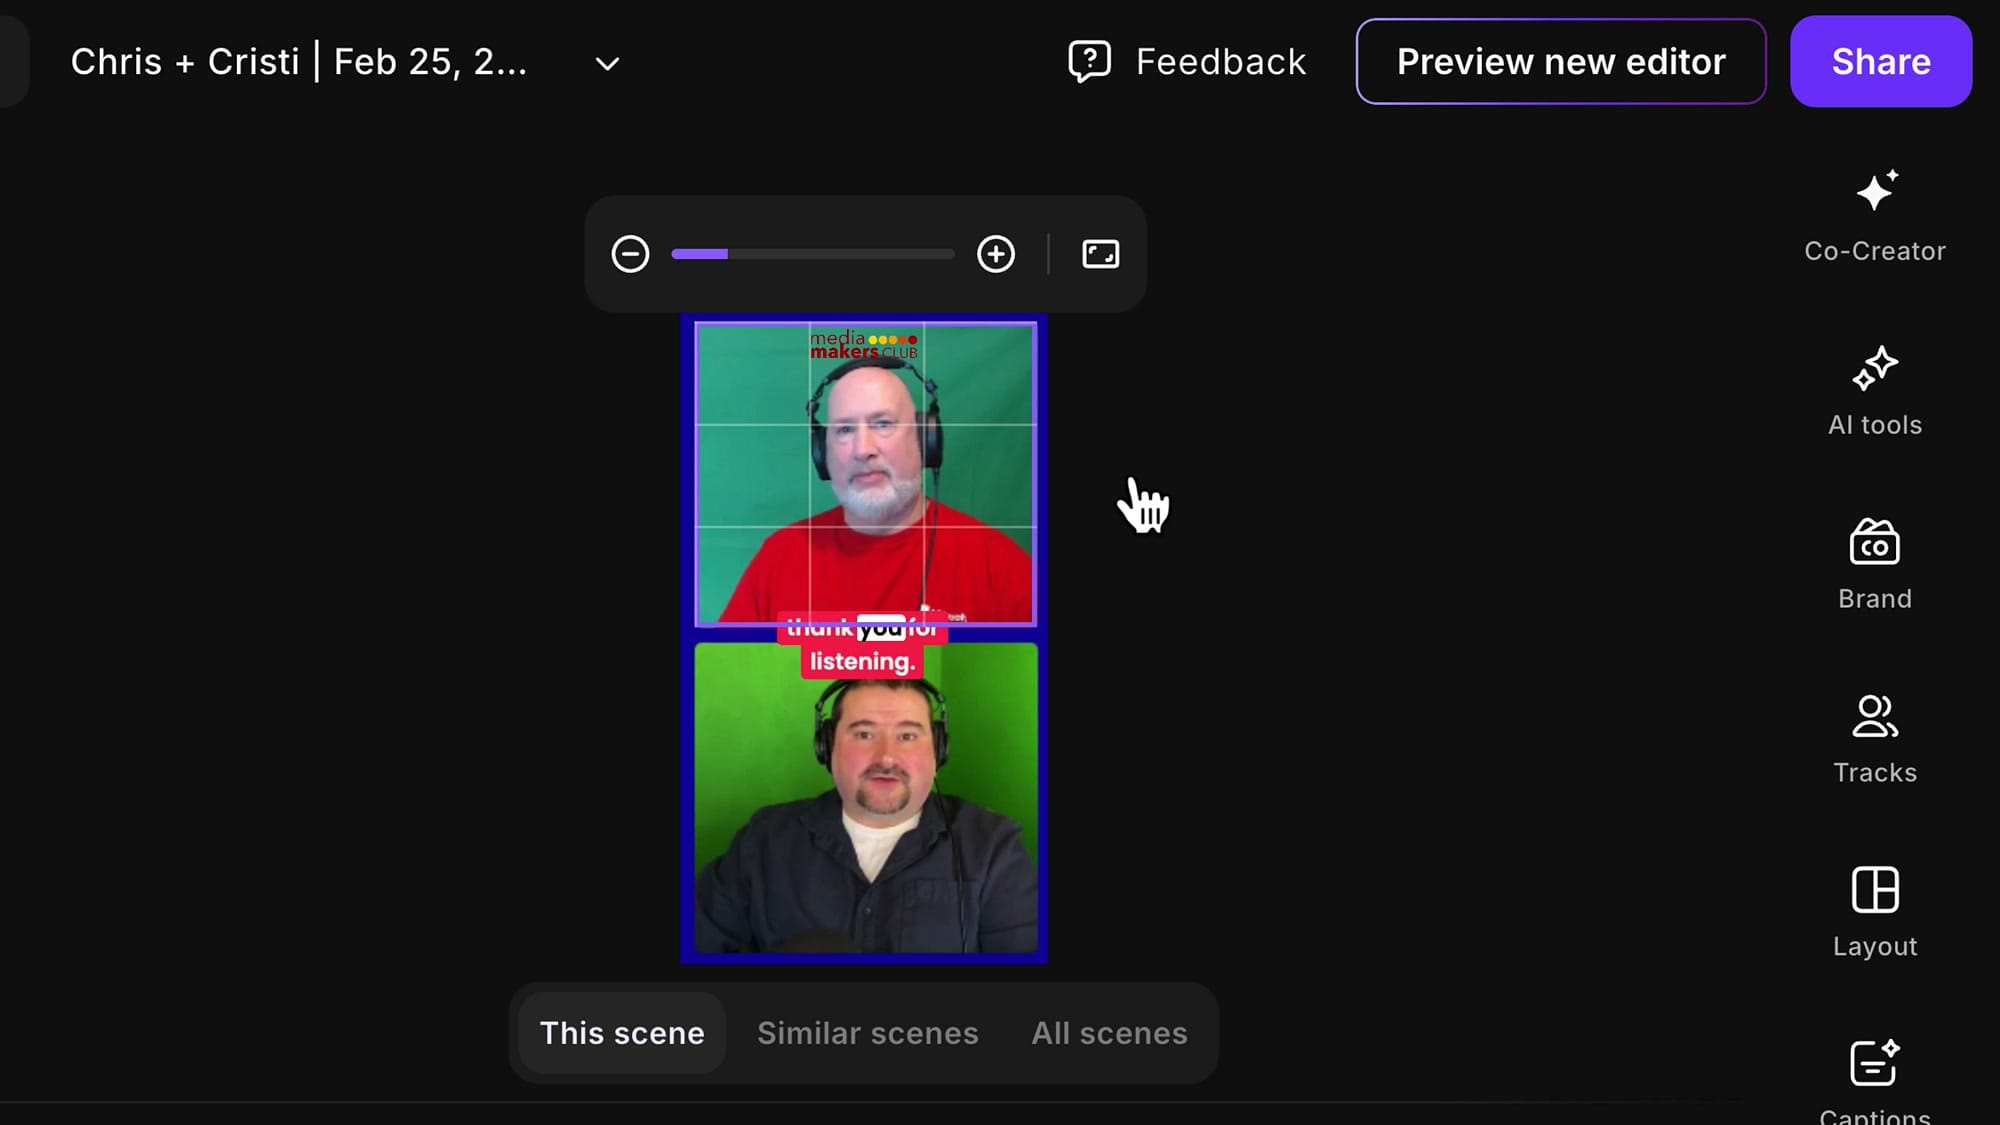
To fix this, click on the speaker's video, go to Crop, and simply drag the frame to reposition them. Use the grid lines as a guide. Click outside to apply, and the speaker will be properly centered in that scene.
Take a few seconds to check your zoomed-in crops. What looks fine at the normal zoom level can look unbalanced when you push in tighter.
Putting It All Together
That is the entire technique. No special camera, no live operator, just scenes, cropping, and layout changes inside Riverside. Once you get the hang of it, you can add sixty to a hundred camera changes to a forty-five-minute episode in about fifteen to twenty minutes.
The result looks like a professionally produced podcast with multiple camera angles. Your viewers stay engaged because the visuals keep moving. Your edits are invisible because every cut point has a zoom change. And you did it all with a single recording.
If you’re eager to learn more about Riverside and wish to have a one-on-one Riverside coaching session, feel free to book a call with me.
I’m here to help you with any questions you have and to guide you through the best workflows, tips, workarounds, or just answer any questions you may have!
Related Riverside Tutorials