
How to Animate Objects Along a Circle Path in Camtasia

Want to make an object orbit along a circular path in Camtasia? While Camtasia doesn't have a built-in "motion path" tool, you can achieve smooth circular animation using Custom Animation keyframes and a clever grouping technique. In this tutorial, you'll learn how to animate any element — a shape, image, or even a video clip — so it moves along a circle path.
This technique works in Camtasia 2019 and later versions. Watch the full video tutorial or follow the step-by-step guide below.
Watch the video:
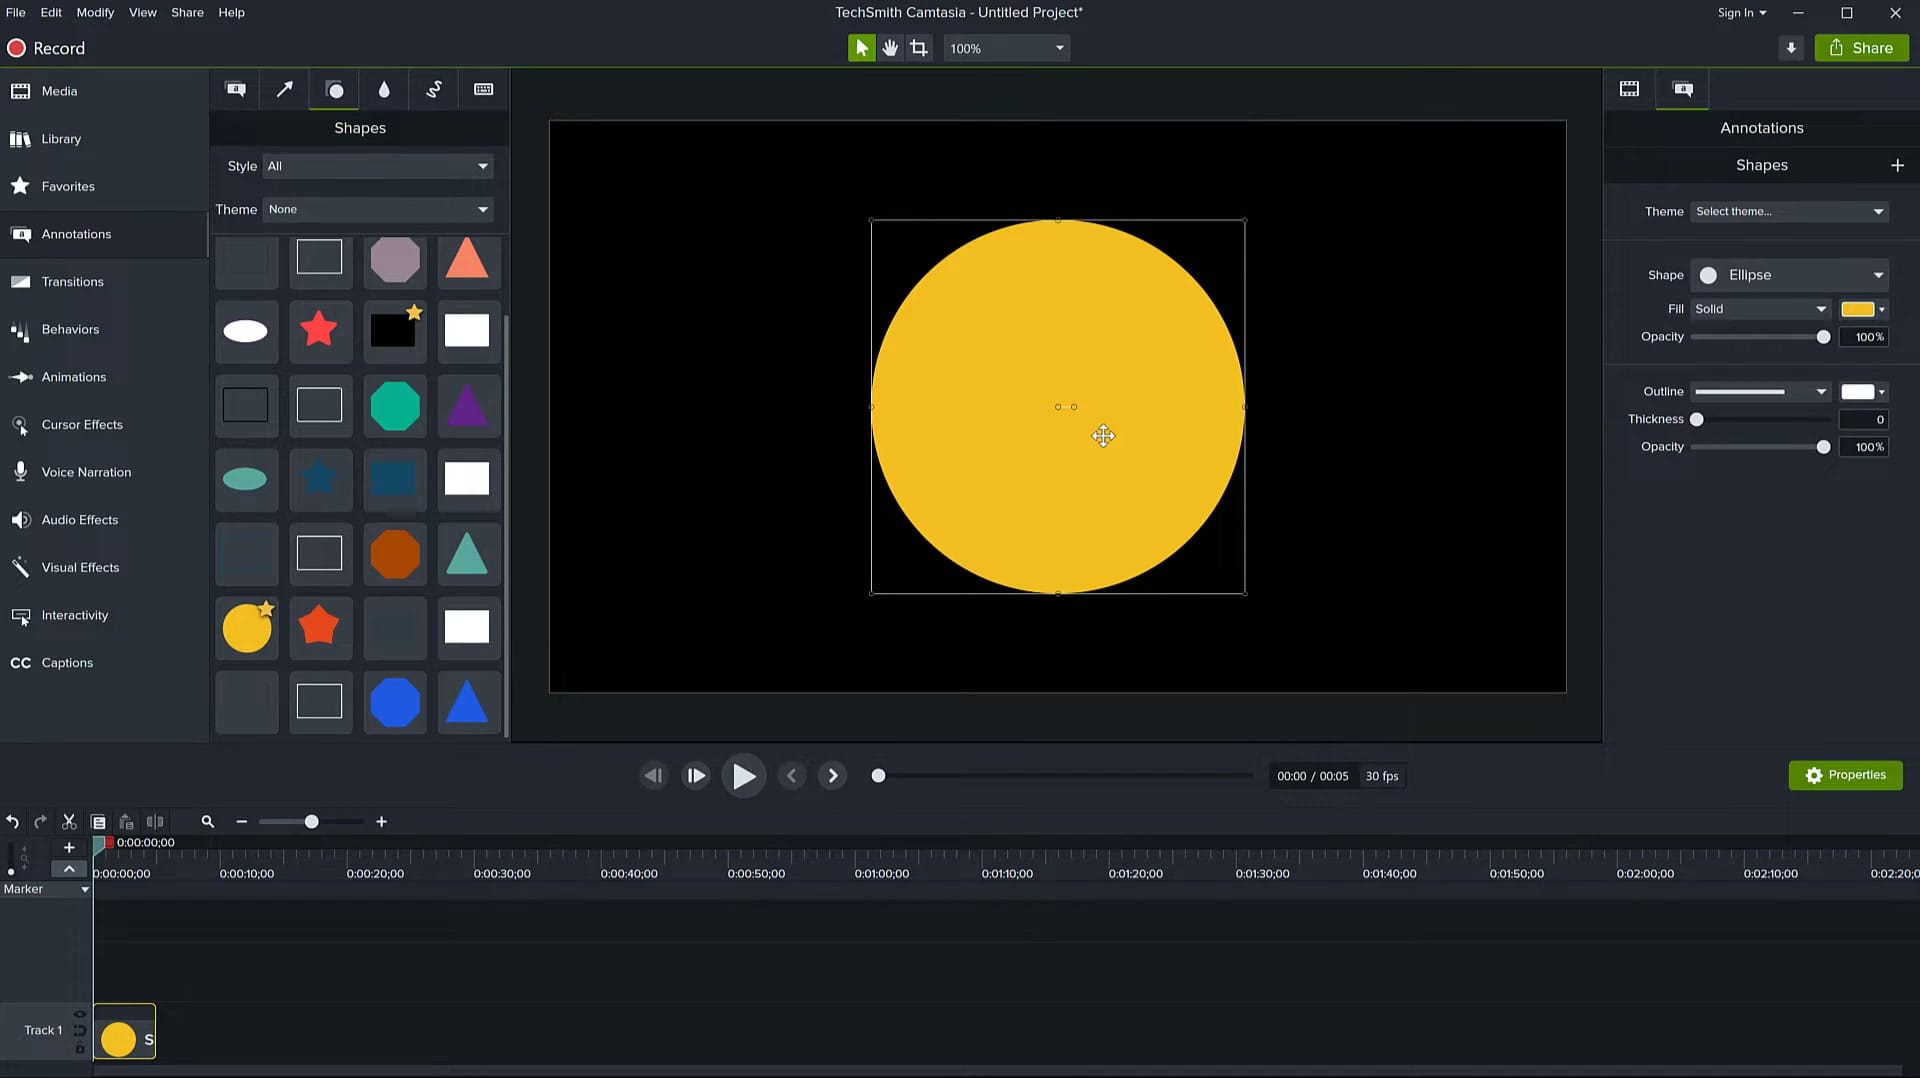
Step 1: Add a Shape to the Canvas
Start by creating the object that will travel along the circle path. For this example, we'll use a simple yellow circle, but you can use any shape, image, or media.
- Open Camtasia and create a new project
- Go to Annotations in the left panel, then click the Shapes tab
- Drag an Ellipse shape onto the canvas
- In the Properties panel on the right, set the Fill color to your preferred color and adjust the size — this will be the object that moves around the circle
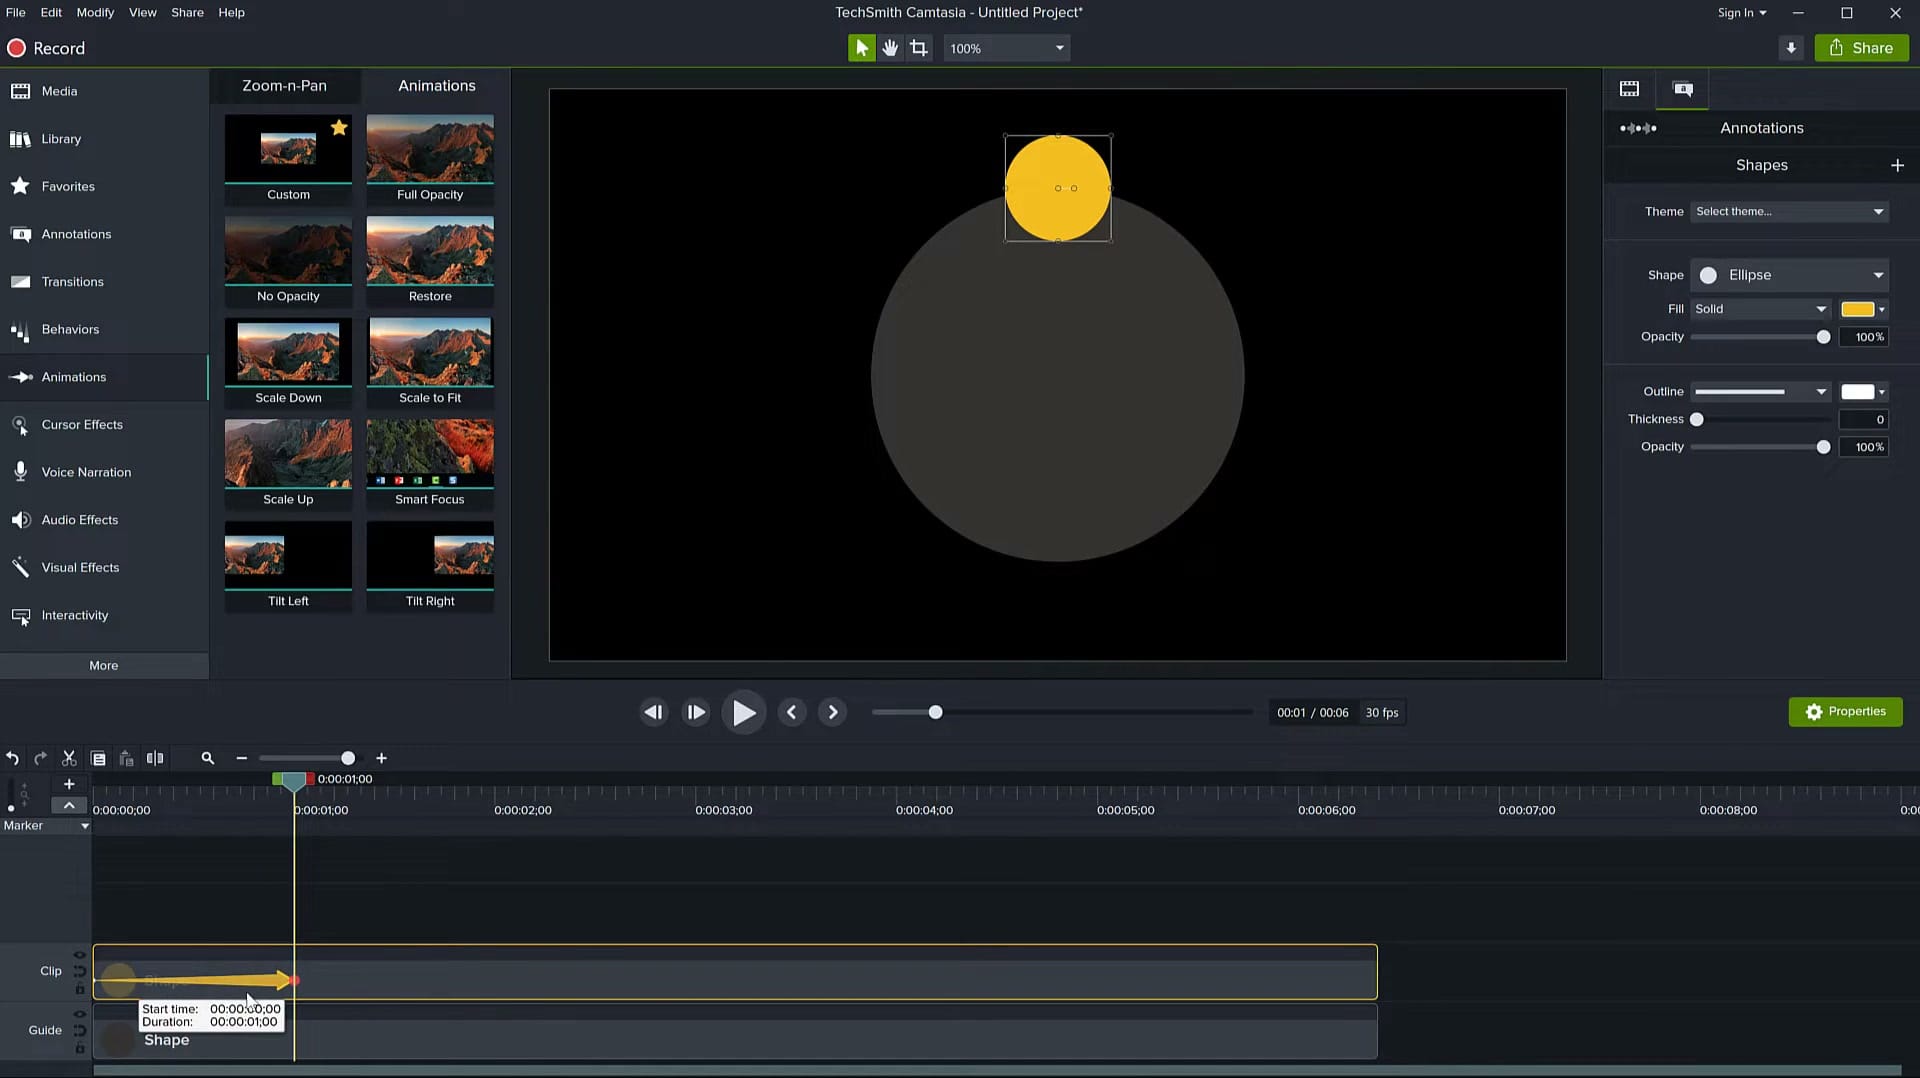
Step 2: Create a Guide Circle
Next, you need a reference circle that defines the path your object will follow. This guide circle won't appear in the final output — it's just there to help you position keyframes accurately.
- Add another Ellipse shape to the canvas — make it much larger than the moving object
- Set the Fill to a dark or transparent color so you can see the moving object on top of it
- Center it on the canvas — this is your orbital path
- Place it on a separate track below your moving shape (labeled "Guide" in the timeline)
Tip: Position your small moving shape at the top of the guide circle to start. This will be the starting position for the animation.
Step 3: Apply Custom Animation
Now comes the key technique: using Custom Animation to create position keyframes that move the object around the circle.
- Select your moving shape on the timeline
- Go to the Animations tab in the left panel
- Drag the Custom animation onto your shape on the timeline
- You'll see animation keyframe arrows appear on the clip in the timeline
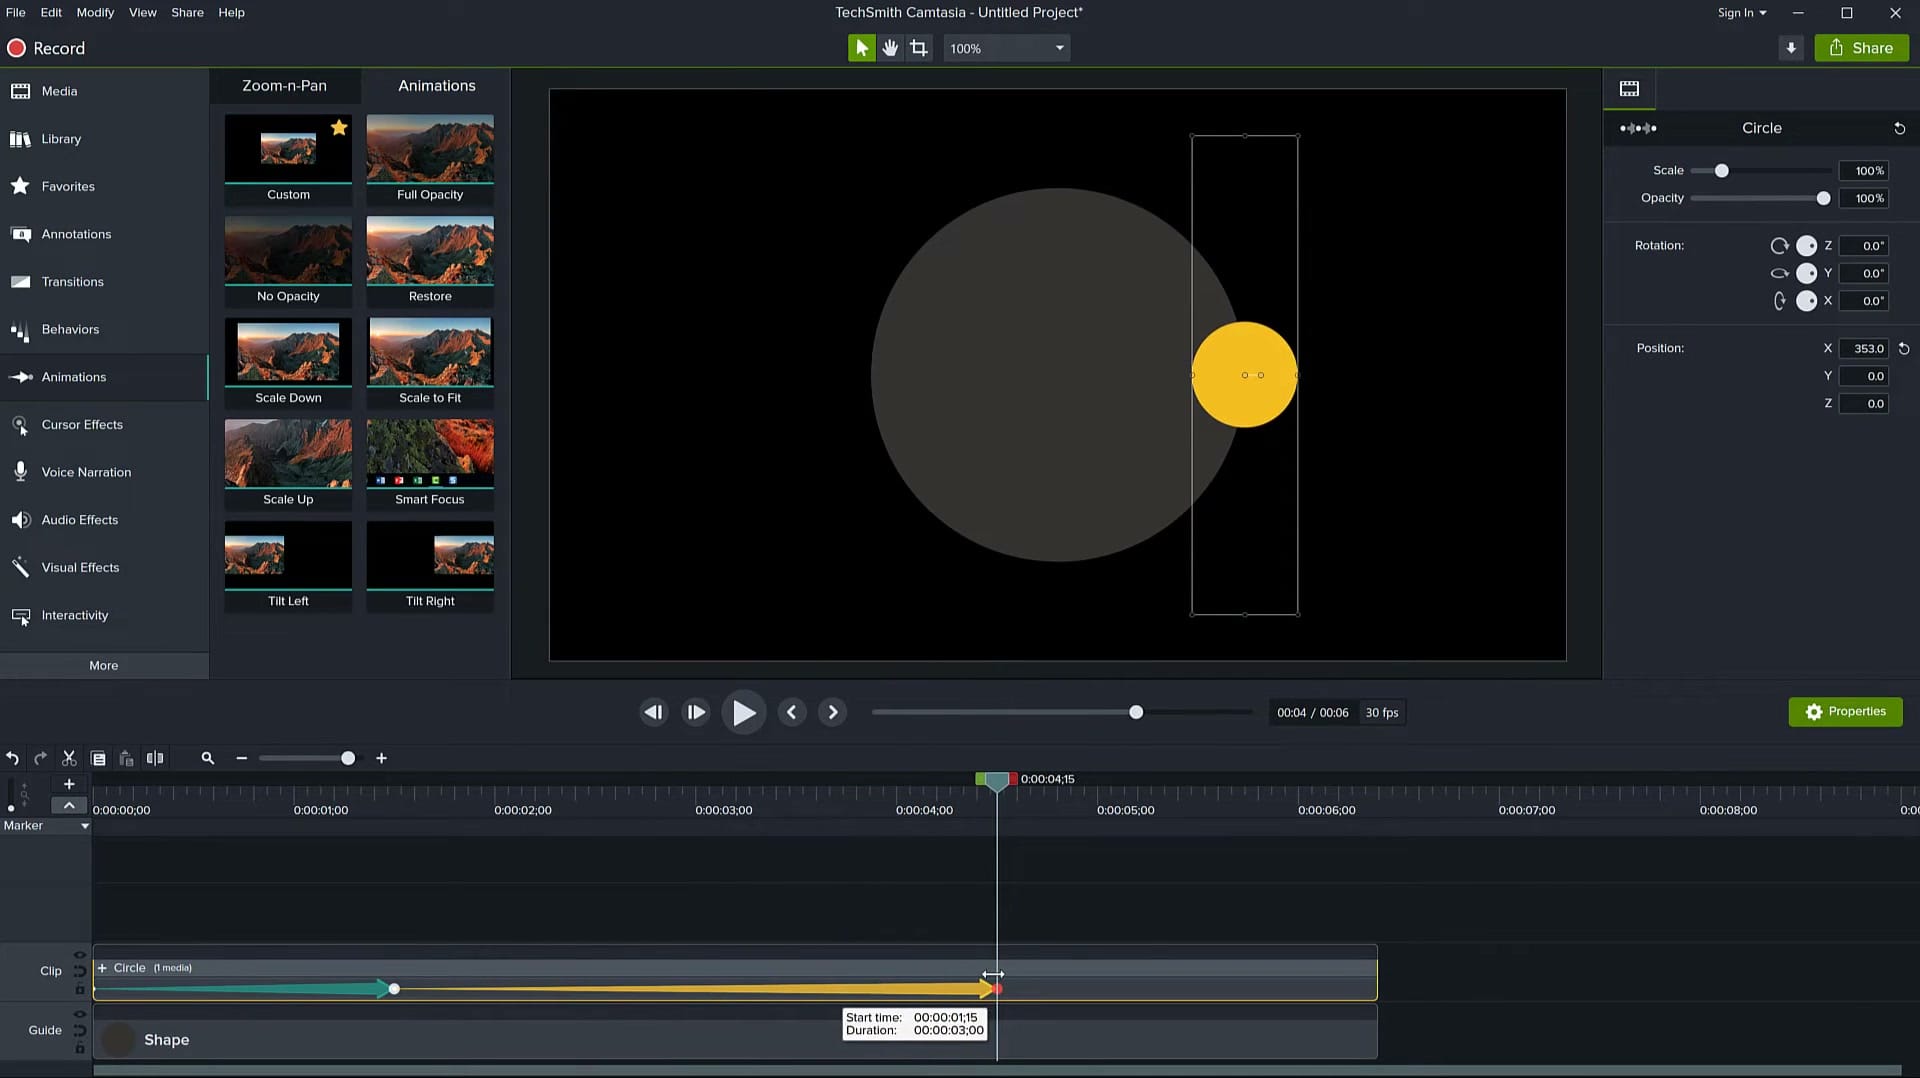
Step 4: Set Position Keyframes Around the Circle
This is the most important step. You'll manually place the object at different positions around the guide circle, creating keyframes at each point. Camtasia smoothly interpolates the motion between keyframes.
- Move the playhead to the first keyframe position
- Drag the shape to the top of the guide circle
- Move the playhead forward (about 1 second) and drag the shape to the right side of the guide circle — a new keyframe is created automatically
- Continue moving the playhead and repositioning the shape: bottom, then left side, then back to the top
Tip: Position the shape at the top, right, bottom, left, and back to top (like the 12, 3, 6, and 9 positions on a clock).
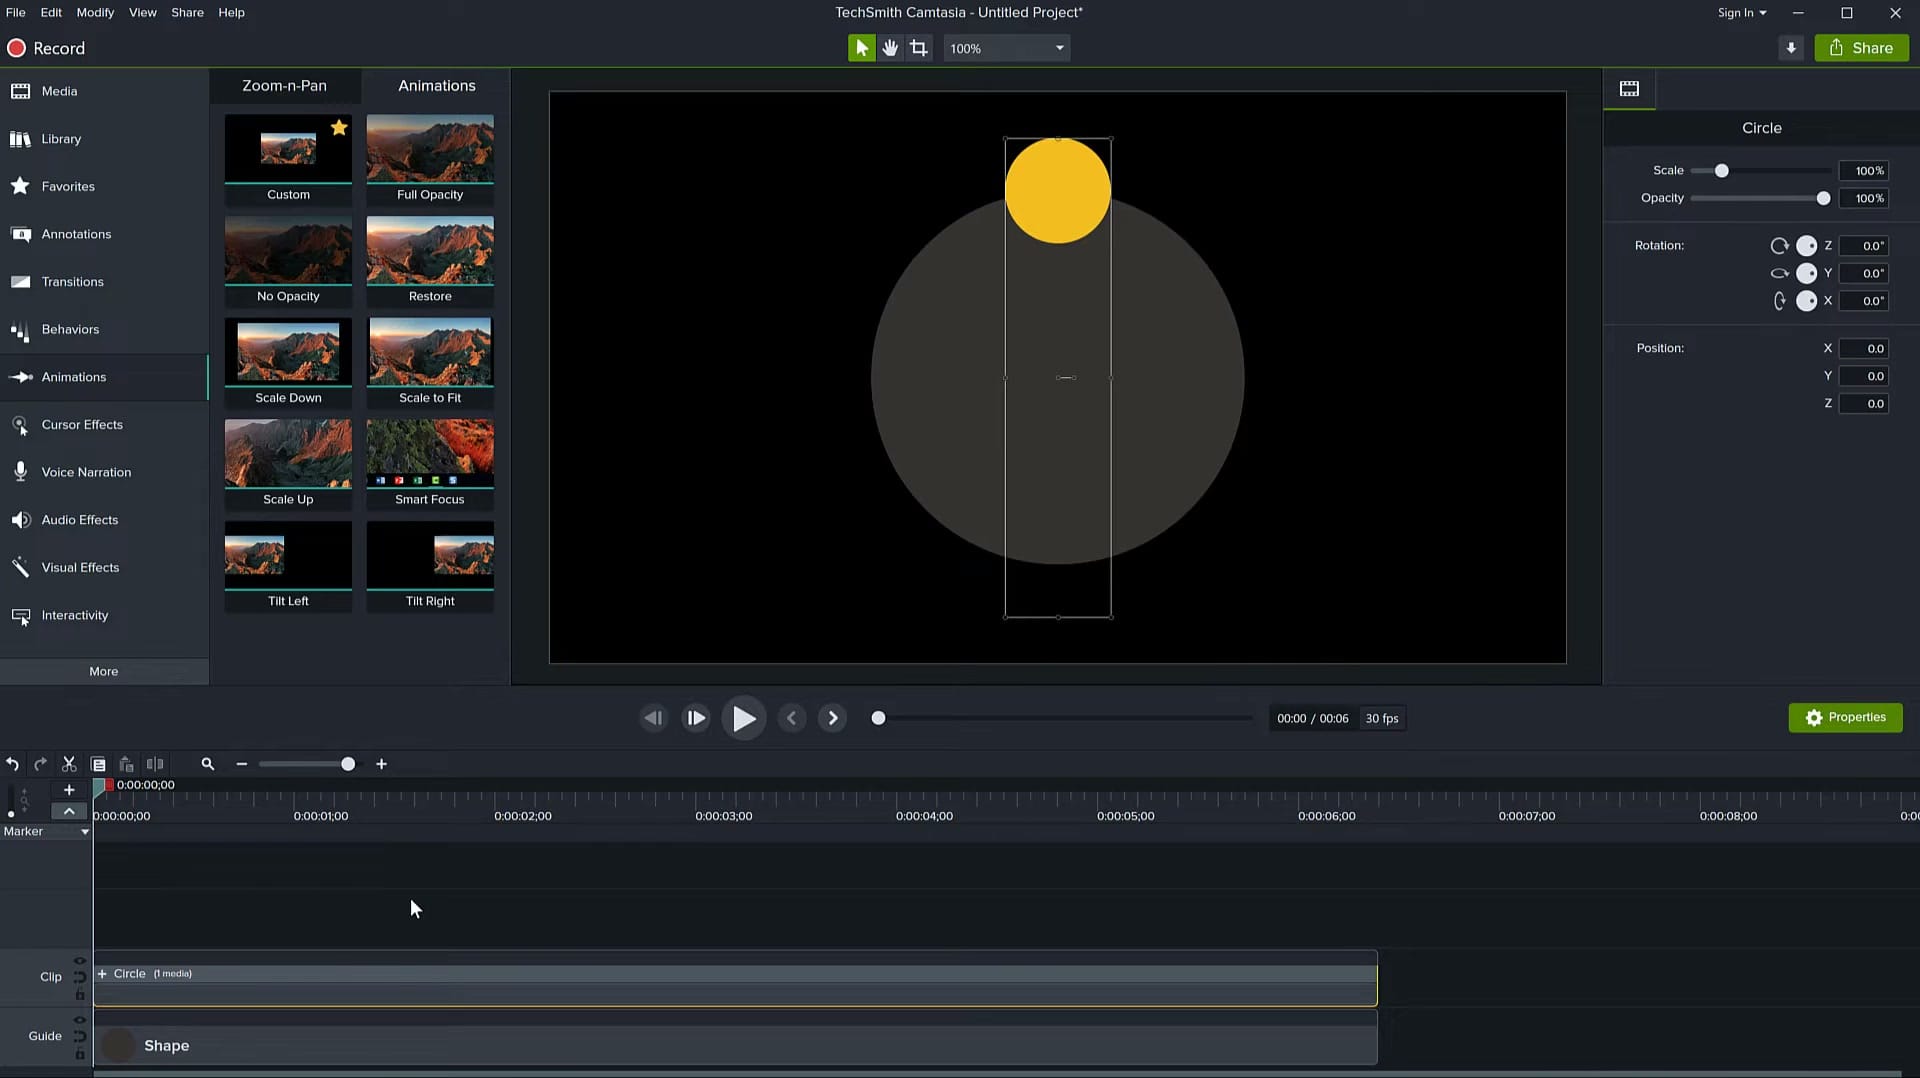
Step 5: Group the Shape and Guide
Here's where the technique gets powerful. By grouping the moving shape with the guide circle, you can control the entire animation as one unit — making it easy to reposition, scale, or duplicate.
- Select both the moving shape track and the guide circle track on the timeline
- Right-click and choose Group
- The two tracks collapse into a single "Circle" group on the timeline
- Now you can move, scale, or rotate the entire group using the Properties panel
Step 6: Fine-Tune the Animation with Group Keyframes
With the group selected, you can add additional keyframes to control the group's position over time. This gives you a second layer of animation — the shape orbits within the group, and the group itself can also move across the canvas.
- Select the Circle group on the timeline
- In the Properties panel, adjust the Position X and Position Y values at different points in time
- Each position change creates a new keyframe on the group
- Preview the animation to verify smooth circular motion
Tip: If the motion isn't smooth enough, add more keyframe positions around the circle path. You can also adjust the timing by dragging the keyframe arrows closer together (faster) or further apart (slower).
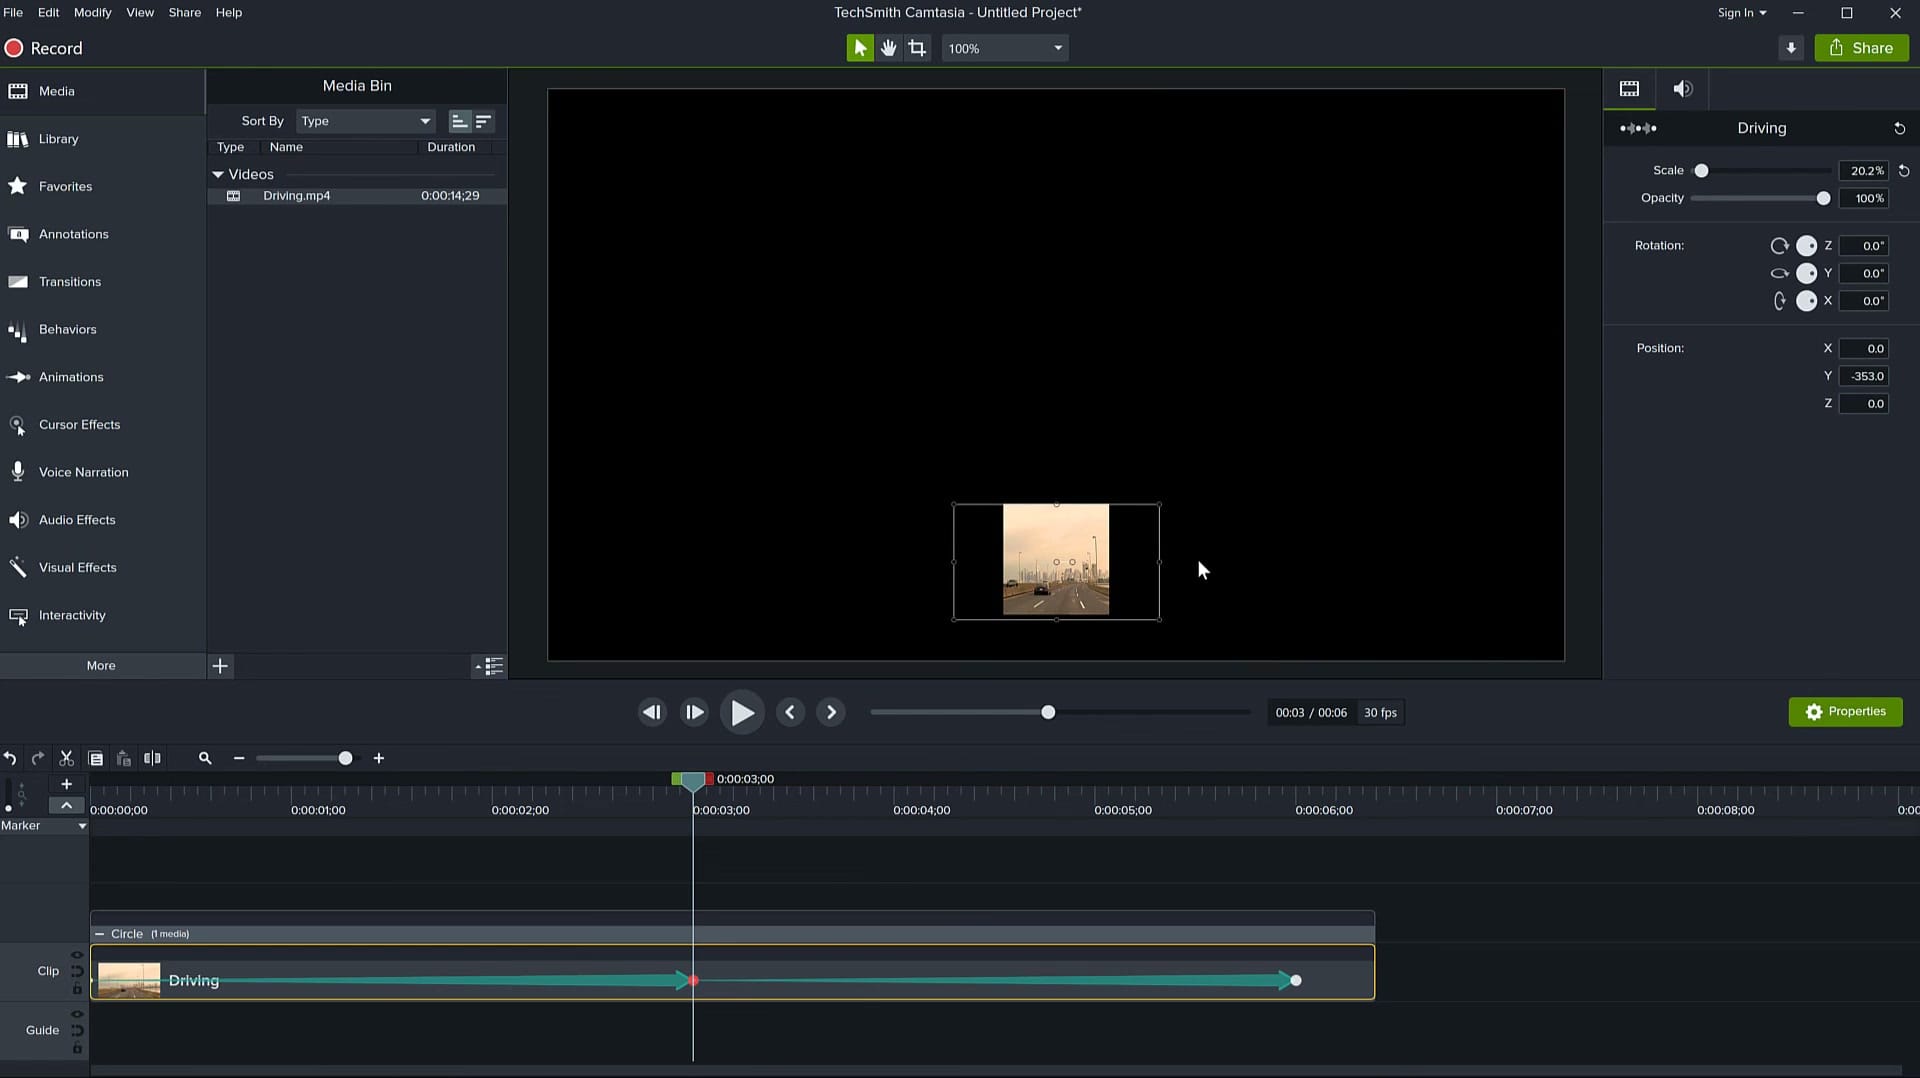
Step 7: Replace the Shape with a Video Clip
Once you've perfected the circular animation with a simple shape, you can swap it out for any media — a video clip, image, logo, or text.
- Import your video or image into the Media Bin (File > Import > Media)
- Drag it onto the timeline and place it in the same track as the original shape
- Delete or disable the original shape
- Adjust the Scale of the new media in the Properties panel so it fits the circle path (in this example, scaling down to about 20%)
- The new media inherits the same animation keyframes — it now orbits along the circle path
Tips for Better Circle Animations
- Hide the guide circle: Before exporting, either delete the guide circle track or set its opacity to 0%. It's only a visual aid during editing.
- Adjust timing: Drag keyframe arrows on the timeline to control the speed of rotation. Closer keyframes = faster motion.
- Add easing: Right-click on keyframes and adjust the easing curve for more natural acceleration and deceleration or None for constant speed.
- Duplicate the group: Copy the Circle group to create multiple orbiting objects. Offset their starting keyframe positions for a staggered effect.
- Scale the group: Instead of resizing individual elements, scale the entire group to make the orbit larger or smaller.
- Combine with other animations: Add rotation to the orbiting object itself so it spins as it orbits — great for logos or product shots.
While dedicated motion graphics software like After Effects offers built-in motion paths, this Camtasia technique is a practical workaround that delivers smooth circular motion without leaving your video editor.
If you’re wish to learn more about Camtasia and wish to have a one-on-one Camtasia coaching session, feel free to book a call with me.
I’m here to help you with any questions you have and to guide you through the best workflows, tips, workarounds, or just answer any questions you may have!


