How to make 3D rotating logo effect in Camtasia 2021 | Camtasia Tutorial
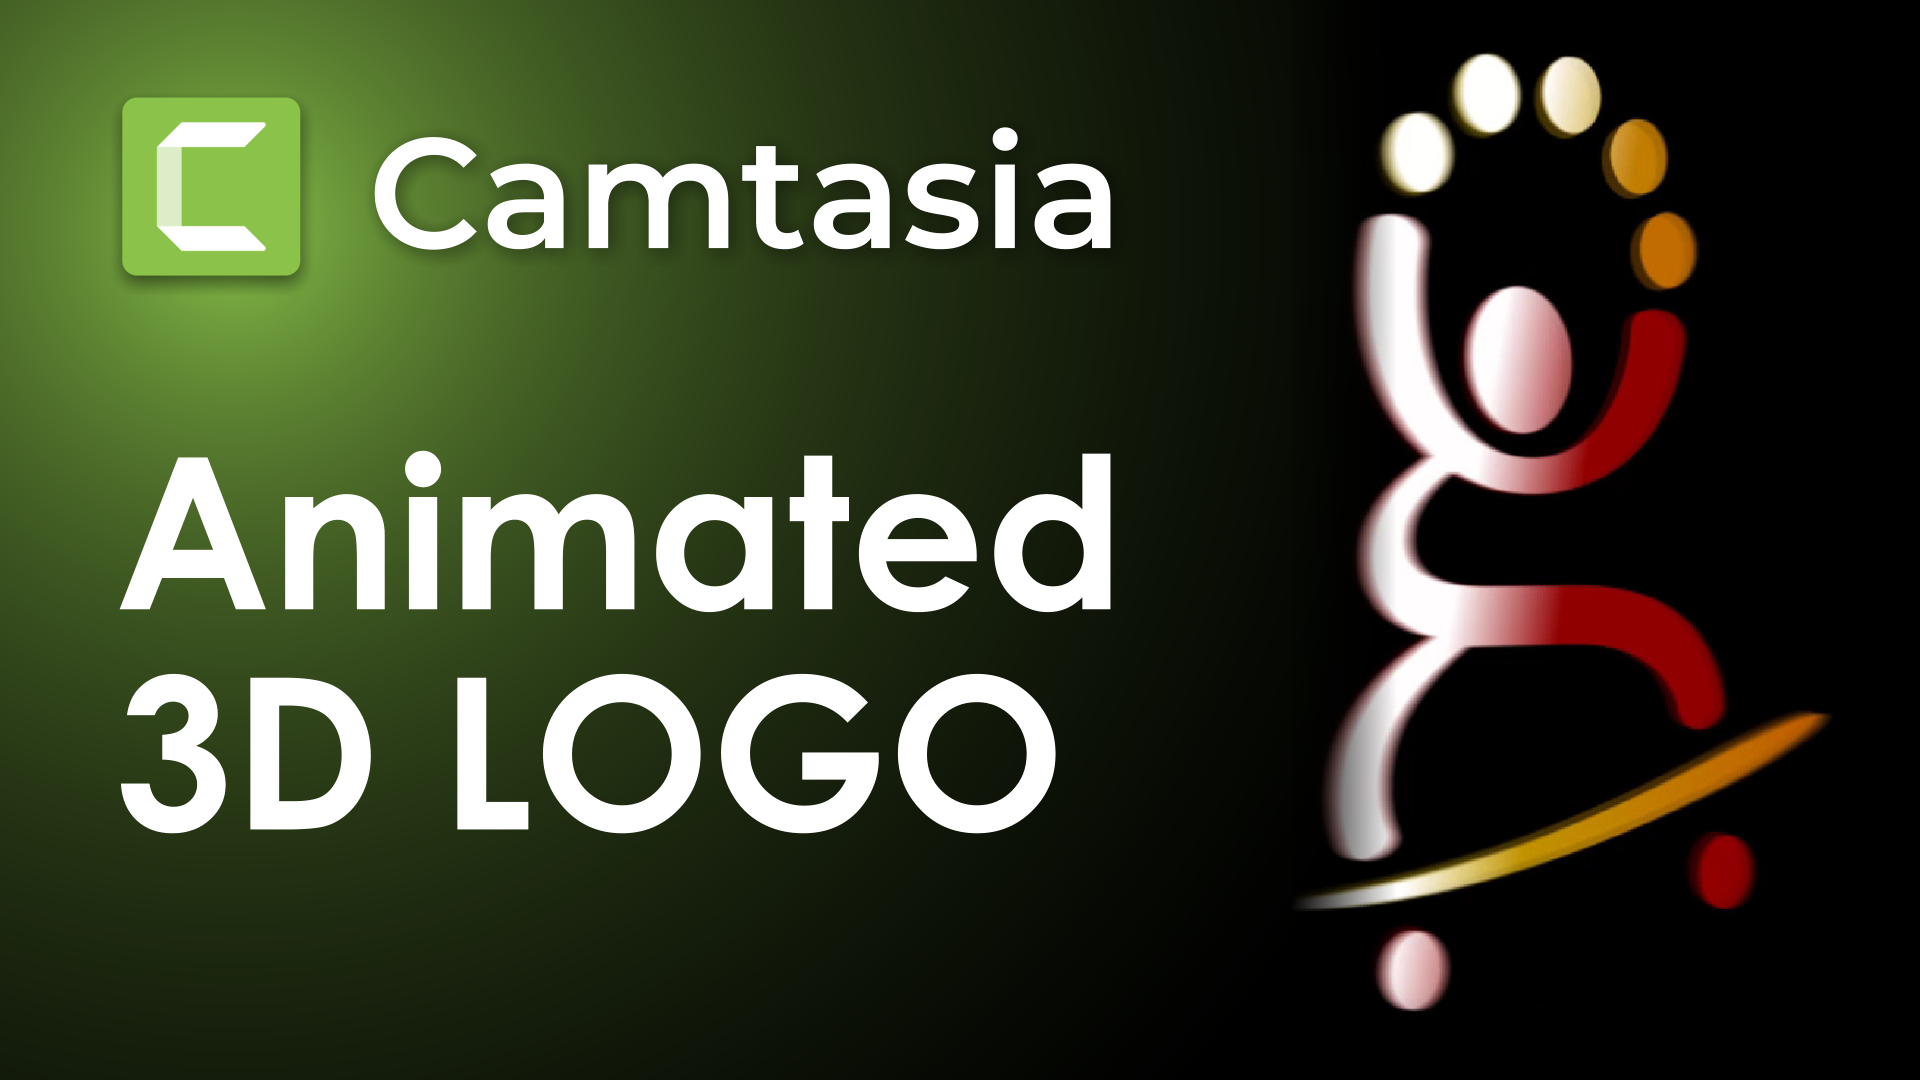
How to create a rotating 3D logo in Camtasia 2021, from a flat image file? In Camtasia 2021, although you don't have 3D effects and 3D space, you can still simulate the 3D movement or rotation of objects and with a little bit of creativity, we can import a flat image (such as a logo, avatar, etc) and move it in 3D, rotate it, add motion and light effects to it, to make it look quite realistic and professional.
In this Camtasia logo animation tutorial, I'm showing you how to create a spinning 3D logo effect with a nice transition in, transition out, light beam effect for a glossy aspect, from two spotlights, motion blur, everything. The spinning logo created in this tutorial can be superimposed onto any other clip or image and it will show through the image, because it's a transparent / PNG image that you import the first time.
I am also covering how to make this a reusable asset and how to replace the logo so that you only create the animation effect once and you can reuse it with other logos or objects, to create brand animations, intros, overlays and more.
Hello, this is Cristi. In today's Camtasia cool tutorial I'm going to show you how you can create a rotating logo animation with light effects, motion blur, all that stuff, and it makes it look like a 3d logo that's rotating, although the logo we start with, is not 3d at all. So you don't need a 3d program for this.
Here's an example of what I'm showing in this video and what we will accomplish, so stay with me and we will take it one step at a time.
So I'm going to start now with my logo, more like an avatar. So I'm bringing this from my hard drive into Camtasia. I'm going to place it in the media bin for now and then I can use it to put it on my canvas right there.
When you add an image or a clip in Camtasia for the first time in a new project, Camtasia resizes your canvas to that object size as a means to kind of helping you maybe, and I don't like that. So I want to change it back to full HD screen. So I'm going to go to the top drop-down here, go to Project settings and change that back to HD and click Apply.
I'm going to leave it to 30 frames and black background for now. Click Apply on this. So there is my logo, my avatar, and I want to make this rotate and have a bit of a light effect and make it look a little 3d and realistic. So how we can do this? Well, the first requirement is that your logo is a PNG file or it's transparent so that you can see through it.
The reason for that is you may want to actually put the logo on top of another footage. Maybe you want to put it on your, you know, like an overlay in your videos on, in a corner somewhere. So if I bring in a new video in here, from my hard drive, you notice my logo is transparent so I can see through it.
So this is a PNG file with Alpha. If you don't know how to export this, I'm going to have a video about this, how to make logos with transparent backgrounds. I have a video on how to do this in Xara, if you look it up on my channel, but anyway, this is my transparent logo. So this is what I'm going to animate in Camtasia.
So let me remove that video for now. I'm going to lock that layer, so I don't change it by mistake. So here we go. This is my logo. So how can we rotate it? Well, we want it to come from one side and stay on the screen for a bit and then go back to the other side, like it's, it's, you know rotating, in front of me, like a sort of an object and it goes away.
So the way to do this is of course we use custom animations for that. So I'm going to zoom in right here and I'm going to actually make this animation quite short, about two seconds completely, you know, the intro and the outro is going to be completely up to about two seconds. It's not really important how long, you know, the longer you make it, the slower it's going to get, but you can adjust this later, so don't worry about this.
So I'm going to you know, before I add any animations, I'm going to select the logo and hold down the CONTROL key and make it slightly smaller. Something like this. So this is what I want. Maybe you want to have your name underneath or whatever you want to do. Of course you can resize this and put it in the corner or do whatever you want with it.
But let's animate it now. So the first step of the animation is going to be to bring the logo in from one side and we will use a custom animation for this. And I'm just going to place this play head at the middle of the track here. And I have this selected, I'm going to go to Animations and drag a custom animation ending here at the play head, right? So this is the part where the logo comes in. And this is the position where I want my logo to be when it's, when I'm looking at it and nothing's happening. Right. So now I want to, I want to do go back to the first part of the animation, you know, I'm going to move the play head to the first part of the animation here. And I'm going to move the logo out of the screen and the way to do this, we will use first of all, I want to move the logo slightly to the right, because it's going to come from the right side, into the center and then move to the left side.
So I want to first move it to the right, just a little bit, not too much and make sure I'm not moving it too much. Just a little bit and make sure you're snapping to the middle, so you're not moving the logo vertically, just horizontally, you know, I could move it a lot, like, you know, but I don't want to, so the logo is in the center and I want to move it slightly to the right, like so just a little bit about 50 pixels.
If you look in the right side where the Properties are, you can actually type the number in here, 50 position X, which is from the center of your canvas, 50 pixels to the right. That is the first thing we want to. And now we want to rotate the logo along the Y axis. So it's going to rotate along the Y axis like this, and you can use this Y here, click inside, where you see zero degrees and you can use the arrow key and hold it hold the arrow key up and you can see the logo is rotating. If you don't want to wait too long, you can hold down the shift key and just press the arrow up, and it's going to move much faster and all the way up to here until you almost don't see it anymore. Like this, you know, my logo has now disappeared. I can only see just a little tiny line. We will take care of that at the end.
So this is my first animation. Let's see if it works. Great. So now the logo comes on screen and before we do anything else, let's take care of the other part, where the logo goes out of screen. I'm going to expand the clip right here on the right and just place my cursor somewhere in here, it doesn't matter. You can move these around, press SHIFT A or you can go to Animations, Animations, Custom animation, bring another animation down here and, this is the part where I take the logo out of the screen. And of course you remember, I moved it 50 pixels to the right in the first part, I'm going to move it 50 pixels to the left now, minus 50 on the X position, moved to the left.
And now I can use it again, the Y position and rotate against the Y axis and just click this. But this time use the down arrow because I'm flipping it. I'm rotating it to the other side of the screen. Hold down the shift key again, to make it go faster. And until it goes away, almost completely like that. You notice it's not exactly 90 degrees, although you would think so. It's not 90 degrees. The reason for that is, that Camtasia keeps a bit of a, the center of the screen in place, like a little bit of a 3d space. So when you rotate an object along one of the axis , it also takes into consideration how far away it is from the center of the canvas. So in my situation here, because this object is off the center of by 50 pixels or so, it doesn't need to be 90 degrees for me to see it, you know, 90 degrees to look at it, perfectly perpendicular to the screen.
So it's a little bit of a, you know, trying to keep a bit of perspective and a orientation in the 3d space, although Camtasia is not a 3d software, but anyway. They try and do these calculations. So here we go, 88.96. You know, it doesn't really matter what the number is, as long as I'm looking at it, and I don't see it.
So this is the part where the logo went out of screen. So let's see now the whole thing, here we go. It's coming in, stays there for a bit and goes away like this. Now I can actually cut the rest of the clip because I don't need it to be staying there. It's off the screen. It's gone. I don't need it.
So this is my whole animation. It's about three seconds counting that one second here in the middle, where it's going to be onscreen. So, you know, you may want to make that shorter or longer, that is up to you. If you want it to stay for longer, all you have to do is just expand this clip and move the out animation further back. So now it's going to stay longer on the screen.
I'm actually going to undo this because it will be the next phase is creating the 3d effect to it. So now the 3d effect is this. What you want to do is, when the logo is during the animation, when the logo is coming in, not when it's flat out, when you're looking at it flat out from the front, you technically don't see what's behind it. So, because my logo is kind of flat and thin, you know, look, if I zoom in here, there is no 3d to this logo. It's just the fact that I'm, I'm rotating it like this, and Camtasia creates a bit of a perspective in my movement, then it makes it look like it's a little bit, you know, 3d, but I want to mimic the 3d.
So before I do that, though, I want to add a little more effect to it. You can do this or skip it, it's up to you at the end and at the start, I want to also scale the object. So I want it to be a little smaller. So when it goes away, it looks like it's turning, but it's also going behind the screen. So it's kind of, it's going far away from my viewpoint.
So what I'm going to do is place the cursor at the beginning of the first animation with the logo is a way, and I'm going to use the width and height adjustment here to make the logo smaller, slightly smaller, not too much. You can also use the scale here. It's 38% now, but I actually want to use pixel values.
So you can see that the height is 730 and it stays at 730 all the way here. Look it's 730 when I'm looking at it, 730 when it starts to go back, and 730, when it is you know, it's gone already. So what I want to do is I want to make that smaller. So I'm going to do maybe let's try 650.
That's a bit smaller, right? The position is the same. It's just smaller. Right? So now look, it's it's it looks like it's coming from behind. And again, here at the end, I'm going to make it 650 again, like, so. So now look at the animation. It is going to start here, so you can see it's fading, it's coming in and going away.
Now, if I did too much of this, it means that I made it too small. So it looks like it's kind of pushing backwards. So you may want to do maybe 700, 700 and not 650. That might be too small. Or where you can do is you can make it go further away from the center. So that's going to look like it's going far, far away, and then it makes sense for it to get smaller.
So look at this. All right, just a little bit more realism. Maybe the distance off center is not long enough. You can, you can make it go further away, but you really want your logo to kind of stay in one place. You don't want it to be flying around all over the screen. So I think I'm going to stop here and this is, I'm happy with this movement here, so let's make it 3d now.
So the way to do this in 3d is actually to make a copy of it, right? So I'm going to just copy this clip with the animations and everything. Copy this, Control C, go to the start and paste, Control V to paste it. The top one is going to be the front logo. Okay. We're going to go front logo and the one on the bottom, you know, behind it, it's going to be the back logo.
That's the logo on the back. Right now they are the same because they are identical. But what I want to do is I want to make the one on the back smaller, completely smaller. All the way you know, sort of the whole animation is going to be smaller and the logo is going to look like it's behind a bit and play a little bit with the offset in animation.
So what I want to do is because it's spinning like this. I want the back one to be smaller, and I wanted to come to, to be separated from the main logo when it's turned. So the way to illustrate this is look, if I go to the back logo here and I'm moving it sort of slightly halfway through, or actually let me just go all the way back to that first animation there.
So what I want to do is actually, I want to make this slightly off from the first one. So the first one is 50 pixels. I want to make this 45 pixels. Right? So it is a little away. Maybe we need to add more, we will see. And at the end, again, we want to do minus 45, that's just five pixels. It may not actually work, but look, if I then move them now and zoom in, you notice they are now offset. When they are in front. I don't see anything, but when they are offset like this, you can start to see they are duplicated, right? So the same here, maybe 45 is not long enough. So let's put here 40. So that's 10 pixels off. So look, when it's coming now, you can see it's duplicated because it looks like there's another one in the back there.
I also want to make it smaller. So instead, you know, just 40, 40 pixels, so it's a bit off, but I want to make it not so tall as well to make it look like it's a little bit behind. So let's try 650 on this one, right? 650. There we go. So now, it's too much for 650 is too much. Let's do a 690, just a bit smaller like this.
You can do a lot of experimentation with this. Look, I mean, it looks like I guess it looks like it's okay now and let's do 690 here and minus 40 as well. They end up both of them end up in the same position anyway, and you don't notice it. But when it's in transit, you notice the duplication. And another thing I want to do is I want to select that bottom clip here, turn on global animation.
So that means if I turn this on, Camtasia is going to change the properties in all of the animation points for that particular animation clip for the media. So I actually want to turn this on, and now you notice the icons, they are red, which means whatever I change here is going to change on all the animation on the selected clip.
So you see, I have the back logo selected and now all of the animation points are red, which means whatever I change in here is going to affect all of them. Right. So if I want to kind of experiment with this and not have to change it multiple times, I can actually turn that on. And you know, maybe I don't like it, that it's a bit too small, I want to make it maybe 695. Let's see. Okay. So a bit taller like that. Okay. So it still looks a bit 3d. And another thing I wanted to do was to turn down the opacity on that clip, so to make it look kind of faded out. Okay. So I can turn off the opacity to about 80% so you can see now the one on the back is a little more transparent if you don't want to do transparency, but you want to change the color of it, you can do that too. Let's go back.
So I'm going to add an effect, Visual effects right down there, visual effects, and I'm going to do a color adjustment on that clip, like so. That by default Camtasia makes it completely white, so I don't want that, I want it to turn down the brightness and the contrast like this and the brightness and bring back the saturation, cause I still want it to be a bit orange and red. So like this, you see now it's darker, and here it's darker and it appears to be. This is actually going to be quite small. So you won't notice these things, but look here in this nice position, it almost looks 3d. So you can change this effect you know, by looking here and say, oh, actually, you know what, I want to change the animation to be maybe taller. So you just place your mouse there, the size of it, and you can change it with the arrow keys until you're happy with that point, you can also change the pixel positions on the start and finish, but you need to turn off the global animation for that to change the distance between the elements. So that it becomes like the object is deeper, you know, extruded in the back deeper, but that's can actually give you a bit more distance in here and it may not look so realistic anymore, if you're paying attention to that phase of the animation.
I hope this makes sense. I know this is kind of becoming a long video, but look at this, in some points of the animation, it looks like it's a 3d point. You can actually skip this whole thing too.
So I'm happy now I'm going to turn off the global animation and let's see what I have so far. I'm going to zoom out here and I'm going to play this. You notice, it's got a little bit of depth. So depending on how fast it's moving, you may or may not notice all of that added depth in there. So that's another phase. Now onto the next thing.
What we want to do now is add that effect of light, a glossy light, a reflection from like two lights that are in front of you because now it's just turning around, but you can't actually see that nice, glossy effect. So to do that, what we need to do is, I mean, look, when you're doing an object that's glossy and you turn it around and it comes in front of the projector, you see that white projector line just dashing on the surface of the object.
This is basically what we will do. So what we will do this, how we will achieve this, we will go and use an annotation, go to shapes and use this white object. Just place it right here on the left side. And make itake it as tall as the logo, maybe even, you know, make it as tall as your canvas. And I'll tell you why, because maybe we want to change this logo later and we put a taller logo in it, so then we want that to still work. I'm going to make this a bit more narrow like this. So this is our beam of light and because the object is turning perfectly horizontally, right. The beam of light is going to move vertically as well. It's going to be horizontally it's going to be from one side to the other.
It's not going to go up and down and kind of diagonally. It's going to move horizontally because that's how my object is moving. So let's suppose the projector with the, let's suppose the light, the reflector is in the front, so when this object turns around, you may see for a second there, you may see the reflection.
So that's what we will do. So the first part of the animation is when the object comes in. So it's going to last about this long, here. Okay. So when it's turning, I see it coming through, but when it's in front of me sitting there, I don't see that light anymore. So this is the only part of the animation where I can see that light going.
Okay. So I'm going to zoom in a bit and the way we will do this is just add a custom animation to this object. You notice it's on the left side now. Go to Animations, custom, drag a custom animation here, make it shorter. You can adjust this later, by the way. And at the end of the animation, we want this object to be all the way on the right side, like, so.
So this is our beam of light, kind of dashing the reflection, dashing across the surface of my object like this. Right. There we go. So we may want to adjust this at the end, don't worry about it, so how can we make this light stay on top of just the surface of the object? Well, it's only going to reflect on the surface of the front of the object, not the back one. So I'm going to select the front logo, you see this one here, that animates. Copy that, the whole thing with animations and everything, and go to the start and paste it. It's going to paste it above the shape element. If it's not, you need to move it to the top on top of the shape element.
So now you see it's covering that, but we will add an effect that was added in Camtasia 2021. It's called the Media matte. So I'm going to click more, or actually visual effects and scroll down to the media matte and I'm going to add the media matte effect to the top, the front logo, one that I just copied here.
So media matte to the very top one, like, so. So you notice now the media matte using the alpha effect will cut out everything that is not on that surface. So watch this now. That is a bit too fast. Isn't it? So I'm going to make the shape animation longer like this. So you see it right there, it's it's dashing across the surface.
Maybe it starts off too far behind, so maybe I want to just put it started from here instead. So I'm going to go to the animation and just move this object here, like so. So now it's going across, maybe it's a little too early so I can move it, I can move it in front of it. So, you know, just play with this until you're happy with the animation transition like this, it comes across this.
And another nice touch we can do is, if we zoom in here, you notice that this is very, very sharp cutoff with the light. What we want to do is actually we want it to be a bit more blurry, right? So we can add a motion blur, select motion blur, and add it to the light ray.
Here we go. It's becoming blurry now. If it's not, if it's too blurry, you can actually go to the top of the animation and put the intensity down and at the beginning as well, put the intensity of the blur down. So the intensity of the blur is dictated by how far the object travels and how fast it travels.
So the further it goes and the faster it goes, the more pronounced the blur effect will be. So make sure you only change these values at the extremities of the animation, because Camtasia also animates that. So you, you may inadvertently add a timeframe in here, a custom key frame with just a blur change, which is not going to help you.
So place it at the end and just turn it down a bit, and place it at the beginning and turn it down again. Or you can use that animation, global animation trick as before. So like this, you know, it's not so blurry anymore. Actually I'm not crazy about it, so I may, I may actually turn it up. Okay. So I'm going to turn it back up a bit.
When you are far away, you can't really notice a big difference like this. Okay. So there it is, it's traveling across the surface. So if I'm happy now I can only see it for a split second, but it really adds to the effect. If you want to see it longer, you know, just make the clip longer and drag the animation back like so, and you know, it's going to go slower across the surface of the object.
Like this. Now for the other part of the animation, suppose we have two reflectors, two lights you know, spotlights or whatever, one in front of the, you know, next to the other. So we want to see the same effect when the logo goes out of screen. So I'm just going to copy this, control C and place it right here just after the animation starts to move, like so.
There you go, okay. If it's not far enough, you know, because I moved it, I can move it there and it's too late now, so you can move it forward just a bit like, so. So the idea is that you're seeing it just for a split second, and then it goes away like so, so this one feels like we have two lights, one on the left, one on the right, just in front of the logo here.
And when the logo kind of turns around it, first time it catches the light on the right, and then the second time catches the other light. But the movement is in the other direction, so the light moves in the other direction. So this is the effect. So let's see it. Now. There we go. It's coming in and it's going out. Really cool.
So maybe I want this to be slower again, you can stretch it out. It doesn't have to be the same way because the light is not going to be in the same position, so you can add a bit of realism to this. So the blur effect makes it look blurry. Let's add the blur effect, everything to make it look even more interesting when it's moving around.
So you notice that the light, the light sort of ray is blurry, but the edges of the logo are not. So what I want to do is I just want to add this blur effect to the top logo here, and the bottom one as well. Like so, so now I have the blur effect in here. You notice, you see that tiny little blur. If you want to add it to the top mask as well, you can do that, but it's going to blur the edges of the light, even more like this.
So this actually looks like more 3d now with the, the blur effect on it. It almost looks like a bit of depth of field, doesn't it? When it's far away here, look, it's blurry on the edges, and it's sharp in the middle, around the rotation axis. So Camtasia creates all these frames in between. So that's how it does the blur effect just fills in all these frames and shows them for longer, anyway.
So this one is very sharp when you're looking at it, but then when it's moving, it's blurry and it's got that light effect, so there we go. This is our effect. Really? We got it. We did it. So now if I play the whole thing, so cool comes in and fades out and you have all that movement going with it.
So now that looks, you know, if I show that video clip again, you know, I can actually, you can see that the logo is playing quite nicely on top. And if I zoom in here, because of that back logo that I duplicated and made it darker, it almost looks like a 3d logo, doesn't it? So you look, it's almost like a, you know, you could fall for that trick.
If it's moving fast, you can also see it as a 3d logo. So there you go, that's how you do it. And to show you another cool trick, this is not just for your logo or this is not just for one logo. If you want to use the same effect for multiple logos, let me show you. So I'm going to save this project and then let's group everything.
Okay. So I'm just going to select everything here and Control G to group it. So now everything is in a group, right? Another thing you may want to do if you want, as you're getting, cause look, I'm, I'm at the start of the animation and I can see that I can see the logos showing in there, like a little, you know, these lines.
That's not so nice. So one thing you could do is add a fade to this group itself, or you go inside and turn the opacity down on the ends of the animation. So when it starts, if you put the opacity way down, on both logos, what you get is you don't see the logo until maybe too late, right. So you can see it's kind of fading out and you're losing that brightness, that color.
Okay. So I'm going to take that off. I'm going to take the opacity, I'm going to put it all the way back to how it was because that's not really cool. So it needs to appear bright and nice up from the front. But what you can do is you can actually add a short fade to this clip on the group itself to fade everything out or add a fade to each one of these in the group itself.
So what I'm going to do is actually I'm going to just add a fade to the group just to make it short so I'm selecting the group itself, press Shift and T to add your default transition, or you can go to transitions and just drag this fade to it. Now, obviously it's fading for too long select both of them with the shift key and hold down the shift key and make them shorter like this.
All you need is just a couple of frames, so it doesn't show you those little lines at the start, right. So now when I'm not seeing anything, I'm not seeing anything. So look, it shows up, and it goes away and disappears. If it disappears too late, or if you can still kind of see it, then you can make these longer, like so, you know, and just, you know, make sure they disappear when it's appropriate. All right.
Another cool trick I want to show you is this, if you want to change the logo, so like, you know, you created your animation with your logo. Let's make sure let's see if we can swap the logo with another logo. So I'm going to go back to the media library and let's suppose that this is you've added this to your library, you can reuse it. So now I want to change this logo with another one, but I don't want to rebuild these effects all the time, right, cause it's so time consuming. So I'm going to actually import another one of my logos. I'm going to bring that to the media bin here. And I'm just going to put it on the canvas for a second.
You notice it's got my full name in here and the the logo with the handwriting text and whatever, right. Still a PNG. So this is still a PNG image, again, you need that transparency so you can see through be able to add it on top of other stuff. I'm going to just undo this. I have the logo, the new logo in my media bin.
So all you need to do for this, and I'm actually going to copy this group and just go somewhere down the line and paste it here. I don't want to change my first one. Right? So here, I want to change this logo with another one. Very easy. Click to open the group here, and I have all these three logos and it's very easy now I'm going to select the bottom one. That's the back logo, right. And I'm going to right click on the new logo that I imported, right click and say, Replace selected media on timeline. My selected media at the moment is the back logo. Click that it's replaced it. You don't see much. Click on the second one, do the same, right click, replace selected media. And finally, I want to replace that mask that dictates how the light is moving and click on the third one there, right-click, replace selected media. There we have it. So now I have a new logo here. Let's see if the effects still works. I'm going to zoom in a bit and place it.
And look at this, the effects still works fine with this new logo. The new logo may be smaller, but that's fine. You can fix that. You can scale the whole thing up by going back outside to the main timeline. So this is my group now, of course, it's kind of smaller because you know, it's a different logo, but if I hold down the control key and zoom in like this, I'm scaling it. You know, I've got a bigger logo now and the effects still works and everything's scales with it because it's inside of that group. So let me show you now, if I zoom in here and go back to where it's coming in, you notice the blur still works, the light still works, and I may not actually see it, but you may even be able to see that duplication happening. Depending on your background, really, so I'm going to turn on the background again here. Look, the logo is kind of 3d because of that darker bit. That is in the background, right? So because of the blurriness on the edges, it almost looks like a depth of field kind of effect like a lens effect on a camera.
So all we did was we didn't need any 3d software. We have a nice spinning logo here that appears like a TV show, kind of like a TV show kind of title. There you go.
Yeah, so that's great. That's a great effect. And you can, you know, you're free to move this around the scene, you know, scale it, make it larger, smaller, put it in the corners, use it as an overlay in your video. So there you have it. Cool 3d logo animation. And this works with any logo that is, you know, you just import it into your media bin, replace it in the group and when you're happy with it, you just add that group to your to your library and use it every time in your project.
So I hope you enjoy this tutorial. This is a great effect. I've been meaning to do this video for awhile. If you enjoy my tutorials, feel free to subscribe to my channel and really I'm struggling for ideas for videos.
So, if you have any ideas, let me know in the comments, what you would like to see or effects or assets you'd like to create, transitions, intro, whatever animations you like to learn how to make them in Camtasia, I am all ears, let me know. And you know, these have been done in Camtasia 2021. The motion blur effect and the media matte are only available in Camtasia 2021. If you have not upgraded, feel free to upgrade using the link in my description. That is an affiliate link, so you'd be supporting my channel at no extra cost to you. So I do appreciate it. Thank you very much for watching and see you on the next one.
More Camtasia tutorials and articles
Camtasia 2022: What's New?
Camtasia 2022 includes a set of new features, a TON of new assets and a bunch of new functionality that hopefully serves as a foundation for more!

Cristian
I specialize in providing clear one-on-one training in software such as Camtasia and Descript, helping you make the most of these programs.
Whether you're interested in learning how to create training videos and tutorials for your company or for YouTube, or are hoping to create your own course or start a podcast, I'm here to help you get started and give you all the shortcuts.
Categories