
How to Record in High Resolution in Riverside

By default, Riverside records in 720p. But if your camera supports it, you can bump the recording quality up to 1080p or even 4K HD. Here's how to change the resolution setting.
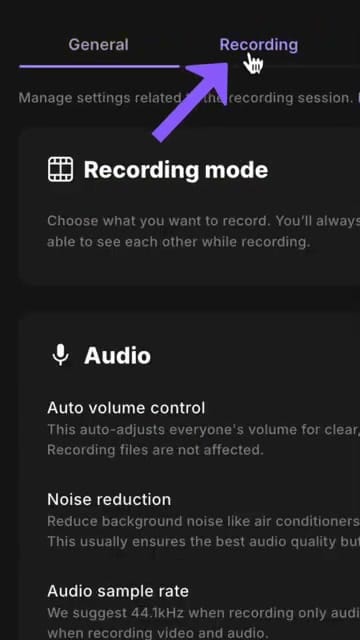
Find the Recording Settings
Go to Settings in the Riverside sidebar, then click Studio settings. Select the Recording tab at the top.
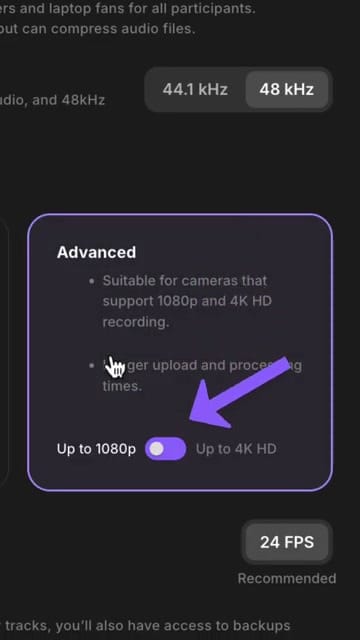
Change Video Resolution
Scroll down to the Advanced section. You'll see a toggle to switch between:
- Up to 1080p — Full HD recording, good balance of quality and file size
- Up to 4K HD — Maximum quality, requires a camera that supports 4K
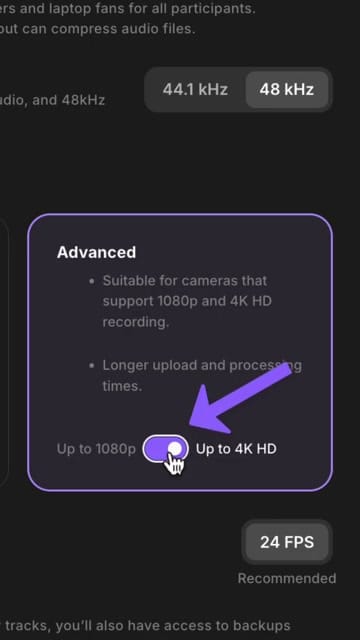
Click the toggle to switch to Up to 4K HD:
Trade-offs to Consider
- 4K files are much larger — expect longer upload and processing times
- Your camera must support it — if your webcam only does 1080p, the setting won't help
- Frame rate is set separately (24 FPS recommended) — also visible on this settings page but is not enabled for plans lower than Business.
- Audio sample rate (44.1 kHz vs 48 kHz) can also be configured here to help avoid lip sync issues
For most podcasters and content creators, 1080p is the sweet spot — high enough quality for YouTube and social media without the massive file sizes of 4K.
Ready to record in high quality? Get started with Riverside.
If you’re eager to learn more about Riverside and wish to have a one-on-one Riverside coaching session, feel free to book a call with me.
I’m here to help you with any questions you have and to guide you through the best workflows, tips, workarounds, or just answer any questions you may have!


