
How to Upload to YouTube Directly from DaVinci Resolve
In this guide, I'll walk you through how to connect your YouTube account to DaVinci Resolve and upload videos directly from the Deliver page.

If you're editing in DaVinci Resolve and uploading your finished videos to YouTube, you might not know that DaVinci Resolve has a built-in YouTube upload feature that lets you render and upload in one step — no need to export a file first and then manually upload it through your browser.
In this guide, I'll walk you through how to connect your YouTube account to DaVinci Resolve and upload videos directly from the Deliver page. It takes about two minutes to set up, and once connected, DaVinci remembers your account — so future uploads are just a couple of clicks.
Setting Up Your YouTube Account in DaVinci Resolve
Before you can upload directly to YouTube, you need to connect your Google account to DaVinci Resolve. Here's how:
- Open DaVinci Resolve and go to the Deliver page (the rocket icon at the bottom)
- Along the top of the Render Settings panel, you'll see presets for different platforms — click the YouTube icon
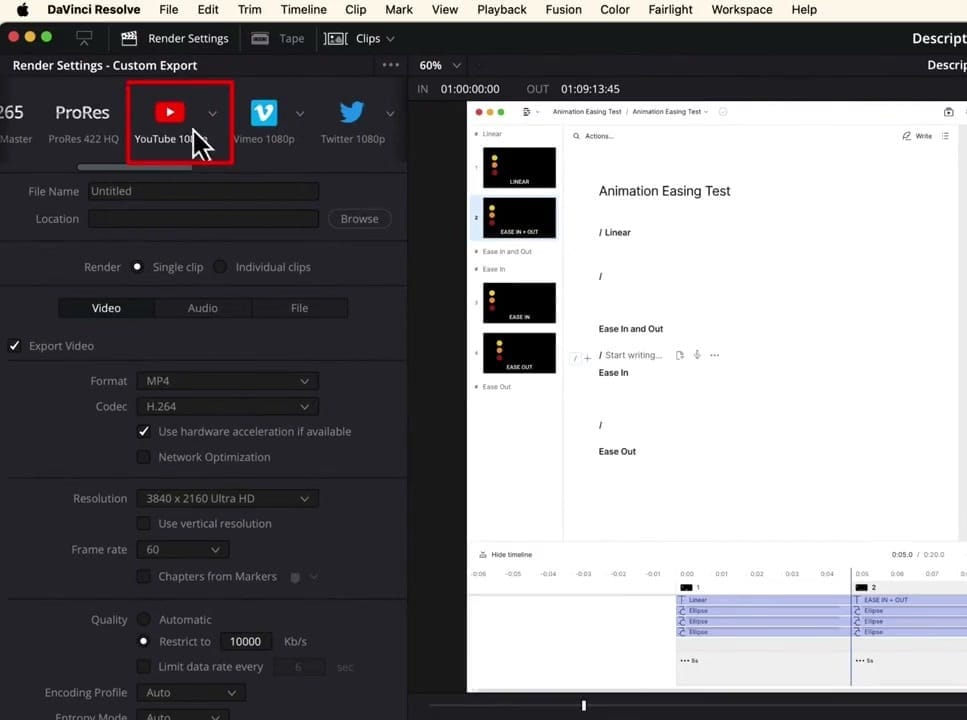
This gives you YouTube-optimized export settings automatically (resolution, codec, frame rate). But before you can upload, you need to link your YouTube account.
- Go to DaVinci Resolve → Preferences (on Mac) or File → Preferences (on Windows)
- Navigate to the Internet Accounts section in the left sidebar
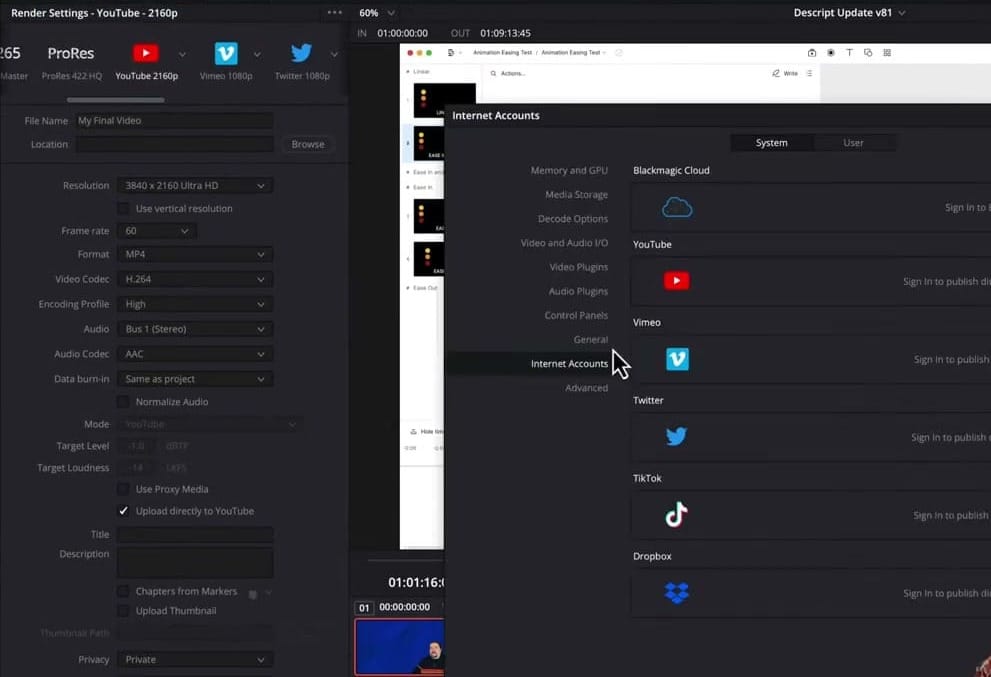
Here you'll see all the platforms DaVinci Resolve can connect to: YouTube, Vimeo, Twitter, TikTok, Dropbox, and Blackmagic Cloud. Click the Sign In button next to YouTube.
Granting DaVinci Resolve Permissions to Manage Your YouTube Account
Clicking "Sign In" opens a browser window where Google asks you to authorize DaVinci Resolve.
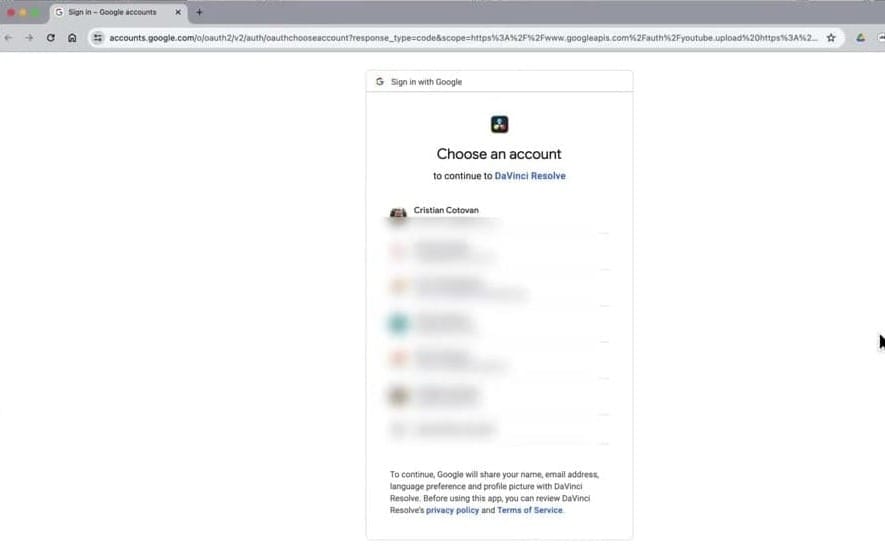
Select the Google account that owns the YouTube channel you want to upload to. If your Google account has multiple YouTube channels, you'll be asked to choose which channel to connect.
Important: You can only connect one YouTube channel per DaVinci Resolve installation. Choose the channel you upload to most frequently.
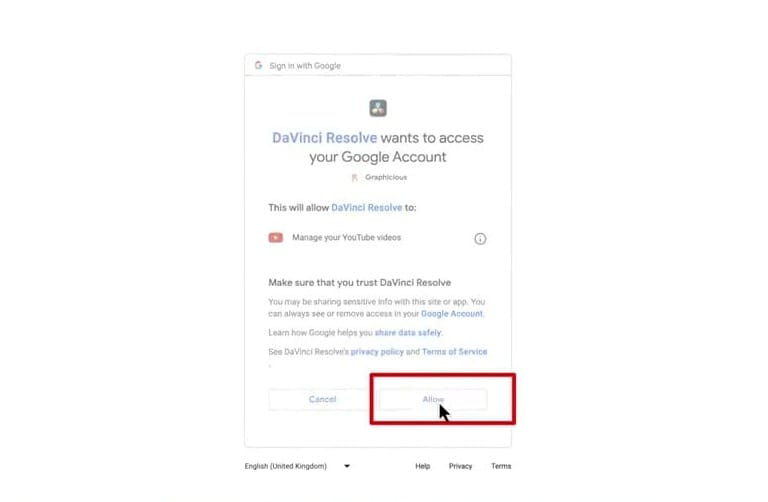
Google will ask you to confirm that DaVinci Resolve can "Manage your YouTube videos". Click Allow to grant the permission. This is safe — it only allows DaVinci to upload videos on your behalf.
Once authorized, go back to DaVinci Resolve and you'll see your account listed as connected in the Internet Accounts panel. Click Save to close Preferences.
Exporting and Uploading Your Video Directly to YouTube
Now that your account is connected, here's how to upload a video:
- Go to the Deliver page and select the YouTube preset at the top
- Scroll down in the settings panel and check the box: "Upload directly to YouTube"
Once you enable that checkbox, additional YouTube-specific fields appear:
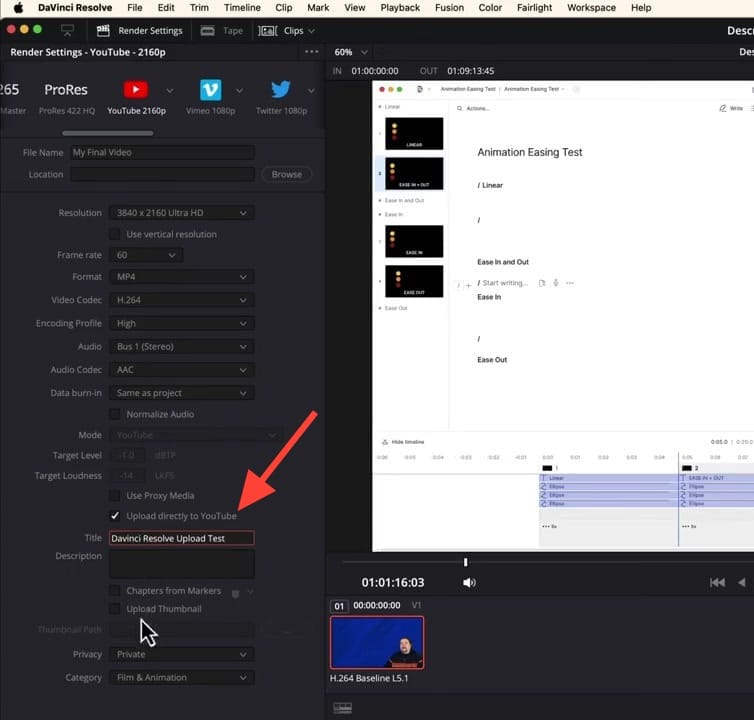
- Title — The title that will appear on YouTube (this is separate from the file name at the top of the panel)
- Description — Add your video description
- Chapters from Markers — Optionally include timeline markers as YouTube chapters
- Upload Thumbnail — Attach a custom thumbnail
- Privacy — Choose Private, Public, or Unlisted
- Category — Select a YouTube category (e.g., Film & Animation, Education)
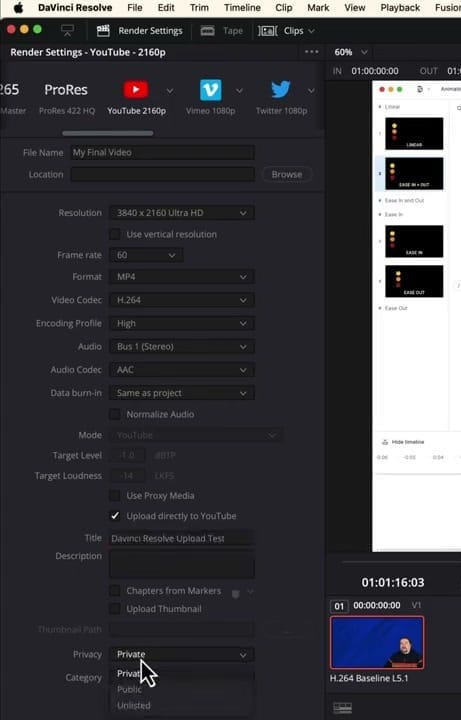
Pro tip: I strongly recommend setting the privacy to Private for your upload. This way, DaVinci Resolve uploads the video without publishing it immediately. You can then go into YouTube Studio to add a more detailed description, tags, end screens, cards, and schedule the publish time — all before your audience sees it.
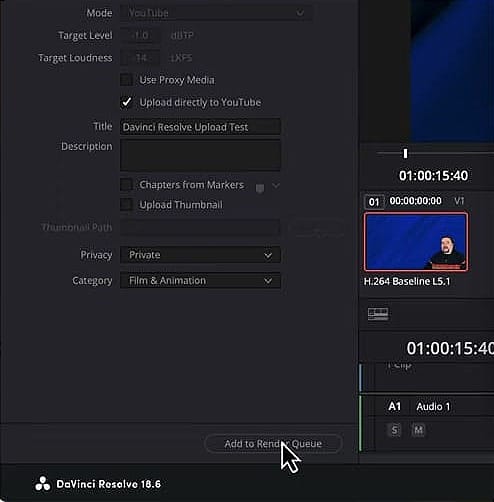
When everything looks good, click "Add to Render Queue" at the bottom of the panel. DaVinci will ask you to choose a save location for the video file (it still saves a local copy before uploading).
Rendering and Uploading
With your job in the Render Queue, click "Render All" to start.
DaVinci Resolve will:
- Render your video to the local folder you specified
- Automatically begin uploading to YouTube once rendering is complete
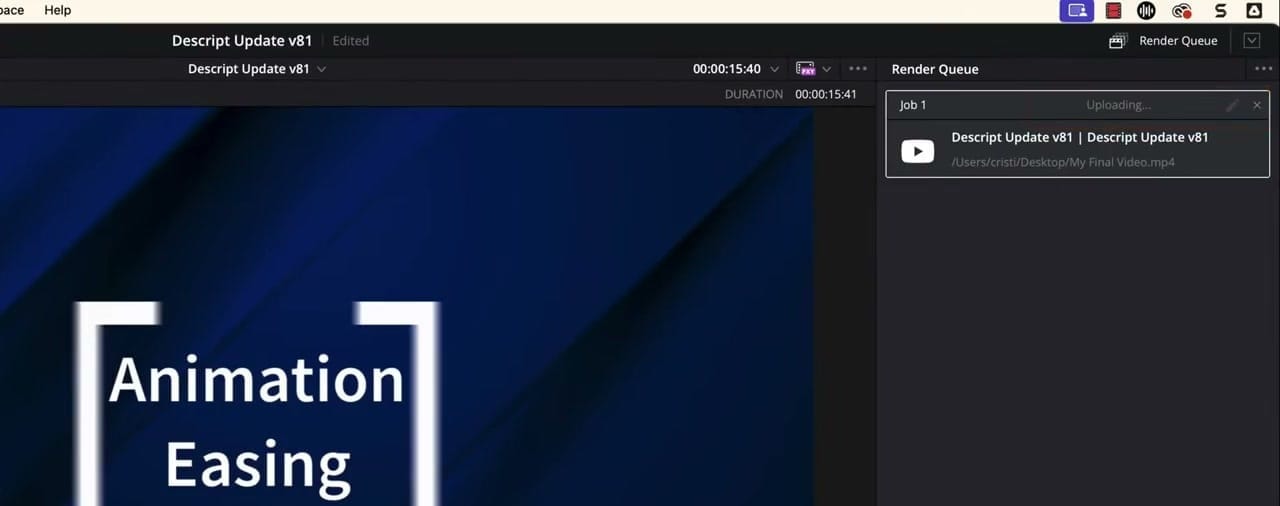
You can monitor the progress in the Render Queue panel on the right — it will show "Uploading..." once the render finishes and the upload begins.
Finalizing Your Video on YouTube
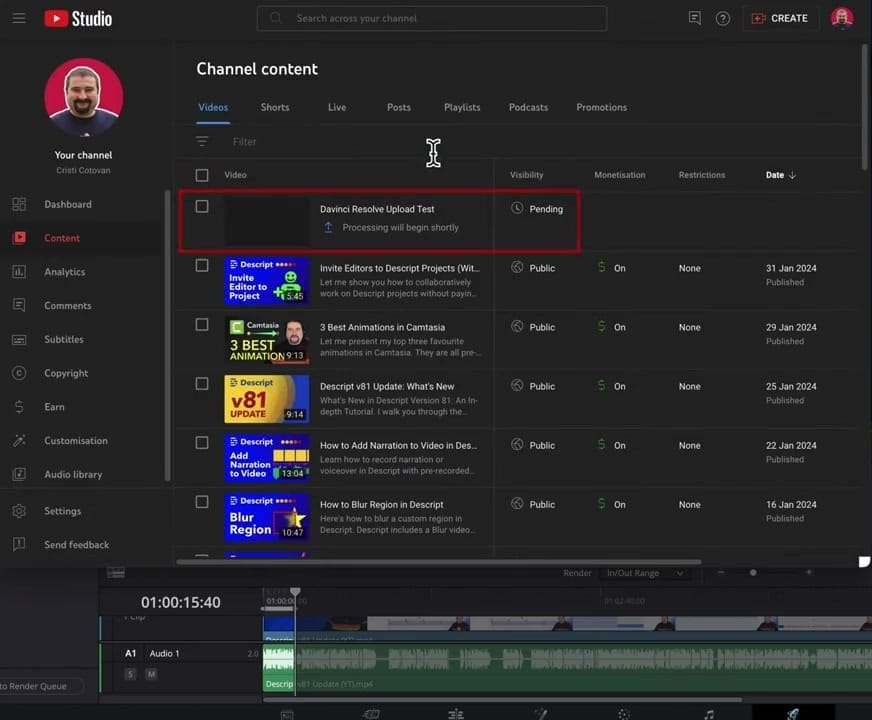
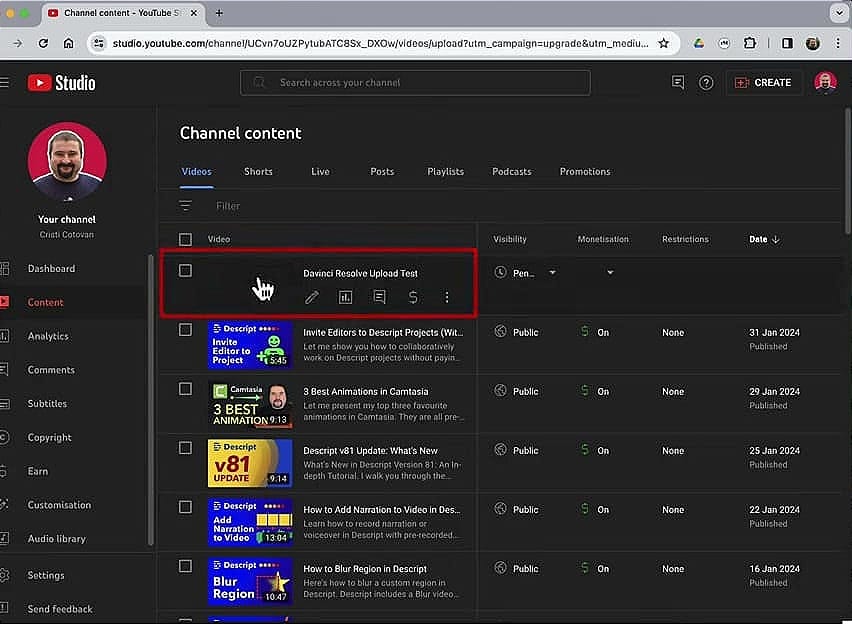
Once the upload completes, head over to YouTube Studio. You'll see your video appear in the content list with a "Pending" status while YouTube processes it.
From here, you can:
- Edit the title and description further
- Add tags and hashtags
- Upload or change the thumbnail
- Add end screens and cards
- Schedule the video to go public at a specific time
- Set monetization options
And that's it! The upload completed successfully. Notice in the Render Queue on the right side it confirms "Upload completed".
Why This Integration Is Worth Using
The best part about this feature is that DaVinci Resolve remembers your connected account. Unlike some other video editors where you have to re-authenticate every time, DaVinci keeps the connection active.
So your next upload is literally:
- Go to Deliver page
- Select YouTube preset
- Enter title, set to Private
- Add to Render Queue → Render All
Two clicks and your video is on its way to YouTube while you move on to your next project.
If you found this guide helpful, check out my Media Makers Club membership for more video editing tutorials, courses, and a community of fellow creators.


