
How to Create Scrolling Text Credits in Camtasia

Scrolling text credits — like you see at the end of movies — are a frequent request for video projects. Whether you're crediting team members, listing music sources, or adding acknowledgments, Camtasia makes it straightforward using a text annotation combined with a custom animation.
Step 1: Add a Text Annotation
Start with a blank project (or at the point in your timeline where credits should appear). Go to Annotations in the left panel and drag a text callout onto your canvas.
Double-click inside the text box, select all the default text, and paste your credits. You can use any placeholder text while setting things up — Lorem Ipsum works fine for testing.
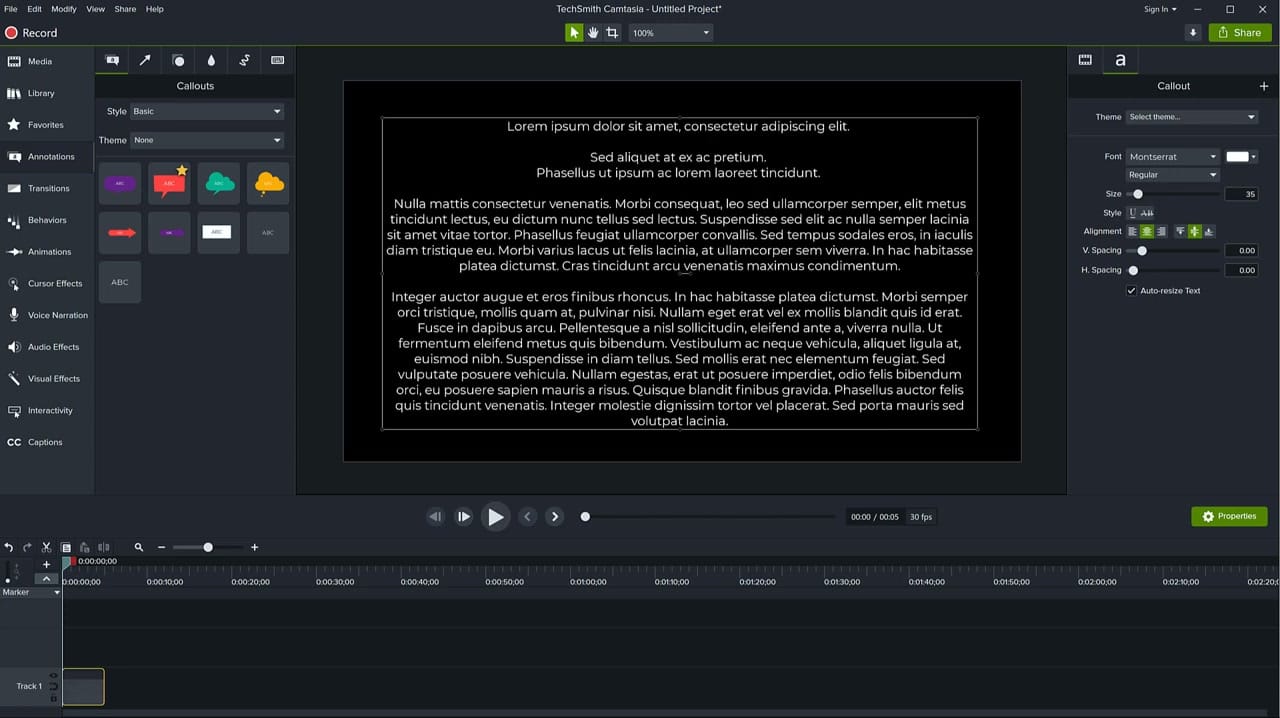
Step 2: Format Your Credits
With the text selected, format it to look like proper credits:
- Center-align the text
- Break lines into short phrases — names, roles, acknowledgments on separate lines
- Adjust the font, size, and color in the Properties panel on the right
- You can style individual lines differently — select specific text to change its font weight or color
Resize the text box to control how wide your credits appear on screen.
Step 3: Position Text Below the Canvas
This is the key trick. With the text annotation selected and the playhead at the start of the clip:
- Press the Down arrow key repeatedly to push the text below the visible canvas area
- Hold Shift while pressing Down to move it faster
- Keep going until the text is completely off-screen below the canvas
You can zoom out with the mouse wheel to see where your text is positioned relative to the canvas.
Step 4: Extend the Clip Duration
Before adding the animation, decide how long your credits should scroll. Drag the right edge of the text clip in the timeline to extend it — 30 seconds, 60 seconds, or however long you need. Longer clips mean slower, more readable scrolling.
Step 5: Add a Custom Animation
Go to the Animations tab in the left panel. Double-click Custom to add a custom animation to your text clip.
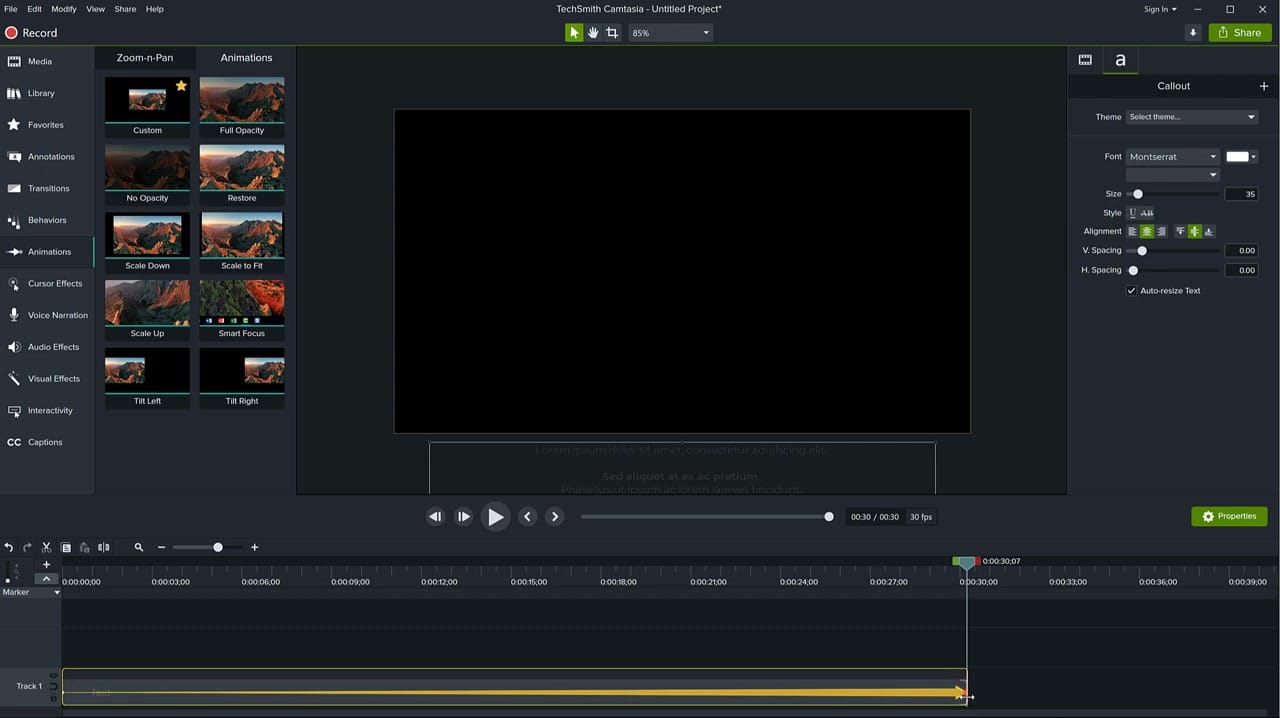
You'll see an animation arrow appear on the clip in the timeline. This arrow represents the transition from the starting position to the ending position.
Step 6: Stretch the Animation
By default, the animation only covers a few seconds. You need it to span the entire clip. Drag the animation arrow's right edge all the way to the end of the text clip.
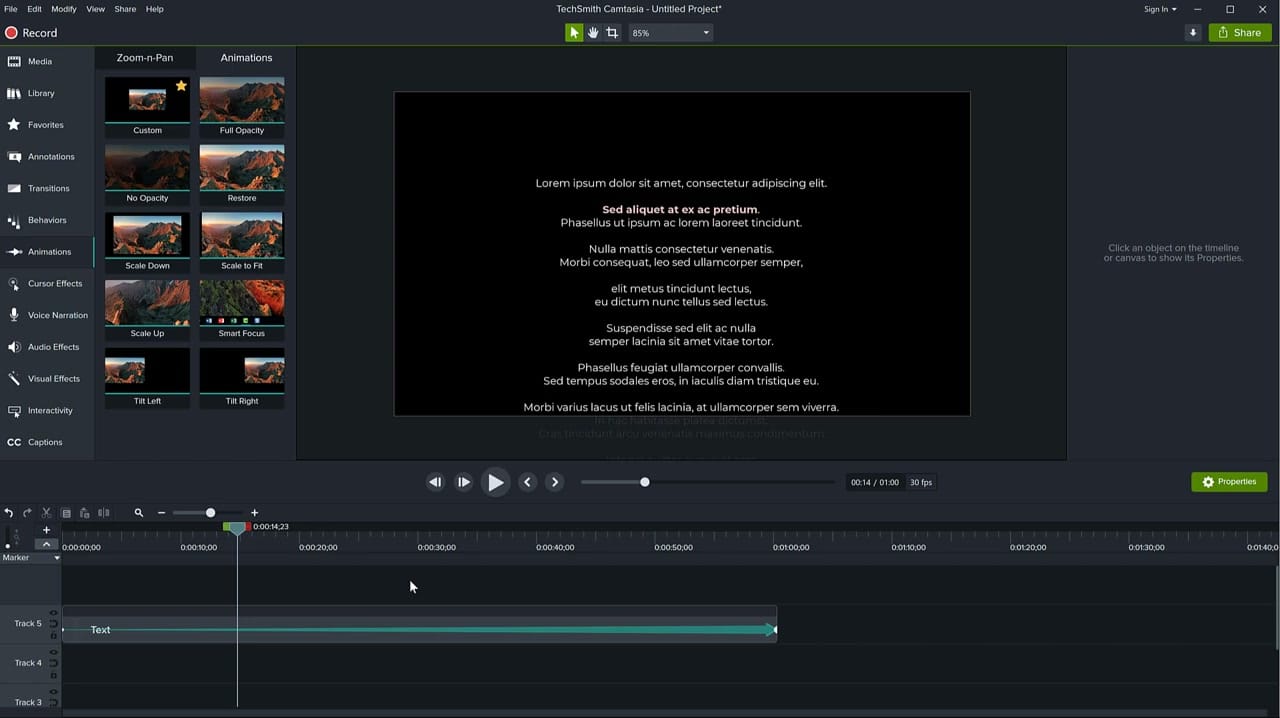
Step 7: Set the End Position
Move the playhead to the end of the clip. Now move the text upward — past the top of the canvas — until it's completely off-screen above. Press the Up arrow key (hold Shift for faster movement).
The animation will now move the text from below the canvas (start position) to above the canvas (end position), creating the classic scrolling credits effect.
Step 8: Disable Easing for Constant Speed
By default, Camtasia applies easing to animations — the text will accelerate at the start and decelerate at the end. For credits, you want a constant scrolling speed.
Right-click on the animation arrow in the timeline and look for the easing options. Set both the start and end easing to None or Linear for a smooth, constant scroll.
Tips for Better Scrolling Credits
- Longer clips = slower scroll. If the text moves too fast, extend the clip duration. Sometimes you may want to match the credits to a song or something.
- Test playback before rendering — make sure all text is readable at the chosen speed.
- For very long credits, duplicate the text clip on the timeline and continue the scroll across multiple clips if needed.
- Use a black background with white text for the classic movie credits look.
Related guides

If you wish to learn more about Camtasia and wish to have a one-on-one Camtasia coaching session, feel free to book a call with me.
I'm here to help you with any questions you have and to guide you through the best workflows, tips, workarounds, or just answer any questions you may have!


