How I prepare metadata for YouTube quickly using Riverside
I walk through the exact steps I follow so you can replicate the same process and prepare metadata for YouTube without overworking each upload.

I regularly prepare metadata for YouTube for tutorial videos edit. Over time I've developed a short workflow that gets me an SEO-friendly title, a concise description, chapter timestamps, tags and clean subtitles in minutes. You can run this in Riverside's Co-Creator.
Step 1: Create a project and upload the finished video
I start with the final edited file (I often edit tutorials in Camtasia because it allows zooming in and out, adding annotations, etc.) and upload it to Riverside’s studio when finished.
Upload launches the automatic transcription and a few AI-generated assets. I don’t use the auto clips here - I only want the transcript so the AI can read the recording.
This initial upload is the fastest way I prepare metadata for YouTube because Riverside gives me a ready transcript to prompt from.
Step 2: Use Co-Creator to generate title and description
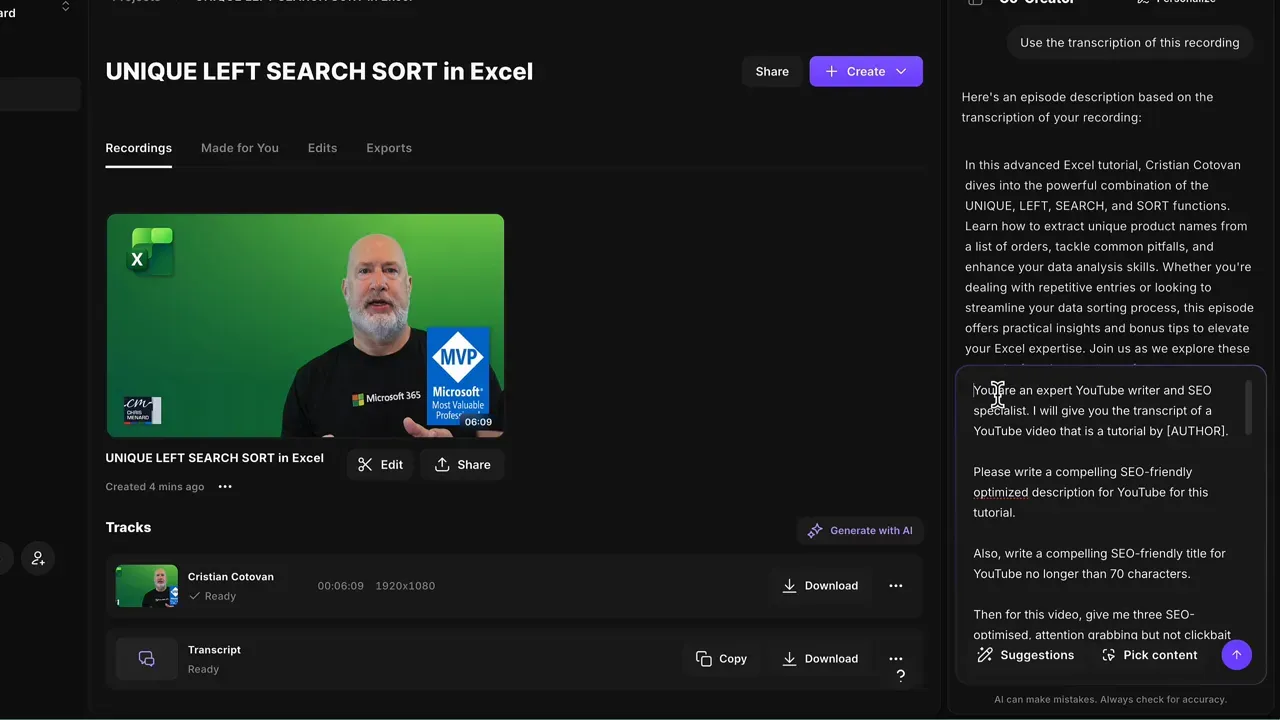
With the transcription available, I run Riverside’s Co-Creator prompt.
My prompt asks for:
- a compelling, SEO-friendly description written in first person
- a primary title plus two alternative titles suitable for A/B testing
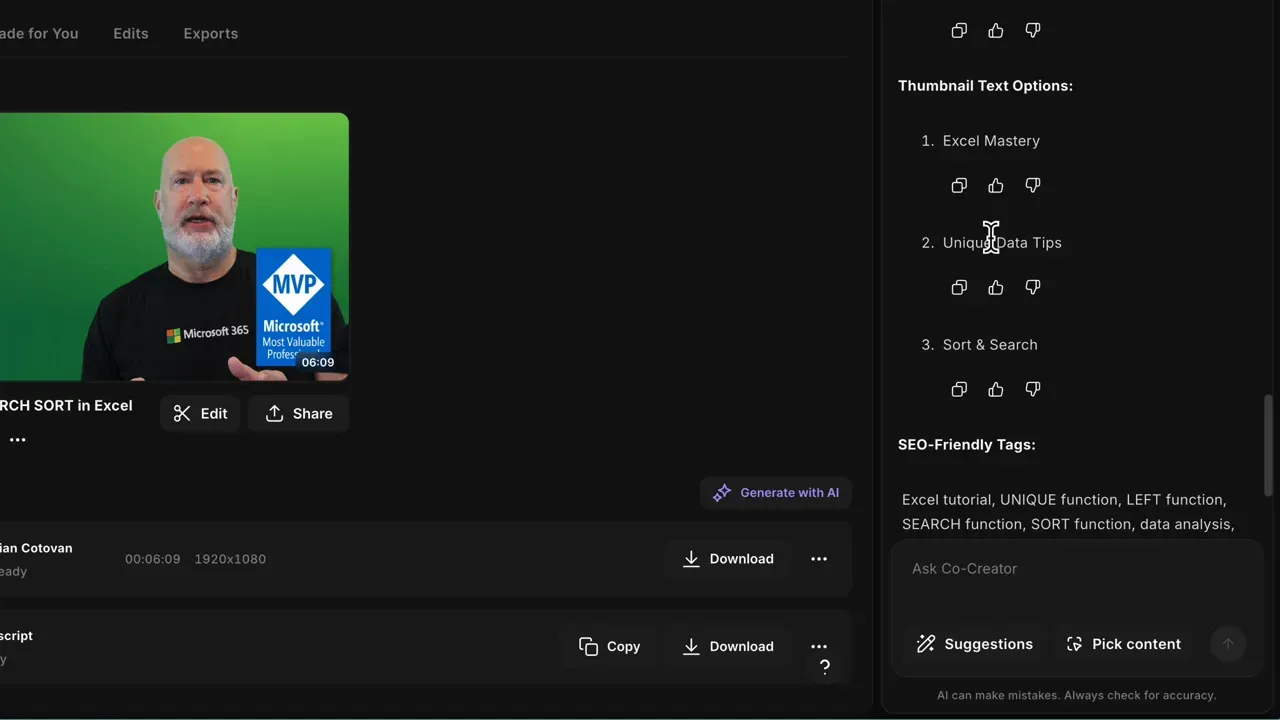
- two short phrases (2–3 words) suitable for thumbnail text
- a comma-separated list of relevant tags under the 500-character limit
I include negative instructions to avoid clichés and vague superlatives and I ask the model to describe concrete benefits - for example, what each function does and who benefits - rather than using hyperbolic language. I paste the transcript into the prompt and run it. The result gives me a usable description and multiple title options I can tweak.
Here's the full prompt, feel free to copy it, use it or tweak it:
You are an expert YouTube writer and SEO specialist. I will give you the transcript of a YouTube video that is a tutorial by [AUTHOR].
Please write a compelling SEO-friendly optimized description for YouTube for this tutorial.
Also, write a compelling SEO-friendly title for YouTube no longer than 70 characters.
Then for this video, give me three SEO-optimised, attention grabbing but not clickbait titles for YouTube title A/B testing. Respect the length of 70-80 characters max. Include relevant keywords that will help make this video findable in search.
Give me a few 2-3 word titles that I can add to the thumbnail of this video - thumbnails on YouTube typically must have very little text.
Finally give me a list of SEO-friendly relevant tags for YouTube for this video separated by commas.
Do not use:
- Clichés
- Gratuitous comparisons
- Hyperbolae
- Overly corporate language
Avoid these specific cliches and overused phrases:
- "changes everything" / "game changer" / "revolutionize"
- "you need to know about" / "you won't believe"
- "secret" / "hidden gem" / "best kept secret"
- "take your [X] to the next level"
- "in [current year]"
- Starting with rhetorical questions
Instead, be direct and factual. State what the feature does and who benefits, without overpromising or using vague superlatives.
Focus on specific, concrete benefits rather than transformative language. Instead of saying something "changes everything," describe the actual workflow improvement or time saved.
Do not start with a cliche question. Do not be cringey. Be professional and concise without giving away all of the tricks. Speak in first person, addressing the viewer in second person.
Here is the transcript:
Step 3: Pick and tweak titles, prepare A/B test variations
I select a primary title that respects the 70-character guideline and create two alternates for YouTube’s A/B testing. Each title includes keywords that match likely search queries for the topic.
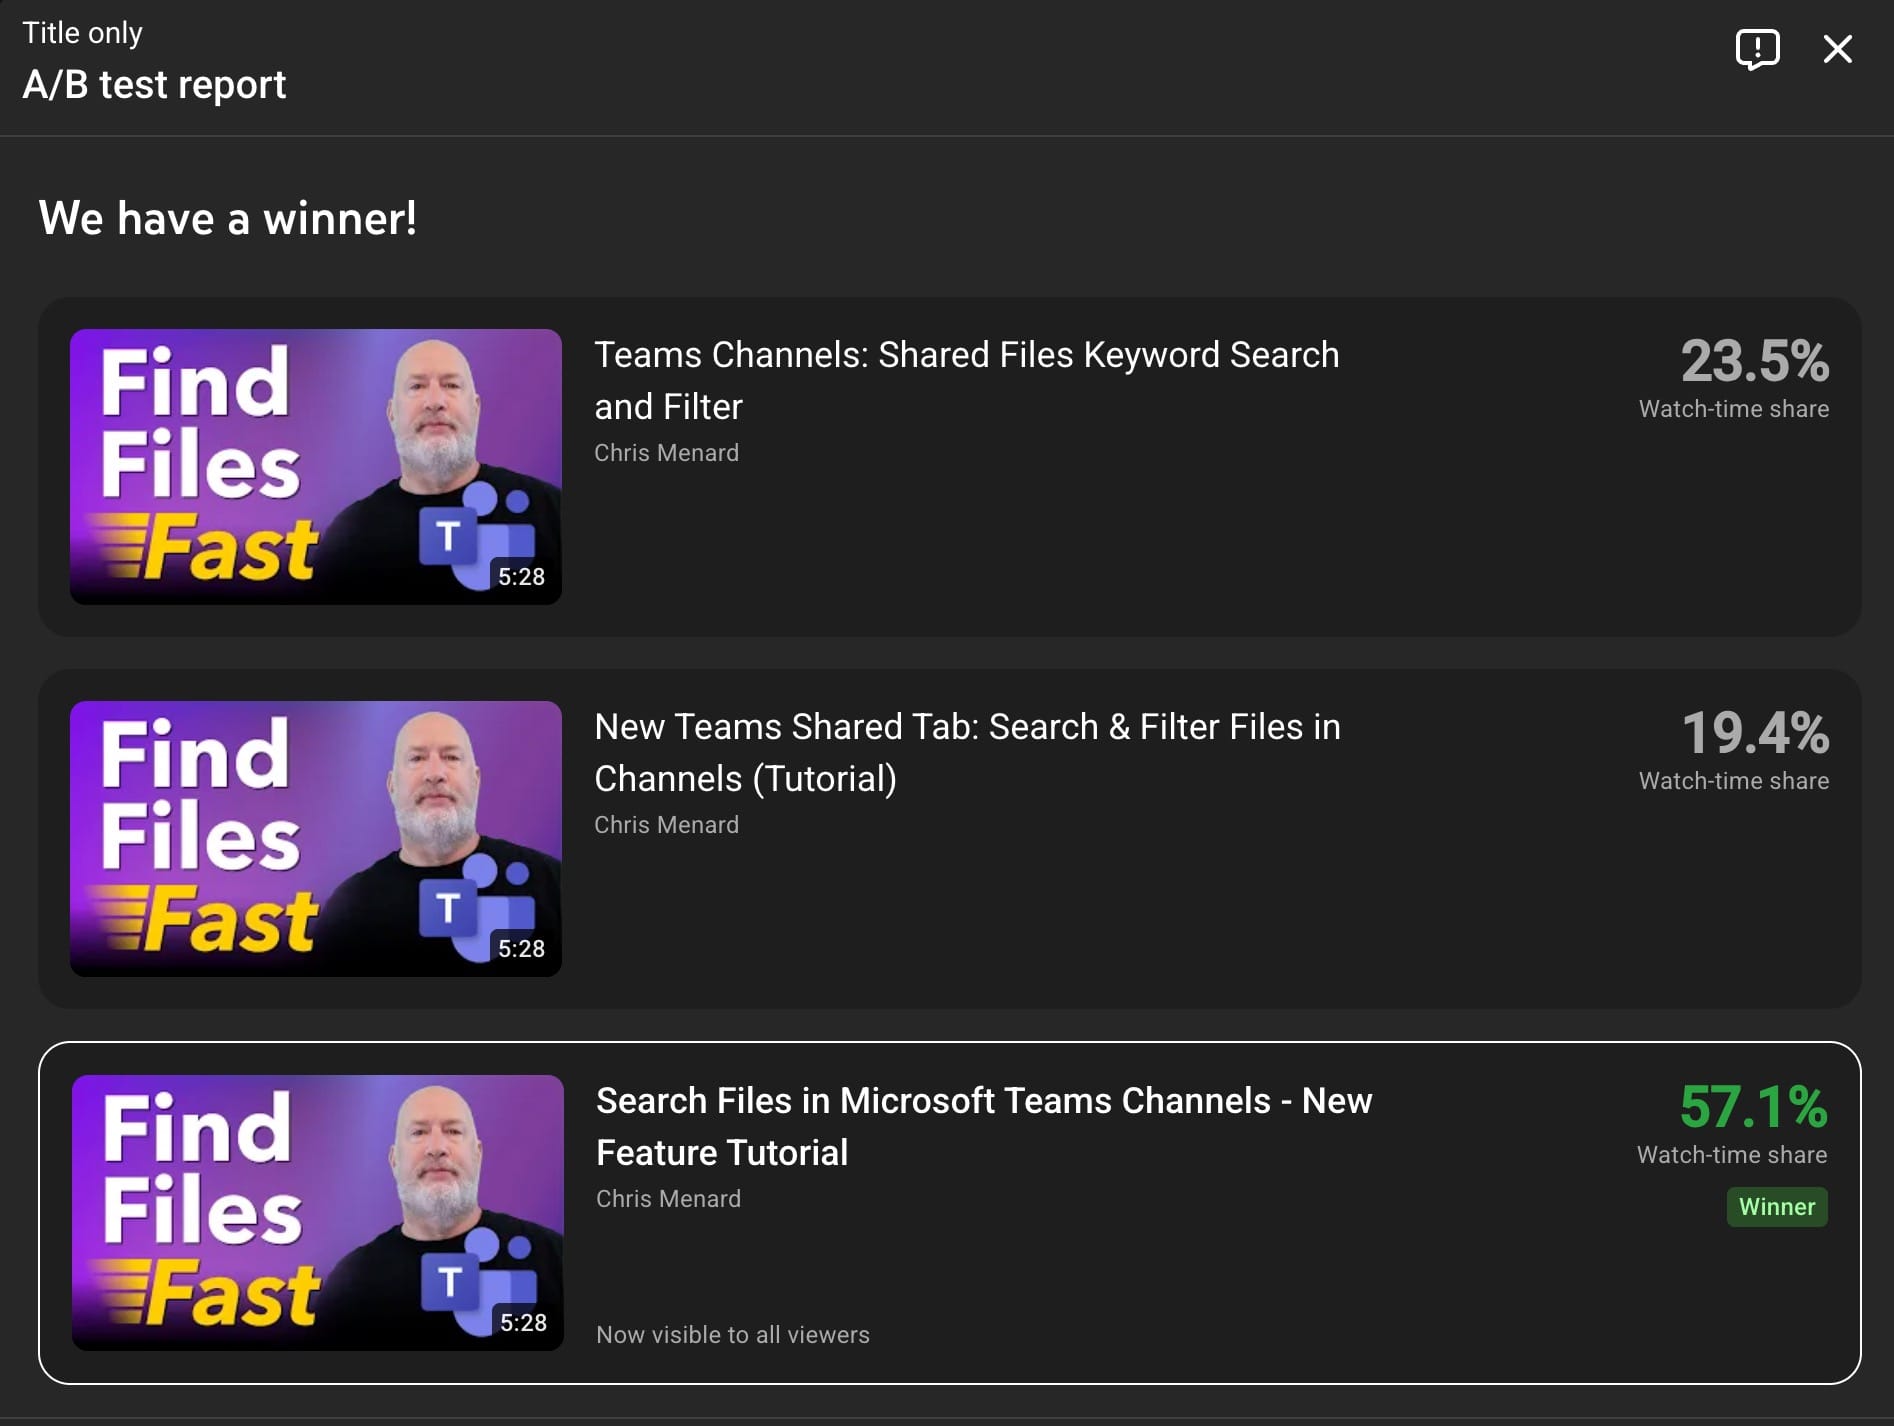
YouTube's A/B testing for titles was recently introduced and it helps if you're undecided which titles/keywords to use in your video for best reach. Here is the result of one of the many A/B tests I've done on Chris Menard's videos:
I also pick two short thumbnail phrases from the AI suggestions and edit them down so they fit the thumbnail visually.
Step 4: Generate chapter markers with exact timestamps
Chapters improve navigation and search discoverability on YouTube. I ask Co-Creator to generate chapter markers with precise timestamps by using the transcript as the source.
If the first pass has formatting issues (brackets, misspelled function names), I revise the prompt to request no brackets and provide the exact spelling of function names (for example UNIQUE, LEFT, SEARCH, TEXTBEFORE, SORT in this tutorial).
Then I copy the cleaned list into my YouTube description.
If you’re eager to learn more about Riverside and wish to have a one-on-one Riverside coaching session, feel free to book a call with me.
I’m here to help you with any questions you have and to guide you through the best workflows, tips, workarounds, or just answer any questions you may have!
Step 5: Copy tags and paste into YouTube
I instruct the AI to return tags separated by commas so they paste cleanly into YouTube’s tags field and also to keep the total characters to 500 (including commas), which is YouTube's limit.
Riverside preserves the comma-separated format, so a simple copy/paste expands into individual tags on the YouTube form. This step saves me the repeated typing of related keywords.
Step 6: Use Riverside transcript to create clean subtitles
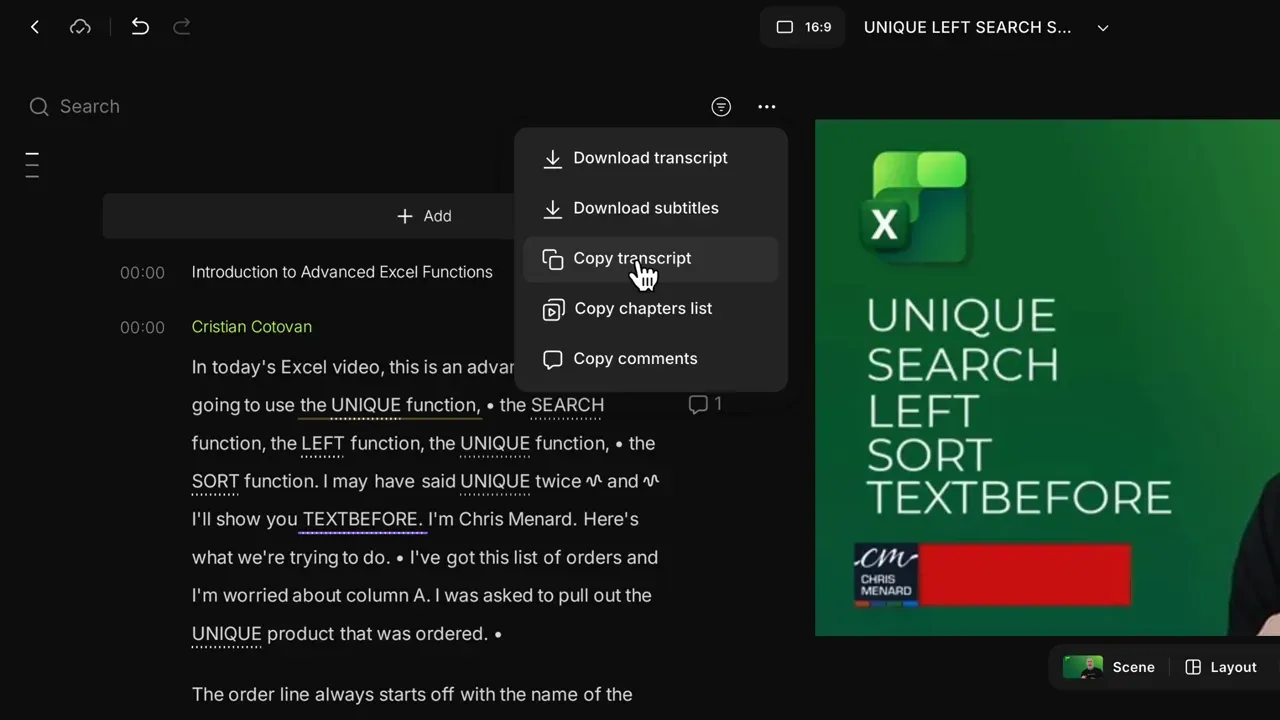
I prefer to upload my own subtitles rather than relying on YouTube’s automatic captions. I copy the transcript from Riverside, then open the YouTube subtitles editor and paste that text.
Before copying, I correct function names and common misread words inside Riverside’s transcript editor using “Correct everywhere” so the subtitles are accurate and consistent.
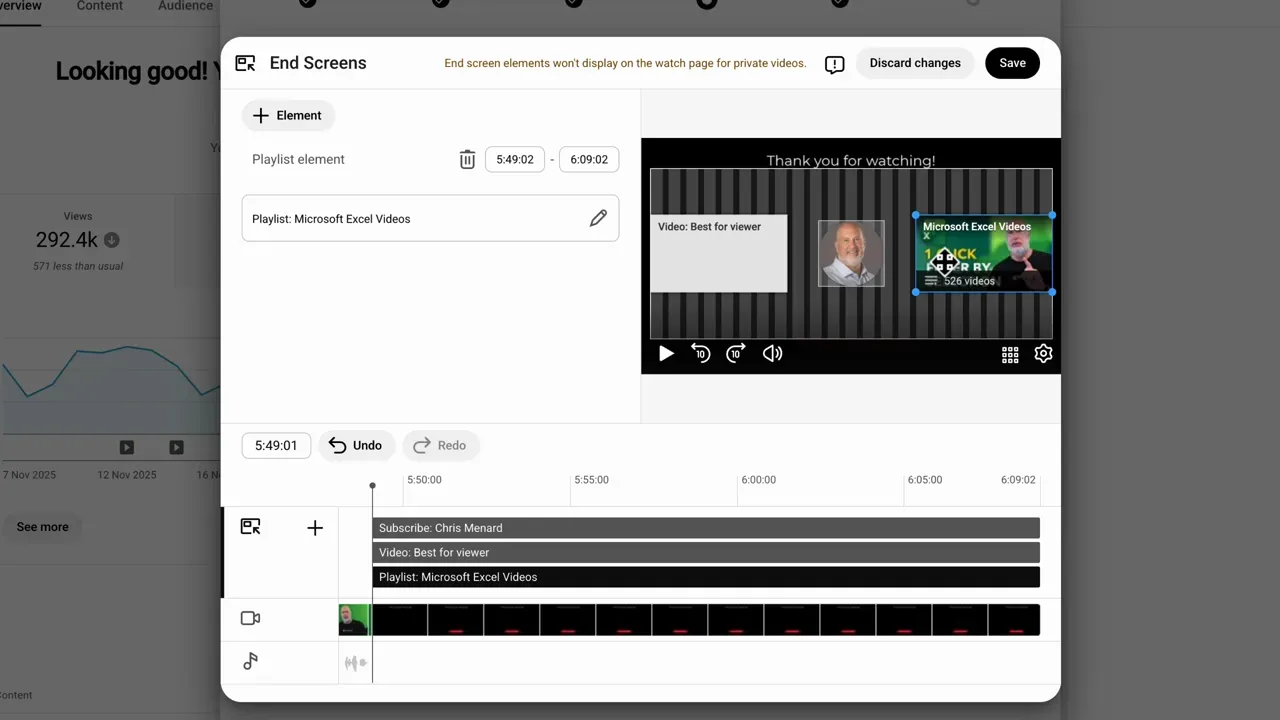
Step 7: Final checks - end screen, monetization and upload
With title, description, chapters, tags and subtitles in place I finish the YouTube upload flow: set monetization, add an end screen or playlist suggestion, and save. If I exported the video from Riverside I can also upload directly from Riverside to YouTube to skip a local download step.
Quick checklist I use every upload
- Upload final video to Riverside and wait for transcript.
- Run CoCreator with transcript to generate title(s), description and tags.
- Tweak titles for A/B testing and pick two thumbnail phrases.
- Generate and clean chapter timestamps; paste them into the description.
- Correct transcript text, copy it, and paste into YouTube subtitles.
- Set end screen, monetization and publish settings.
Why this approach works for me
This routine lets me prepare metadata for YouTube quickly while keeping the language factual and focused on concrete benefits. Using the transcript as the source keeps titles and descriptions tightly tied to the video content, and correcting transcript terms once eliminates small errors in both the description and subtitles.
It's not a perfect shot every time - the AI seems to insist on embellishing the description a lot, but I tweak and clean it up to match my own voice.
Final notes
If you create tutorials, capture the transcript and use it as the single source of truth for titles, descriptions, chapters and subtitles. Over time you can refine the Co-Creator prompts to match your voice and eliminate repetitive edits. That reduces the time it takes to prepare metadata for YouTube from many minutes to just a minute or two per video.