
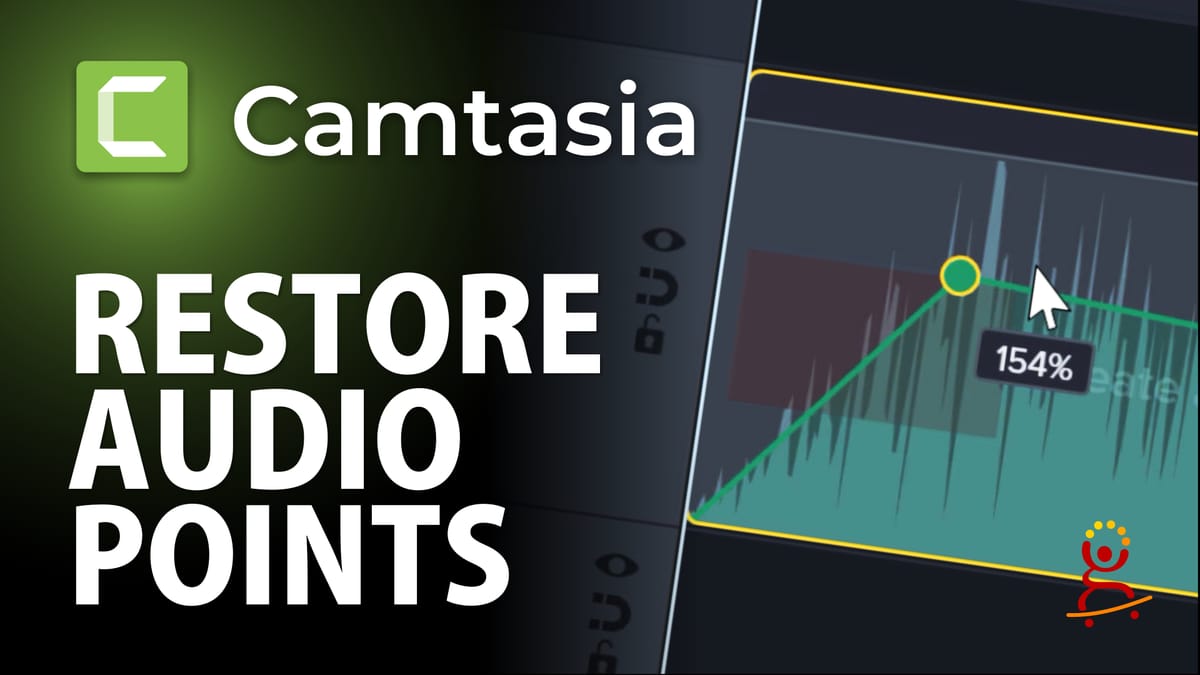
How to Adjust Variable Audio Volume Levels in Camtasia
Learn to use volume keyframes in Camtasia

When you have background music running under narration in Camtasia, you need the music to dip when someone is speaking and come back up in the gaps. You can do this entirely by hand using volume keyframes — no audio effects required.
Watch the full walkthrough:
Set Up the Timeline
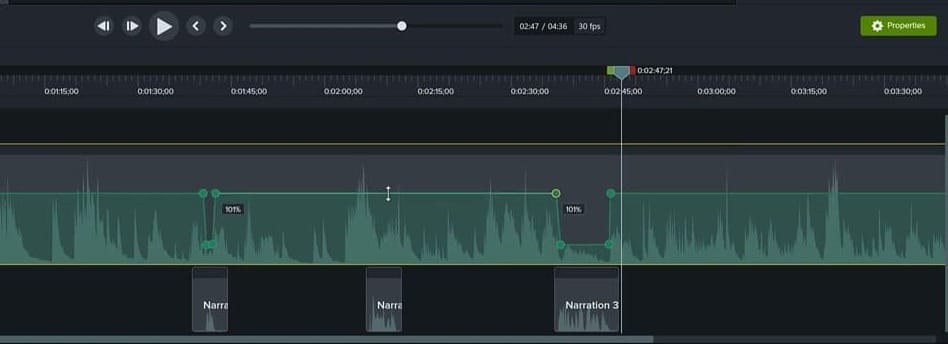
Import your narration clips and a music track into the Media Bin, then drag them onto the Camtasia timeline. Place the music on one track and the narration clips on a separate track so they overlap in time.
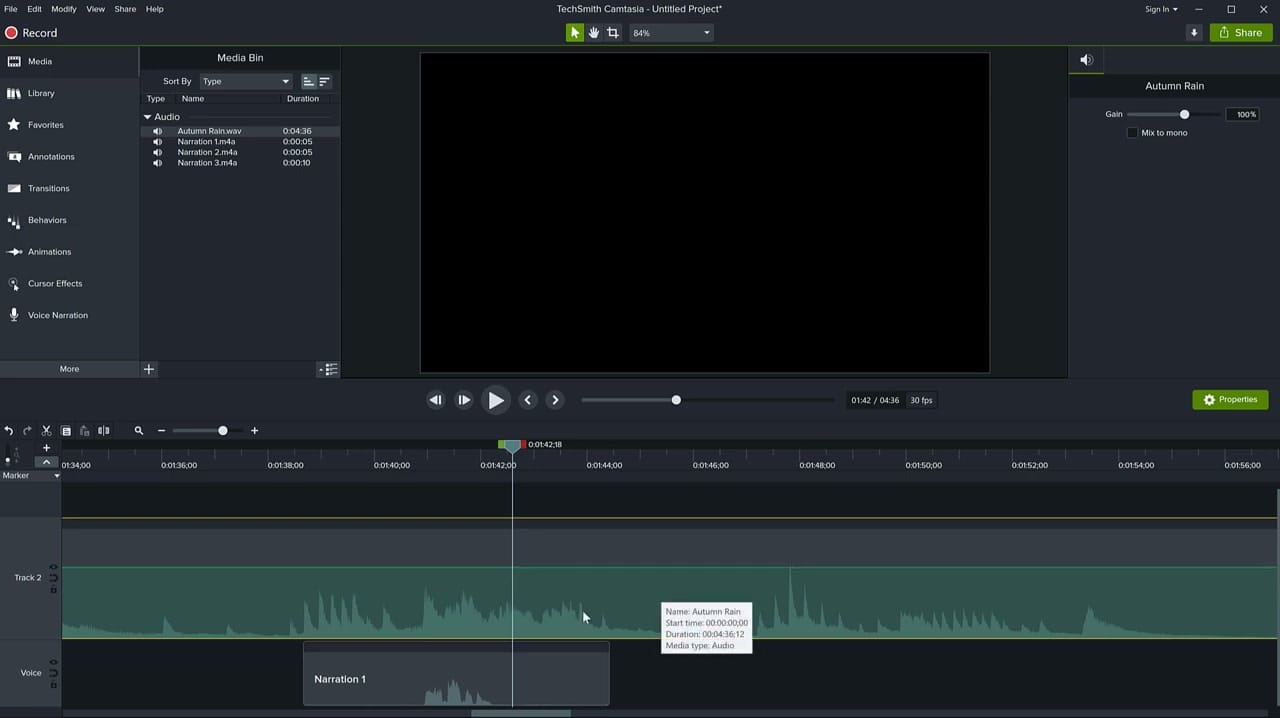
Rename your tracks (double-click the track name) so you can tell them apart at a glance. Make the music track taller by dragging the top edge — this reveals the green volume line that runs across the clip.
Add Volume Keyframes
Click the music clip to select it. You'll see a green line running horizontally across the waveform — this is the volume level for that track. To create a volume dip around a narration section, you need four keyframe points:
- Double-click on the green line just before the narration starts — this is where the music begins to lower
- Double-click again where the narration actually begins — this is the start of the quiet section
- Double-click where the narration ends — this is the end of the quiet section
- Double-click just after the narration — this is where the music returns to full volume
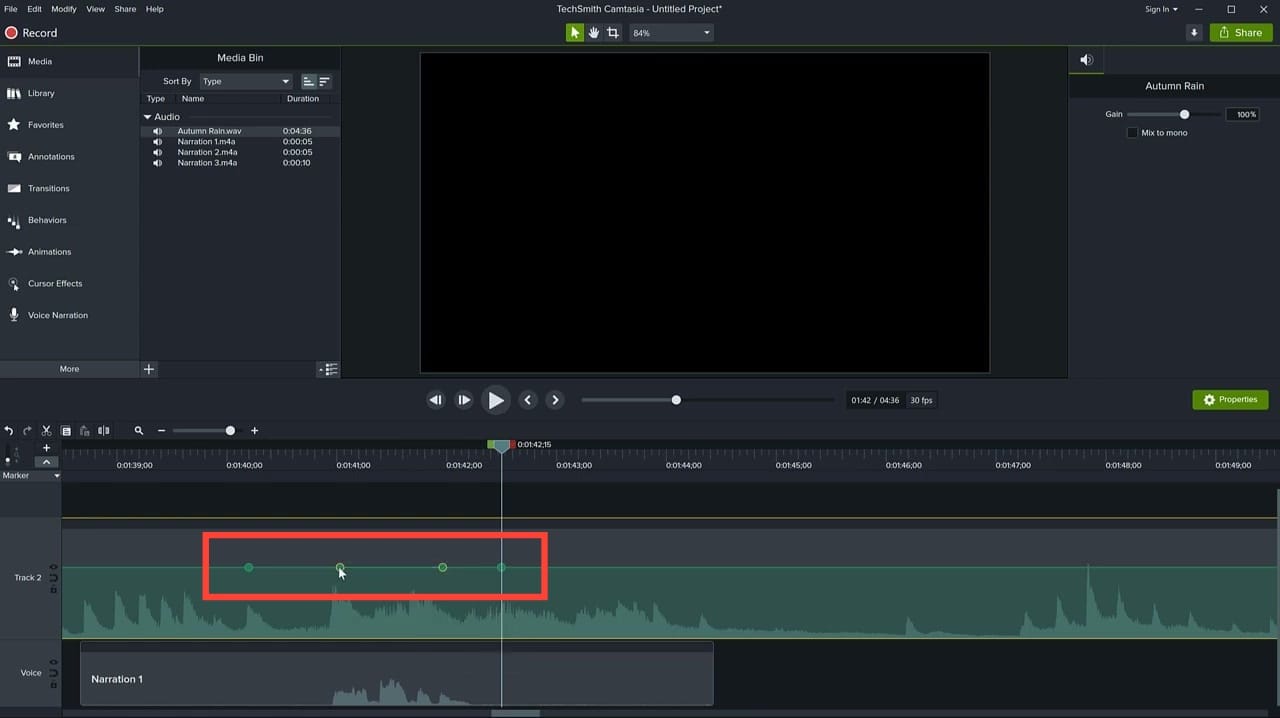
Each double-click creates an inflection point (keyframe) on the volume line. You can place as many as you need along the clip.
Adjust the Volume Levels
Now drag the two inner keyframe points downward. You don't want to mute the audio completely — lowering the music to about 25–30% keeps a pleasant bed under the narration without competing with the voice.
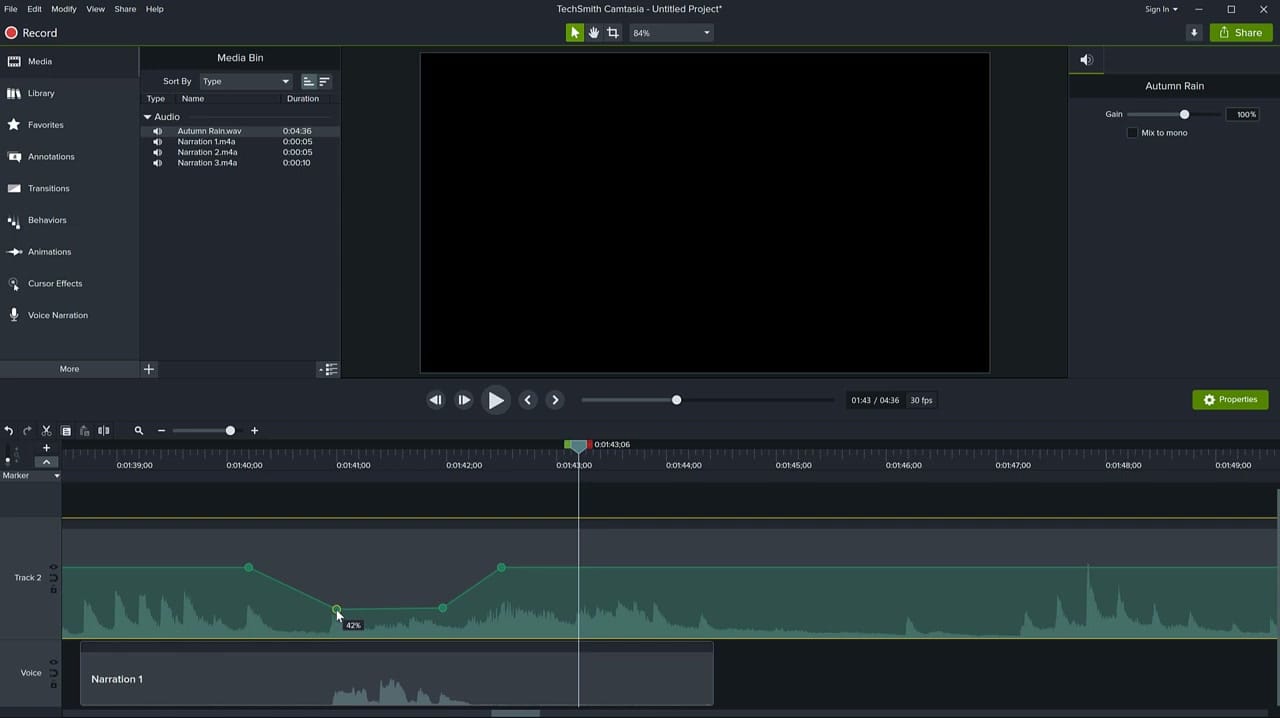
Preview the result and fine-tune as needed. If the transition sounds too abrupt, slide the outer keyframe points further apart to create a more gradual ramp. If the music is still too loud during speech, drag the inner points lower.
Adjust an Entire Section at Once
Instead of dragging each keyframe individually, you can drag the line between two points. This moves the entire section up or down while keeping both endpoints locked in place horizontally — so you won't accidentally shift the timing.
Repeat this process for every narration clip on your timeline. Each section gets its own set of four keyframe points.
Tips
- You can move keyframe points after placing them by dragging them left or right along the volume line
- If you want the audio to fade more gradually, space the outer and inner keyframes further apart
- This technique works on any audio clip — not just music. You can use it to selectively lower or raise volume on narration, sound effects, or ambient audio
- For an automated version of this workflow, try the Audio Emphasize effect which does volume ducking automatically when it detects speech
Related guides
If you’re wish to learn more about Camtasia and wish to have a one-on-one Camtasia coaching session, feel free to book a call with me.
I’m here to help you with any questions you have and to guide you through the best workflows, tips, workarounds, or just answer any questions you may have!


