How to Change the Color of Objects in a Video Using Adobe Premiere Pro


Need to change the color of a dress, a car, or any object in your video without masking or tracking? Adobe Premiere Pro has a simple built-in effect called Change to Color that does exactly this. It targets a specific color in your footage and replaces it with another — no frame-by-frame work required.
Applying the Effect
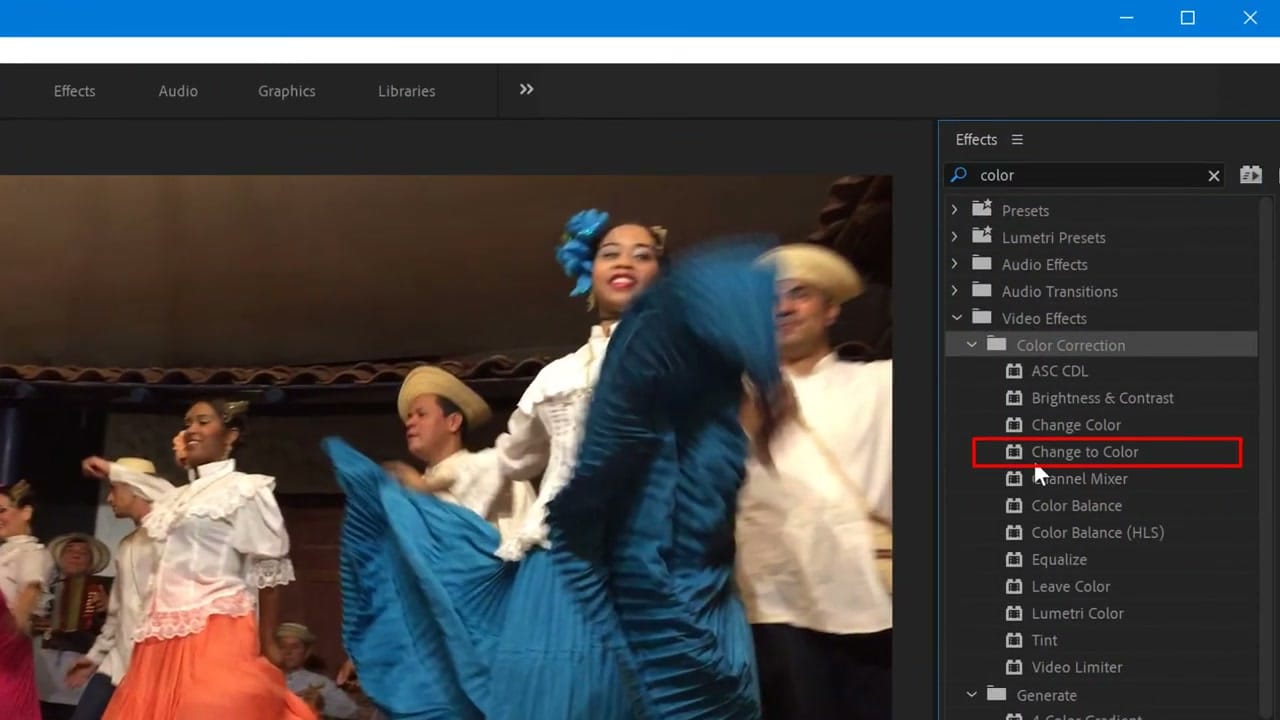
Open the Effects panel (Window > Effects) and search for "color." Under Video Effects > Color Correction, find Change to Color and drag it onto your clip in the timeline.
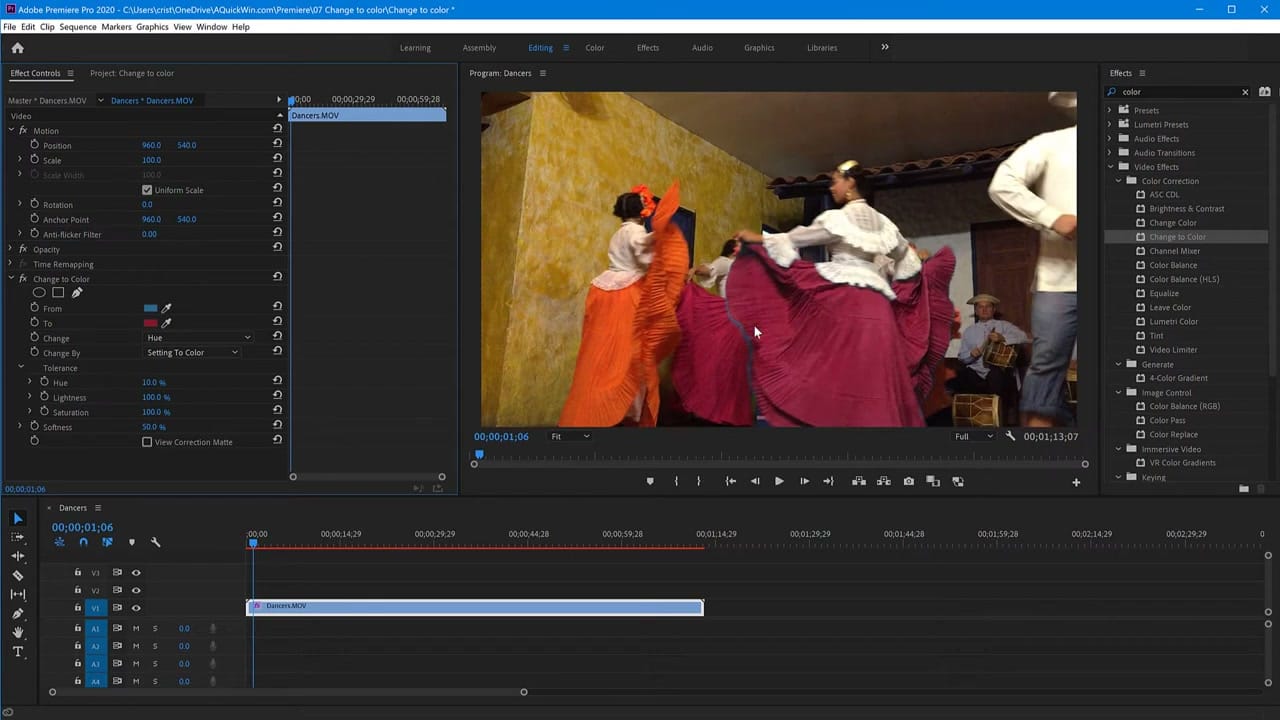
Select your clip, then open Effect Controls. You'll see the Change to Color settings with two color swatches: From (the source color) and To (the target color). Click the eyedropper next to "From" and pick the color you want to change directly from the video preview. Then click the "To" swatch and choose your replacement color.
Related guides
Adjust the Tolerance and Softness sliders to fine-tune the range of colors being replaced. Too much tolerance and surrounding colors get affected; too little and you'll see remnants of the original color. The effect works best on objects with a relatively uniform, distinct color.