How to Bleep Words in Riverside: Mute a Speaker and Add a Censor Sound
Cover an unwanted word in Riverside without losing the audio around it — mute just one speaker, drop in your own censor beep, and fine-tune the timing, trimming, fades, and volume.


One of the questions I get asked often about Riverside is a simple one: can I bleep a word? Maybe someone swears, maybe a name or a number needs to disappear, and you want to cover it with a beep while keeping the laughter, reactions, and everything else around it intact. The good news is that this is genuinely easy in Riverside's new editor, and I'll walk you through the whole thing step by step.
By the end you'll know how to mute just the speaker you want, drop in your own censor sound, and fine-tune the timing, trimming, fades, and volume so the beep sits cleanly in your edit. If you want to follow along in your own account, you can try Riverside here.
Get a bleep or censor sound ready
Riverside's new editor doesn't have a built-in sound-effects library yet. The stock library currently holds music only, so a proper beep isn't in there (hopefully a sound-effects library is on the way). That means you'll bring your own bleep sound, and you only need to do this once.
Grab a free censor beep from Pixabay — here's the exact one I use — and save it somewhere handy. I renamed mine "Censor Beep" so it's easy to find later. We'll upload it into Riverside in a moment, and once it's in there it stays available for every future project.
Select the words you want to bleep
Open your project and expand the timeline so you can see the audio clearly. Find the moment you want to cover, then select the words right in the transcript by dragging across them. As you do, you'll notice the matching section light up in the timeline below — the transcript and the timeline are linked, so selecting text selects the audio.
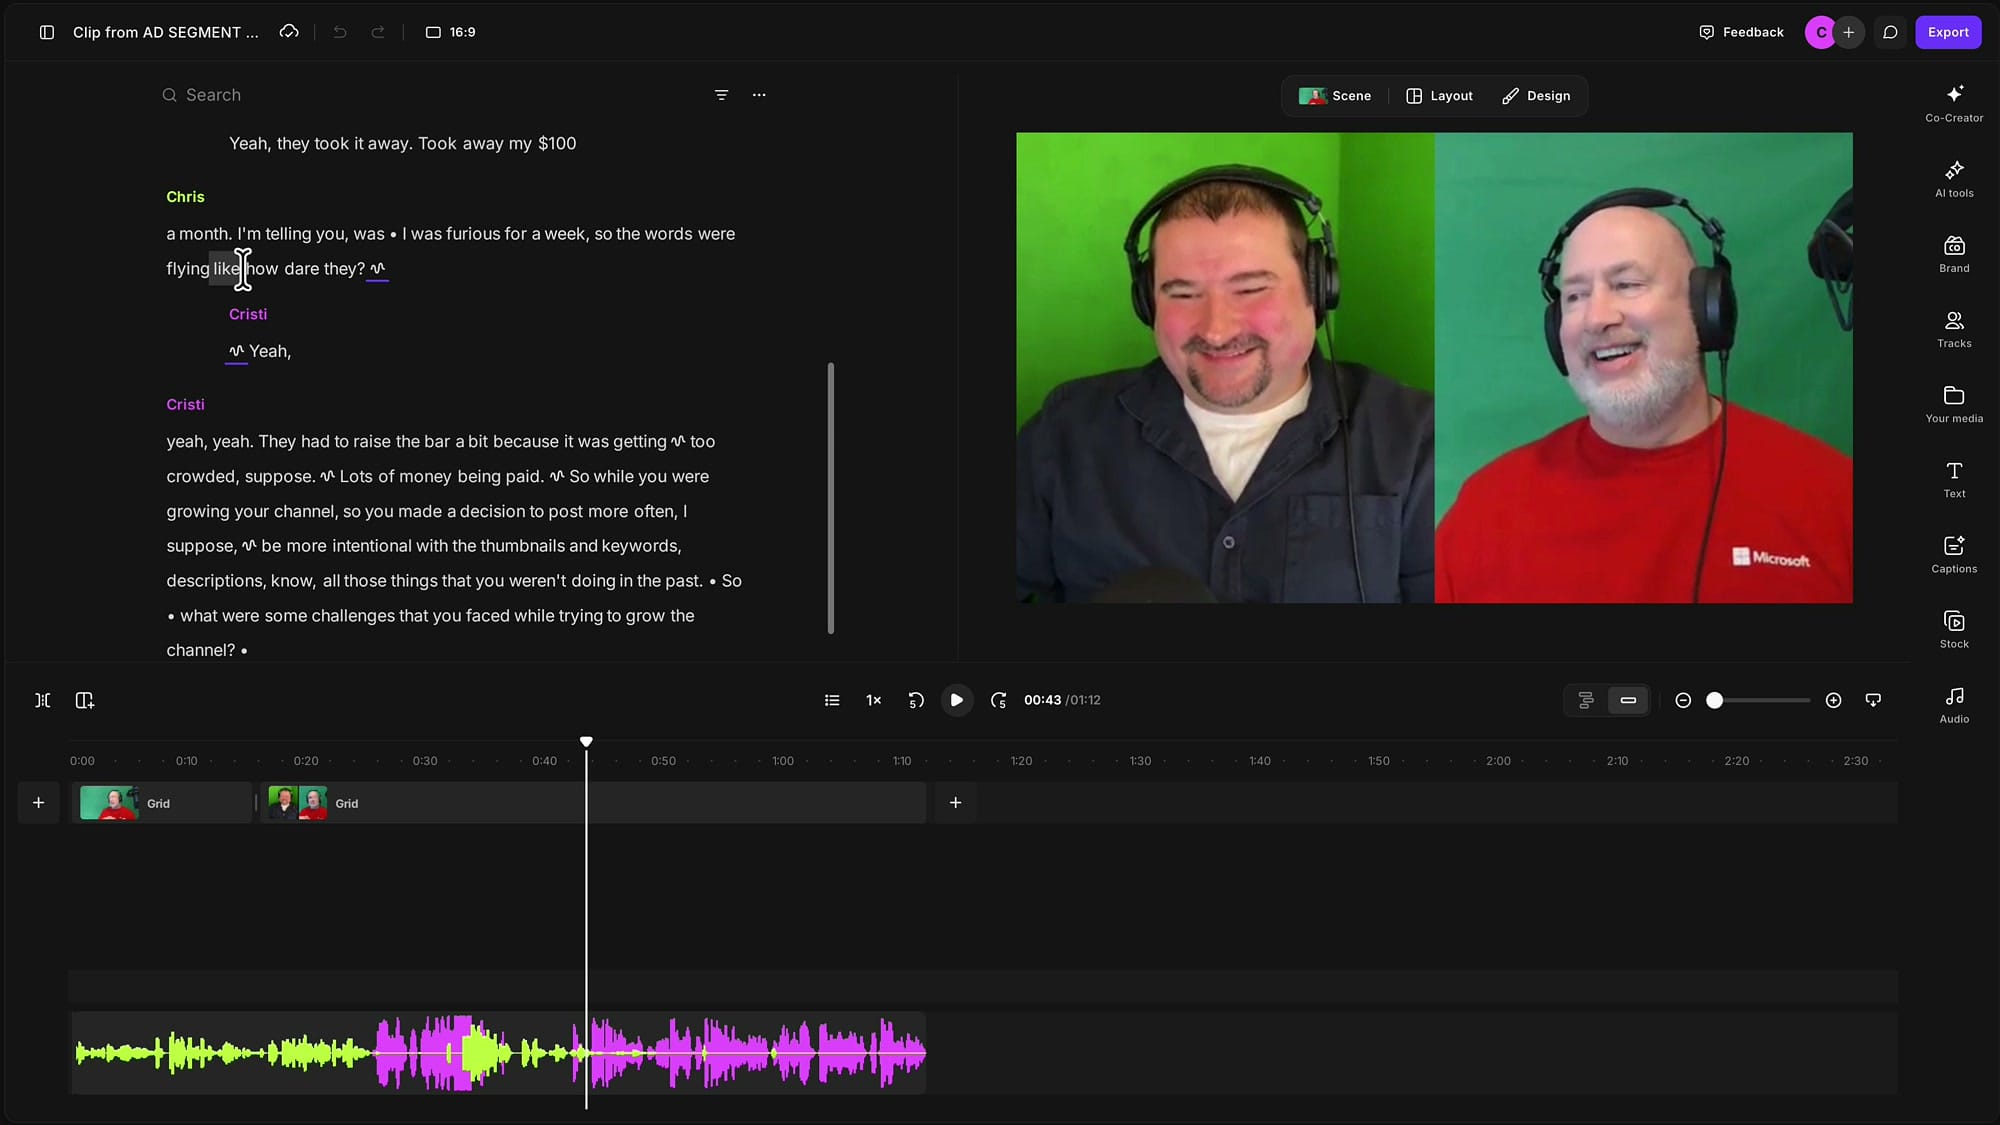
Here's the catch to watch for: if two people are talking over each other, selecting a phrase can grab both voices. In my example, I'm laughing while my guest is speaking, and I don't want to mute my own laughter — only his words. So the next step is telling Riverside exactly whose audio to silence.
Mute only the speaker you want
With the words selected, click Mute. Riverside asks who you want to mute, and you simply pick the speaker — in my case that's my guest, leaving my own track untouched. This same idea of silencing one person while keeping the other is exactly how I handle crosstalk in Riverside, so it's a handy technique to have in your back pocket.
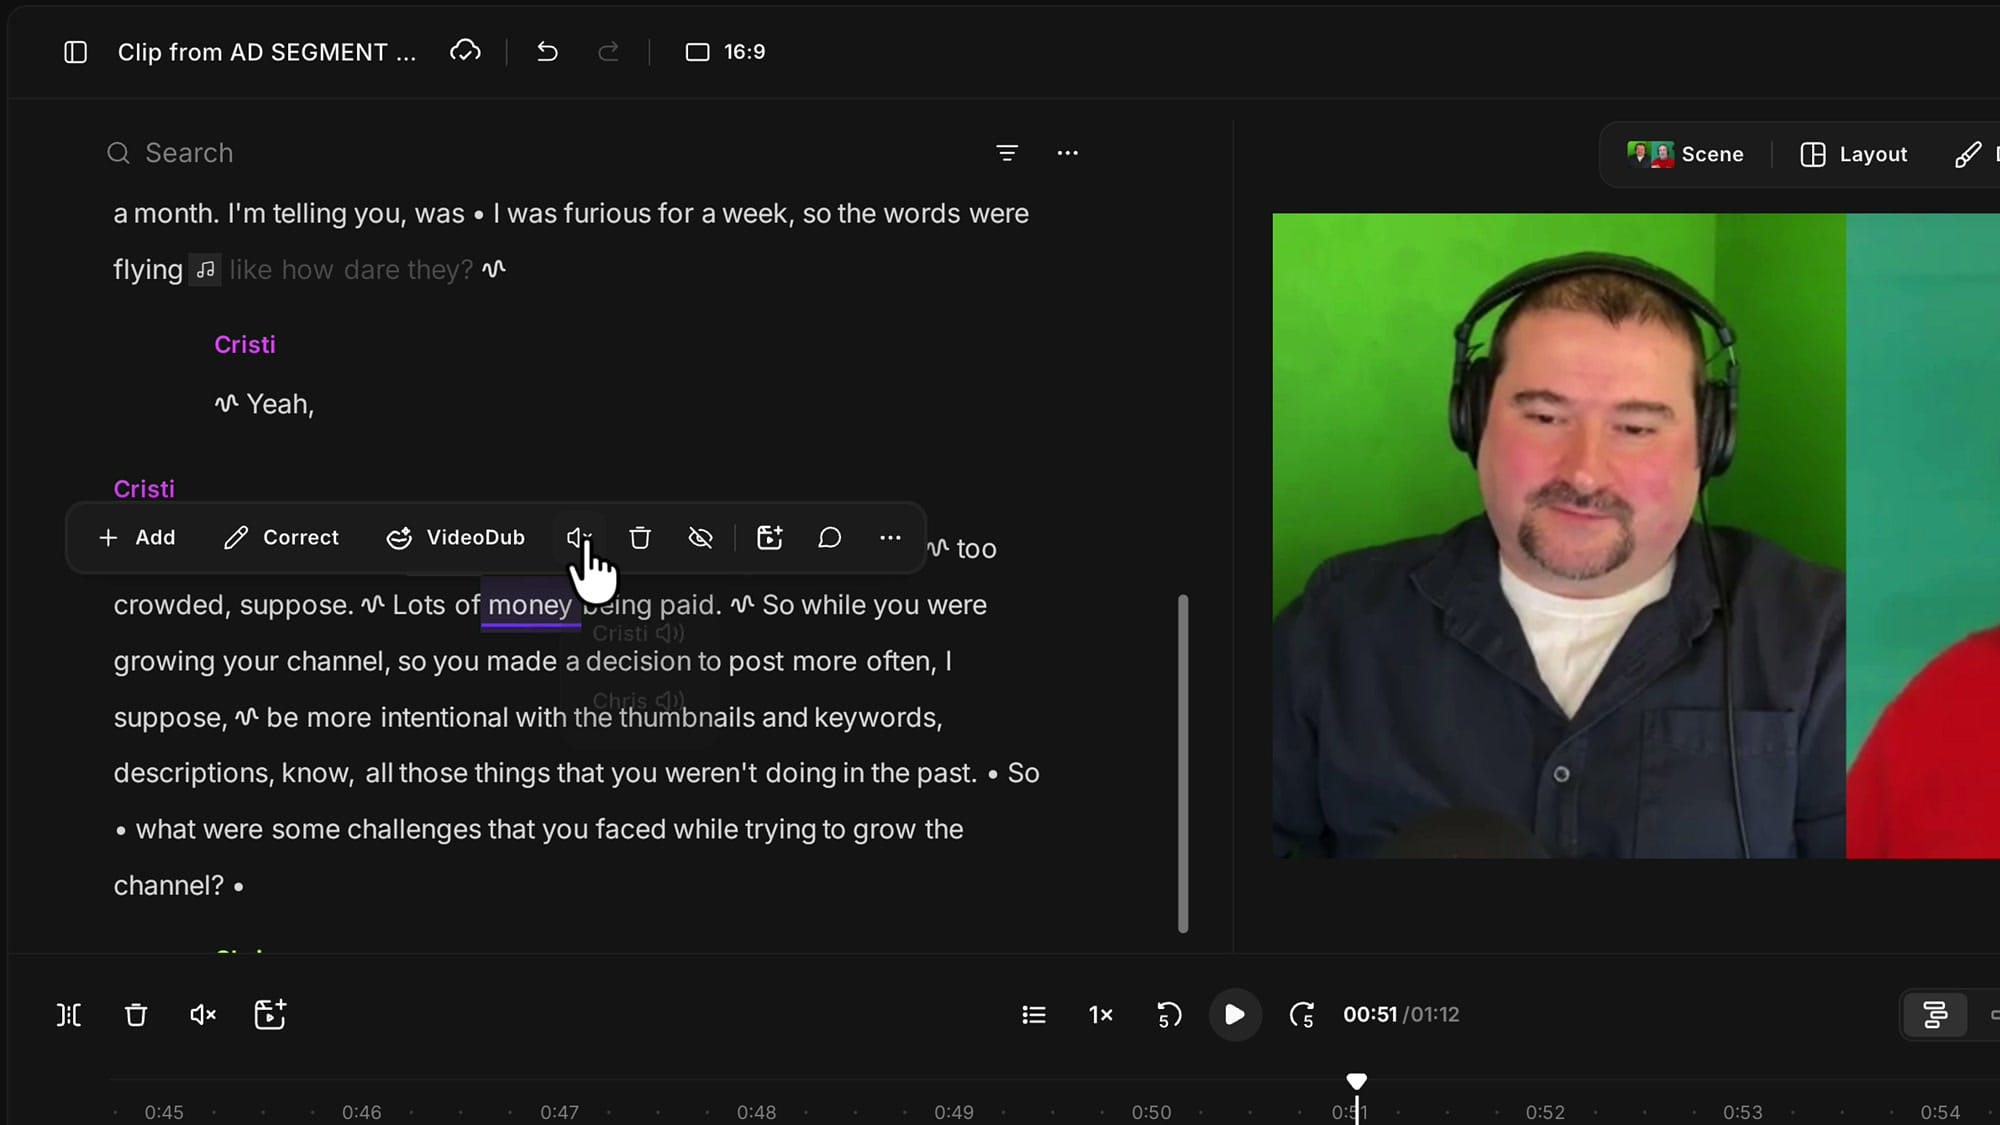
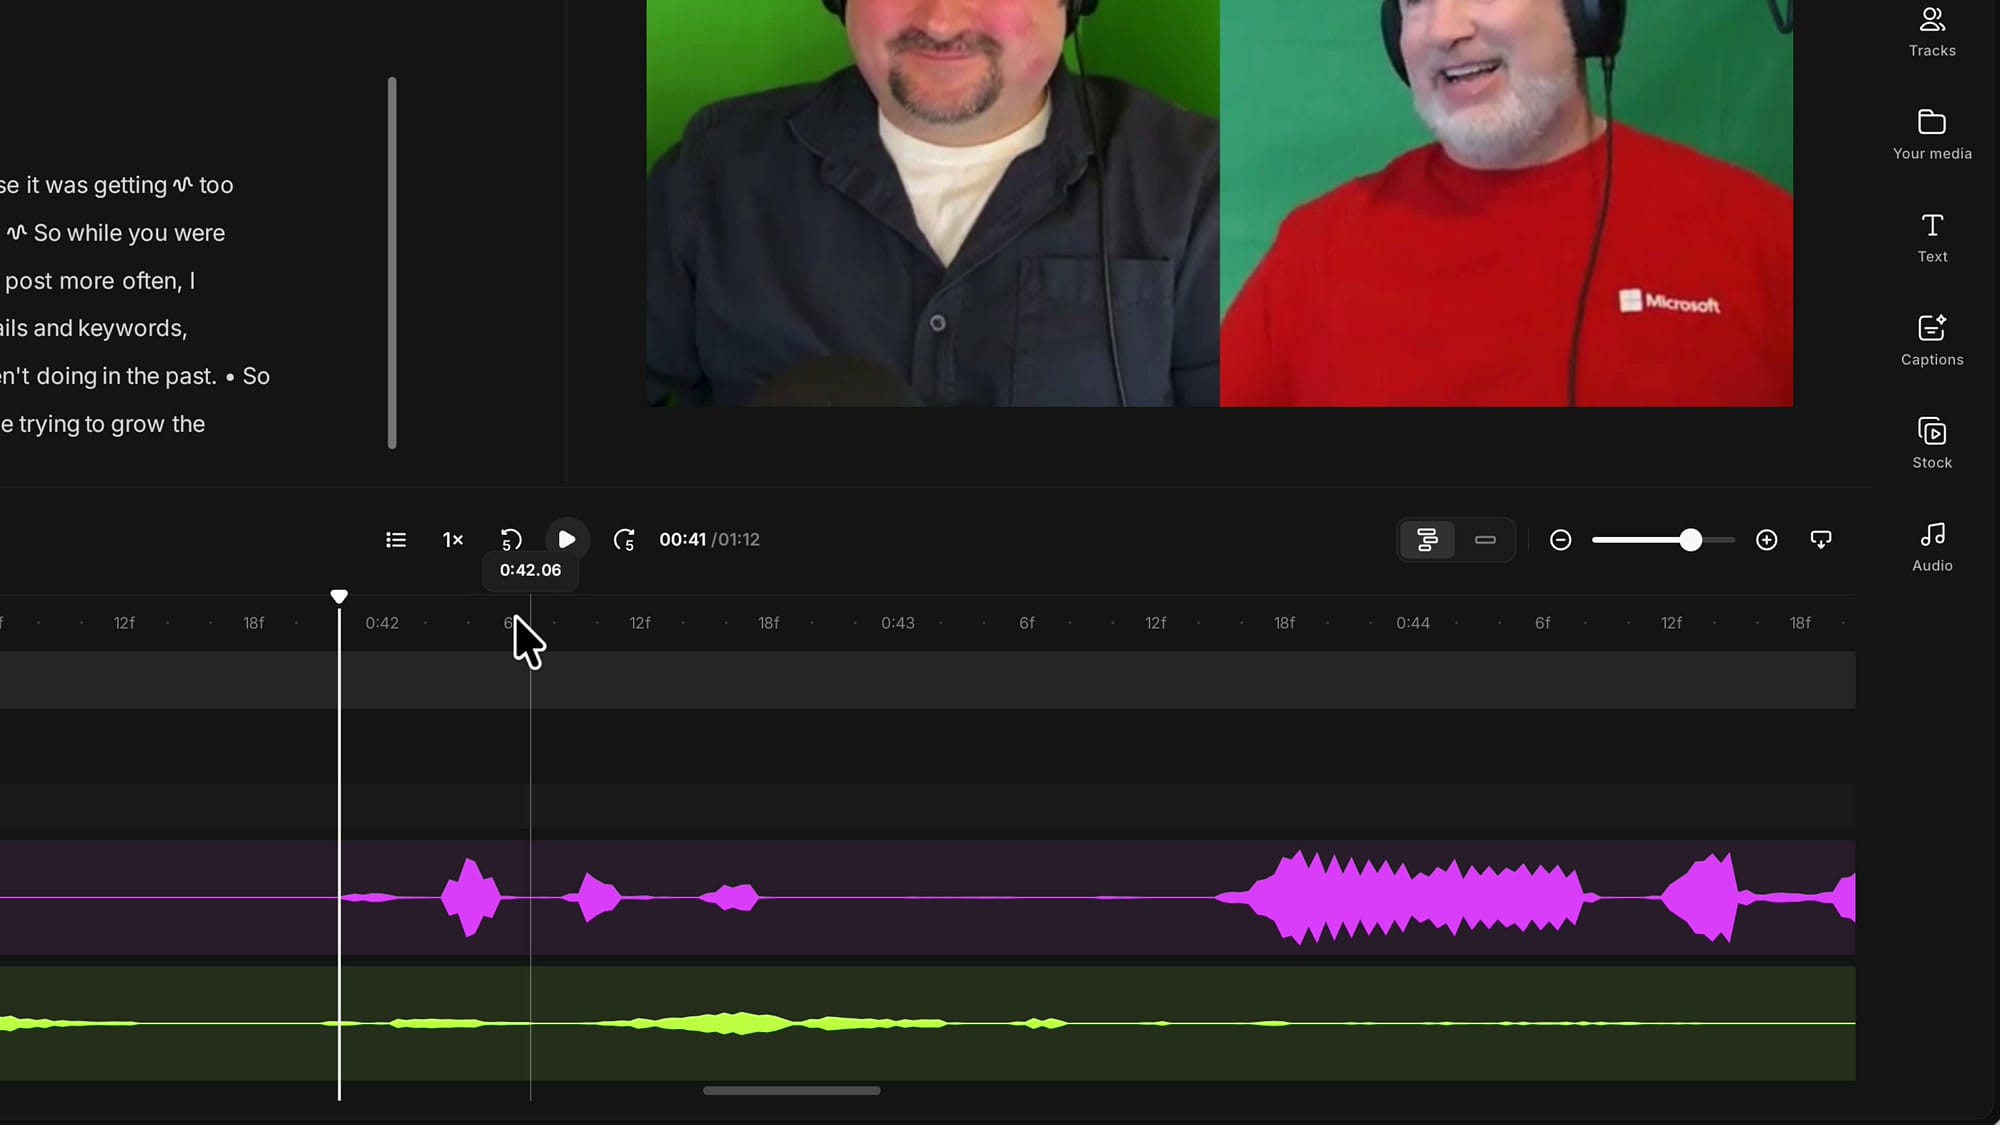
There's a second way to be even more surgical. Expand your tracks so each speaker sits on their own row — you can press Shift+E or use the Separate tracks option. Now you can make a selection on a single speaker's track and mute only that part, without touching anyone else. If you spend a lot of time working this way, my guide to multi-track editing in Riverside goes deeper on the separated-track workflow.
If you’re eager to learn more about Riverside and wish to have a one-on-one Riverside coaching session, feel free to book a call with me.
I’m here to help you with any questions you have and to guide you through the best workflows, tips, workarounds, or just answer any questions you may have!
Fine-tune the muted section
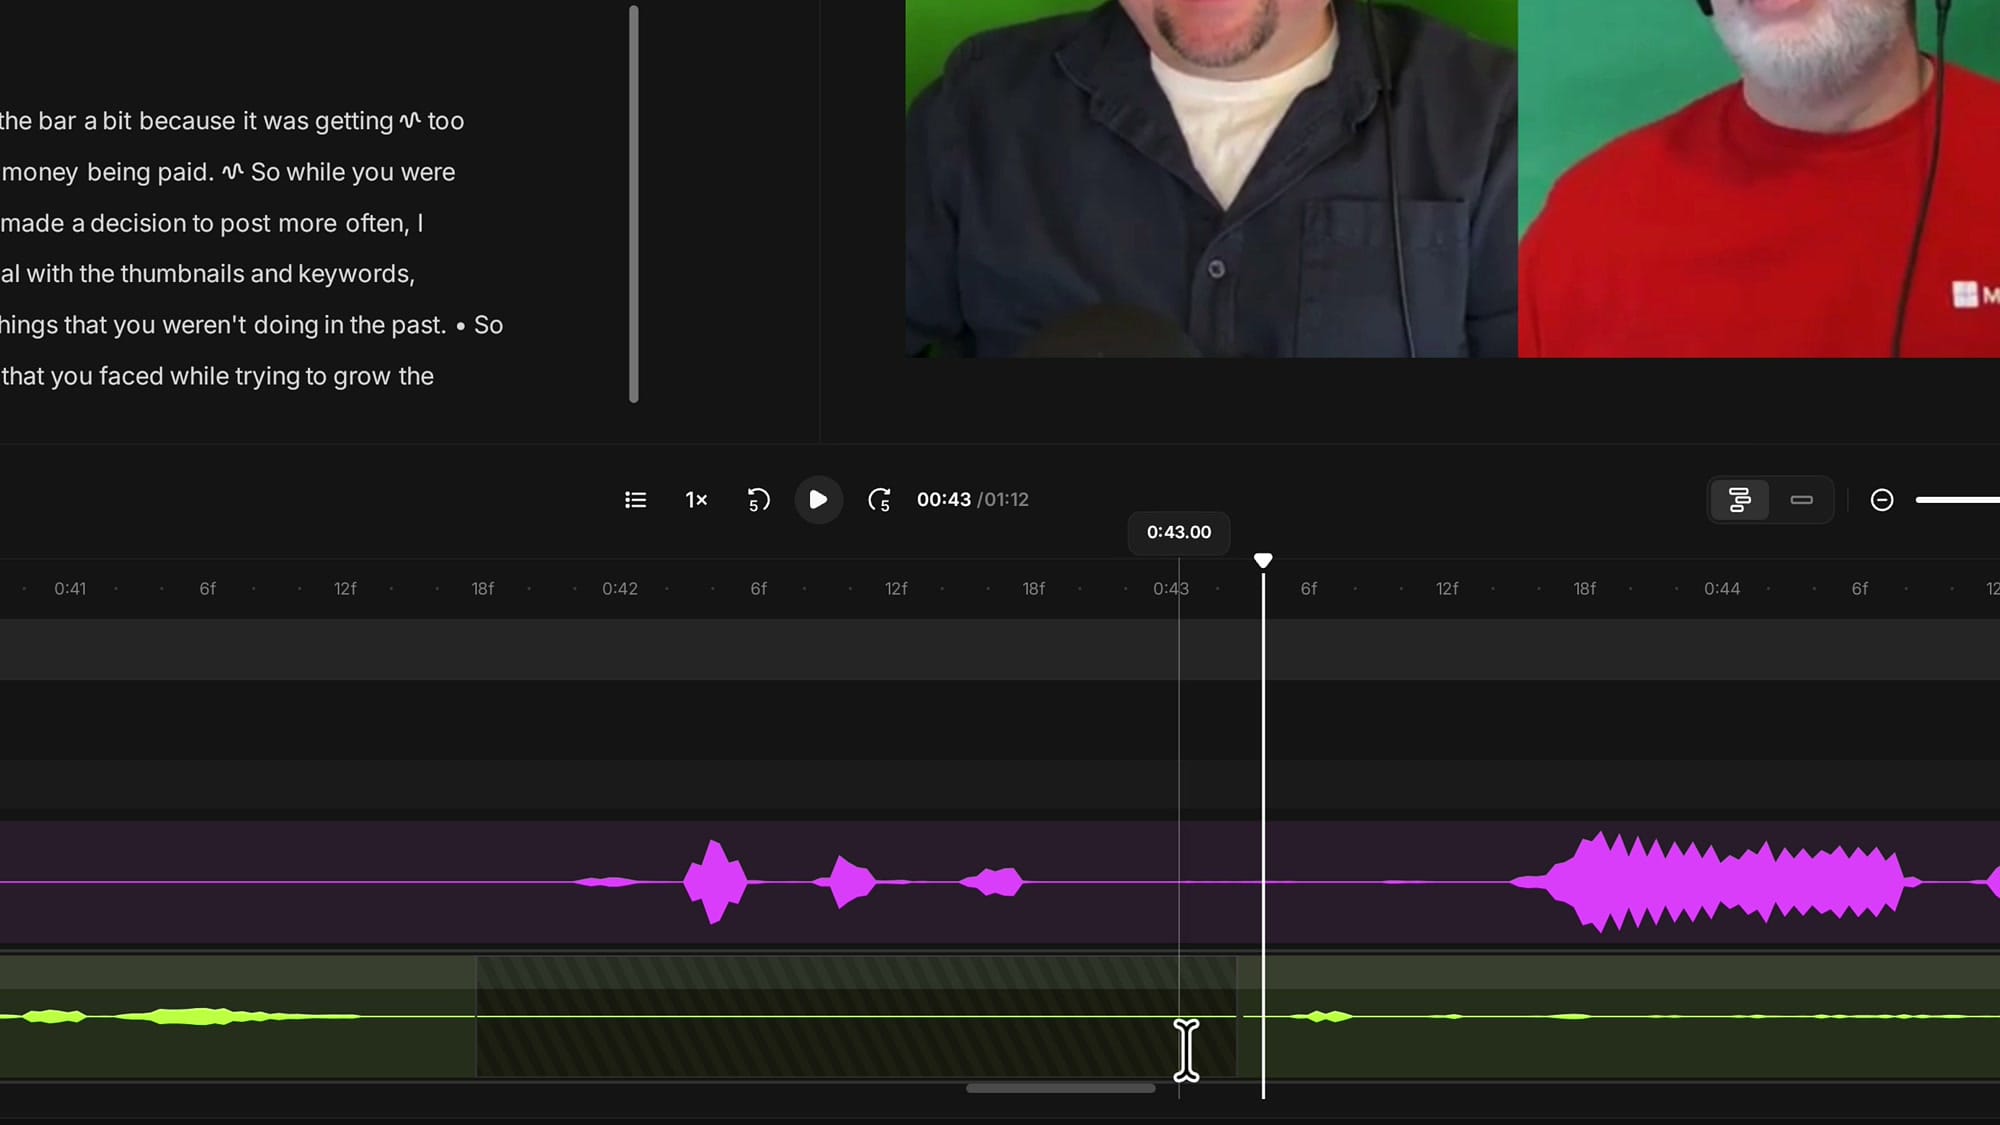
Muting through the transcript is fast, but it isn't always perfectly precise — word-level alignment can be a little off, so the muted region might start or end slightly early or late. That's easy to fix. Expand your tracks again and you'll see the muted part shown as a hatched, highlighted block. Grab either edge and drag it to reveal or cover more of the audio until the mute lines up exactly where you want it.
Add your bleep sound
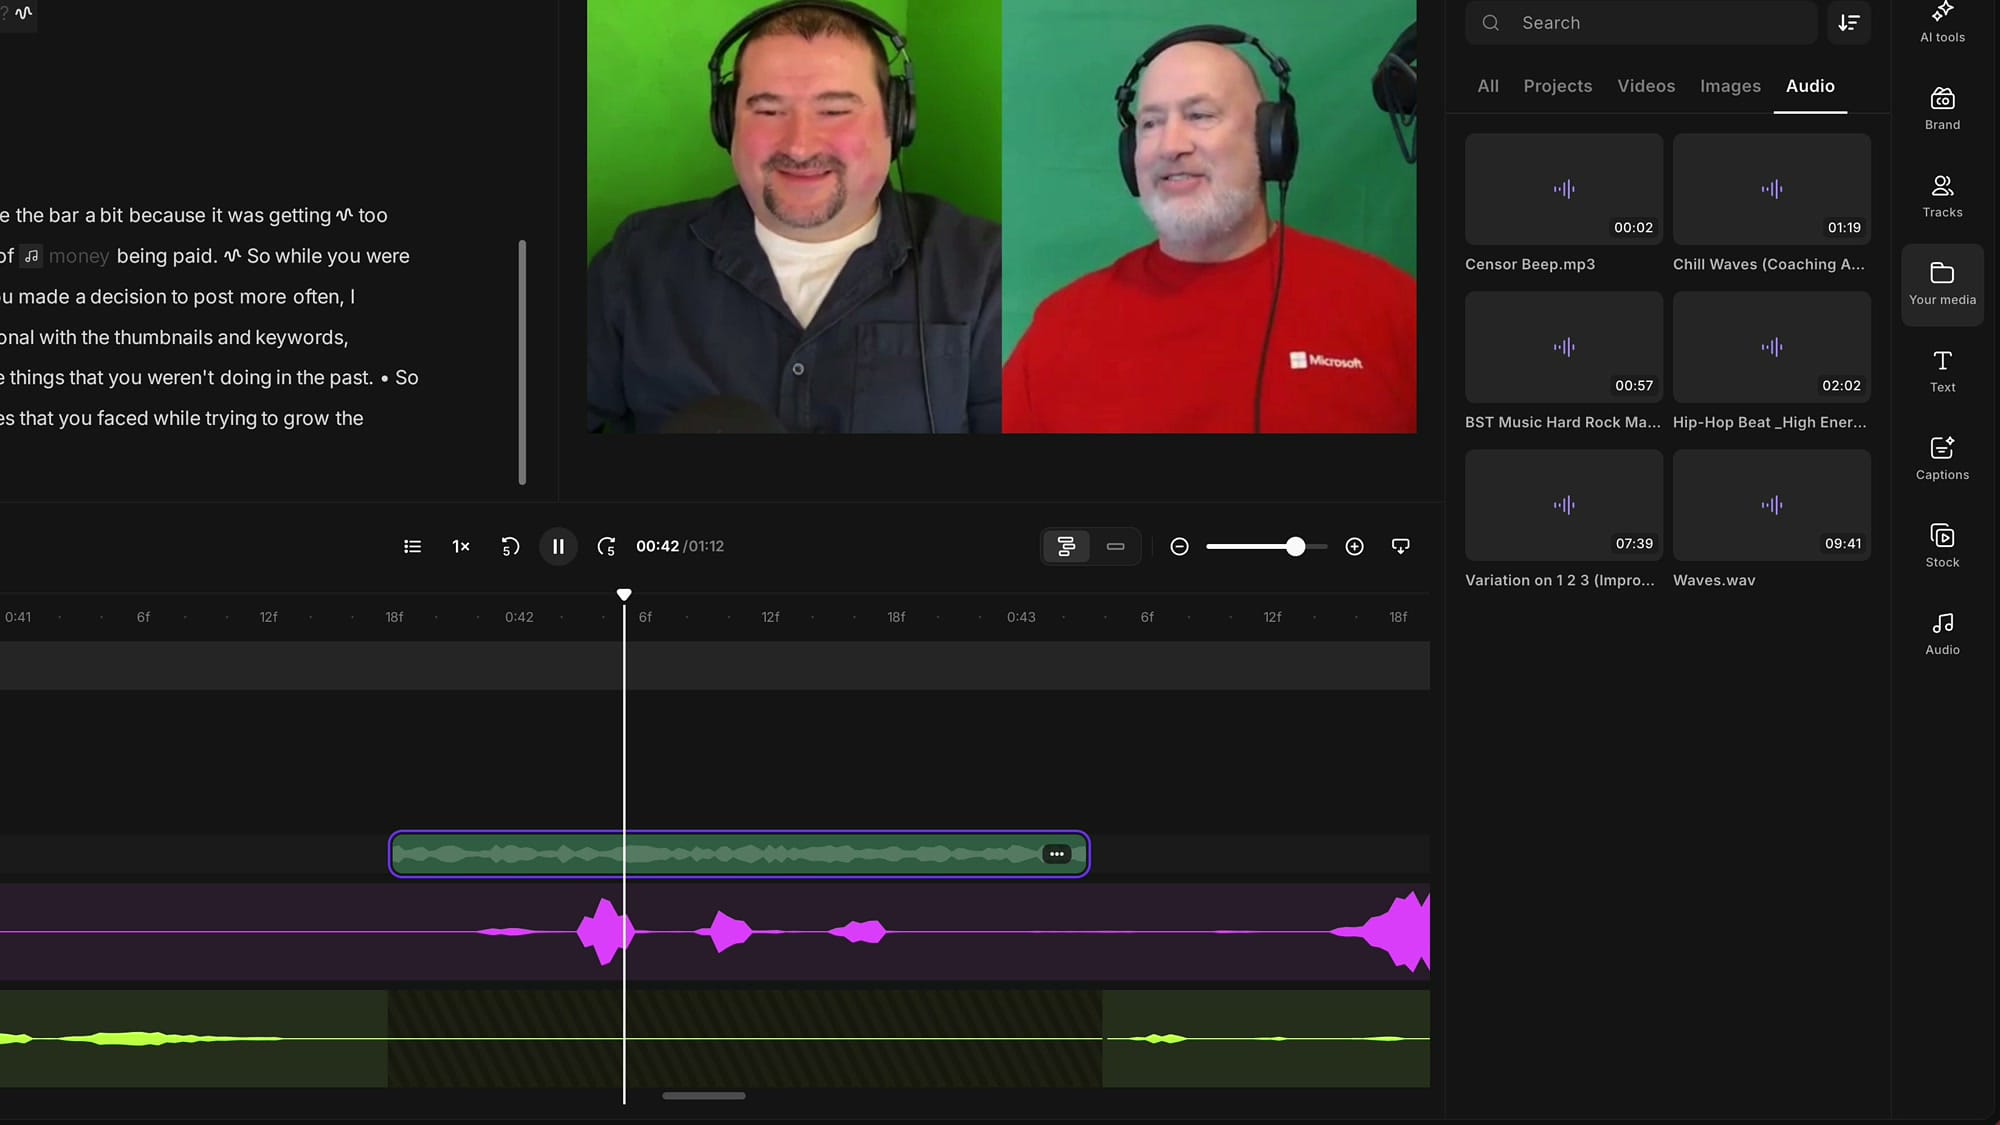
Now bring in the beep. On the right-hand side of the editor, open Your media and switch to the Audio tab. At the moment you can't drag a file straight from your computer into the panel, so use the Upload button and pick your censor sound. Once it uploads, it lives in Your media permanently — it'll stay there until you delete it.
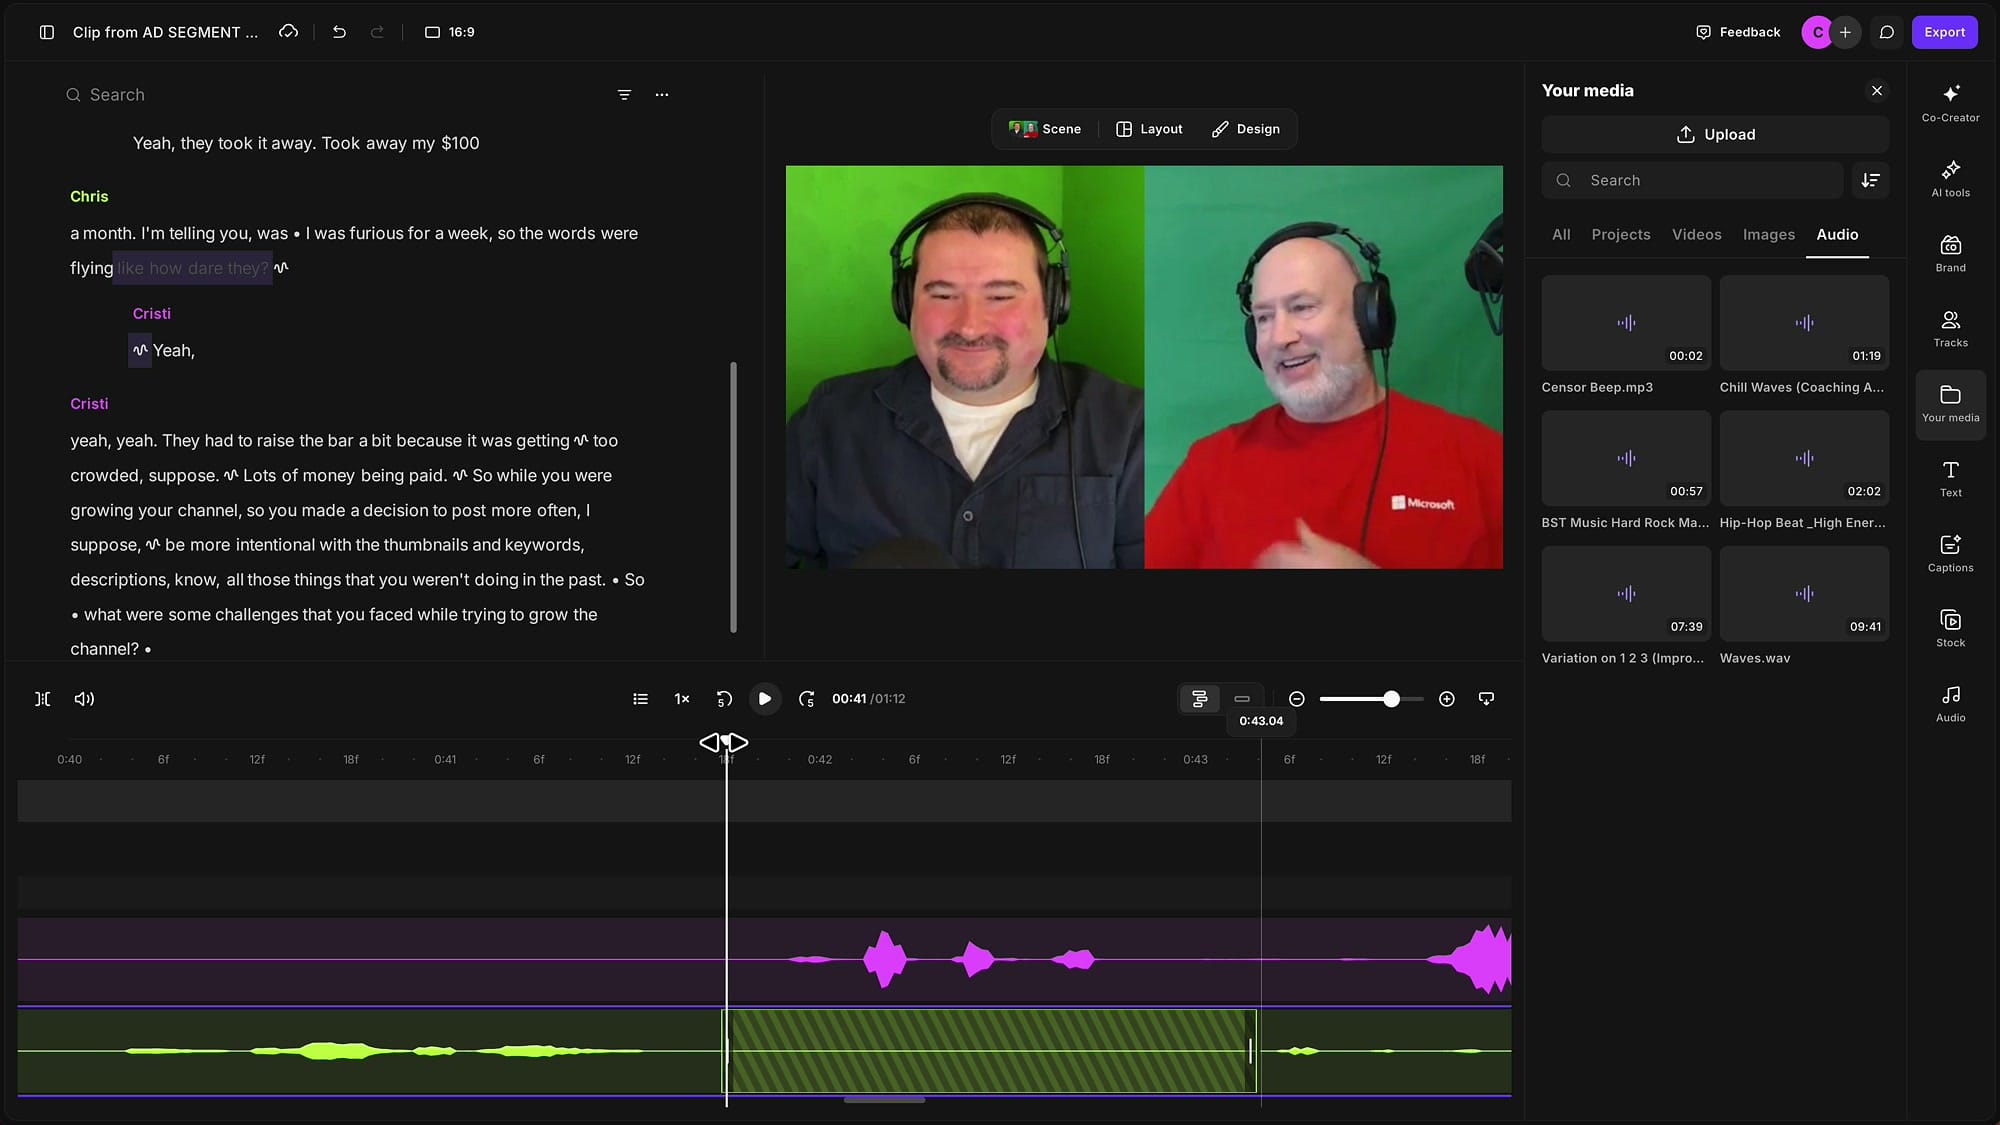
To place it, move the playhead — the white marker — to the start of your muted section, then click the sound in Your media. It drops in right at the playhead. Don't worry about being exact yet; you can slide it left or right afterwards. The same upload-and-position routine is what I use when I add background music in Riverside, so once you've got the hang of it here it carries over.
Bleep another word
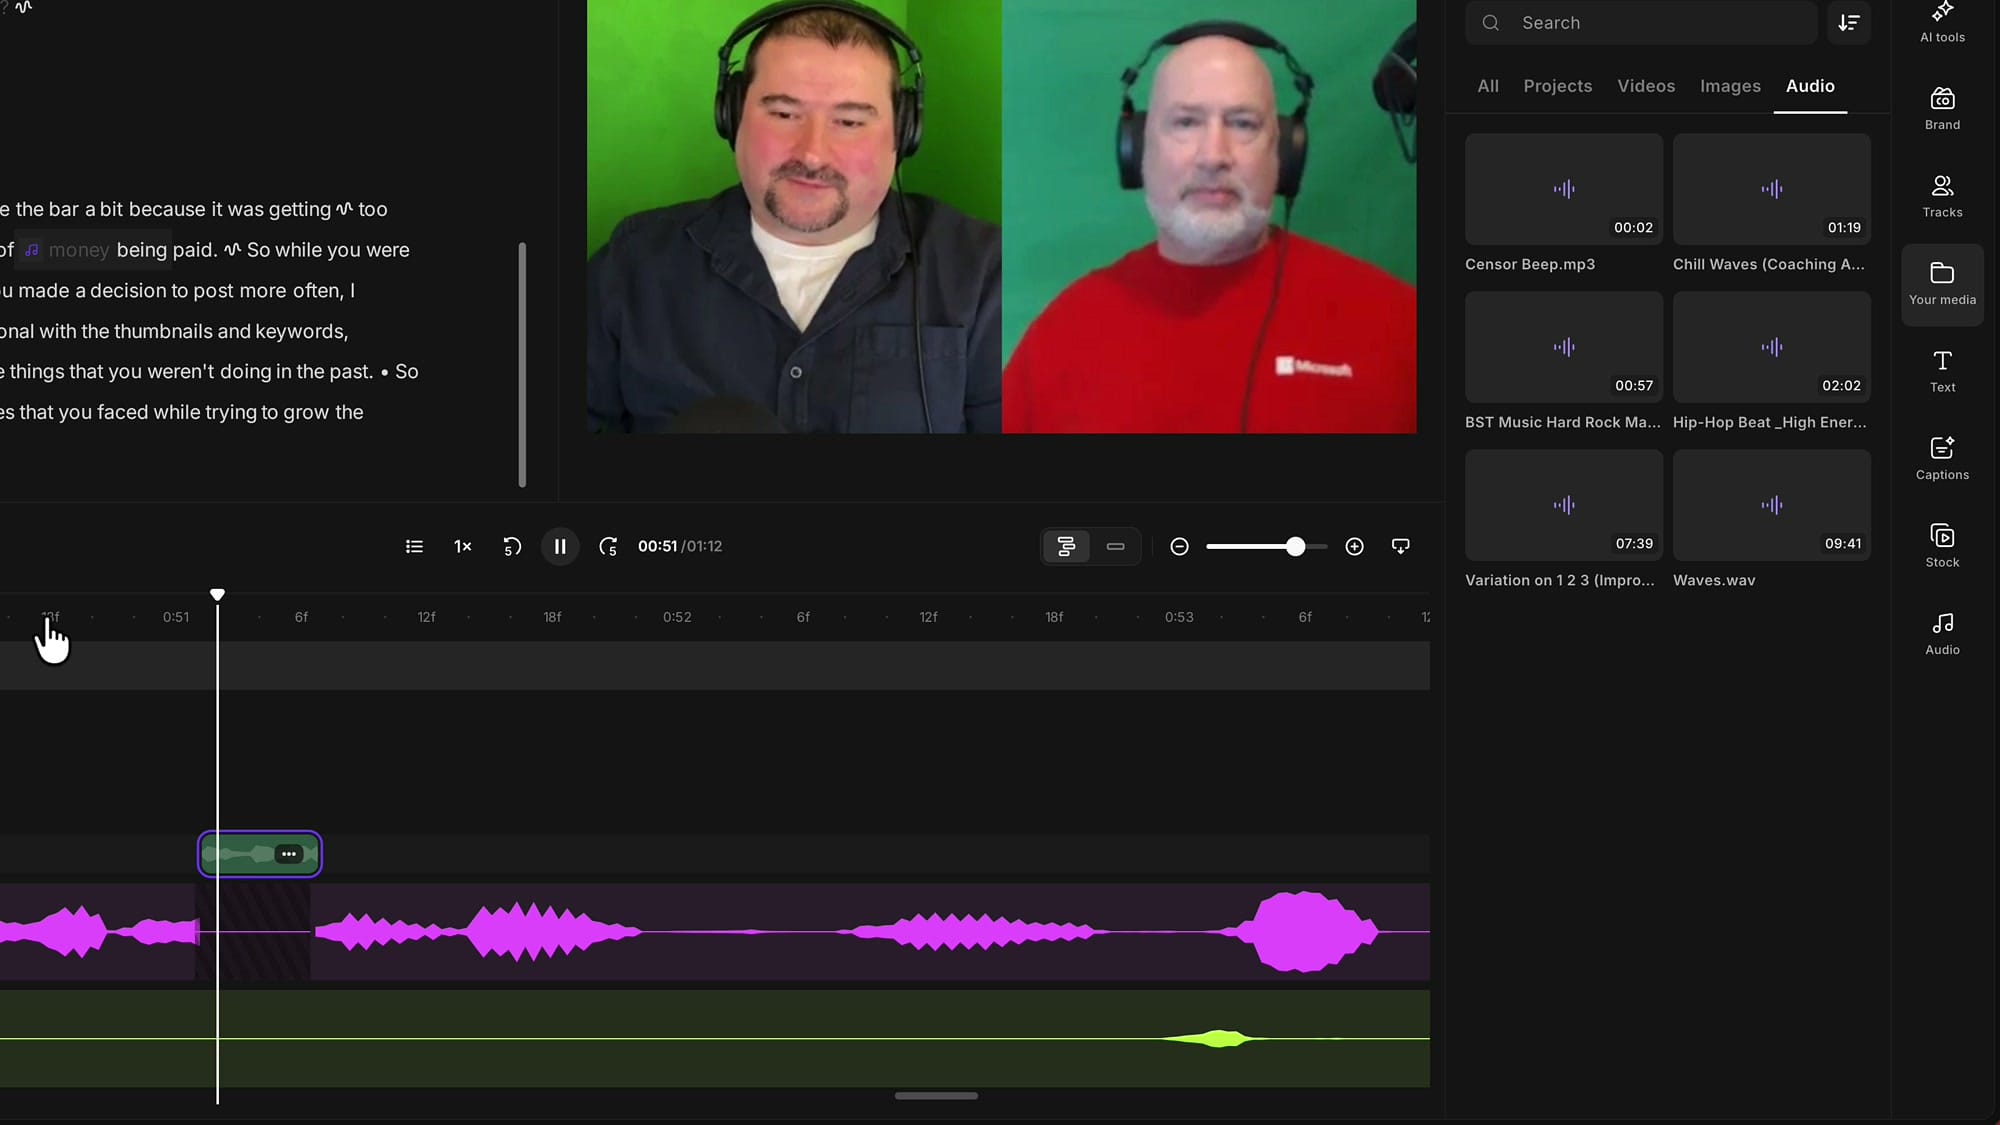
Repeat the process for any other word. Select it in the transcript — say you want to cover the word "money" in your own sentence — and mute your own track this time.
A quick tip: don't hit Delete when you only want to mute, because deleting collapses the word and removes it from the edit. Mute keeps the timing intact and simply silences the audio.
If the muted word is short and hard to see, zoom into the timeline so you can work precisely, then move the playhead to the start of the muted spot and click your beep in Your media to drop it in.
Trim, position, fade, and set the volume
Short words rarely need the full length of a beep. If the sound runs longer than the word, grab the end of the clip and trim it back — you can drag either edge in. You can also grab the middle of the clip and slide it left or right so it lands earlier or later, lining the beep up with the exact syllable.
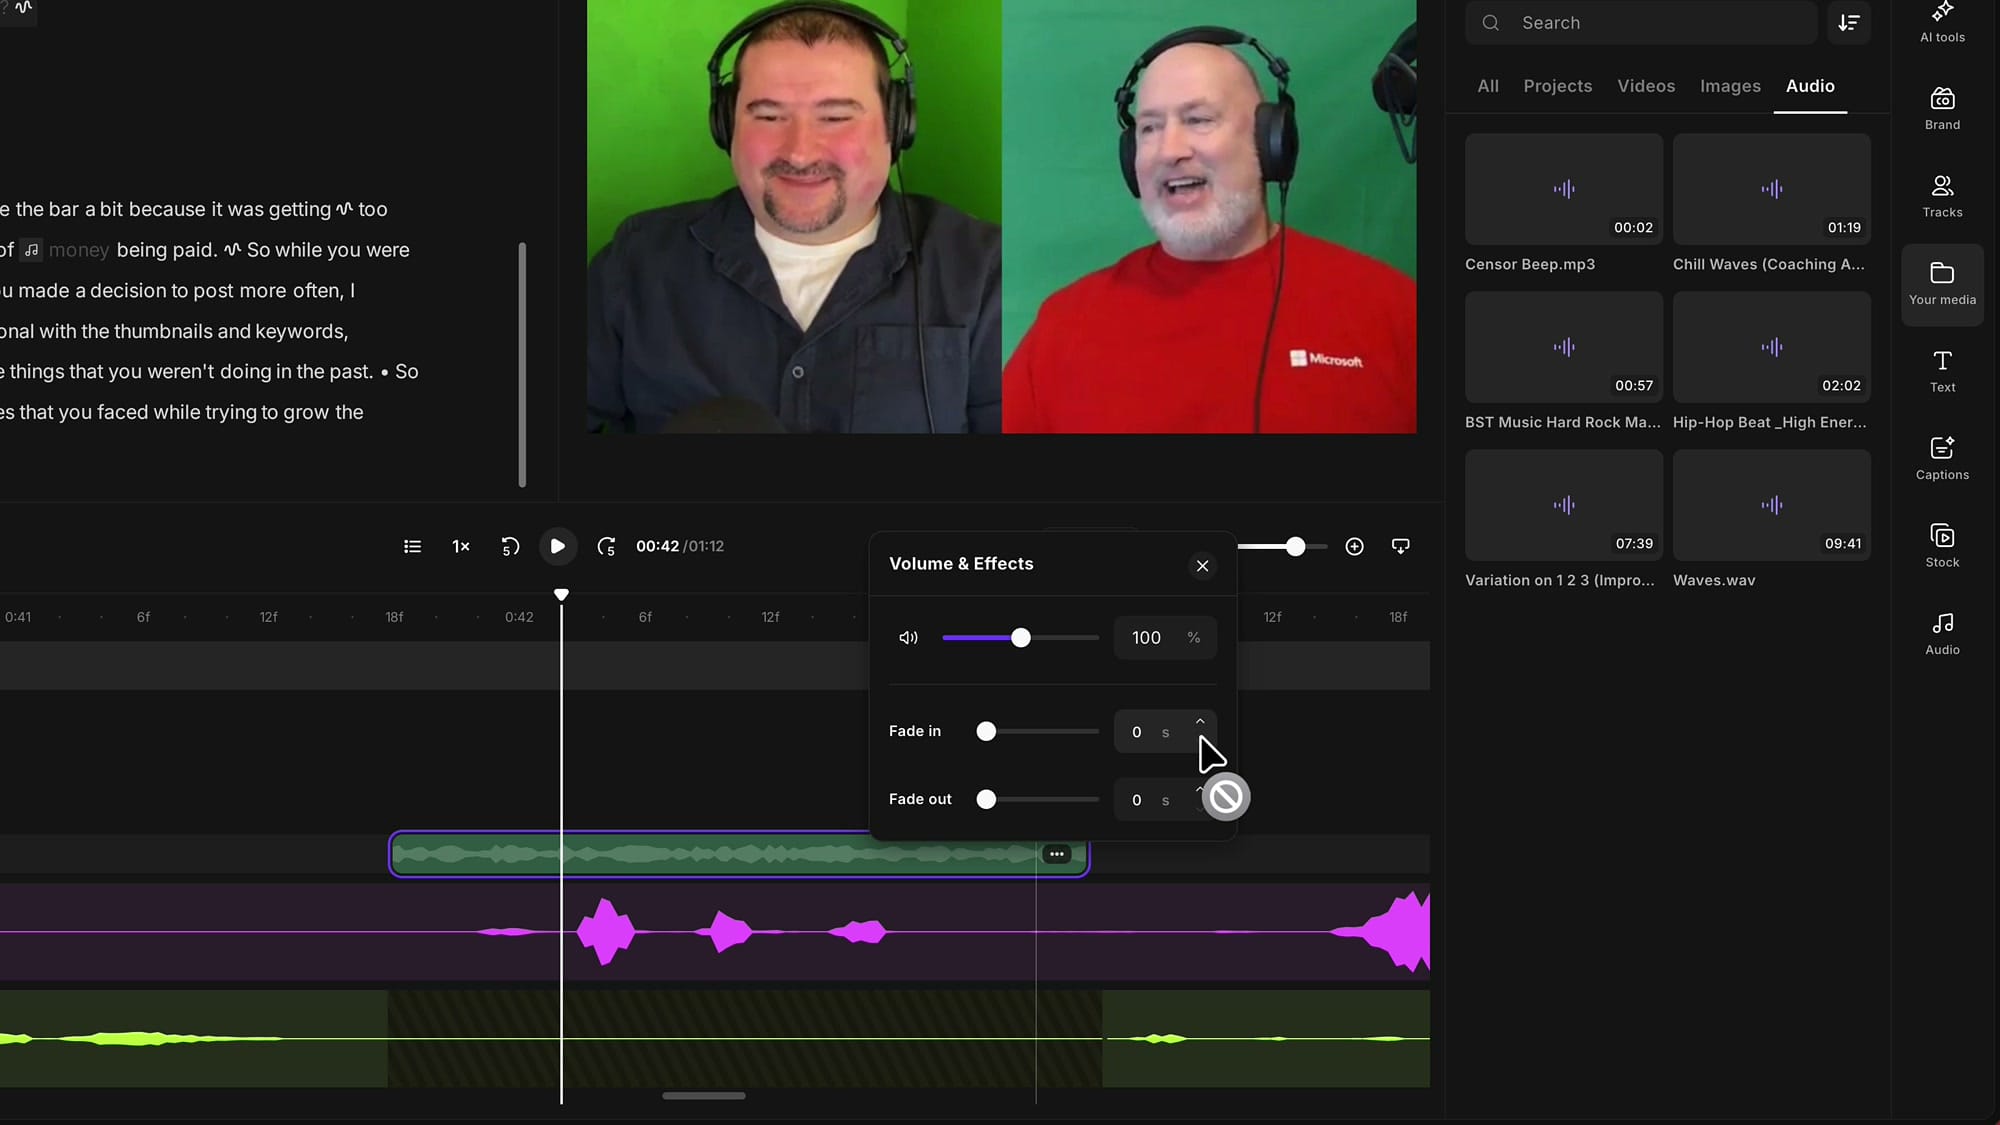
For a smoother result, click the three dots on the sound clip to open Volume & Effects. There you can fade the beep in or out — keep in mind fades are set in whole seconds, so a beep shorter than a second can't really be faded, but a longer one can. In the same panel you can turn the volume down so the beep doesn't fight with laughter or anything else playing underneath it.
Reuse your beep anytime
That's the whole workflow: find your word, select it in the transcript, mute the right speaker, and cover it with a beep from Your media — then trim, position, fade, and balance the volume for a clean edit. Because your censor sound stays in Your media, you never have to hunt for it again; it's one click away in every project you open.
Find a bleep you like, upload it once, and you've got a repeatable way to censor words in Riverside without losing any of the audio around them.
Related guides
 Cristi Cotovan
 Cristi Cotovan
 Cristi Cotovan
 Cristi Cotovan
 Cristi Cotovan
If you’re eager to learn more about Riverside and wish to have a one-on-one Riverside coaching session, feel free to book a call with me.
I’m here to help you with any questions you have and to guide you through the best workflows, tips, workarounds, or just answer any questions you may have!