How to Add B-Roll in Riverside's New Editor Using Scenes

How do you drop a B-roll clip, an image, or a video on top of just one part of a podcast episode, hide the host and guest for that section, and do it without cropping, stretching, or forcing the media to full screen?
With the new editor that shipped as part of the Riverside 2.0 update, this is now a quick job. Let me walk you through the exact workflow.
The new Riverside editor
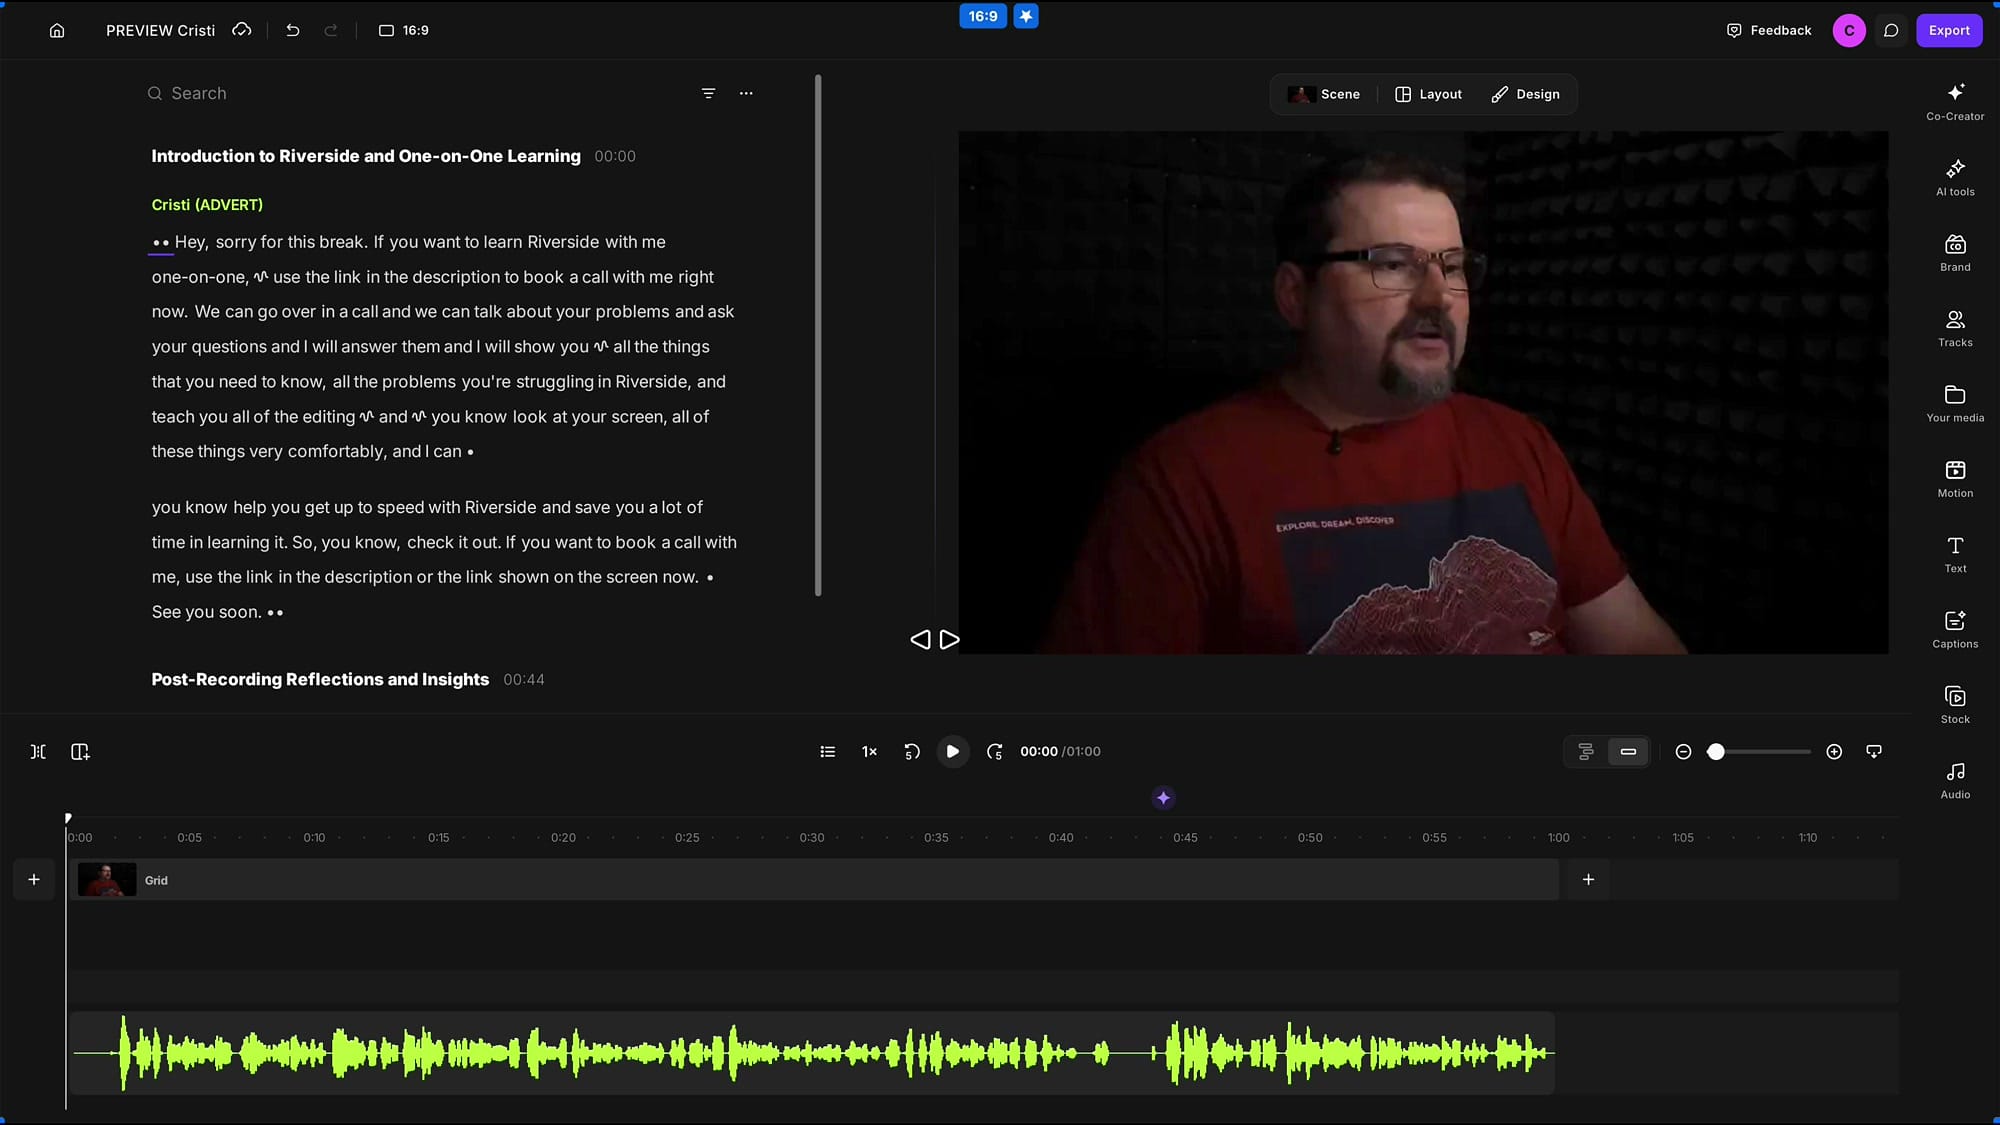
If you haven't opened Riverside since the 2.0 launch, the editor looks and feels different. It is noticeably faster, the panels are flexible so you can adjust your workspace, and the three modes at the top — Scene, Layout, and Design — give you far more control than the old editor did. Everything below is done inside this editor on a short example edit.
The quick way to add media — and why it isn't enough
The obvious approach is to open the stock library (or your own uploads), pick an image or video, and click to add it. It lands on the timeline as a layer on top of your video. If that media happens to be a 16:9 clip, you can click the frame to fill the screen and it covers everything cleanly.
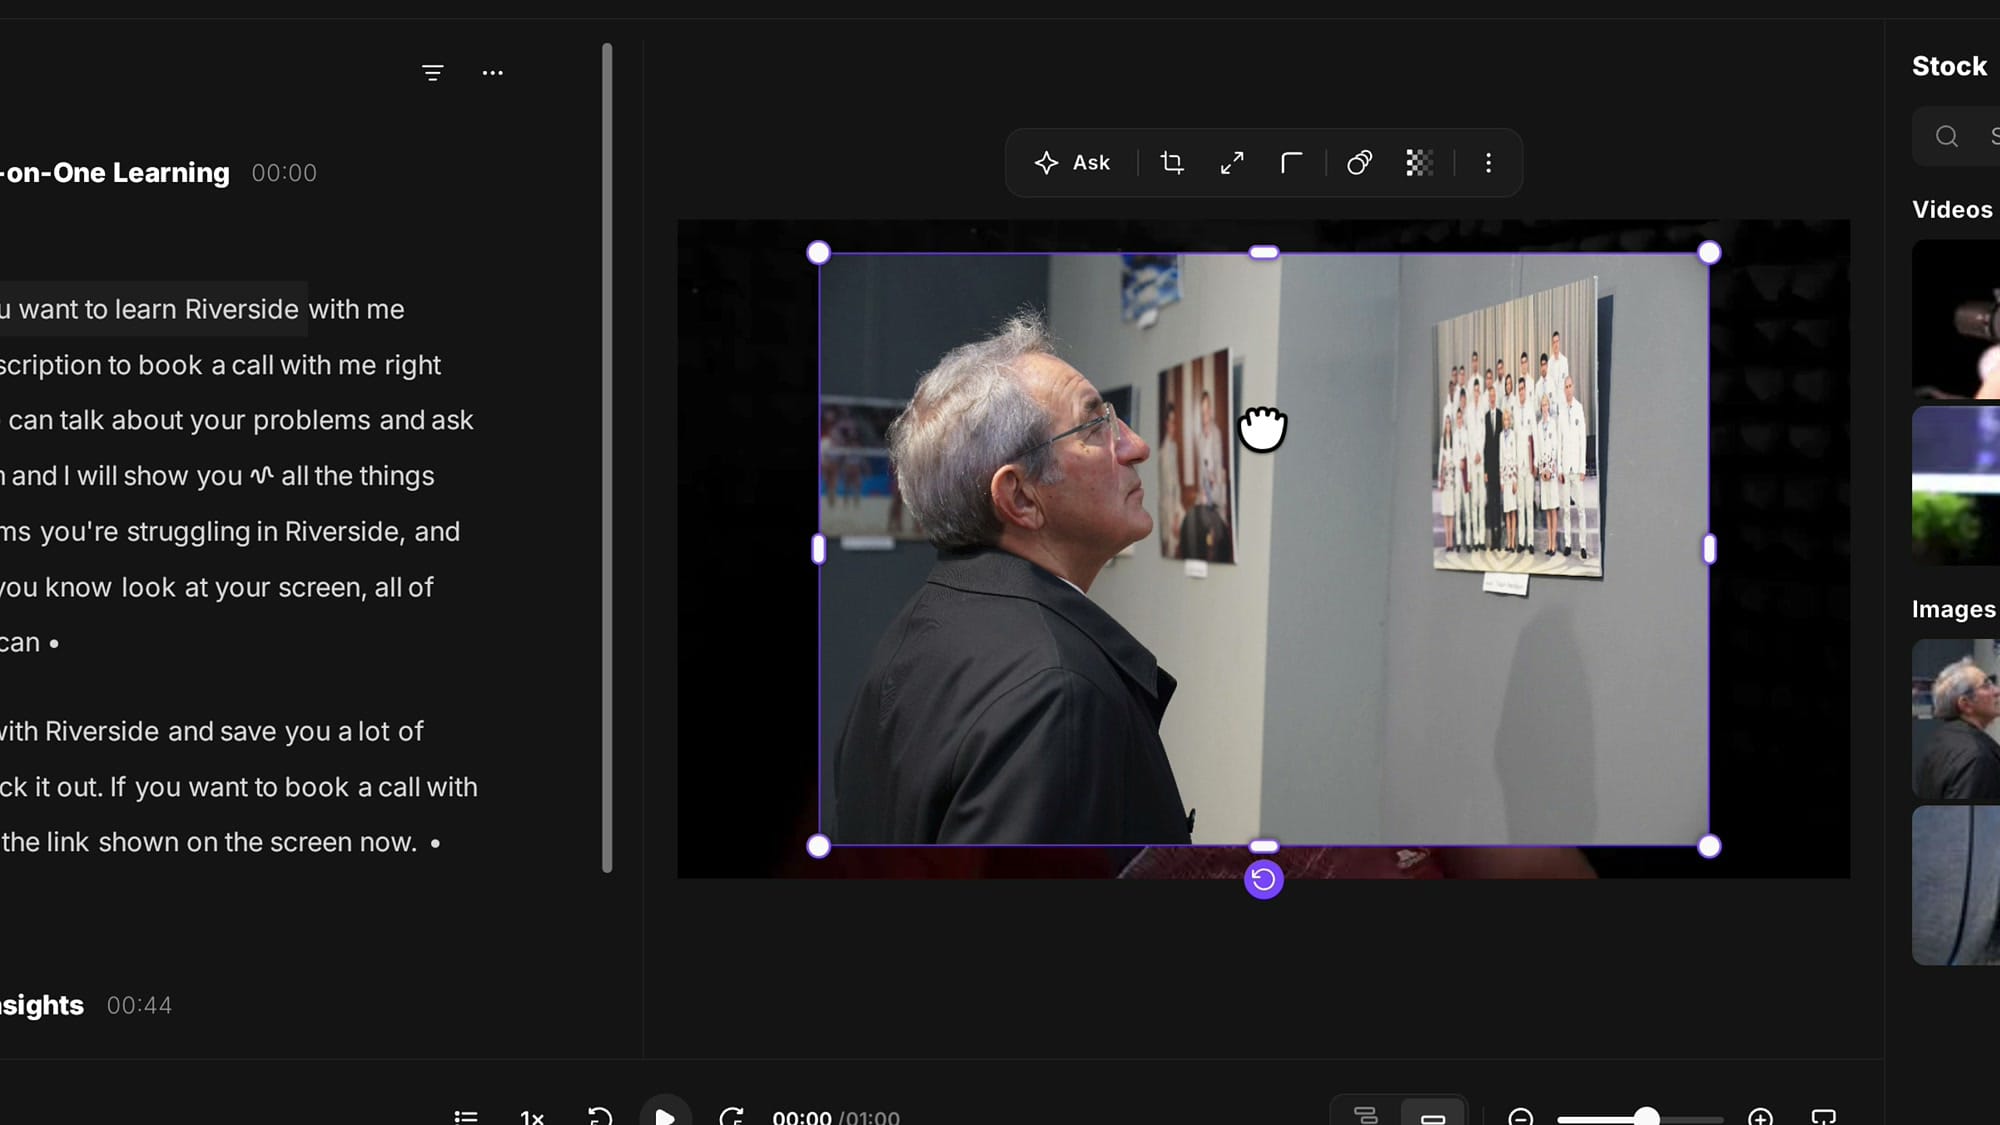
The problem shows up the moment you use media with a different aspect ratio — a portrait photo, a square graphic, an off-ratio screenshot. Fill the frame and you either crop the image or distort it. Leave it at its native size and your own video is still visible behind it. And if you simply delete your video track to get rid of yourself, it disappears from the entire episode, not just this moment. That is where scenes come in.
Isolate the change with a scene
A scene is a section of your edit that you can style independently from everything around it. To place B-roll over one segment only, you first need a scene wrapped around that exact segment.
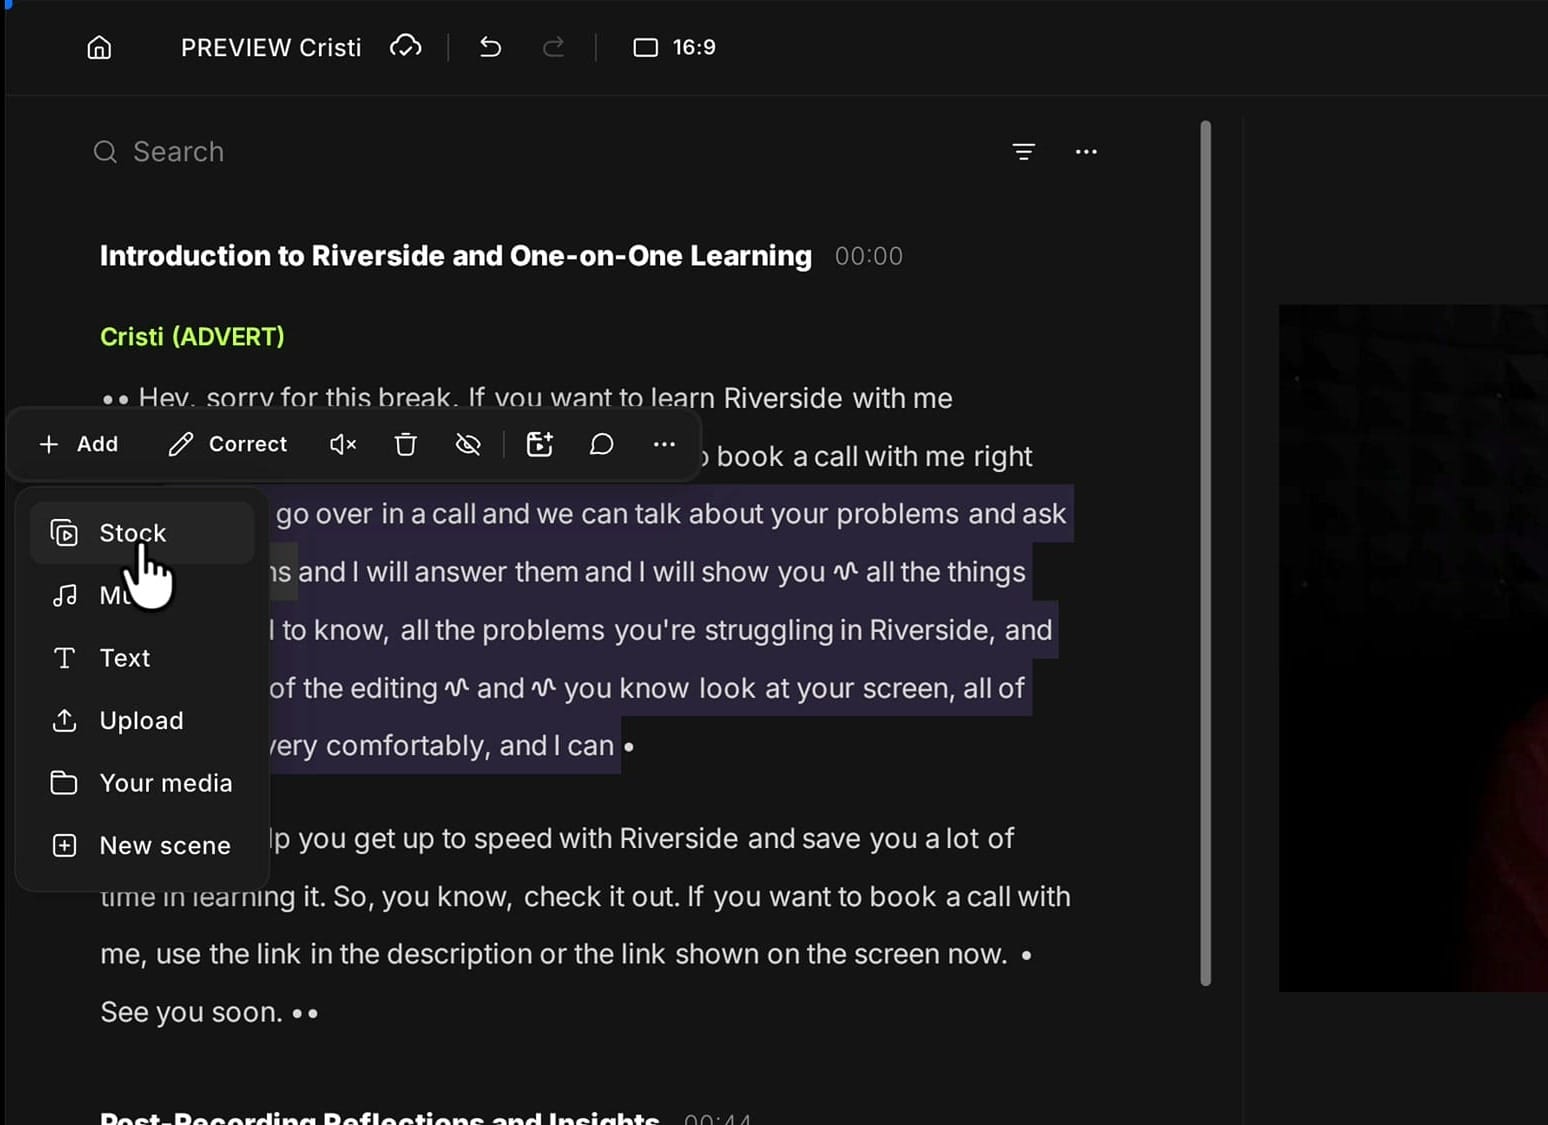
The easiest way to create one is right in the transcript: select the words where you want the B-roll to start and end, click Add, and choose New scene.
Don't pick Stock or an image from this menu yet — you specifically want New scene first, so you have a boundary to drop the media into.
If you’re eager to learn more about Riverside and wish to have a one-on-one Riverside coaching session, feel free to book a call with me.
I’m here to help you with any questions you have and to guide you through the best workflows, tips, workarounds, or just answer any questions you may have!
Read your scene boundaries in the timeline
Creating the scene doesn't change anything you can see in the preview yet, but look at the timeline at the bottom. You now have a scene break where your selection begins and another where it ends, with your segment highlighted between them. That highlighted region is the scene you'll be working inside.
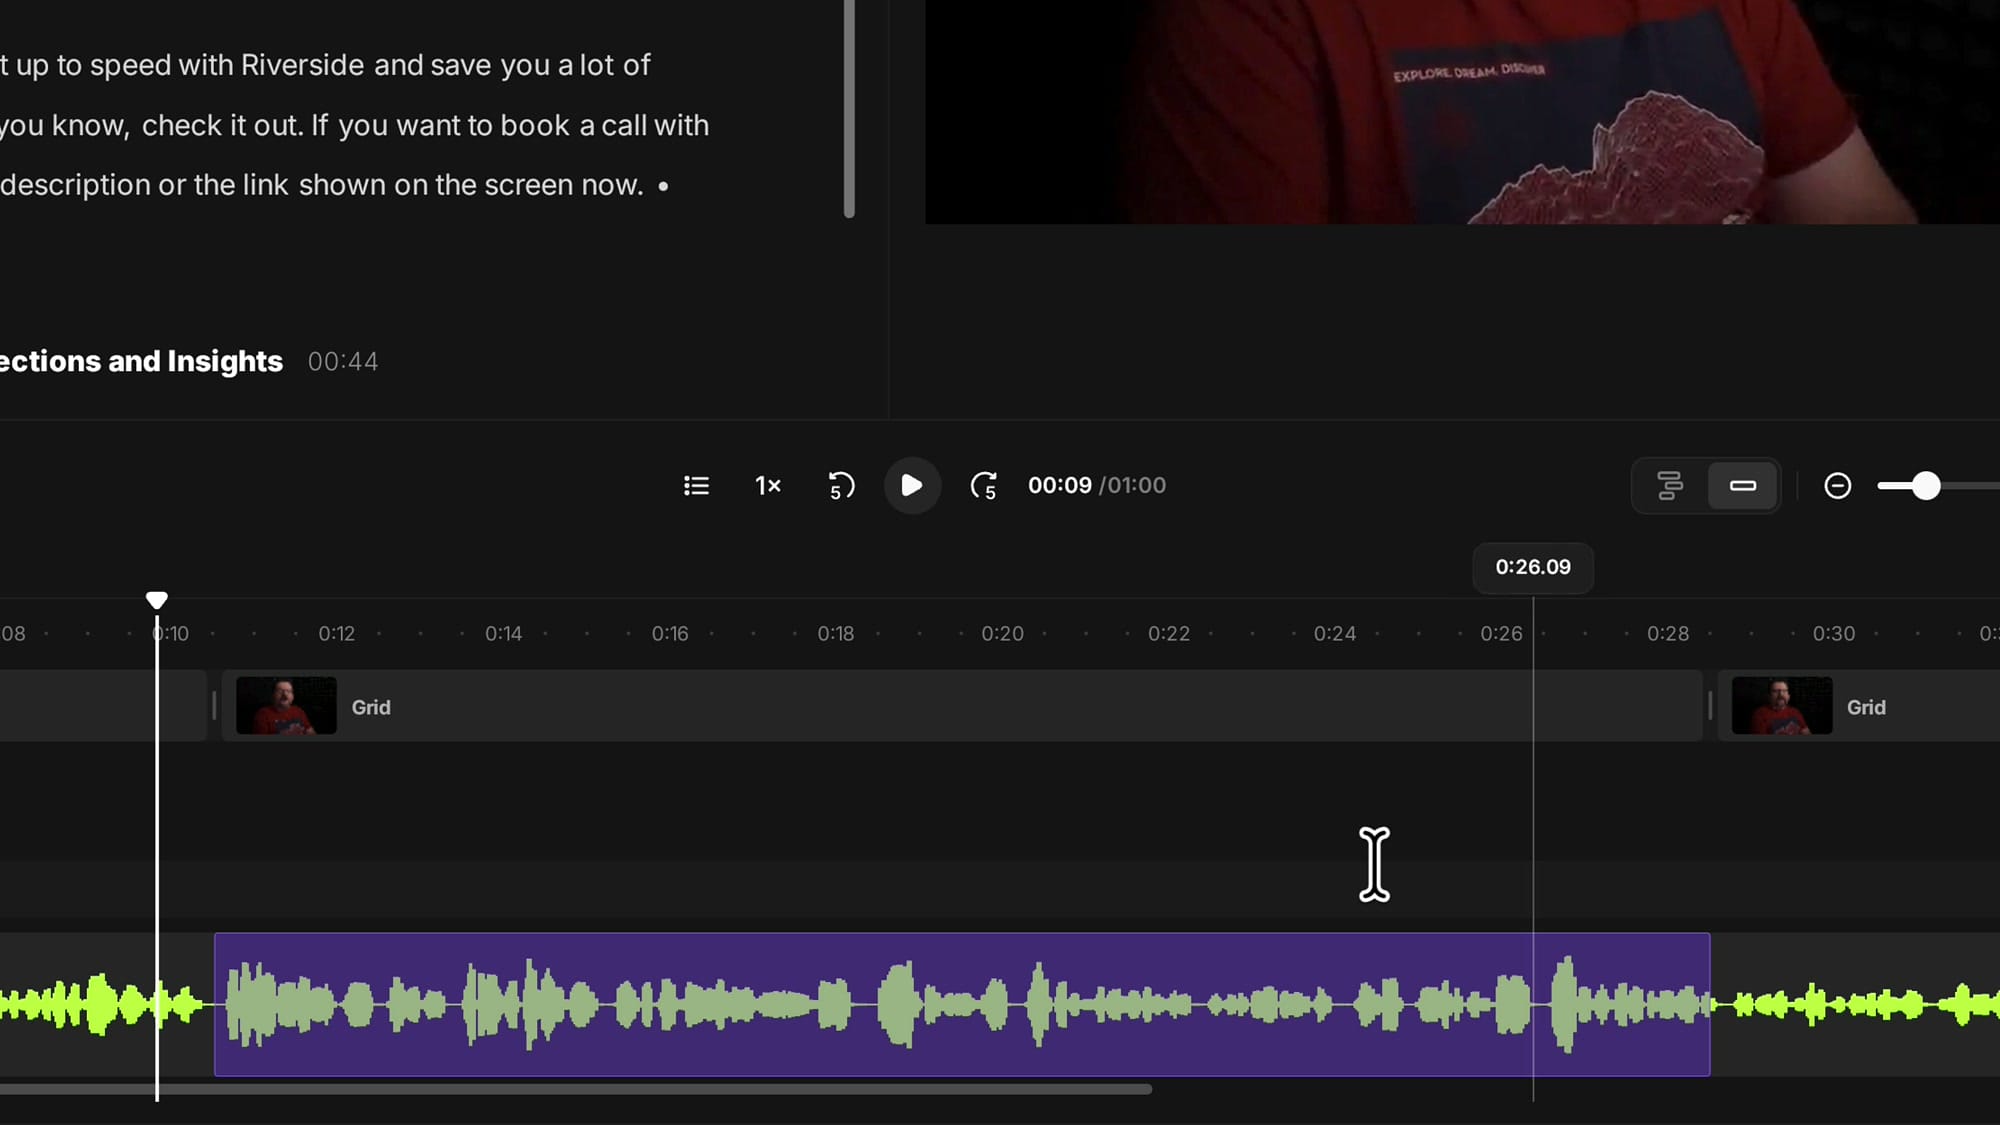
One small thing I'm still hoping Riverside adds: scene breaks aren't marked in the transcript text itself yet, only in the timeline. For now, the timeline is where you confirm where a scene begins and ends.
Drop your B-roll inside the scene
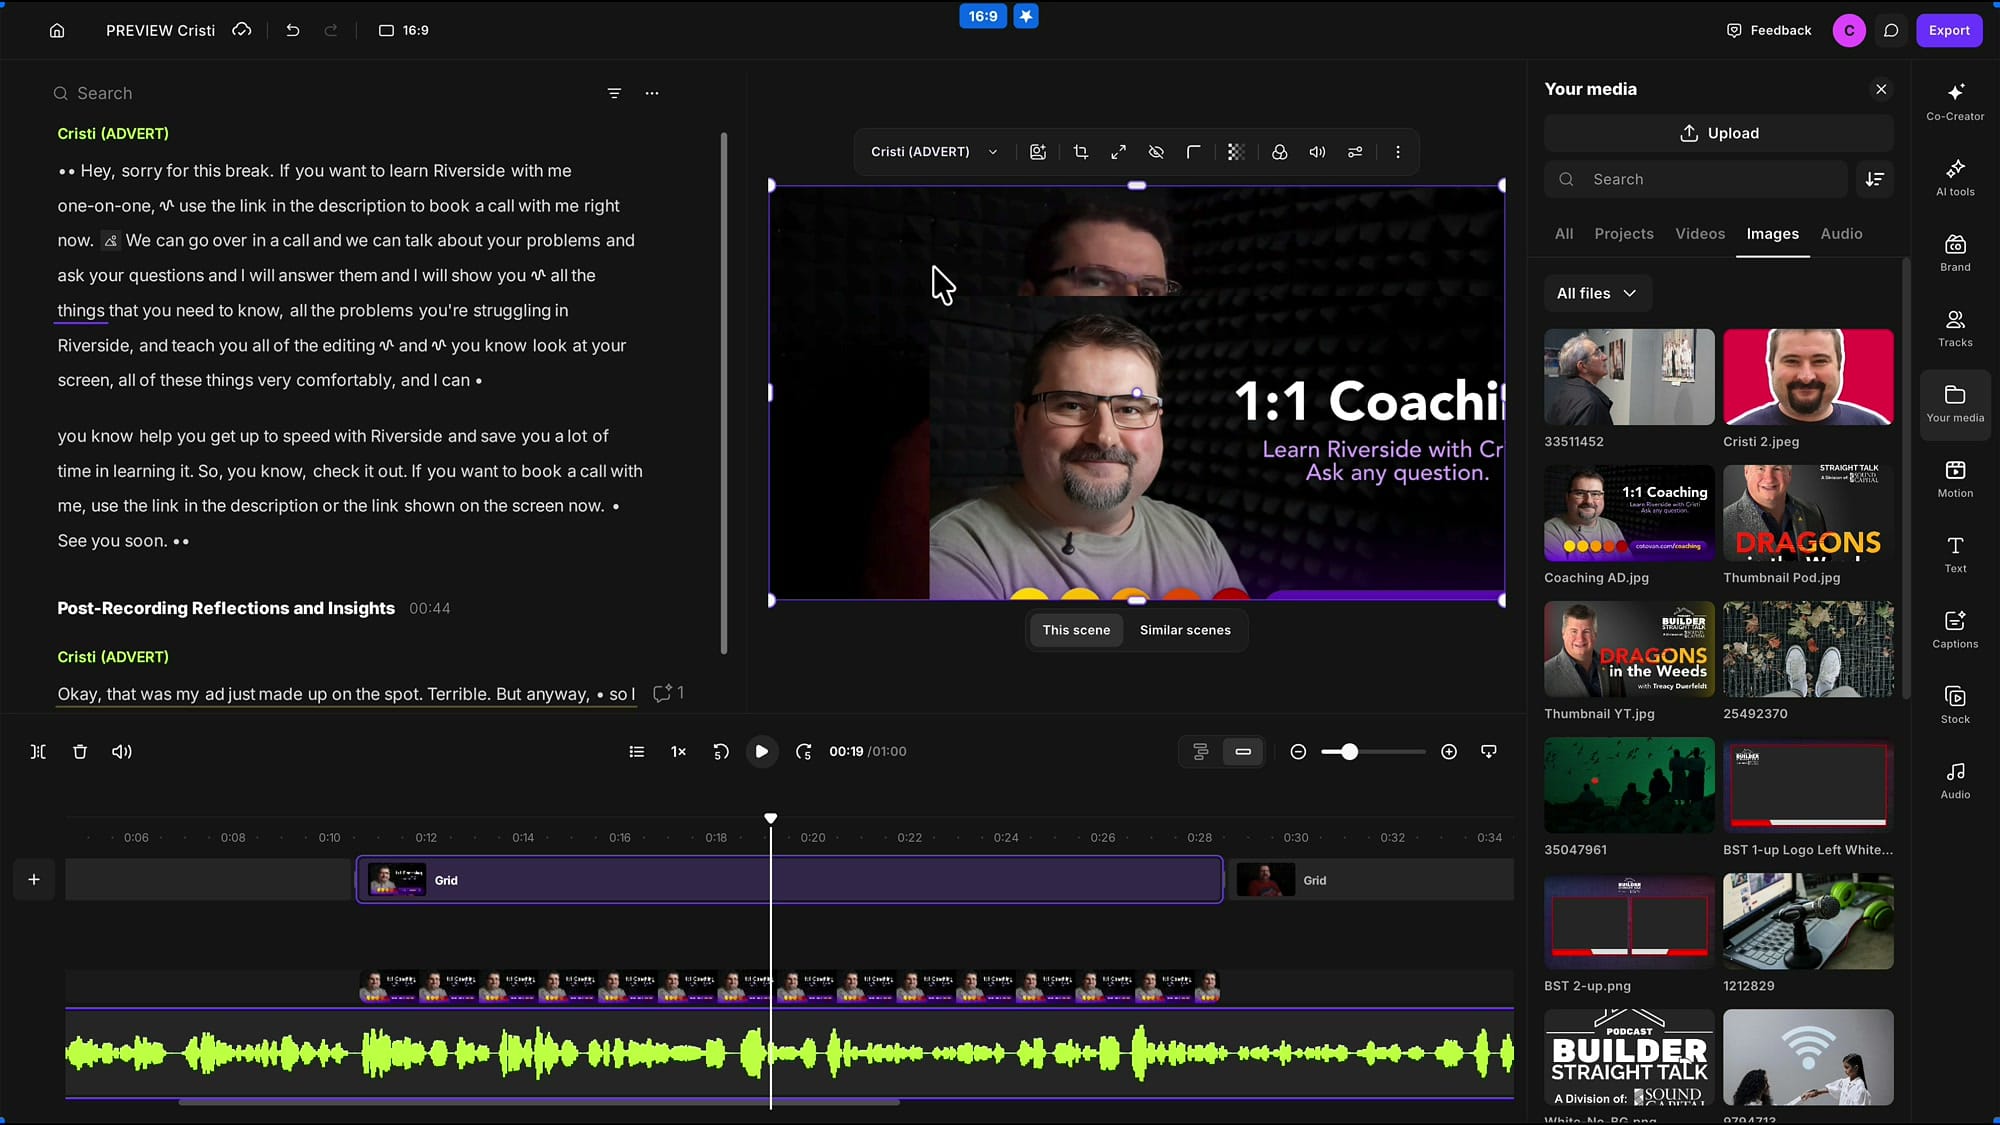
With the scene in place, go back to the stock library or your own media and click the image or video you want. Instead of covering the whole video, it snaps to the boundaries of the scene you defined — it starts and stops exactly where those scene breaks are. If you still had the text selection active when you clicked, it expands to that selection; if not, just make sure your playhead is inside the scene and the media will fill it.
Hide the host so only the B-roll shows
To remove yourself from just this moment, click your video in the preview. Check the timeline as you do — it confirms the scene is selected, which means whatever you change affects this scene only.
Now delete the video. It doesn't leave your edit; Riverside simply hides it for this scene, and you can bring it back any time. The result: your B-roll fills the frame here, while you stay on screen everywhere else in the episode.
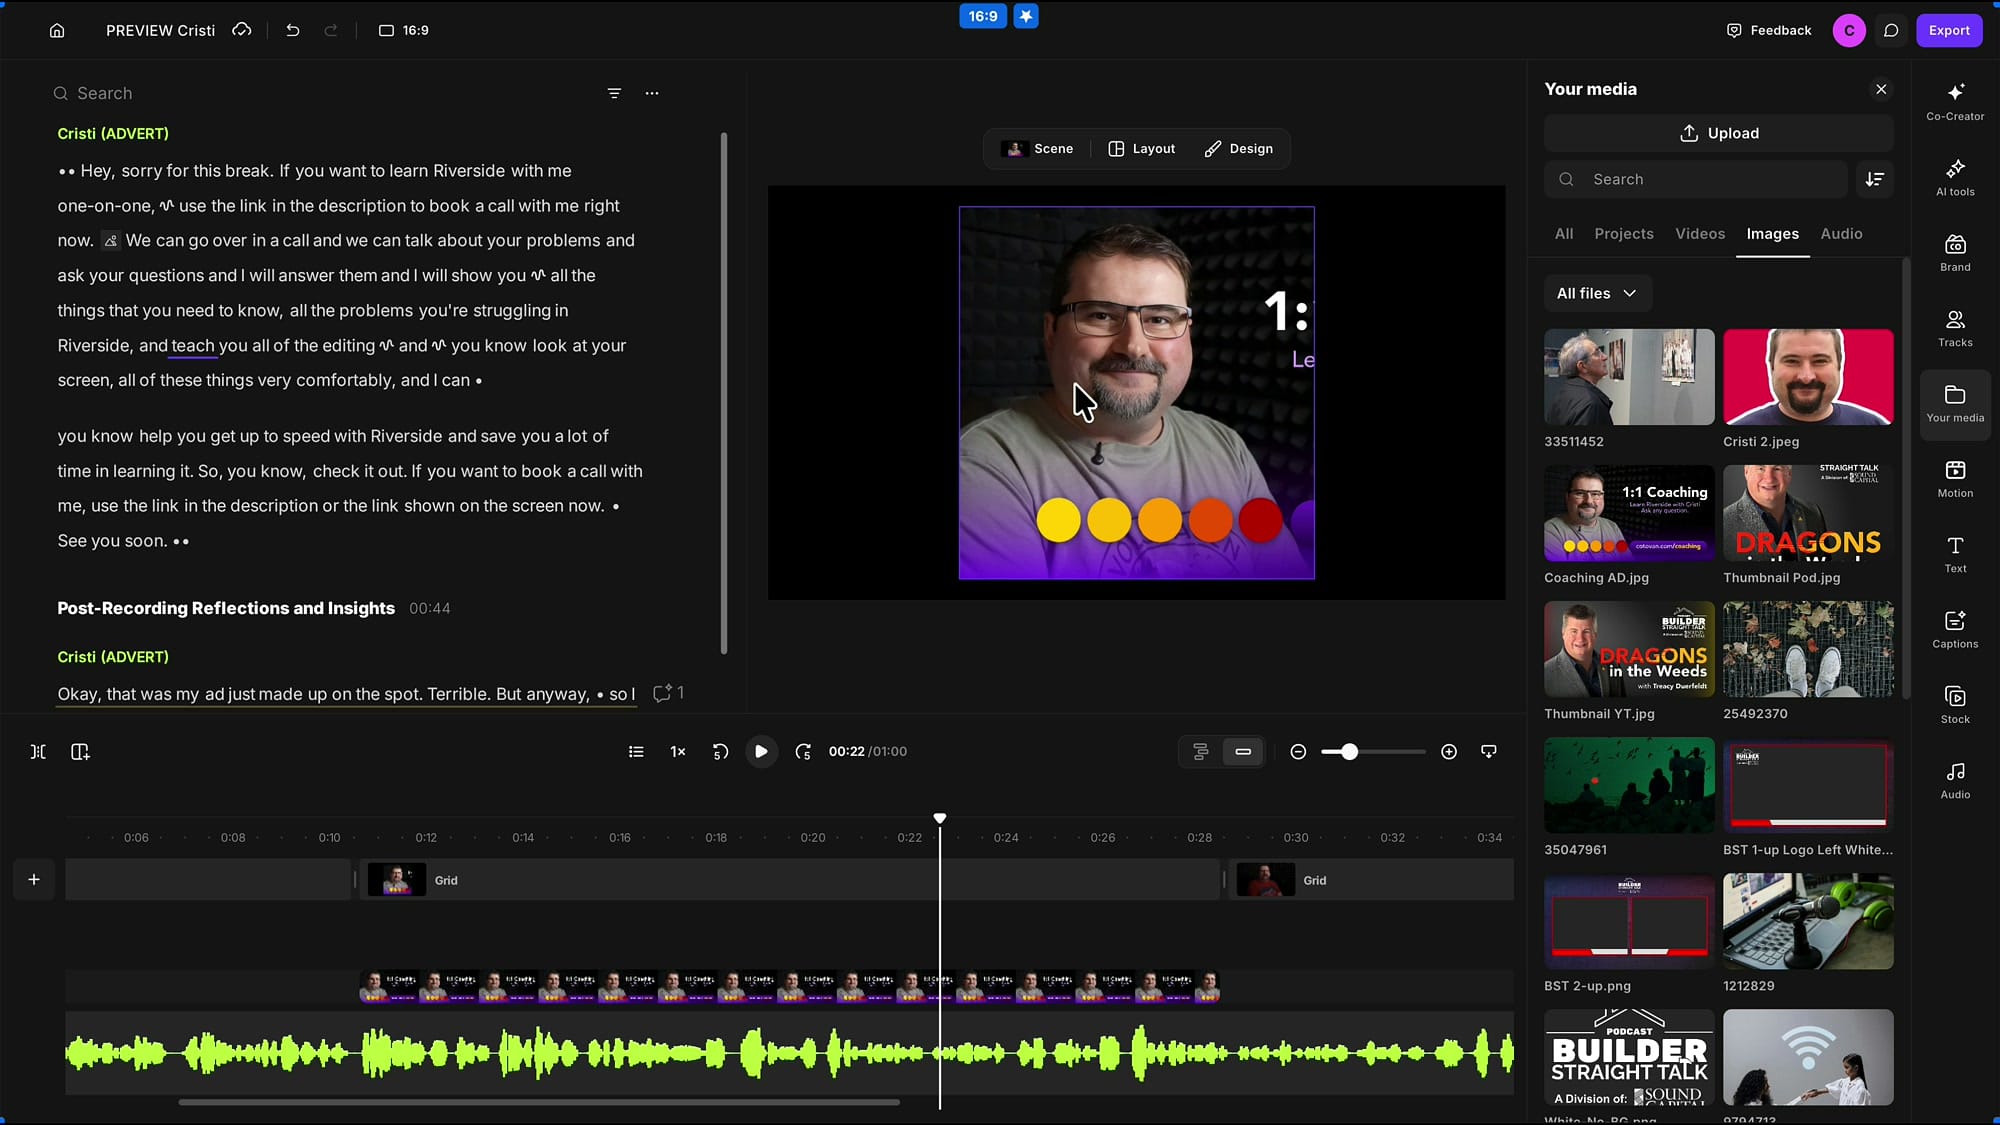
Control the layout scene by scene
This per-scene control is the real power of the new editor. Move your playhead outside the scene and you're full screen again. Inside it, it's just the B-roll. And each scene remembers its own arrangement — you might be full screen in scene one, hidden in scene two, and picture-in-picture in the corner in scene three. Changing the layout in one scene never touches the others.
If you decide you'd rather show your video beside the image instead of hiding it, that's just as easy. Slide the picture to one side, deselect everything, and set the layout to Solo Speaker to bring your camera back in. If you have a guest, choose One on One instead and both of you return. The same idea lets you style captions differently per scene too.
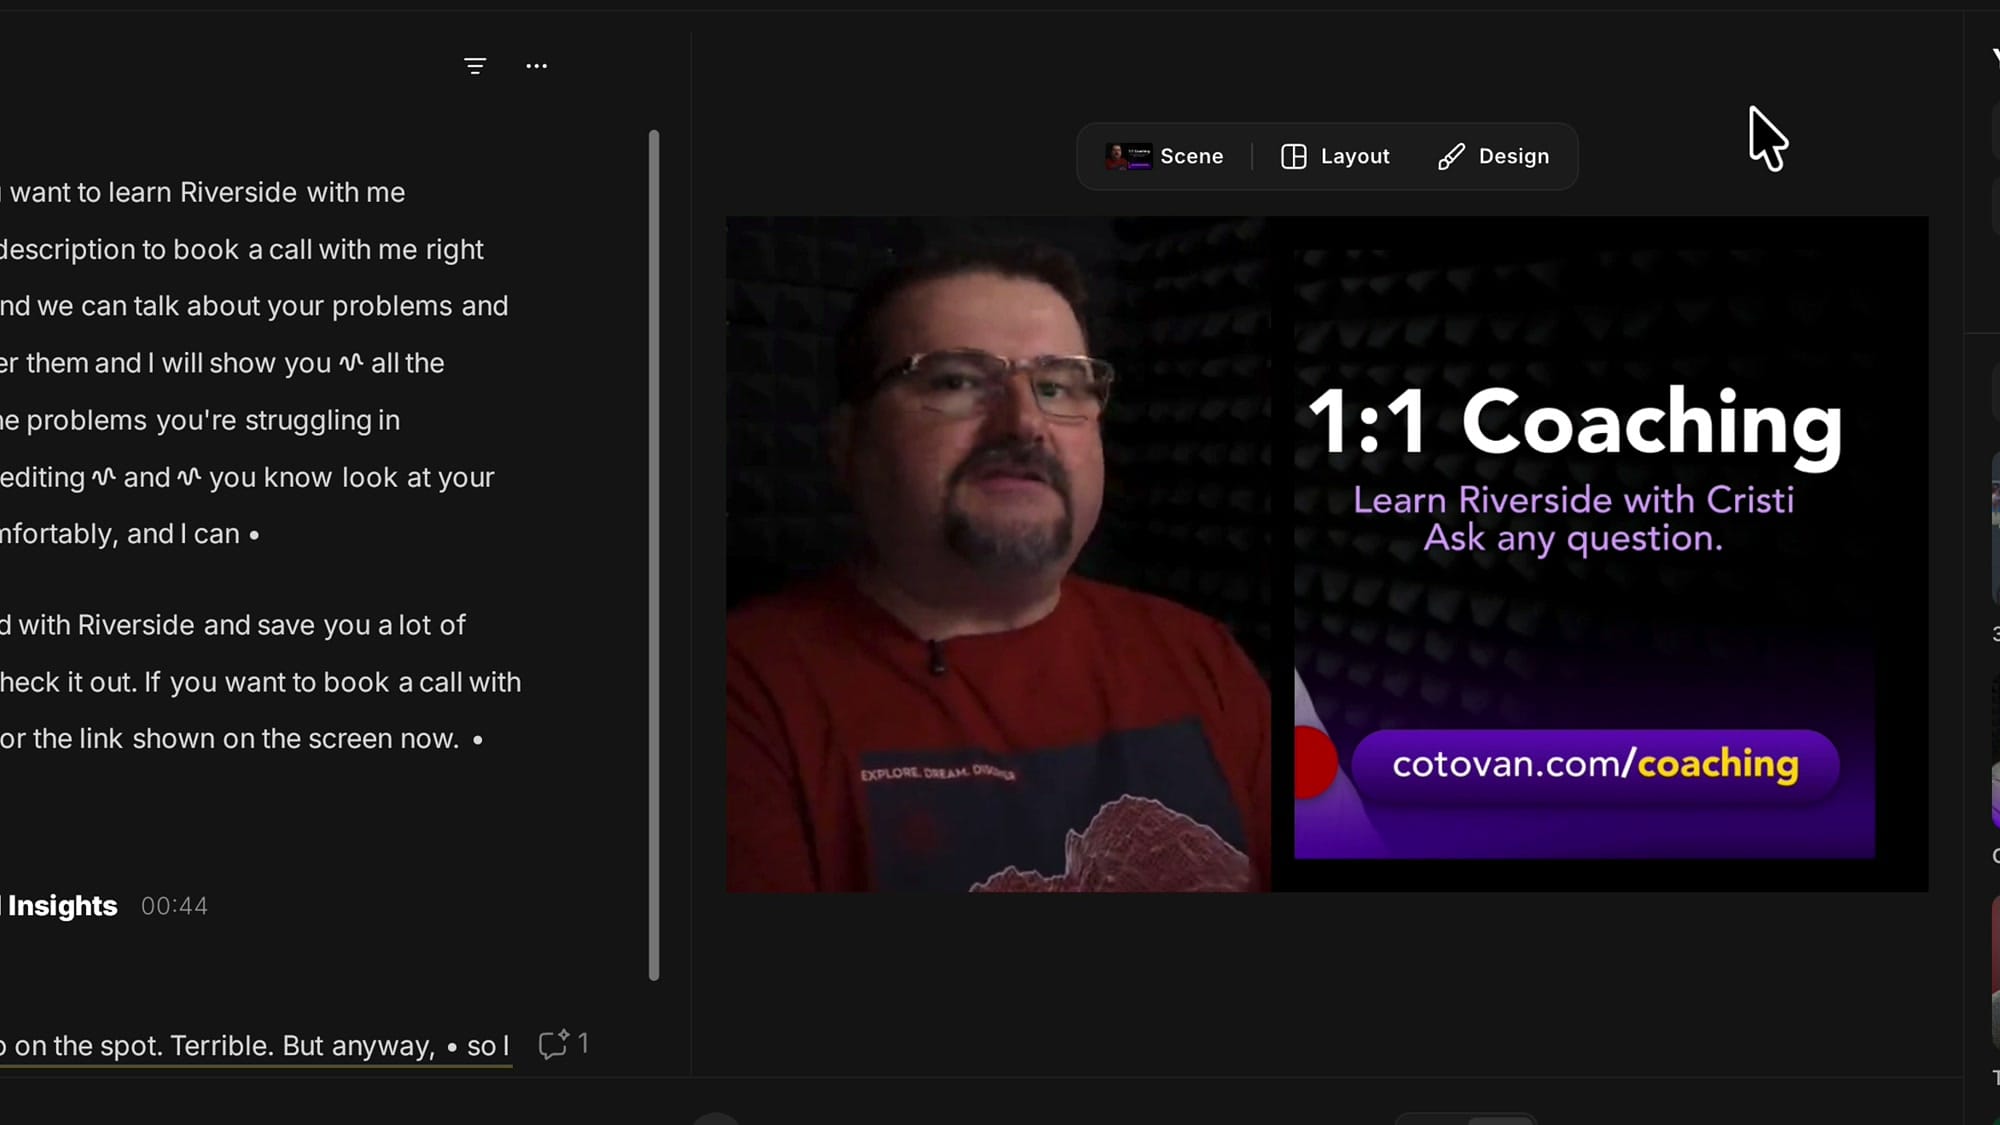
Crop and reposition each element
Once your video is back in the frame you can resize it, drag it into place, and zoom into your shot. Double-click the video (or click the crop icon) to enter crop mode, zoom in, and reposition — the alignment guides snap things into place. Click Done when you like it.
You can crop and reframe images exactly the same way. If you want to go deeper on this, I have a full guide on cropping, repositioning, and reframing video in Riverside.
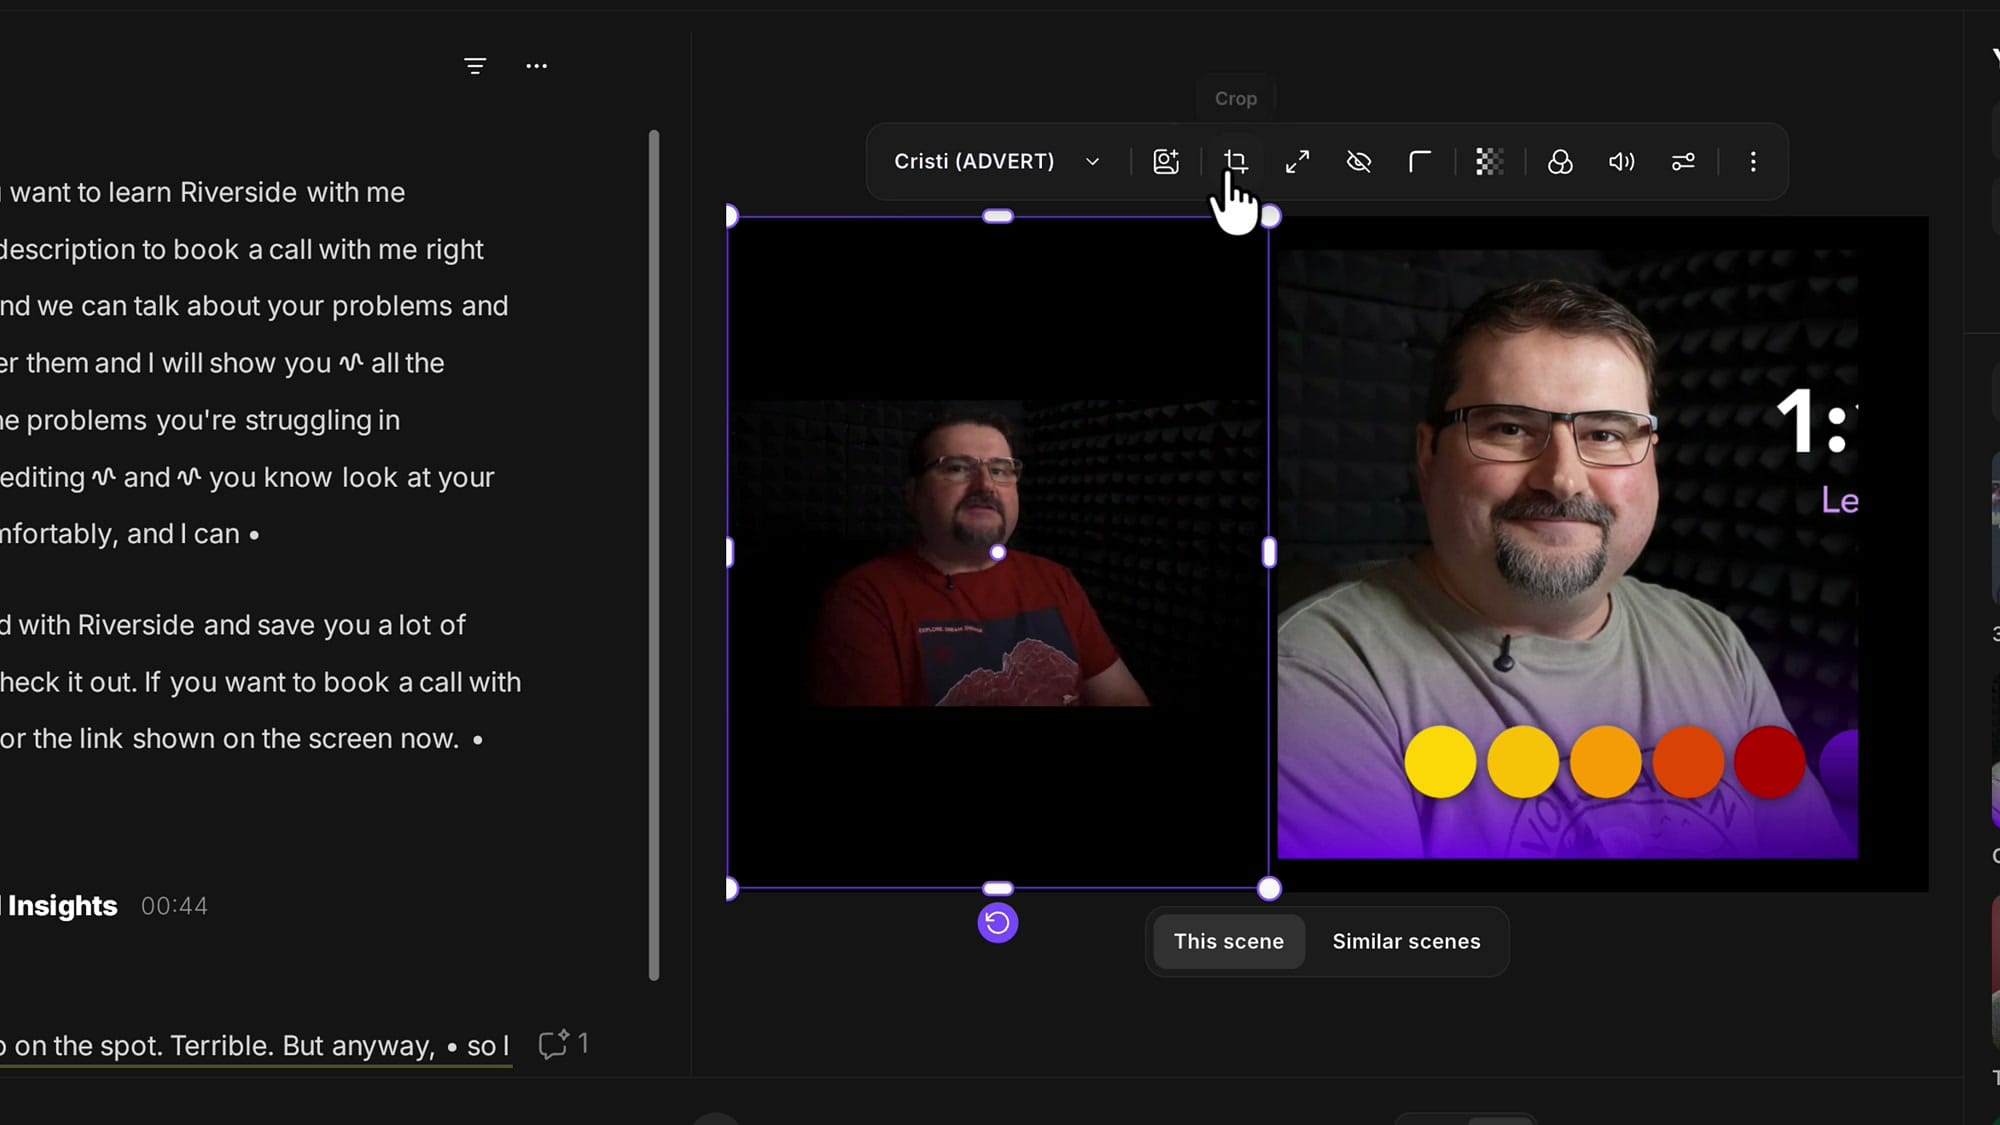
Adjust the timing when you change your mind
Timing isn't locked in. If you want the scene to start earlier or end later, grab a scene boundary in the timeline and drag it — the scene gets shorter or longer, and your speech and camera stay put.
One thing to know: stretching the scene won't automatically stretch the B-roll, because Riverside doesn't assume you want the media to fill the new space. Just grab the end of the image and extend it to the new boundary; it snaps into place there too. If you want more precision on where those breaks land, see my guide on adjusting scene break locations in Riverside.
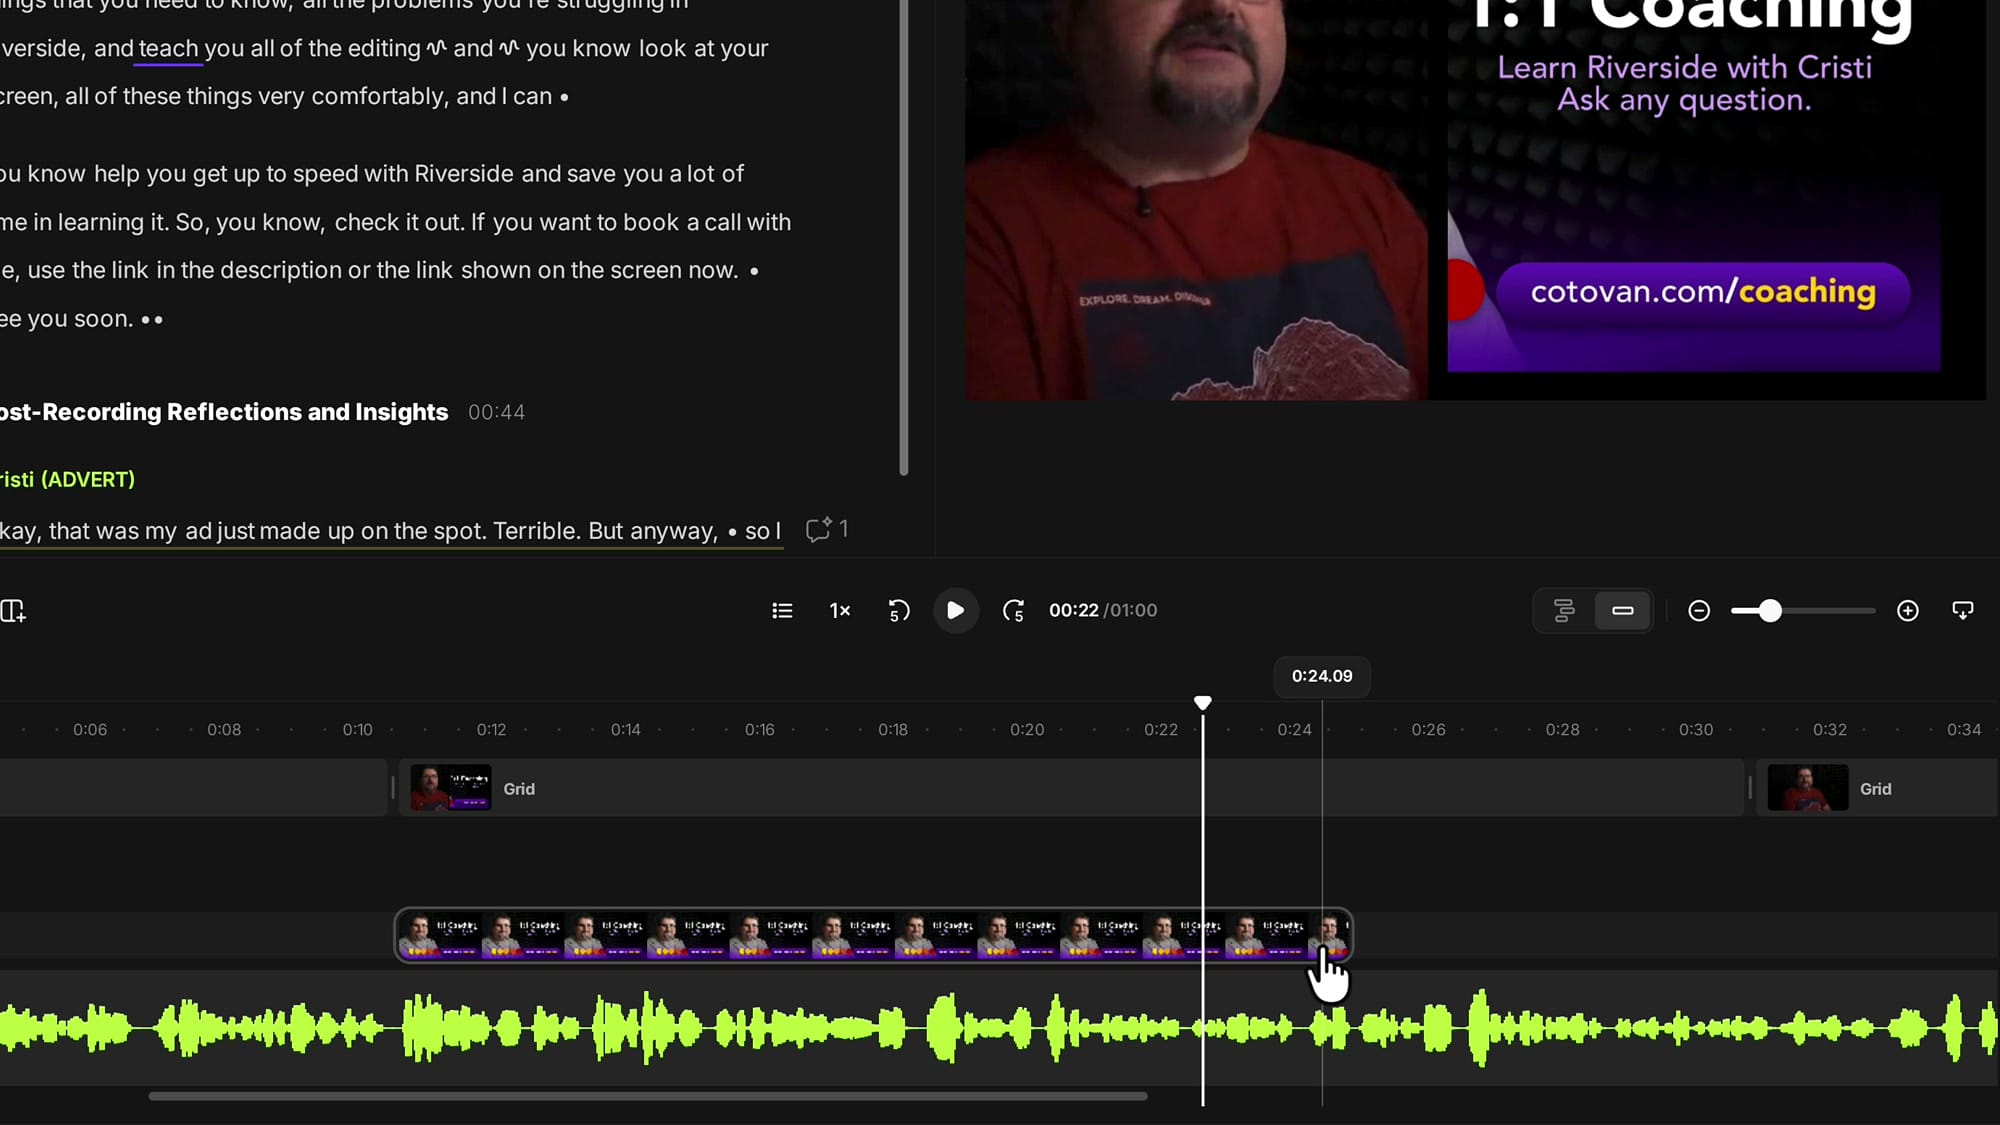
The recipe, in one line
So here's the whole answer: create a scene around the exact segment you want, drop your B-roll inside it so it stretches to the boundaries, then hide or reposition the person behind it. That's it. Scenes were always powerful, and the new editor makes them fast and flexible — you can even save scene layouts to reuse later, which is a huge time-saver once you settle on a look.
Have you tried the new Riverside editor yet? If not, give it a go — the speed difference alone is worth it. And if you get stuck on any of these steps, let me know and I'll put together a video for it.
If you're eager to learn more about Riverside and wish to have a one-on-one Riverside coaching session, feel free to book a call with me. I'm here to help you with any questions you have and to guide you through the best workflows, tips, workarounds, or just answer any questions you may have!
Related guides
 Cristi Cotovan
 Cristi Cotovan
 Cristi Cotovan
 Cristi Cotovan
 Cristi Cotovan