Insert a sponsorship ad in Riverside with B-roll and music
Insert a sponsor or coaching ad into a Riverside episode, even when the ad is just audio and an image. Add it to the timeline, lay an image over it as B-roll, balance the audio, and finish with music that fades in and out.

If your podcast has a sponsor read, a promo, or a coaching offer you want to drop into an episode, you can build that ad break right inside Riverside — even when the ad is just audio plus a logo or image. In this guide I'll insert a short ad segment into an existing episode, then make it feel polished with an image as B-roll, a balanced voice track, and music that fades in and out around the break.
A quick note before we start: this is fixed insertion, not dynamic ad insertion. We're not swapping ads in at the hosting level — we're making this ad segment a permanent part of the episode edit. When you export, the ad is baked into the video.
Start your edit from the recording
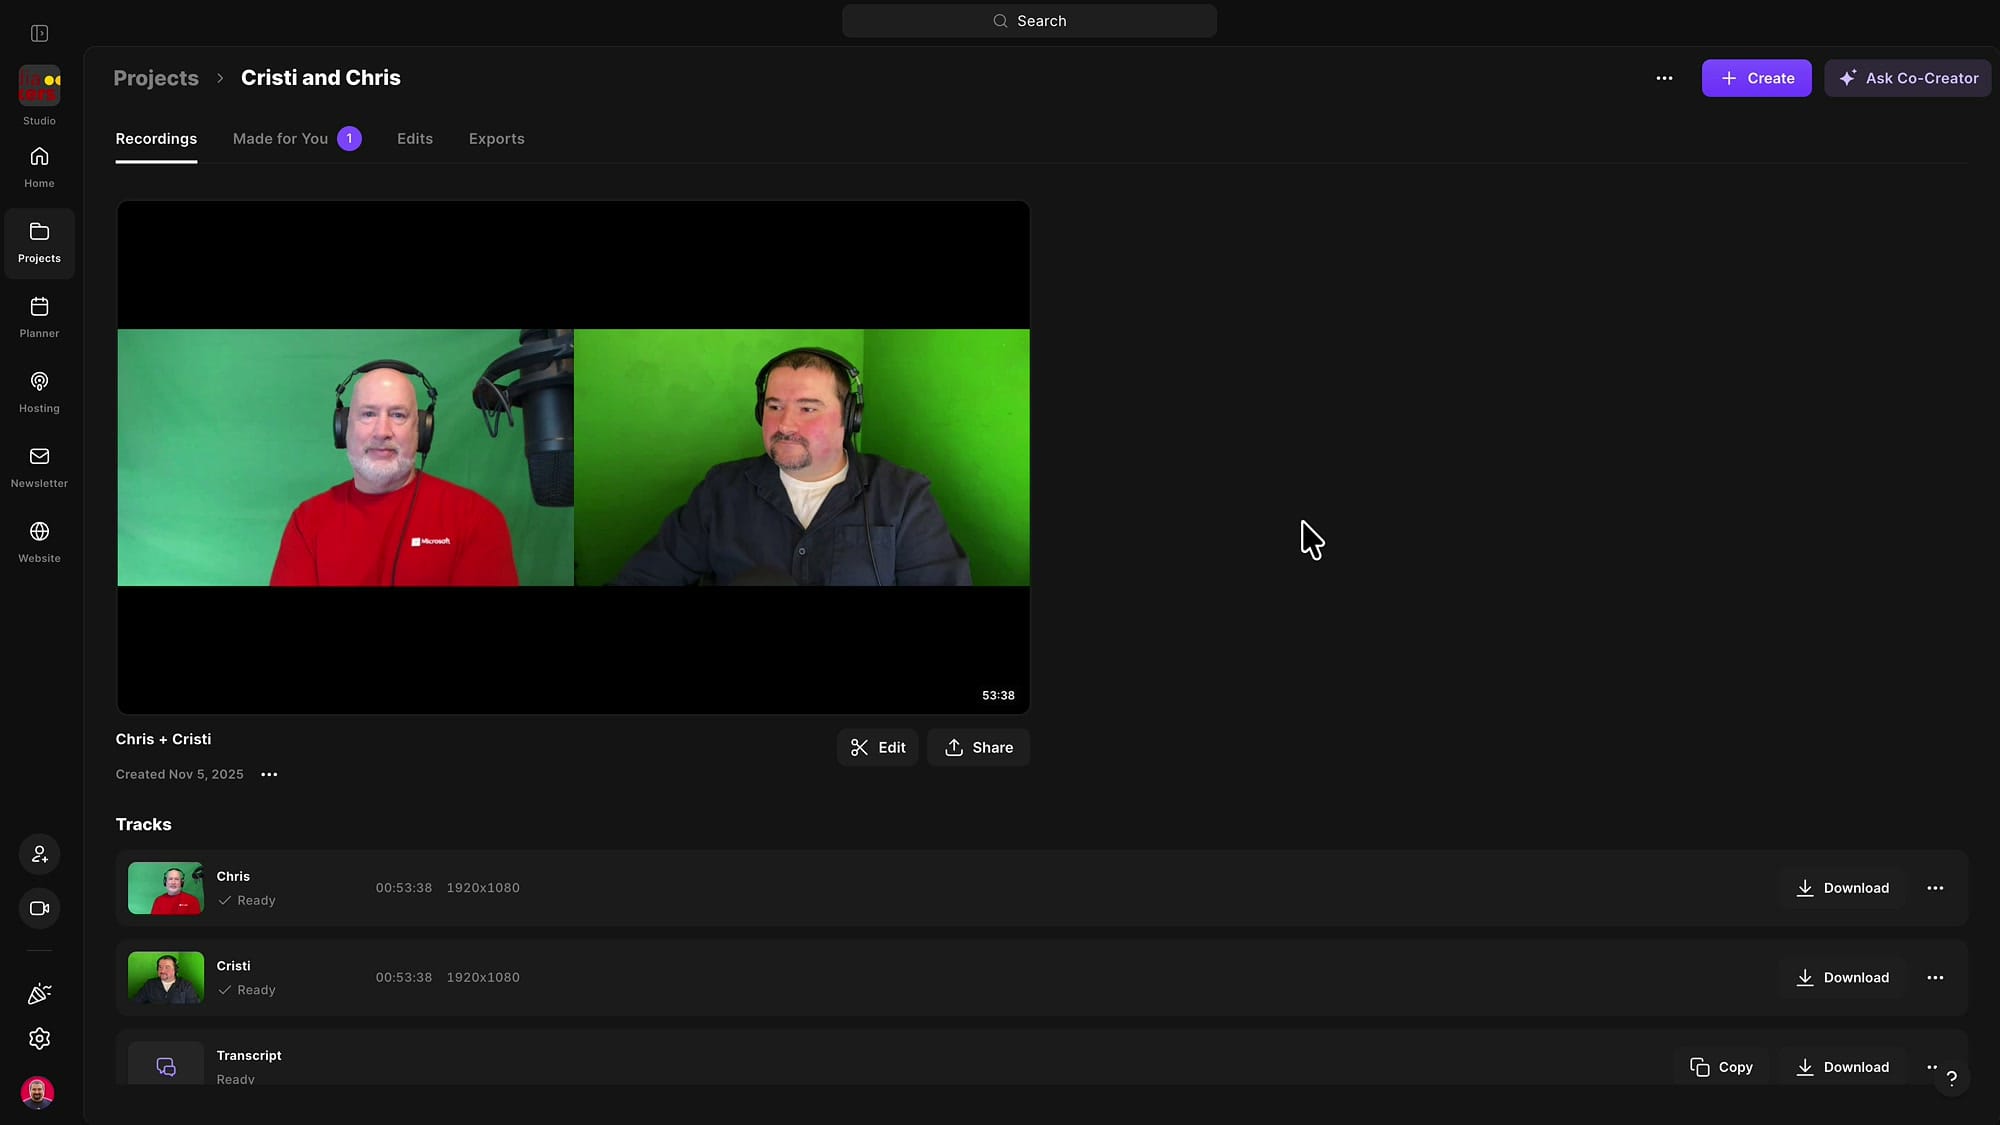
Open the project that contains your episode and go to the Recordings tab. Click Edit on the recording you want to work with — that opens a fresh editing project in Riverside, ready to go. If you'd rather keep your original edit untouched, this is also a good moment to start a new edit from an existing one so your ad experiments stay separate.
Choose where the ad goes
There are two ways to pick the insertion point, and which one you use depends on how precise you need to be.
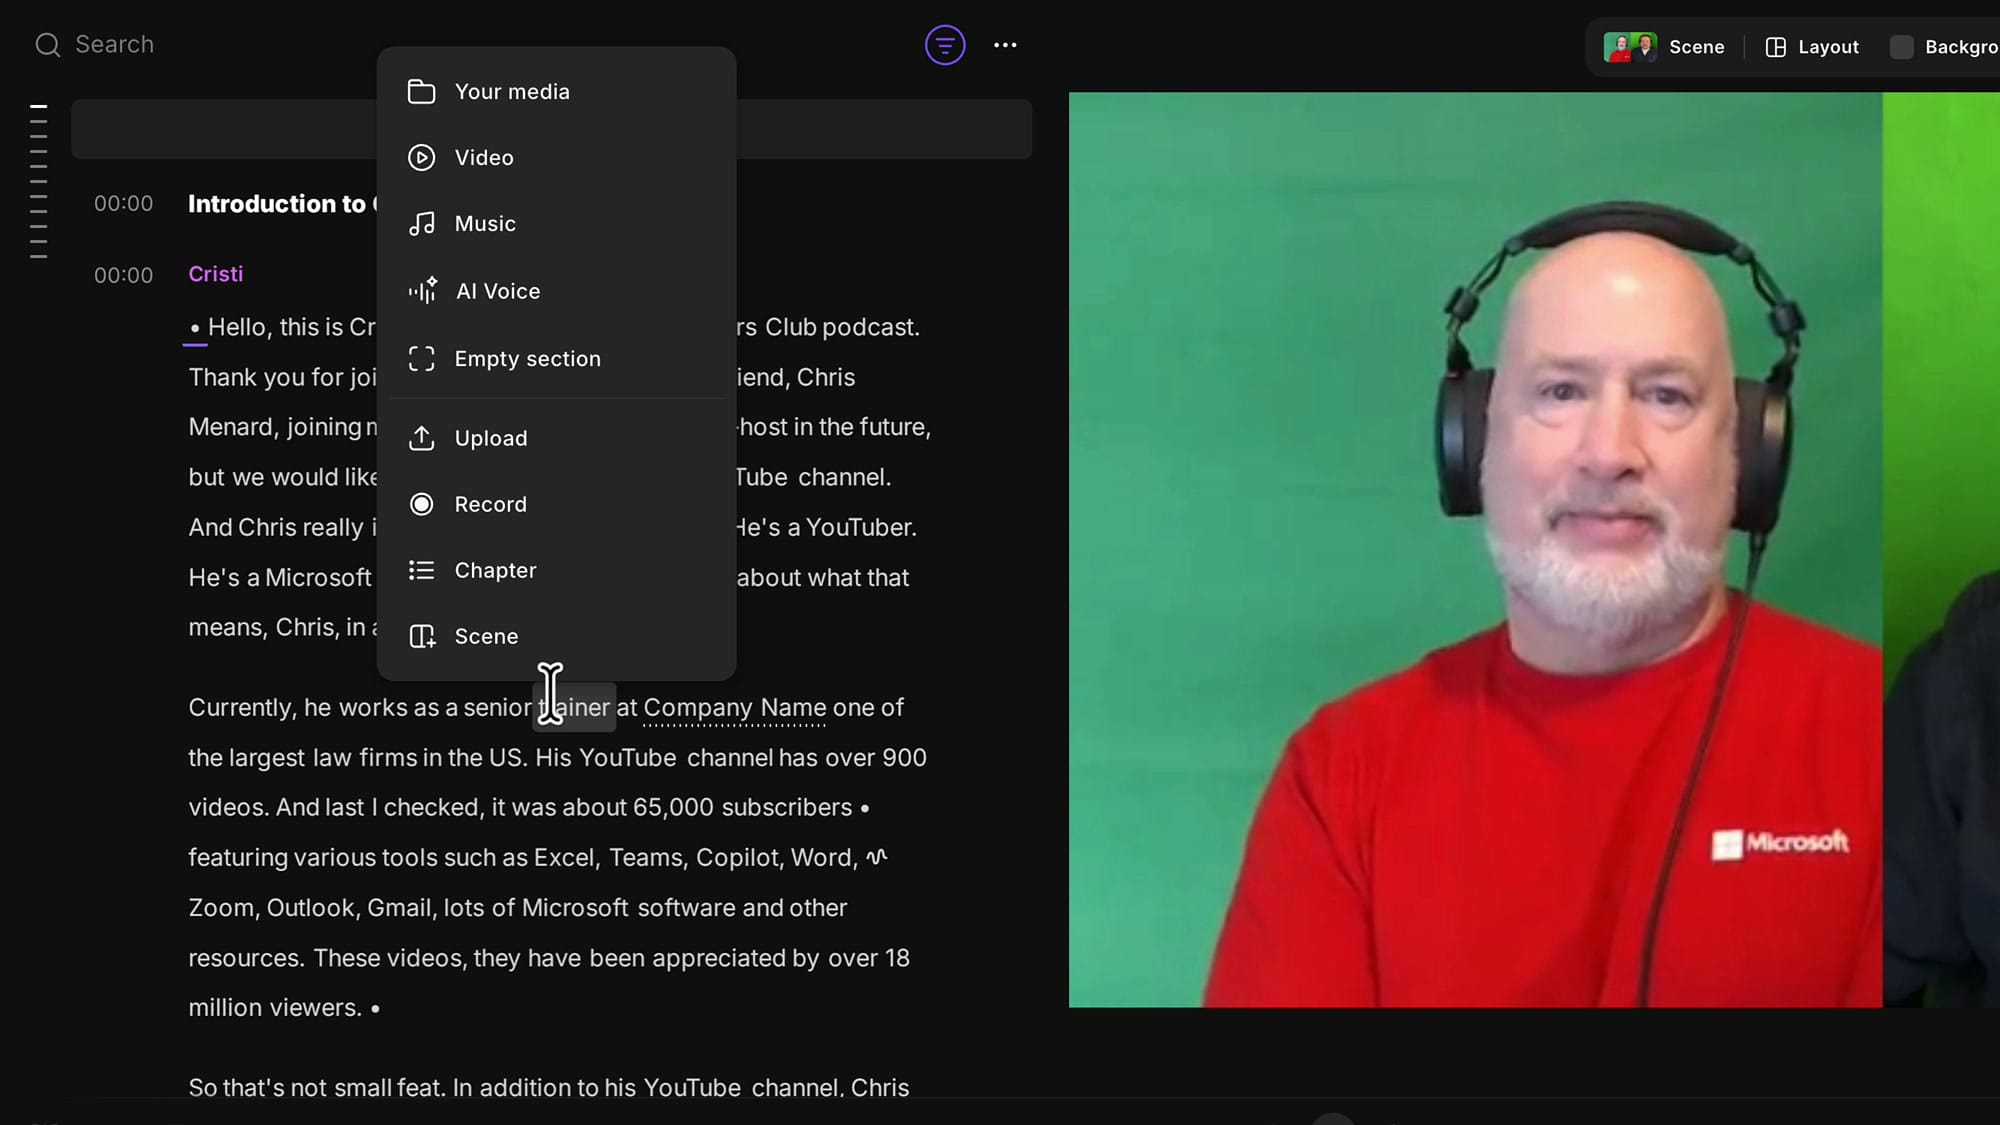
From the transcript. If you like working in the transcript, hover your mouse between two paragraphs. A small + appears at that exact spot — click it and you'll get an Add section menu asking what you want to add: something from your media, a new video, a music file, or an empty section. This drops the new section precisely at that paragraph break.
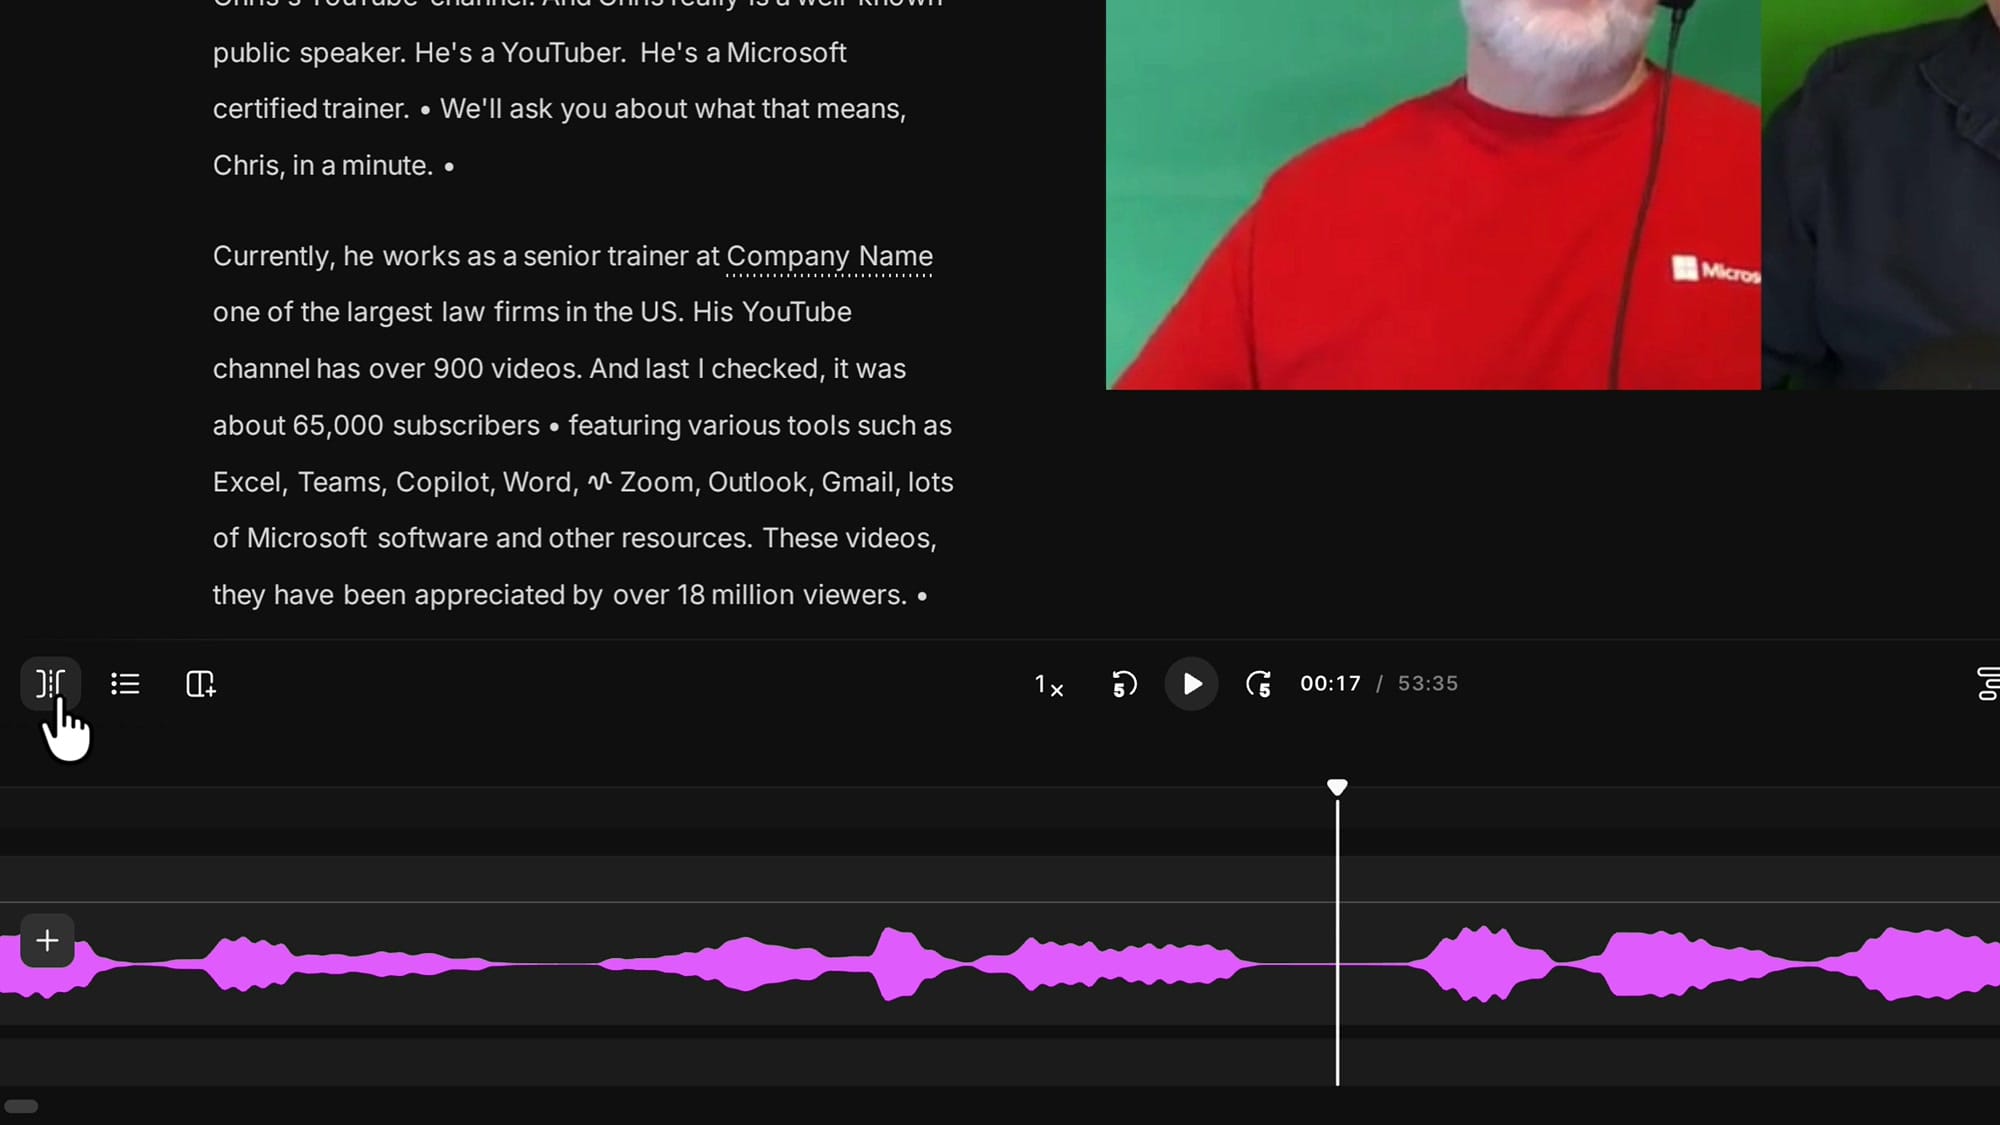
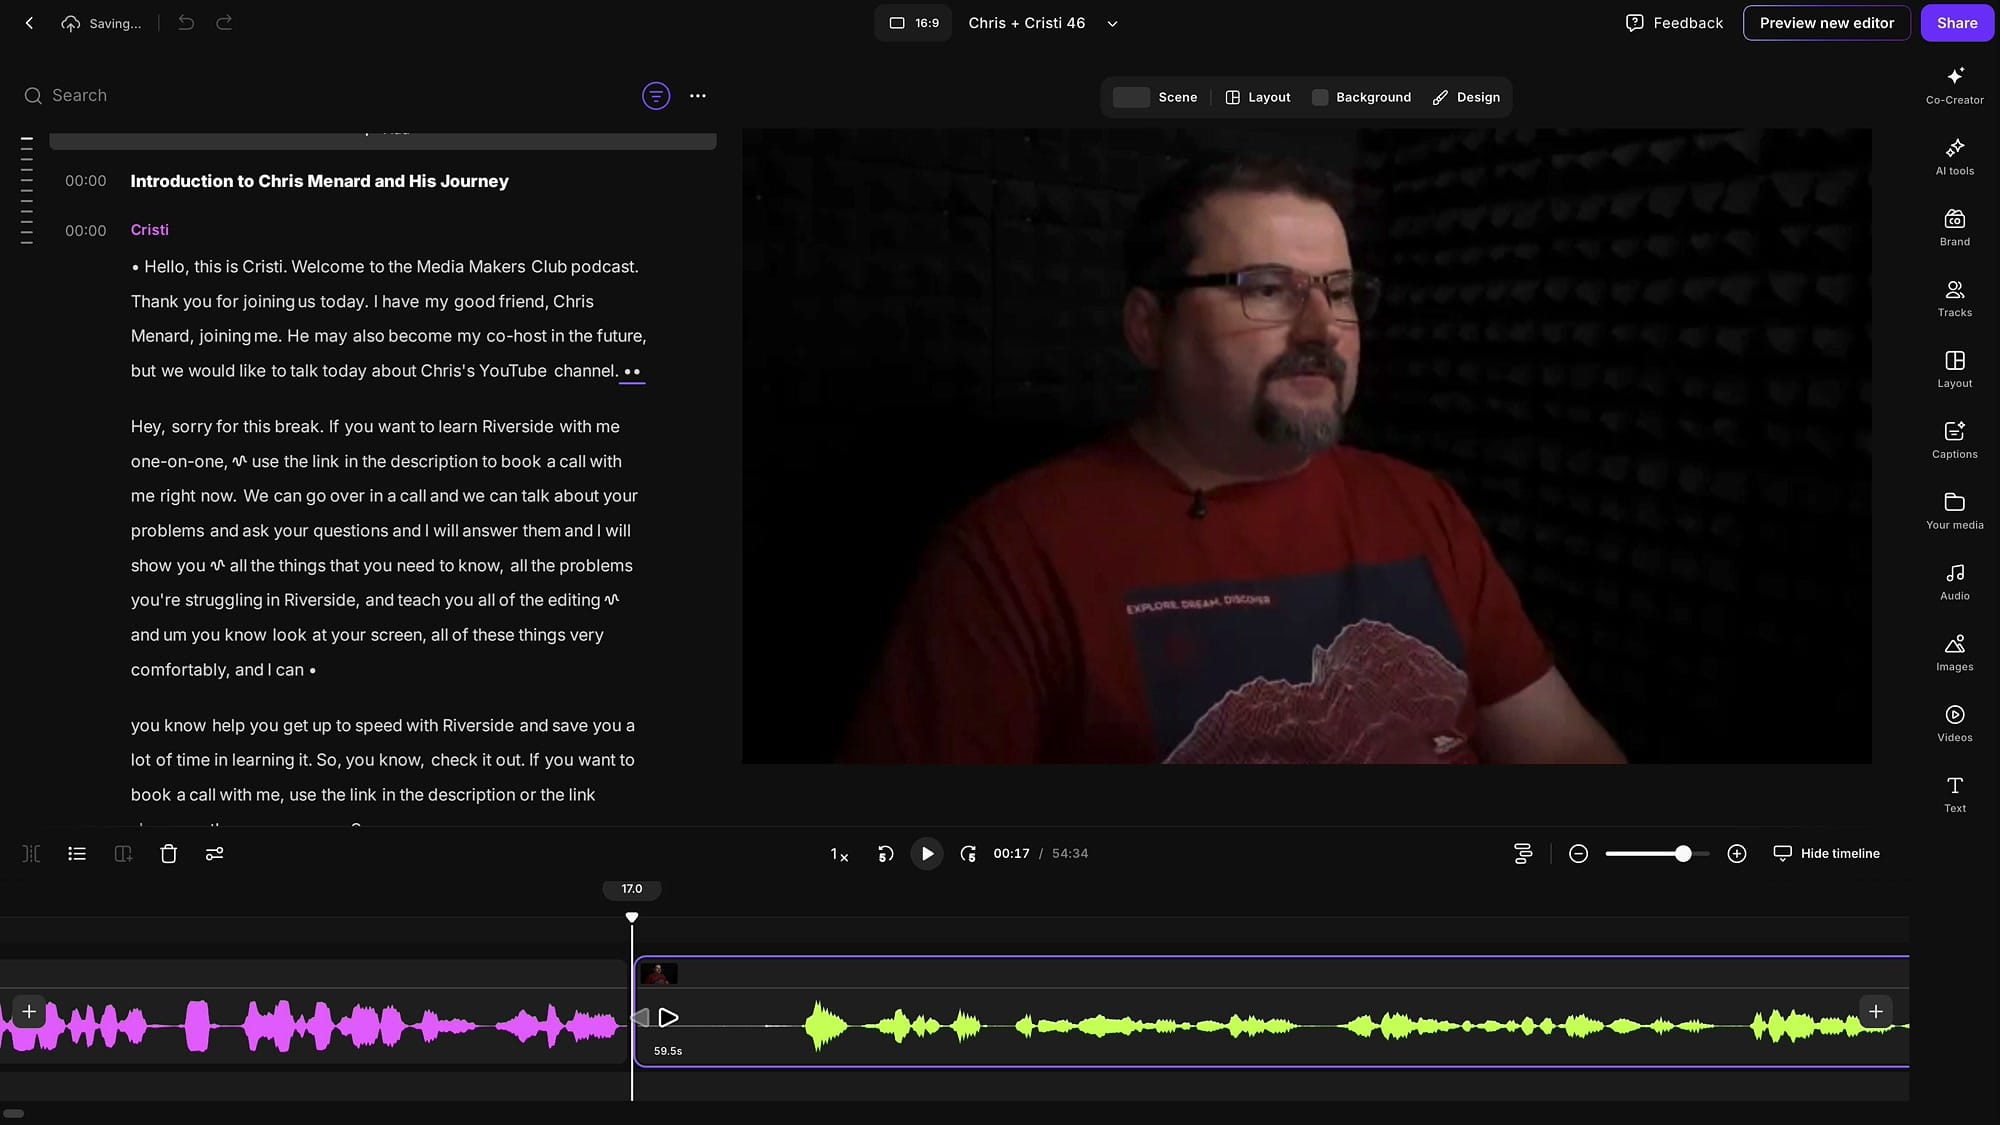
From the timeline. Paragraph breaks won't always land where you want the ad — sometimes you need to insert in the middle of a sentence. That's where the timeline wins, because you're not constrained by transcript breaks. Open the timeline at the bottom of the editor (use the timeline button if it isn't showing). You can zoom in with Command + Mouse Wheel (Control + Mouse Wheel on Windows) to find the perfect spot.
Place the play head exactly where you want the ad — the play head position is what matters here — then click the split button or press S. Splitting cuts that piece of media into two, which gives you a gap to insert into.
Move the play head away and you'll see the two segments; hover between them and the same + Add section menu appears.
(Heads up: I'm using the older Riverside editor here — the new one hasn't rolled out to everyone yet — but the workflow is the same.)
Record or upload the advert
From the Add section menu you can upload an audio file, choose a clip you've already added under Your media (uploads show under Audio; anything you recorded shows under Recordings), or record a fresh ad on the spot. If you've already got the ad as a file, upload it and skip ahead.
For this example I'll record the ad directly. Click Record and Riverside jumps you straight into the recording studio. Before you hit record, double-check your microphone is the right one.
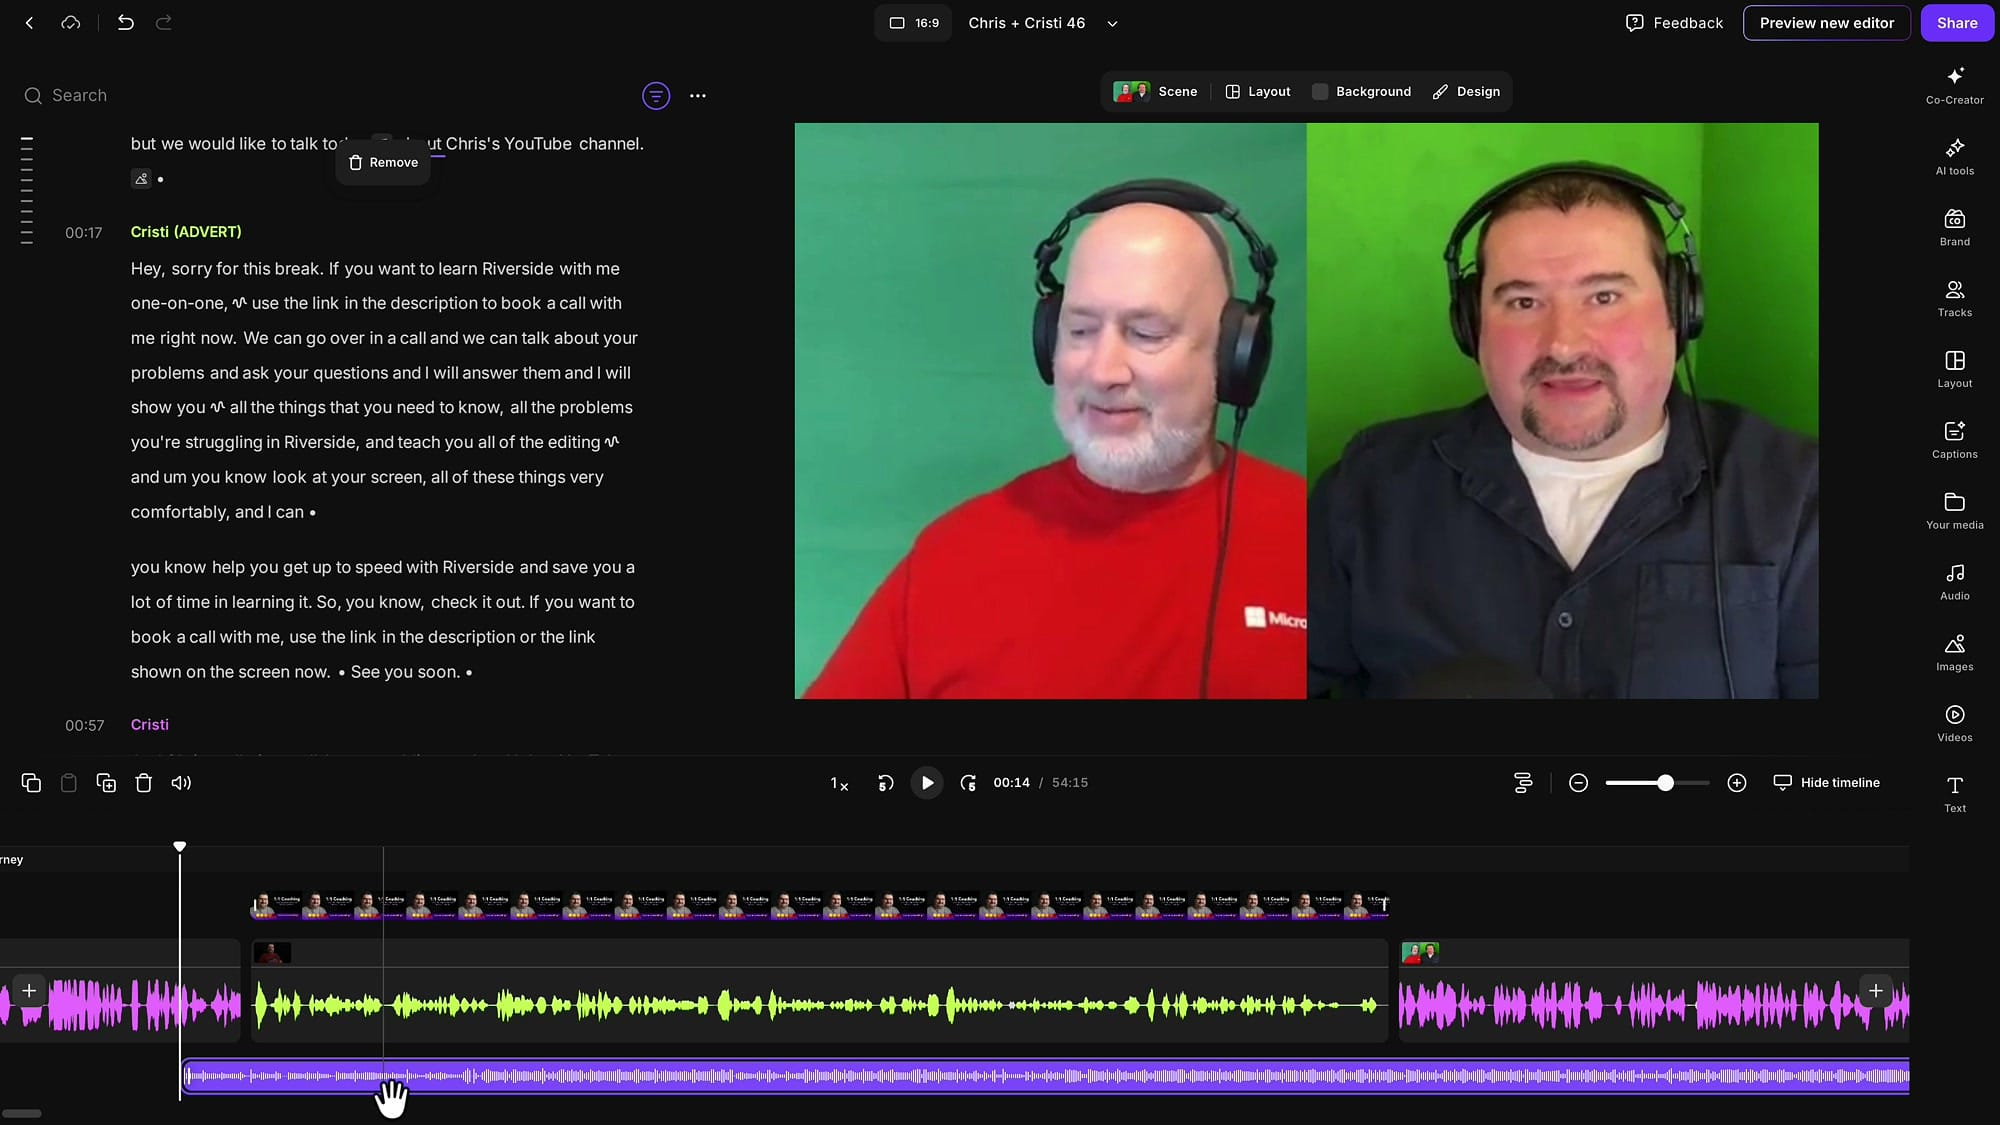
Record your read — you can use your camera, but you don't have to, since we'll lay an image over the video next. When you're done, click Stop. Anything you say after you think you've finished is still being captured, so stop promptly.
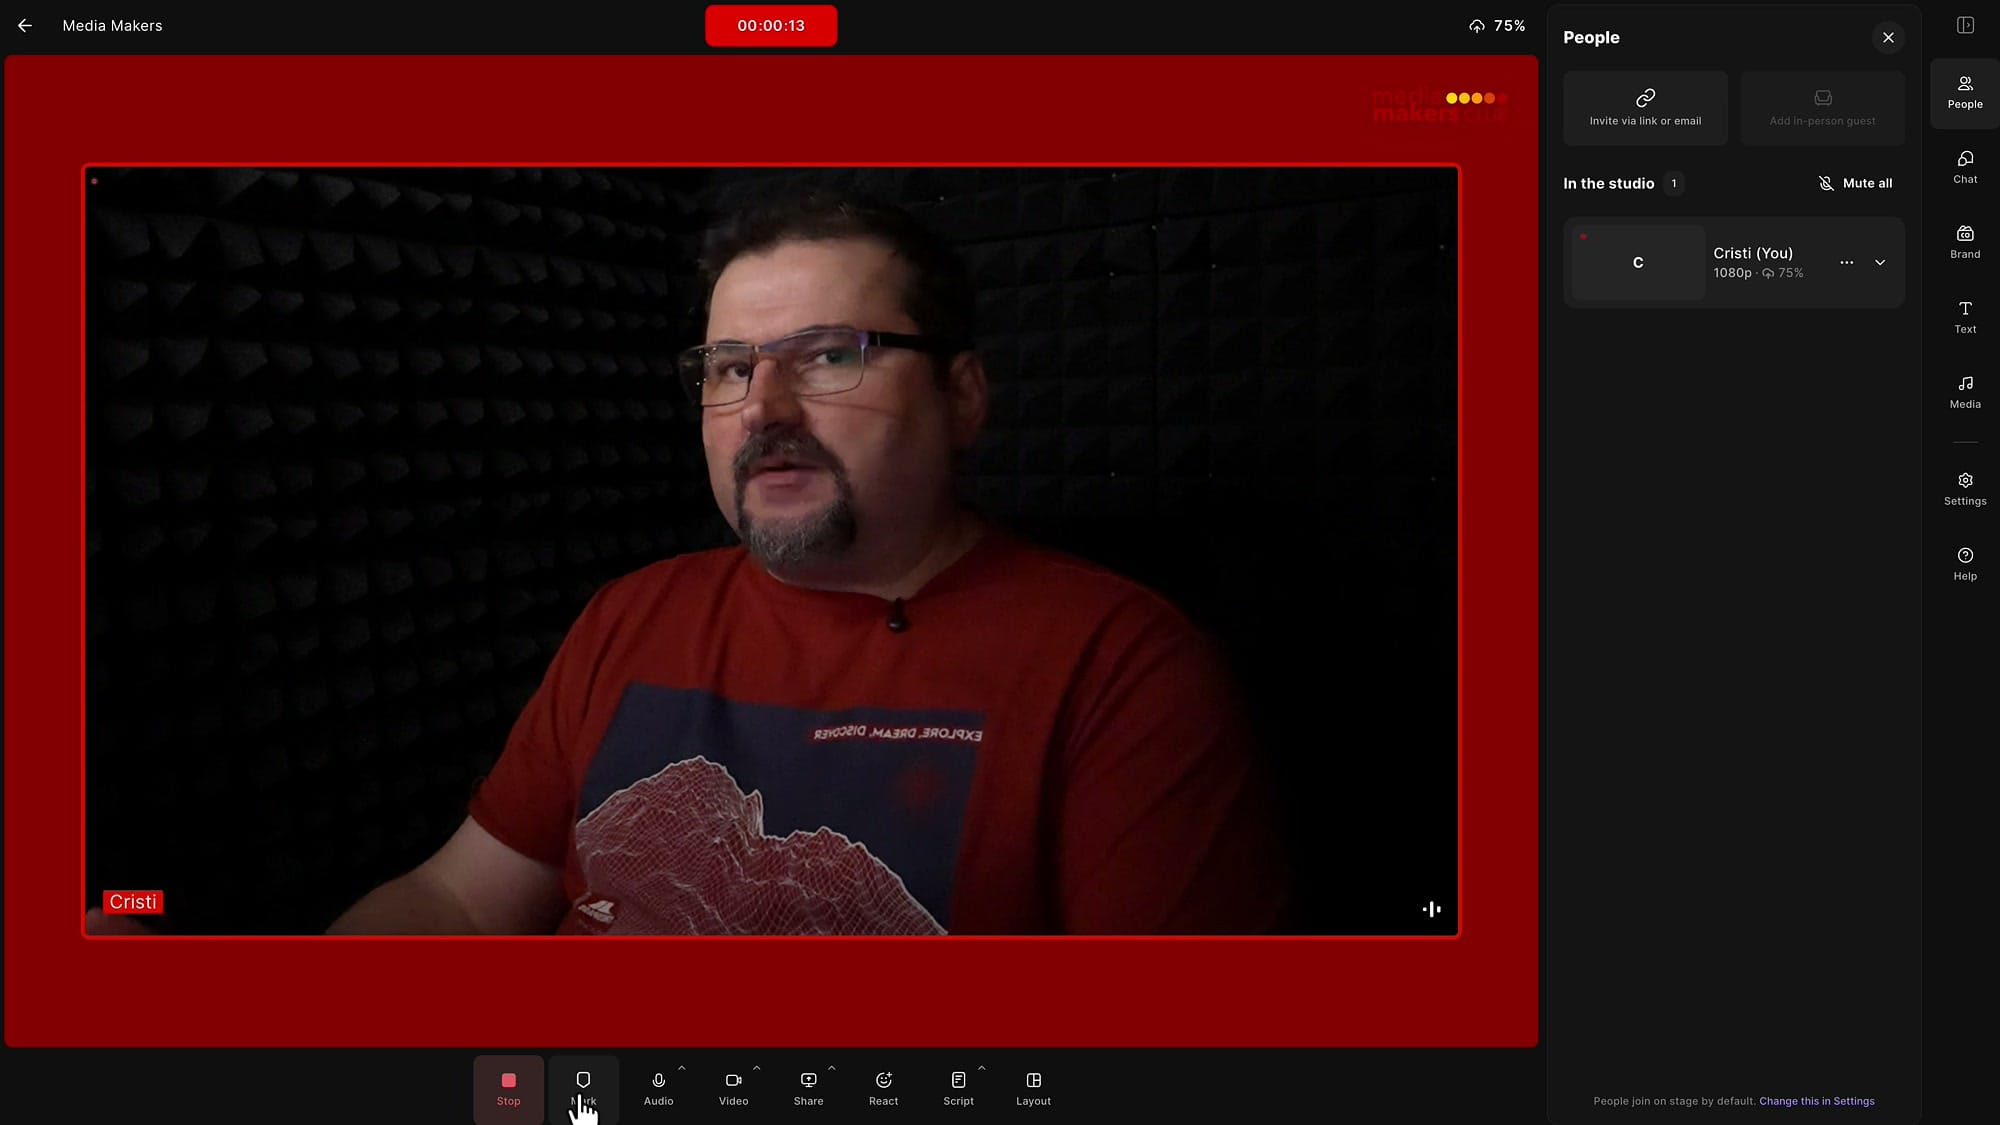
Riverside takes a second or two to finish uploading the recording from your computer. Once it shows as uploaded, click Continue editing and it drops you back into the editor with the new recording placed exactly where you started recording — right at your split point.
If you’re eager to learn more about Riverside and wish to have a one-on-one Riverside coaching session, feel free to book a call with me.
I’m here to help you with any questions you have and to guide you through the best workflows, tips, workarounds, or just answer any questions you may have!
Review the inserted segment
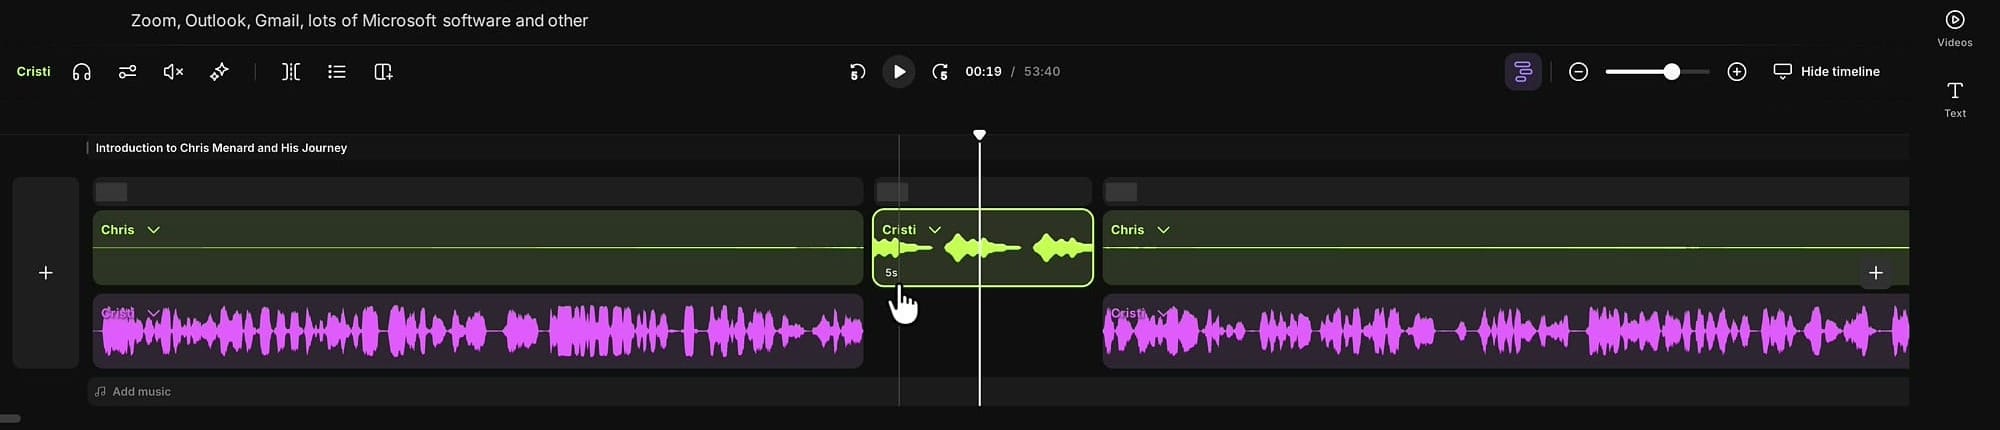
Look down in the timeline (it expands to show all the tracks) and you'll see the segment you just recorded. At first it may show as roughly five seconds long — that's just Riverside still processing it. Give it a moment and it expands to the full length of your recording. In my case the ad came in at just under sixty seconds.
Trim the advert
Almost always you'll have a little dead air to clean up — a breath before you start, some talk after you stop. Find the beginning of the ad and drag the split point in to trim the front.
Use Shift + Mouse Wheel to scroll along the timeline. For the end, drop the play head right where the ad should stop, split again, click the leftover tail segment, and press Delete. Now the episode flows straight into your ad and back out again.
If you want to be surgical about these cuts, the same playhead-and-split technique is the heart of precision editing in Riverside.
Balance the ad's volume
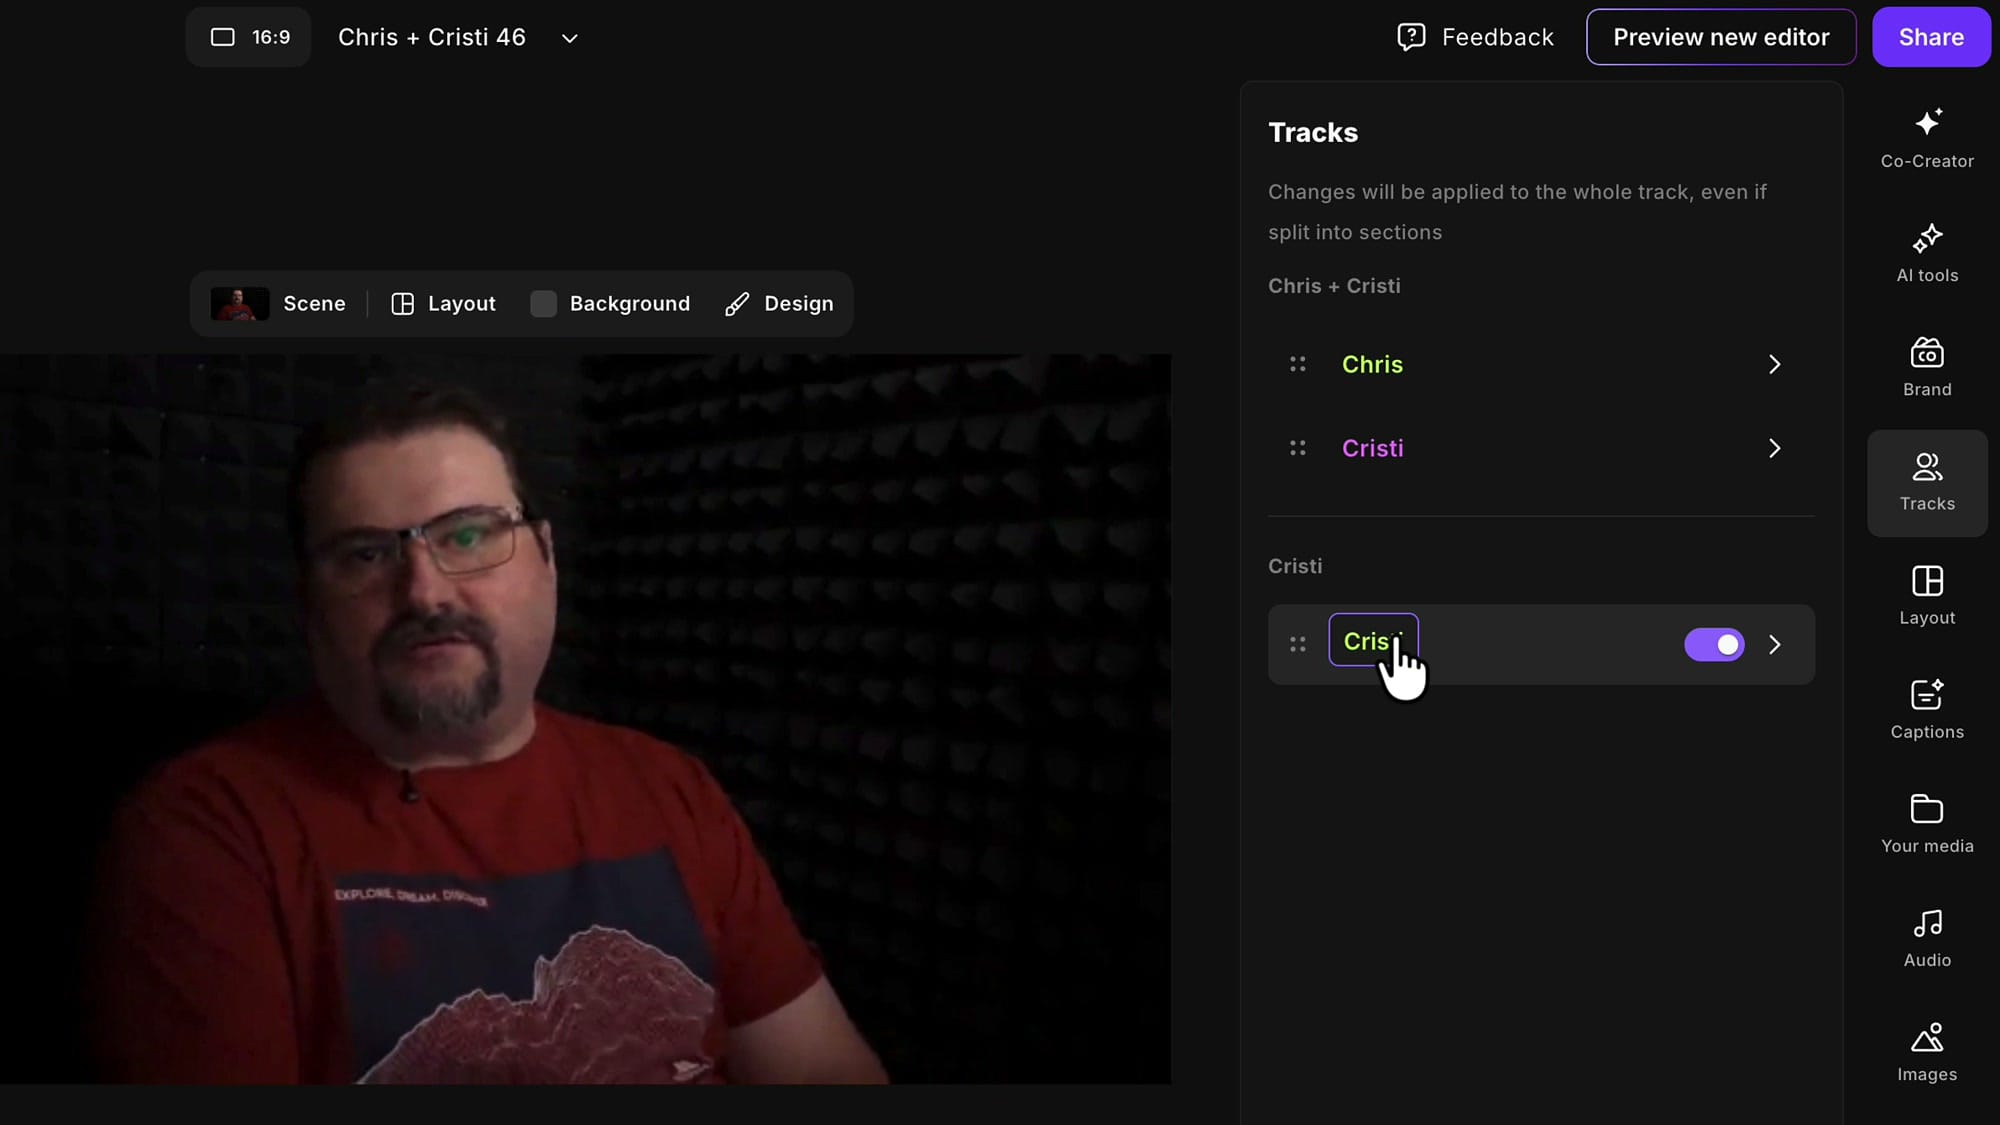
Your ad recording will often be louder or quieter than the episode. Click the ad segment, open the Tracks panel, and find that track — you can toggle it and change its volume right there. Riverside also offers Magic Audio to clean up the recording; flip it on if it helps.
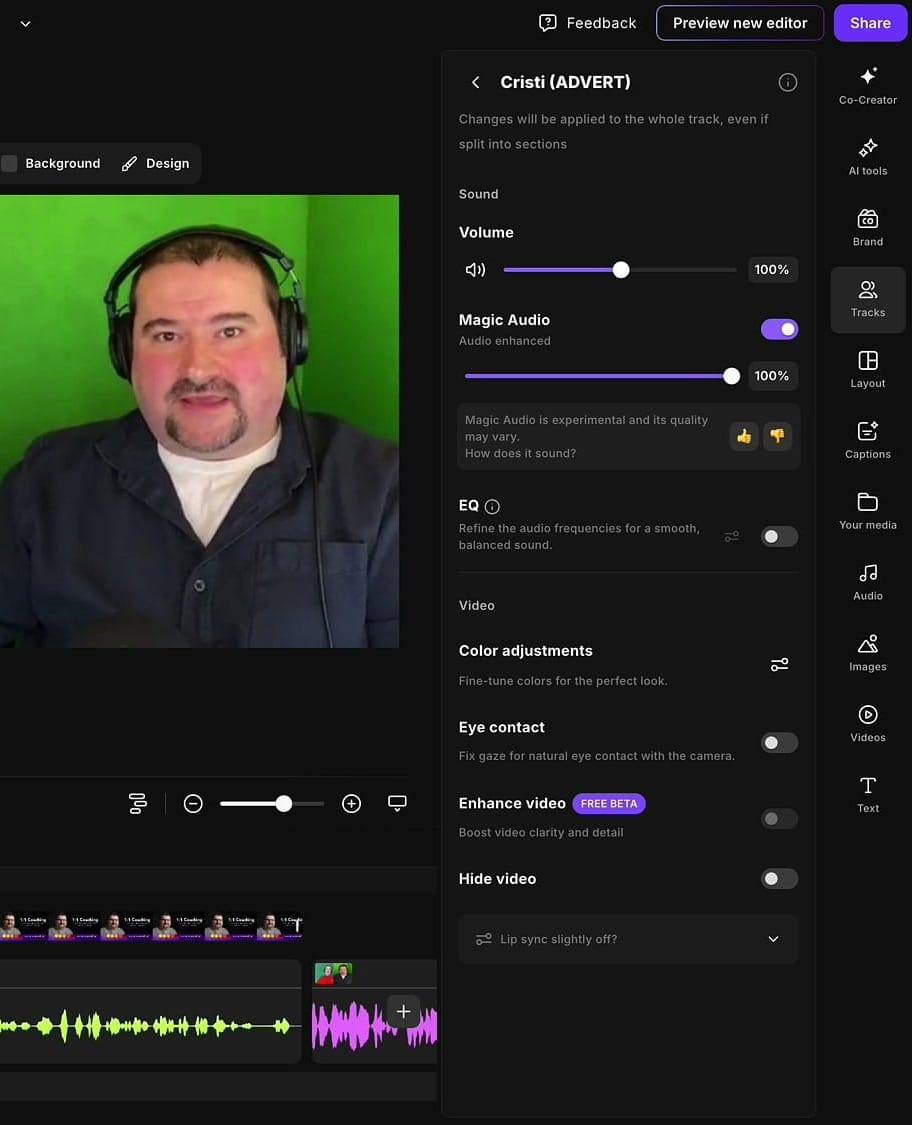
One tip that saves a lot of confusion: rename the ad's speaker. In the track list the ad shows up in a different color from the interview, but to be certain you're adjusting the right thing, click the speaker name and rename it to something like Advert. Now it's labelled clearly in the timeline, the track list, and the transcript, so you always know which track you're touching.
(Because I recorded the ad inside Riverside, it transcribes automatically — and if you upload your ad file to the Recordings section of the same project, it transcribes on insert too.)
Add your image as B-roll
Now the part that makes this work even without ad video: laying an image over the segment. I designed a simple coaching graphic in Affinity Designer, but Canva or any graphics tool works — you can even ask ChatGPT or Riverside's own Co-creator to generate one for you.
This image is not a new section — it goes on top of the video as B-roll. The easiest route is Your media → Upload (the Images tab does the same thing; it doesn't matter which you use).
Upload the file, make sure the play head is roughly in the area you're inserting, then click the image. It appears on the canvas. It won't fill the frame automatically — click Fill video and it expands to cover the whole image, or drag the corners to size it by hand.
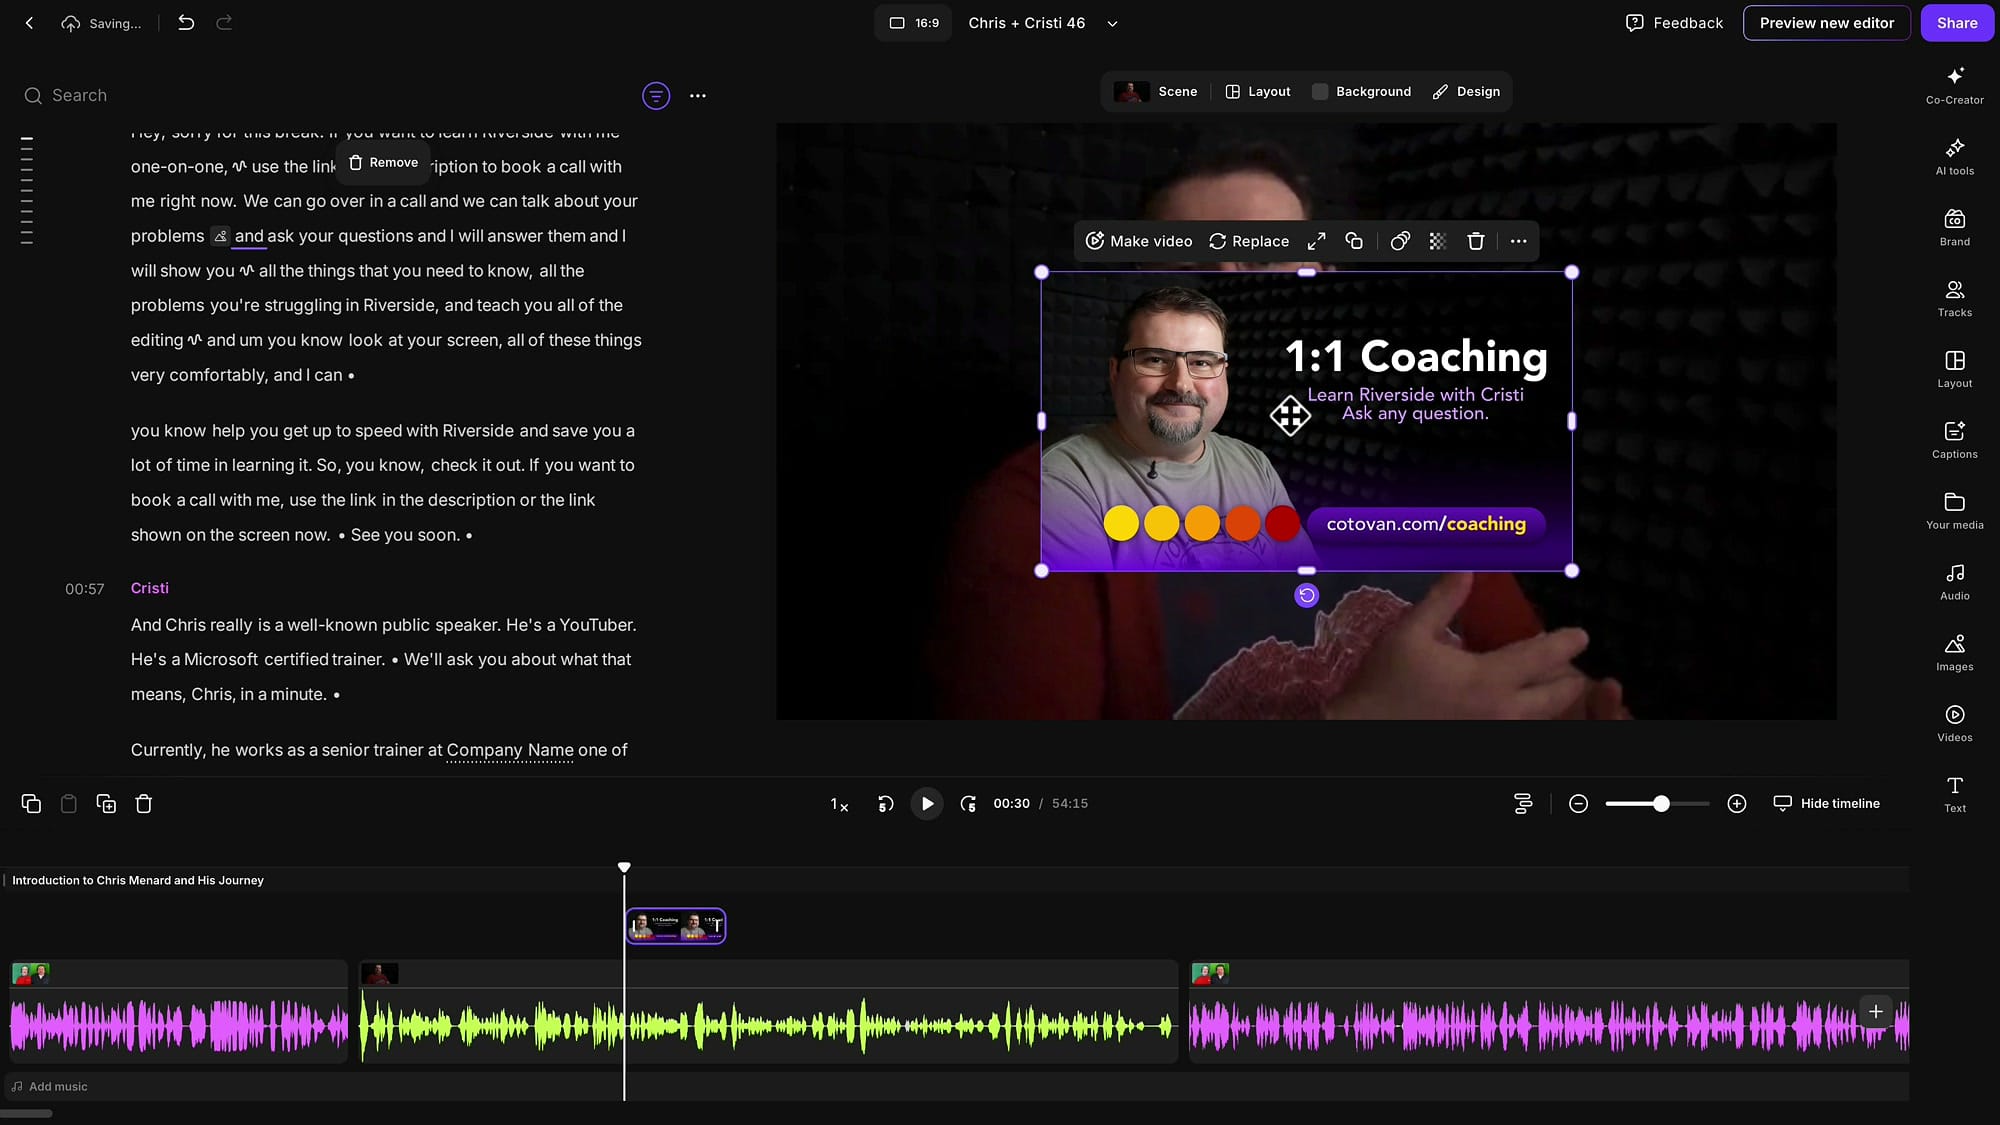
In the timeline the image lands on its own layer above the video track, so it's easy to spot as B-roll. Zoom in close and you'll see little handles on the edges — grab them and drag to extend the image. Pull the start back to where your ad begins; it snaps neatly to the cut point. Do the same at the end so the image covers exactly the length of the ad.
If you’re eager to learn more about Riverside and wish to have a one-on-one Riverside coaching session, feel free to book a call with me.
I’m here to help you with any questions you have and to guide you through the best workflows, tips, workarounds, or just answer any questions you may have!
Add music
An ad break feels flat without music. The approach I like is to bring music in just before the ad starts — a small cue that something's changing — and fade it out at the end. You can use a track from Riverside's built-in stock library (browse by mood or style), but I prefer my own, so here I'll upload a track I made in Suno.
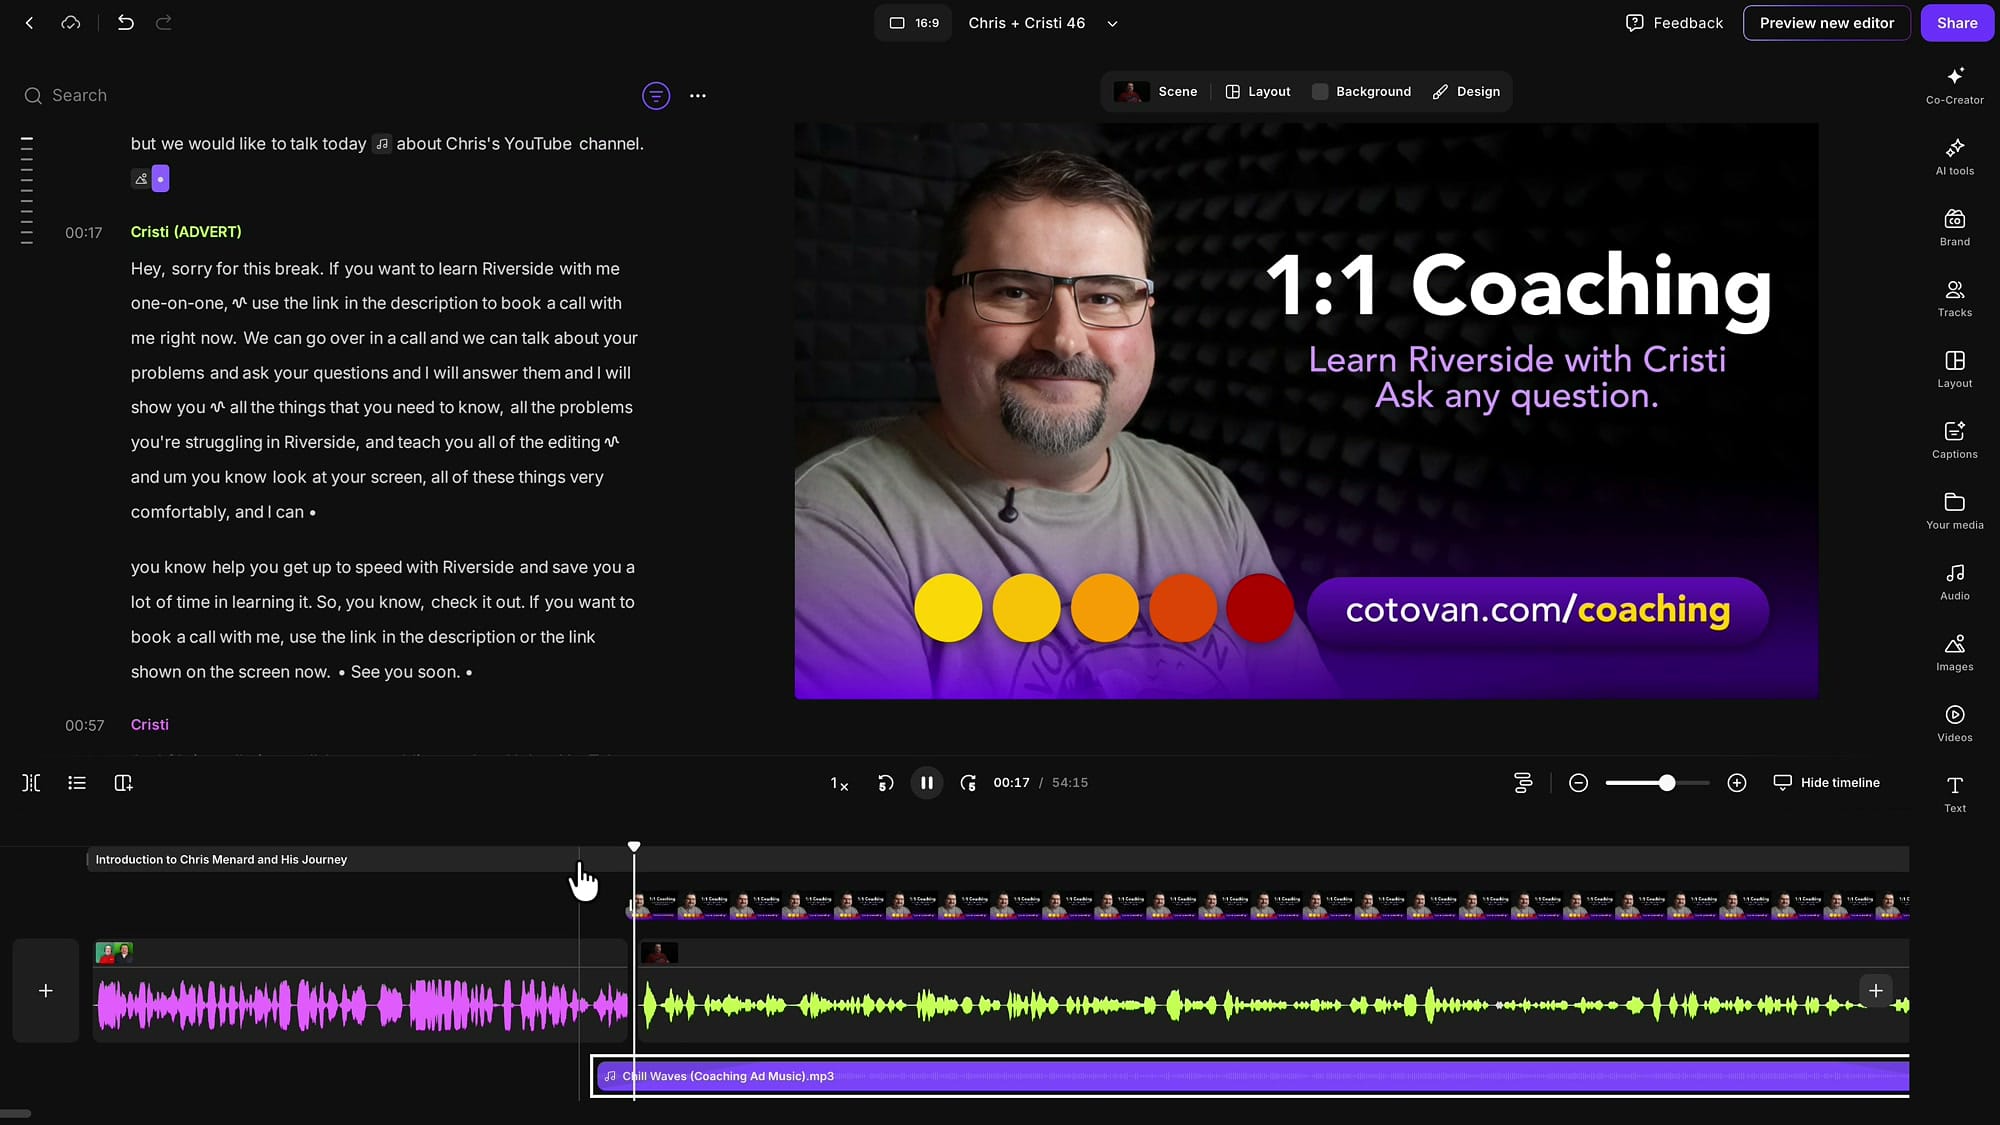
With the play head already where I want the music to begin, I click Upload, choose the file, and the music drops onto its own track at the bottom of the timeline (in the old editor, music gets a dedicated track).
For a nice touch, select the music clip, open Audio → Volume and effects, and fade it in over about five seconds and out over five seconds. This is the same fade-and-balance idea I cover in adding background music in Riverside and in my walkthrough of intros, outros, hooks, and music.
Balance the music and tighten the timing
Play it back and listen. The first time through, my music was too loud against the voice, so I selected the clip and pulled its volume down to around 45–50%. Much better.
Then I tuned the timing: I wanted the music to end exactly when the ad ends, so I dragged the music clip forward until its natural ending lined up with the end of the read.
Trimming a clip in Riverside doesn't throw anything away — you can always pull the edges back out — so it's safe to nudge the music left or right until it sits right.
I also pulled the image to start just a touch before the video underneath it, because I'd noticed a brief flash of my camera before the B-roll kicked in. A small move like that is the difference between an ad break that feels intentional and one that feels patched together.
Reuse the ad in future episodes
If this is an ad you'll run again, don't rebuild it every time. My recommendation: create the ad as its own separate edit in Riverside, then insert that edit into your episodes. Riverside lets you drop one edit into another, which keeps the ad self-contained. I show this kind of workflow in my 'create compilations with Riverside' article.
The catch is that because this ad carries music and B-roll, things can shift around depending on what else is in the target episode — extra tracks or assets can knock pieces out of place. To keep it clean, make the music exactly the same length as the ad so the whole block is self-contained. When you bring that edit back in, you can still extend its edges and nudge the placement left or right to fit.
That's the ad break
And that's it — a sponsor or coaching ad inserted right in the middle of an episode, with an image on top of the video, balanced audio, and music that comes and goes cleanly.
The camera footage is still sitting behind the image if you ever want it, but the graphic is what your audience sees. Export the episode and the ad shows up in that exact moment, baked in.
If you'd like to learn Riverside one-on-one, you can book a coaching call with me and we'll work through your exact editing questions together. And if you have a workflow you'd like me to demonstrate, leave it in the comments — I'm happy to make a follow-up.
Related guides


If you're eager to learn more about Riverside and wish to have a one-on-one Riverside coaching session, feel free to book a call with me. I'm here to help you with any questions you have and to guide you through the best workflows, tips, workarounds, or just answer any questions you may have!