How to Add B-Roll in Riverside: Overlay vs Insert to Timeline

There is a bit of confusion around inserting videos and photos in Riverside. Sometimes you want a clip to sit on top of what you already have, playing at the same time as your episode. Other times you want it to take its own place in the main timeline, pushing everything else along to make room. Those are two completely different results, and Riverside handles them differently.
The good news is that both live in the same place, and once you know which gesture triggers which behaviour, you will feel right at home in the new Riverside editor. Here is how each one works, and when to reach for which.
Overlay or timeline insert: the difference
An overlay is B-roll in the classic sense. The clip sits above your existing footage on its own track and plays simultaneously with your episode. Your audio keeps running underneath, your speakers keep talking, and the overlay covers part or all of the canvas.
An insert is a separate clip in the main timeline. Riverside makes room for it, pushes everything after it further along, and plays it on its own. Nothing plays underneath it. This is what you want for a pre-recorded advert, an intro, or any segment that needs its own slot in the show.
I have covered adding images as B-roll using scenes before, but for video, I've made this separate guide, so let's walk through it properly.
Method 1: click to add a video as an overlay
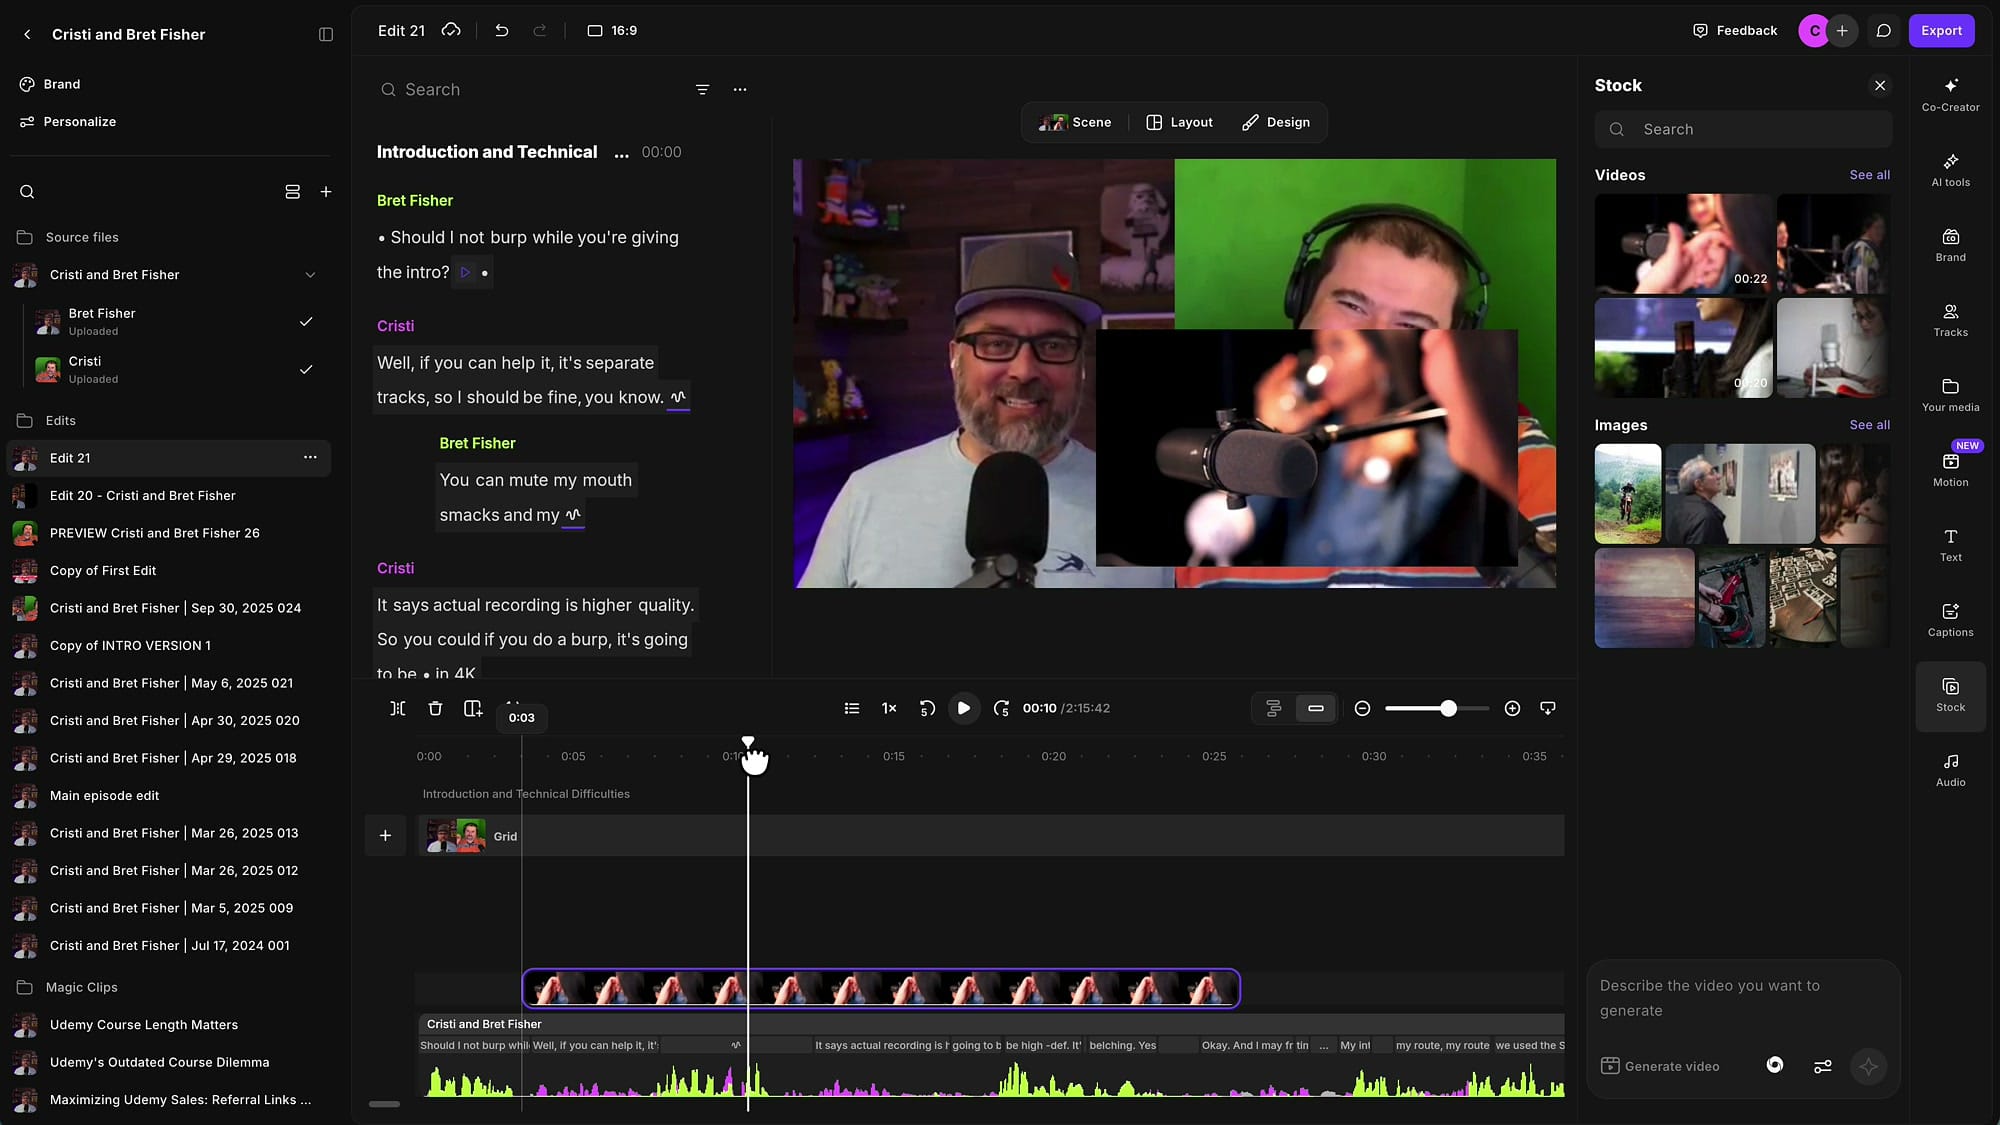
The fastest route is a single click, and the only thing you need to get right first is your playhead. Wherever the playhead sits is where the clip lands.
Open your media panel from the right-hand rail. You can pull from Your media — recordings, uploads, images, audio clips and anything from previous projects — or from Stock. It genuinely does not matter which source you use; the behaviour is identical.
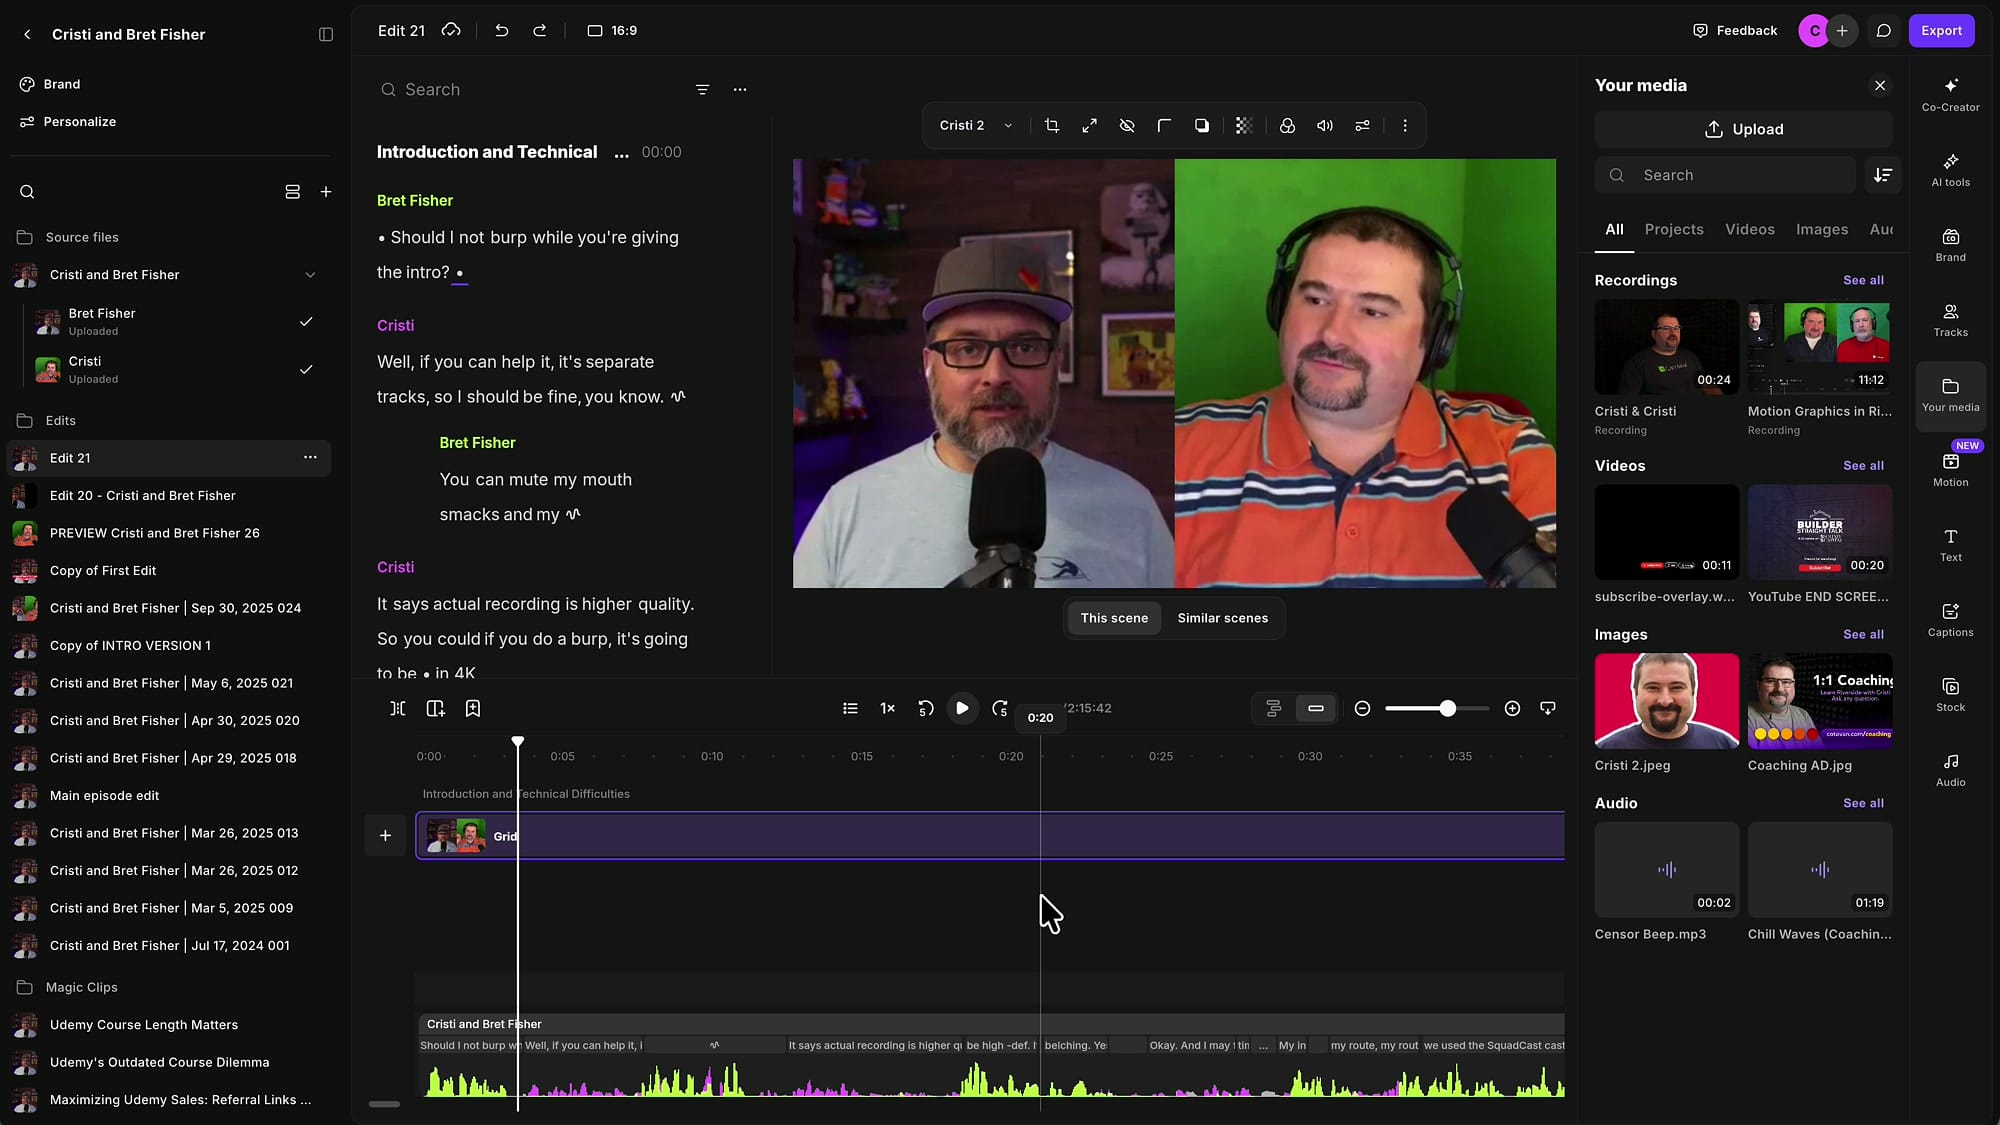
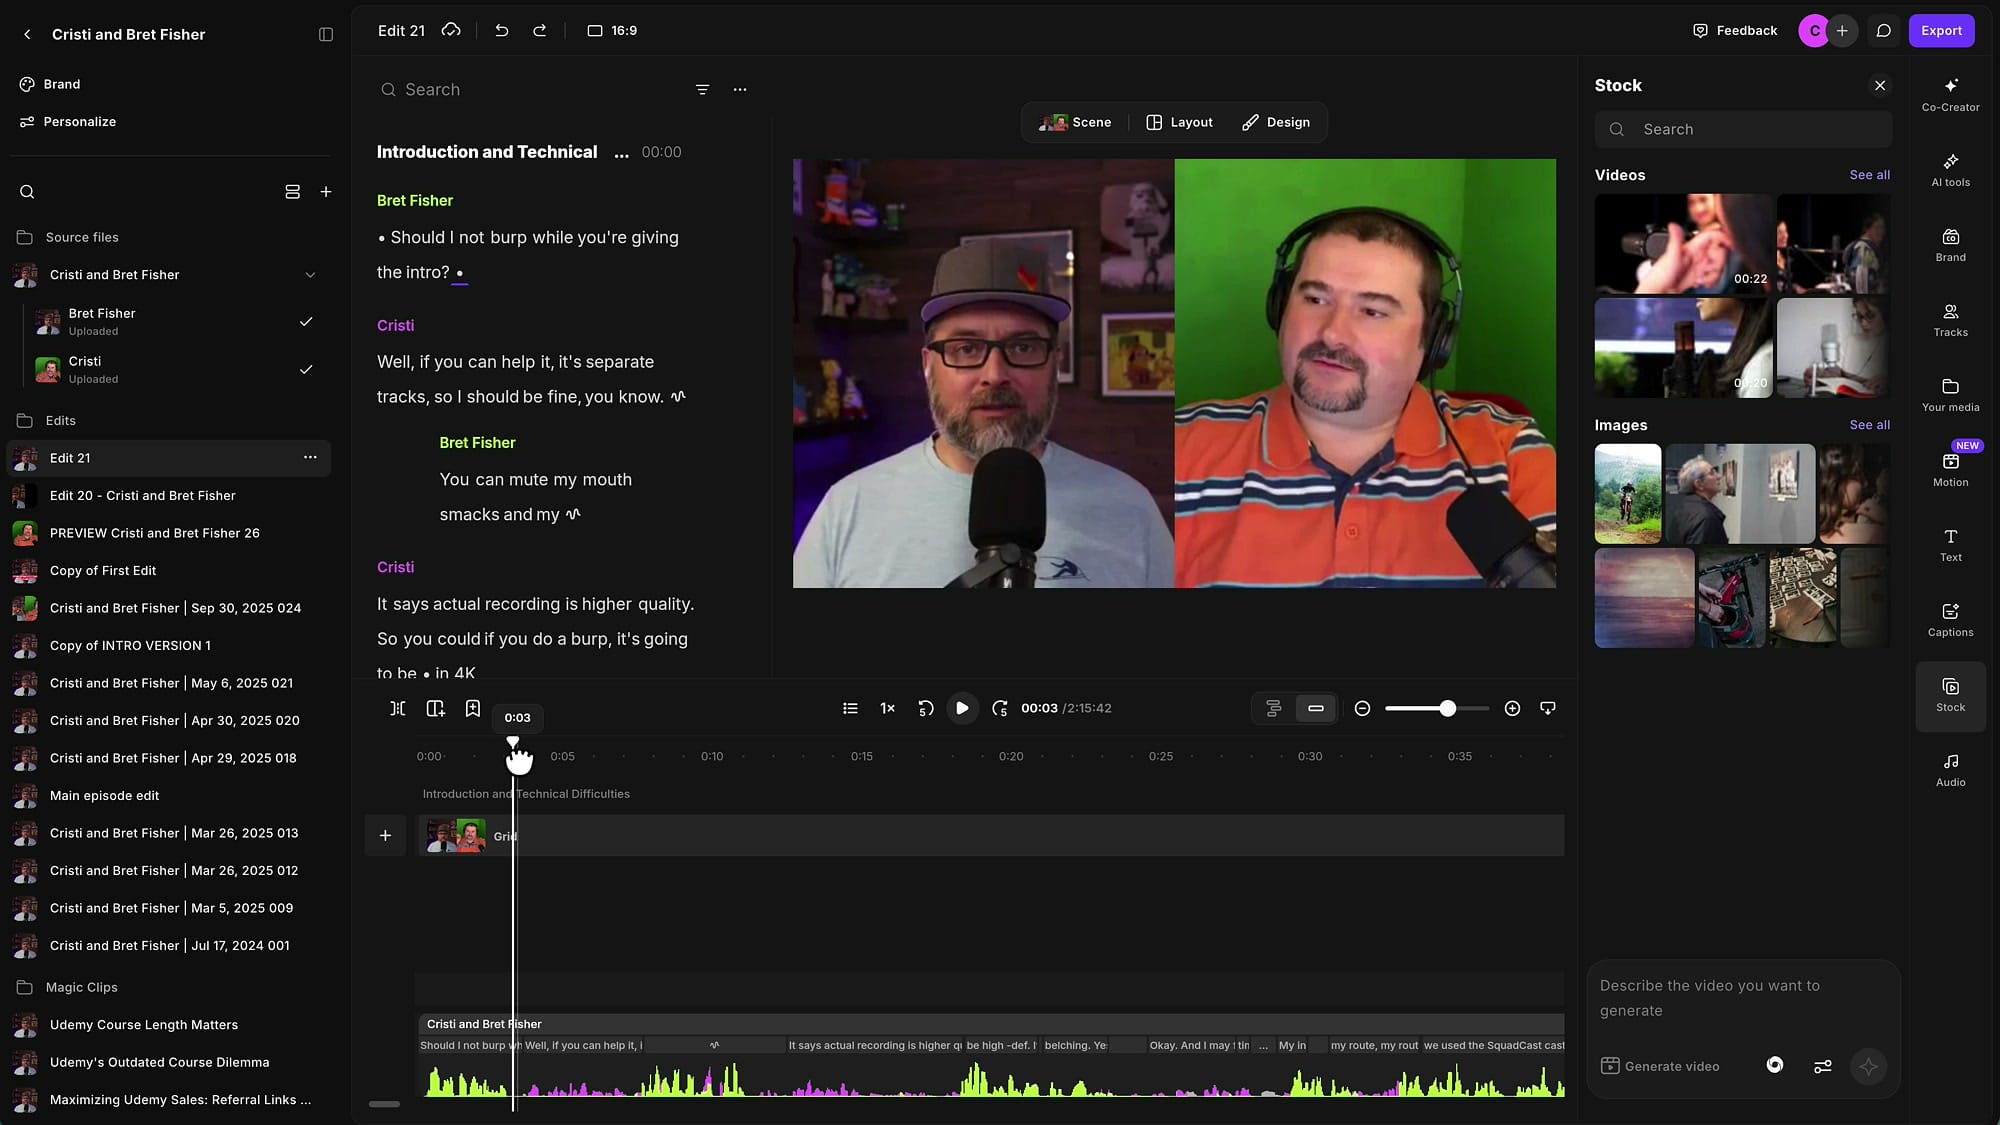
Now click the clip you want. Riverside drops it in at the playhead, on a track above your existing video, and it immediately covers the canvas.
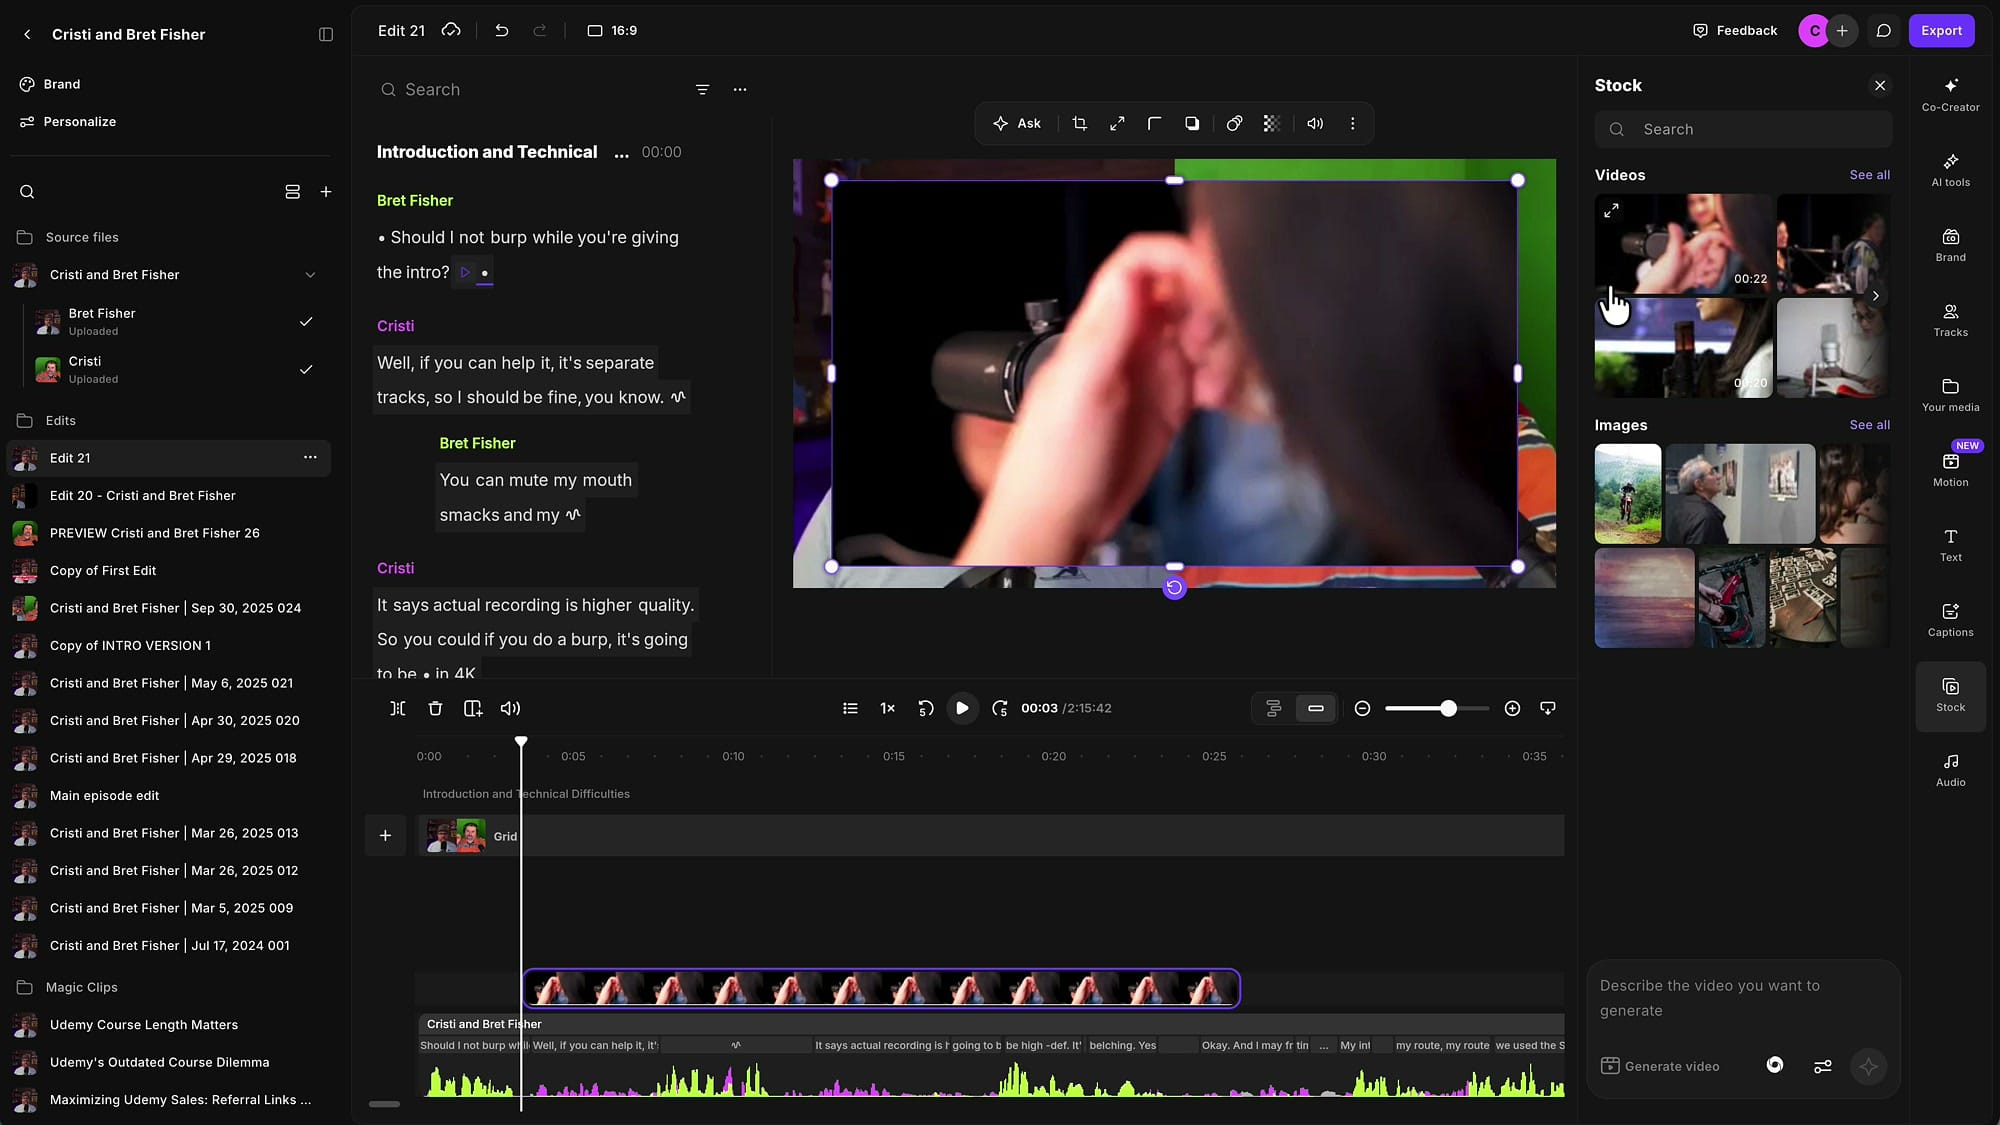
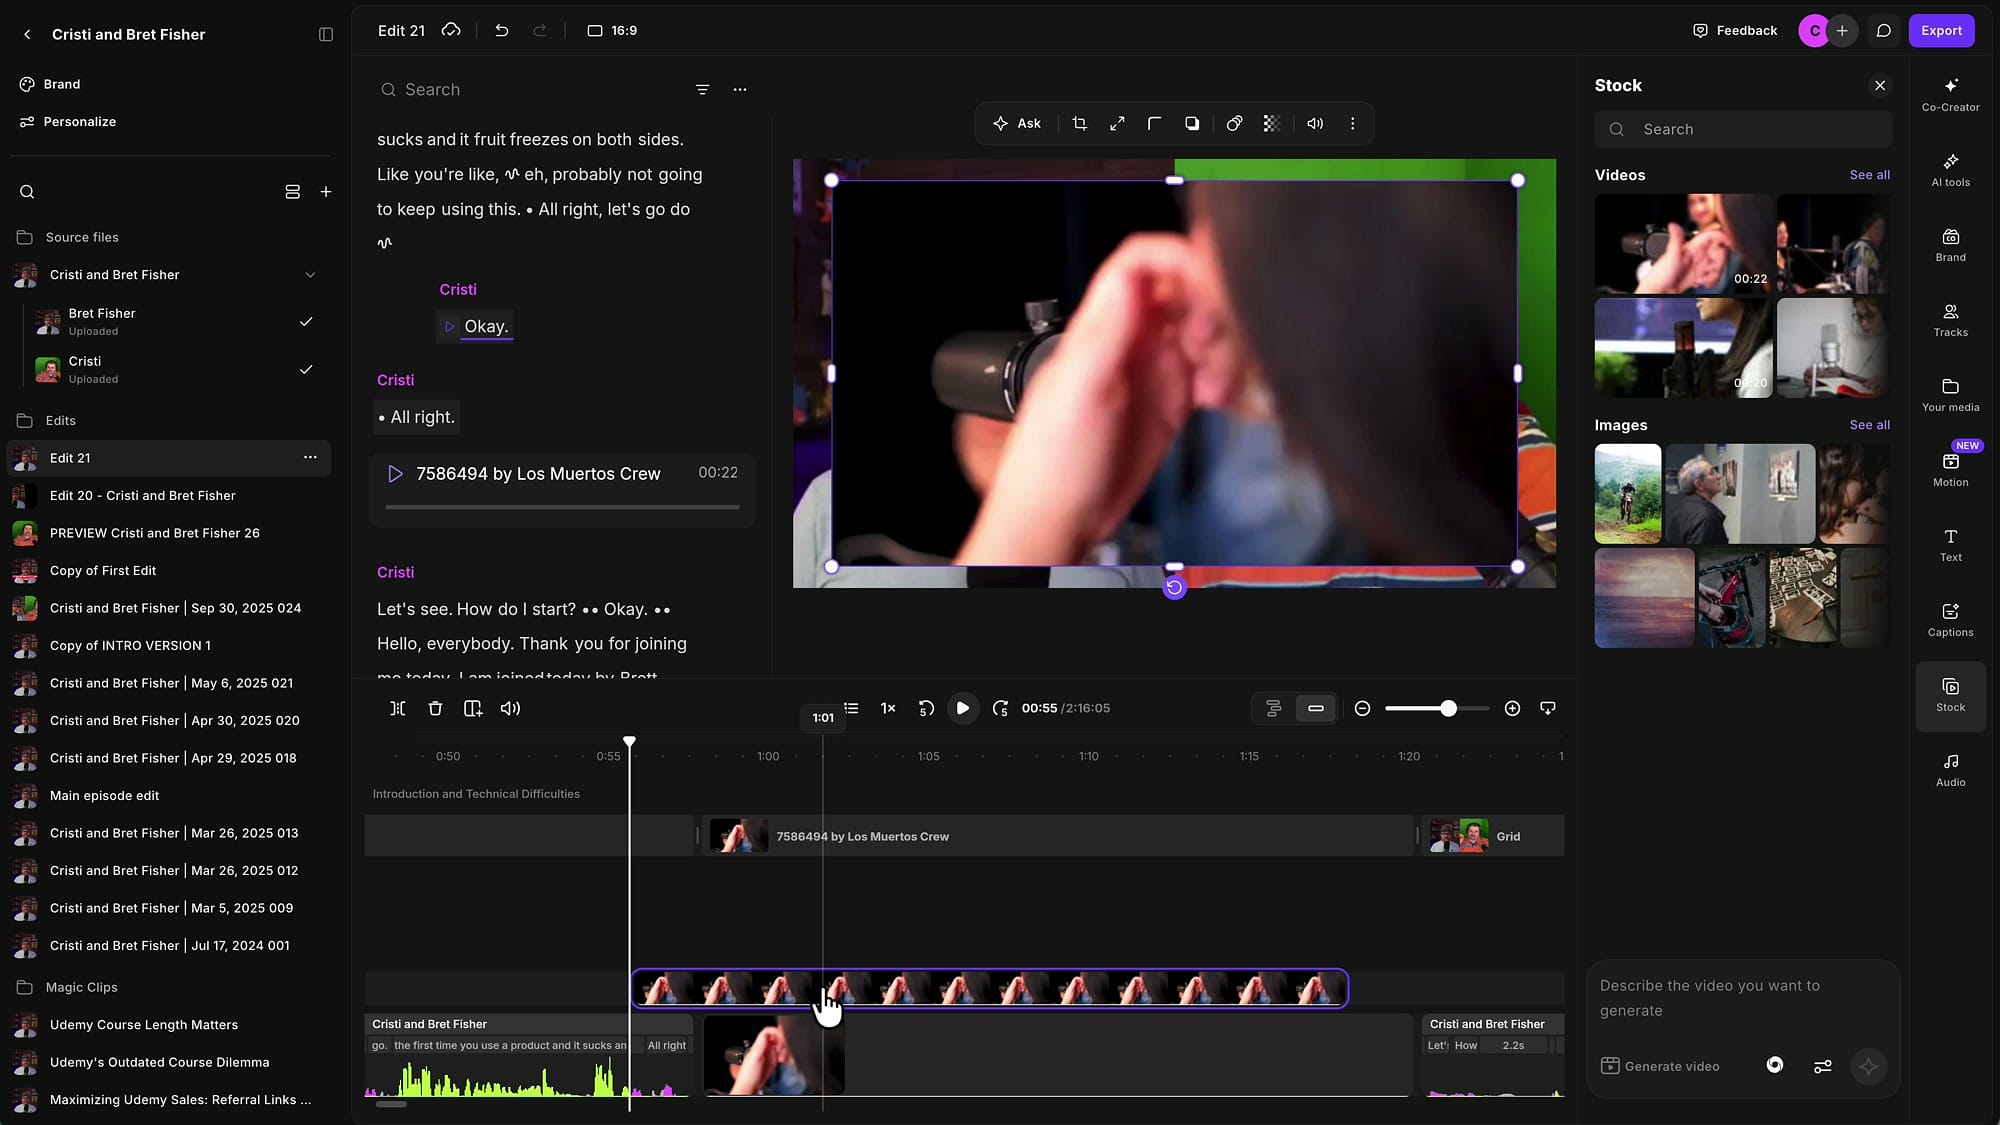
At full size it hides everything underneath, which makes it look like a timeline insert. It isn't. Grab a corner handle and pull it in, and you will see your episode still playing behind it. You can resize, reposition and crop the overlay however you like on the canvas.
Method 2: drag it in and pick your drop zone
Clicking always gives you an overlay. If you want the other behaviour, don't click — drag.
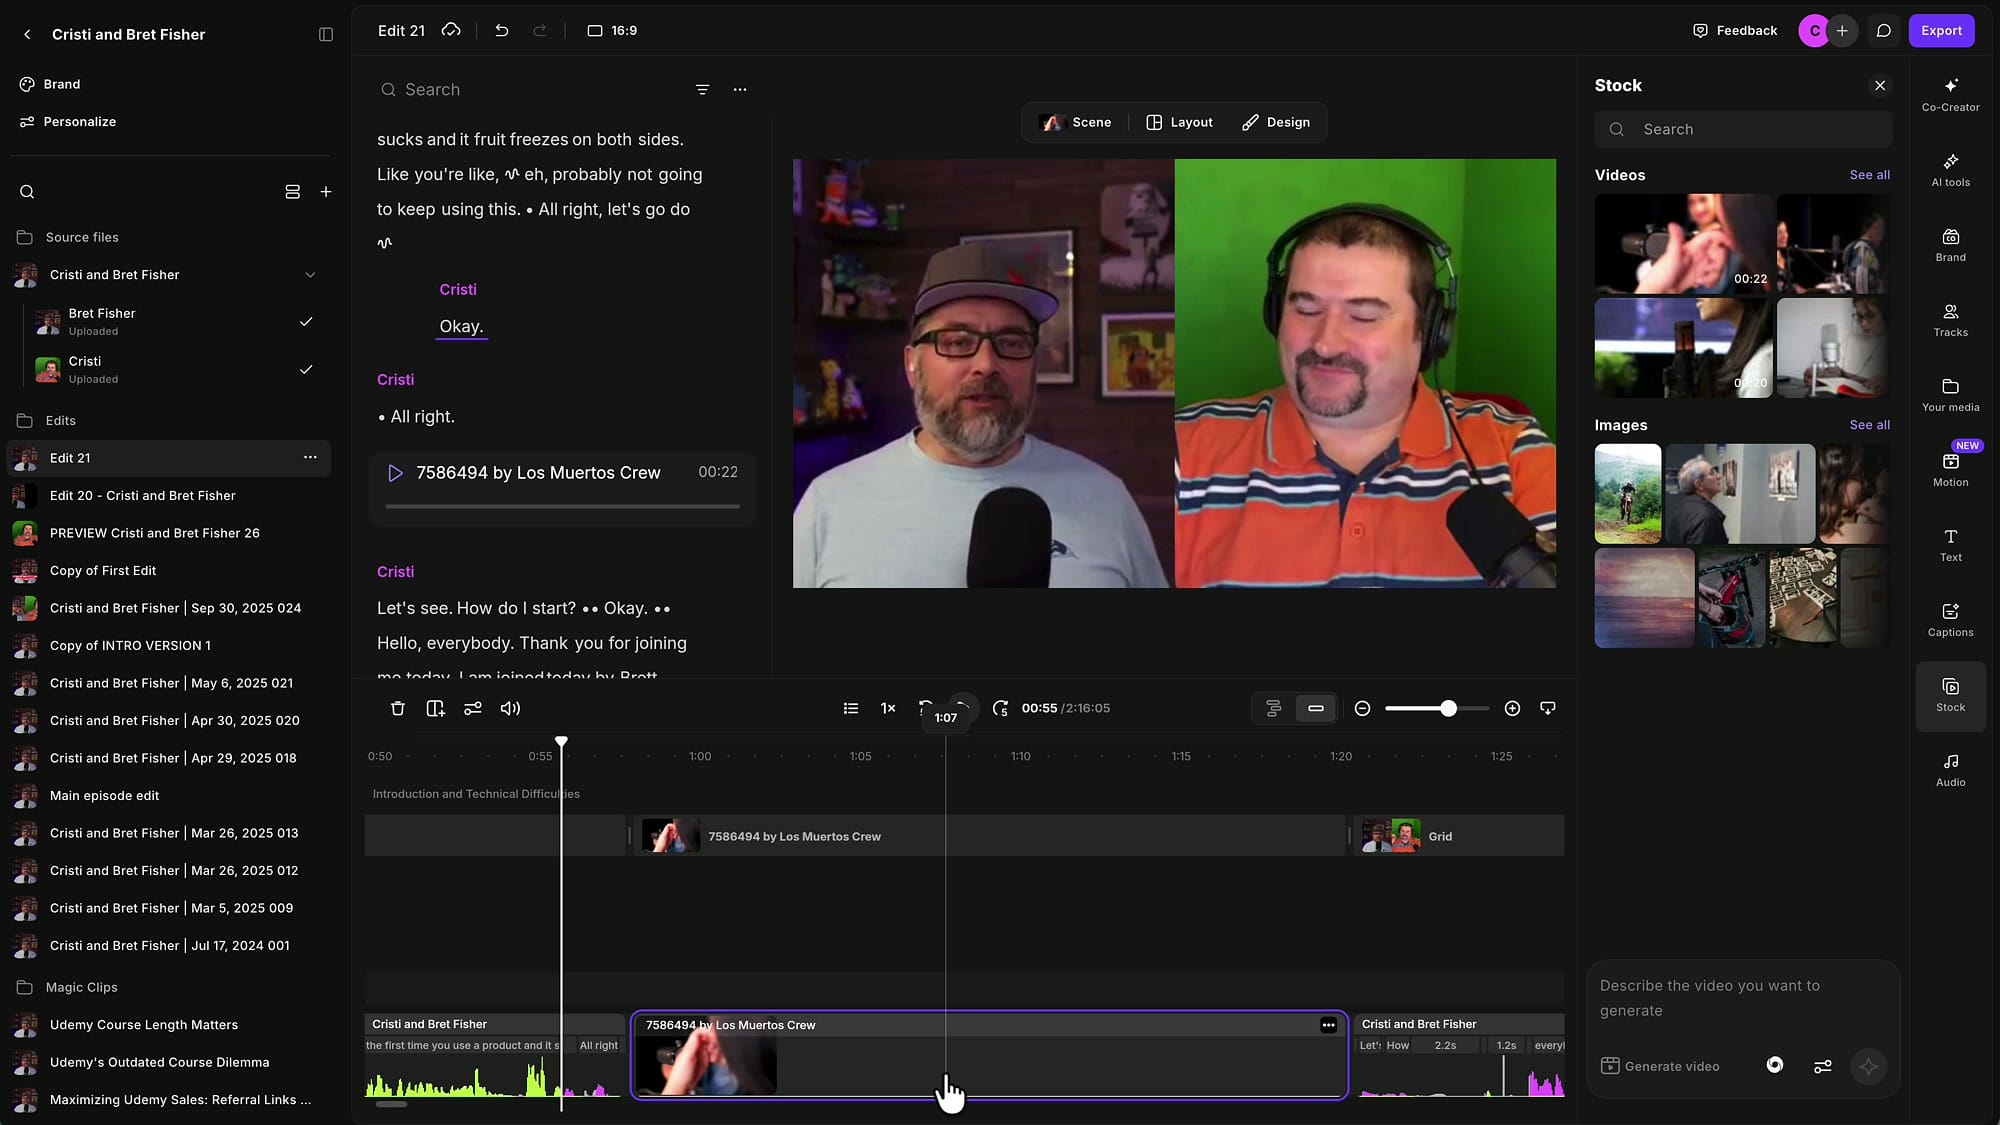
Press and hold on the clip in the media or Stock panel and start dragging it towards the canvas. As soon as you do, Riverside splits the canvas into two labelled regions: Add overlay across the top, and Insert to timeline across the bottom.
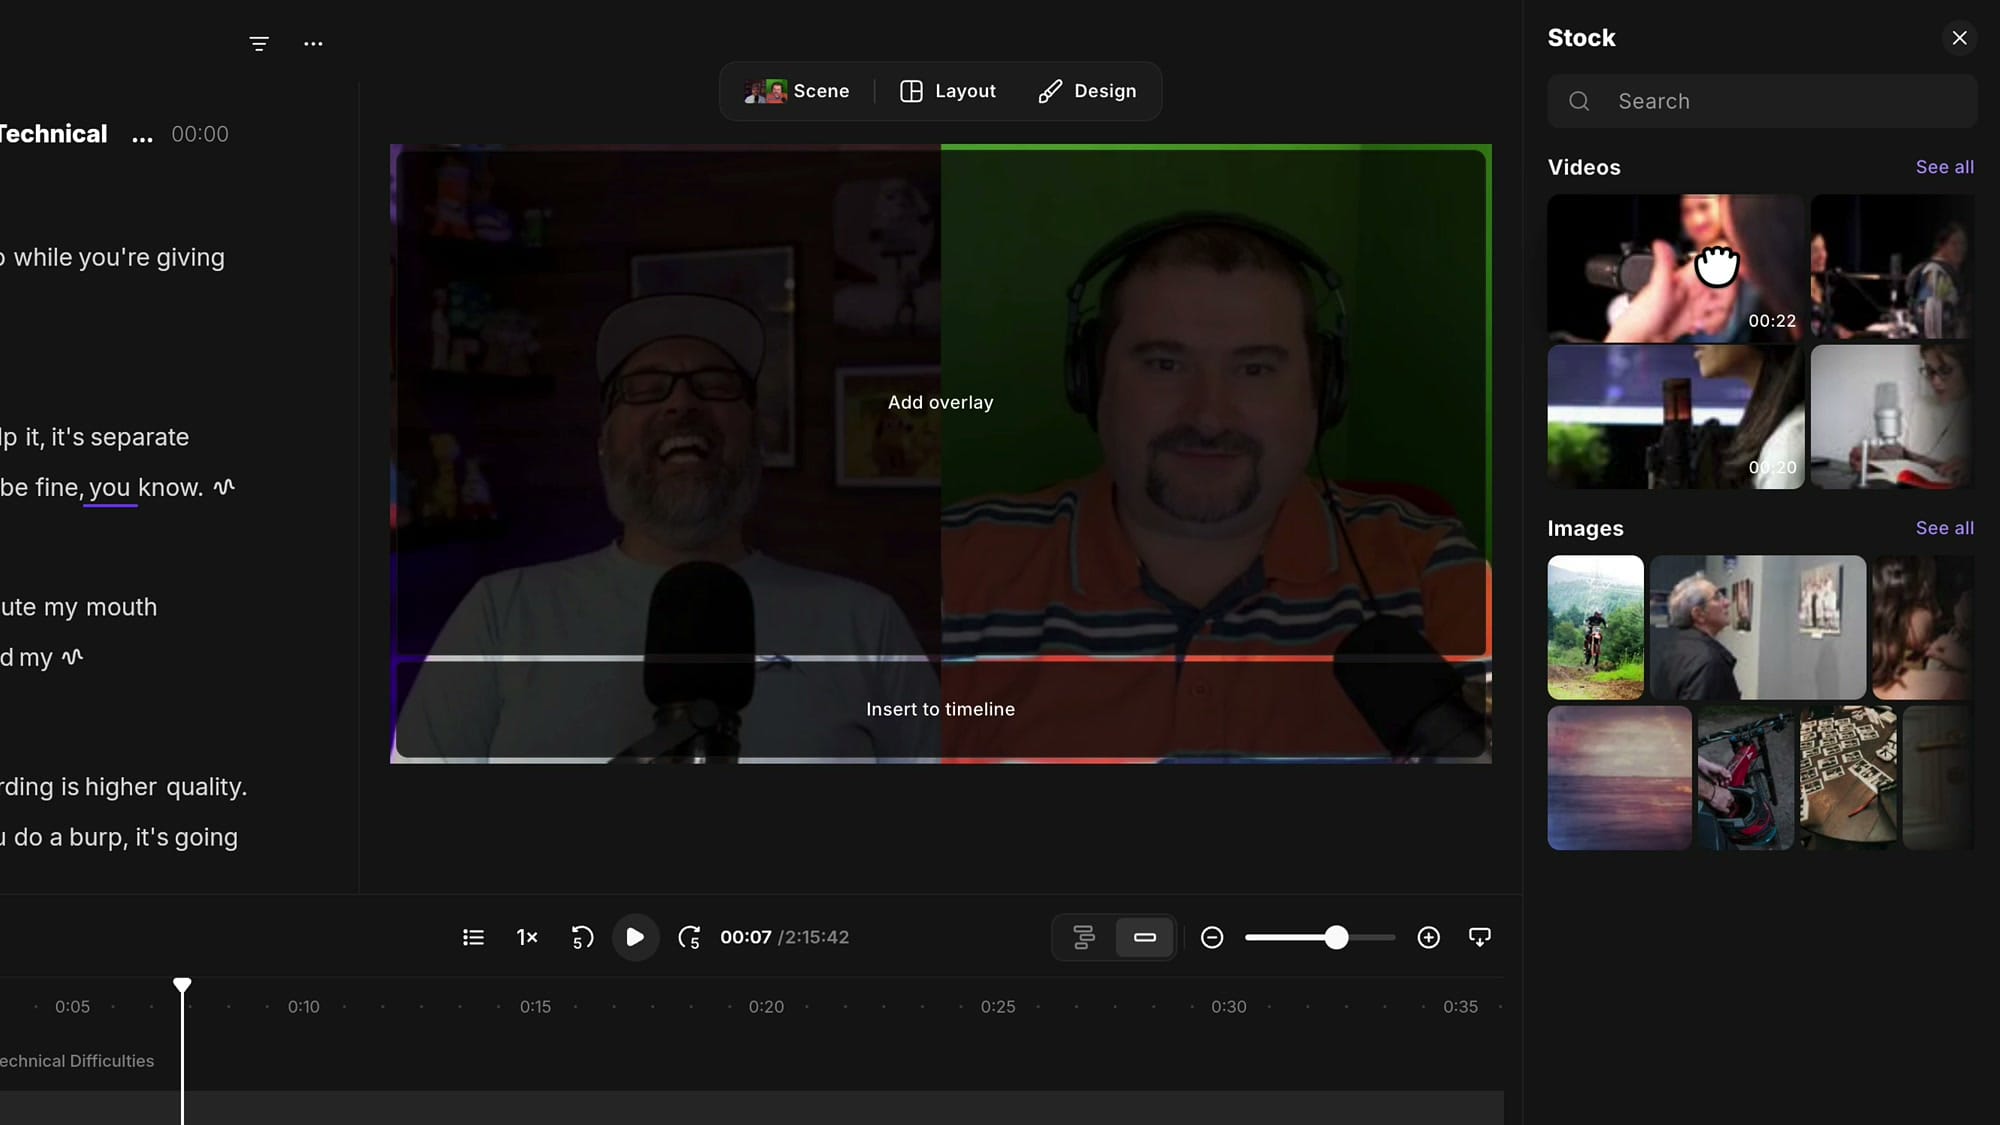
Drop it on the lower strip and Riverside makes room for it in the main timeline, pushes the rest of the show along, and places the clip in its own slot. That is exactly the behaviour you want for a recorded advert or a sponsorship read you produced separately — you don't want that talking over your episode.
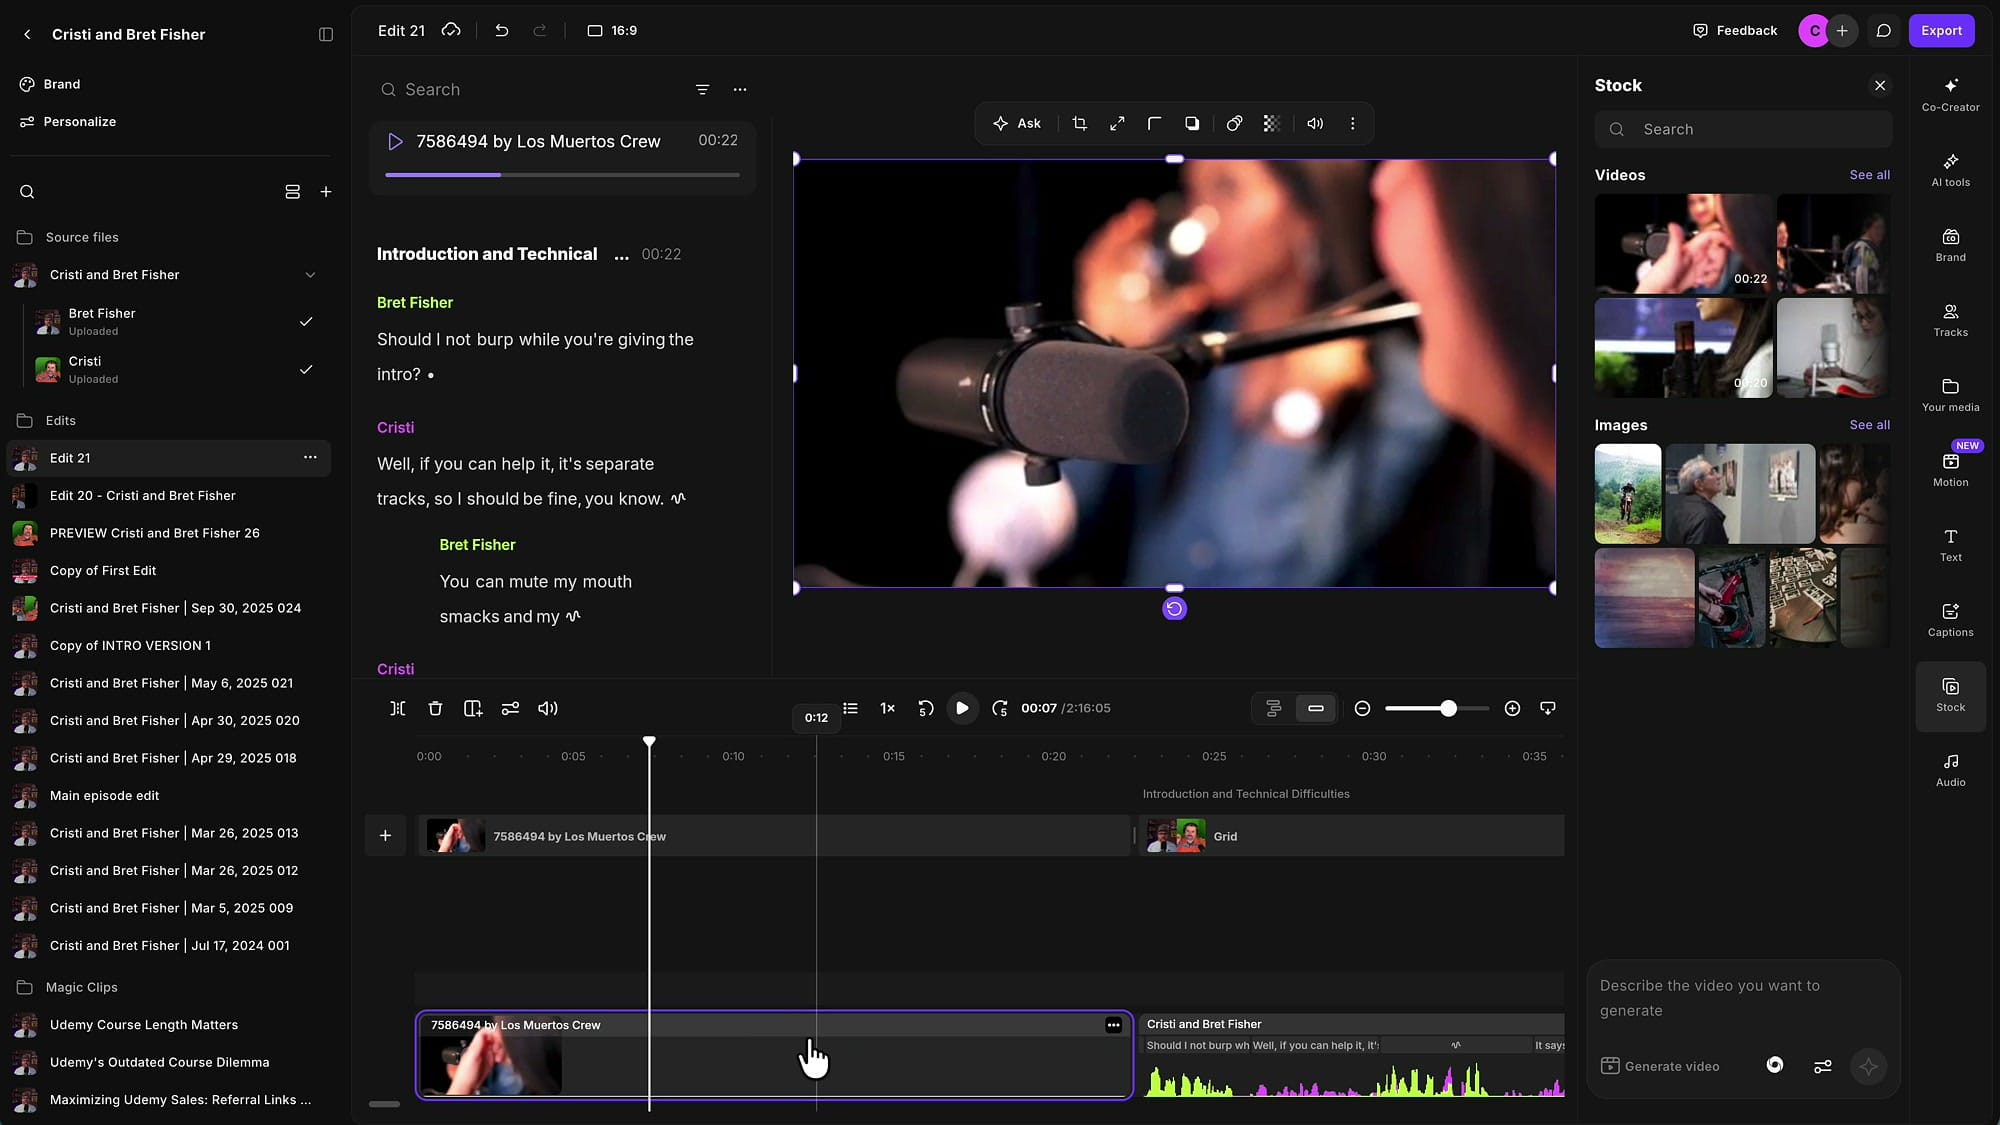
Method 3: split the clip and insert with precision
Dragging to the timeline drops the clip at the playhead, which is fine for the top of the show. When you need something dropped at an exact point in the middle of a conversation, make the room yourself first.
Park the playhead where you want the break, select the clip, and split it. Press S on the keyboard, or click the Split button in the toolbar above the timeline.
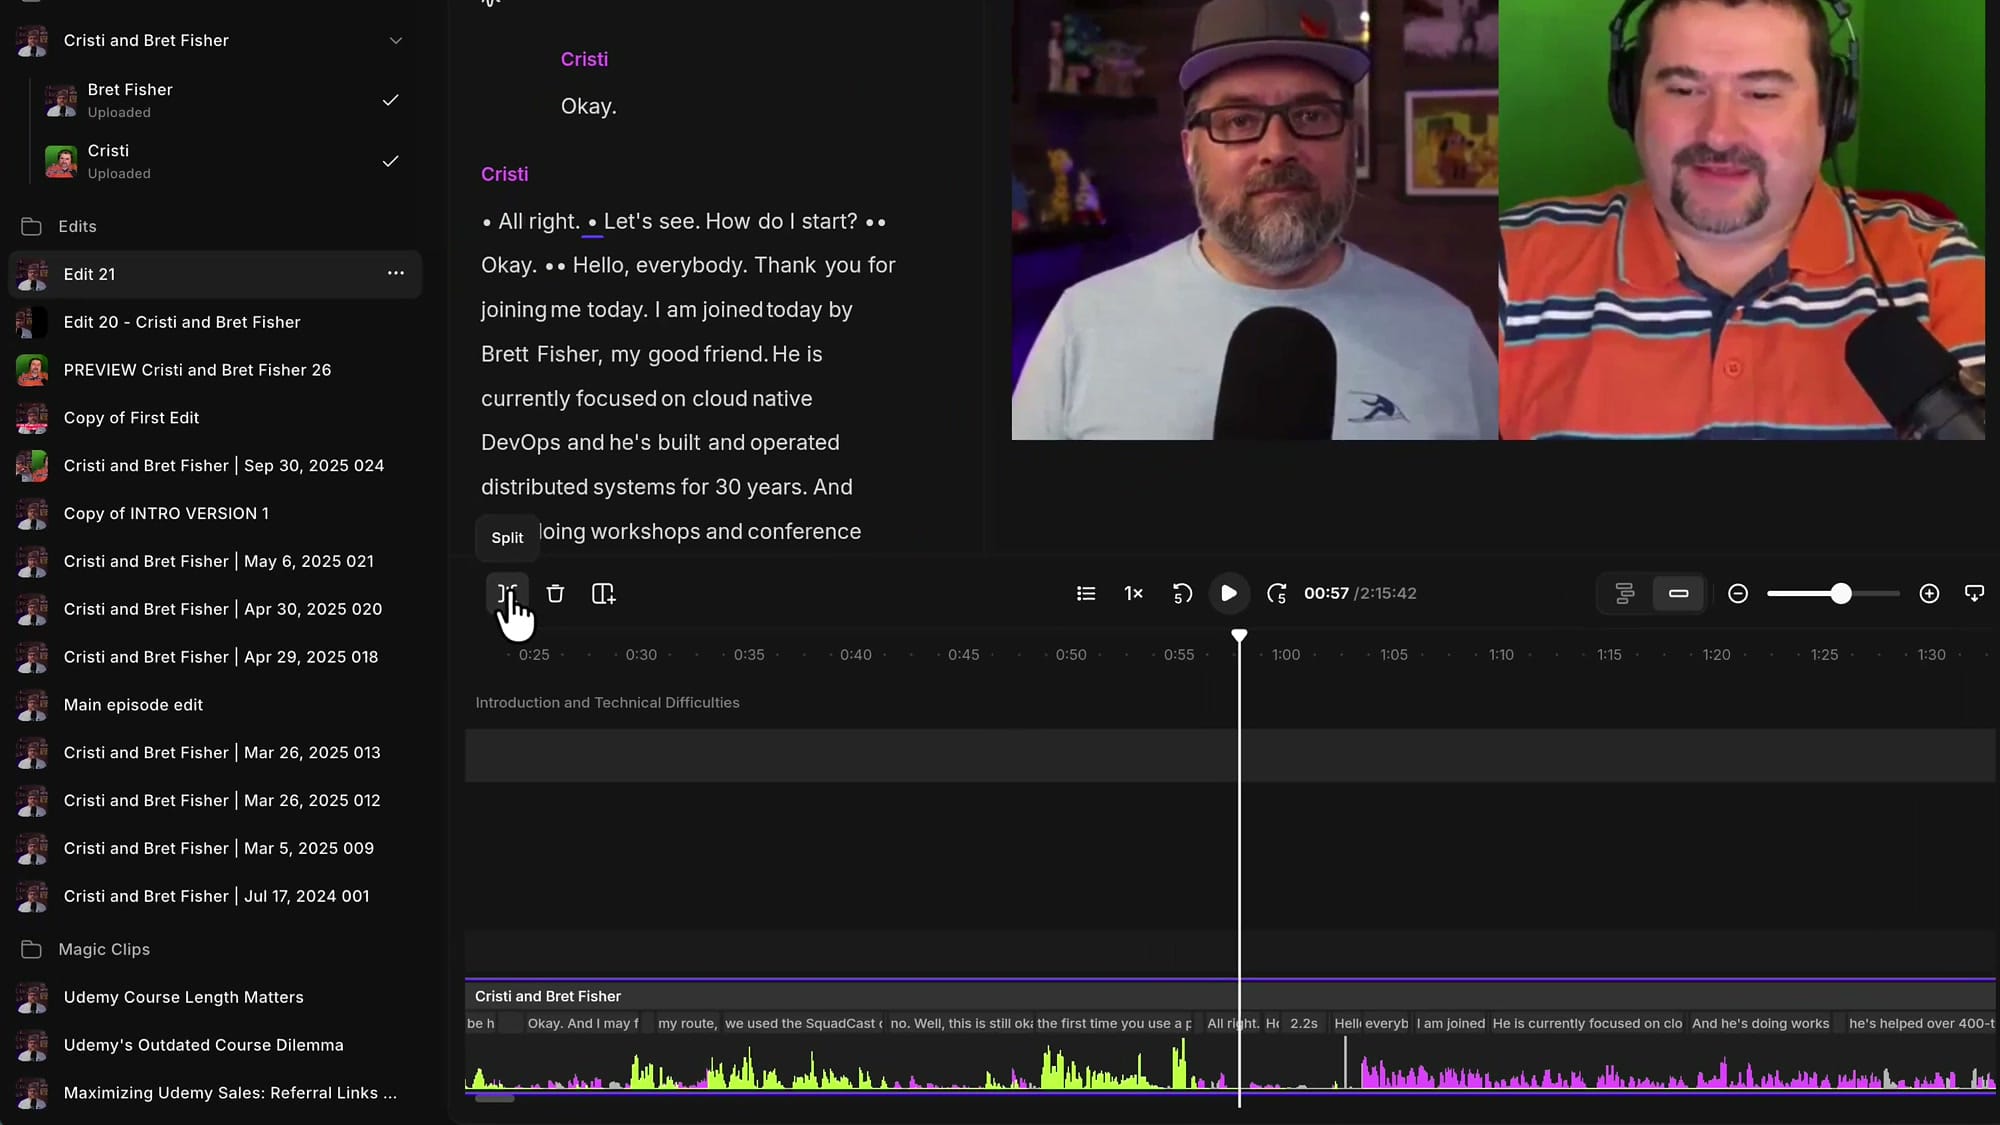
Now zoom in on the timeline and hover your mouse over that seam. A small plus button appears on the split. Move the playhead out of the way if it is sitting on top of the seam and hiding the button.
Click the plus and Riverside asks what you would like to drop in: Stock, Music, Text, Upload, Your media, a New scene, a chapter marker, or an empty section.
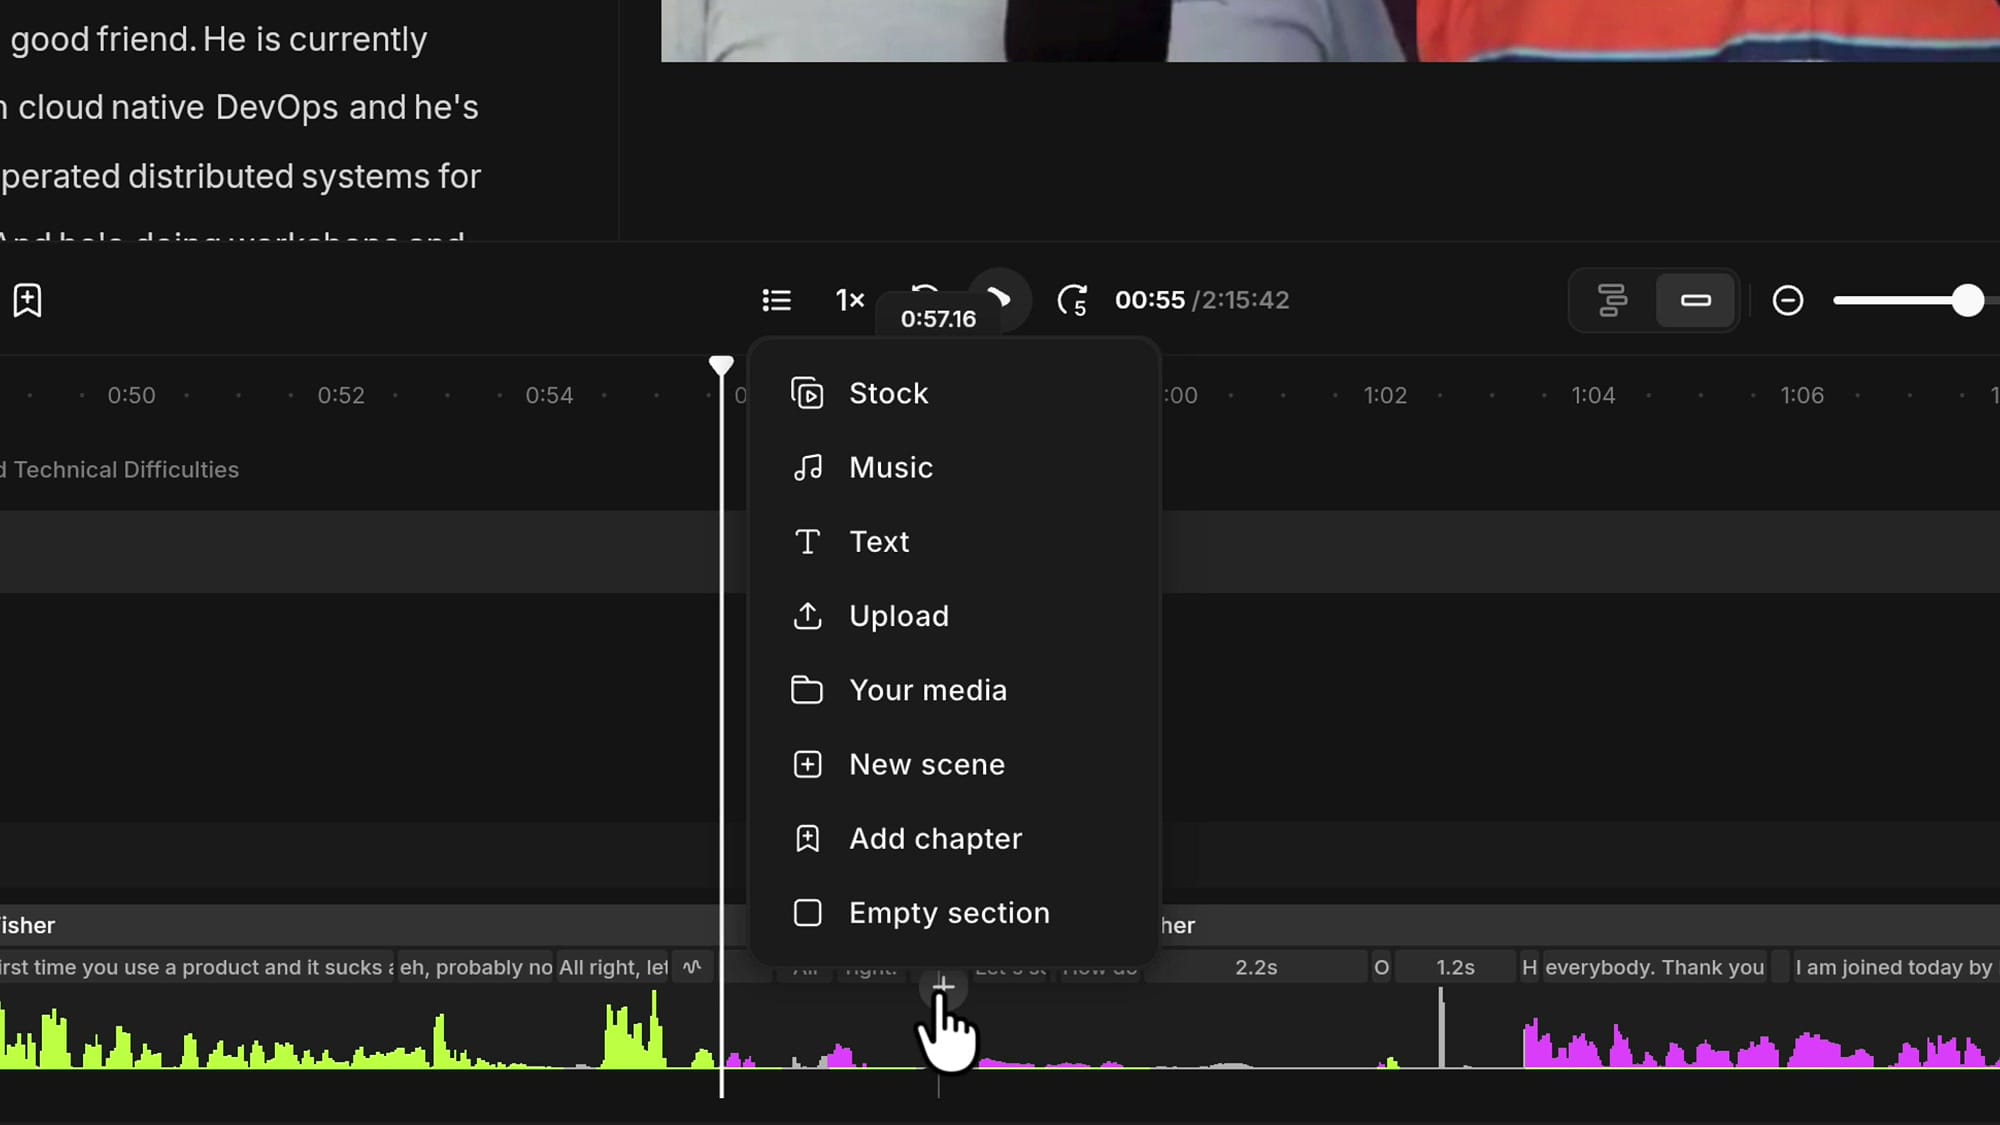
Pick your source — I'll use Stock here — and choose the clip. It lands precisely in the gap you created, not at the playhead, not at the start, exactly where you split. This is also the route to take when you want to drop in a file you edited elsewhere and re-uploaded, or a piece you already used in another project. The same menu handles intros, outros and music beds too.
If you’re eager to learn more about Riverside and wish to have a one-on-one Riverside coaching session, feel free to book a call with me.
I’m here to help you with any questions you have and to guide you through the best workflows, tips, workarounds, or just answer any questions you may have!
You can still stack an overlay on top
These methods are not mutually exclusive. Once you have inserted a clip into the main timeline, you can still drag another piece of media in and drop it on Add overlay — and it will play on top of whatever is underneath at that point.
Where you place it decides whether it gets a transcript
This is the part that catches people out, and it is worth committing to memory.
A clip sitting on the overlay track will not produce a transcript. Even if it has audio, and even if that audio contains speech, it will not appear in the transcript panel and you will not be able to text-edit it.
If you need a clip to be transcribed and editable by text, two things have to be true: it has to go into the bottom track, in the main timeline, and it has to have arrived in Riverside through Recordings. That is the pathway that triggers transcription. A clip pulled from Stock, or dropped in from somewhere else, will not be transcribed — there is no way to force it at the moment. Riverside will, however, happily transcribe your own files once they come in through the right door.
The takeaway
Two rules cover almost everything:
- Set the playhead first, then drag. Dragging gives you the choice between overlay and timeline insert, so you decide the behaviour instead of guessing at it. Clicking always gives you an overlay.
- For precise placement, make the room first. Split the clip where you want the break, hover the seam, click the plus, and pick your source. Stock, uploads, media from previous projects — it all goes in the same way.
Everything else — resizing, cropping, repositioning — you can do after the fact on the canvas. The only decision you cannot undo casually is whether the clip lives on the overlay track or in the main timeline, because that is what determines transcription.
If you are still setting things up, you can try Riverside here. And if you would like to learn Riverside with me one-on-one, I offer coaching sessions — complete beginner to advanced, the new editor, and whatever you are currently stuck on.
Related guides
 Cristi Cotovan
 Cristi Cotovan
 Cristi Cotovan
 Cristi Cotovan
 Cristi Cotovan
If you're eager to learn more about Riverside and wish to have a one-on-one Riverside coaching session, feel free to book a call with me. I'm here to help you with any questions you have and to guide you through the best workflows, tips, workarounds, or just answer any questions you may have!