How to Use Smart Layouts in Riverside for Automatic Camera Switching


Smart Layouts is the Riverside feature that does your camera switching for you. If you edit interviews with one or two guests, it can create the scenes, put people side by side, cut to whoever is talking full screen, and go back to side by side again — without you placing every layout change by hand. The feature was recently improved, and you now get a lot more control over how it behaves.
Let's go through every option in the new panel, apply the layouts to a real interview, and then look at how to adjust what Smart Layouts did when you don't agree with it.
Why Use Smart Layouts
I have covered changing layouts manually many times, and it works, but on a long interview it takes a while. Smart Layouts can save you most of that time. You decide how often the layouts change — more often, more rarely, or barely at all — what the side-by-side view looks like, and whether the layout changes should line up with cuts you already made.
That last part matters. One classic way to hide a bad cut is to change the layout right on it. When you remove filler words, some of those cuts become jumpy: the person's head jumps a little between two frames. The usual fix is to switch cameras at exactly that point — to the other person, to a reaction shot, or to a slightly tighter zoom (a punch-in). Smart Layouts can now try to do that for you.
Prepare Your Edit First
In my example edit I have not created any scenes yet. If you zoom out on the timeline, there is just one main scene. What I did do is remove filler words automatically with the AI tool, so there are plenty of cuts on the timeline to test the new jump-cut options. You can always review the removed filler words and bring some back.
Riverside gives you a tip right in the panel: apply when you're done editing, so layout switches can cover any jump cuts. Do your content cuts, filler word removal and gap removal first, so Smart Layouts can find those cuts when it builds the scenes.
Open Smart Layouts
Smart Layouts lives in the AI tools menu on the right side of the editor. It used to be a much simpler menu. Now you click Adjust to see all the choices.
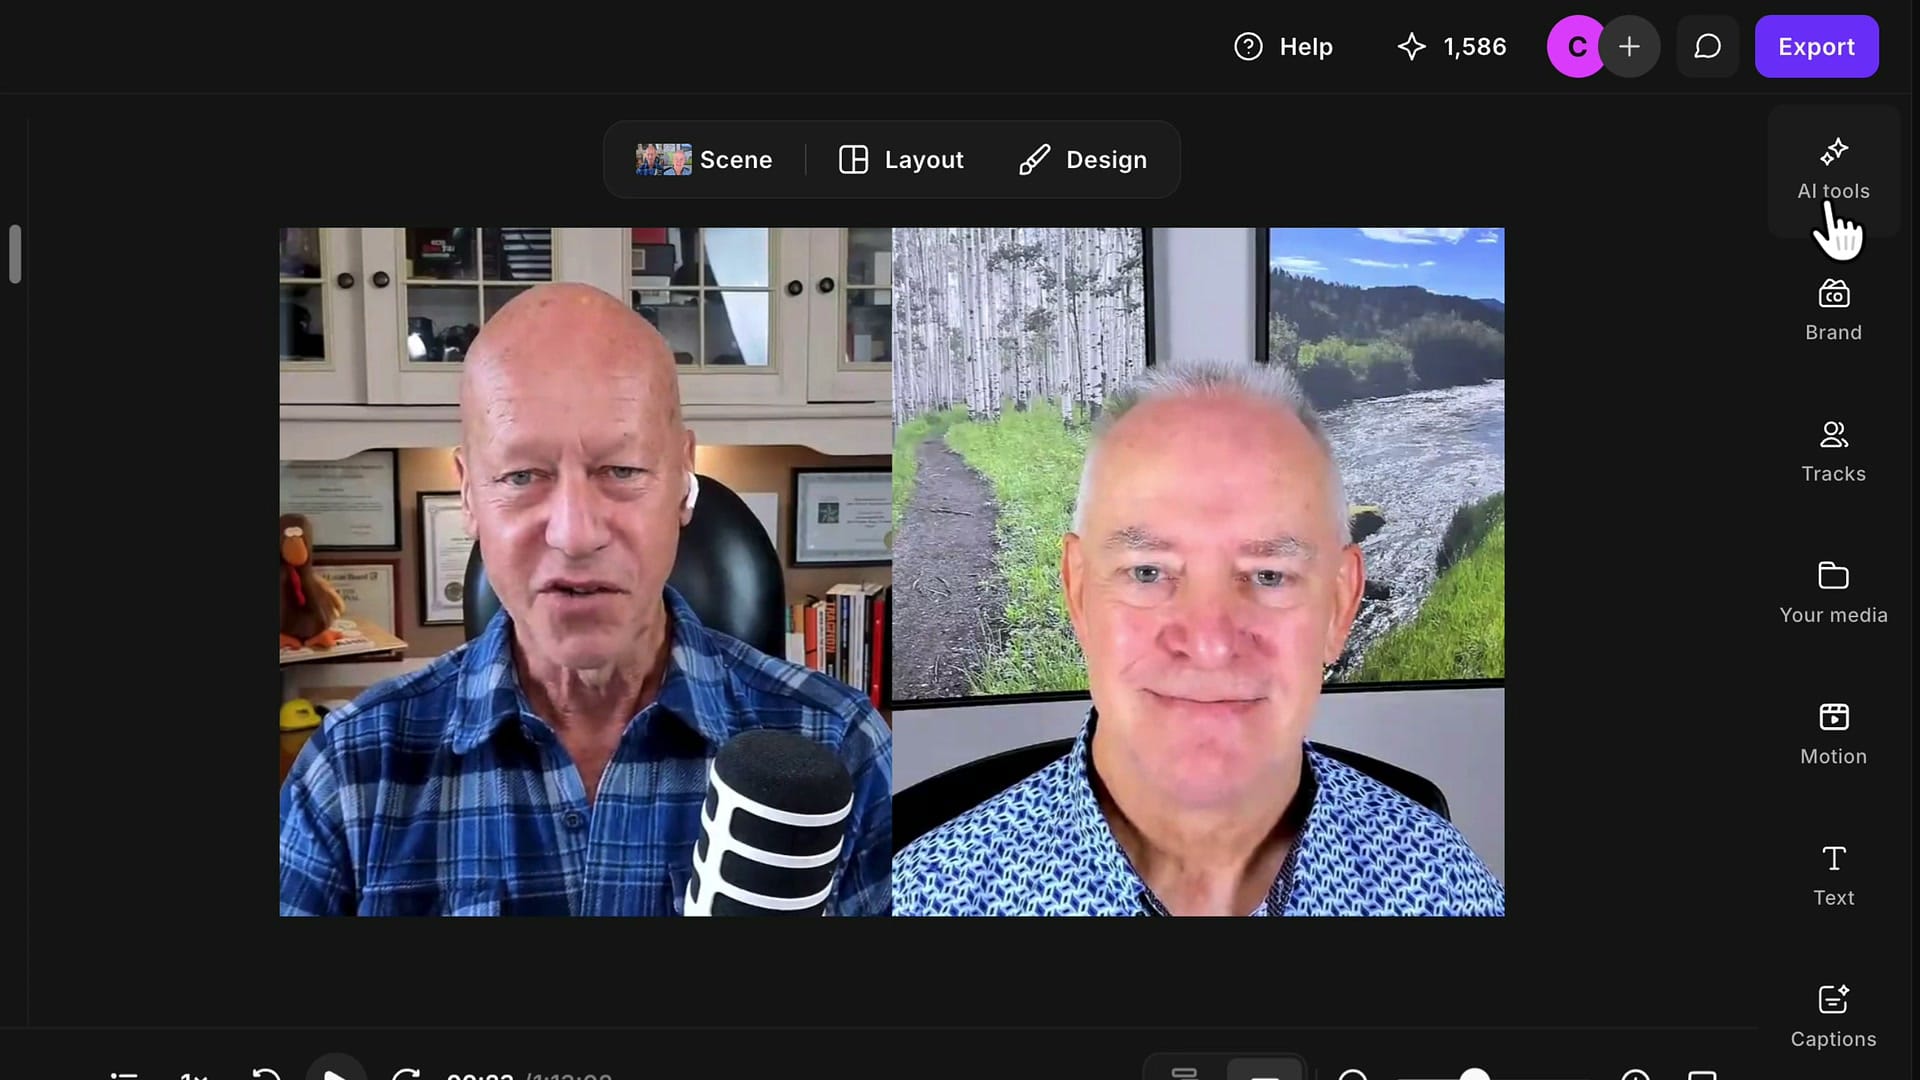
There are a lot of options, and they can look overwhelming at first, but each one is simple once you know what it does.
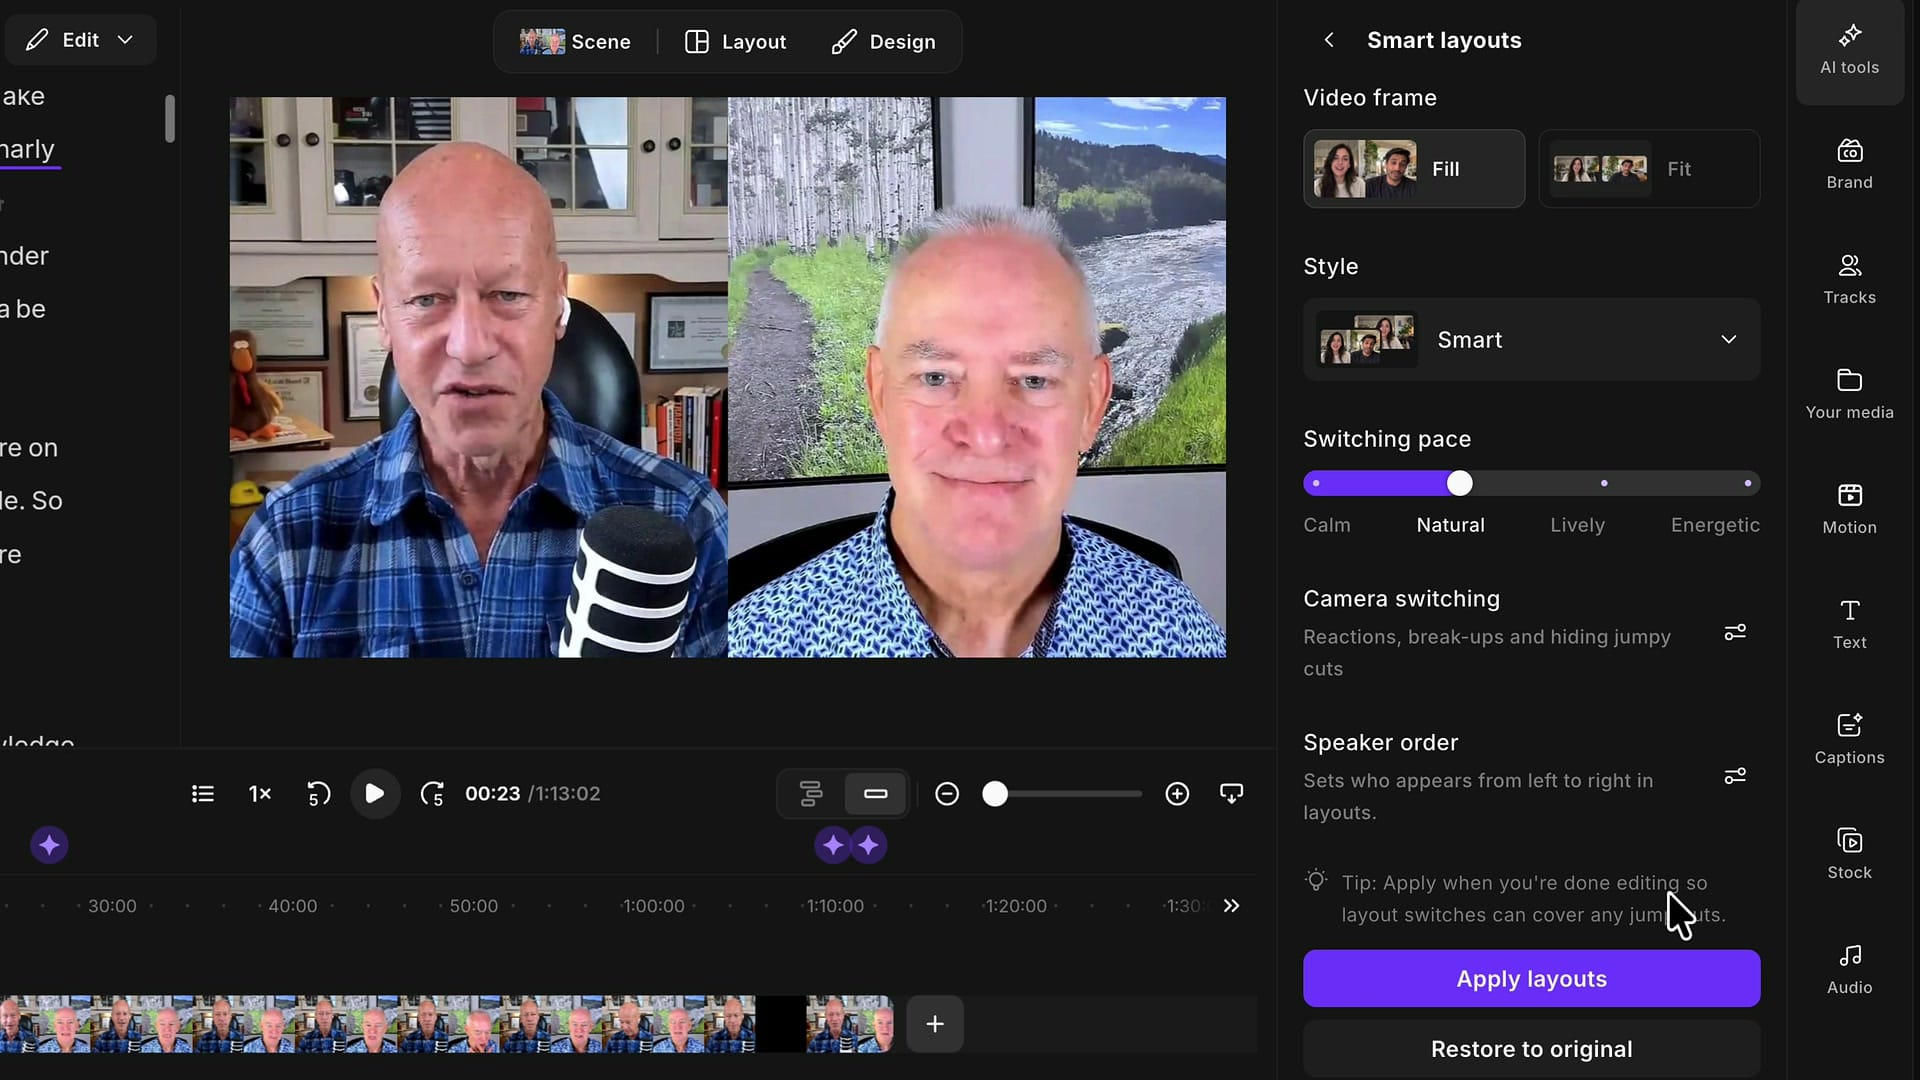
Video Frame: Fill or Fit
The first choice is how the side-by-side view is laid out. Fill makes both speakers fill the screen vertically, which is what I usually want. Fit shows each person's full frame, like a Zoom call, with empty space above and below.
Fit is the same as opening the Layout menu and choosing the second one-on-one layout. Fill is the first one.
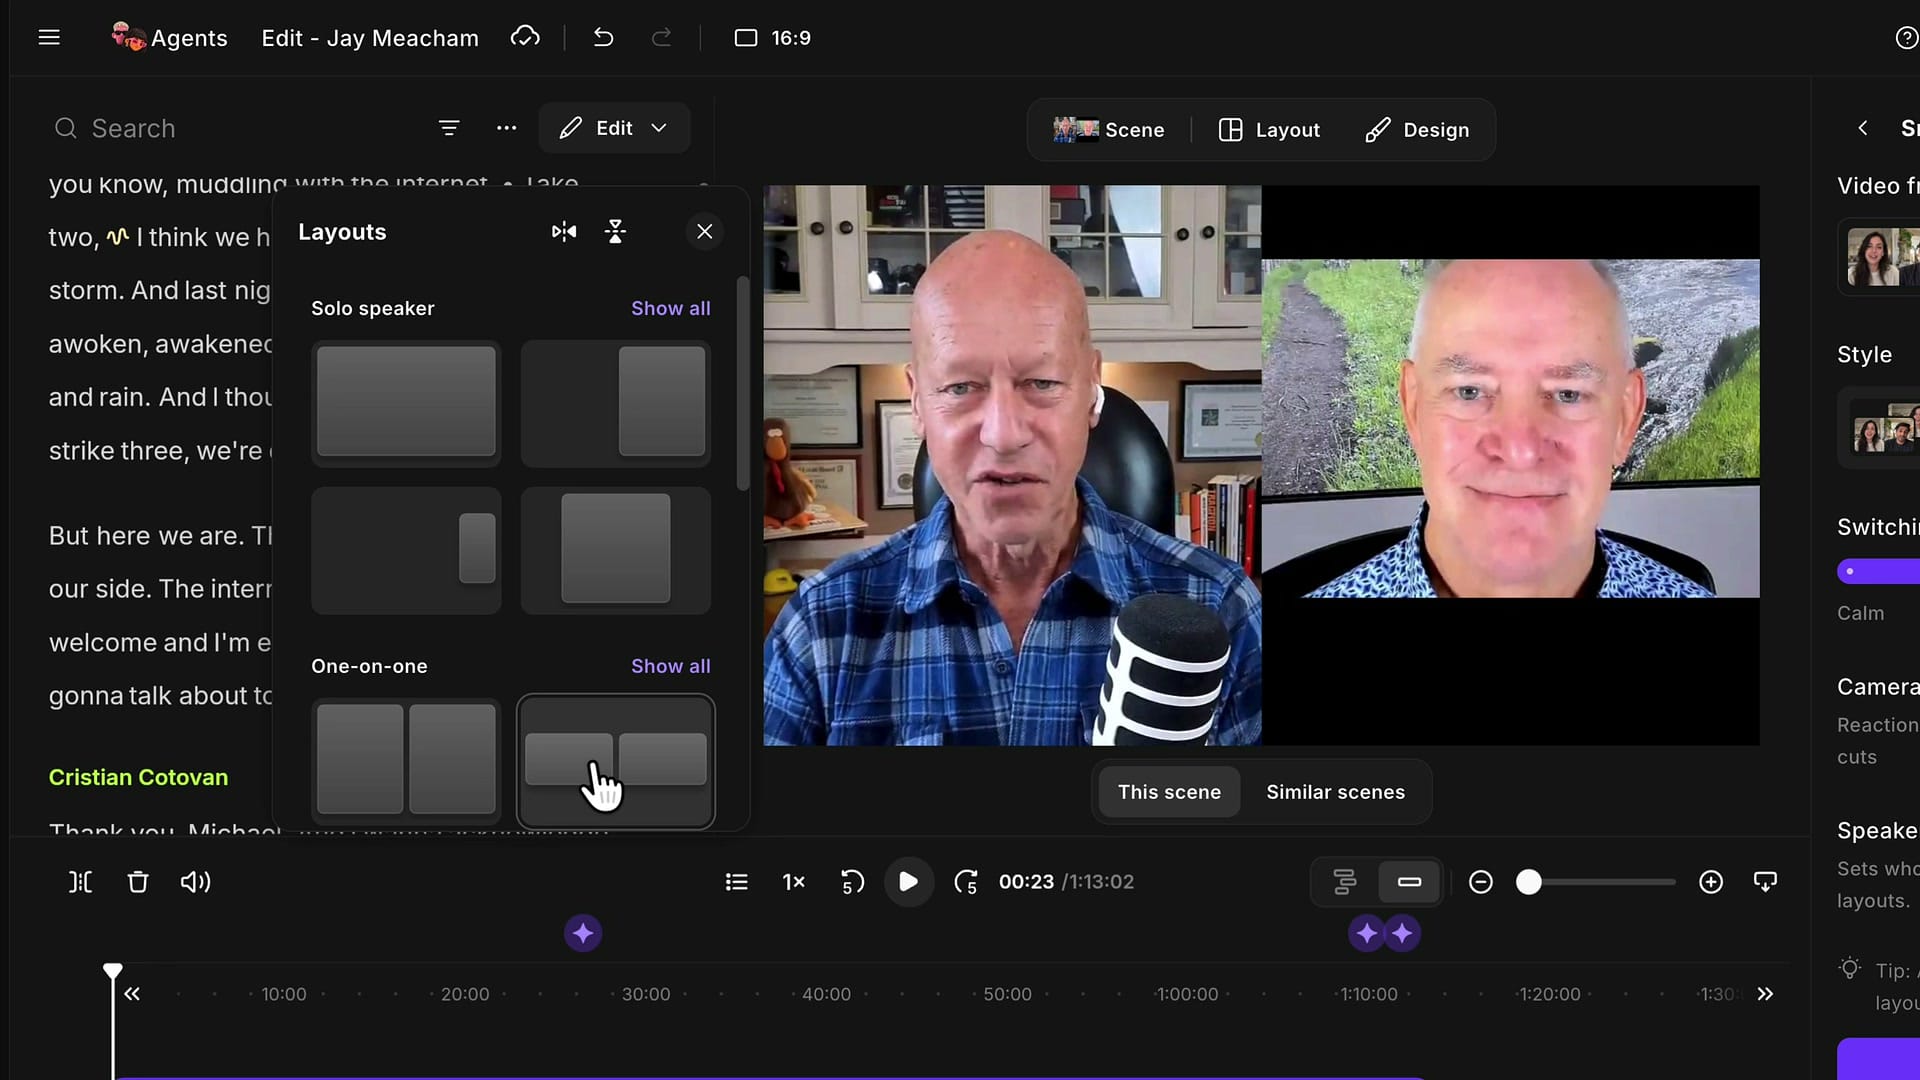
Style: How the Switching Works
Next, choose the style. There are five:
- Smart — the Riverside algorithm decides. It shows whoever is speaking and adds reactions, break-ups and zooms. When one person says something and the other nods or laughs, it can cut to them. In my tests, the reaction detection is right about half the time, but your results may differ depending on your footage.
- Full screen — whoever is speaking goes full screen, one person at a time, back and forth. You never see the participants side by side. I don't favor this one, because I like showing both people together often.
- Grid — everyone in equal tiles, with no switching at all.
- Split — the speaker is shown large and everyone else smaller beside them. Because the positions keep moving with whoever talks, it can feel busy and draw attention to itself. Viewers end up wondering where someone went.
- Picture in picture — the speaker full screen and everyone else in a small tile in the corner, switching back and forth. I find this one a little distracting too.
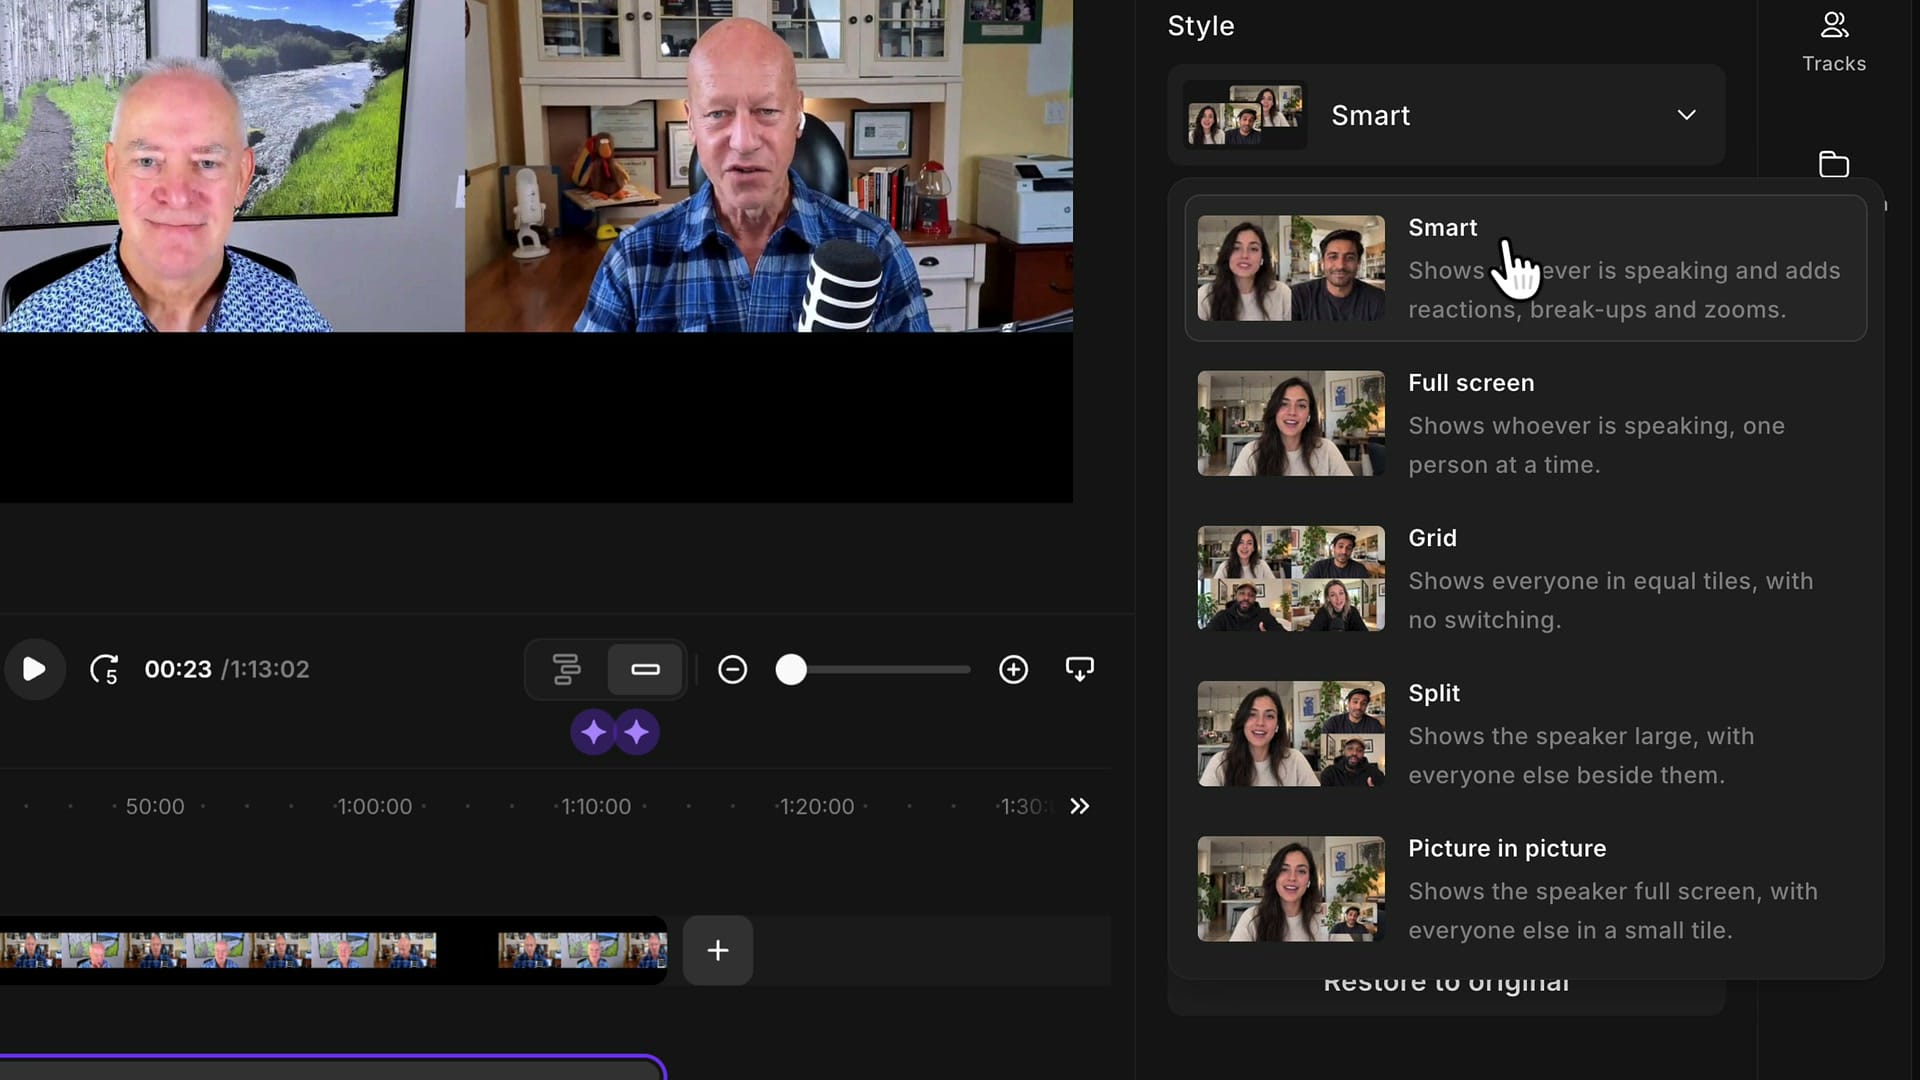
Pick whatever fits your show. For this edit I stay on Smart.
Switching Pace
The switching pace controls how often the layout changes: Calm, Natural (the default), Lively and Energetic. Energetic cycles through the layouts quickly, which can work for social media clips where you want a lot of movement.
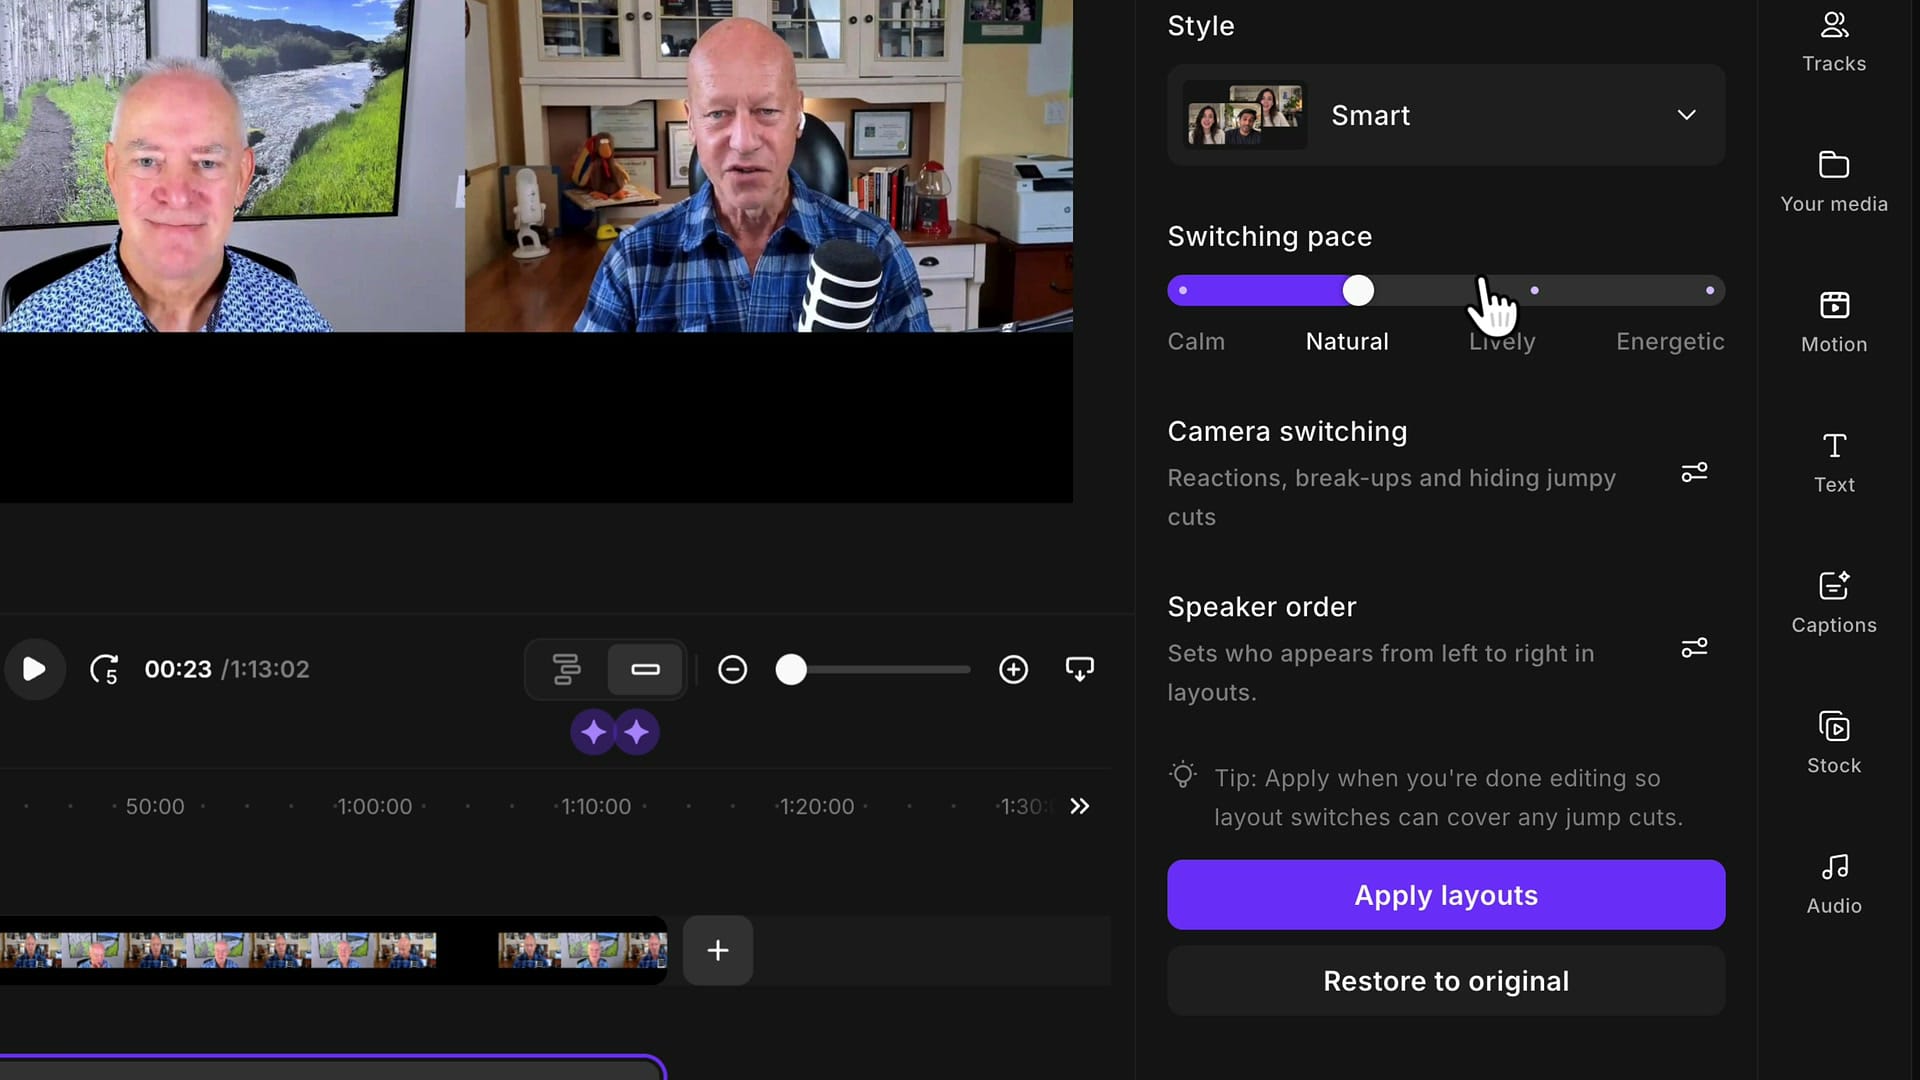
Every switch creates a new scene, and I find that even Calm can produce too many. So for a long interview I start at Calm. The options in the next section also affect how many switches you get.
Camera Switching Options
Click the icon next to Camera switching to see four options you can turn on and off:
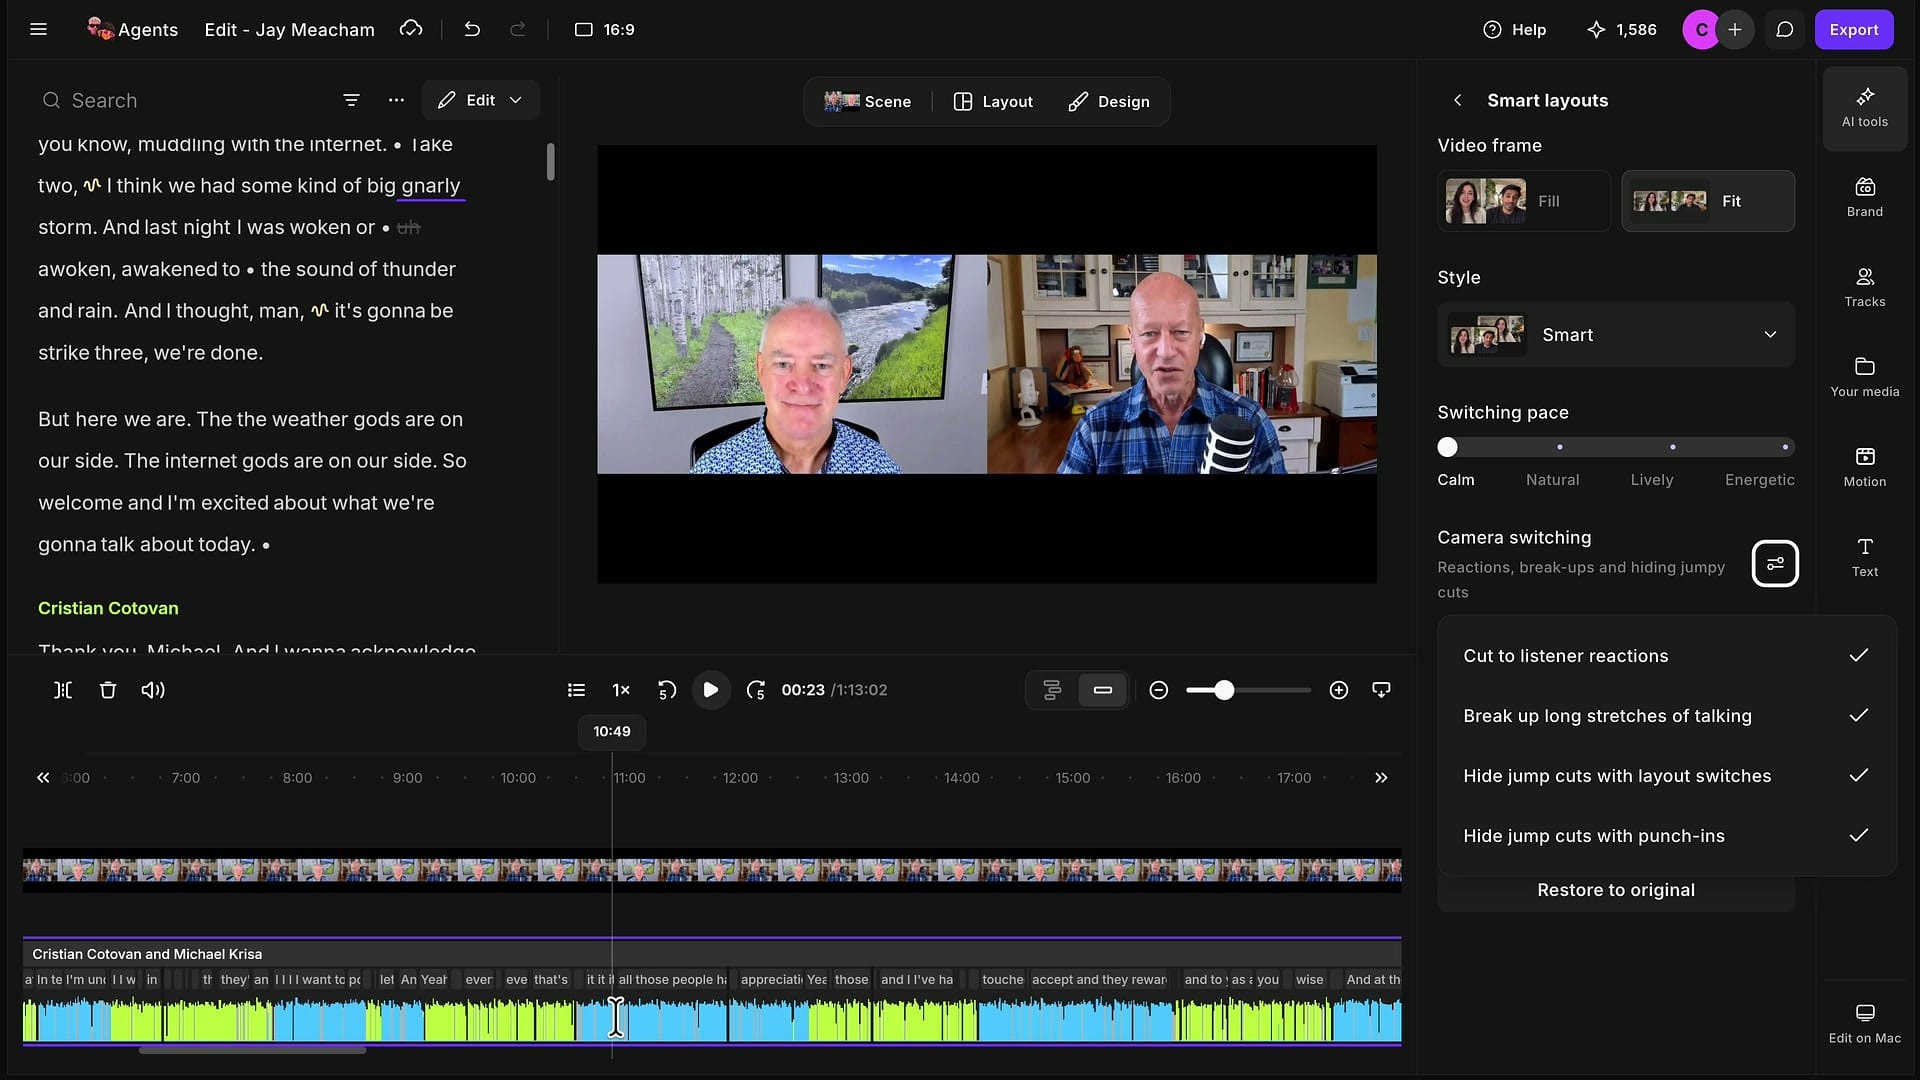
- Cut to listener reactions — when one person says something interesting or funny and the other nods for a second or two, it cuts to the listener, then back to the speaker. If a reaction scene runs too long, you can shorten it afterwards.
- Break up long stretches of talking — this is what I do manually all the time. When one person talks for a while, I switch them to full screen and let them talk undistracted. When they're nearly done, I go back to side by side for the exchange, like the host asking the next question. Then the colored speaker bars on the timeline show you who is talking when. If the host has a sip of coffee during the guest's long answer, nobody needs to see it.
- Hide jump cuts with layout switches — this is the new one. It finds the jump cuts left by removed filler words, shortened gaps or removed content, and switches the layout at that point — maybe from full-screen speaker to side by side — not because the conversation needs a switch, but to hide the cut.
- Hide jump cuts with punch-ins — instead of changing the layout, it changes the zoom. If you are on a full-screen guest and there's a cut in the middle of their answer, zooming in by about 10% at that point makes it look like an intentional camera move rather than a head jumping around.
Speaker Order
This one had been annoying me for a while, and I'm glad it's here. I prefer to keep the host on the left of the screen, but Riverside put my guest on the left and the host on the right. You can drag the videos to swap them in a single scene, or use the swap button at the top, but when you apply a layout again, it doesn't always remember the order.
With Smart Layouts, that problem gets bigger: it might generate a hundred scenes, and nobody wants to fix the order in each of them. Click the icon next to Speaker order and drag the names into the order you want, from left to right. I moved Michael, the host, to the top so he appears on the left, and Jay, the guest, on the right.
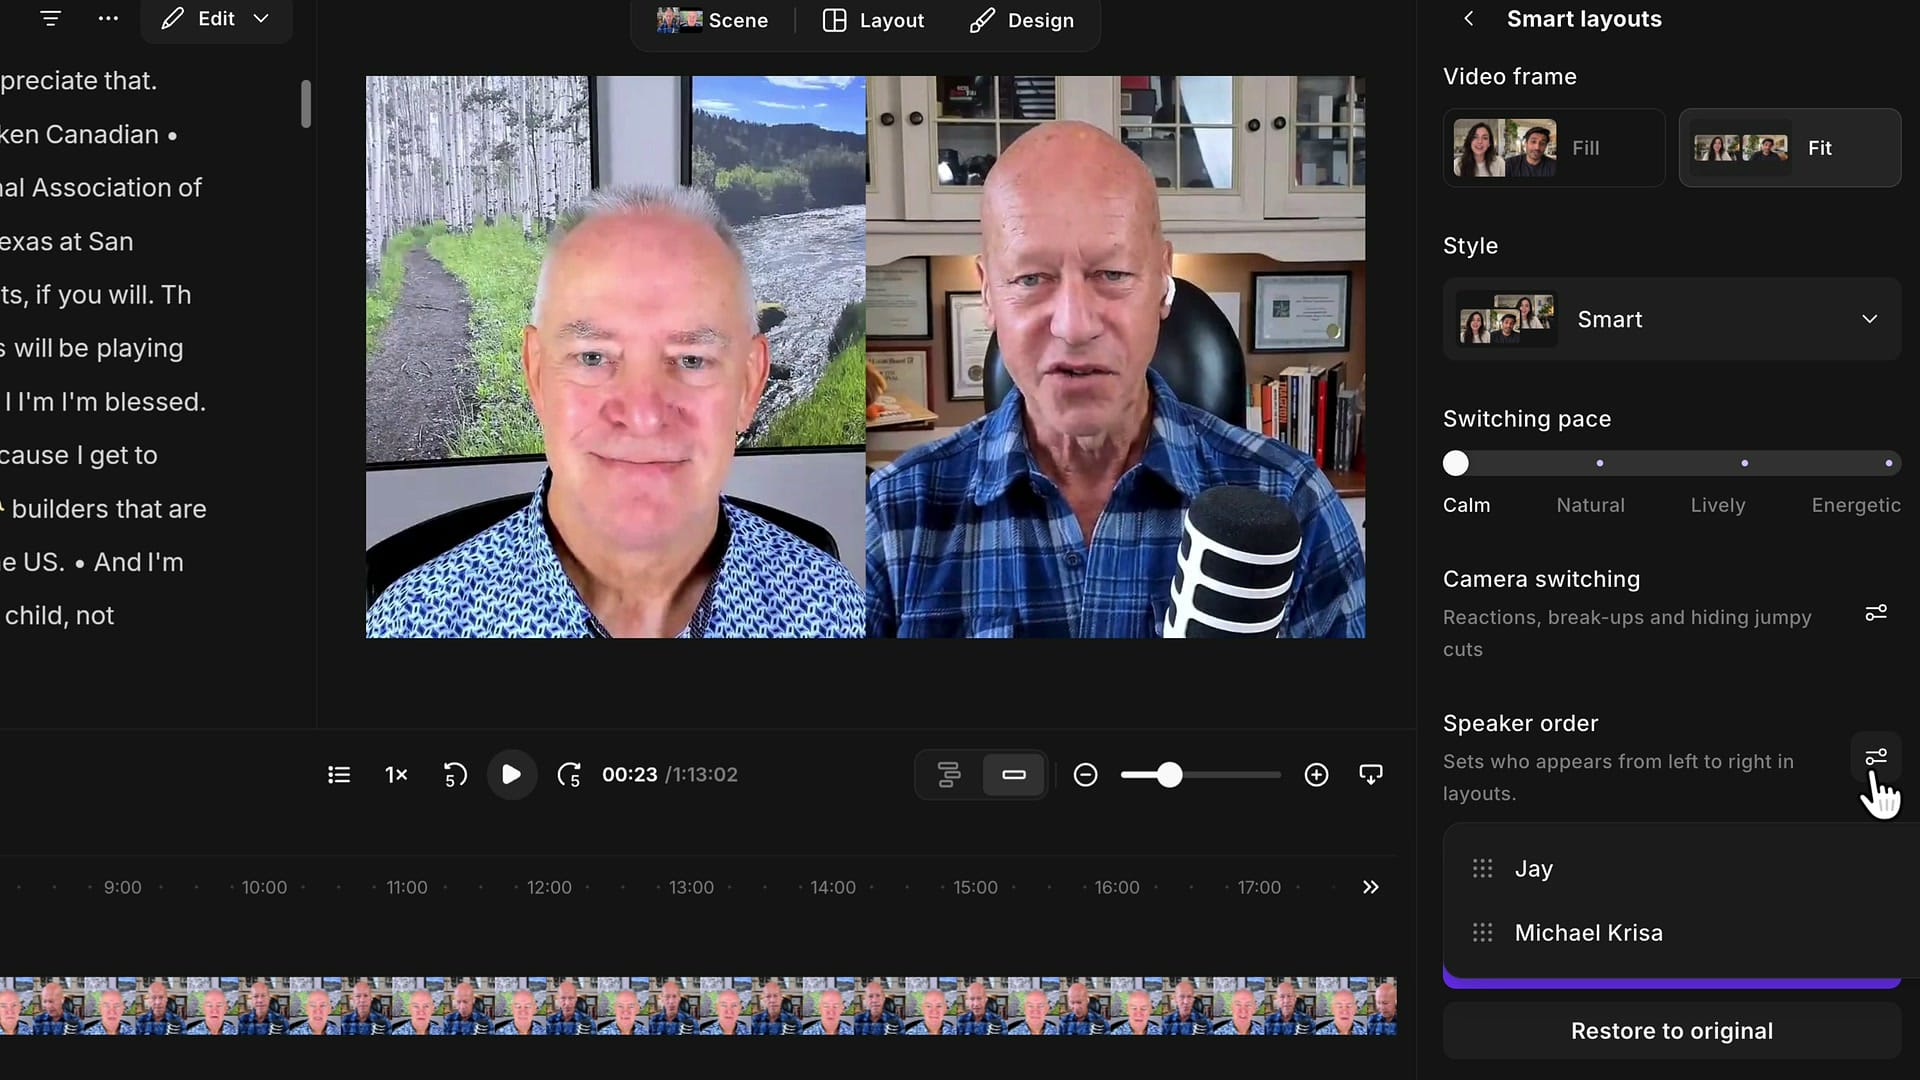
Now every scene Smart Layouts creates respects that order.
Apply the Layouts
Once your options are set, click Apply layouts. For my first pass I left Calm selected and all four camera switching options on. It only takes a second. Zoom into the timeline and every small line on the scene strip is a layout change — a new scene.
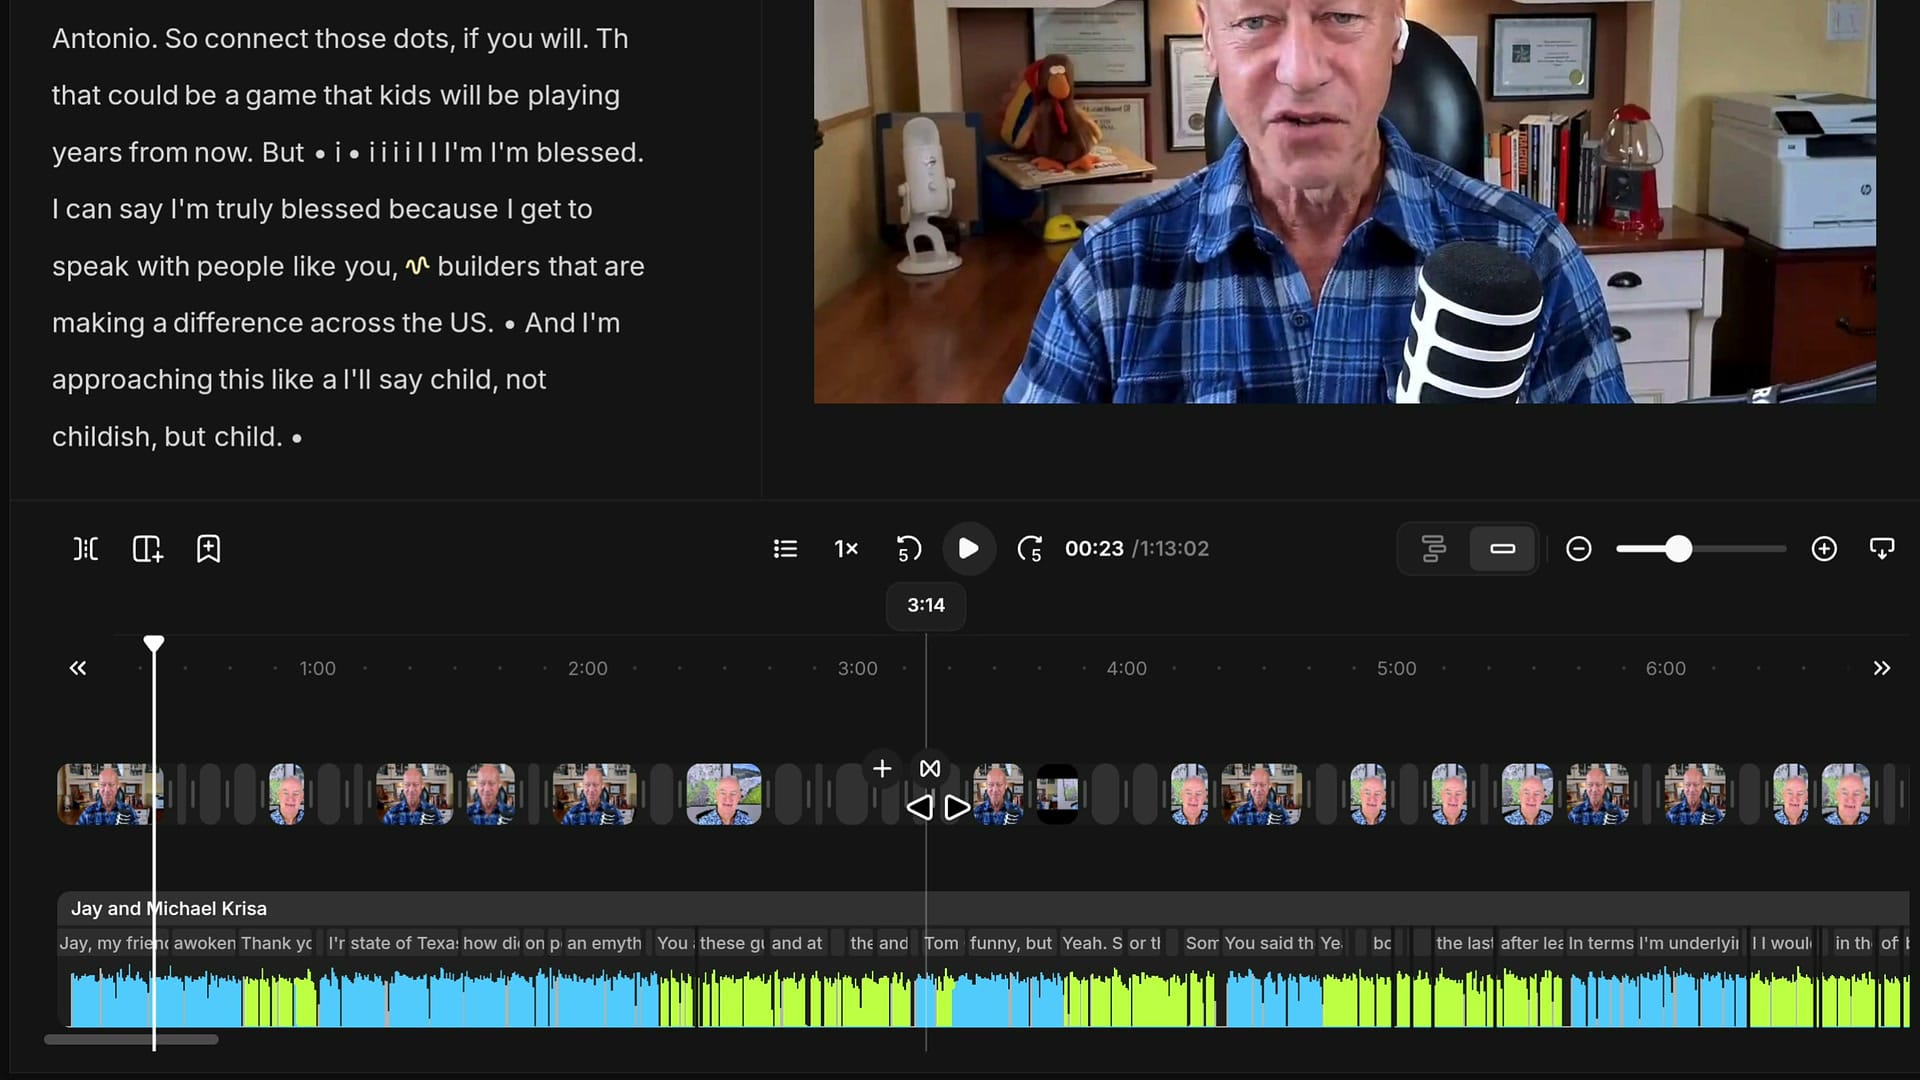
Looking closer, it kept Michael full screen during his introduction, then switched as he introduced the guest. When Michael told the story about waking up to thunder and rain, Jay was nodding along, so it cut to Jay for a moment and then went back to Michael. That's the reaction shot in action.
If you’re eager to learn more about Riverside and wish to have a one-on-one Riverside coaching session, feel free to book a call with me.
I’m here to help you with any questions you have and to guide you through the best workflows, tips, workarounds, or just answer any questions you may have!
Change Settings Without Recreating Scenes
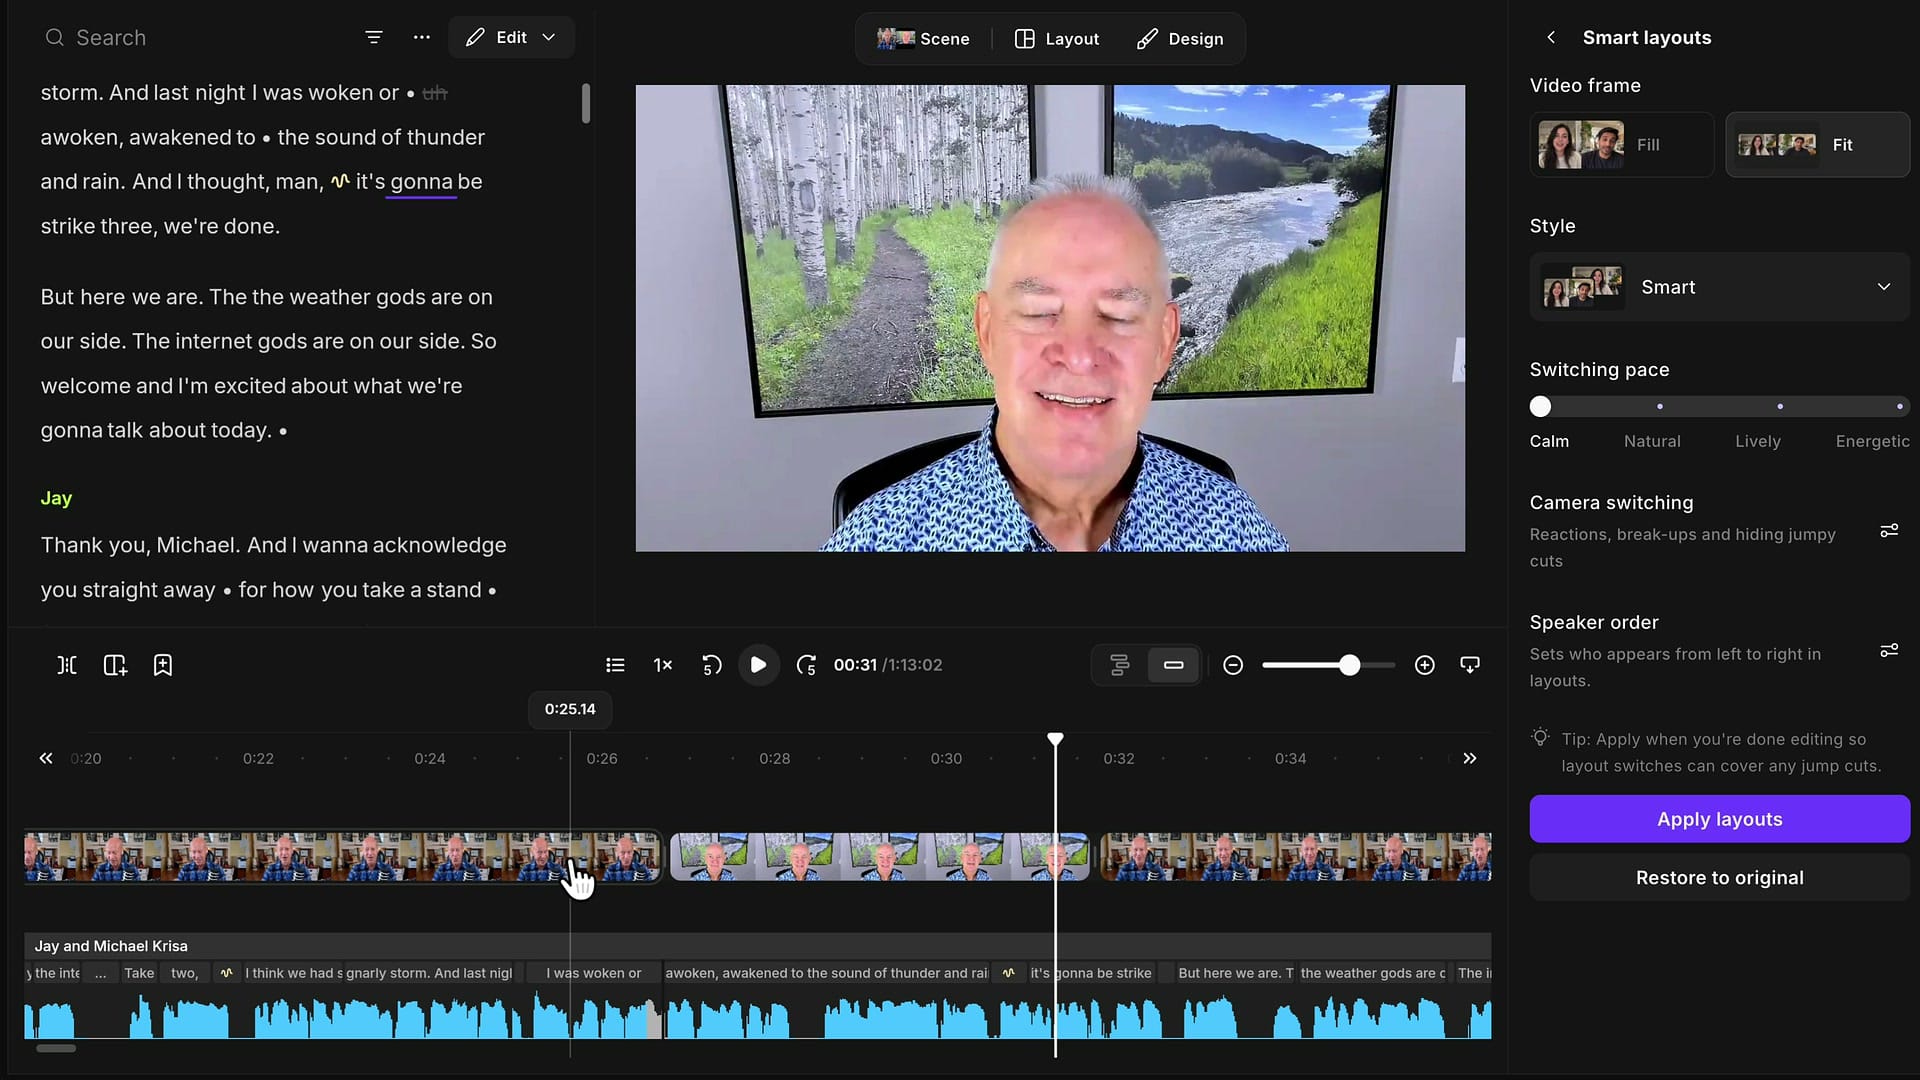
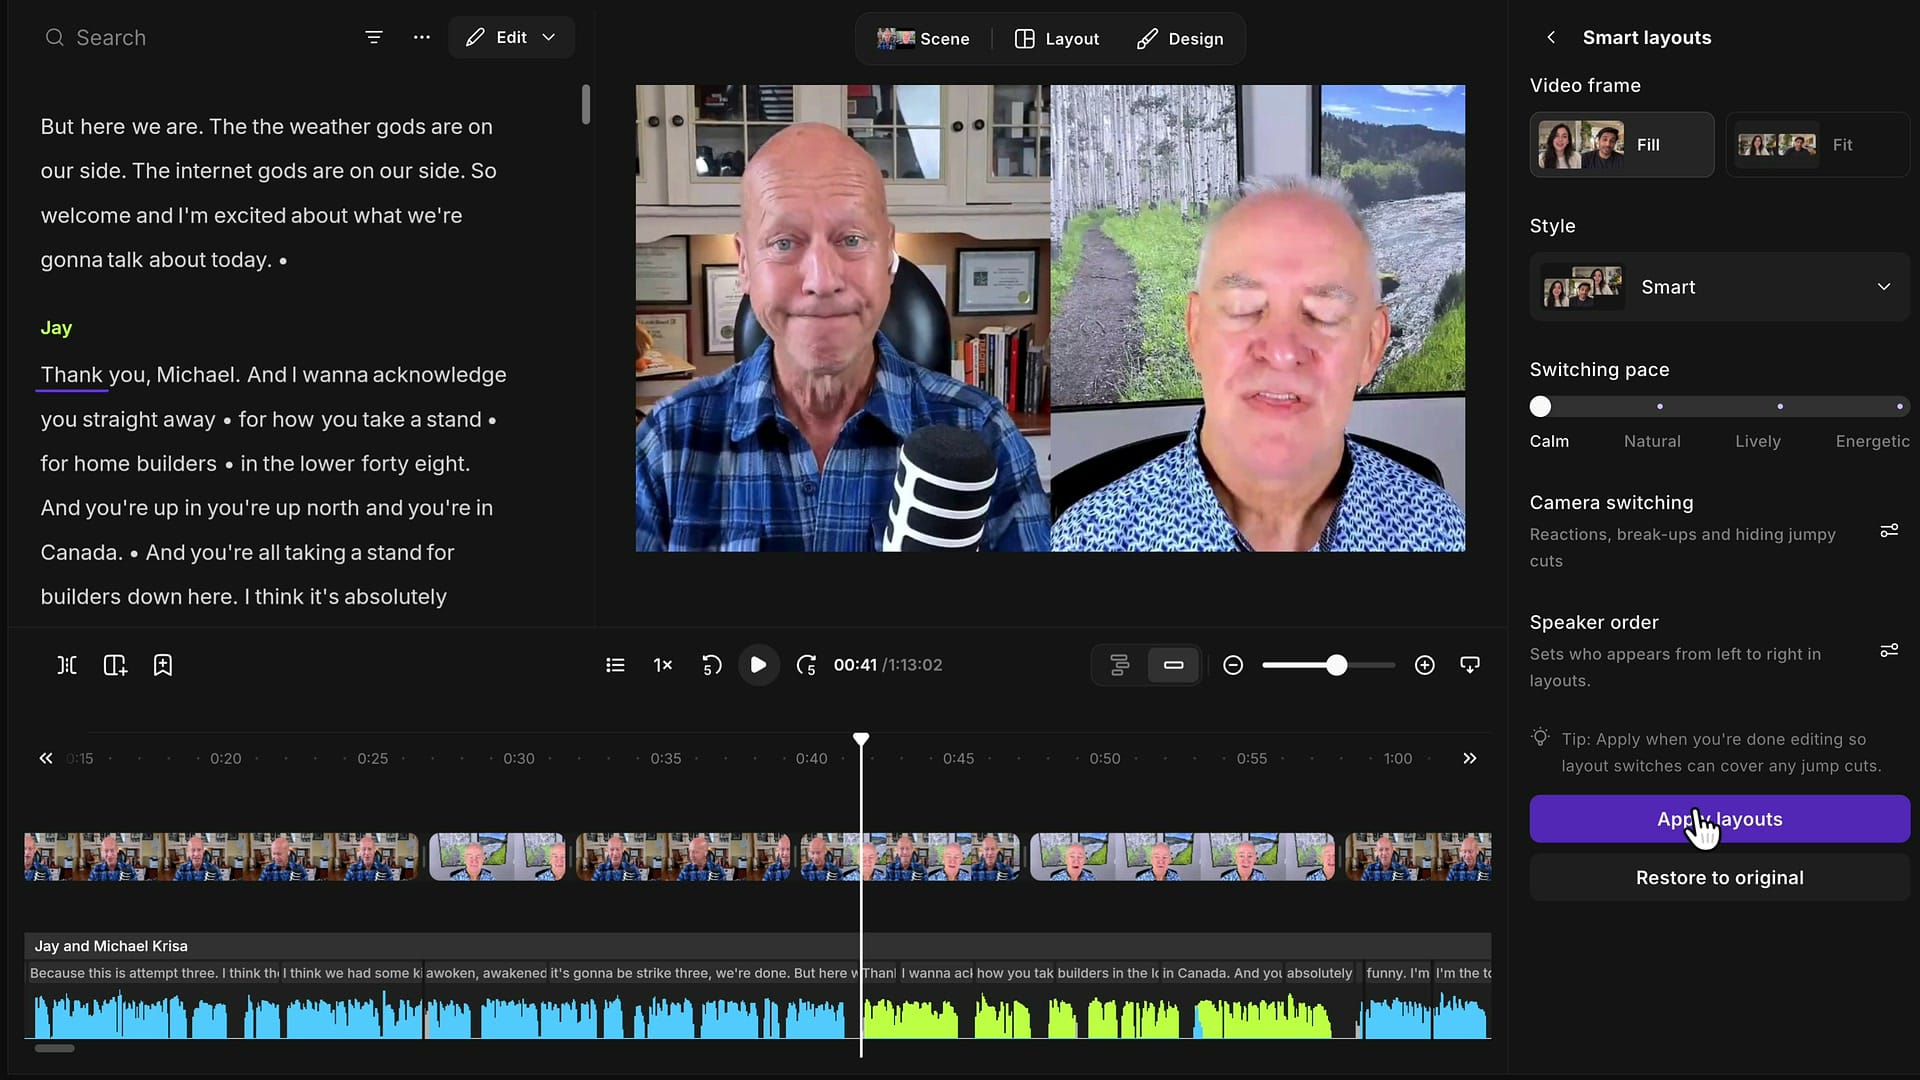
When the guest started talking, the side-by-side scenes used the Fit frame, because that's what I had chosen. I switched Video frame to Fill and clicked Apply layouts again.
This is the part I like: it did not create new scenes on top of the existing ones. It kept the same scenes and only adjusted the layouts — side by side, filling the screen, and with Michael on the left as I set in Speaker order.
Adjust Every Similar Scene at Once
One thing I didn't like was that Michael wasn't centered in his half of the frame in the side-by-side scenes. He sat slightly to the left, and with maybe a hundred scenes, fixing them one at a time is not an option.
Riverside remembers which layout each generated scene uses, so you can change them all together:
- Click the speaker's video on the canvas, then double-click to enter crop mode.
- Before you adjust anything, choose Similar scenes in the bar under the canvas.
- Look at the timeline: every scene with the same layout is now highlighted, all the way to the end.
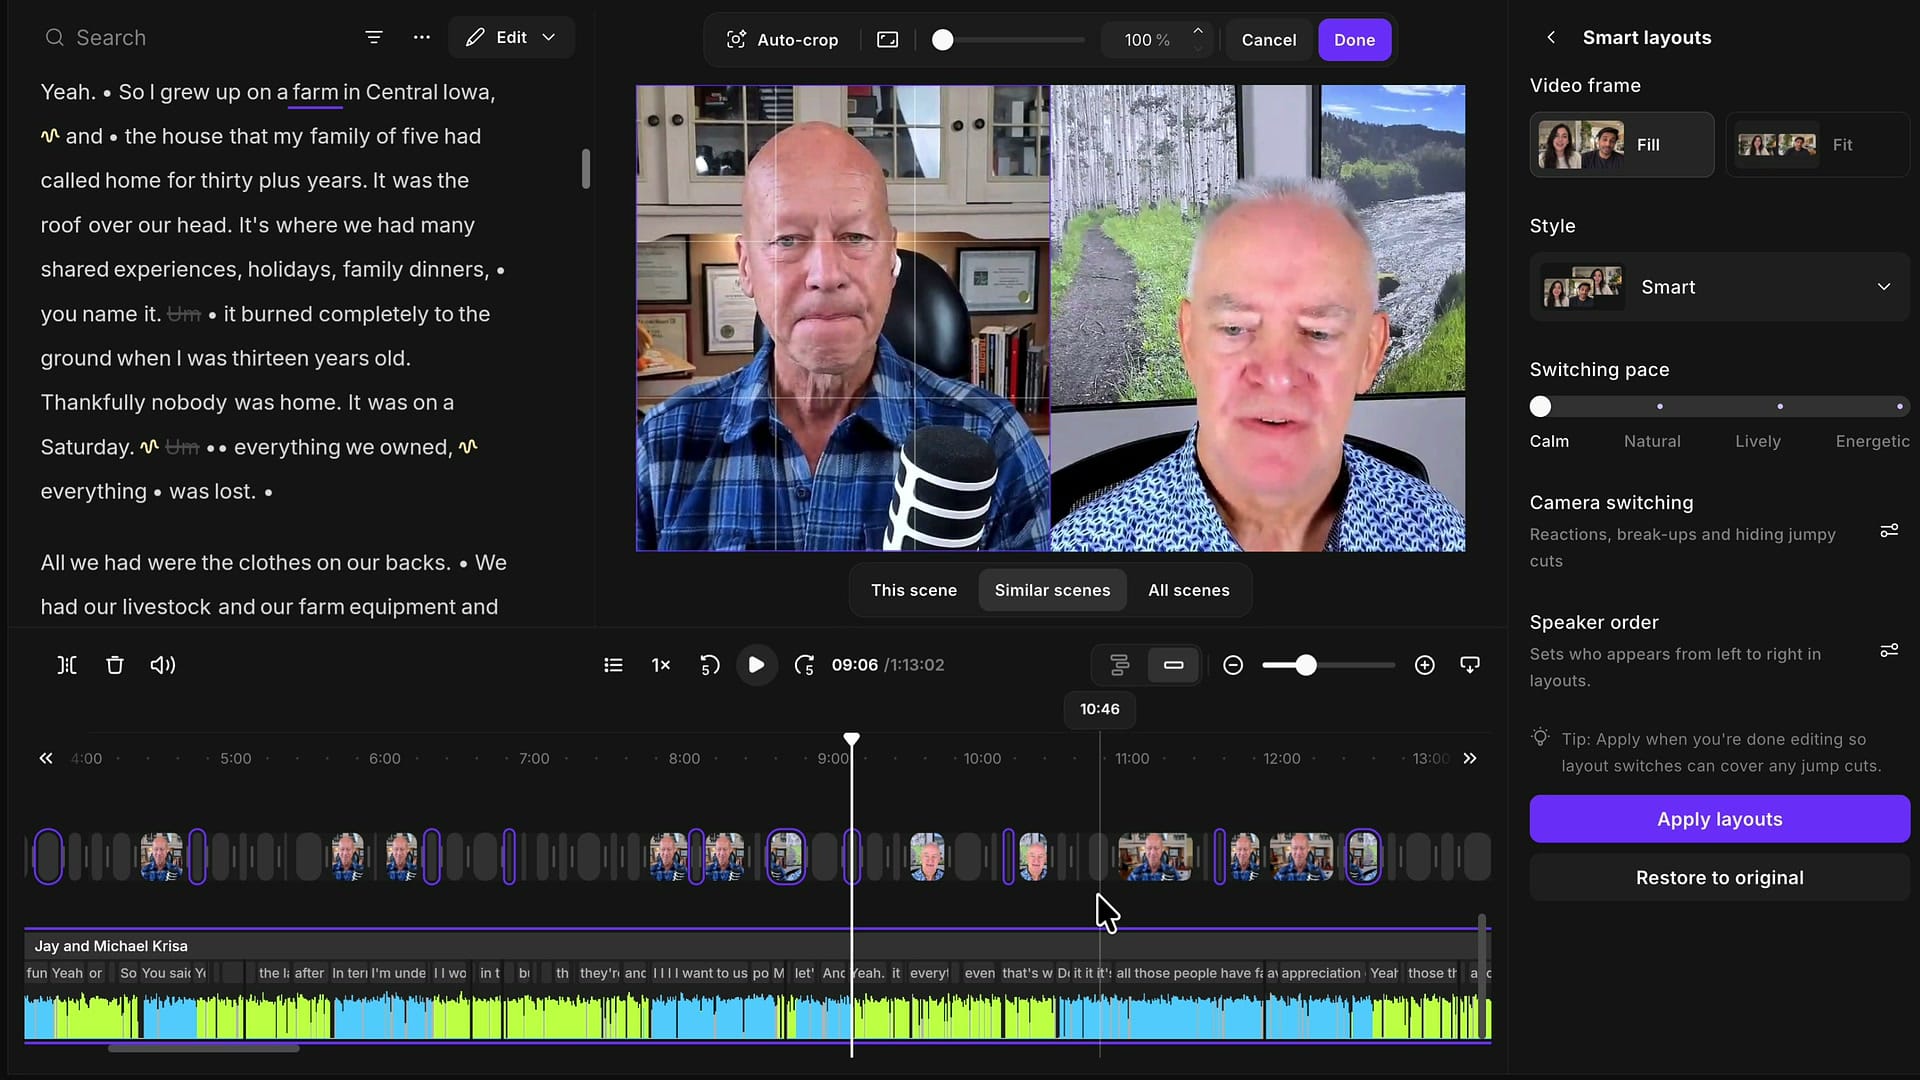
Now move or zoom the video and click Done. I nudged Michael toward the center, and every highlighted scene picked up the change. I did the same for Jay, zooming him in slightly and centering him.
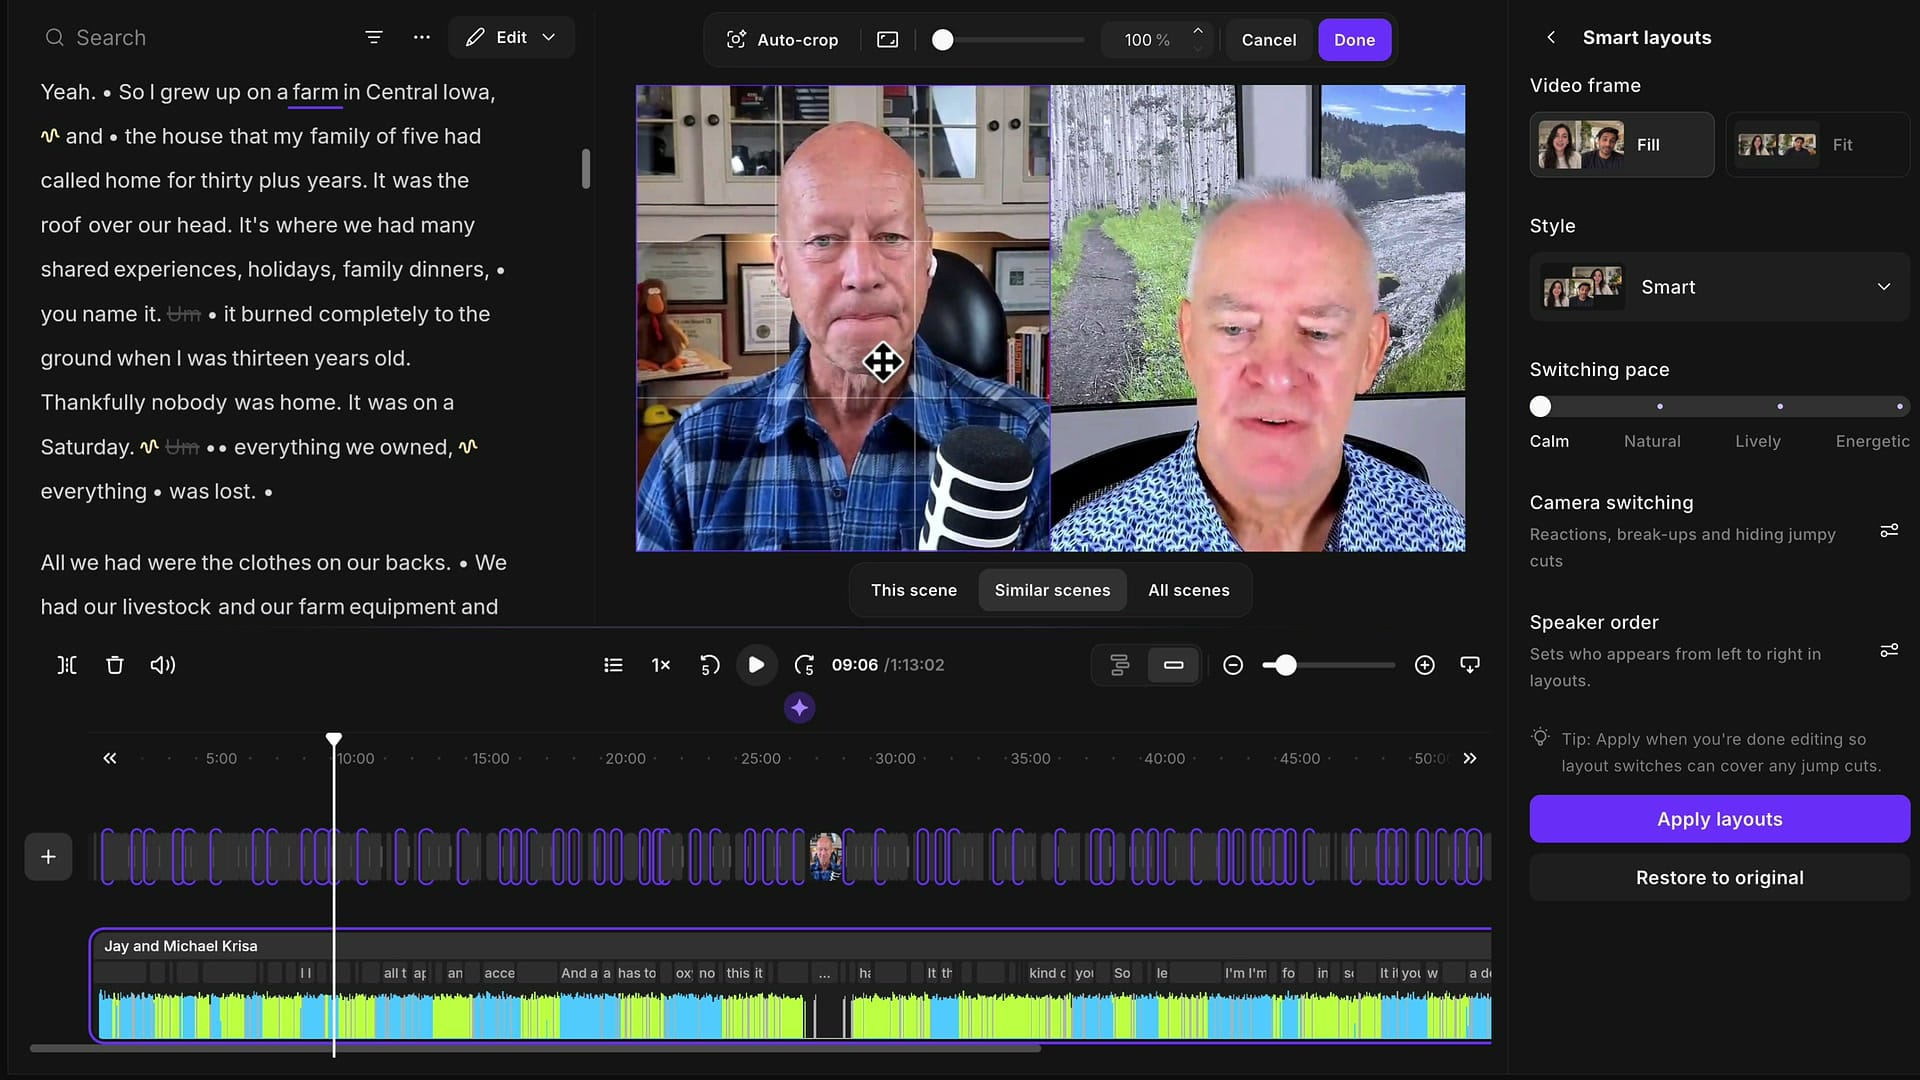
It works for any layout type. For the scenes where Jay is full screen on his own, select him, keep Similar scenes on, enter crop mode, and adjust. A couple of clicks fix all of those automatically created layouts.
Merge Scenes by Dragging a Boundary
Sometimes Riverside creates more scenes than you want in one stretch. In my edit, Michael was talking for a while, and Smart Layouts had split it up — including a punch-in where it had found a cut. I wanted Michael to stay in one scene for that whole part.
There's no merge button right now, but merging is easy: grab the boundary line between two scenes and drag it over the scenes you want to absorb.
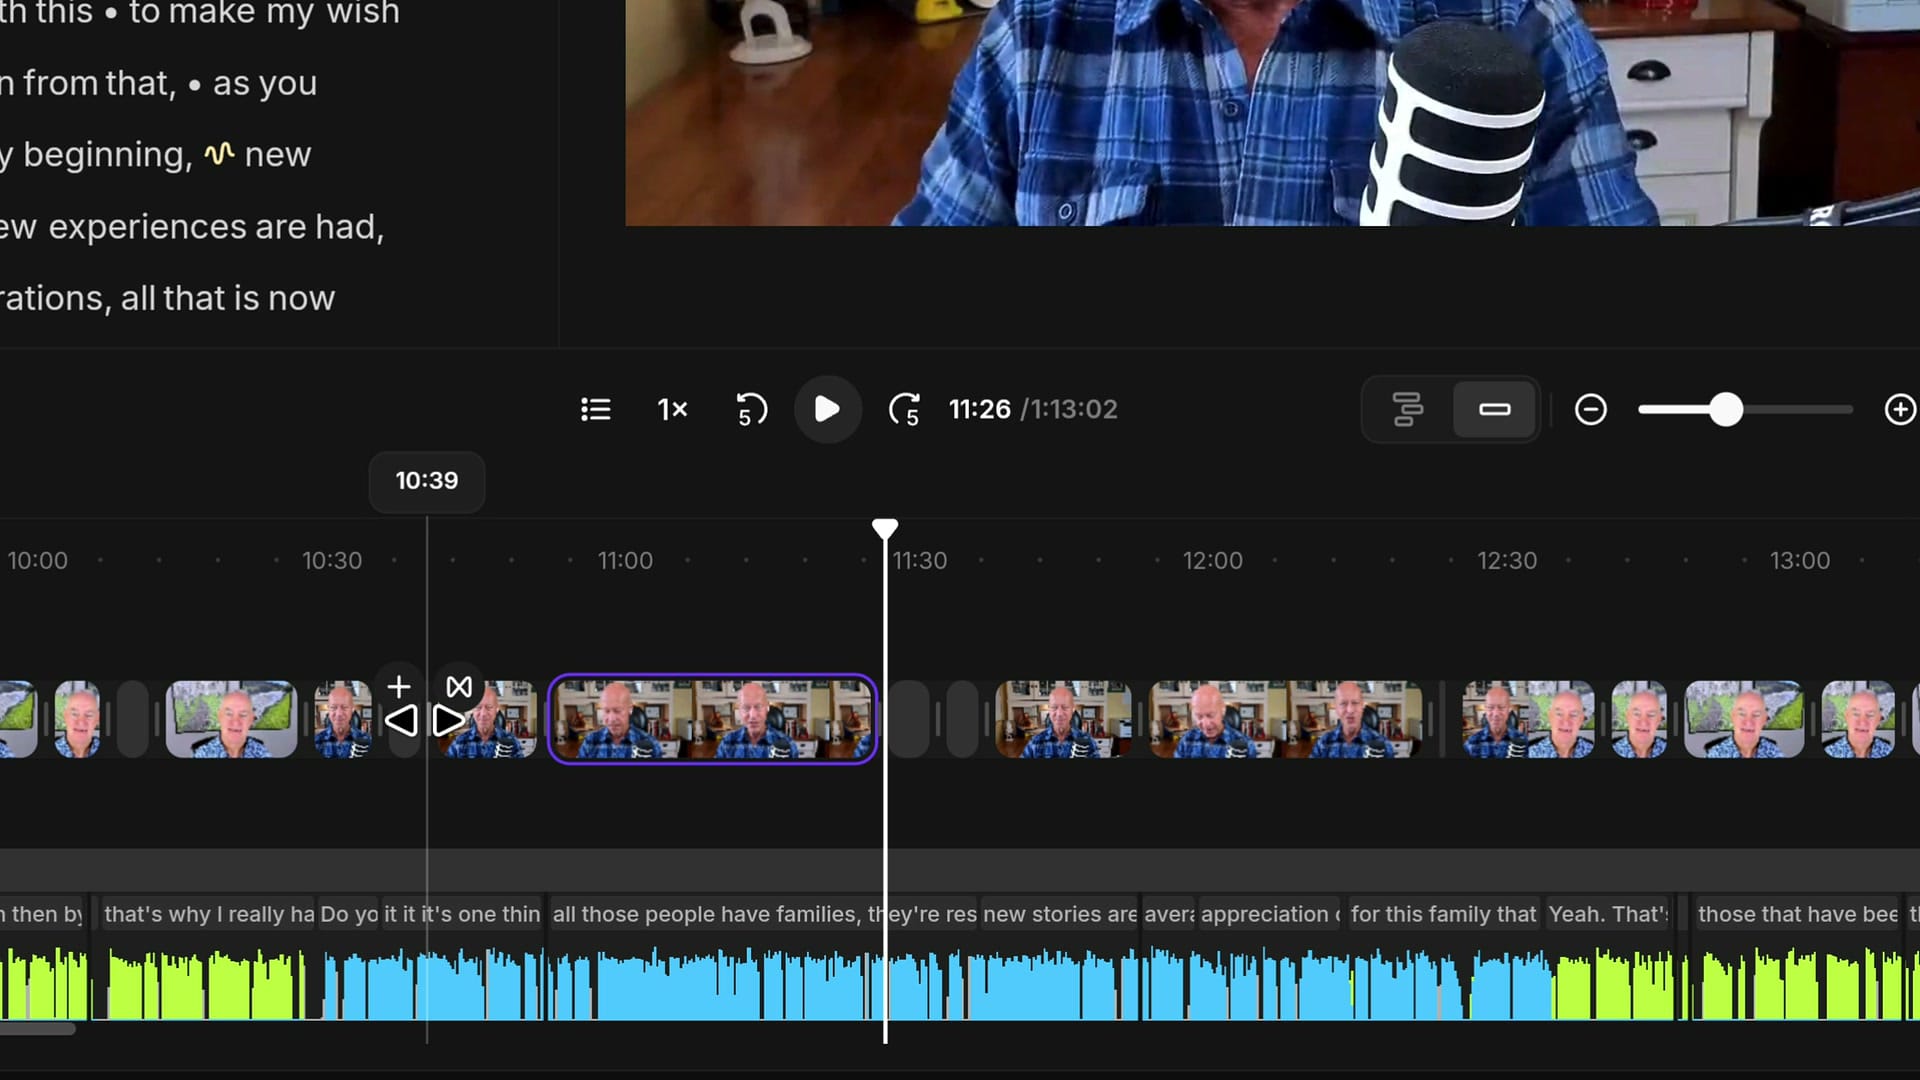
Pay attention to which side you drag from. The first time, I dragged the wrong way and brought Jay's scene over, so I undid it. Grab the end of the scene you want to keep — Michael's — and drag it to the right. It swallows the other scenes and they become a single scene, which you can then adjust like any other.
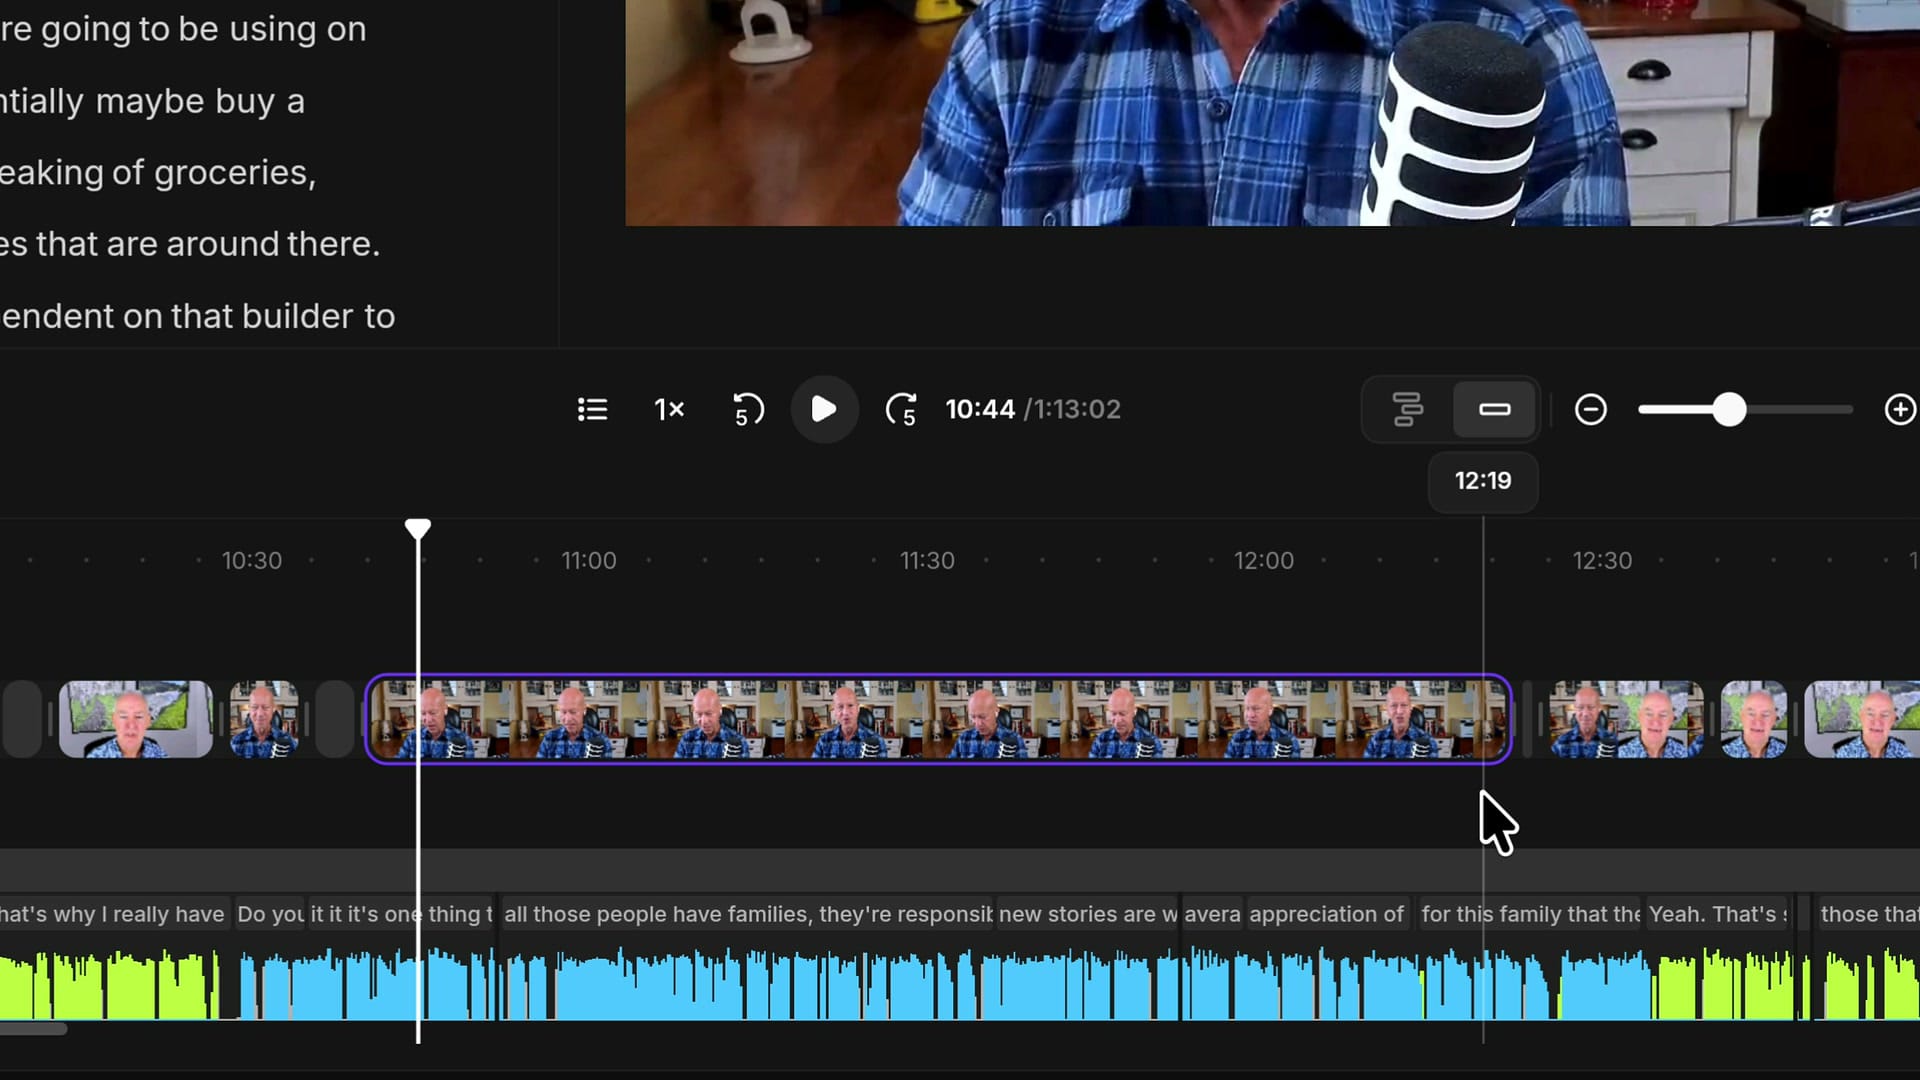
This also works the other way: if you don't agree with where a scene starts or ends, drag the boundary to a new location. The boundary snaps to cuts on your timeline, so you get the same jump-cut-hiding effect Smart Layouts aims for.
Start Over
If you don't like the result, click Restore to original at the bottom of the Smart layouts panel. You can also zoom all the way out, grab one boundary and drag it across the whole timeline, which merges everything back into a single scene. Either way, you're back to square one and can try different settings.
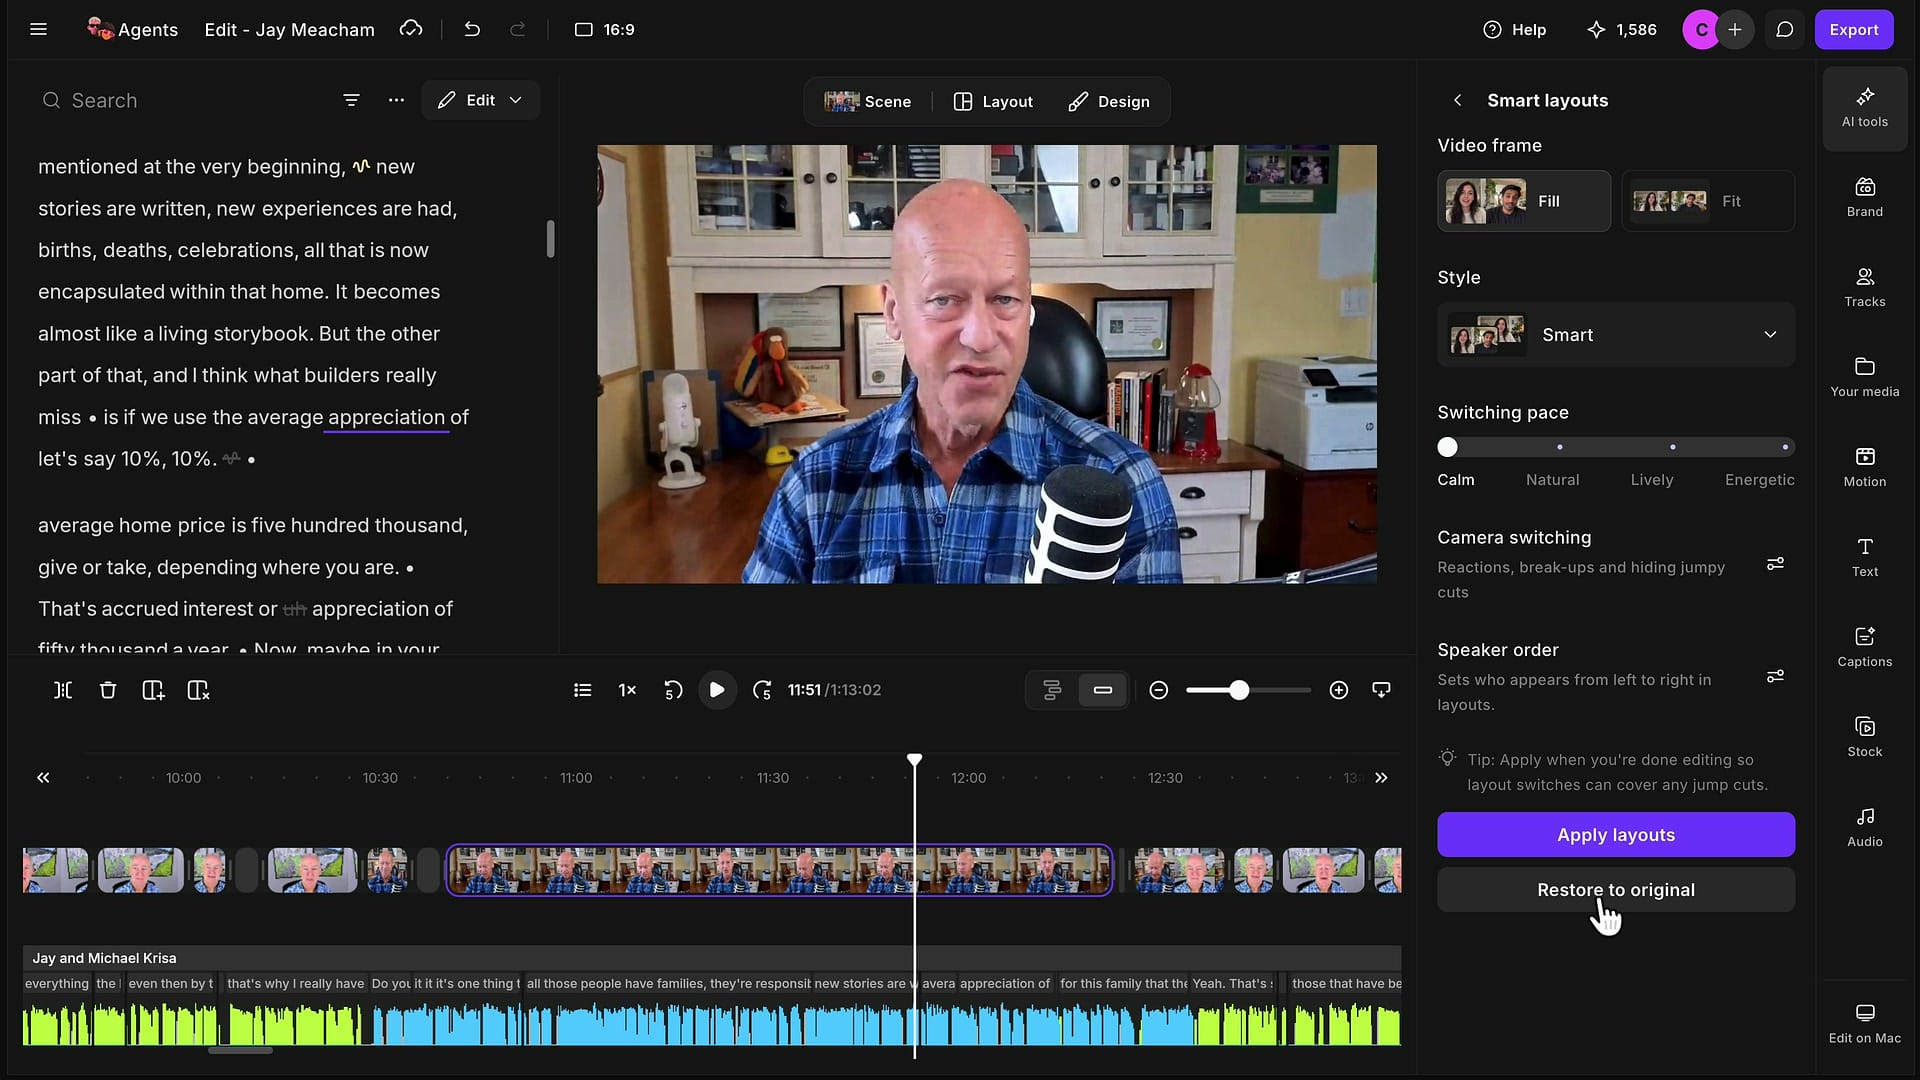
Everything here is non-destructive. Changing layouts and scenes never deletes any of your content unless you delete it yourself.
Get Fewer Scene Changes
The more options you turn on, the more scenes you get. For a more conservative edit, I turned off all four camera switching options, set Speaker order with Michael on top again, kept Calm and Smart, and applied the layouts. Even zoomed all the way out, I could now see individual scene boundaries, because it created far fewer.
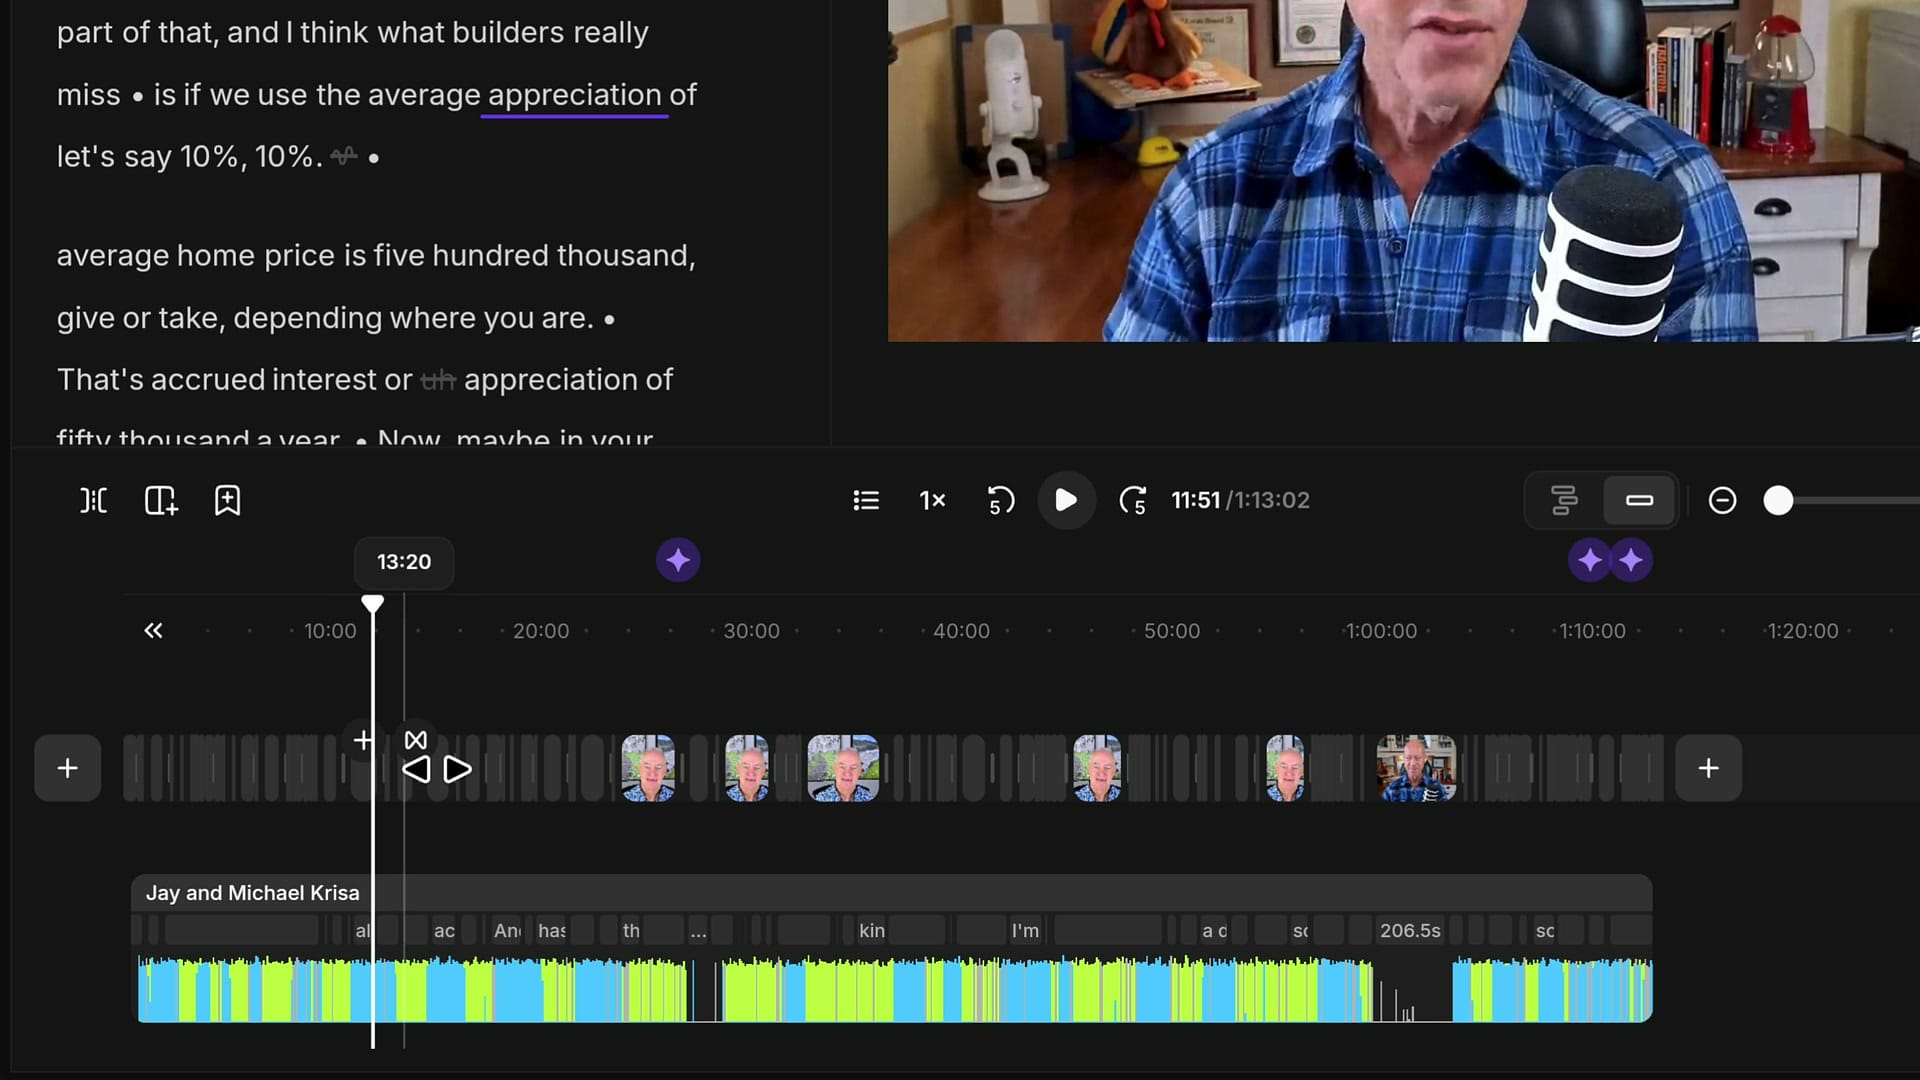
I wish Riverside showed a scene count. There's no number anywhere, even when you zoom in, so you have to judge by eye.
Quick Recap
- Finish your cuts, filler word removal and gap removal first, then open AI tools → Smart Layouts → Adjust.
- Choose Fill or Fit for side-by-side, then a style. Smart works well for interviews.
- Start at Calm and turn off camera switching options you don't need. Fewer options means fewer scenes.
- Set Speaker order so the host stays on the left in every scene.
- Re-applying with different settings updates the existing scenes instead of adding new ones.
- Use Similar scenes in crop mode to reframe a speaker across every matching scene.
- Drag scene boundaries to merge scenes or move them. They snap to cuts.
Related guides
 Cristi Cotovan
 Cristi Cotovan
 Cristi Cotovan
 Cristi Cotovan
 Cristi Cotovan
If you're eager to learn more about Riverside and wish to have a one-on-one Riverside coaching session, feel free to book a call with me. I'm here to help you with any questions you have and to guide you through the best workflows, tips, workarounds, or just answer any questions you may have!