How to Use Riverside Scene Templates to Speed Up Podcast Editing


Every time you start a new episode edit in Riverside, do you find yourself rebuilding the same scene layouts from scratch? Speaker name overlays, side-by-side arrangements, solo speaker close-ups — it's the same setup every time. Scene templates solve this by letting you apply pre-built or custom layouts with a single click.
In this tutorial, I'll show you how to use Riverside's built-in scene templates and how to save your own custom scenes so you can reuse them across every project.
Watch the Full Tutorial
Where to Find Scene Templates
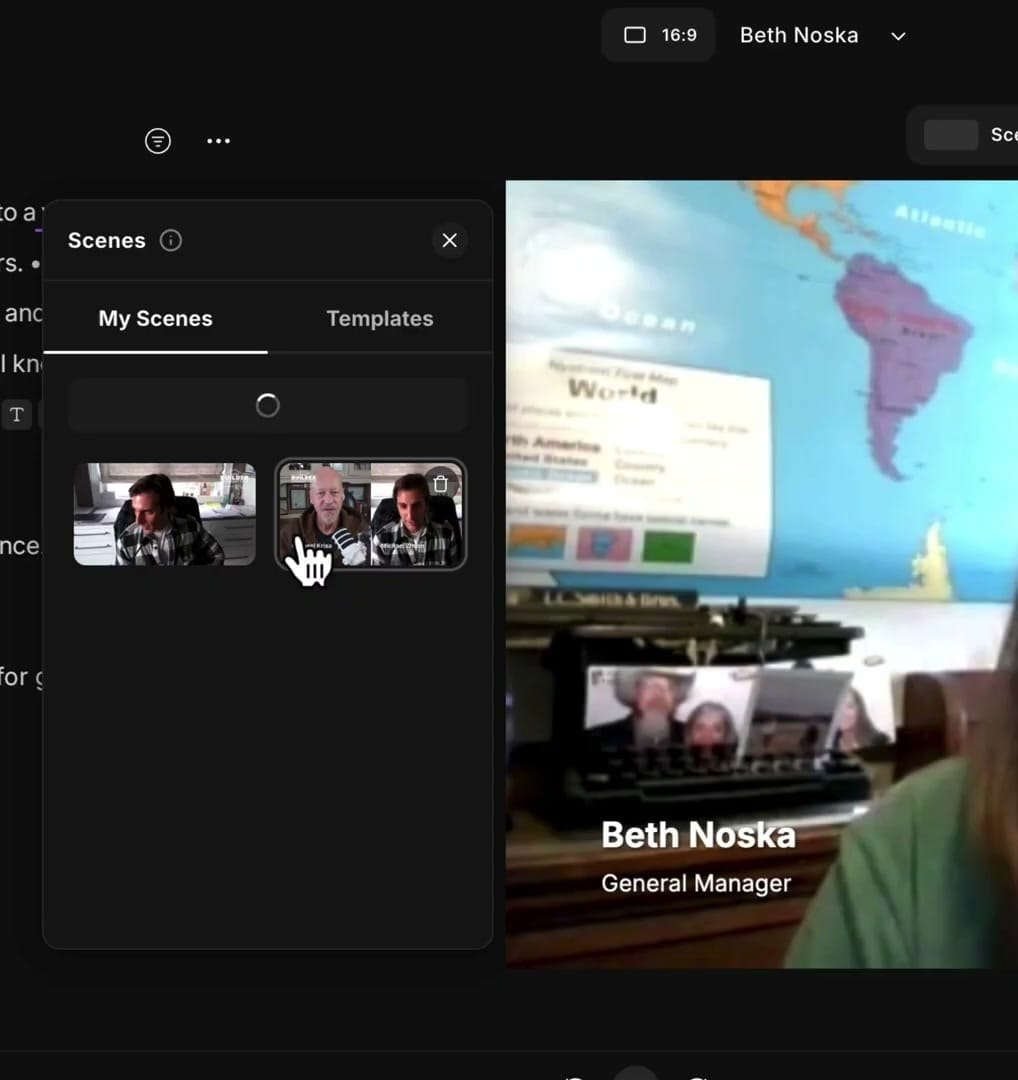
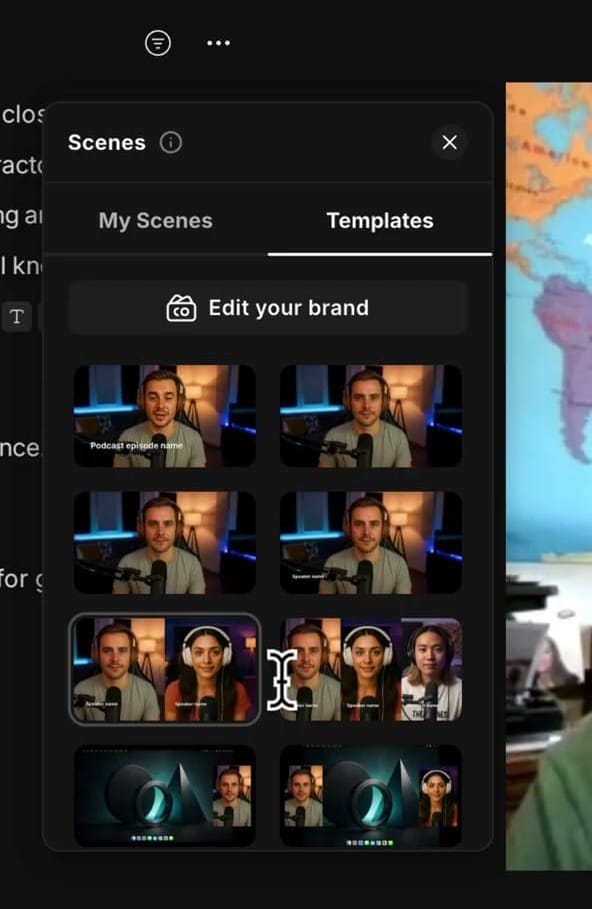
When you're in the Riverside editor, click the Scene tab at the top of the canvas area. This opens the Scenes panel on the left side, which has two tabs:
- My Scenes — Your saved custom scenes
- Templates — Riverside's built-in template gallery
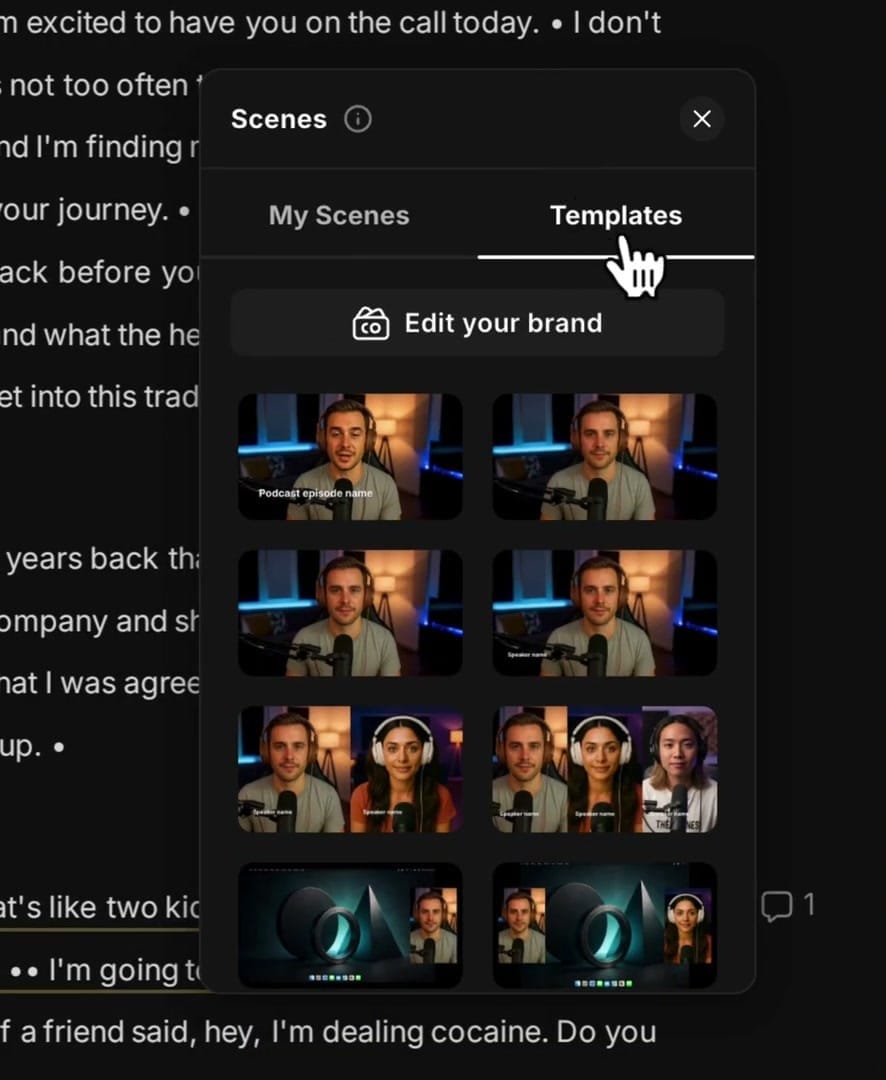
Applying a Template
Click on any template thumbnail to apply it to your current scene. The template instantly sets up the speaker layout, overlays (like speaker names and titles), and positioning. You'll see the canvas update immediately with the new arrangement.
Templates include layouts for:
- Solo speaker (full screen or with sidebar)
- Two-speaker side-by-side
- Two-speaker with one featured larger
- Multi-speaker (three or more participants)
- Dynamic layouts with branded overlays
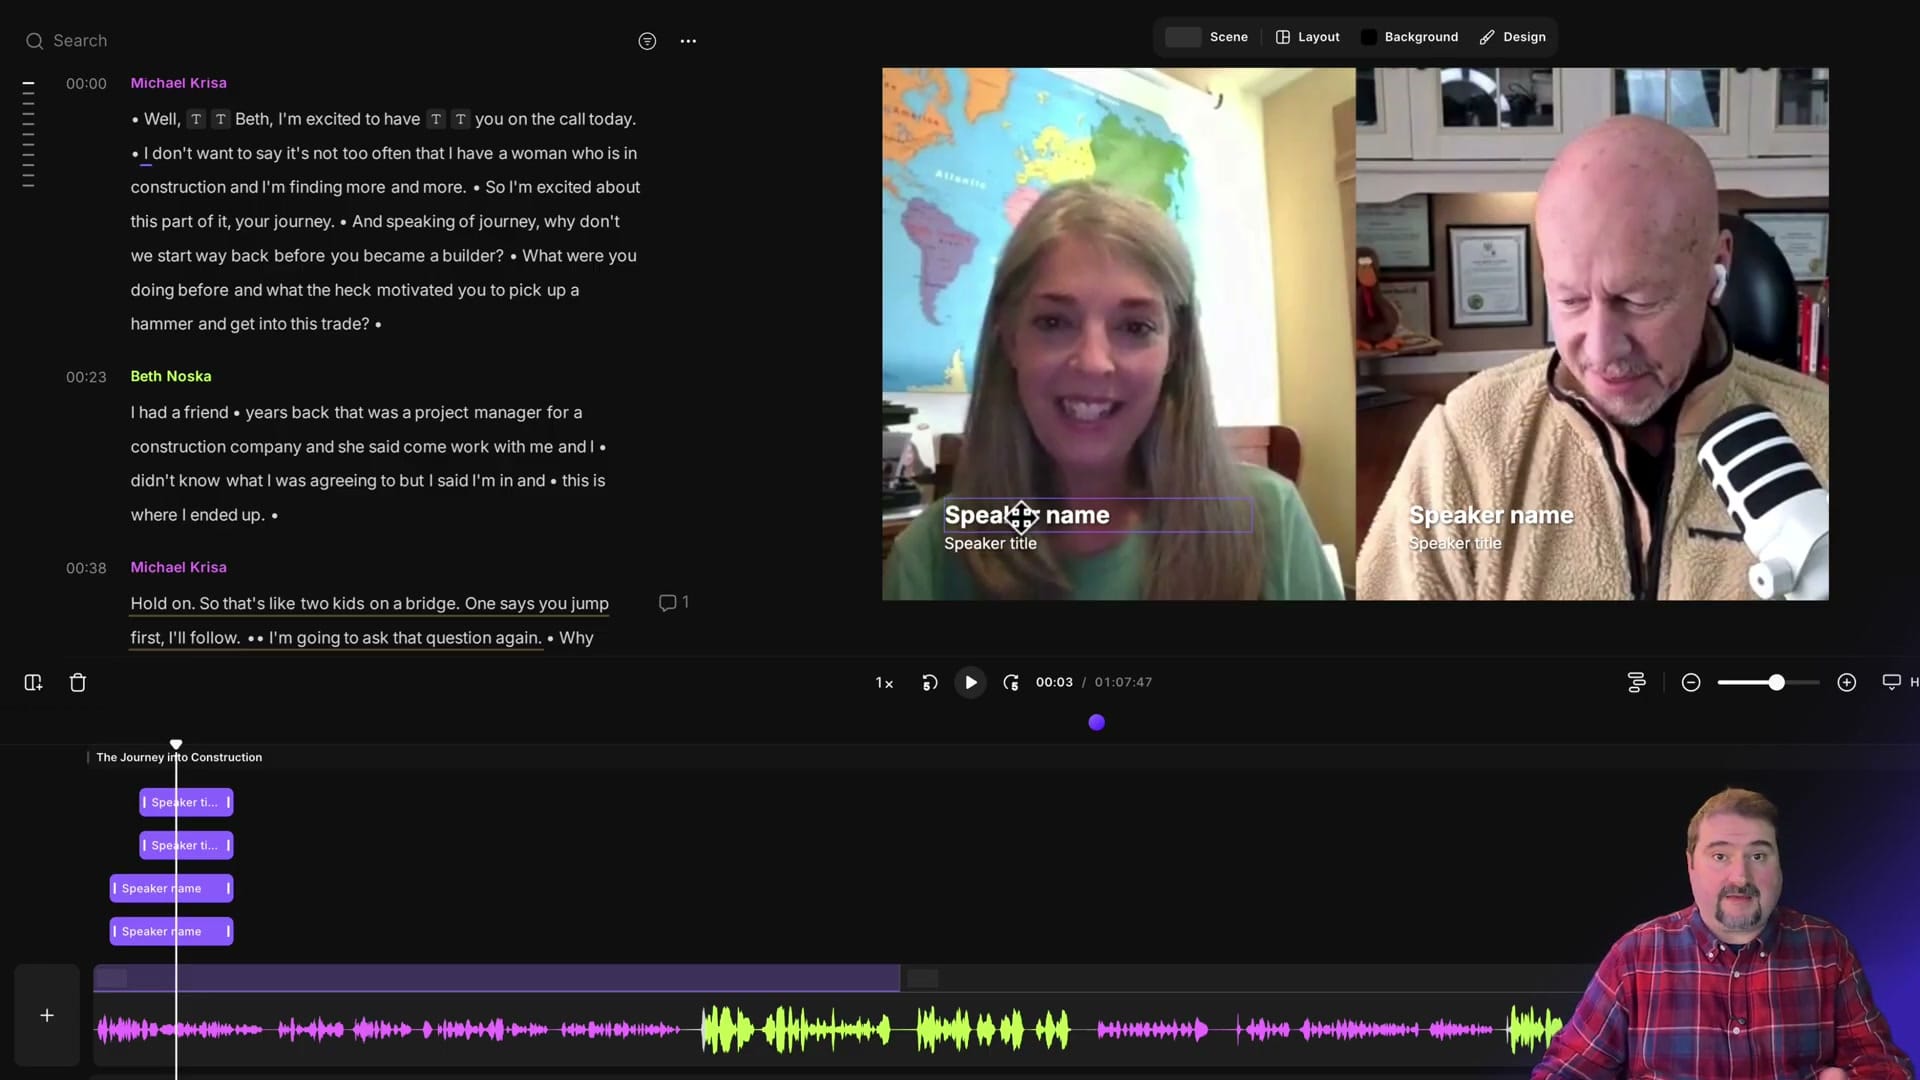
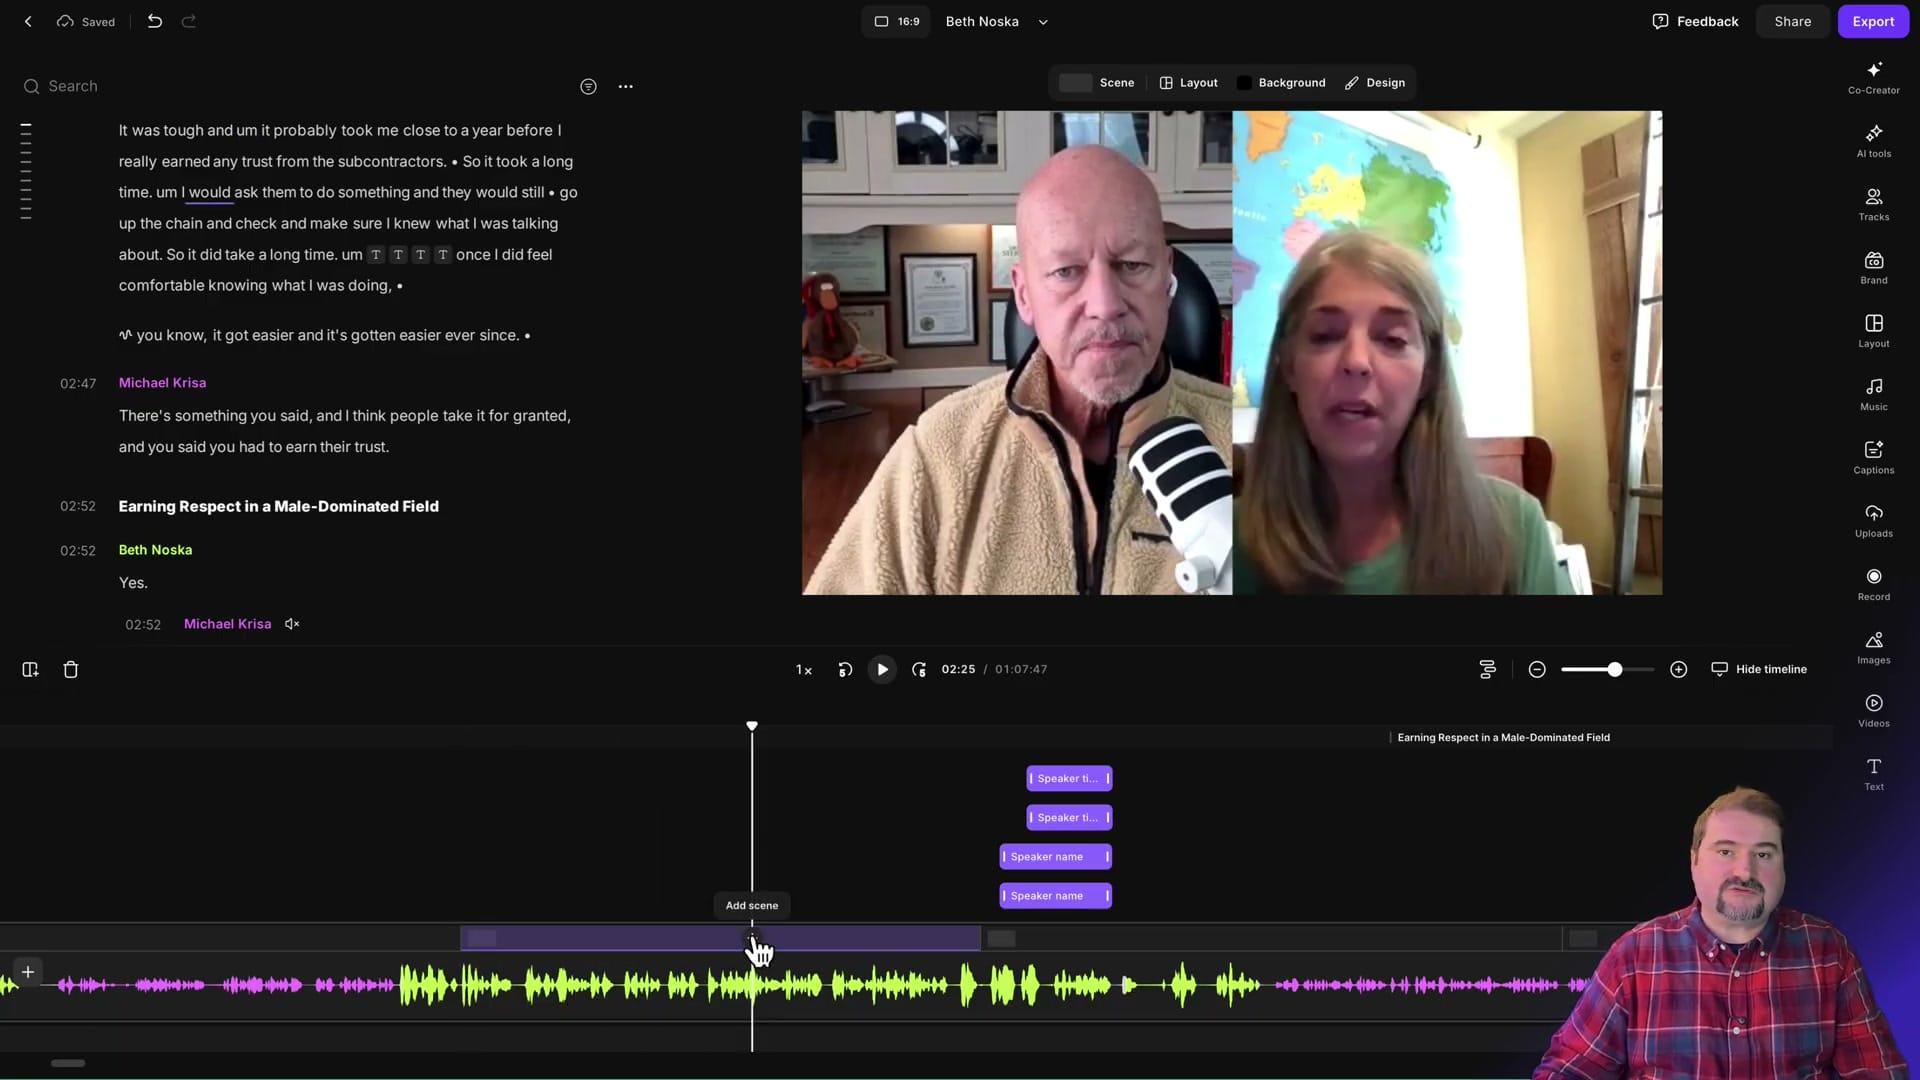
Working with Scenes on the Timeline
Scenes in Riverside work like chapters — each scene can have a different layout. On the timeline, you can see your scenes as labeled sections. To add a new scene at a specific point, position the playhead where you want the scene change, then use the "Add scene" option.
This is especially useful for podcasts where you want to:
- Show the guest solo when they're telling a story
- Switch to side-by-side during conversation
- Feature the host for intro and outro segments
Saving Your Own Scene Templates
Once you've designed a scene layout you like — with your brand colors, speaker positioning, overlays, and styling — you can save it as a custom scene for reuse.
Go to the My Scenes tab in the Scenes panel. Your saved scenes appear as thumbnails. Click any saved scene to apply it to the current section of your edit.
Templates with Brand Kit Integration
Templates work alongside Riverside's brand kit. When you apply a template, you can customize it with your brand elements — then use "Edit your brand" at the top of the Templates panel to update colors, fonts, and logos that apply across all templates.
Tips for Using Scene Templates Effectively
- Create a standard set — Save 3-4 go-to scenes (intro, conversation, solo guest, outro) that match your brand
- Apply to similar scenes — Use the "This scene" and "Similar scenes" options to apply layouts consistently
- Combine with per-scene captions — Different scene layouts may need different caption positioning
- Use the Tracks panel — Toggle individual speaker tracks on/off to control which speakers appear in each scene
Try It Yourself
Scene templates are one of the biggest time-savers in Riverside's editor. Instead of manually positioning speakers and adding overlays for every episode, set up your templates once and apply them with a click. Try Riverside and start building your template library.
If you’re eager to learn more about Riverside and wish to have a one-on-one Riverside coaching session, feel free to book a call with me.
I’m here to help you with any questions you have and to guide you through the best workflows, tips, workarounds, or just answer any questions you may have!