Riverside Timeline Shortcuts: Jump to Start, Jump to End, Zoom and Scroll

You may have noticed a small improvement in the Riverside editor: Jump to Start and Jump to End buttons on the timeline. They don't sound like a big deal, but editors have asked for them for a long time, and I was honestly surprised they weren't there before.
In this guide I'll show you how to use the new buttons and their keyboard shortcuts, plus the two mouse wheel shortcuts I use constantly to zoom and scroll the timeline. If you edit with a mouse that has a scroll wheel (and if you don't have one, I strongly recommend getting one), these shortcuts will get you where you need to be in your edit much faster.
Jump to Start and Jump to End
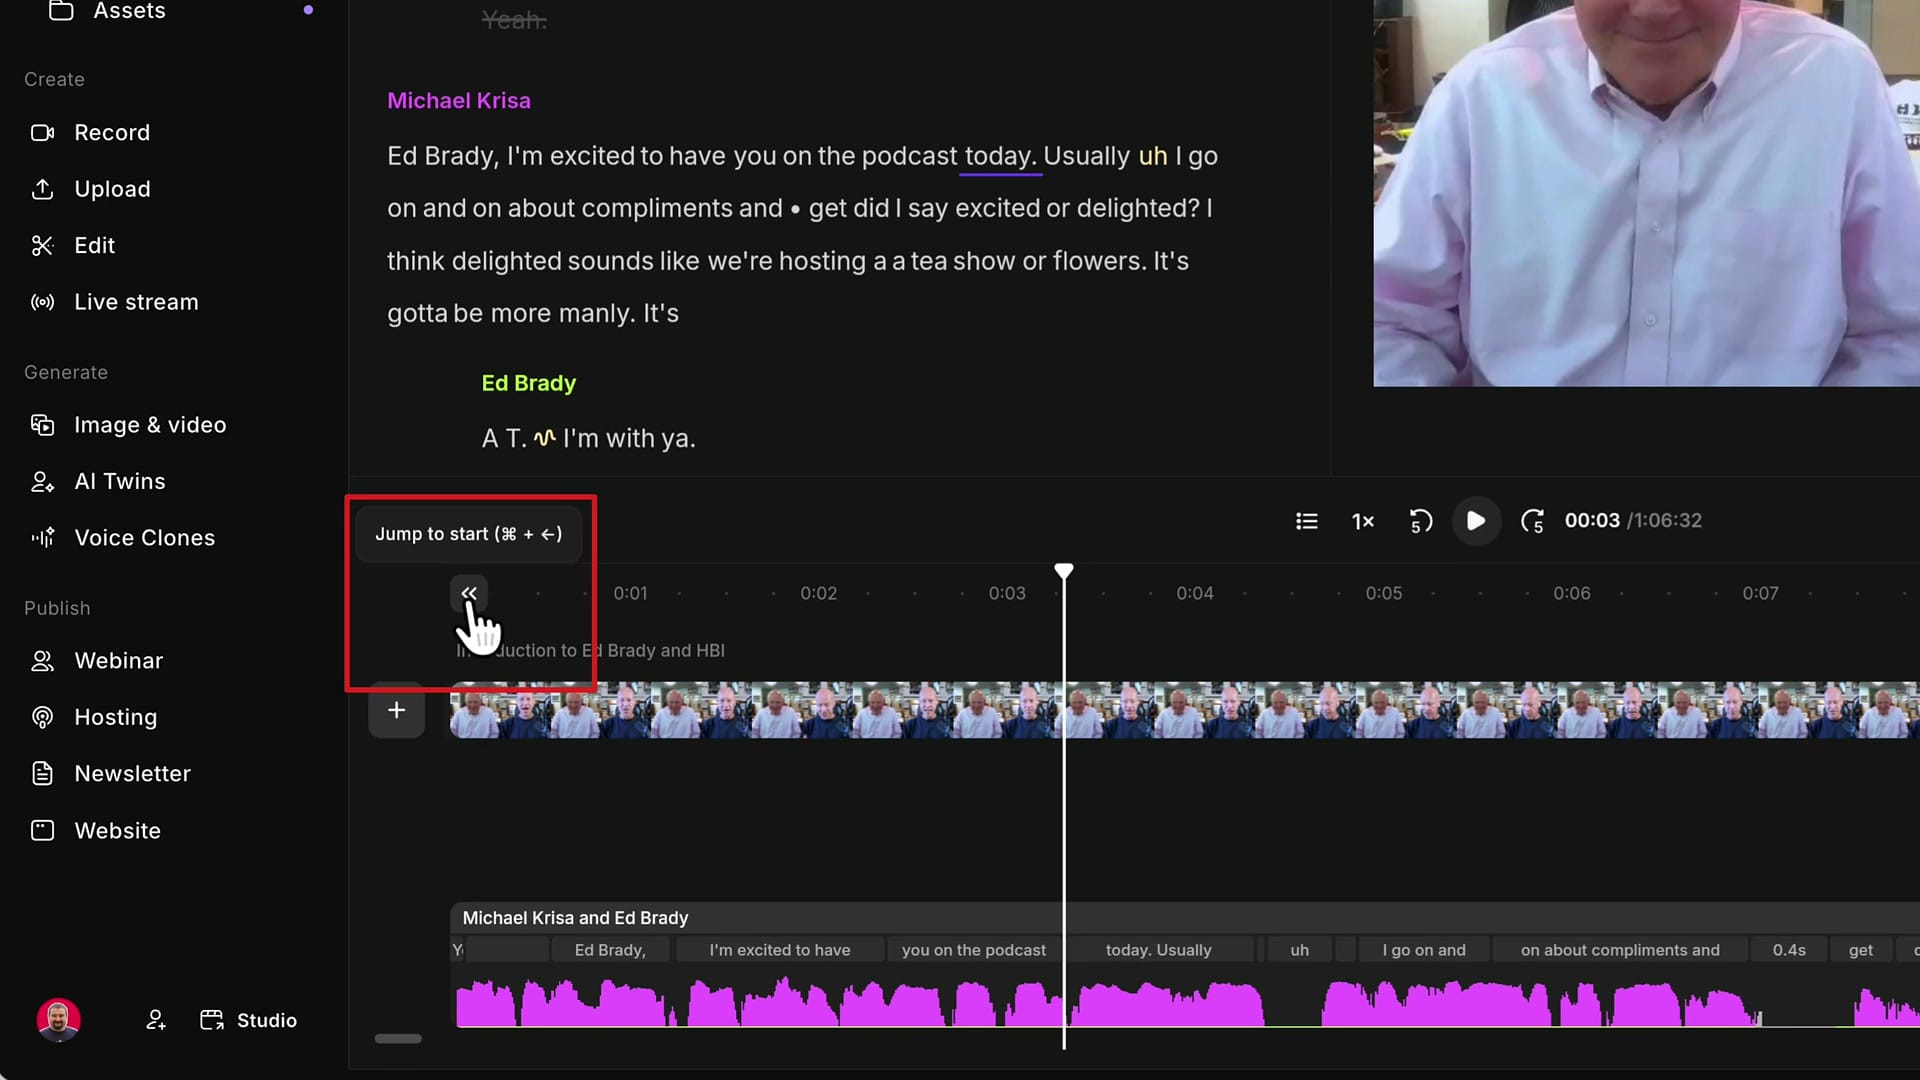
Open your edit and look at the timeline at the bottom of the editor. You can expand it or collapse it as usual. On the far left, just above the tracks, there is now a small double-arrow button. Hover over it and the tooltip reads Jump to start.
Move somewhere else in your edit, zoom out if you like, and click that button. The playhead goes straight to the very beginning of your edit. On the top right of the timeline there's a matching button that takes you to the very end, in one click.
The Mac and Windows Shortcuts
You don't have to click the buttons if you prefer the keyboard:
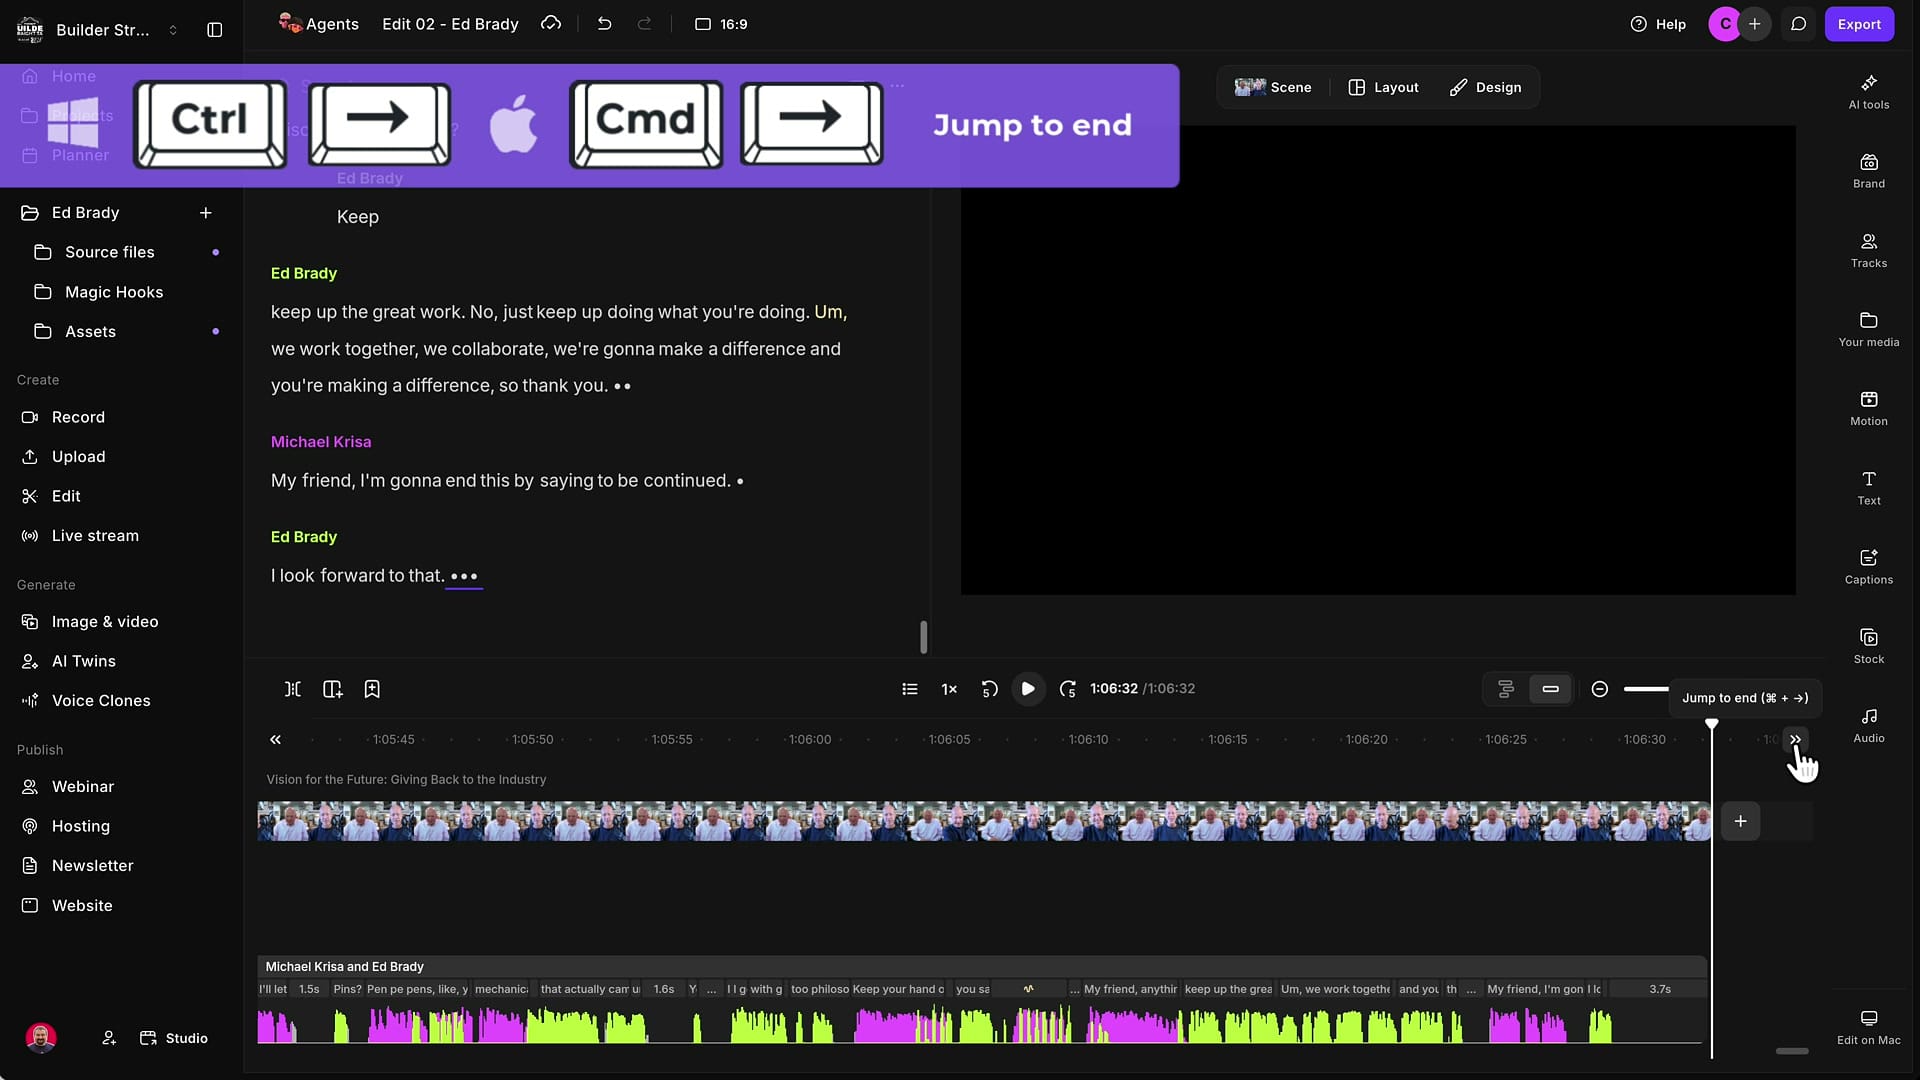
- Jump to start: Command + Left Arrow on Mac, Ctrl + Left Arrow on Windows.
- Jump to end: Command + Right Arrow on Mac, Ctrl + Right Arrow on Windows.
Press the shortcut from anywhere in your edit and the playhead jumps to the beginning or the end immediately.
Zoom with the Timeline Zoom Controls
Jumping to the ends is only half of navigating a timeline. The other half is getting to a specific spot in the middle of a long episode. For that I keep my hands on two keys and the mouse wheel almost all the time while I edit.
First, let's look at zooming. Riverside has zoom controls on the top right of the timeline. Click the minus button and the timeline gets smaller, so you can see more of the episode. Click the plus button and it zooms in.
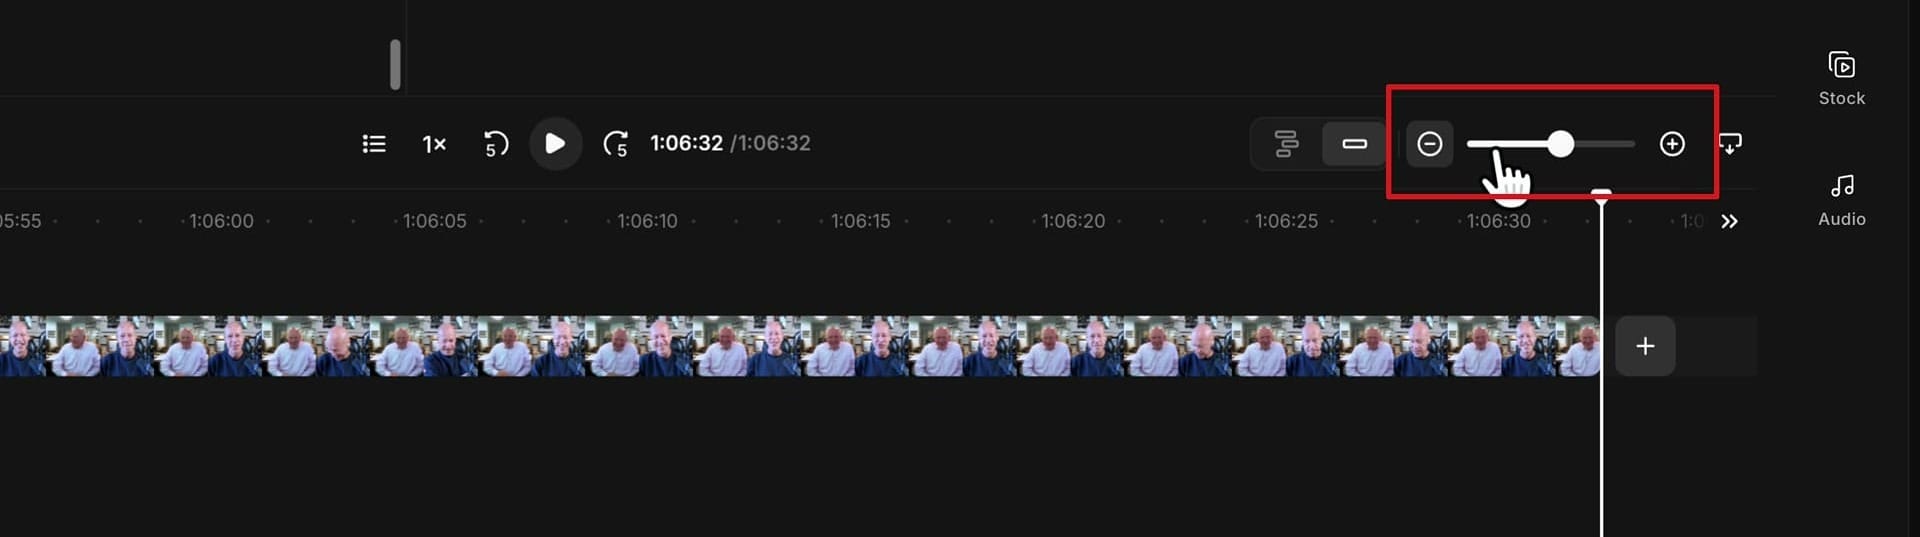
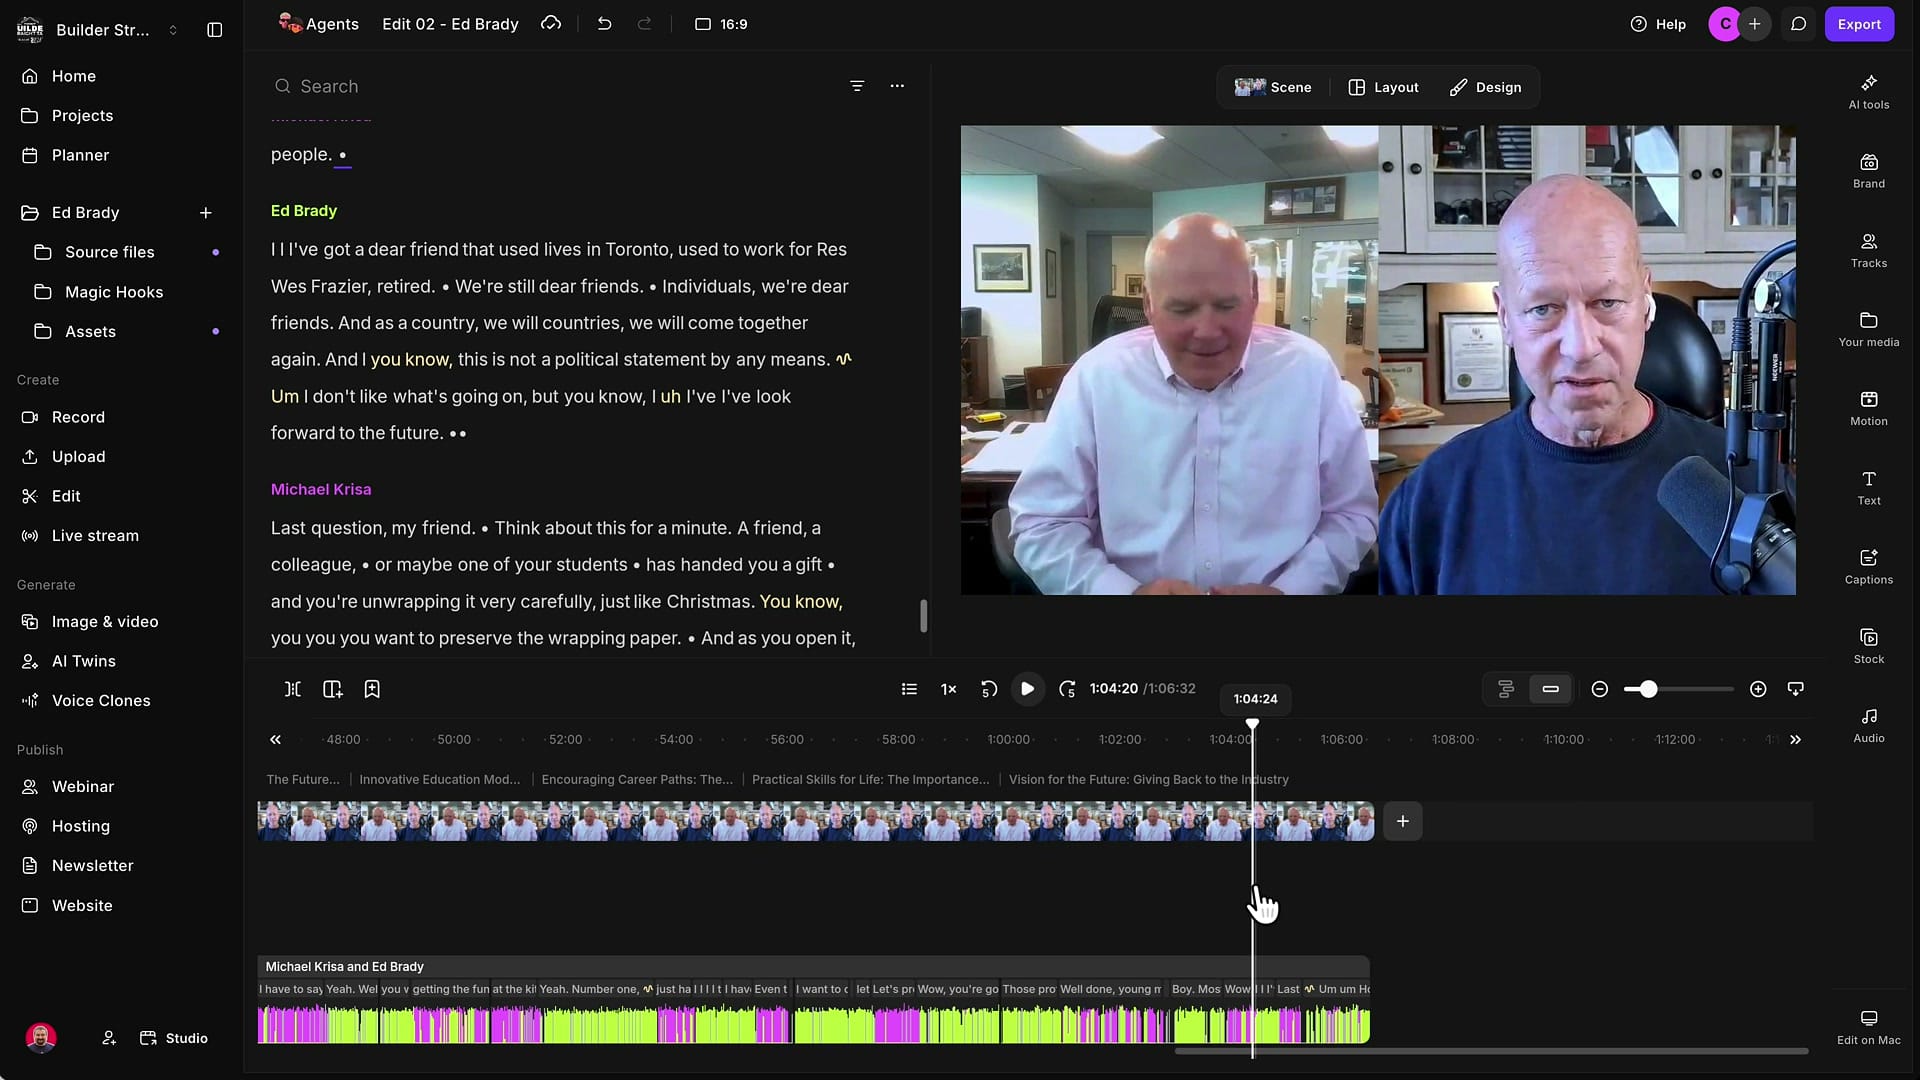
There's a catch: this zoom happens around the playhead, the white line with the marker on top. If I drag the playhead to a new spot and then click plus or minus, Riverside centers the playhead and zooms in on that location. That's handy if you're playing back and want a closer look at where you are right now.
Zoom Where Your Mouse Is Hovering
But what if you want to zoom in somewhere else? Say the playhead is near the end of the edit, and I've spotted a crowded section of purple and green further back that I want to inspect. Moving the playhead there first is an extra step I don't need.
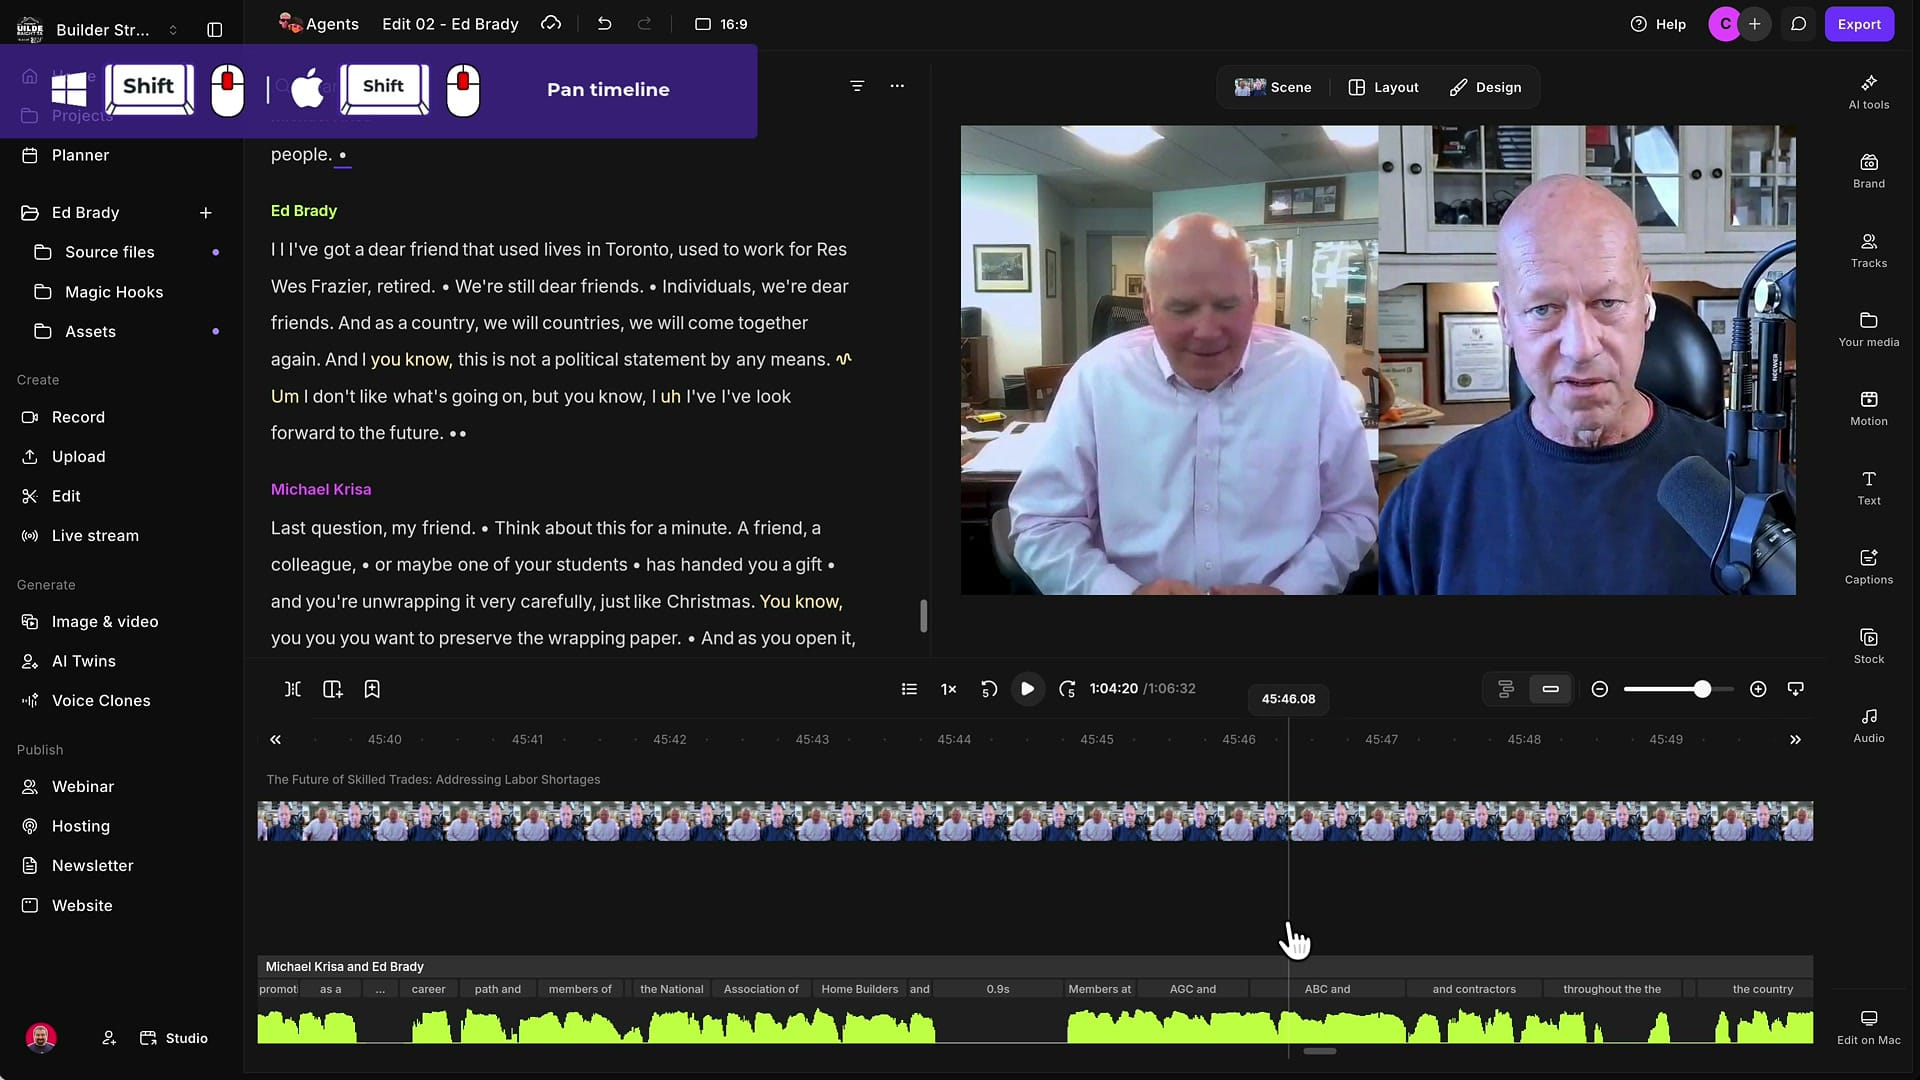
When you move your mouse over the timeline, a faint line follows your cursor around, with a small timestamp above it. Bring that line to the spot you're interested in. You don't need to click.
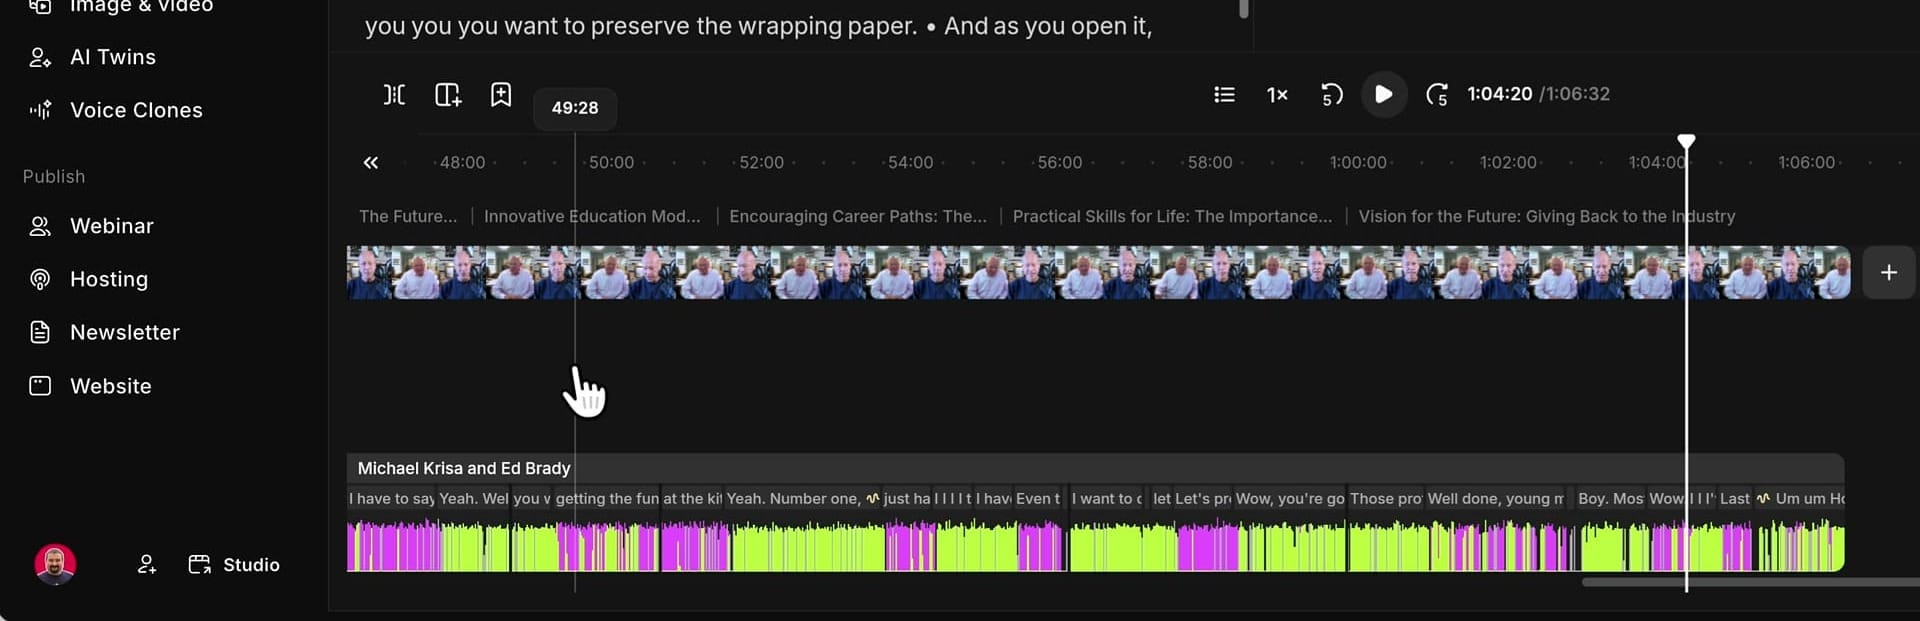
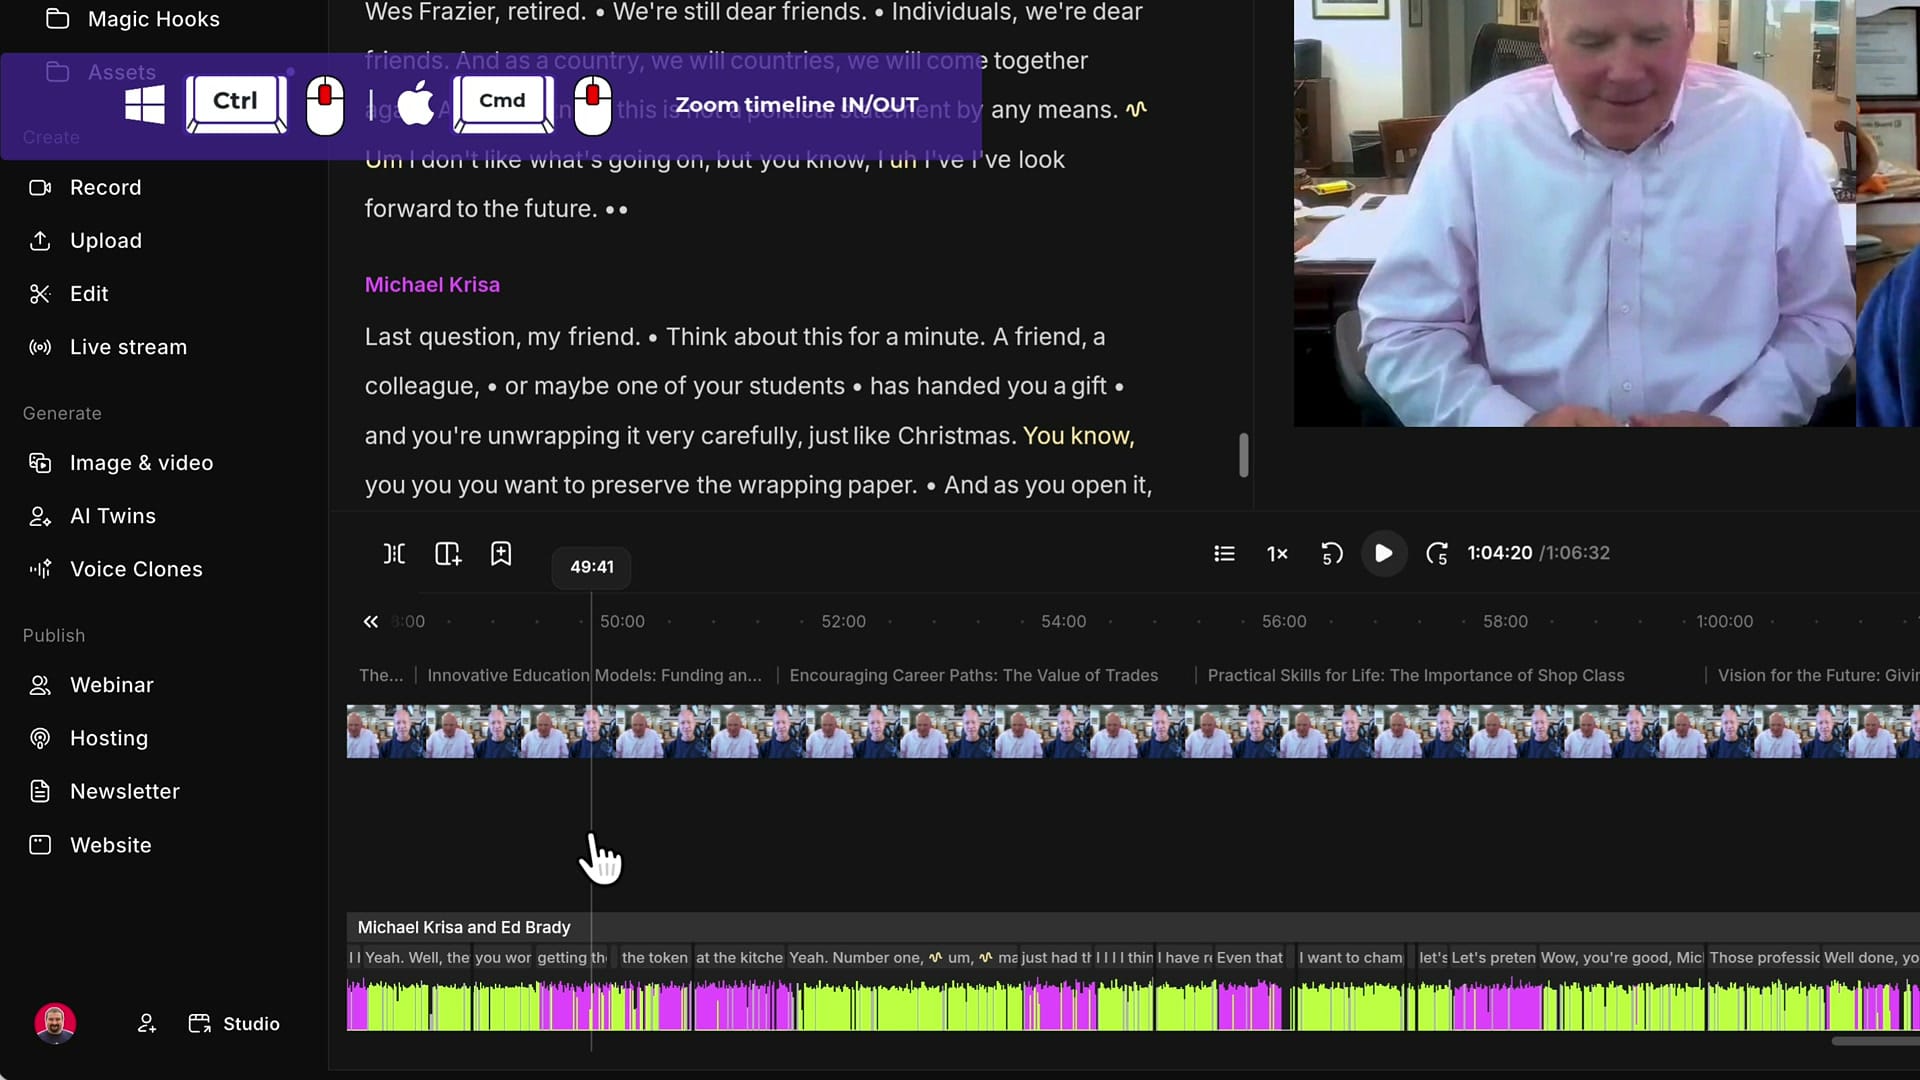
Now hold down Command on Mac or Ctrl on Windows, and spin the mouse wheel forward. The timeline zooms in right where your mouse is hovering. Keep holding the key and pull the wheel back to zoom out again. You can go all the way out like this and see the entire timeline, then zoom straight back in on any other spot.
Scroll Left and Right with Shift
Once you're zoomed in, the next question is how to move left and right. There is a scroll bar at the very bottom of the timeline, but it's small and hard to see. You can grab it and drag, but when you're zoomed in close it's very sensitive. Move it a little and you've jumped way too far, with no idea where you are.

The better way is the second shortcut: hold Shift (same key on Mac and Windows) and spin the mouse wheel. The timeline scrolls smoothly left and right at a pace you can follow, so you always know where you are.
If you’re eager to learn more about Riverside and wish to have a one-on-one Riverside coaching session, feel free to book a call with me.
I’m here to help you with any questions you have and to guide you through the best workflows, tips, workarounds, or just answer any questions you may have!
Combine Zooming and Scrolling
Put the two together and you can move around a long edit very quickly: Command or Ctrl plus the wheel to zoom in and out, Shift plus the wheel to scroll left and right. Most video editing software has supported these shortcuts for a long time, and so has Riverside. If you want more detail on these two, I wrote a full guide on how to zoom and pan the Riverside timeline with your mouse.
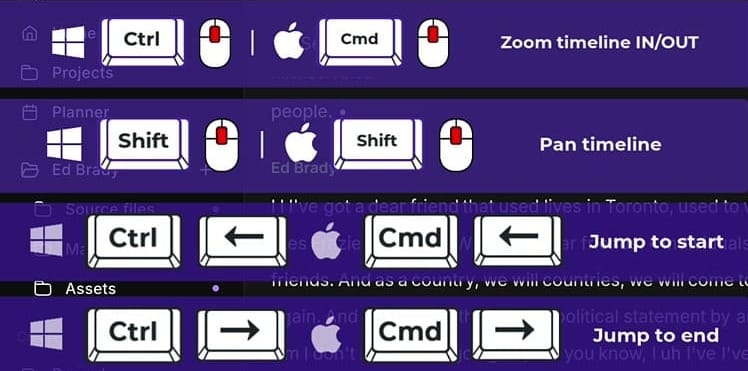
What's new is the jump to the beginning and end of your edit. Add those two shortcuts and you can move between any parts of your edit in seconds. Here are all four:
- Zoom in and out: Command (Mac) or Ctrl (Windows) + mouse wheel
- Scroll left and right: Shift + mouse wheel
- Jump to start: Command or Ctrl + Left Arrow
- Jump to end: Command or Ctrl + Right Arrow
I use these all the time and they save me a lot of time, especially when I'm doing precision editing on a long episode. If you're still getting used to the redesigned Riverside editor, these four shortcuts are a good place to start.
If you'd like to learn Riverside with me one-on-one, I offer coaching sessions where I'm happy to answer all your questions.
Related guides
 Cristi Cotovan
 Cristi Cotovan
 Cristi Cotovan
 Cristi Cotovan
 Cristi Cotovan
If you're eager to learn more about Riverside and wish to have a one-on-one Riverside coaching session, feel free to book a call with me. I'm here to help you with any questions you have and to guide you through the best workflows, tips, workarounds, or just answer any questions you may have!