Riverside's New Editor: A Complete Walkthrough of the Redesigned Workspace
A full tour of Riverside's rebuilt editor: the new project sidebar, resizable panels, AI workflow toggles, version history, free-form layouts, the frame-accurate timeline, transcript corrections, motion graphics, and the new music library.

Riverside has rebuilt its editor, and the headline change is not a single feature — it is the whole workspace. The old editor could feel slow and cramped: I would reload the page more often than I want to admit, and jumping between edits meant leaving the editor entirely.
The rebuilt one is quick, and almost everything I used to leave the editor for now lives inside it.
Below is the full tour: where every panel lives, what moved, what is genuinely new, and how to set the workspace up so you have room to actually edit. If you are new to Riverside, you can try it here.
Getting into the editor
Open a project, go to the Edits tab, and click any edit. That drops you straight into the editor with the transcript, canvas, and timeline ready to go. The load is fast enough that you can treat edits as disposable — open one, look at it, jump to another — which was never really practical before.
The new sidebar puts the whole project in one place
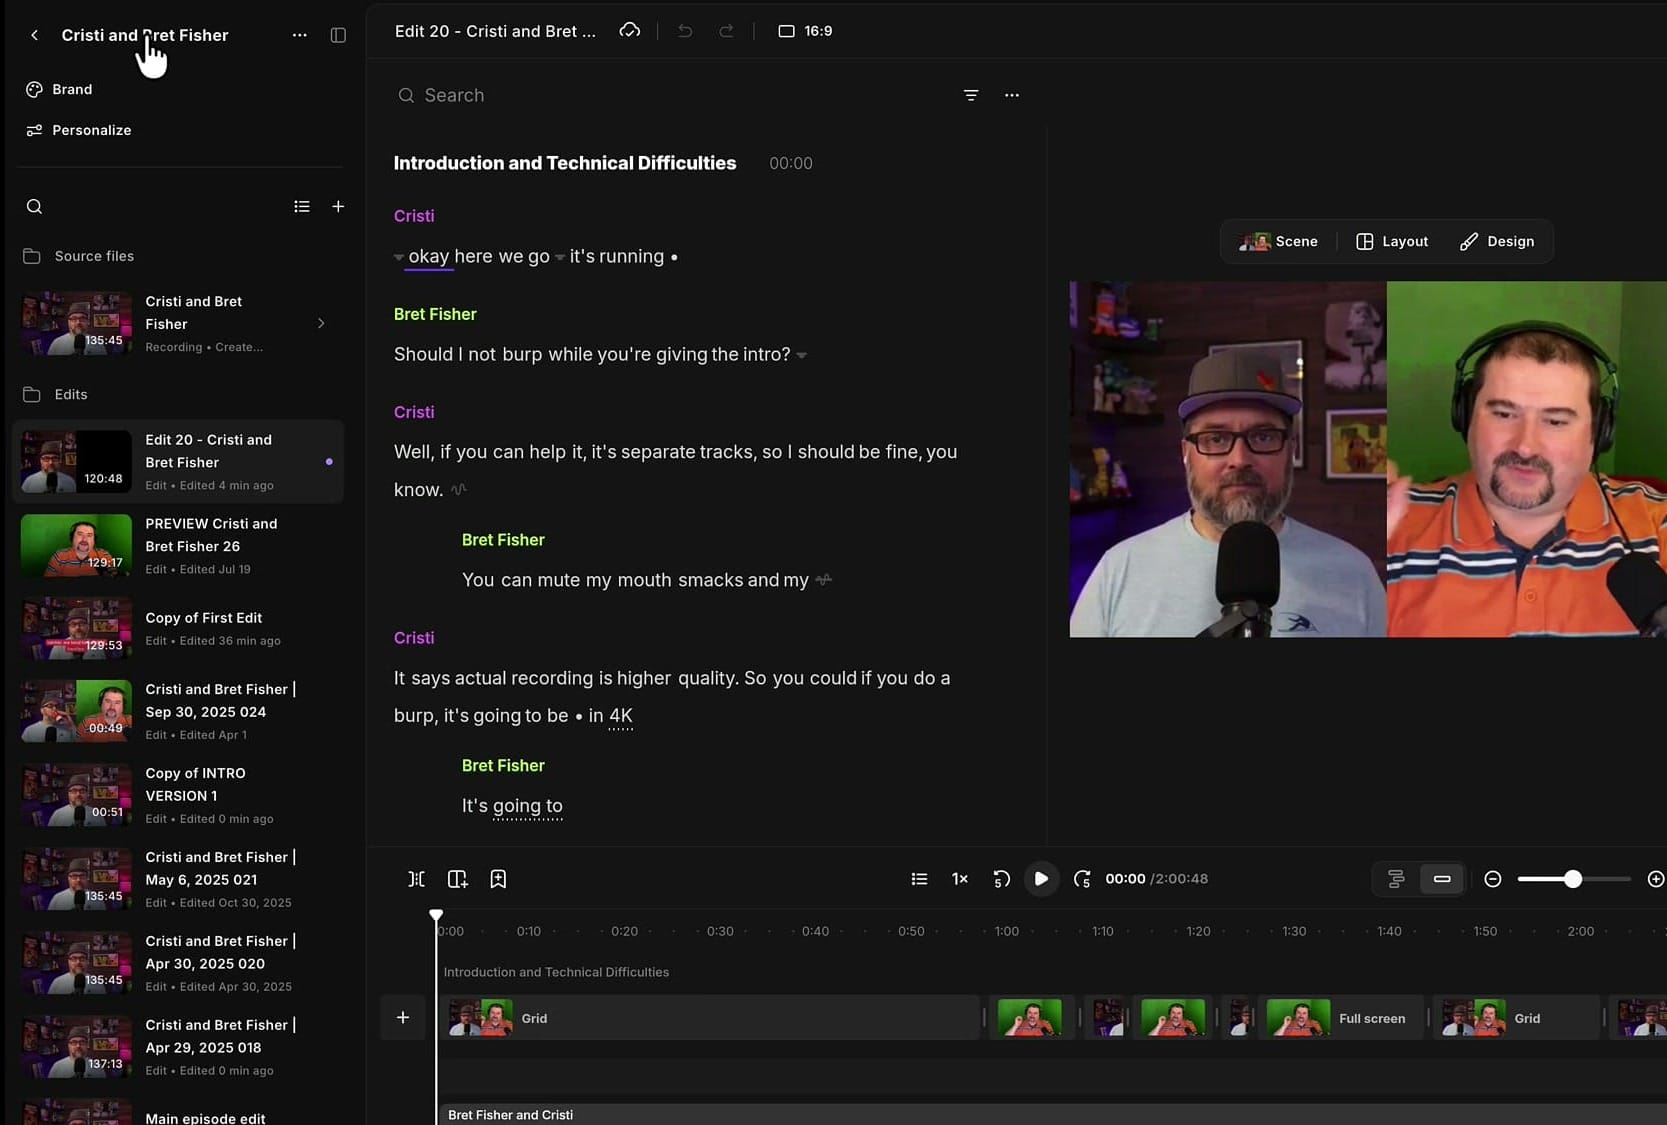
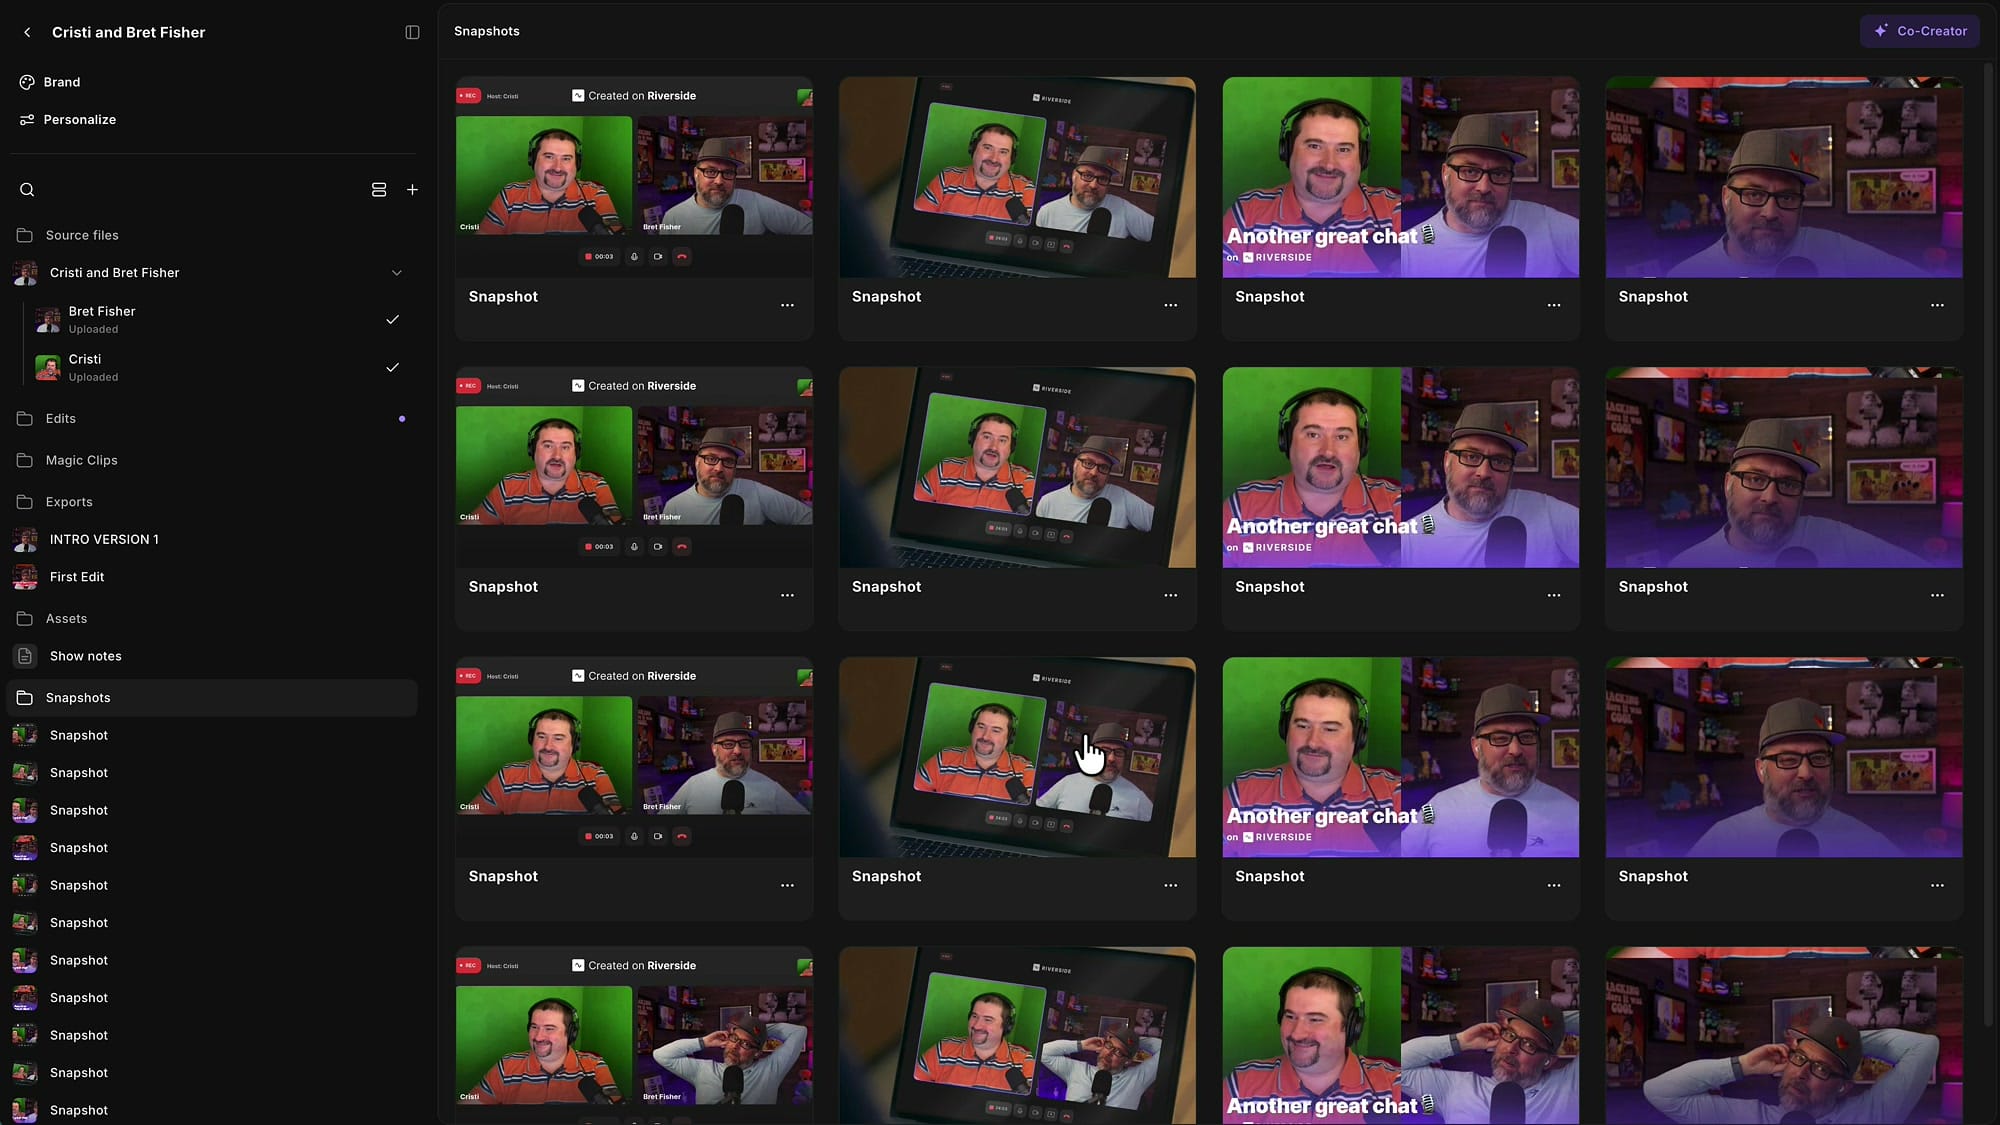
The left sidebar is the biggest structural change. It shows the project name at the top, and underneath it every asset that belongs to that project: source files, edits, Magic Clips, exports, assets, show notes, and snapshots. You no longer have to exit to the recordings tab to find a file.
Source files
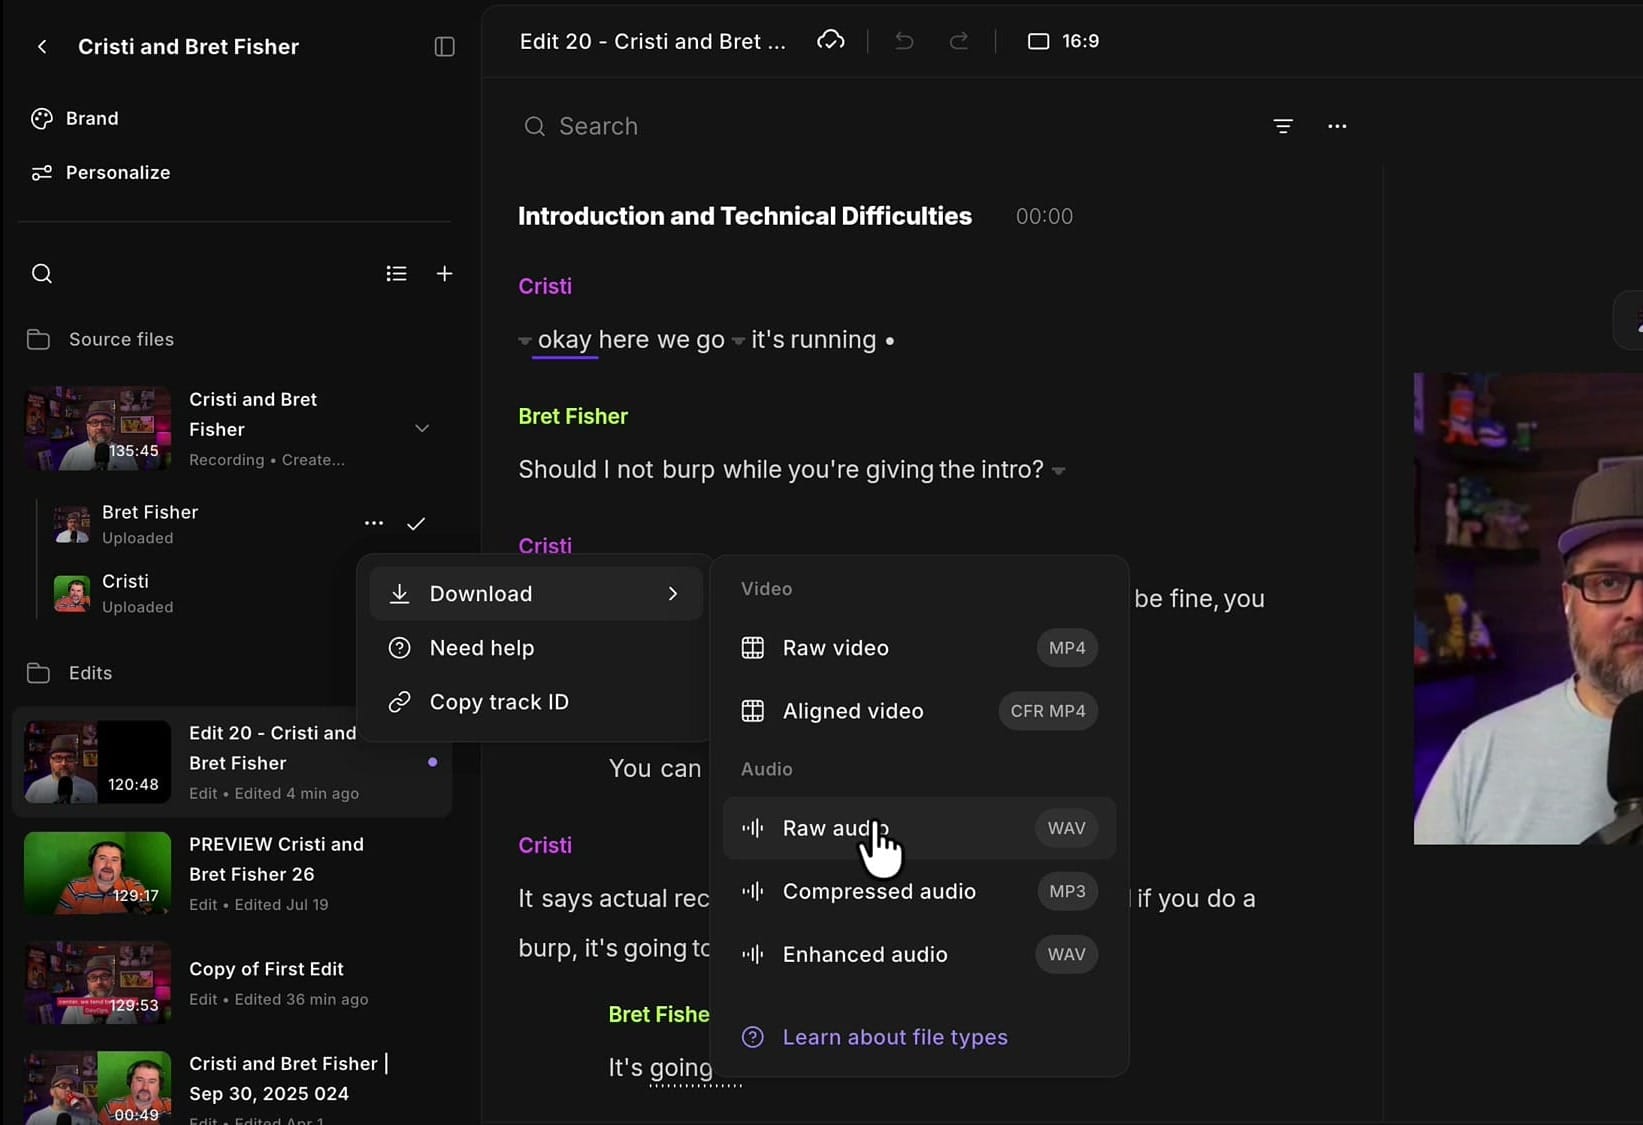
Expand a recording to see its individual tracks. Click the three dots next to a track and you can add it to the timeline, start a fresh edit from it, translate it, or rename it. The download submenu is the useful one: raw video, aligned video, raw audio, compressed audio, and enhanced audio are all one click away.
Edits
This is where you will spend most of your time. Every edit in the project is listed, regardless of type, and switching between them takes a fraction of a second. Click the Edits folder itself to see them all laid out at once.
Two habits worth building here. First, when you start a new edit — via the three dots on a source file, then Edit — it opens immediately without kicking you out of the editor. Second, rename it right away. Riverside names new edits sequentially, so you will end up with Edit 19, Edit 20, Edit 21 and no idea which was which. Right-click the entry in the sidebar, or click the name at the top, and give it something meaningful. It updates everywhere instantly.
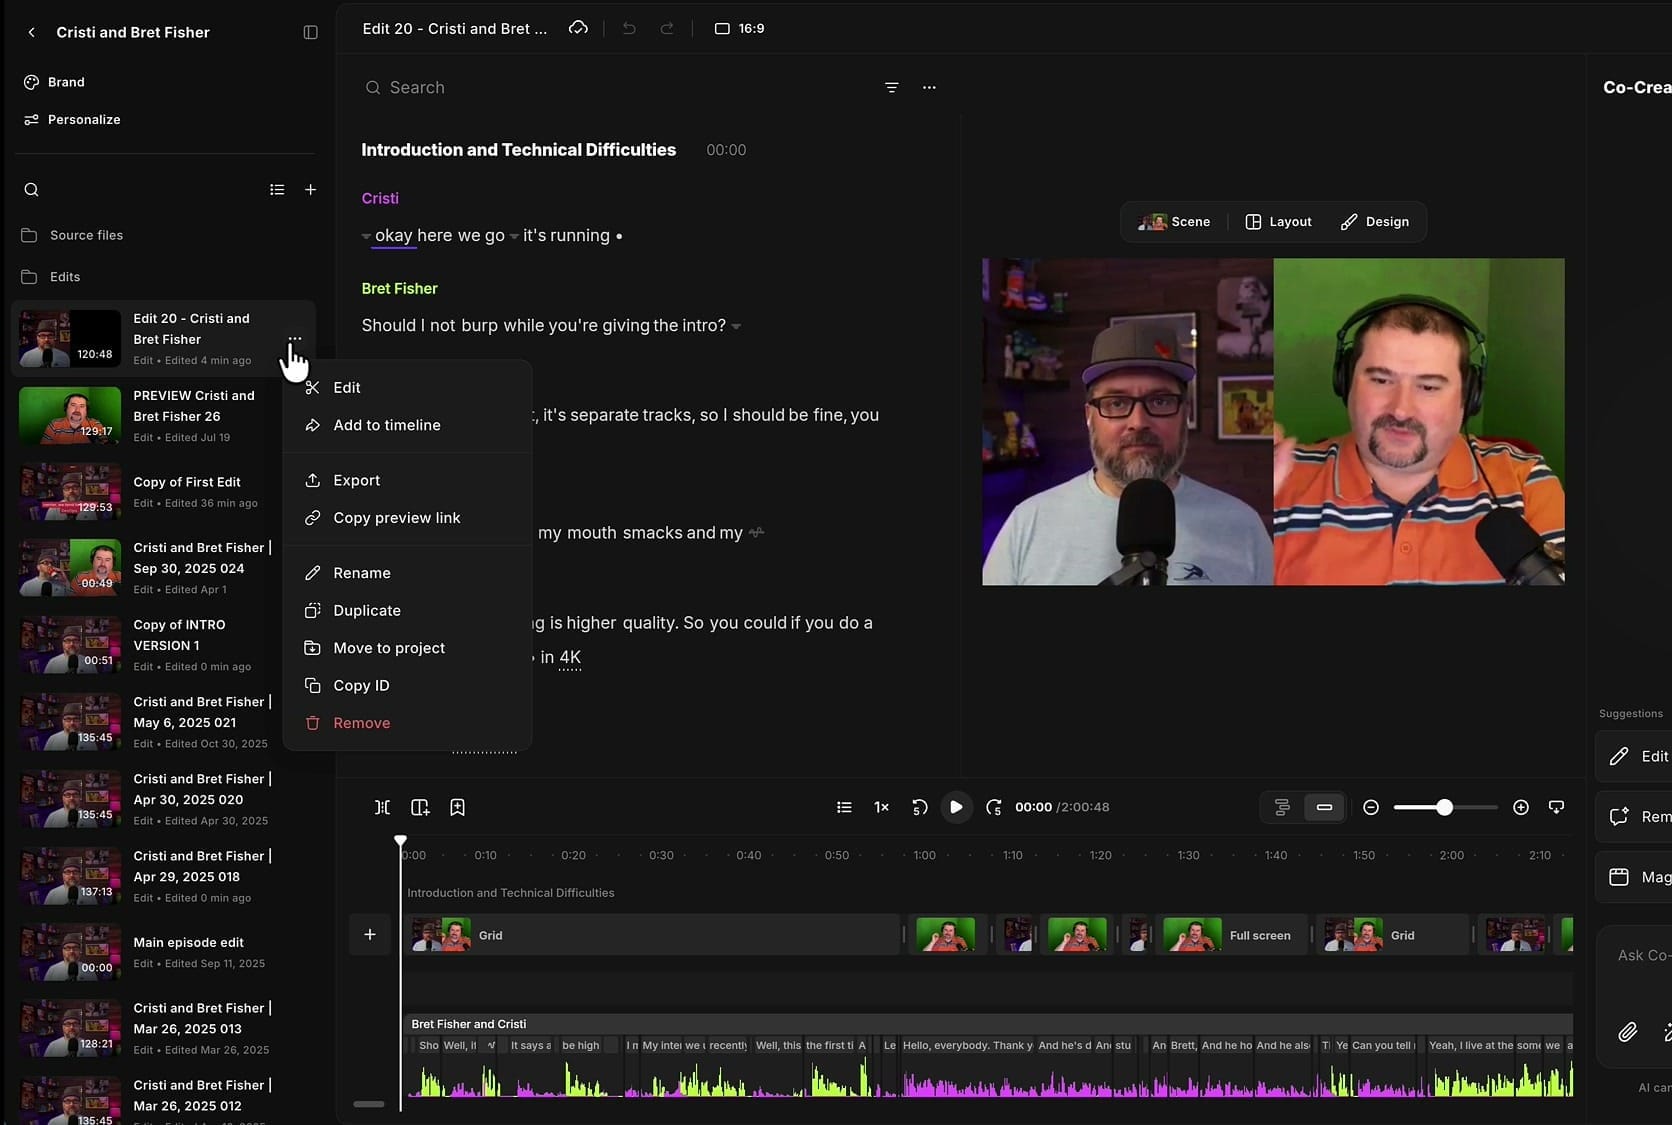
If the thumbnails take up too much room, click the three-lines icon above the list and switch to the compact list view — smaller thumbnails, more names on screen. You can also drag the sidebar wider when file names get long.
Magic Clips, exports, assets, and snapshots
Magic Clips get their own folder. Open the folder to see them all, then use the three dots on any clip to export it, copy a preview link, rename, duplicate, or move it to another project.
Exports lists every version you have rendered from the project. From each one you can share it, add it to your schedule, download the file, resume editing it, or copy a preview link. Assets holds your show notes and everything else the AI generated, and Snapshots collects the stills captured during recording.
Make room: collapse, resize, and rearrange
The old editor felt claustrophobic. This one does not have to. Use the button at the top of the sidebar to collapse it, close whichever tool panel is open on the right, and collapse the timeline from its own button. What is left is a wide-open editing area.
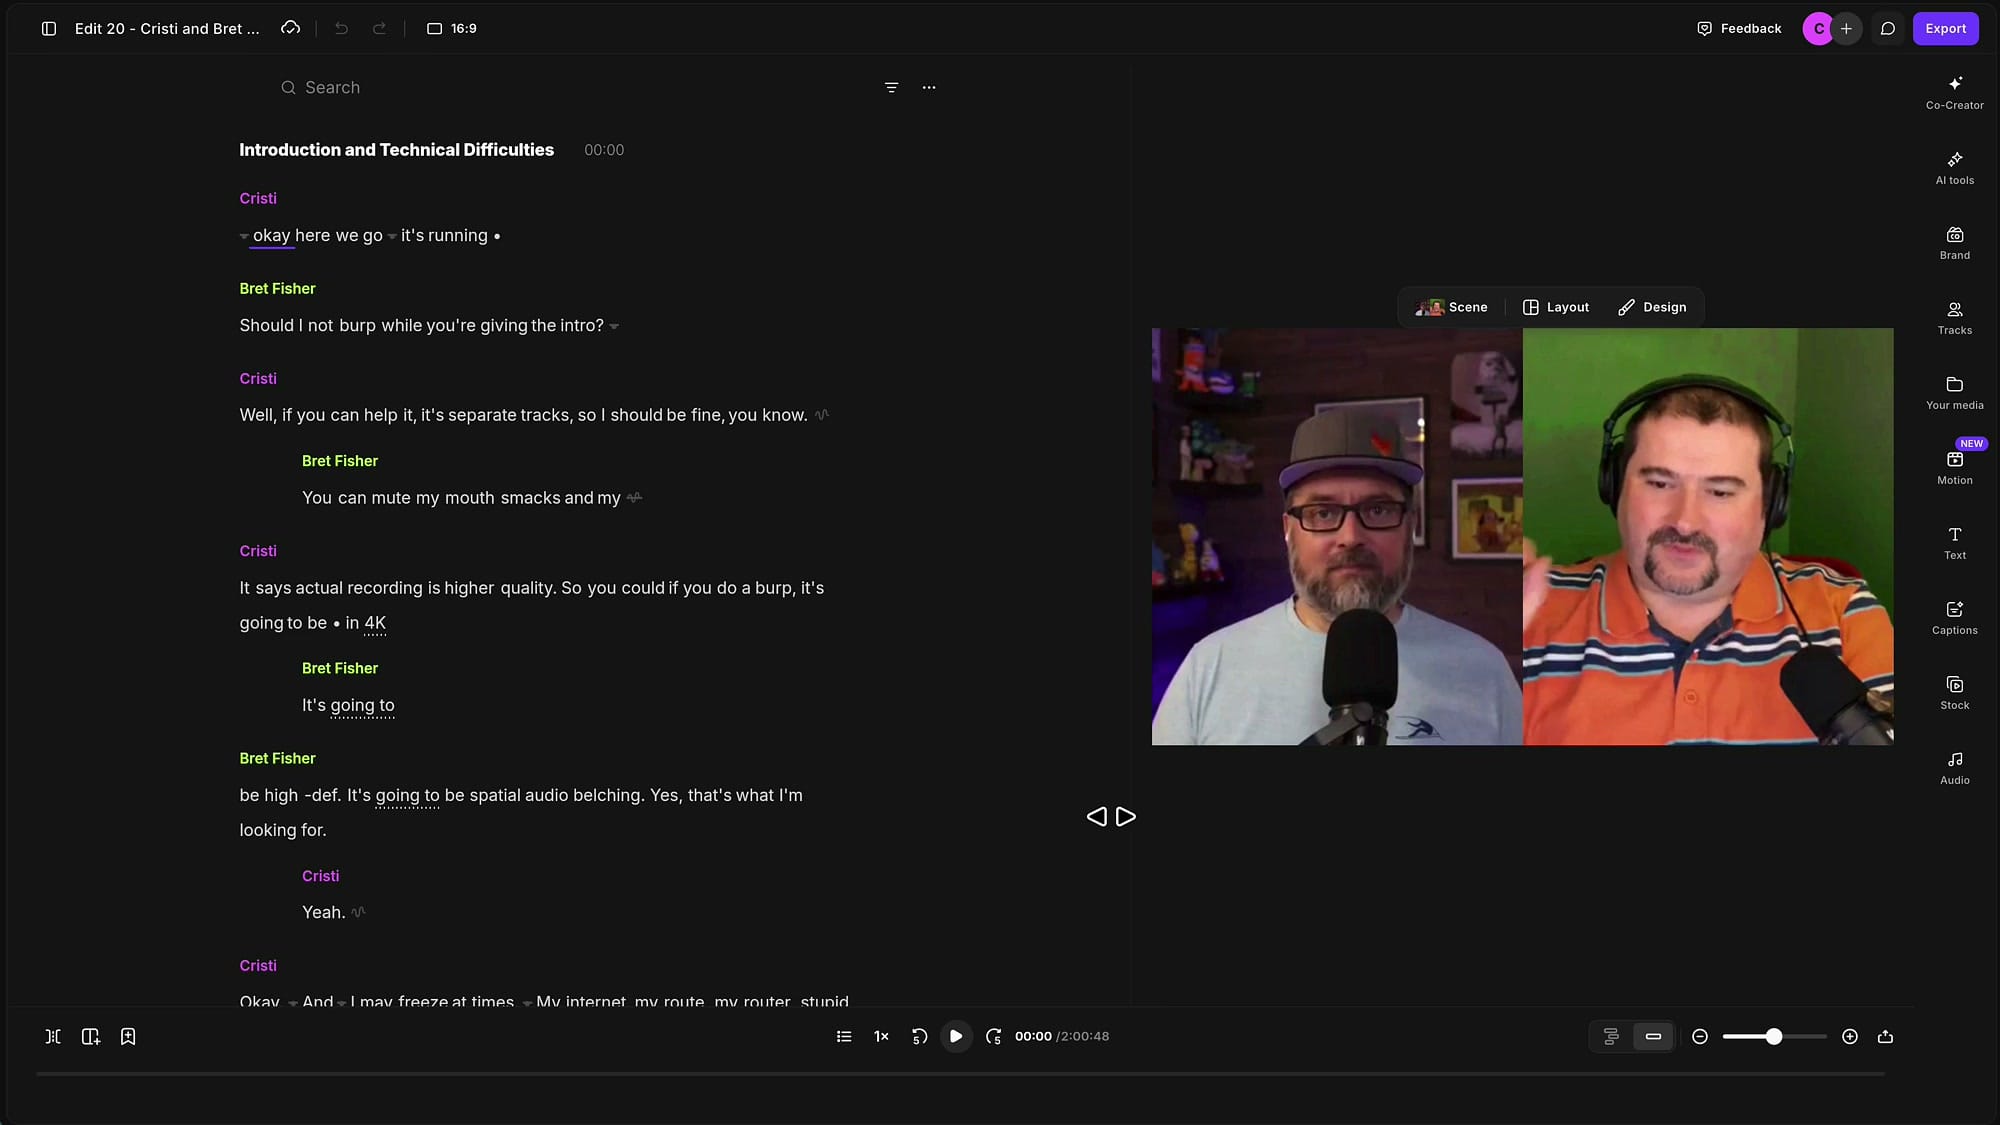
Every panel is also resizable. If you are working purely on text, shrink the video preview. If you are checking framing, make the canvas larger. And you can drag the timeline up to give it real height — worth doing, because the new timeline holds a lot more than it used to.
Turn automatic AI workflows on or off
By default, Riverside starts generating Magic Clips, Magic segments, a Magic episode, show notes, and more the moment you stop recording. Plenty of people do not want that — you would rather edit the episode first and then cut clips from the finished version.
You can now switch all of it off. At the top of the sidebar, click Personalize and open the Workflows tab. Every workflow has its own toggle.
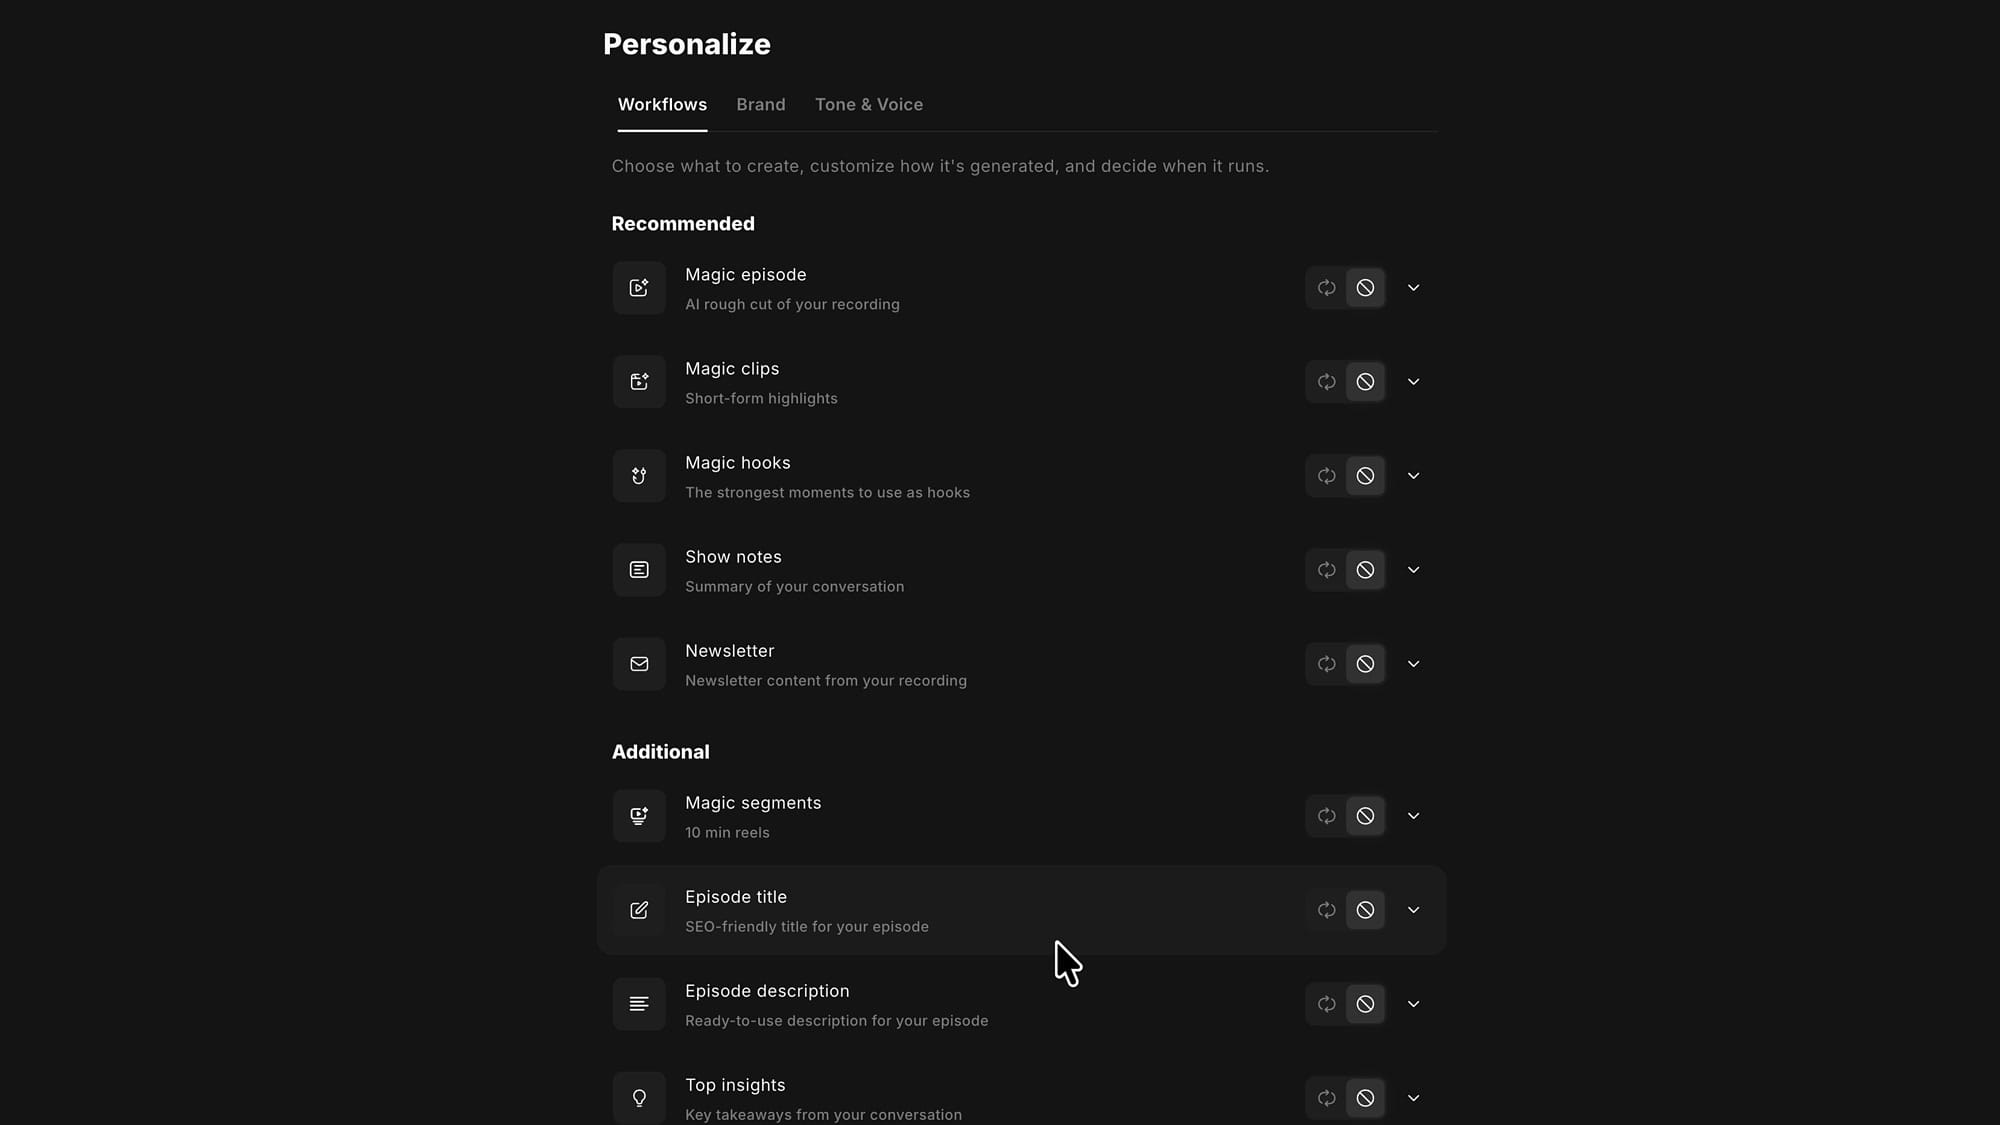
If you keep a workflow on, expand it and you can shape exactly what it produces. For a Magic episode that means ratio, layout, whether your brand gets applied, how aggressively pauses are removed, whether filler words are stripped, Smart Mute, Magic Audio, and hooks — each with its own parameters.
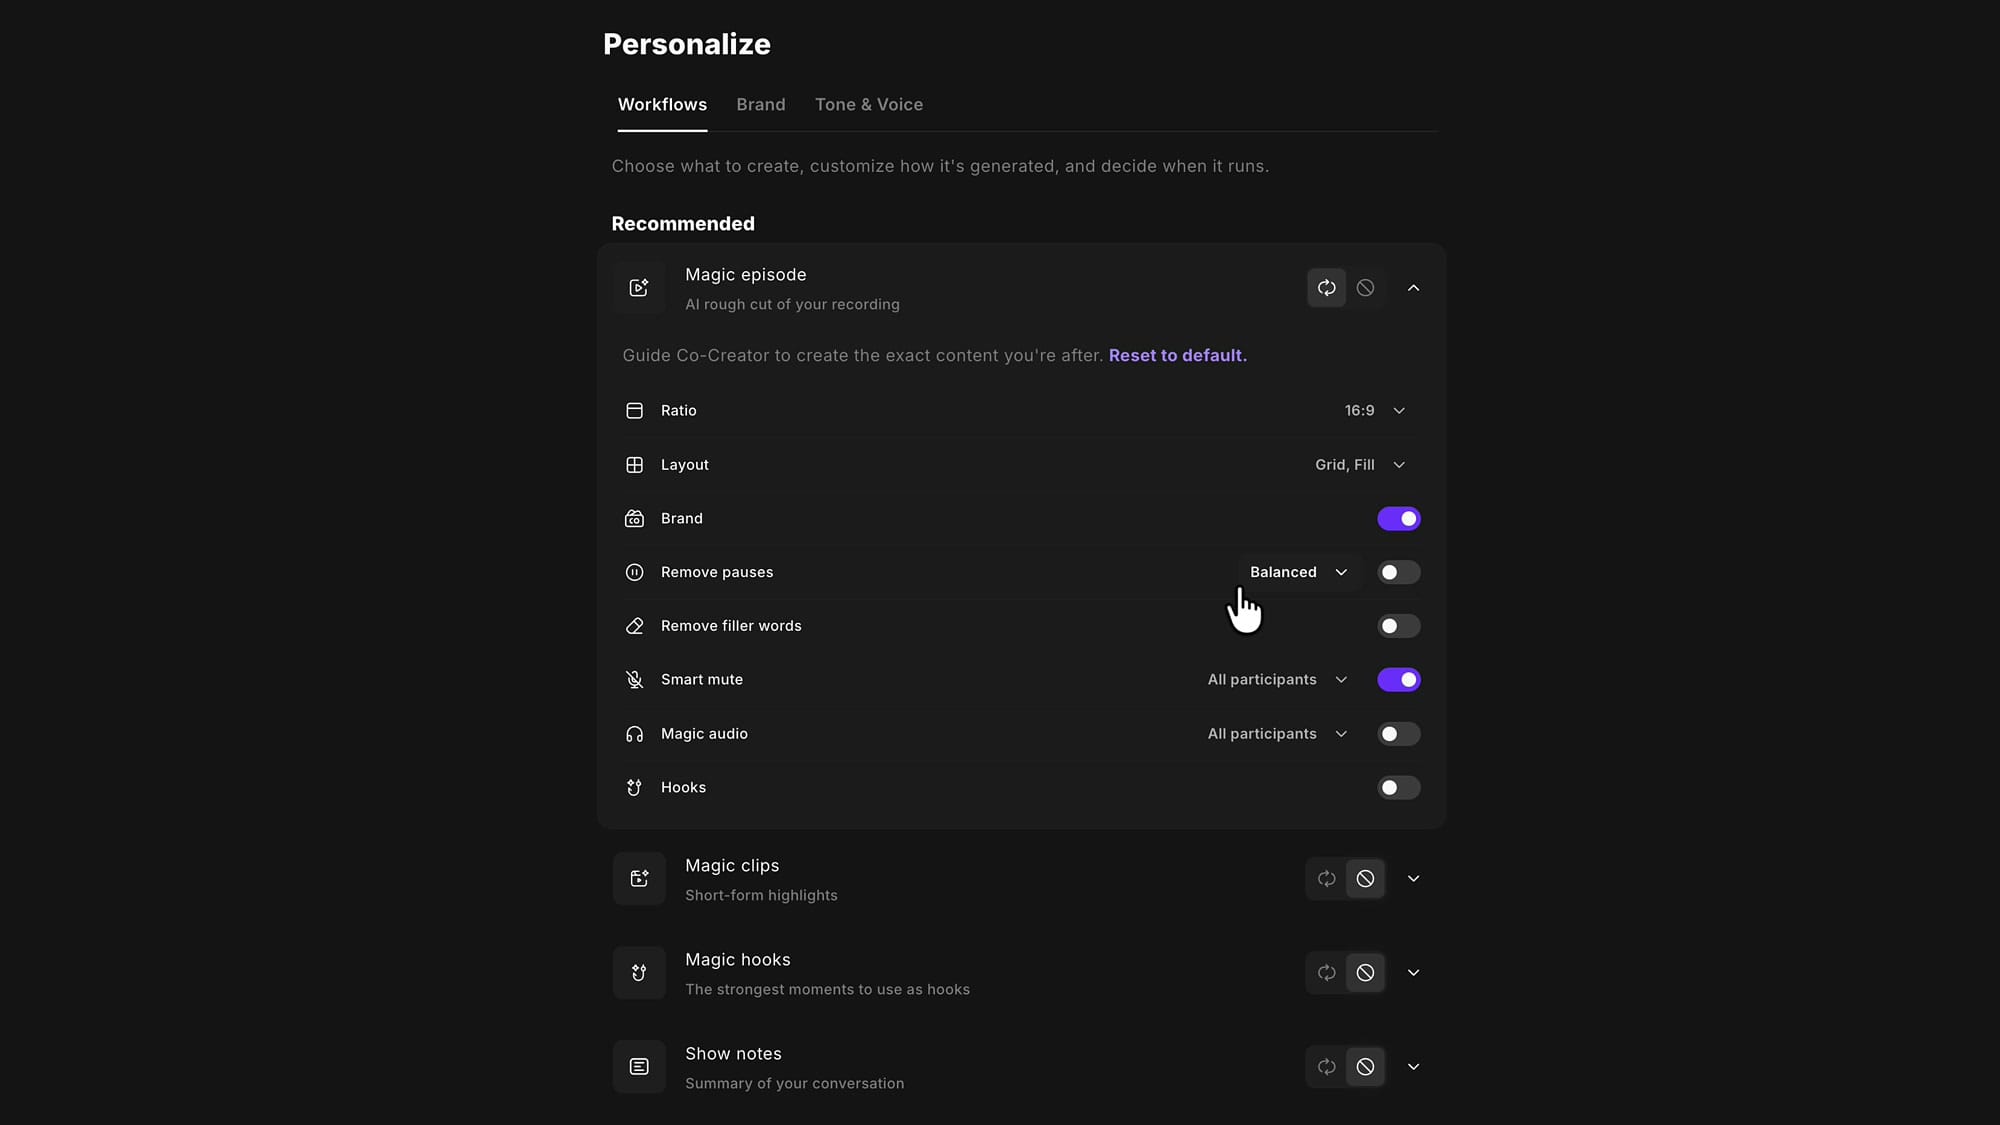
This is where the time saving lives. If you produce twenty social clips a month and apply the same four adjustments to each, define them once here and stop clicking. There is more on tailoring the AI to your own style in my guide to personalizing AI responses and automations.
Words on the timeline
Words now appear on the timeline next to the waveform. Expand the timeline, zoom in, and you will see the individual words sitting on each track.
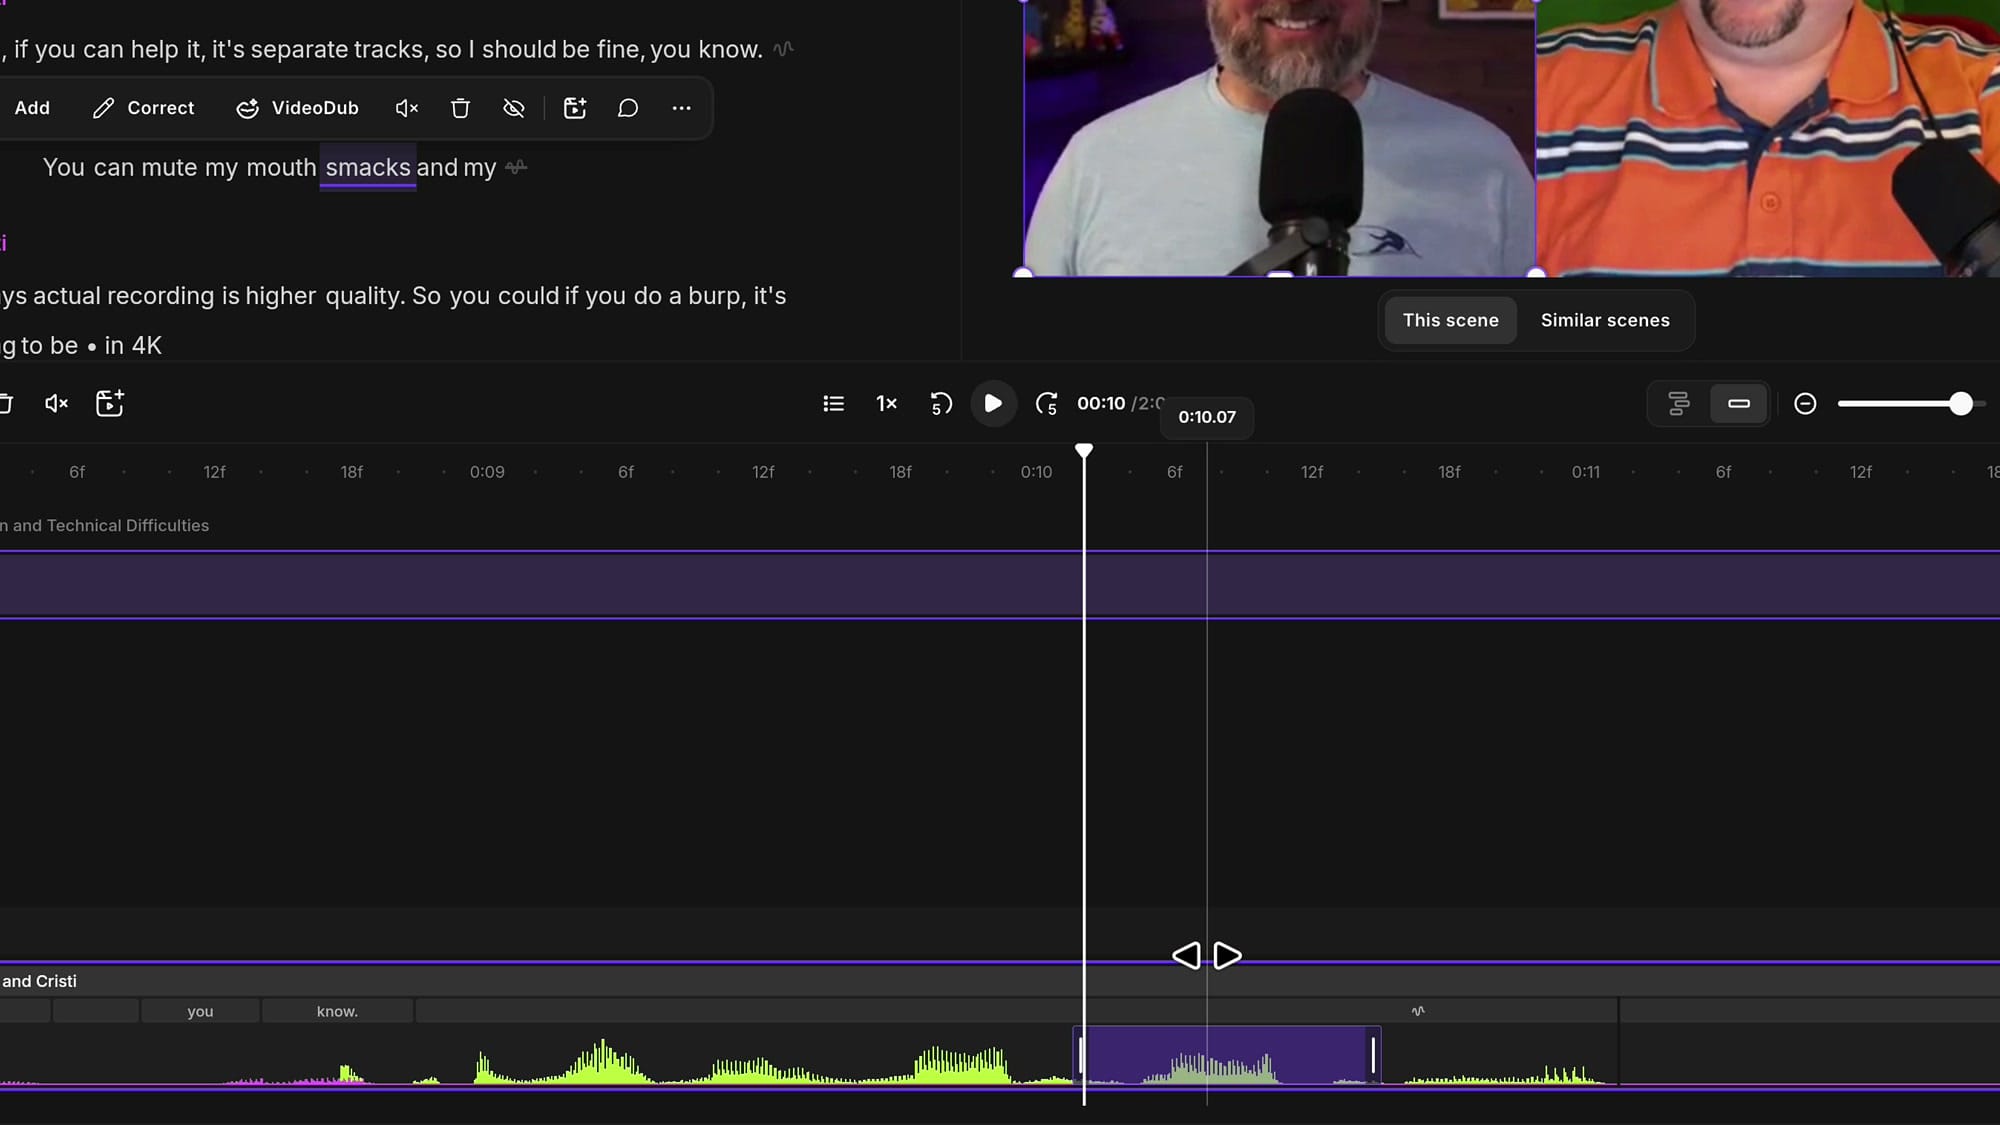
Click a word and it selects the region of audio that corresponds to it. To select a range, either click and drag across the timeline, or click the first word, hold Shift, and click the last one — the selection follows.
Aspect ratio and the audio-only view
The aspect ratio selector sits in the top bar. Switch between 16:9 for YouTube and Spotify, 1:1 for LinkedIn, X and Instagram, or 9:16 for Shorts, Reels and TikTok, and the canvas rearranges itself.
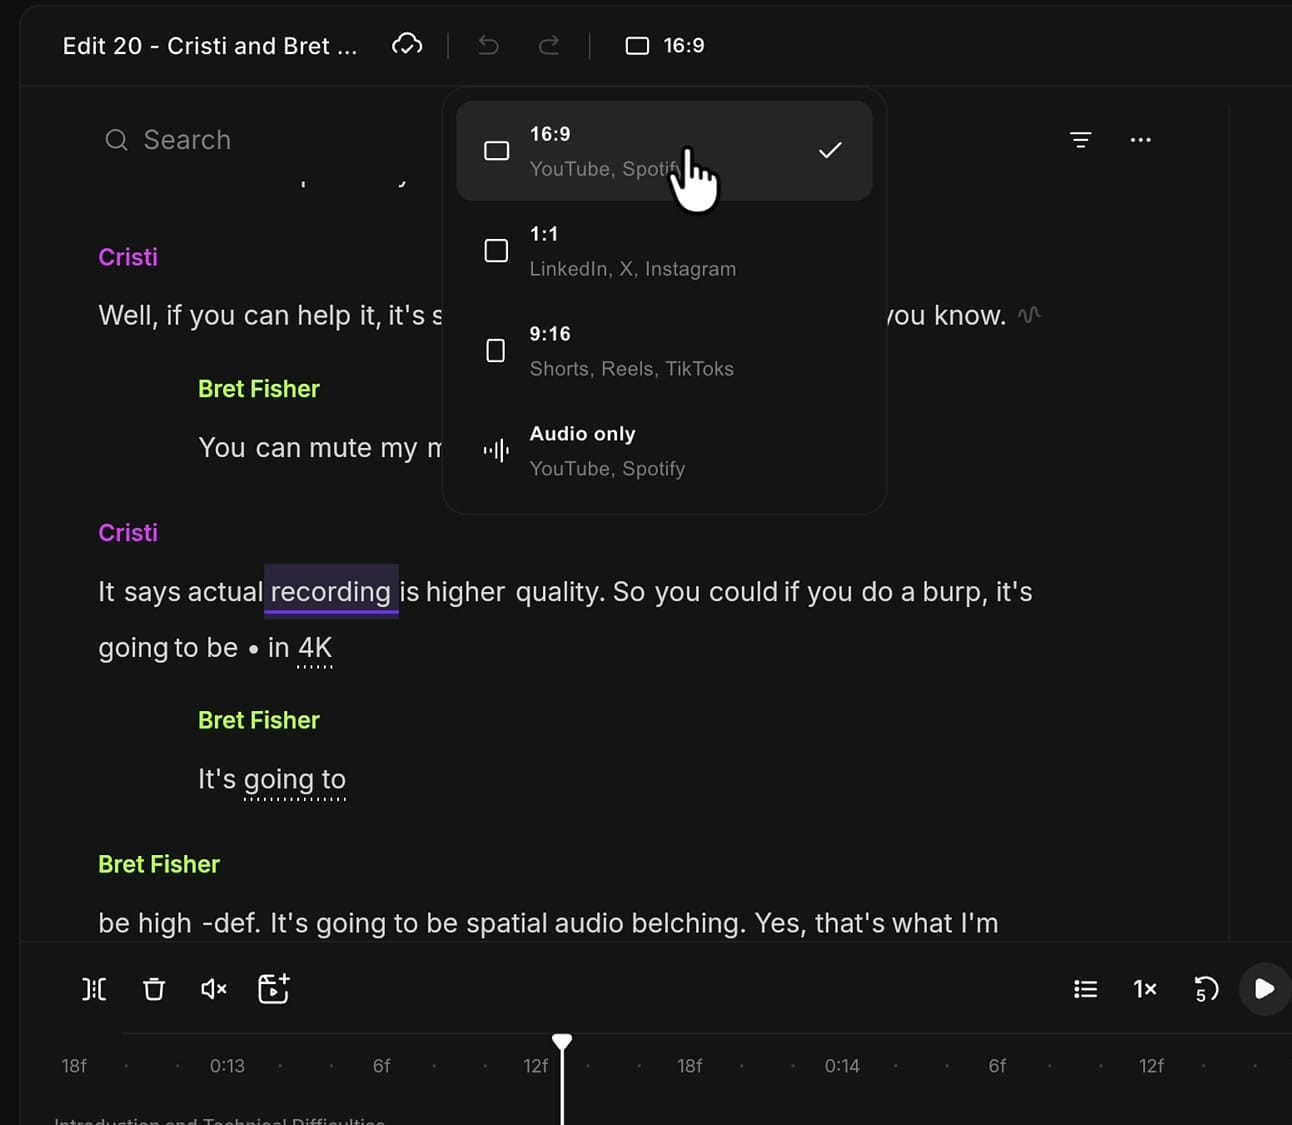
Audio only hides the video so you can concentrate on the sound. Nothing is destroyed — switch back to 16:9 and the canvas returns exactly as it was.
Version history saves you from yourself
This one has rescued me more than once. Click the small cloud icon next to the edit name to open Version history. Riverside takes snapshots as you work, roughly every fifteen minutes, and groups the changes made in that window together.
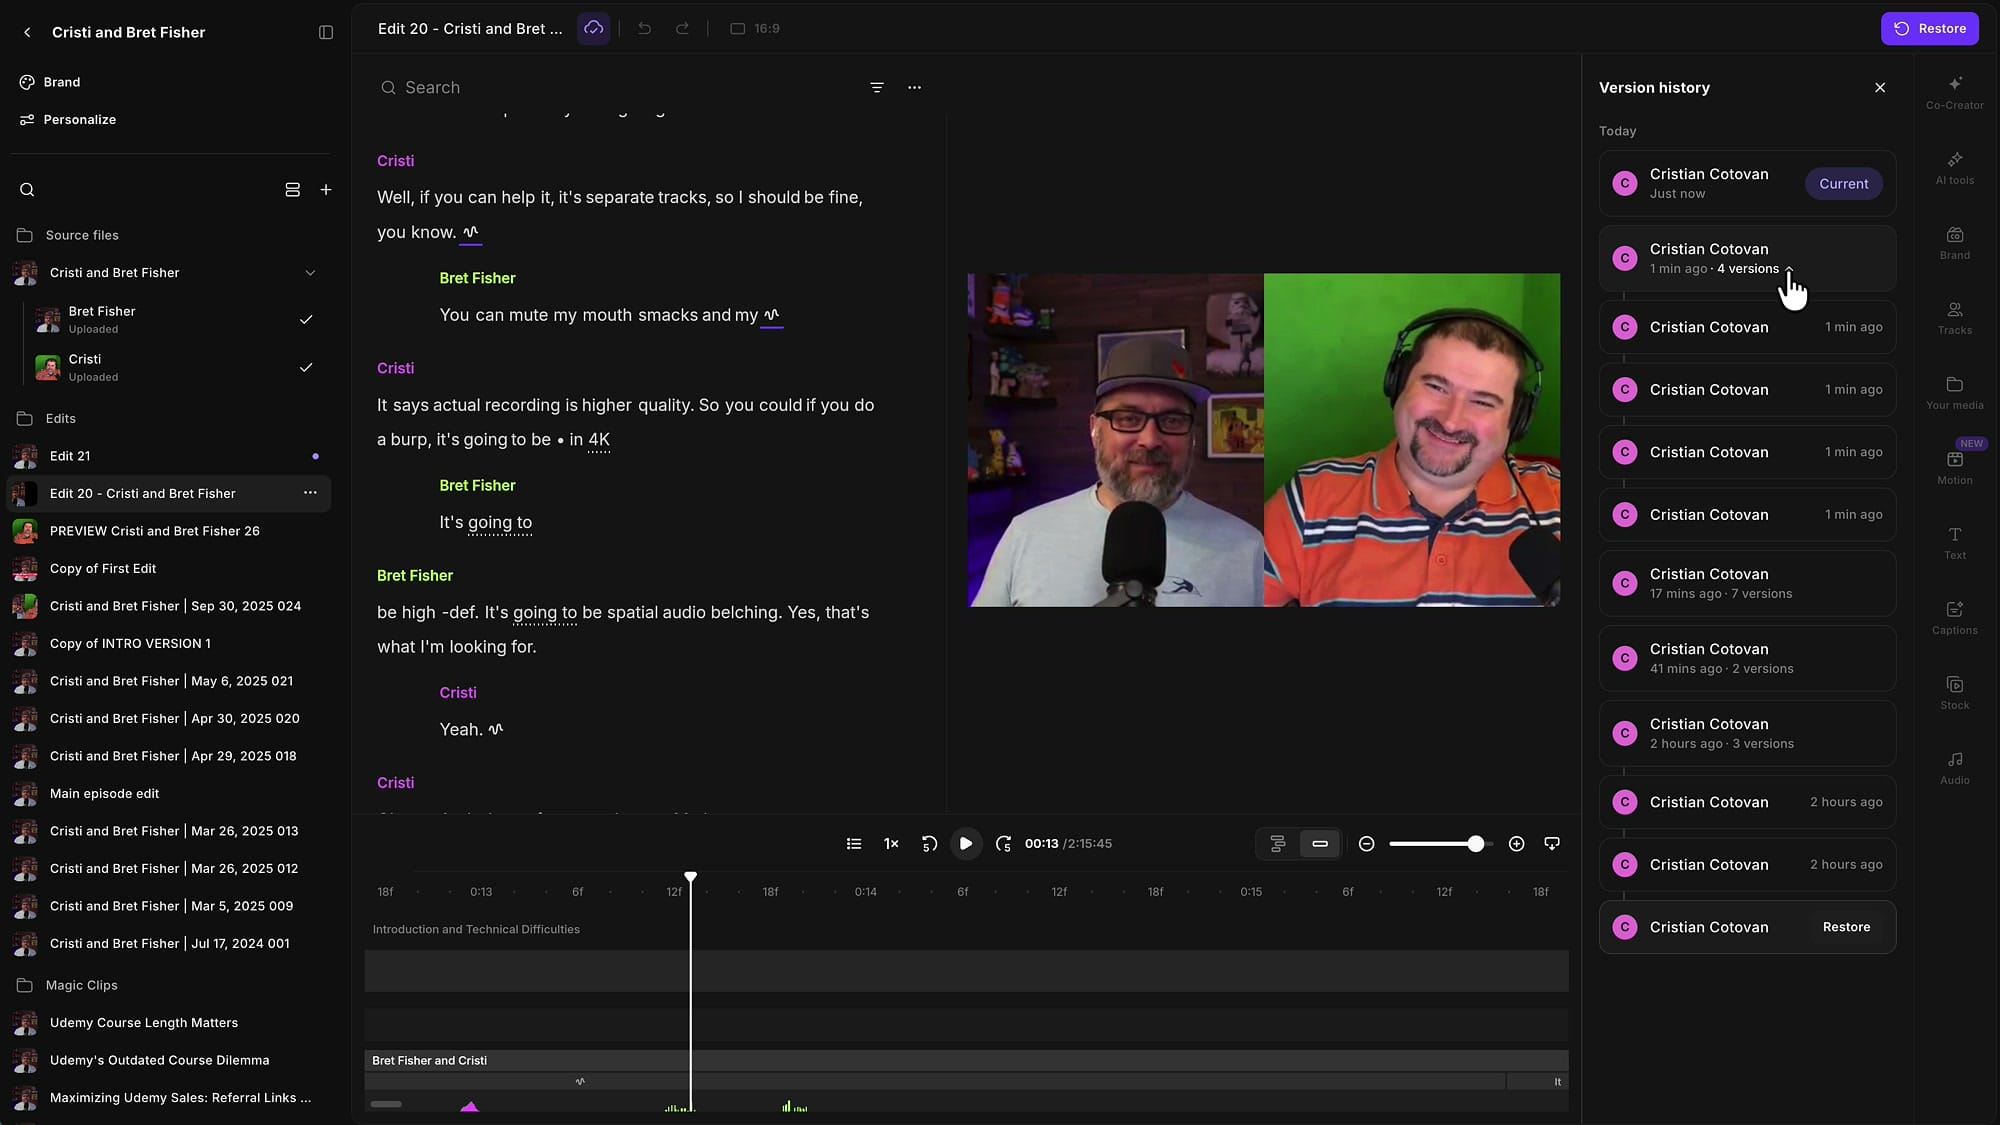
Expand a snapshot and you will see it contains several individual versions. You can preview each one and restore it. Say you have already removed filler words and set your layout, then realise you deleted something you needed two hours ago — you can go back to that version. Restoring does discard the edits made after that point, so preview before you commit.
Version history is also broken down by user. On your own it is all you; add collaborators through the collaborator add-on and every snapshot shows who made it.
The tools rail on the right
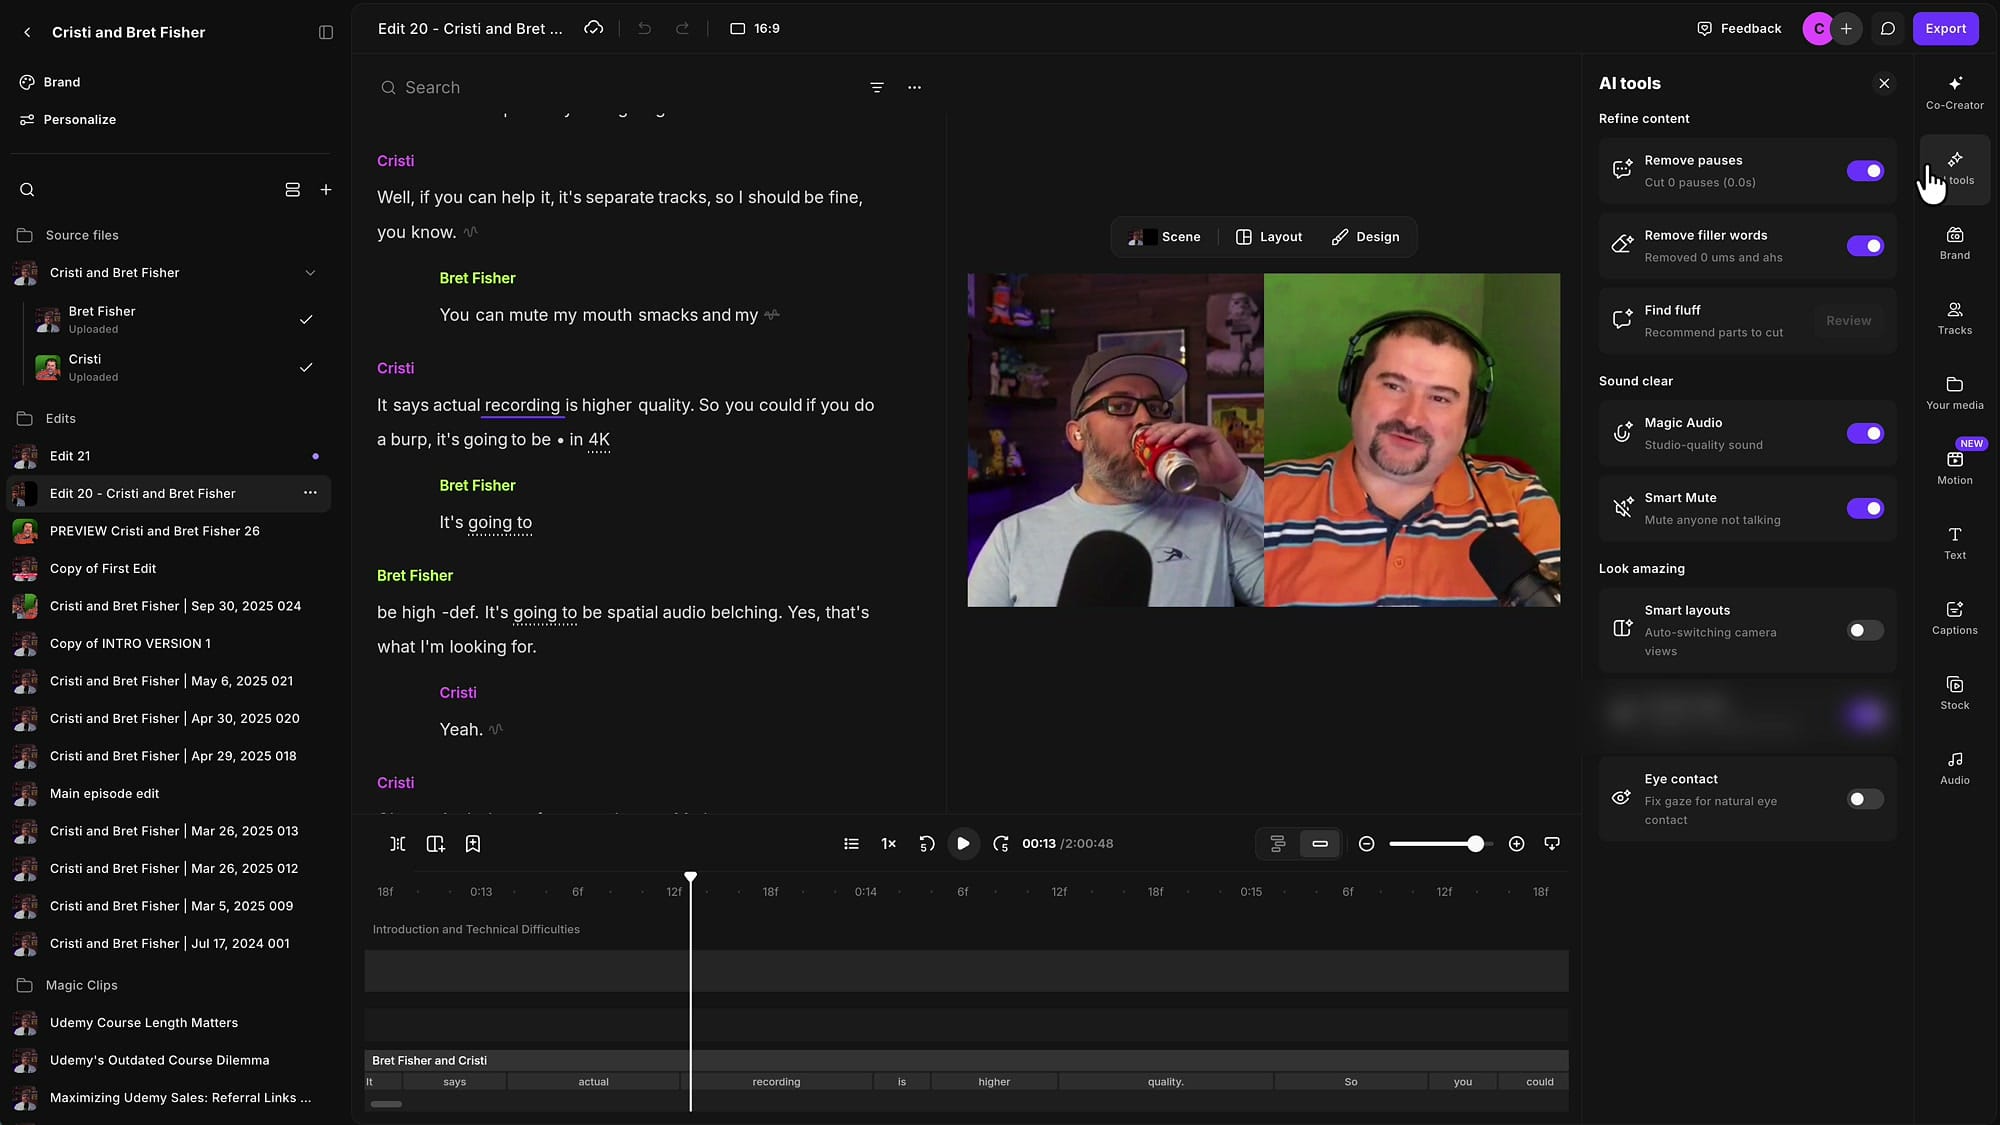
All the tools live in a vertical rail on the right edge.
Co-Creator sits at the top. It is the AI chat: ask it to do something and it does it, mostly by driving the same tools you can operate manually. It will remove filler words, generate an image, find B-roll, or pull out a clip on a given topic. It is the same assistant behind AI thumbnails.
AI tools are the manual equivalents: remove pauses, remove filler words, find fluff, Magic Audio for sound enhancement, Smart Mute to silence whoever is not speaking, Smart layouts for automatic camera switching, and eye contact to correct the gaze of someone reading off-screen.
Brand is where you upload your logo and set titles, fonts, colours, and captions, then apply the lot with one click. If you have not set that up yet, start with customizing your logo and brand kit.
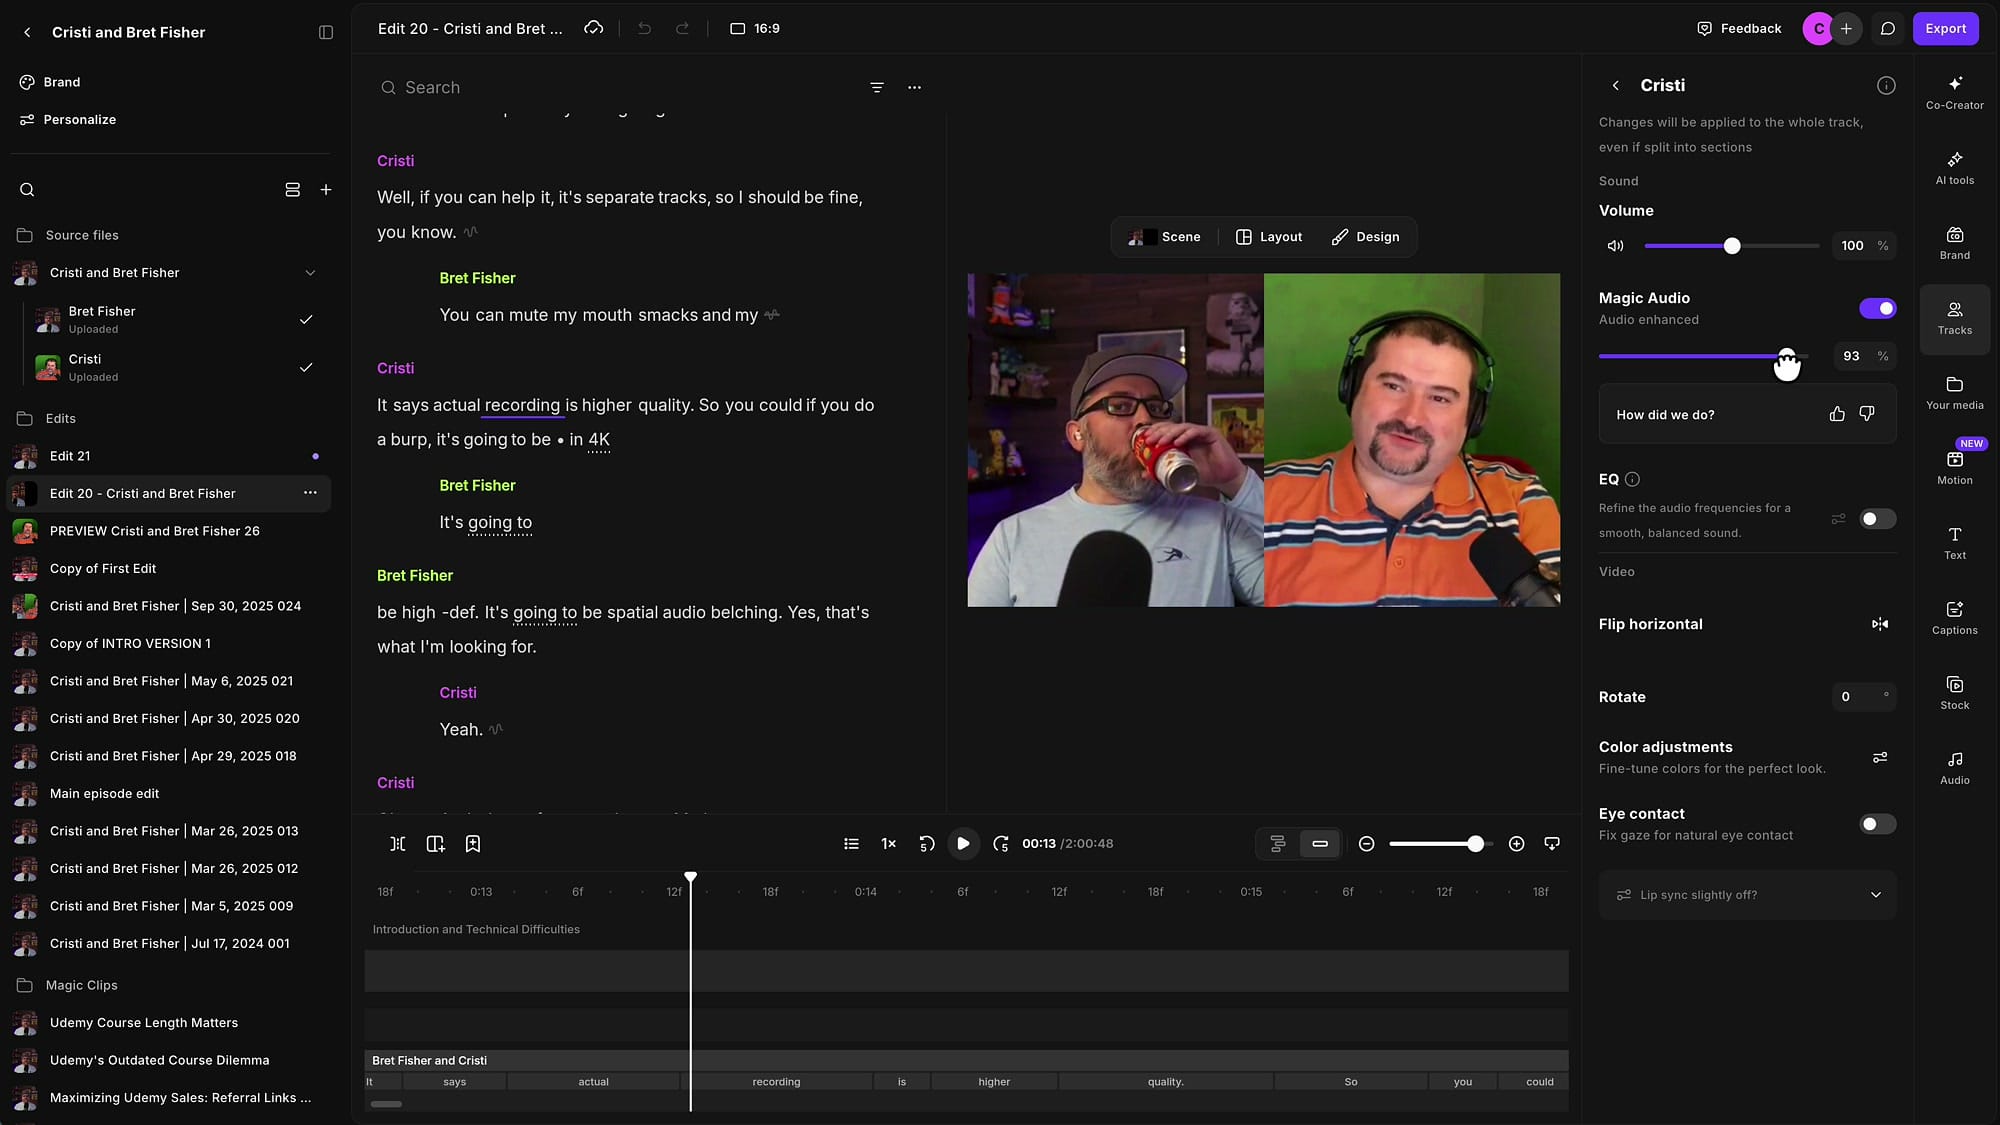
Tracks gives you per-speaker controls: rename speakers, adjust volume when levels are uneven, apply Magic Audio and set its strength, use the equaliser, flip or rotate the video, adjust colour, and toggle eye contact for that track alone.
If you’re eager to learn more about Riverside and wish to have a one-on-one Riverside coaching session, feel free to book a call with me.
I’m here to help you with any questions you have and to guide you through the best workflows, tips, workarounds, or just answer any questions you may have!
Free-form layouts on the canvas
This is the change I had been waiting for. Layouts used to be a short list of presets — side by side, full screen, a couple of variations. Now you can grab any video on the canvas and move, resize, crop, or rotate it freely.
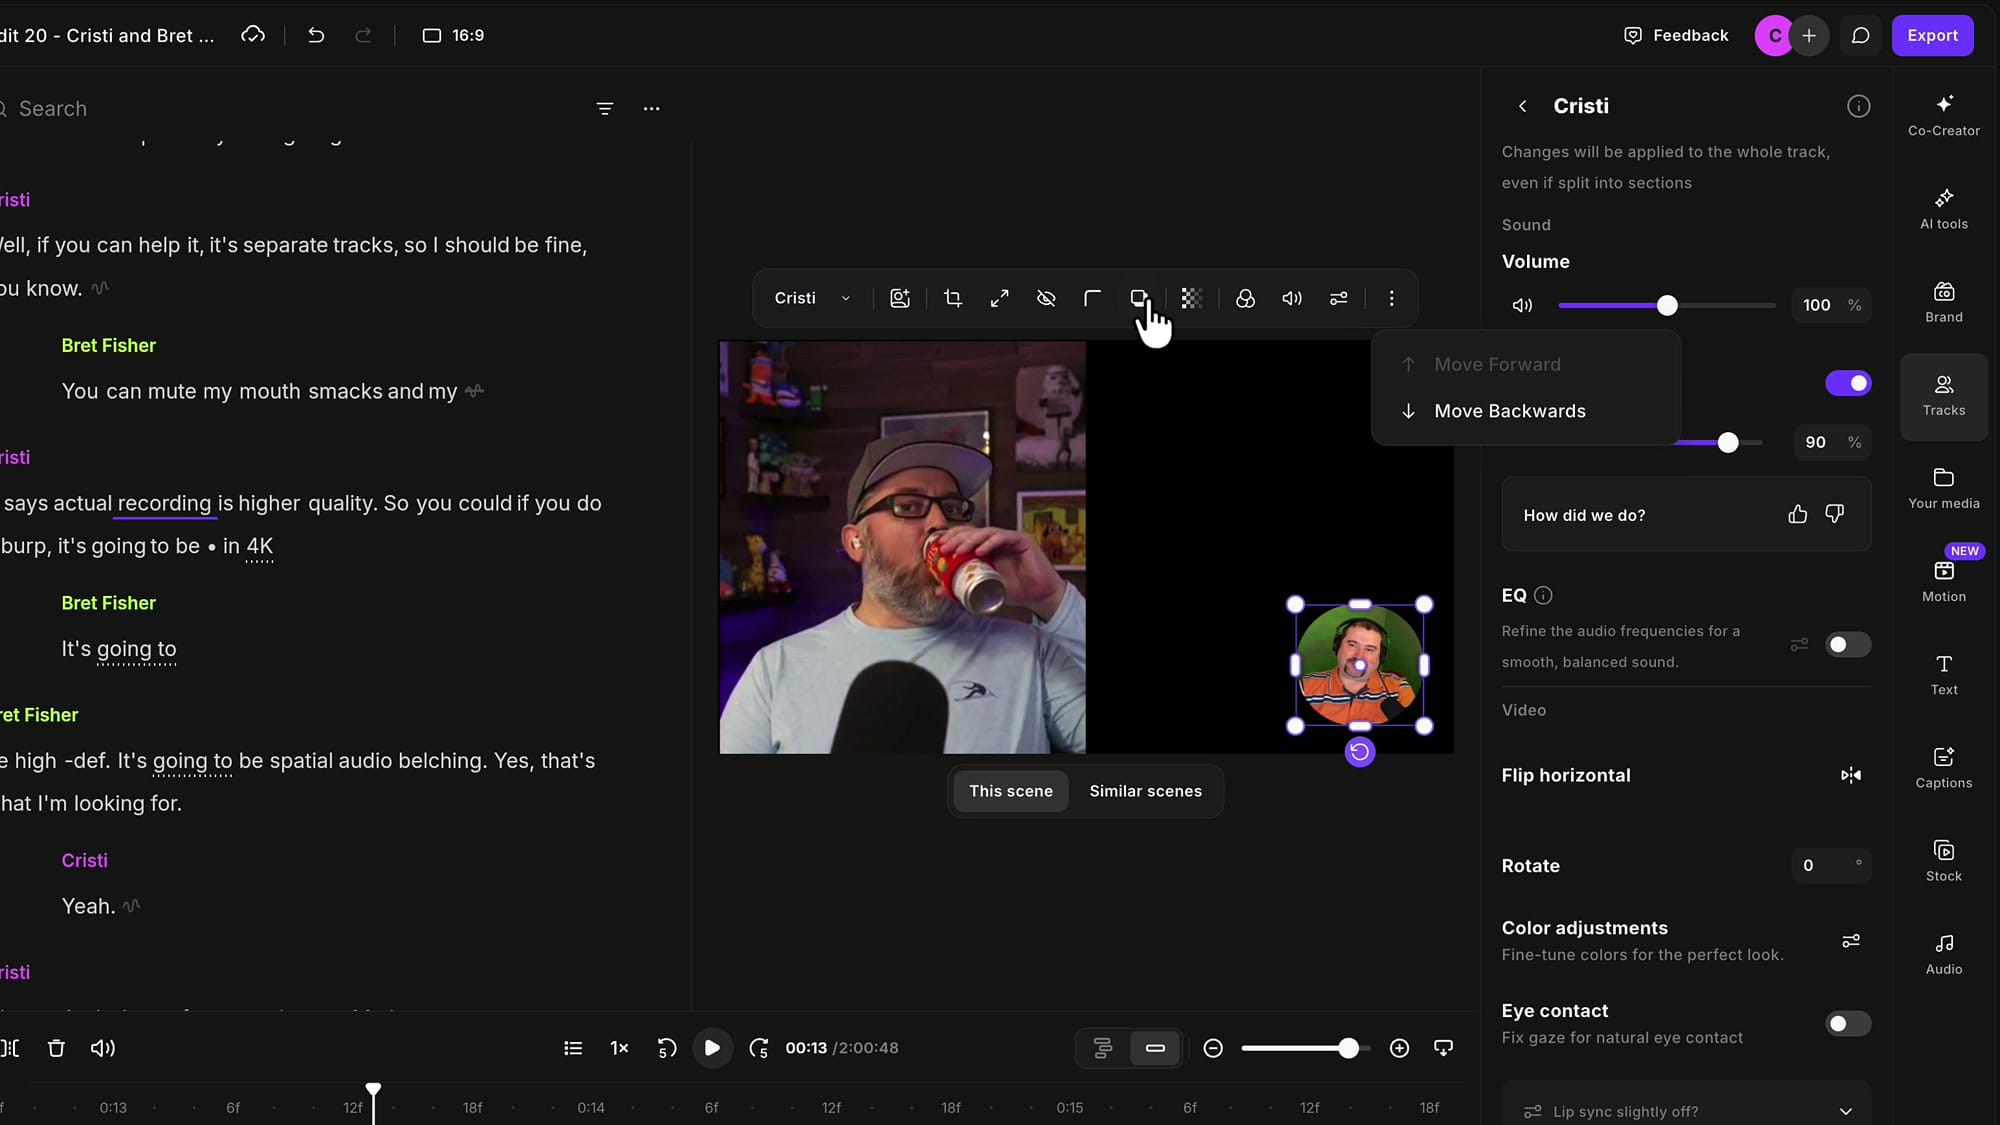
A few things that make it workable rather than fiddly:
- Hold Shift to constrain rotation to right angles.
- Elements snap to each other and to the edges of the canvas as you drag.
- Round the corners of any clip to turn a rectangle into a circular talking head.
- Control the stacking order with move forward and move backwards, and add drop shadows.
If you mostly need to reframe rather than rebuild, my guide to cropping, repositioning and reframing covers that side of it.
The upgraded timeline
The timeline deserves a walkthrough of its own, but here is what has changed most.
It goes down to the frame. Expand it, expand the tracks, and you get a ruler marked in frames. Zoom with Command and the mouse wheel on a Mac, Control and wheel on Windows — the same zoom and pan gestures as before.
Your arrow keys then step one frame at a time, which is what makes precision editing practical.
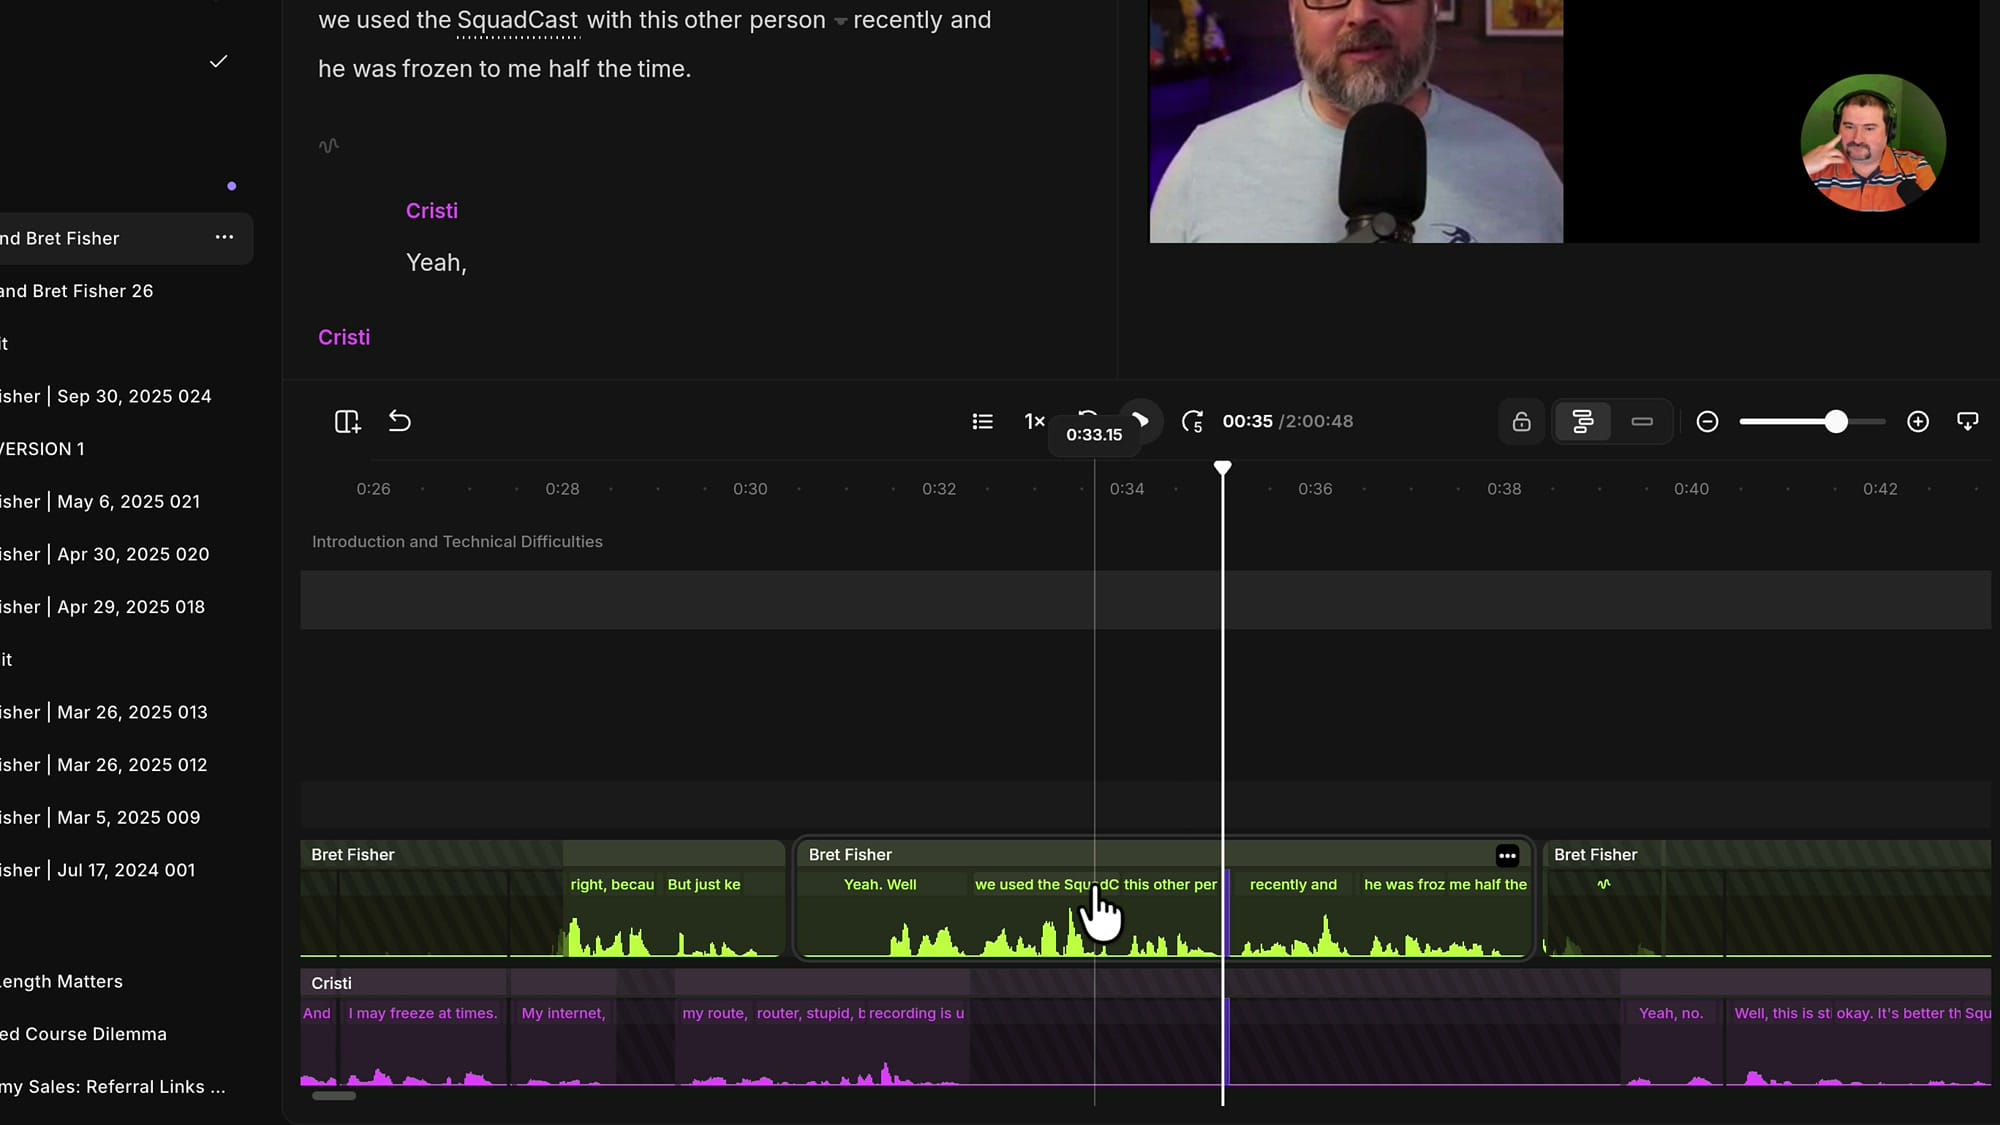
You can move tracks independently. There is a lock in the timeline toolbar that keeps tracks in sync. Unlock it, split a clip with S, and you can drag that piece anywhere on the timeline. This is the direct fix for crosstalk: pull the two speakers apart so they stop talking over each other, then cover the video gap with a different scene or layout.
Volume is per segment. Isolate a section and change its level without touching the rest of the track — something the old editor could not do. Useful when one person spikes loud for a few seconds, or when you want to duck a passage rather than the whole recording.
Overlays get their own tracks. Add a text box from the Text panel and it lands as an overlay with its own track. Add another and it gets another track. They snap to clip boundaries as you resize them, and you can drag them between tracks — hover between two existing tracks and a line appears showing you are about to create a new one.
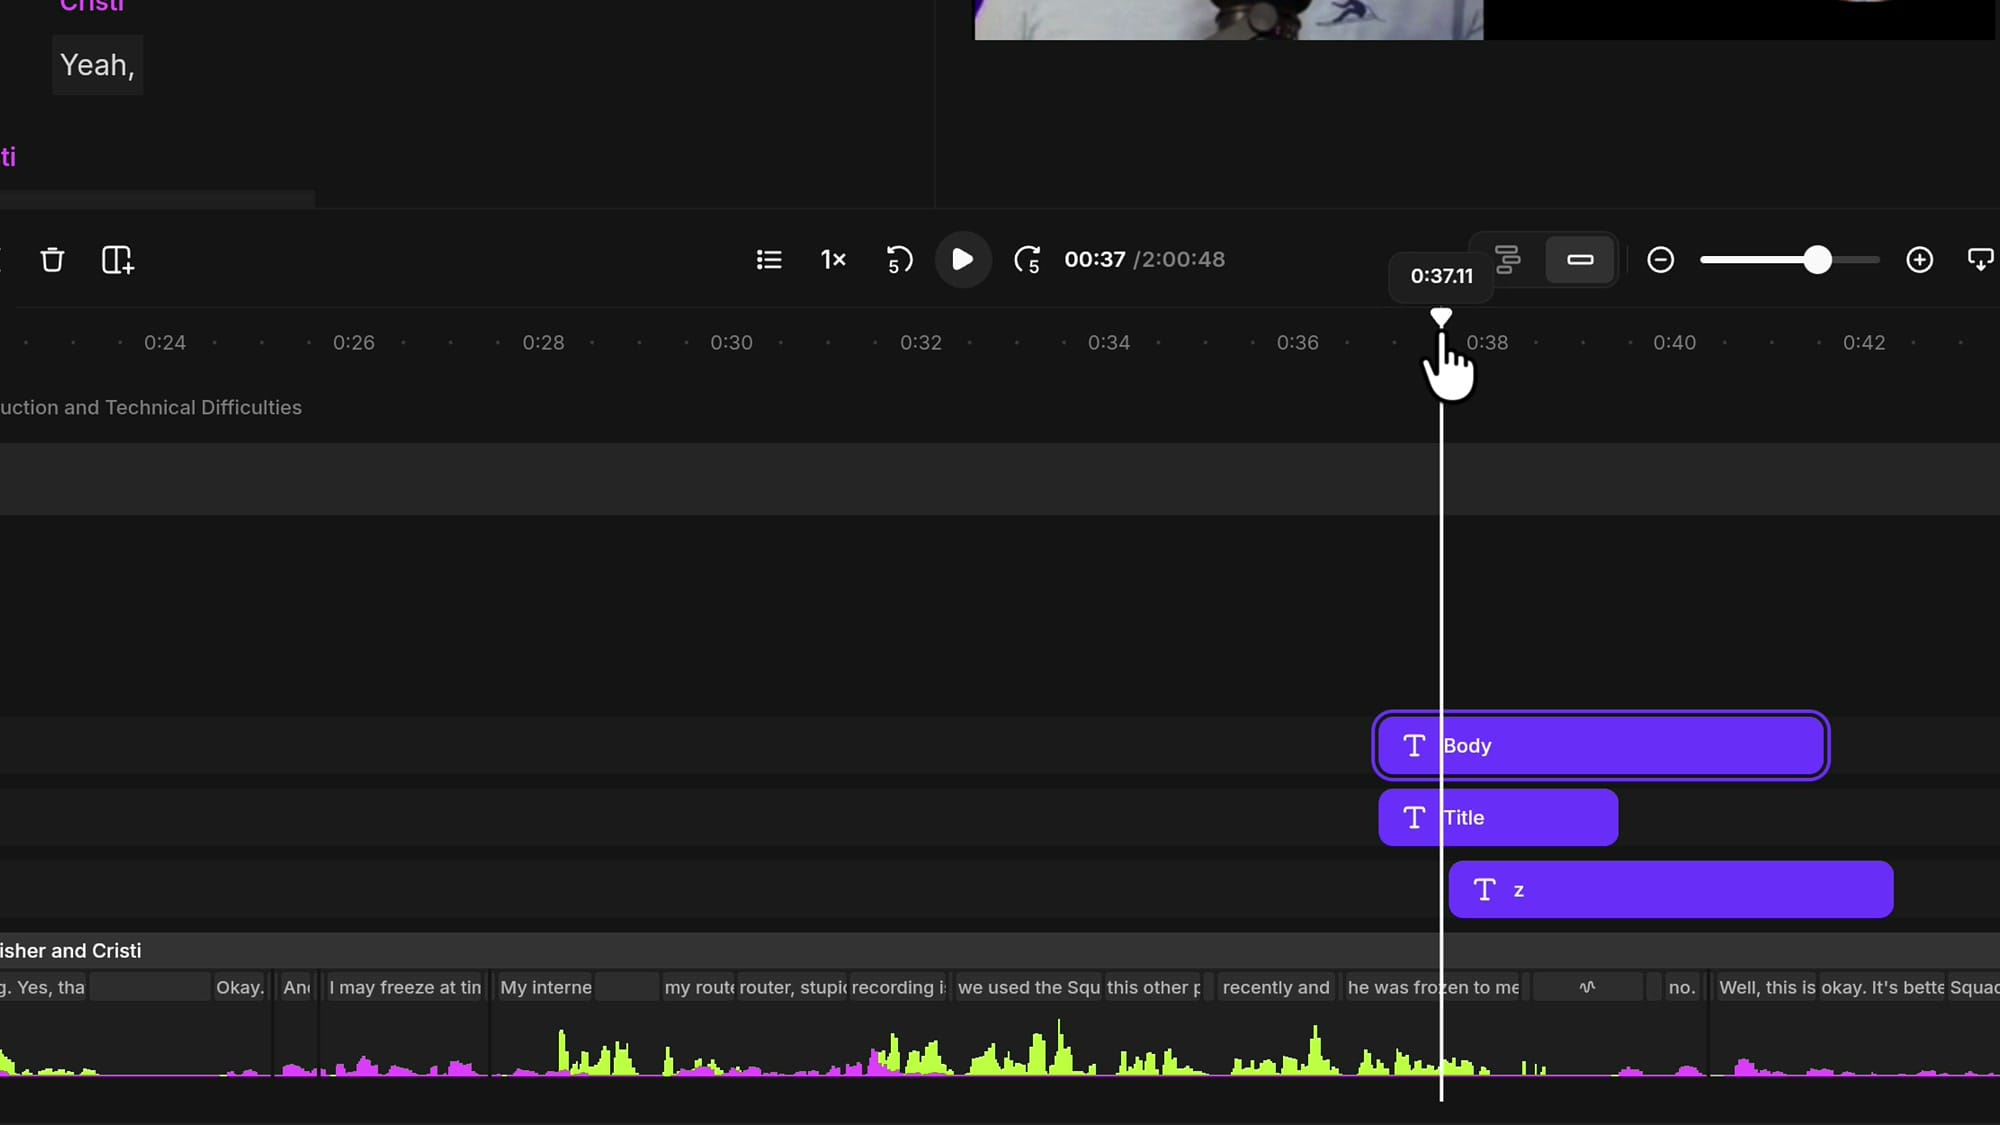
Splitting is context-aware. Select a single clip and press S to split just that clip. Click on the timeline without selecting anything and press S to split everything at the playhead — scene, tracks, and all. Select the scene bar and press S to create a scene boundary.
Between those and the plus button you can slot new material into the middle of an edit, whether that is B-roll, images, video, or scene-based B-roll.
Transcript corrections and comments
Transcript editing still works the way it always has — select words, press Delete, they are gone. What is improved is proper correction.
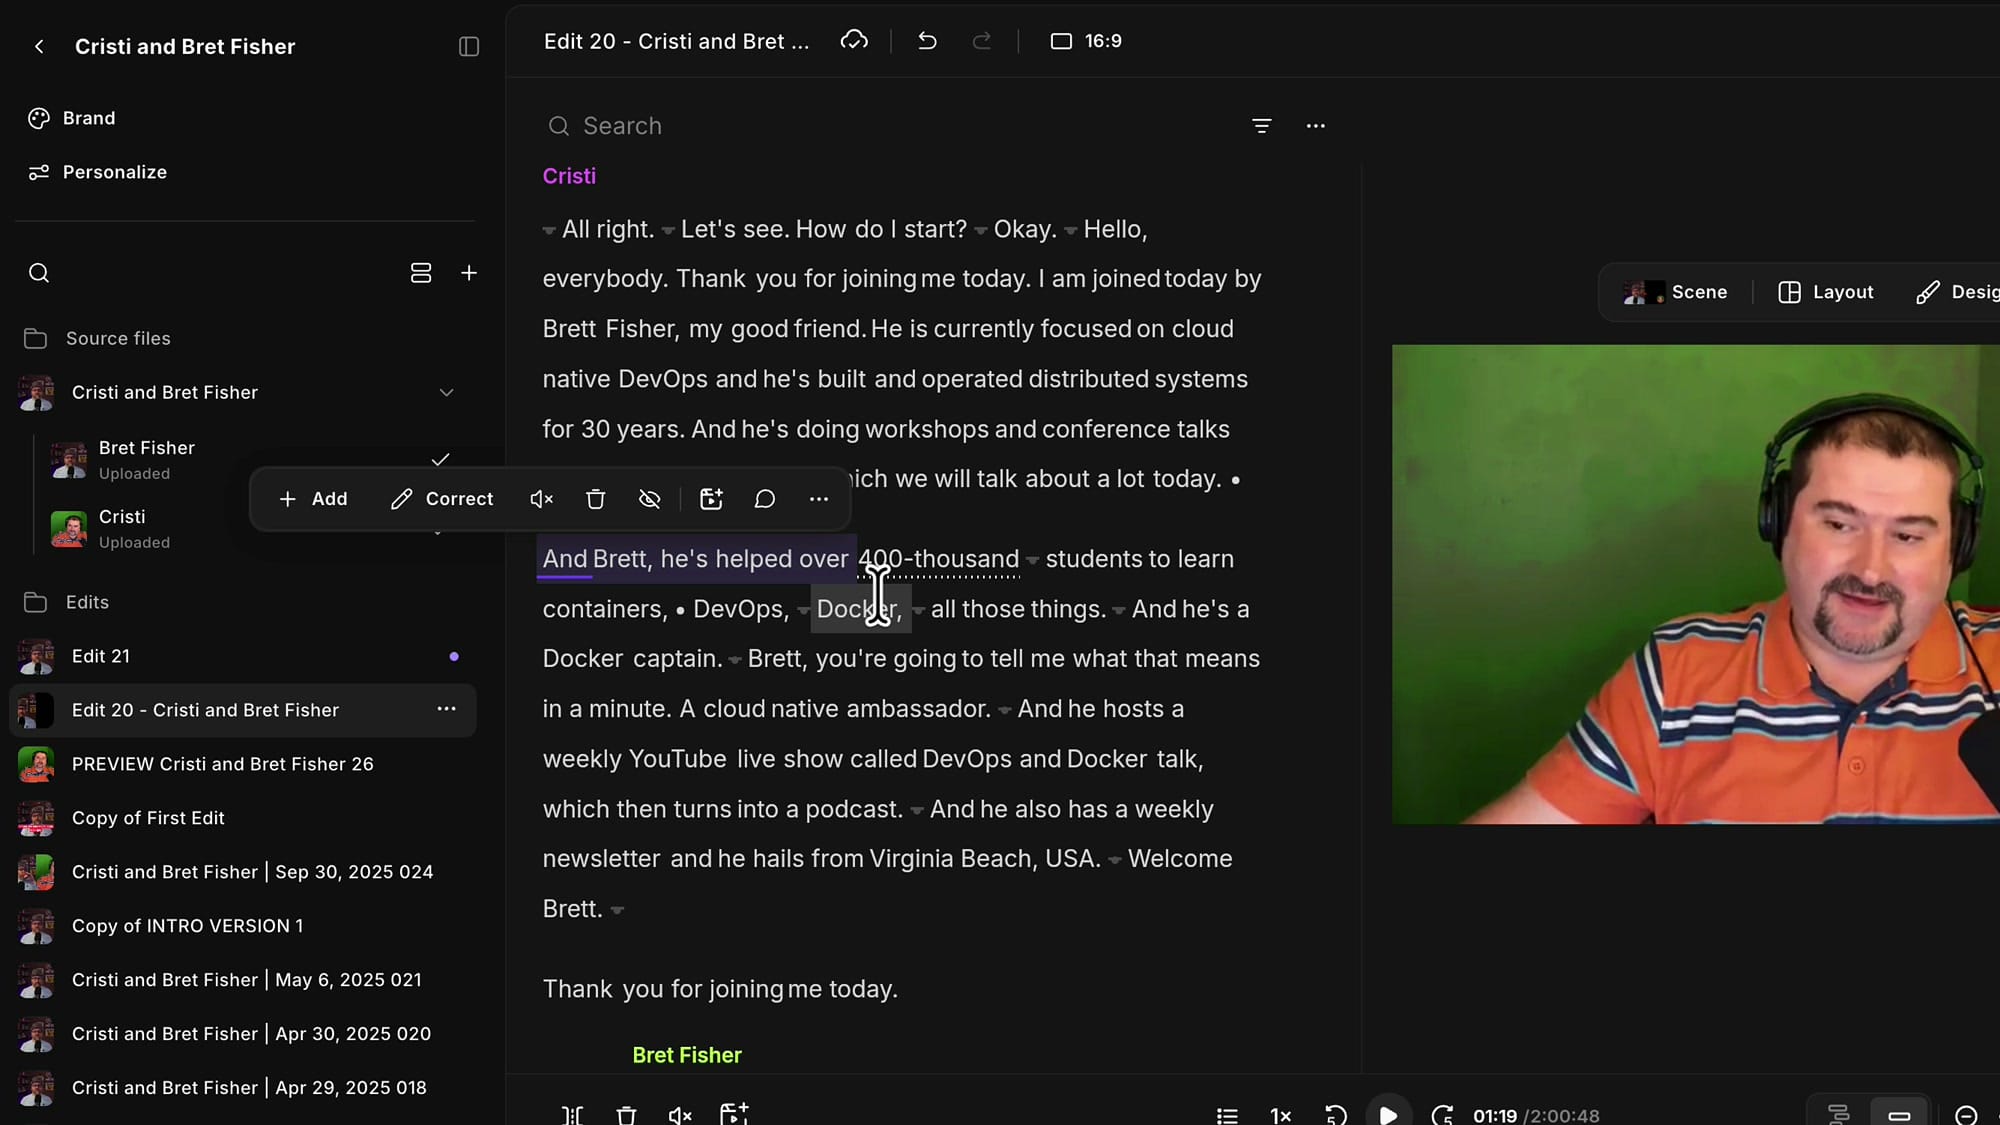
Select a word and click Correct, or click the word and press C, and a text box opens. Type the fix and press Enter. If pressing C grabs the wrong word, click just before the word you want so the playhead lands on it, then press C again.
Corrected words are shown underlined, so you can see at a glance what you have changed — and revert if you got it wrong. For a name that appears throughout an episode, correct it once and choose Correct All to replace every instance in one go.
Comments now show up in the timeline as well as the transcript. Comments you added during recording, comments from collaborators, AI comments, and fluff detections all appear as markers you can click through, reply to, or delete.
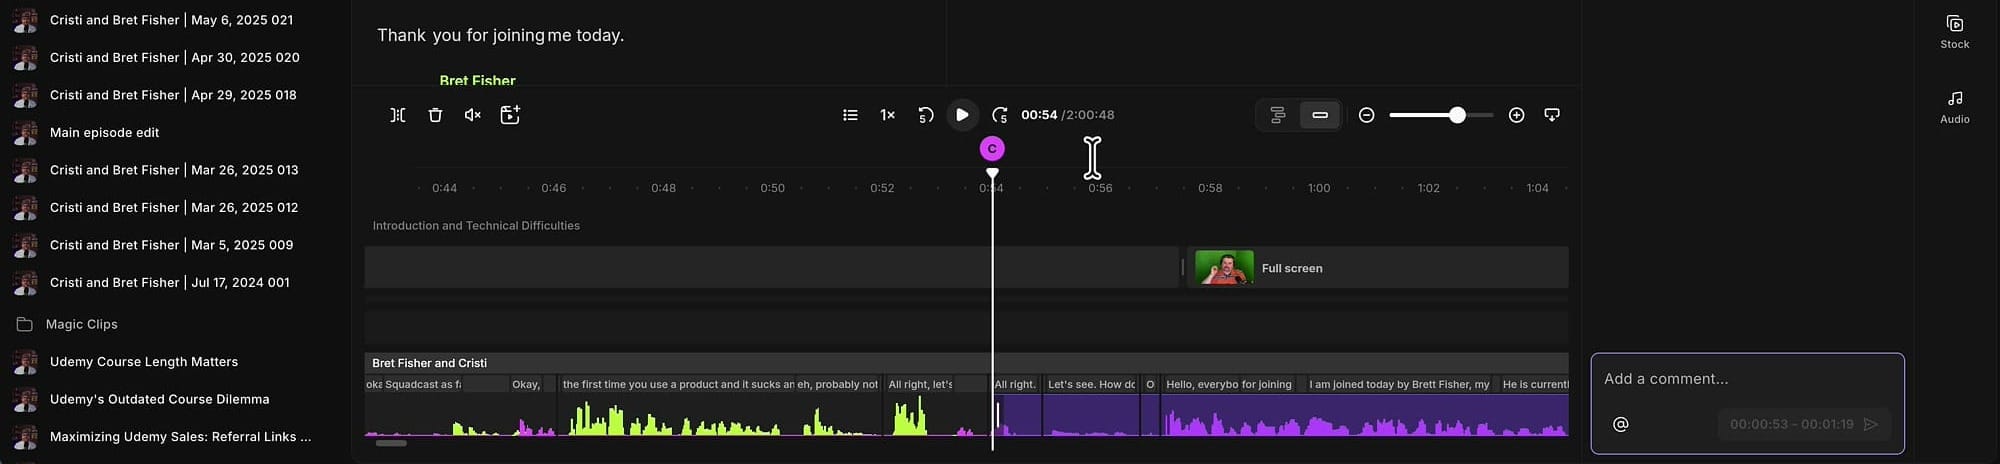
If that starts to look cluttered, open the options and turn comments off in the transcript, in the timeline, or both. Worth knowing if you use review links with clients and end up with a lot of feedback on one edit.
Motion graphics
Motion graphics are animated assets you can drop in as overlays or B-roll — lower thirds, name plates, subscribe buttons, stat overlays, animated waveforms, match cuts.
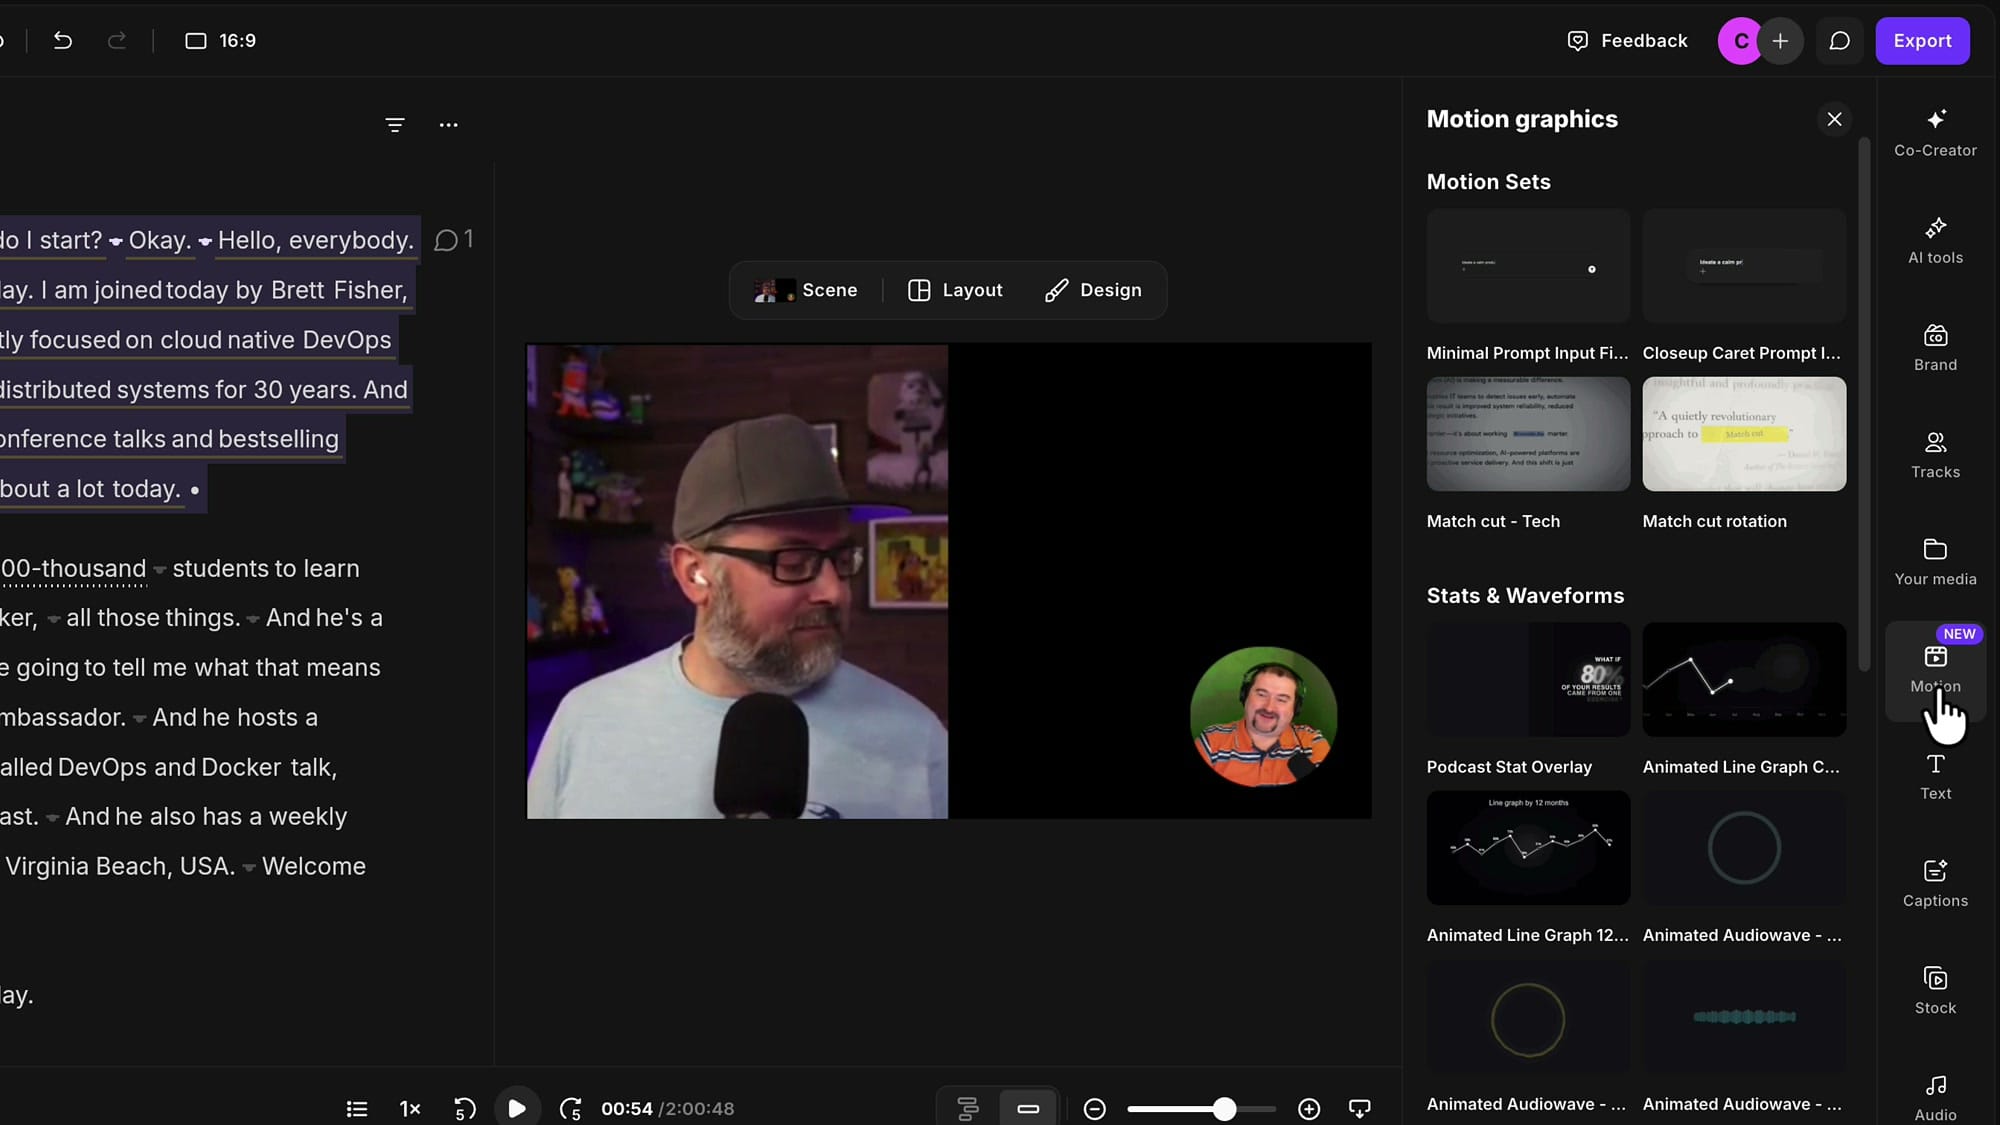
You do not edit them with sliders and colour pickers. You tell the AI what you want changed — the text, the colours — and it produces the version, which you then save and use. There is a fuller walkthrough in my post on adding AI motion graphics.
Export, share, and publish
The Export panel is broadly what it was, with everything gathered in one place. Export and download the current edit, copy a link, embed it on your site if your plan allows, or publish it as an episode if you host your podcast with Riverside.
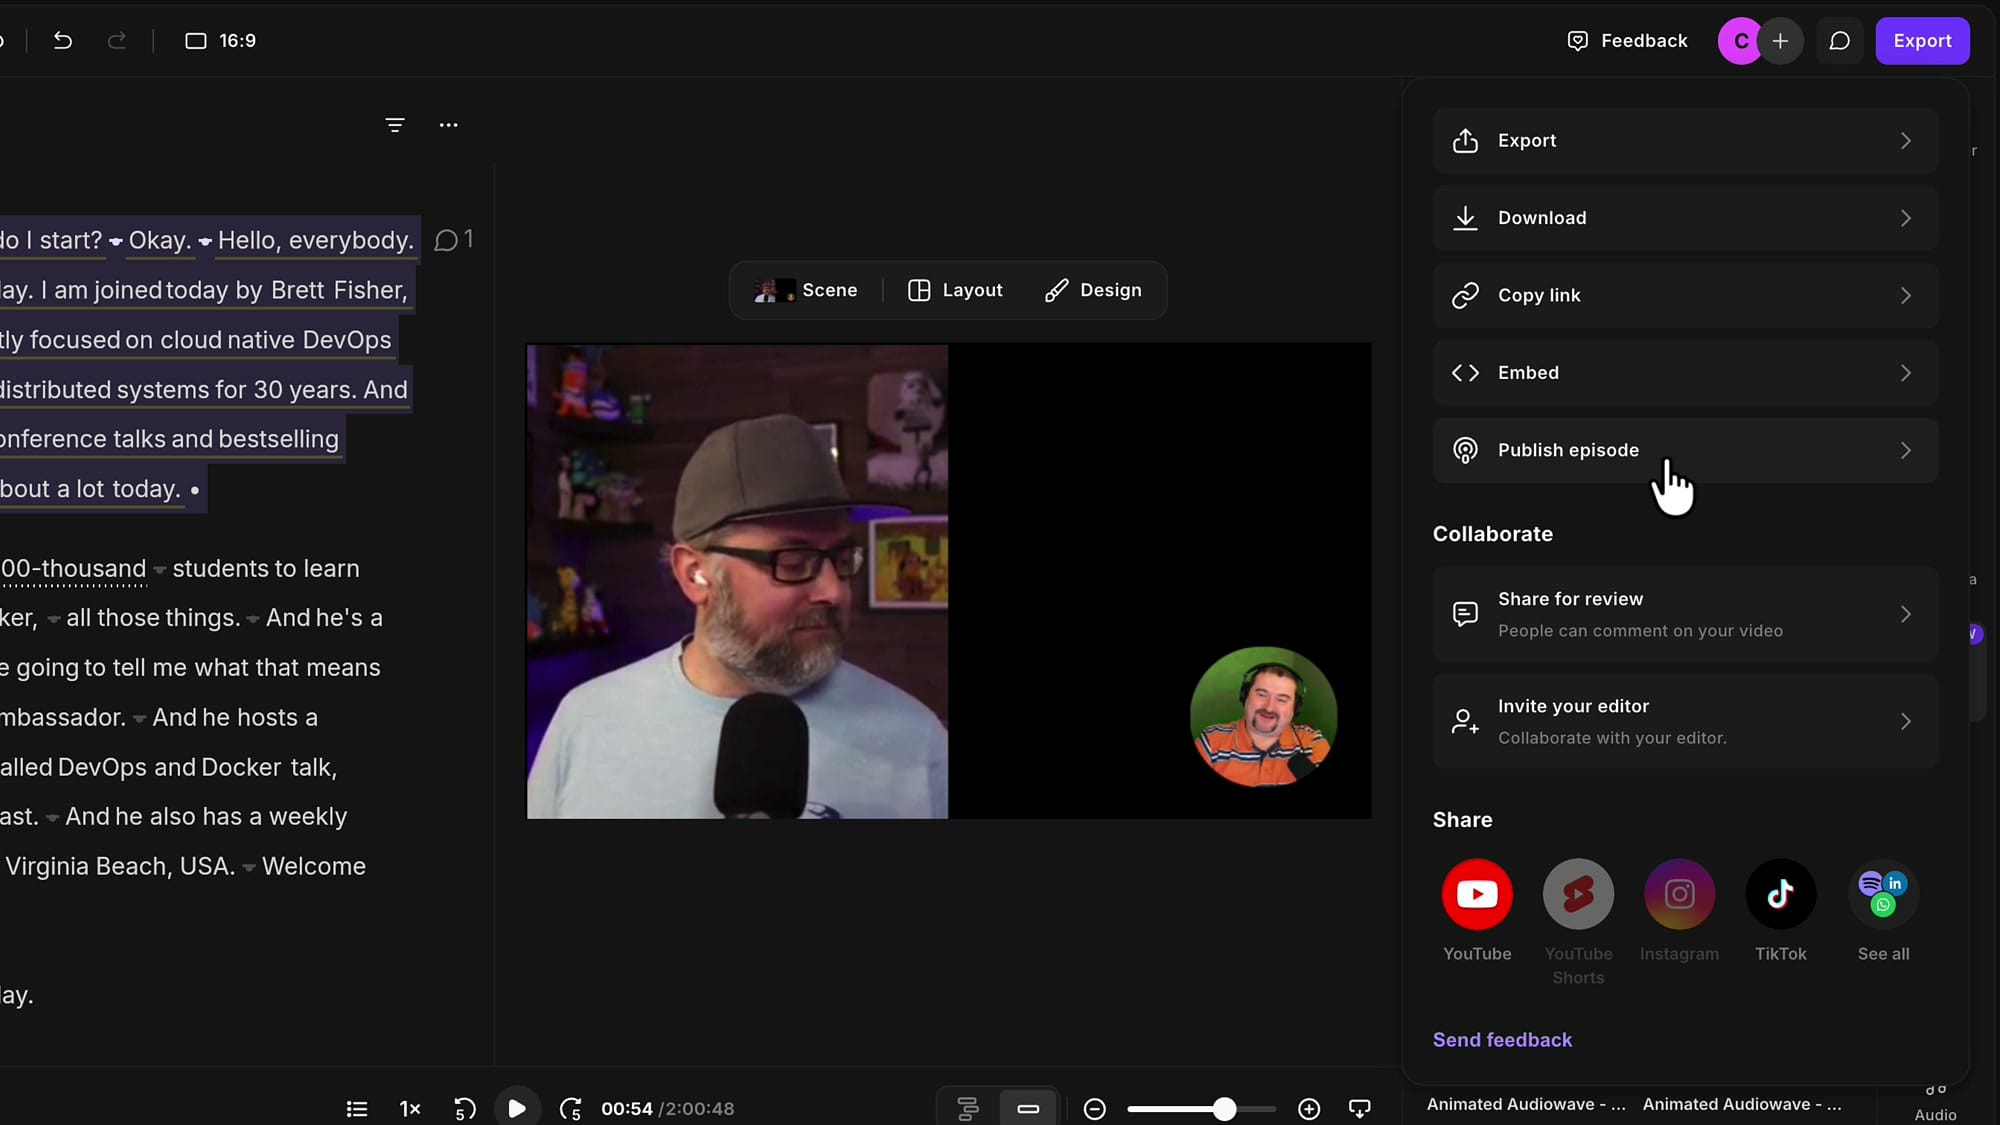
Underneath that: share for review so people can comment on the edit, invite an editor to work on it, share straight to YouTube, and schedule social posts, episodes, and meetings. Magic Clips and social clips can be scheduled from here too, which pairs with the content planner.
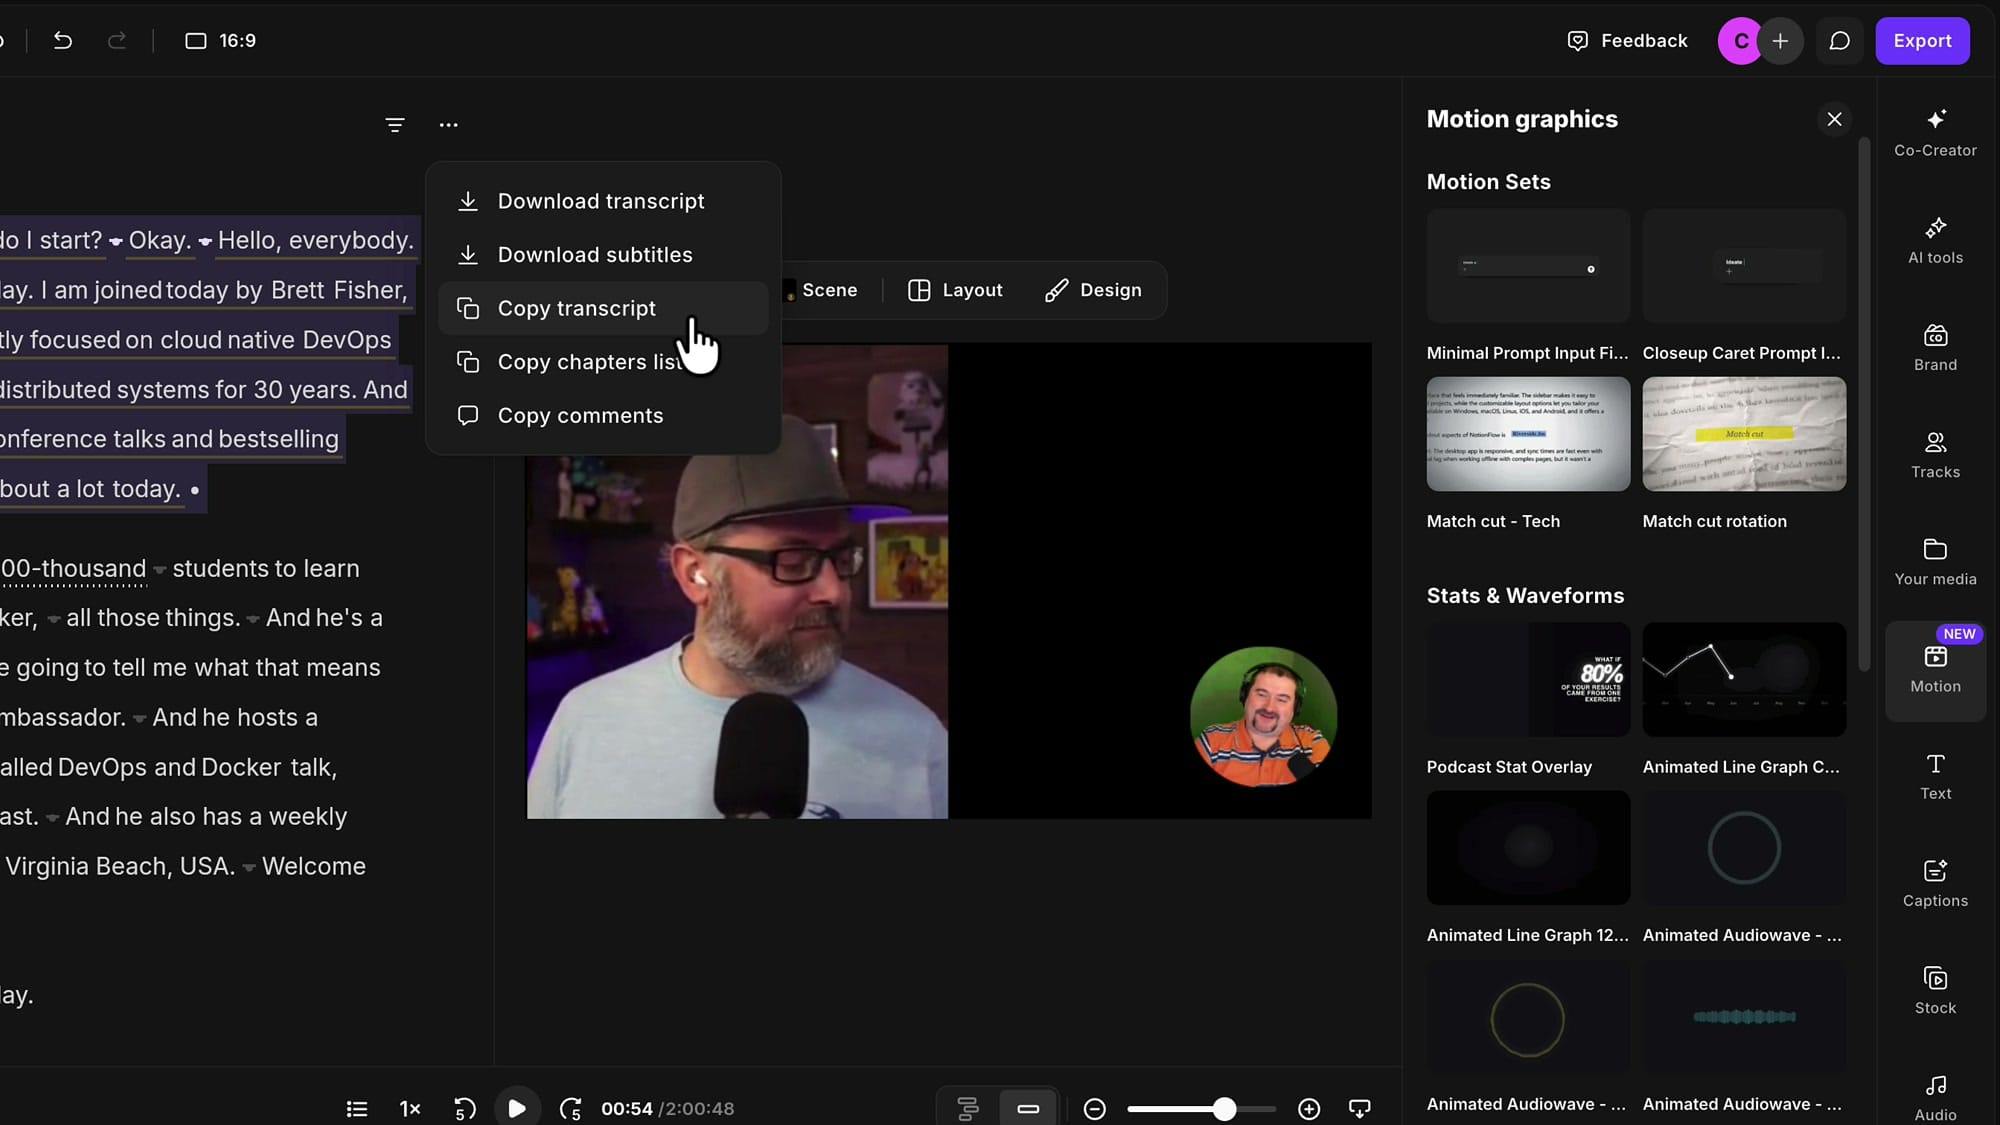
One thing lives elsewhere: the transcript downloads. Use the three dots above the transcript for download transcript, download subtitles, copy transcript, copy chapters list, and copy comments. The chapters list is the one to remember if you have set markers.
The new music library and custom fades
The audio library has been replaced. There is a new Riverside music library with something that was badly missing before: search. You can also filter by mood, style and genre, preview tracks, and favourite the ones you use repeatedly so they surface first in every future edit.
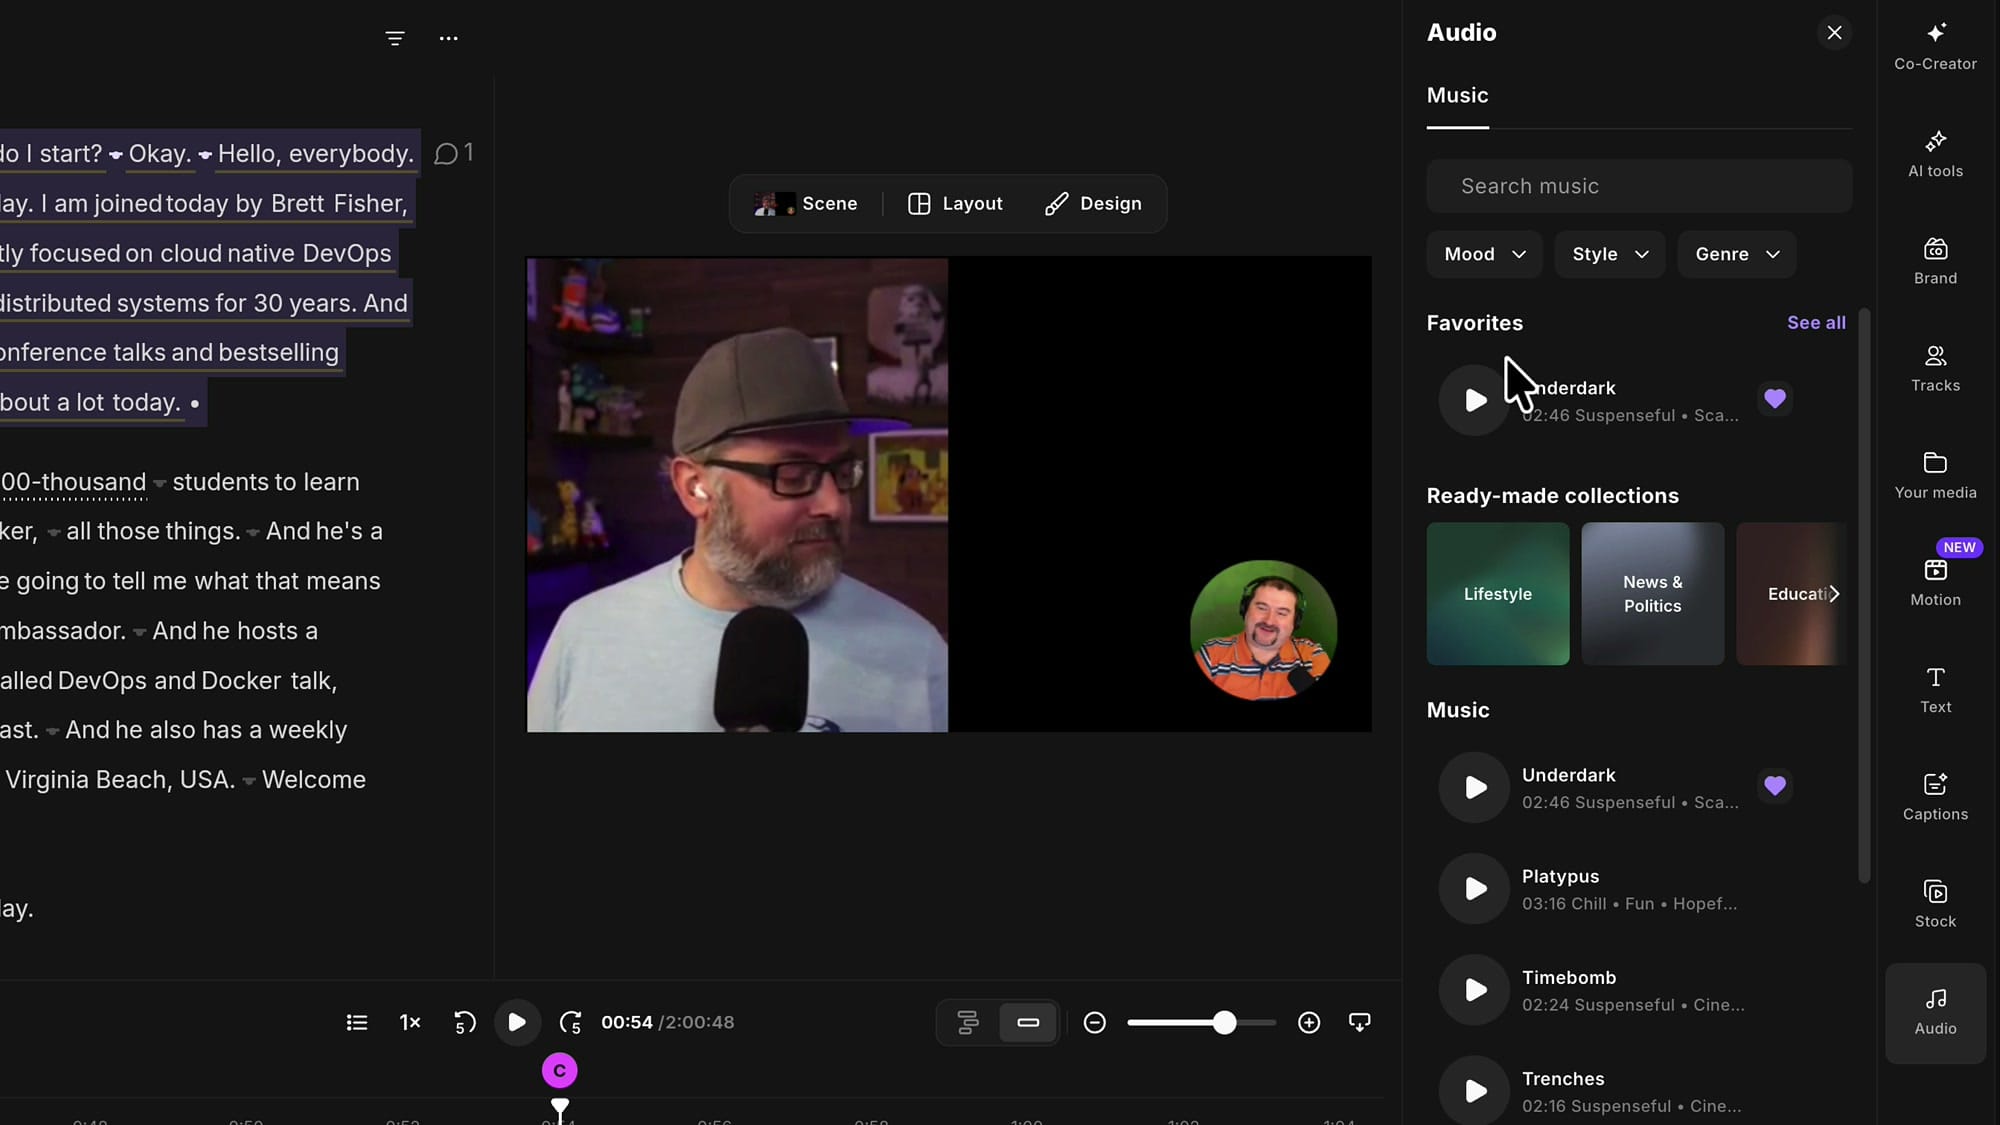
Click the plus on a track to insert it at the playhead. From there it behaves like any other clip: drag it along the timeline, move it between tracks, and split it with S.
Combine that with per-segment volume and you can finally do proper music ducking by hand — start loud, drop the level when the speech begins, bring it back up at the end. Split the music, set each segment's level, done.
The fades are the other real improvement. You used to be limited to one, two, or three seconds. Now a fade can run up to roughly the full length of the clip — a sixty-second fade in is possible if that is what the piece needs. Open Volume & Effects on a music clip and set fade in and fade out independently.
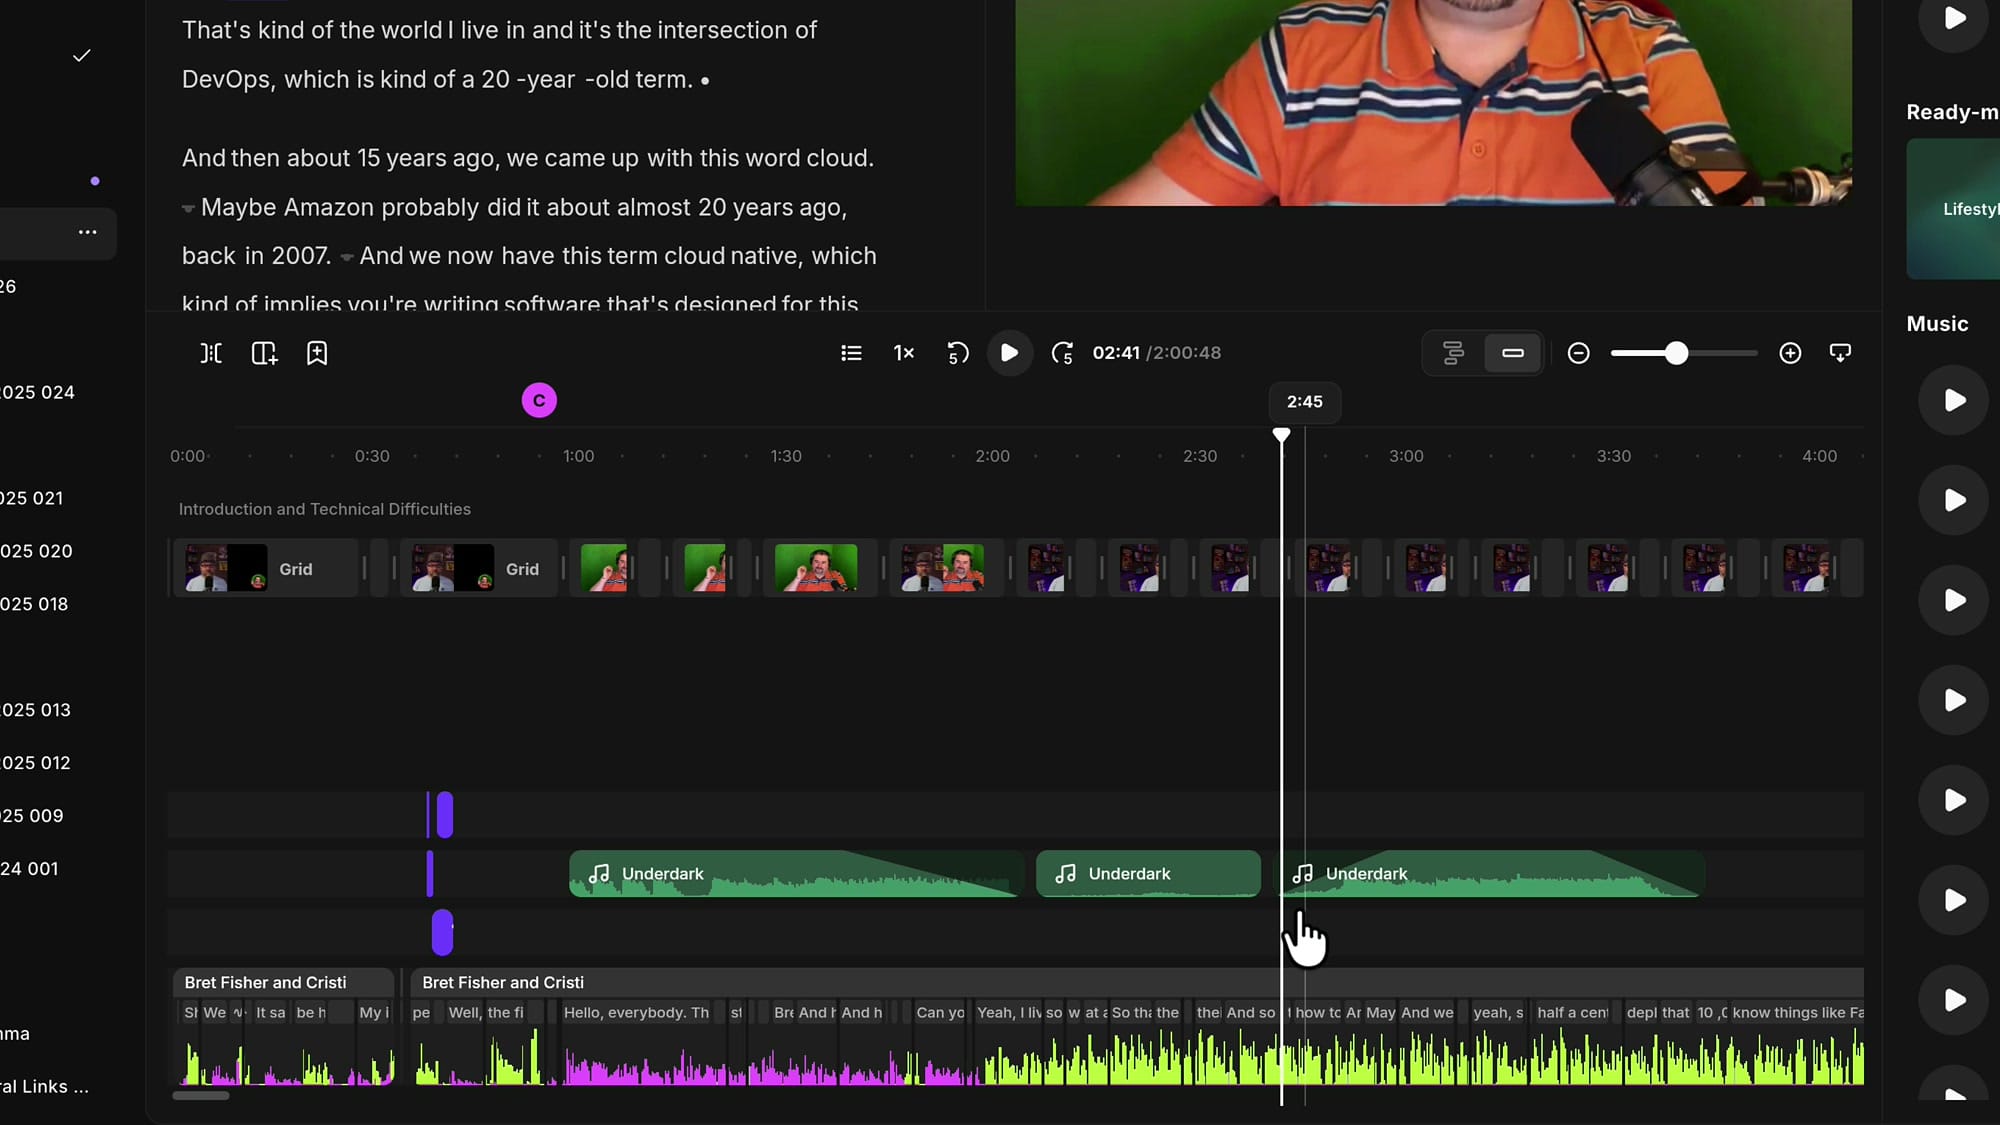
The slope drawn on the clip tells you where the fade begins and ends, so you can judge it by eye. If you are building an episode from scratch, this pairs with adding background music and assembling intros, outros and hooks.
Where this leaves the workflow
The short version: apart from recording and publishing, you can now do essentially everything from inside the editor. Tools, project files, edits, clips, exports, music, and assets are all one click away, and the interface gets out of the way when you want space.
The timeline is my favourite part — frame-level precision, independent track movement, segment volume, and overlays on their own tracks change what is realistically editable inside Riverside rather than in a separate NLE. I have dedicated guides coming on the timeline and on the sidebar tools.
Related guides
 Cristi Cotovan
 Cristi Cotovan
 Cristi Cotovan
 Cristi Cotovan
 Cristi Cotovan
If you're eager to learn more about Riverside and wish to have a one-on-one Riverside coaching session, feel free to book a call with me. I'm here to help you with any questions you have and to guide you through the best workflows, tips, workarounds, or just answer any questions you may have!