How to Use Scenes in Riverside Studio to Switch Layouts While Recording or Streaming

If you have ever gone live from Riverside, you know the juggling act. One minute it is just you on camera, the next you are sharing your screen, then a guest joins and you want the two of you side by side. Every one of those changes used to mean opening the layout options, making sure the windows fit, switching a lower third on or off, maybe hiding the logo — all while you were trying to talk to an audience.
That is the part of live streaming I always found annoying. Am I showing the right thing? Is the correct screen shared? Did I remember to turn the website banner off? Riverside now has Scenes inside the studio, and it takes that whole checklist off your plate. You build each layout once, before the session, and then switch between them with a single click or a keyboard shortcut.
Open the Scenes Panel
Join your studio as usual. In the bottom-left corner of the control bar there is a new Scenes button. Click it and the Scenes panel opens on the left side of the stage.
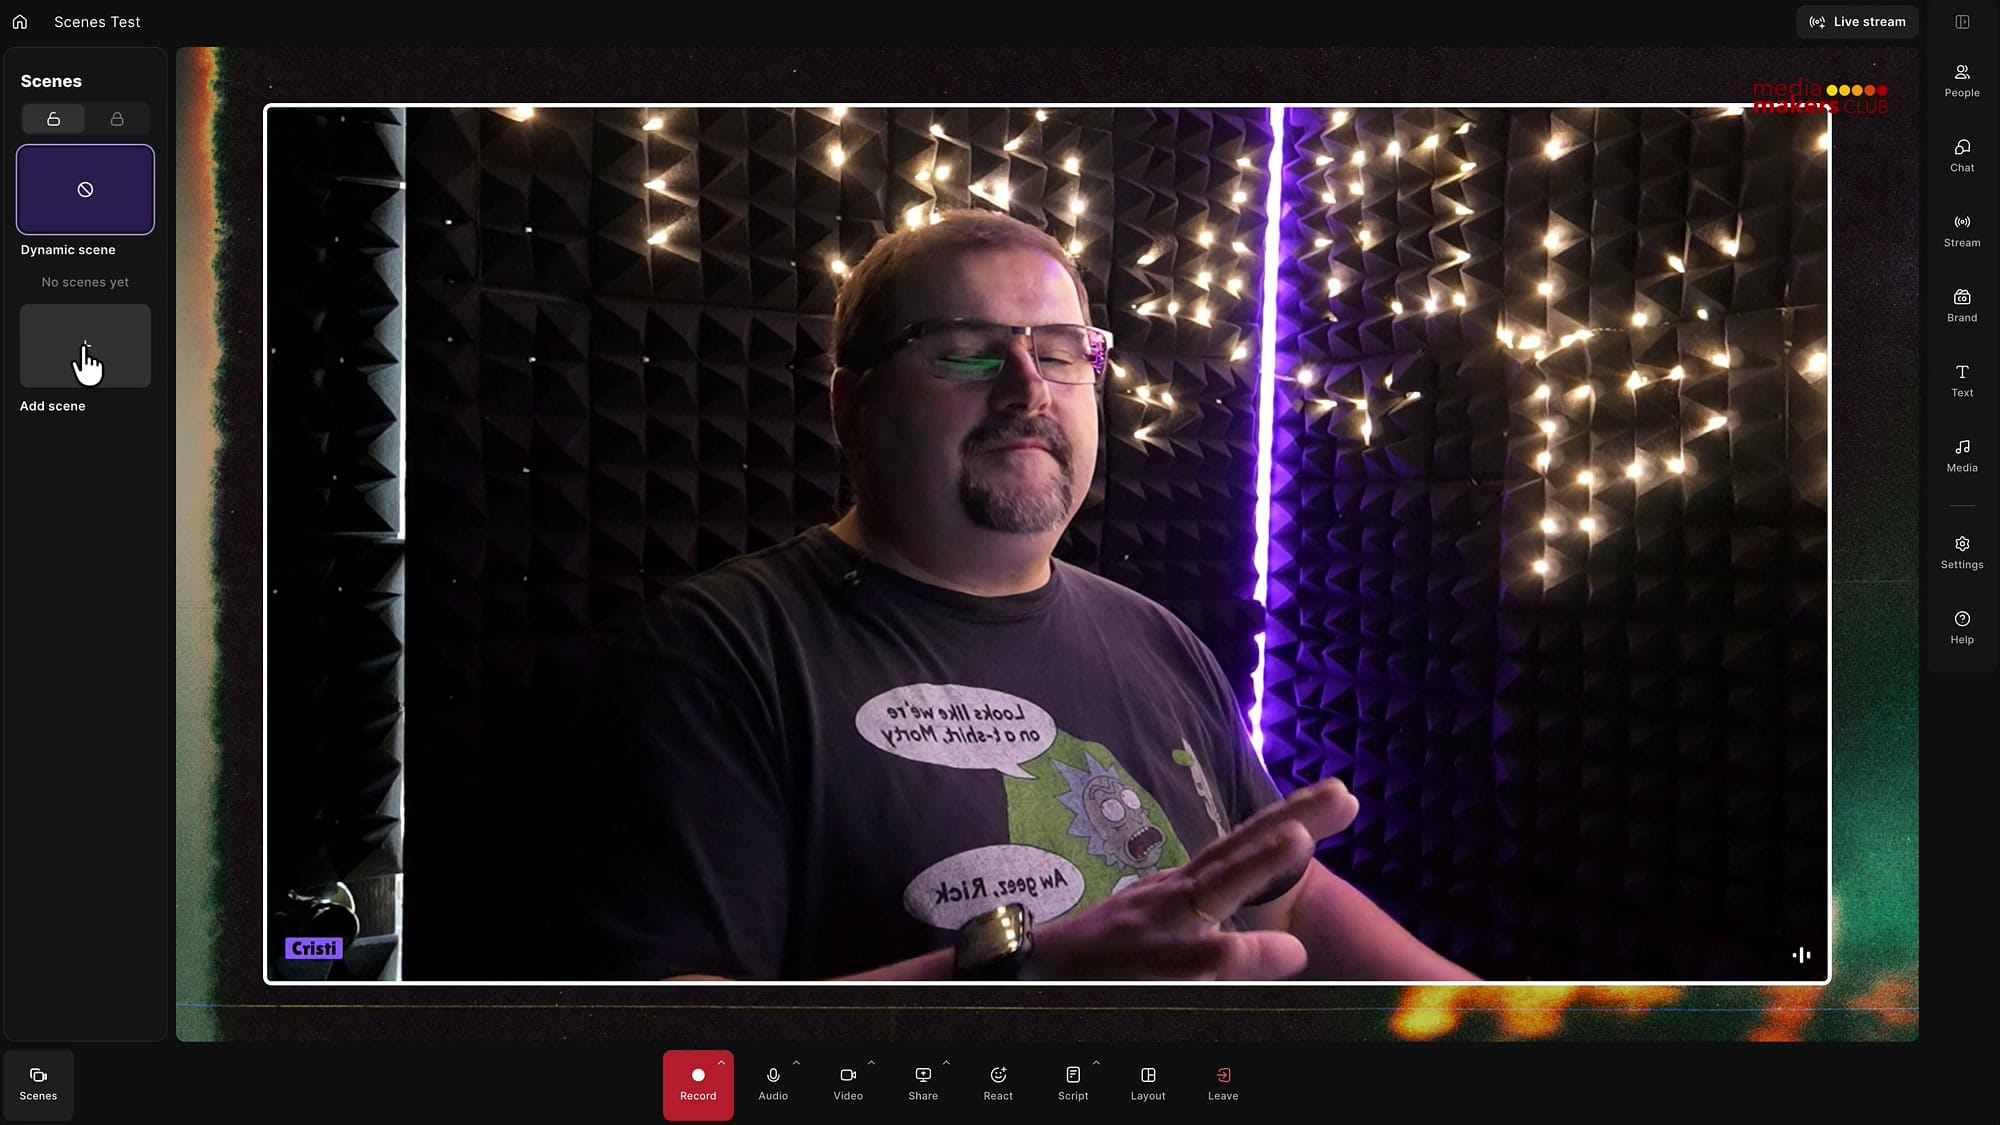
You will see one entry already there, called Dynamic scene. That is the default behaviour you are used to — the studio arranging itself as people join and you change layouts by hand. Below it is Add scene, which is where the new workflow begins.
Create a Full-Screen Host Scene
My first scene is always the simplest one: just me, full screen. Click Add scene, then open the People panel on the right and add yourself to the stage. Whatever background, logo and branding you have set up for the studio shows up straight away, and you can switch those elements on or off for this scene if you want to.
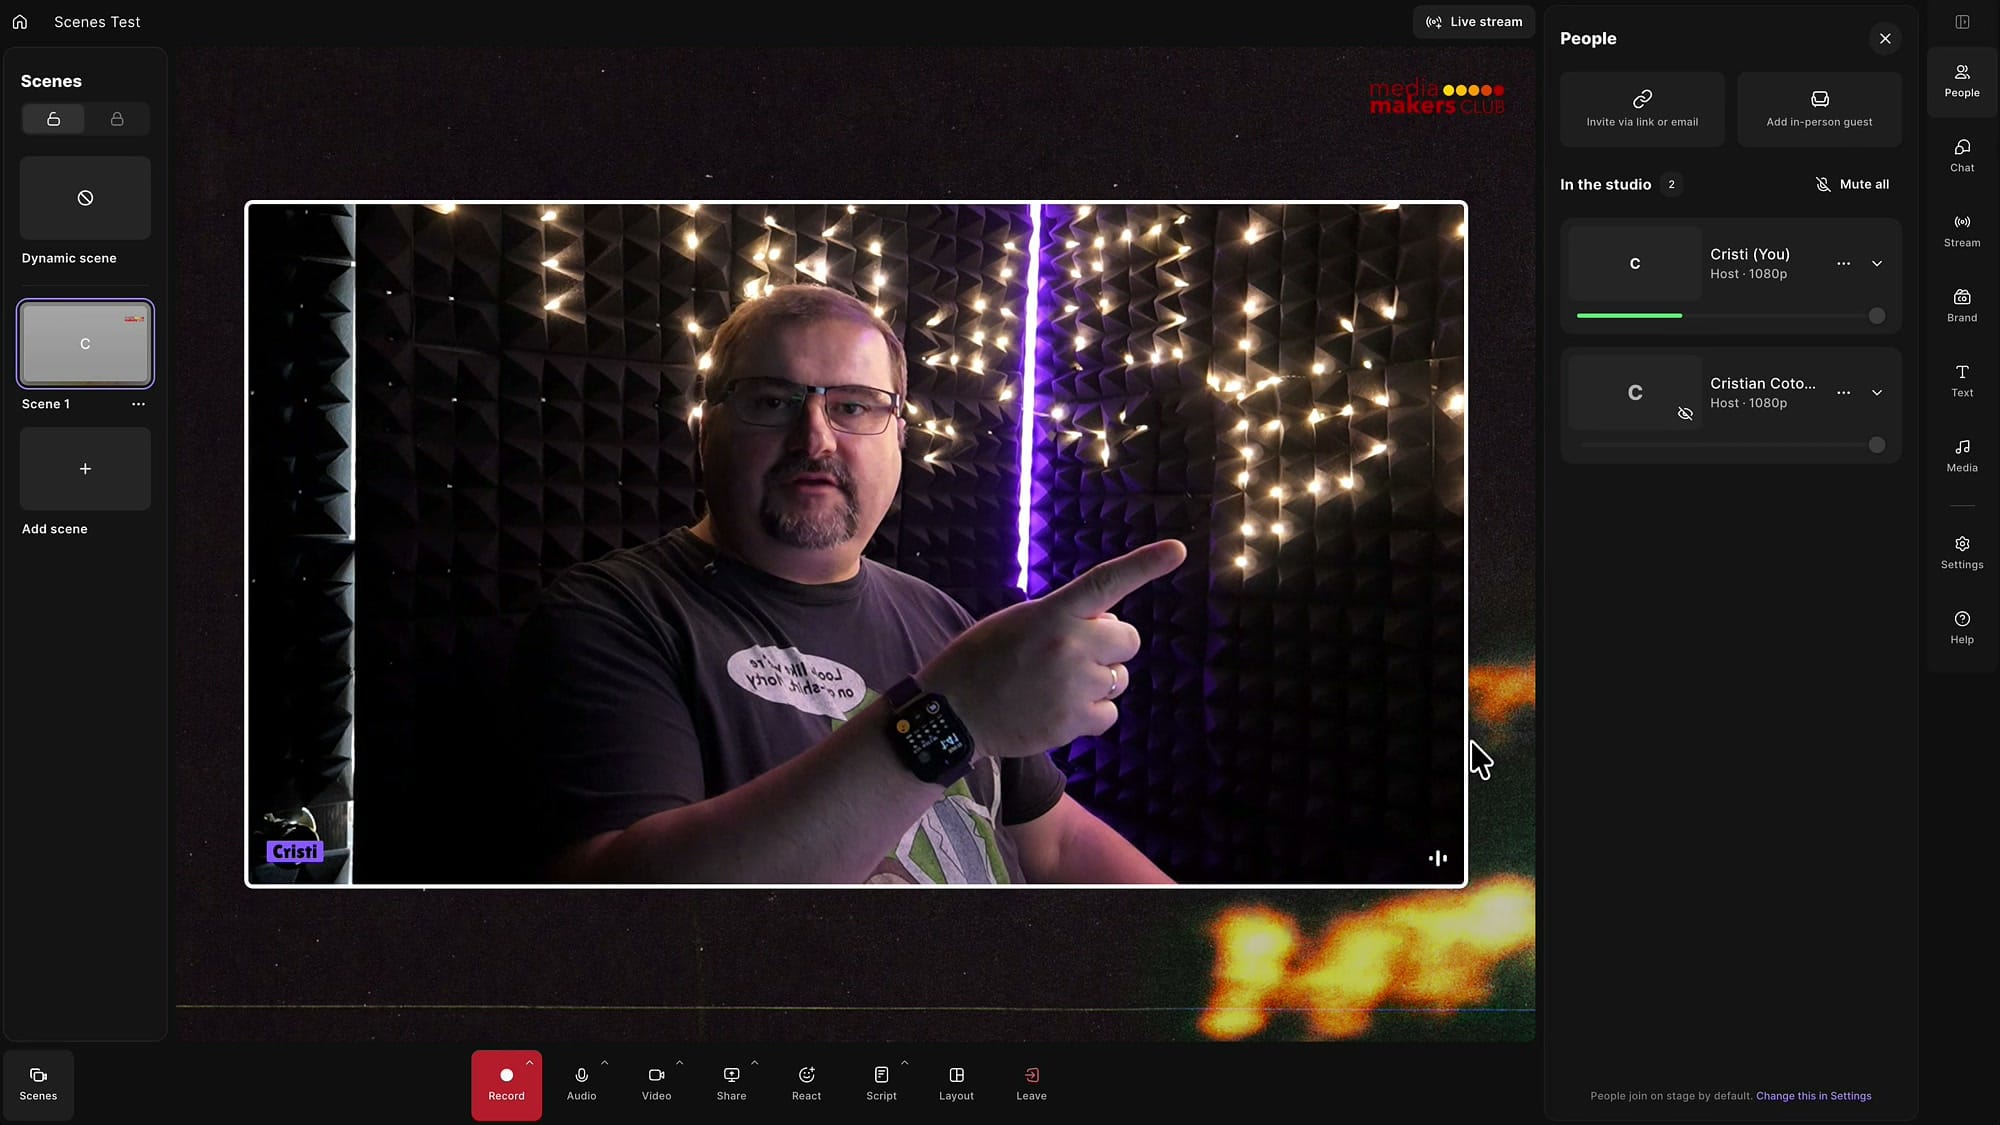
There is no save button. The scene is stored as soon as you make it, and it appears in the panel as Scene 1. Names like that get confusing fast, so give it a proper one: click the three dots next to the scene name and choose Rename. I call mine Host.
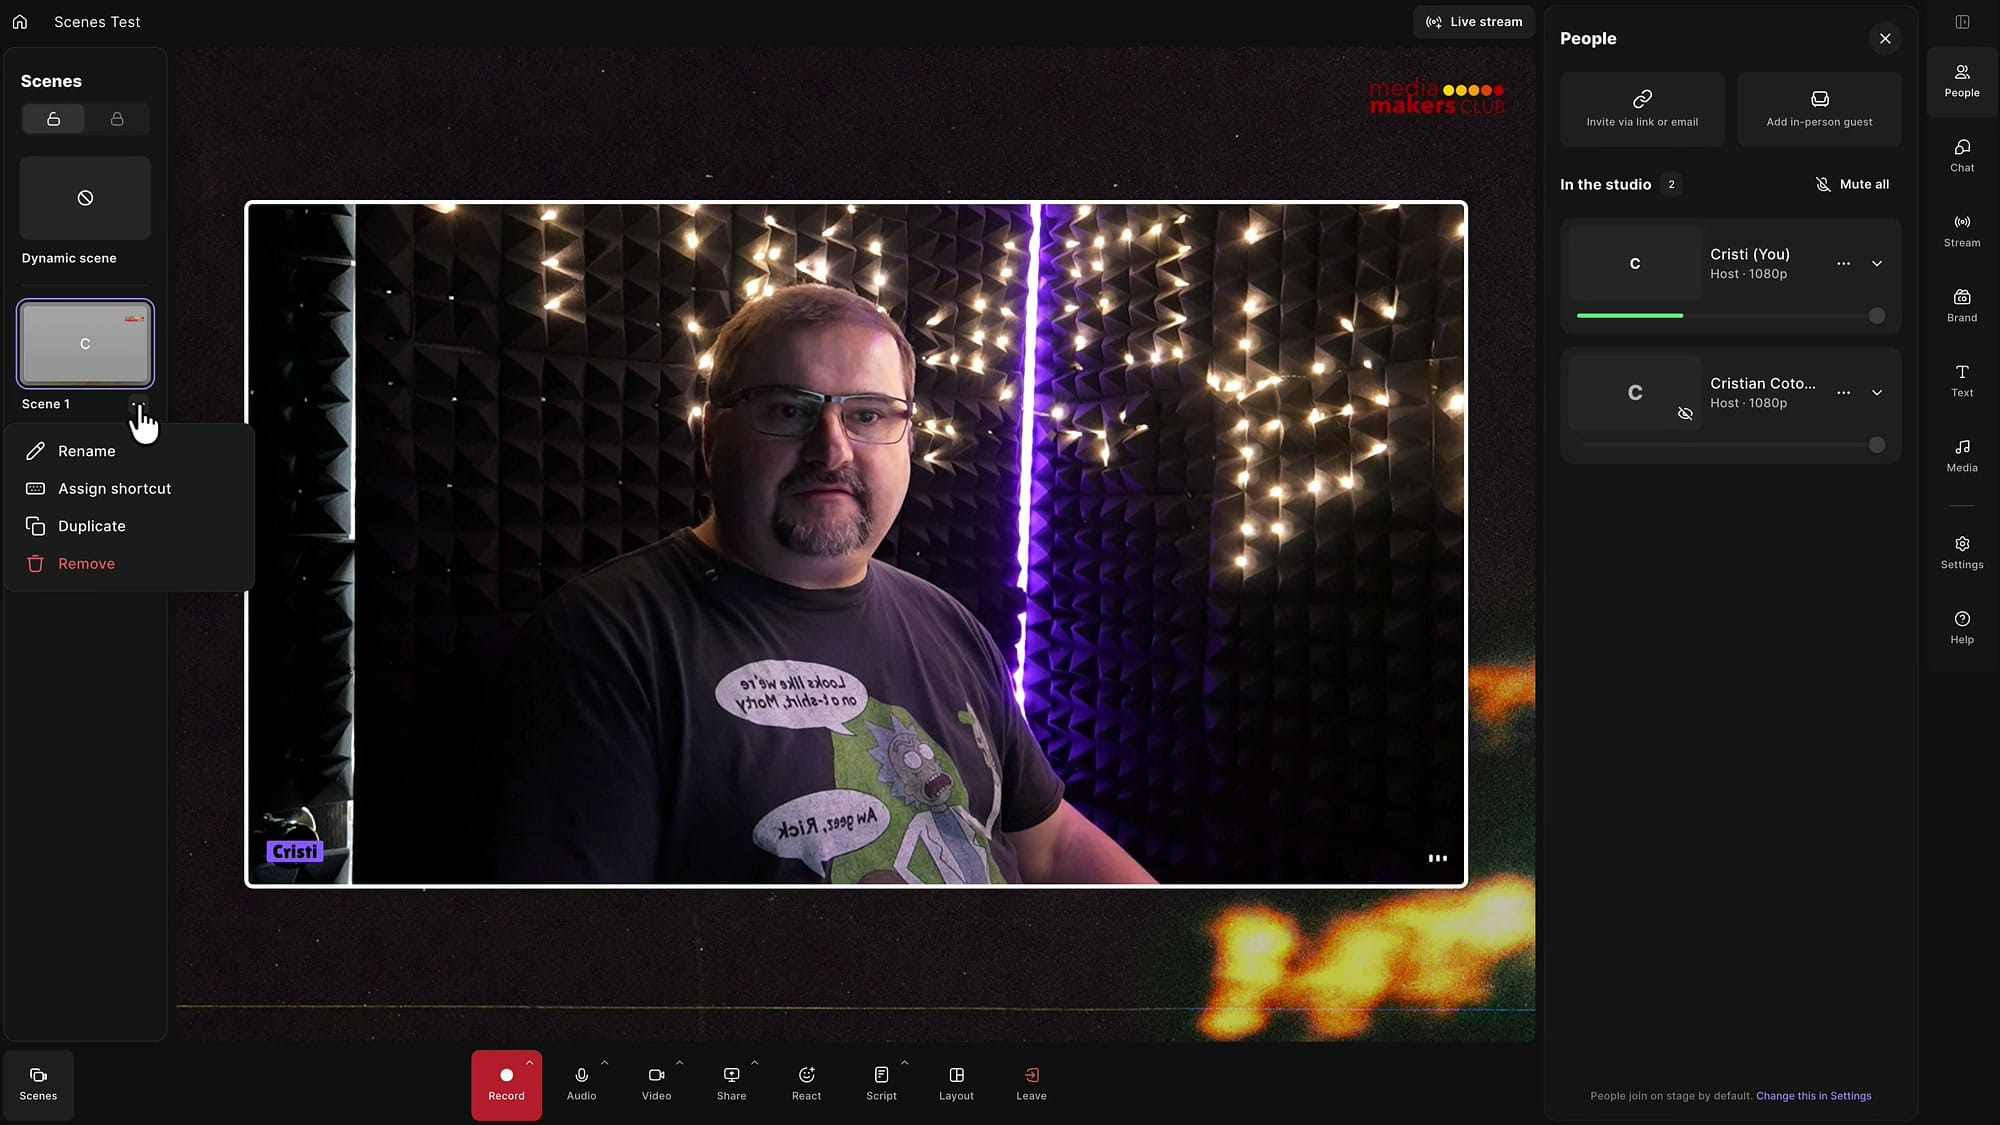
That same menu also has Assign shortcut, Duplicate and Remove. We will come back to shortcuts at the end.
Build a Screen-Share Scene
Click Add scene again. Notice that a new scene does not copy the previous one — it goes back to default and hides everything, so you are constructing it from an empty stage.
Add yourself from the People panel again, but this time pick a different layout from the layout strip under the stage, then click Share in the control bar. Your browser asks what you want to share — a tab, a window or an entire screen. I share my second monitor.
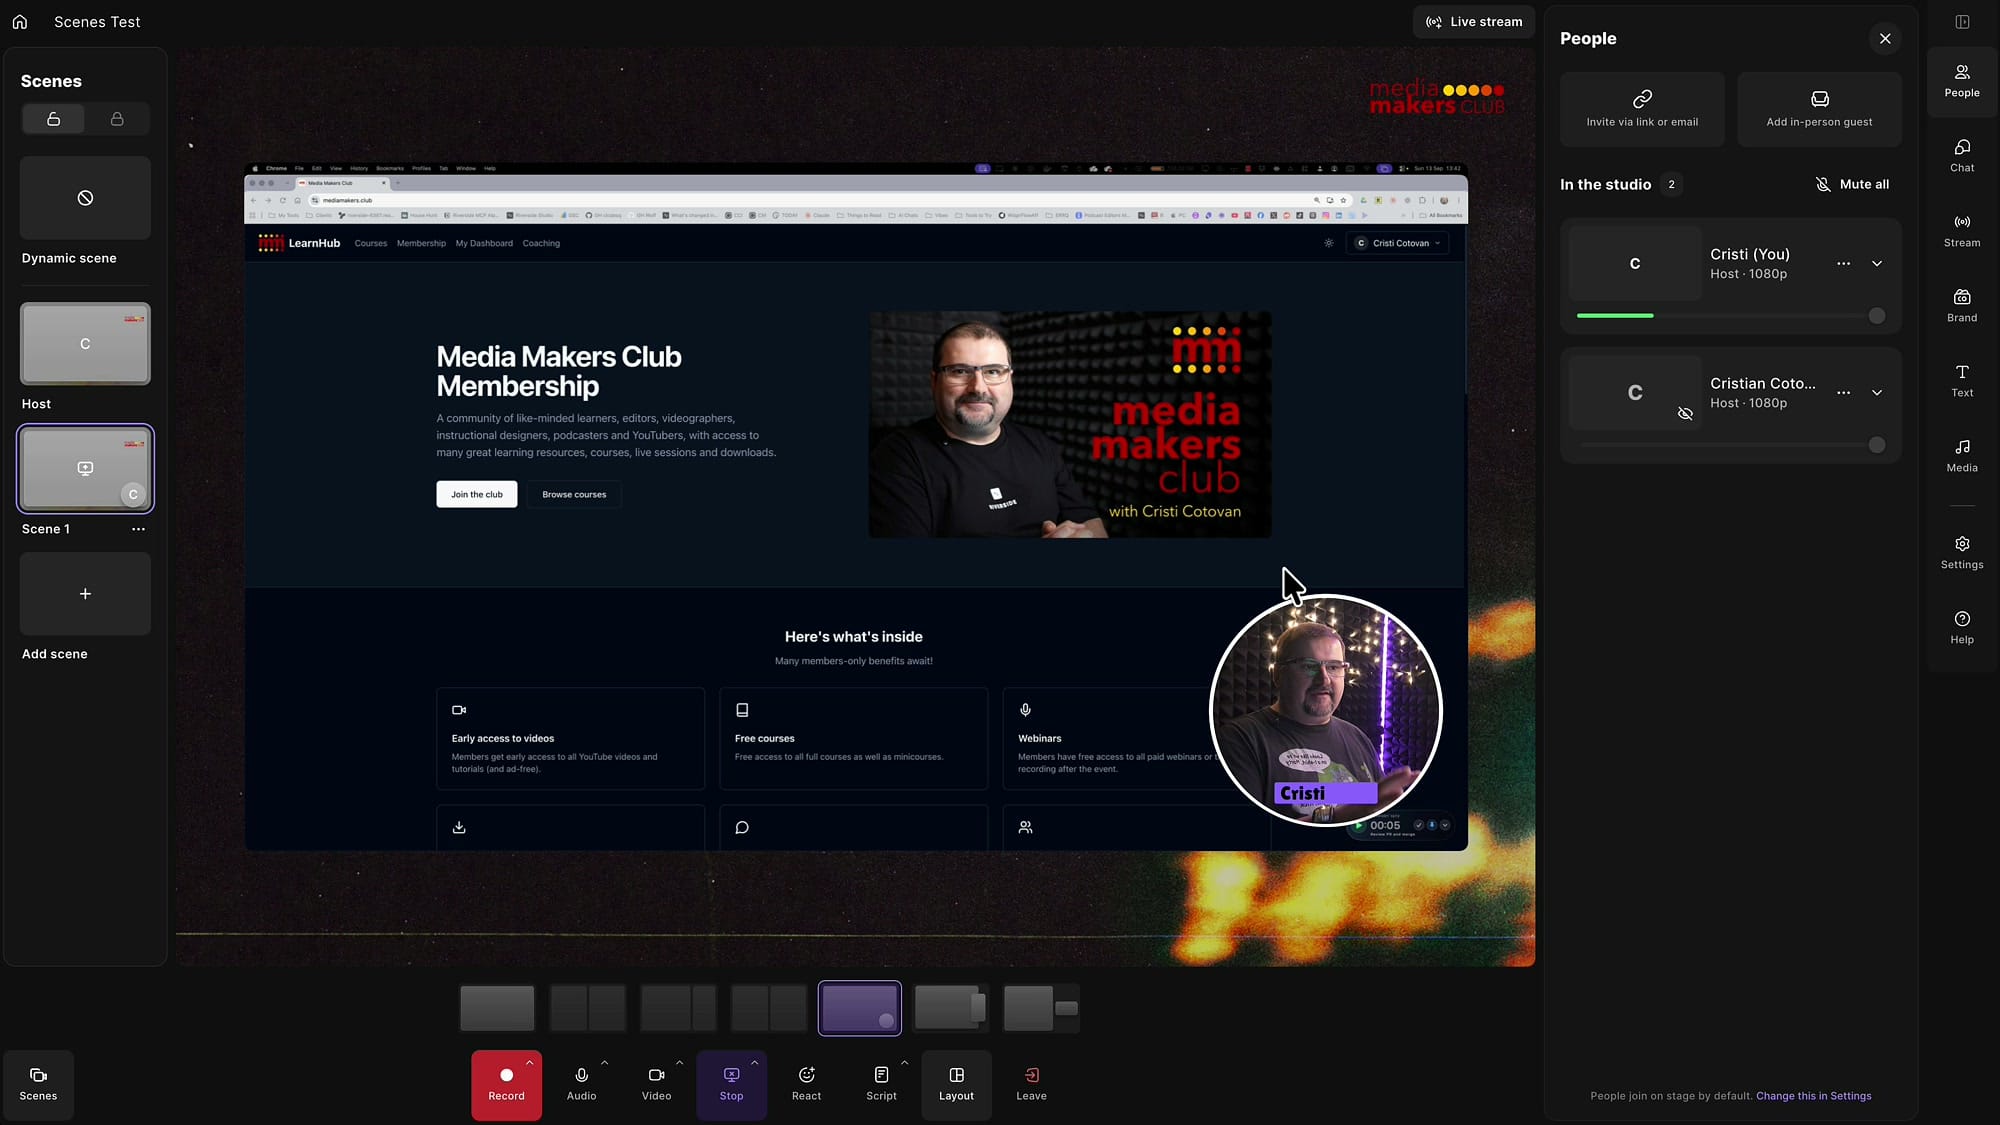
The shared screen is now part of that scene, and just like before, every change is saved automatically. Rename it to something obvious like Screenshare.
Lock Your Scenes Before You Go Live
Automatic saving is convenient while you are building, but it also means a stray click during a live session would quietly change your scene. At the top of the Scenes panel there are two lock icons. Switch to the locked padlock and your scenes are protected — nothing you click while live gets written back into them.
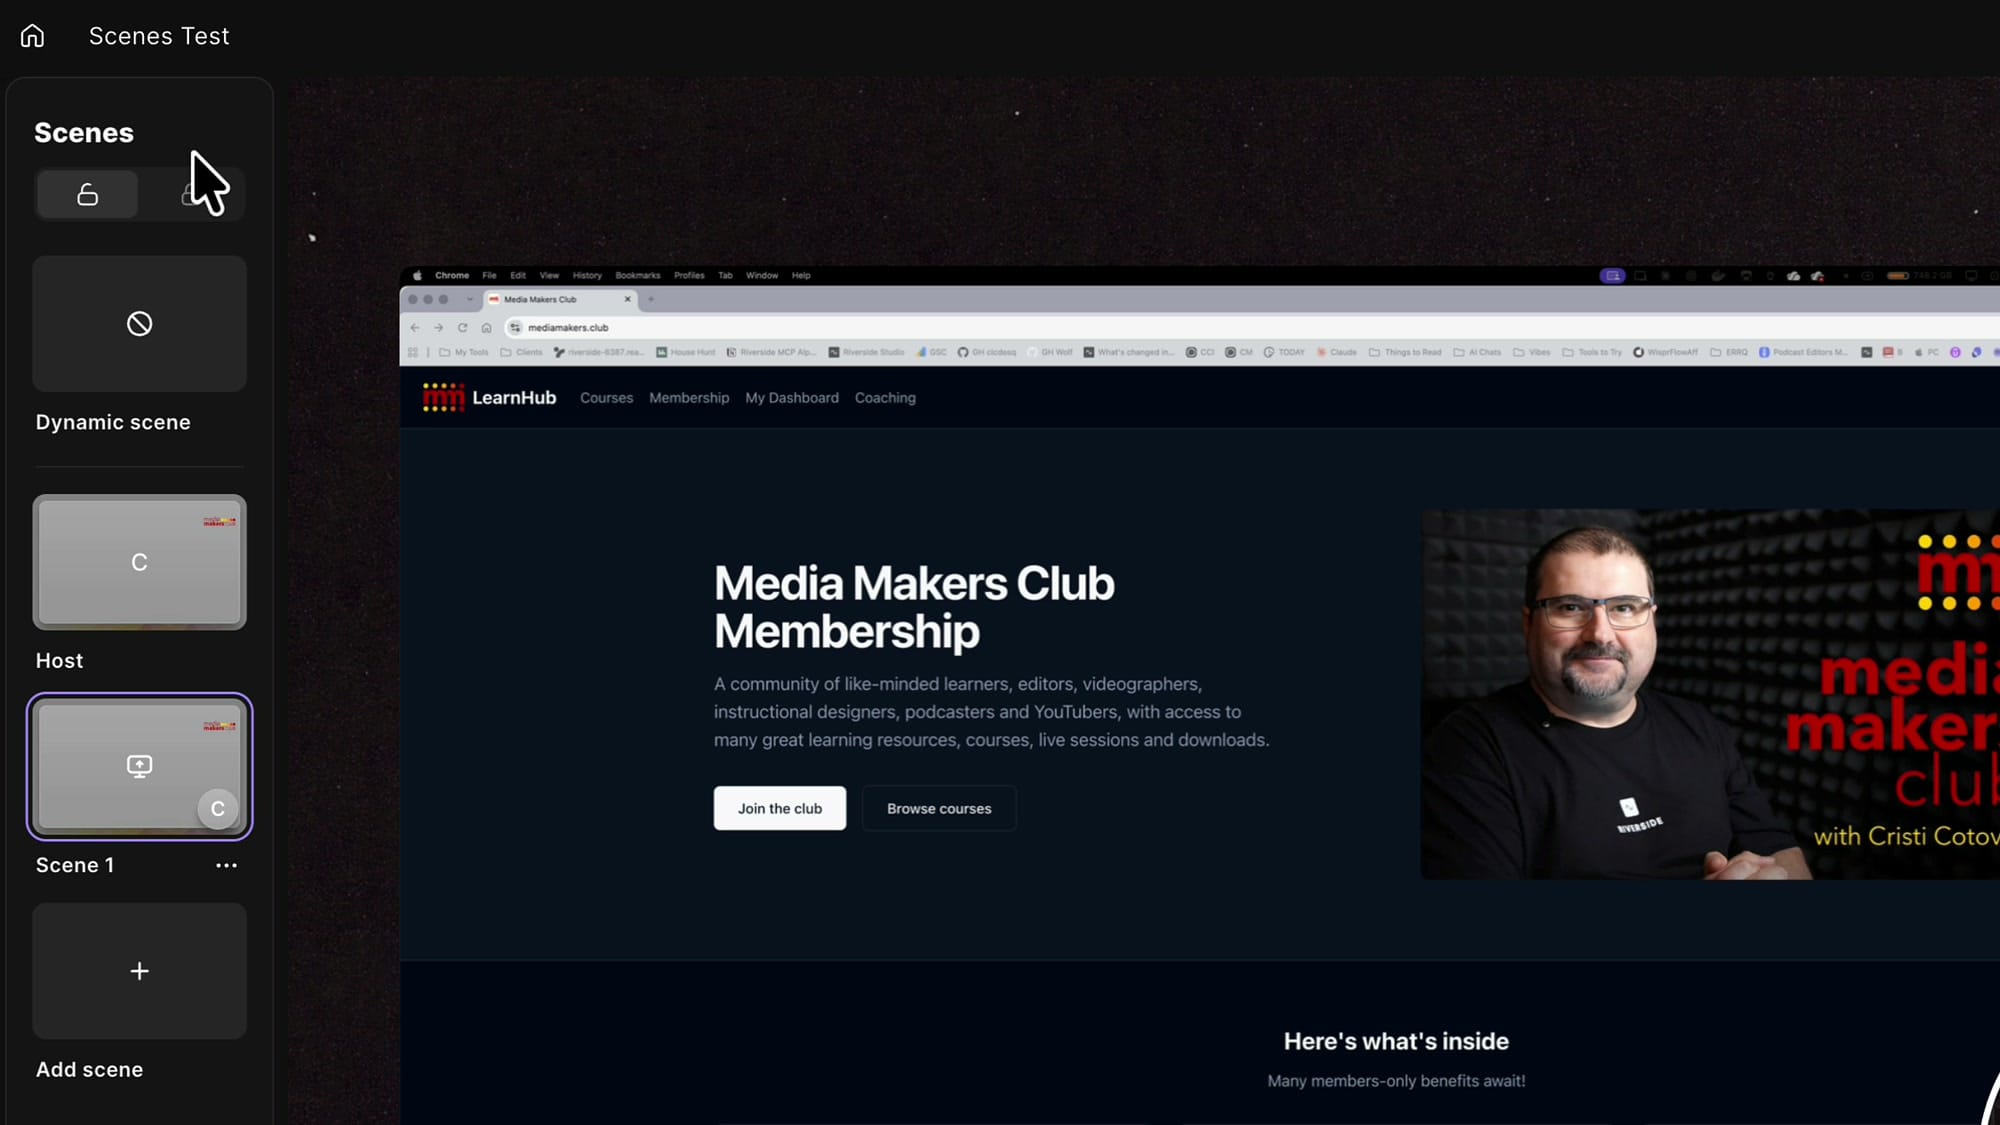
I would build all my scenes first, then lock them right before going live.
If you’re eager to learn more about Riverside and wish to have a one-on-one Riverside coaching session, feel free to book a call with me.
I’m here to help you with any questions you have and to guide you through the best workflows, tips, workarounds, or just answer any questions you may have!
Add a Side-by-Side Scene for Guests
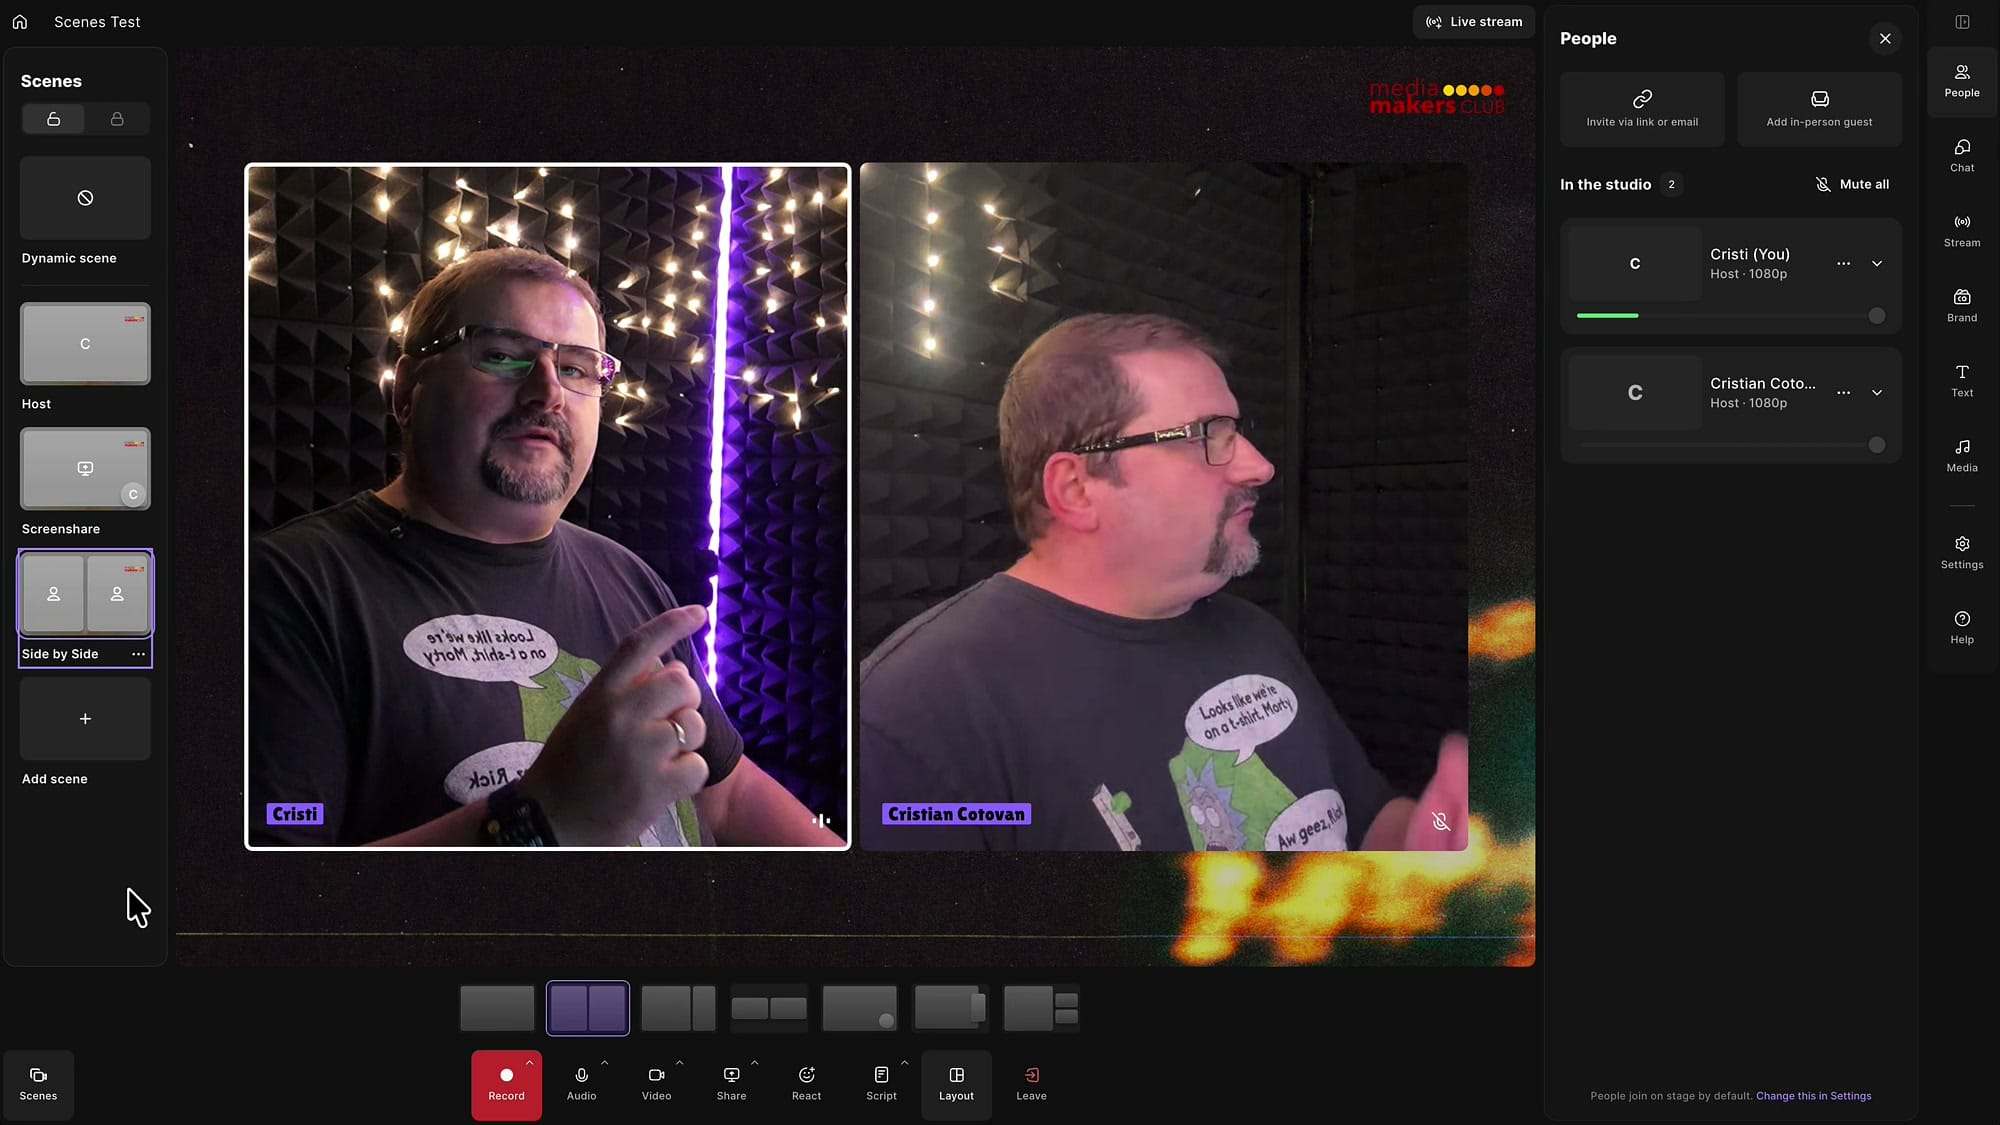
For the third scene, click Add scene once more and add two people from the People panel. In my case the second person is me again, joined from my phone as a second camera, but in a real session this is where your guest or co-host goes. If you still need to get them into the studio, here is how to quickly invite guests to record in Riverside.
Choose the side-by-side layout from the layout strip, and rename the scene Side by Side.
Switch Scenes With One Click
Now the payoff. Say I am live, presenting something, and I want to show my screen. I click Screenshare in the Scenes panel and the layout changes instantly. Click Host and it is just me, full screen. Click Side by Side and my guest is back on stage. No layout menus, no resizing windows, no checking which screen is shared.
Save Text and Branding Per Scene
You might be thinking that layouts could already do most of this. They could. What layouts could not do is remember everything else that belongs to a particular shot — and that is where Scenes earn their place.
Show a Lower Third Automatically
When I cut back to myself full screen during a live stream, I like to put my website on screen so people know where to go. Doing that by hand every single time gets old quickly.
With the Host scene selected, open the Text panel on the right. This is where your saved lower thirds live — I have one for my Media Makers Club website. Click Show on the one you want. By default it stays on screen for a short time, but you can click the timer next to the button and set it longer. I usually use 20 seconds.
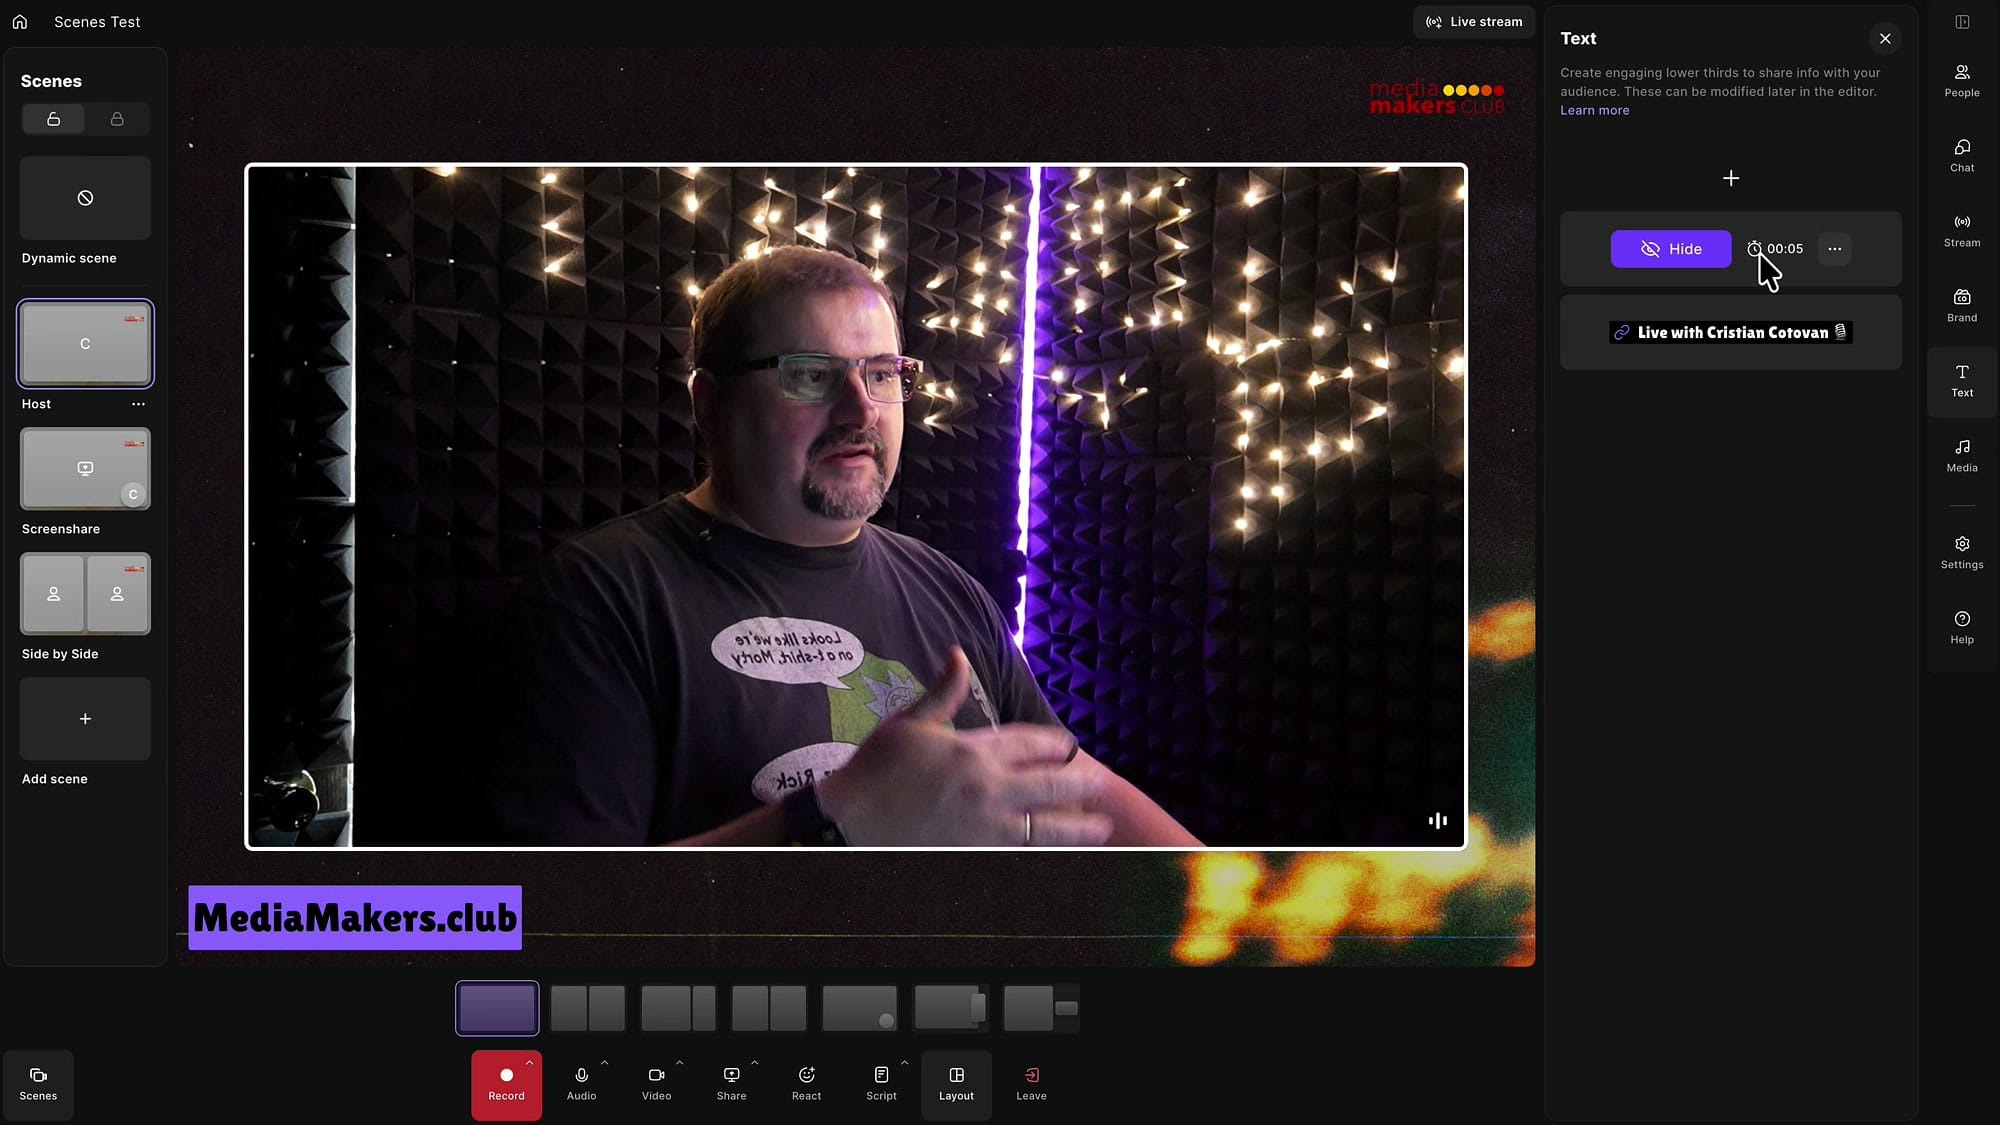
That lower third is now part of the Host scene. Switch to Screenshare and it disappears. Switch back to Host and it appears again on its own, counts down the time you set, and then goes away.
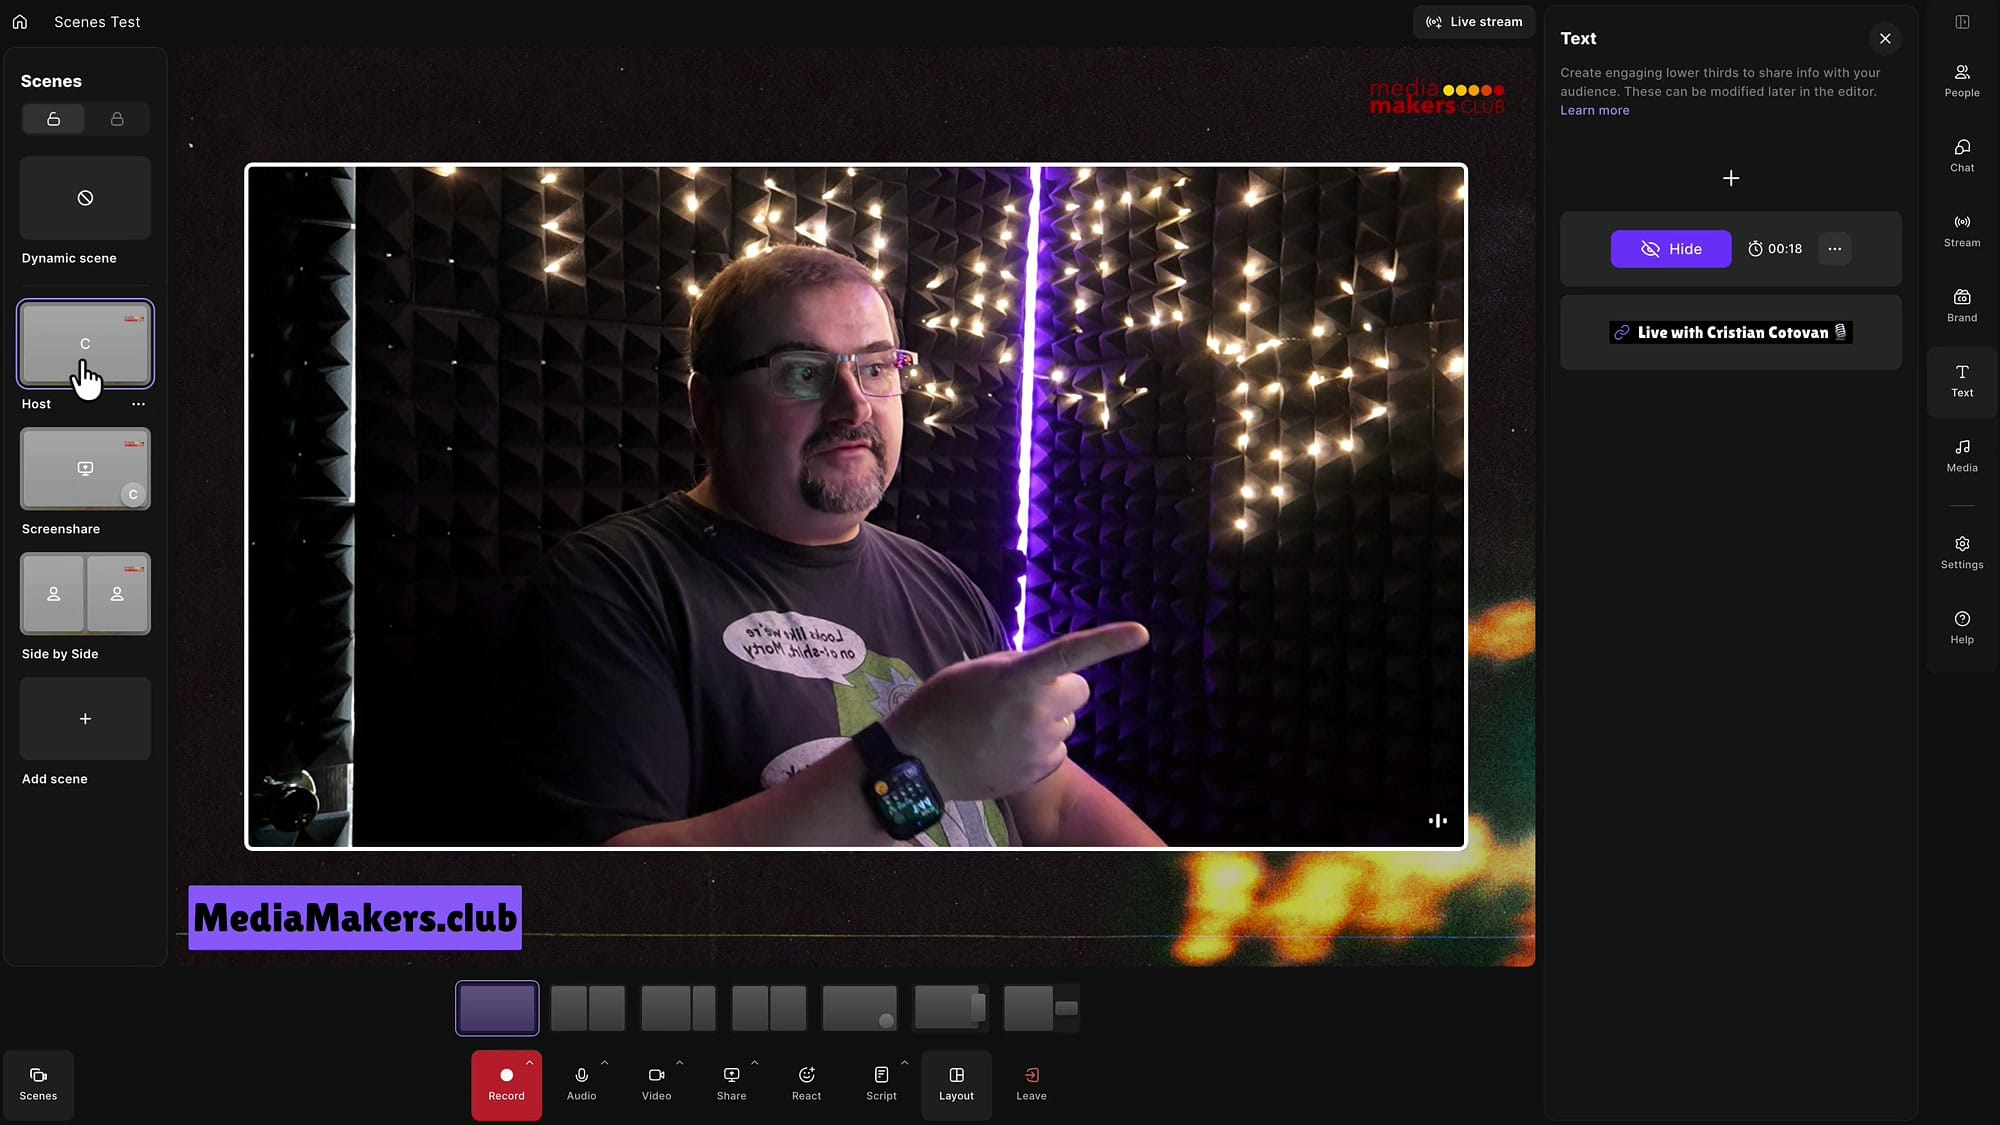
Screen, full screen, screen, full screen — the promotion comes back every time without me thinking about it. You can do the same for every scene and show different text in each.
Hide the Logo on Specific Scenes
The Brand panel works the same way. For my full-screen Host scene I decided I did not want the logo, so with Host selected I opened Brand and removed the logo. It is gone from that scene only.
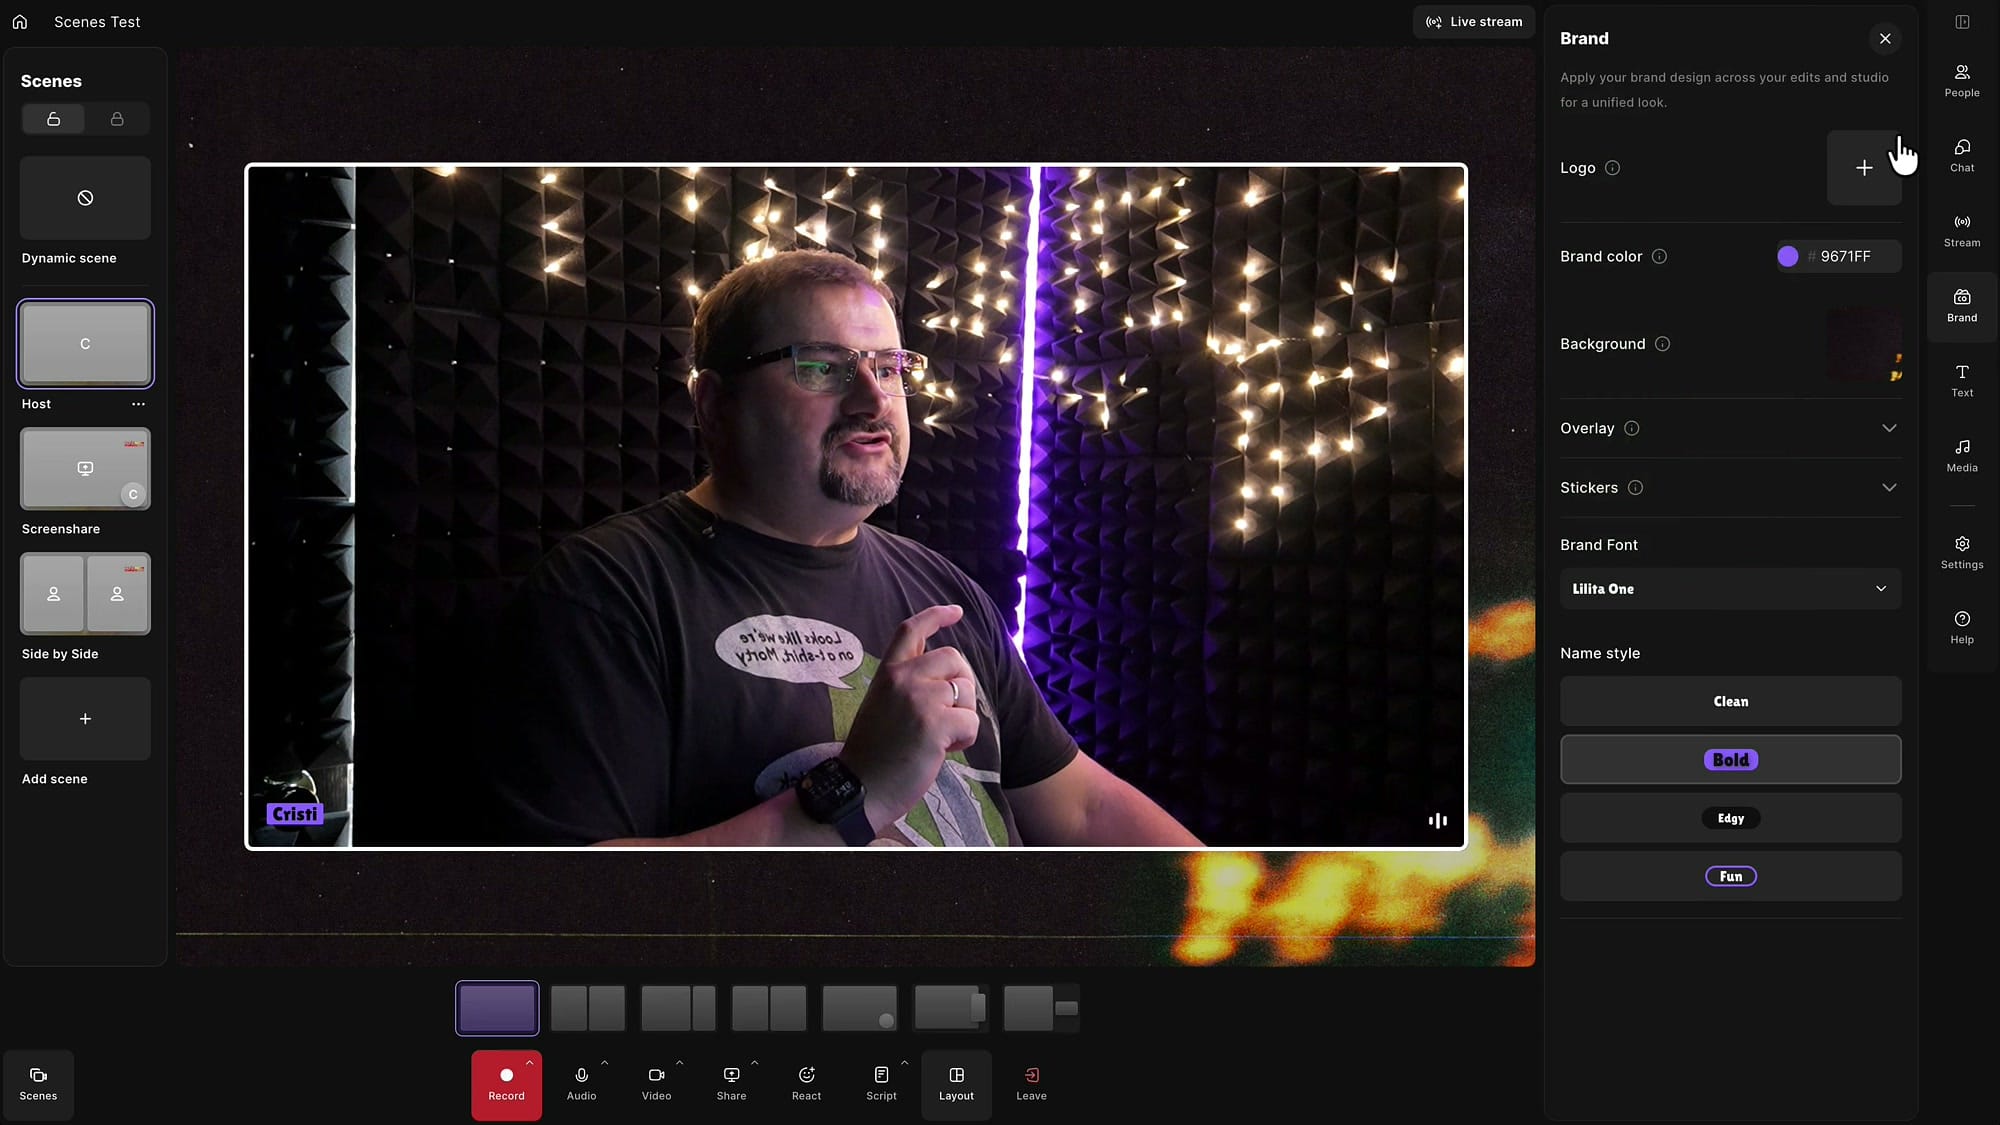
Switch to Screenshare and the logo is back, because that scene still has it. Switch back to Host — no logo. If you have not set up your studio branding yet, start with how to customize your logo and brand in Riverside.
Assign Keyboard Shortcuts to Your Scenes
Clicking scenes is easy, but shortcuts are faster and they work with the Scenes panel closed, so it does not have to take up space on your screen.
Click the three dots on a scene and choose Assign shortcut. Every scene shortcut is Shift plus a key you choose. Press the combination, then click Save.
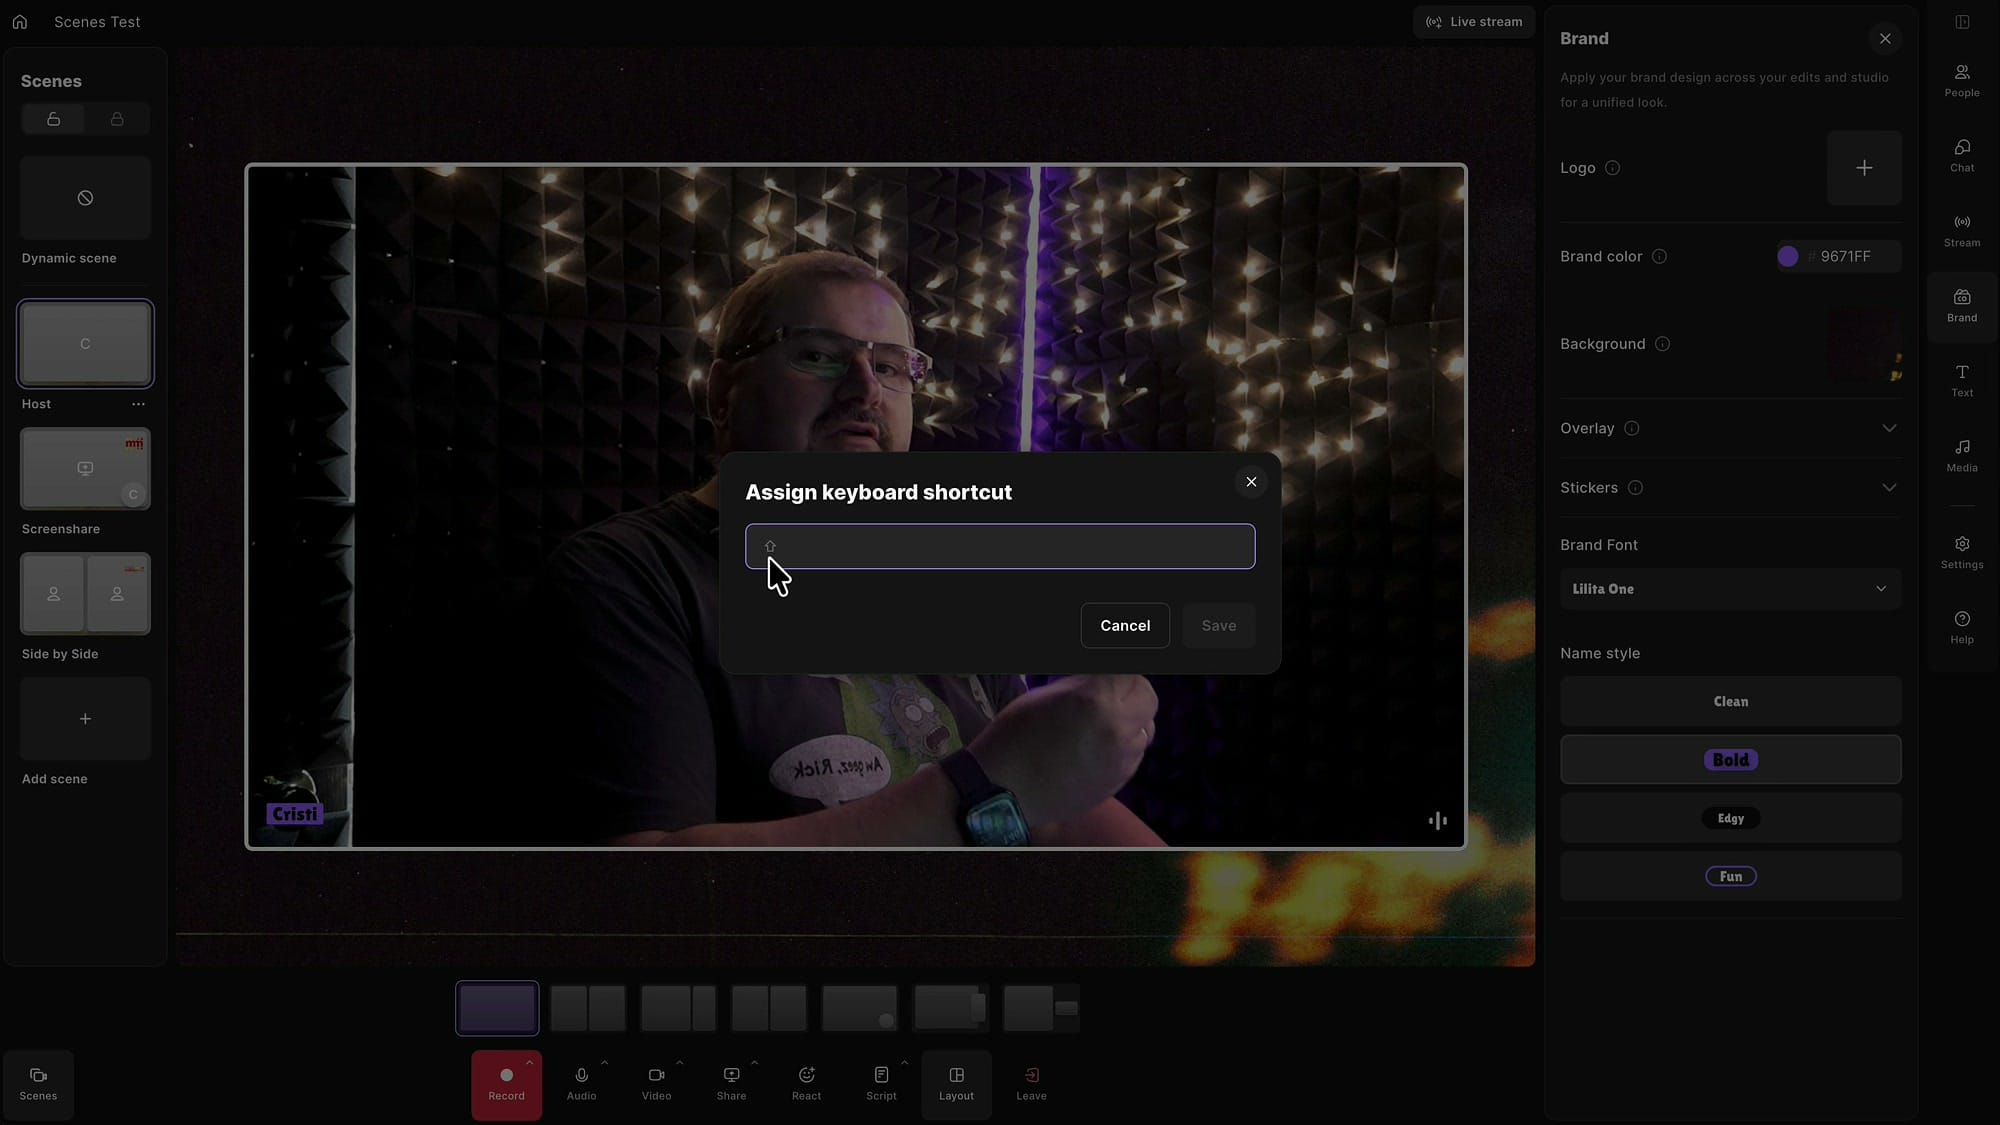
I gave Host Shift+1, Screenshare Shift+2 and Side by Side Shift+3. Each scene thumbnail now shows its shortcut, so you do not have to remember which is which.
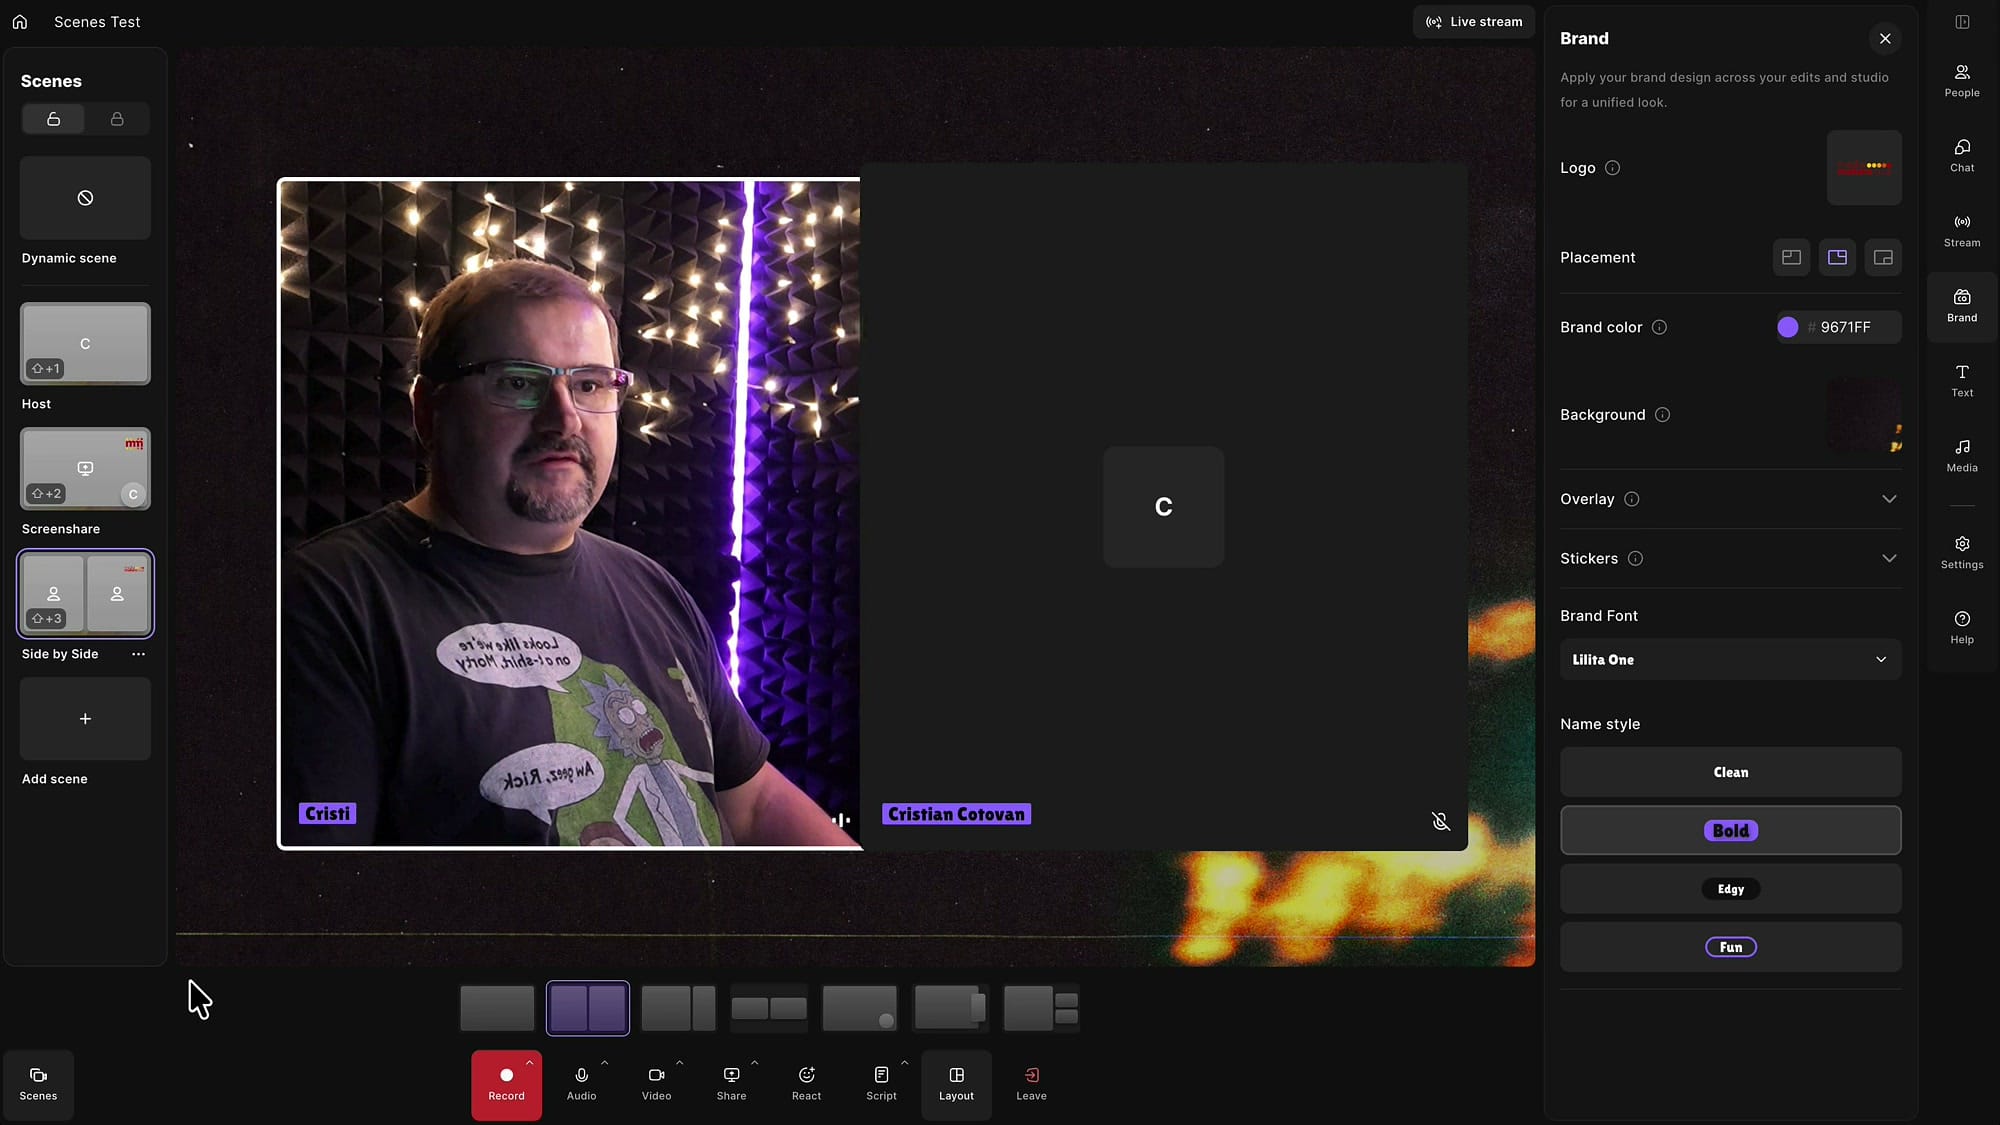
Close the panel and try it: Shift+1, Shift+2, Shift+3. The stage switches every time.
What Your Audience Sees vs What Riverside Records
There is one thing to understand before you rely on Scenes for a recording. Scenes control how the session is presented — what your live stream audience sees. They do not change what Riverside records.
Riverside still records each participant on a separate track, and the scene layouts, lower thirds and logo changes are not transmitted into the recording. When you open the project in the editor afterwards, you will not find your scene switches at those same moments. You build the edited layouts there instead, for example by saving and reusing scene layouts in the editor, and adding guest names and titles after recording.
I am hearing that carrying studio scenes into the recording may be on the way, but for now, treat Scenes as a live production tool. And for live streams, it is the feature I have been waiting for.
Related guides
 Cristi Cotovan
 Cristi Cotovan
 Cristi Cotovan
 Cristi Cotovan
 Cristi Cotovan
If you're eager to learn more about Riverside and wish to have a one-on-one Riverside coaching session, feel free to book a call with me. I'm here to help you with any questions you have and to guide you through the best workflows, tips, workarounds, or just answer any questions you may have!