Riverside Screen Glow and Lighting Controls: How to Look Better Before You Record
Riverside's Appearance controls let you smooth your skin, relight your face, and turn your own screen into a ring light — all before you press record.

Riverside has had appearance effects inside the recording studio for a while, and I already walked through the first version of them in my guide on how to touch up your appearance in Riverside Studio. The latest update turns that handful of toggles into a proper lighting kit — and adds the one control I was pleasantly surprised with: a software ring light that lives on your own screen.
This matters more than it sounds. I've had clients tell me flat out that they'd rather record in Zoom because Riverside didn't smooth their skin. That objection is gone, and what replaced it goes further than Zoom does.
One thing to be clear about up front: everything here happens before or during recording or live streaming, in the studio. It isn't a post-production effect. The payoff is that the file you record is already better, instead of you fixing it in the editor afterwards.
Riverside now tells you when your lighting is bad
Open a project and click Record to launch the studio. You land on the "Let's check your devices" screen — the lobby where you confirm your camera, microphone, and headphones before joining. It's a good moment to sanity-check the rest of your Riverside studio settings too.
What's new is that Riverside now watches your camera feed here and speaks up when the light isn't good enough. A Tip panel appears over your preview: "Your lighting could be better — Check that you have enough light and that you're facing it," with an Adjust lighting link right underneath it.
I switched my key light off on purpose for this, and on a Logitech C925e webcam the image drops off a cliff — which is exactly the situation the tip is built to catch.
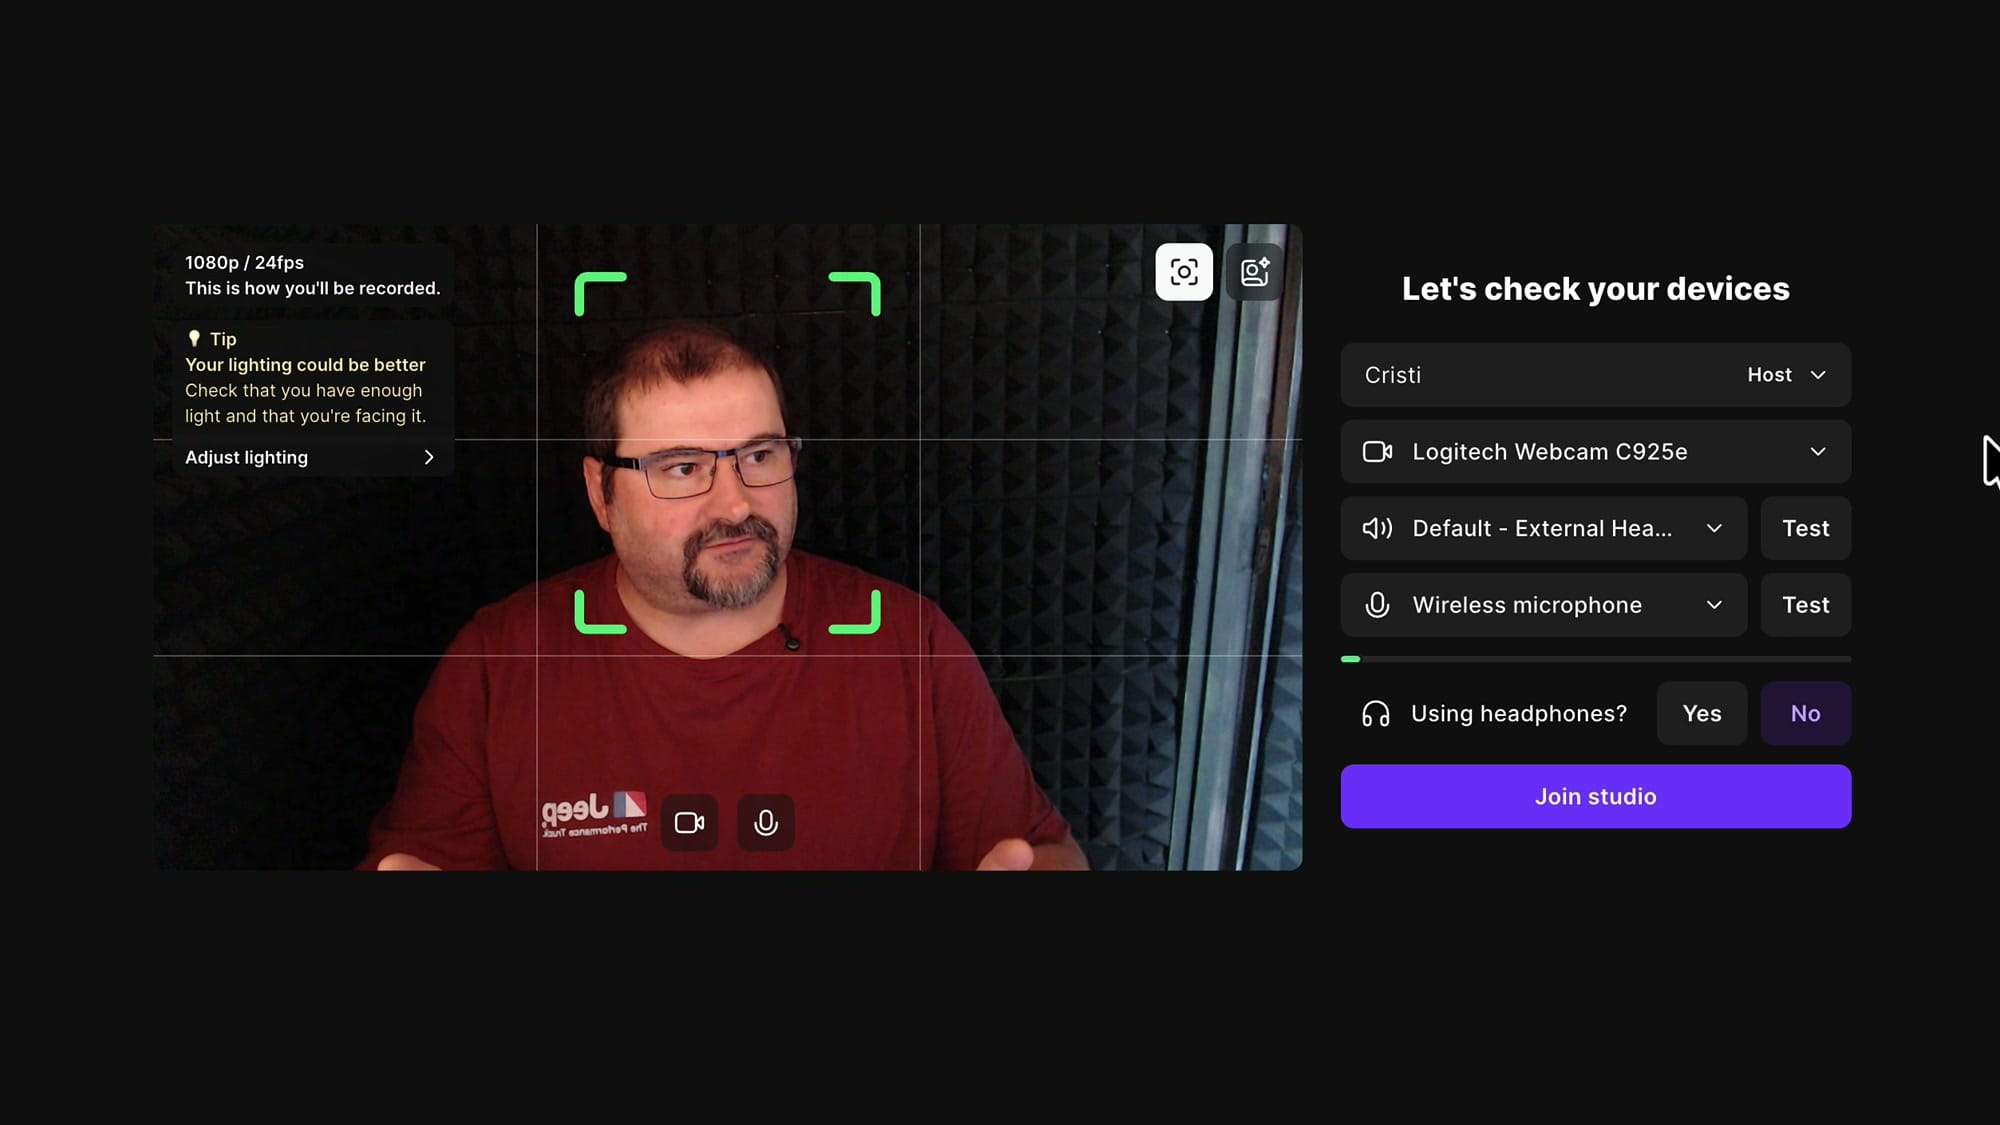
While you're looking at that corner, the "1080p / 24fps — This is how you'll be recorded" line is worth a glance every time. If it isn't showing the resolution you expect, sort that out before you fix anything cosmetic — here's how to record in high resolution in Riverside.
The framing guide you get for free
Click Adjust lighting and two things happen. The effects panel opens on the right, and your preview picks up a framing overlay: a rule-of-thirds grid plus a green bracketed rectangle.
Put your face inside those brackets and your framing is right. Not cropped at the forehead, not floating in the middle of the frame with a metre of empty headroom above you. I had been planning to make a whole video about camera framing, and this overlay does most of the teaching for me.
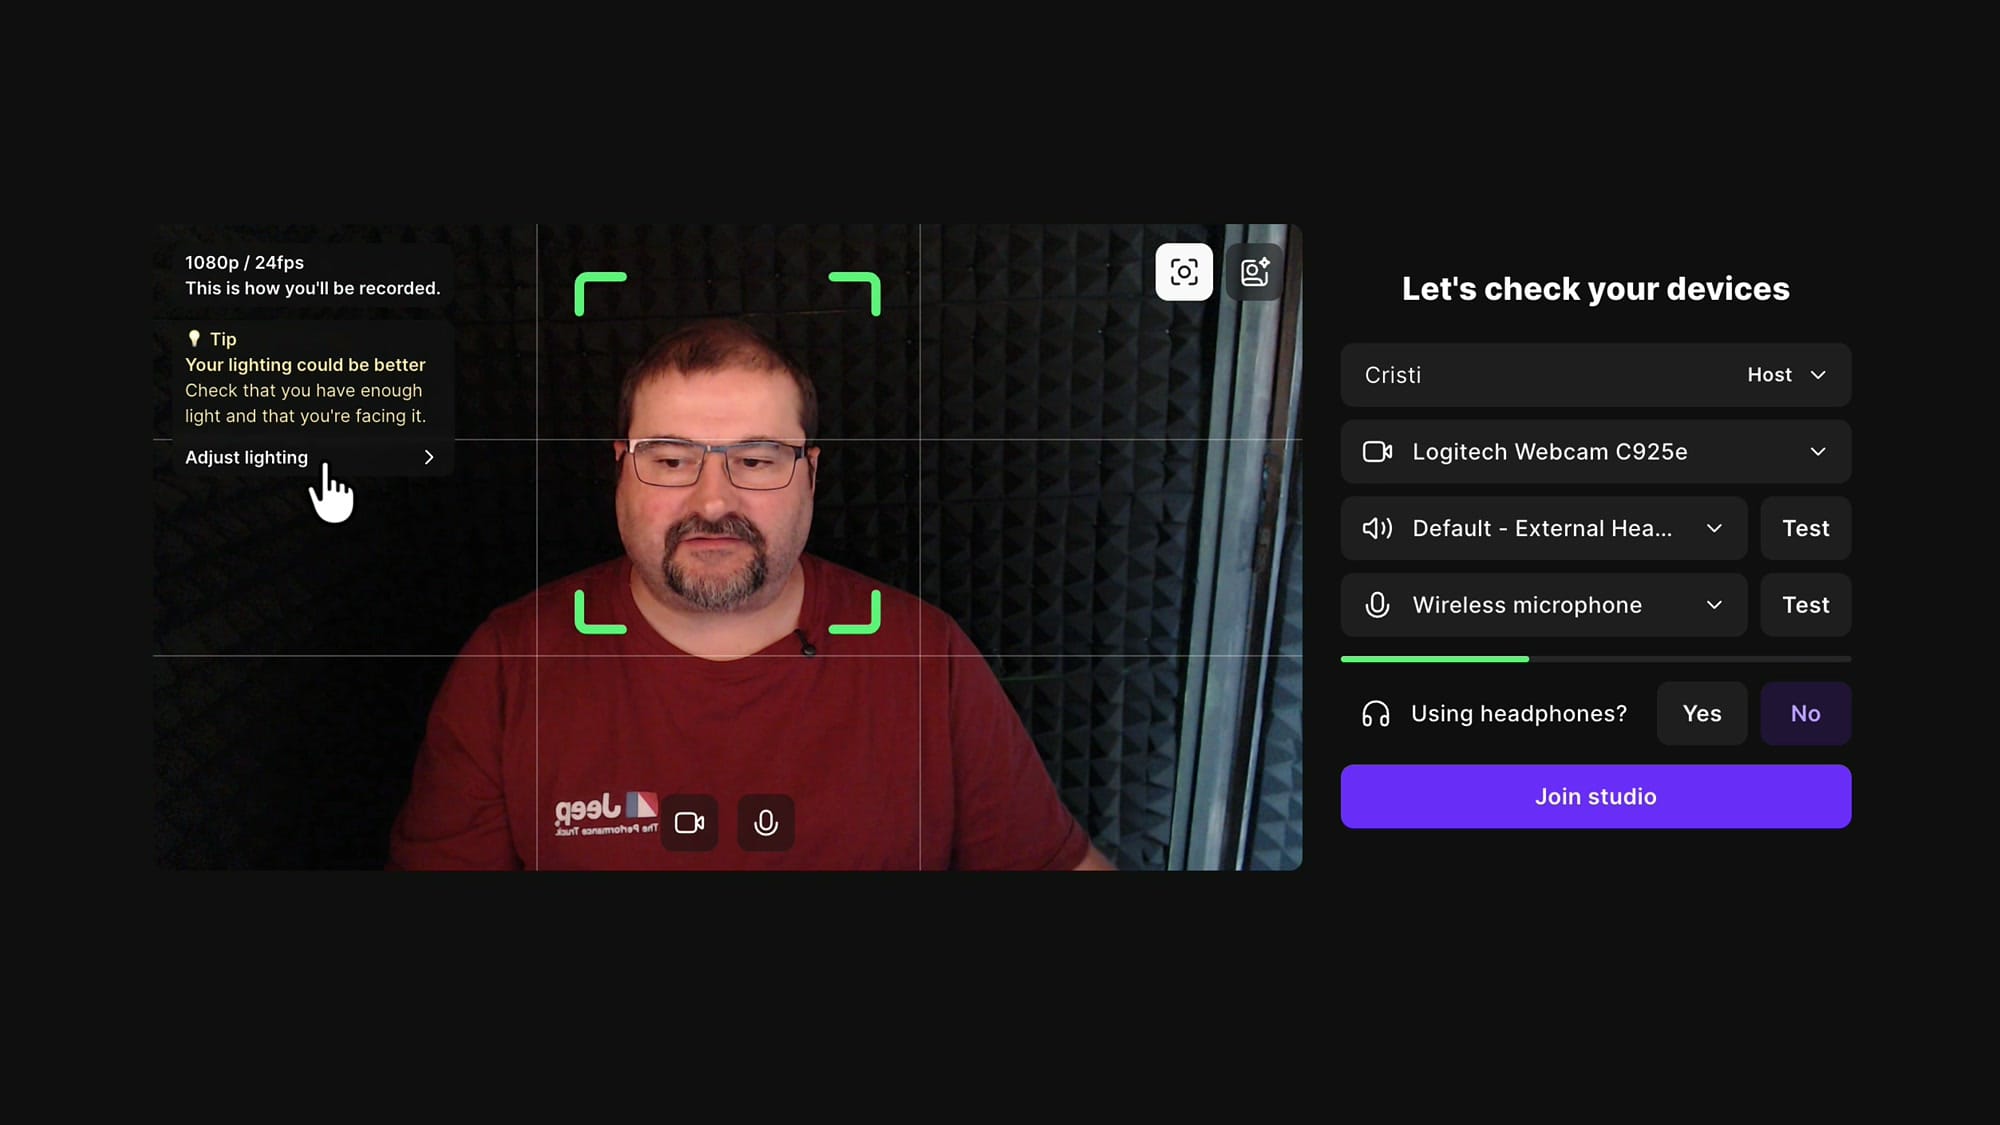
If framing slips during a real session, you can still recover it later with AutoCrop and reframe in the Riverside editor, which can centre your face automatically. But getting it right in the lobby costs you nothing and looks better.
If you’re eager to learn more about Riverside and wish to have a one-on-one Riverside coaching session, feel free to book a call with me.
I’m here to help you with any questions you have and to guide you through the best workflows, tips, workarounds, or just answer any questions you may have!
Where the controls live
The panel that opens is called Background and effects, and it has two tabs. Background is the one you may already know — blur your background or swap it for an image. The new stuff is on the Appearance tab, and there are four controls on it:
- Touch up — smooth your skin on camera
- Face lighting — improve lighting on your face
- Studio lighting — adjust the lighting in your scene
- Screen glow — brighten your face when your lighting is low
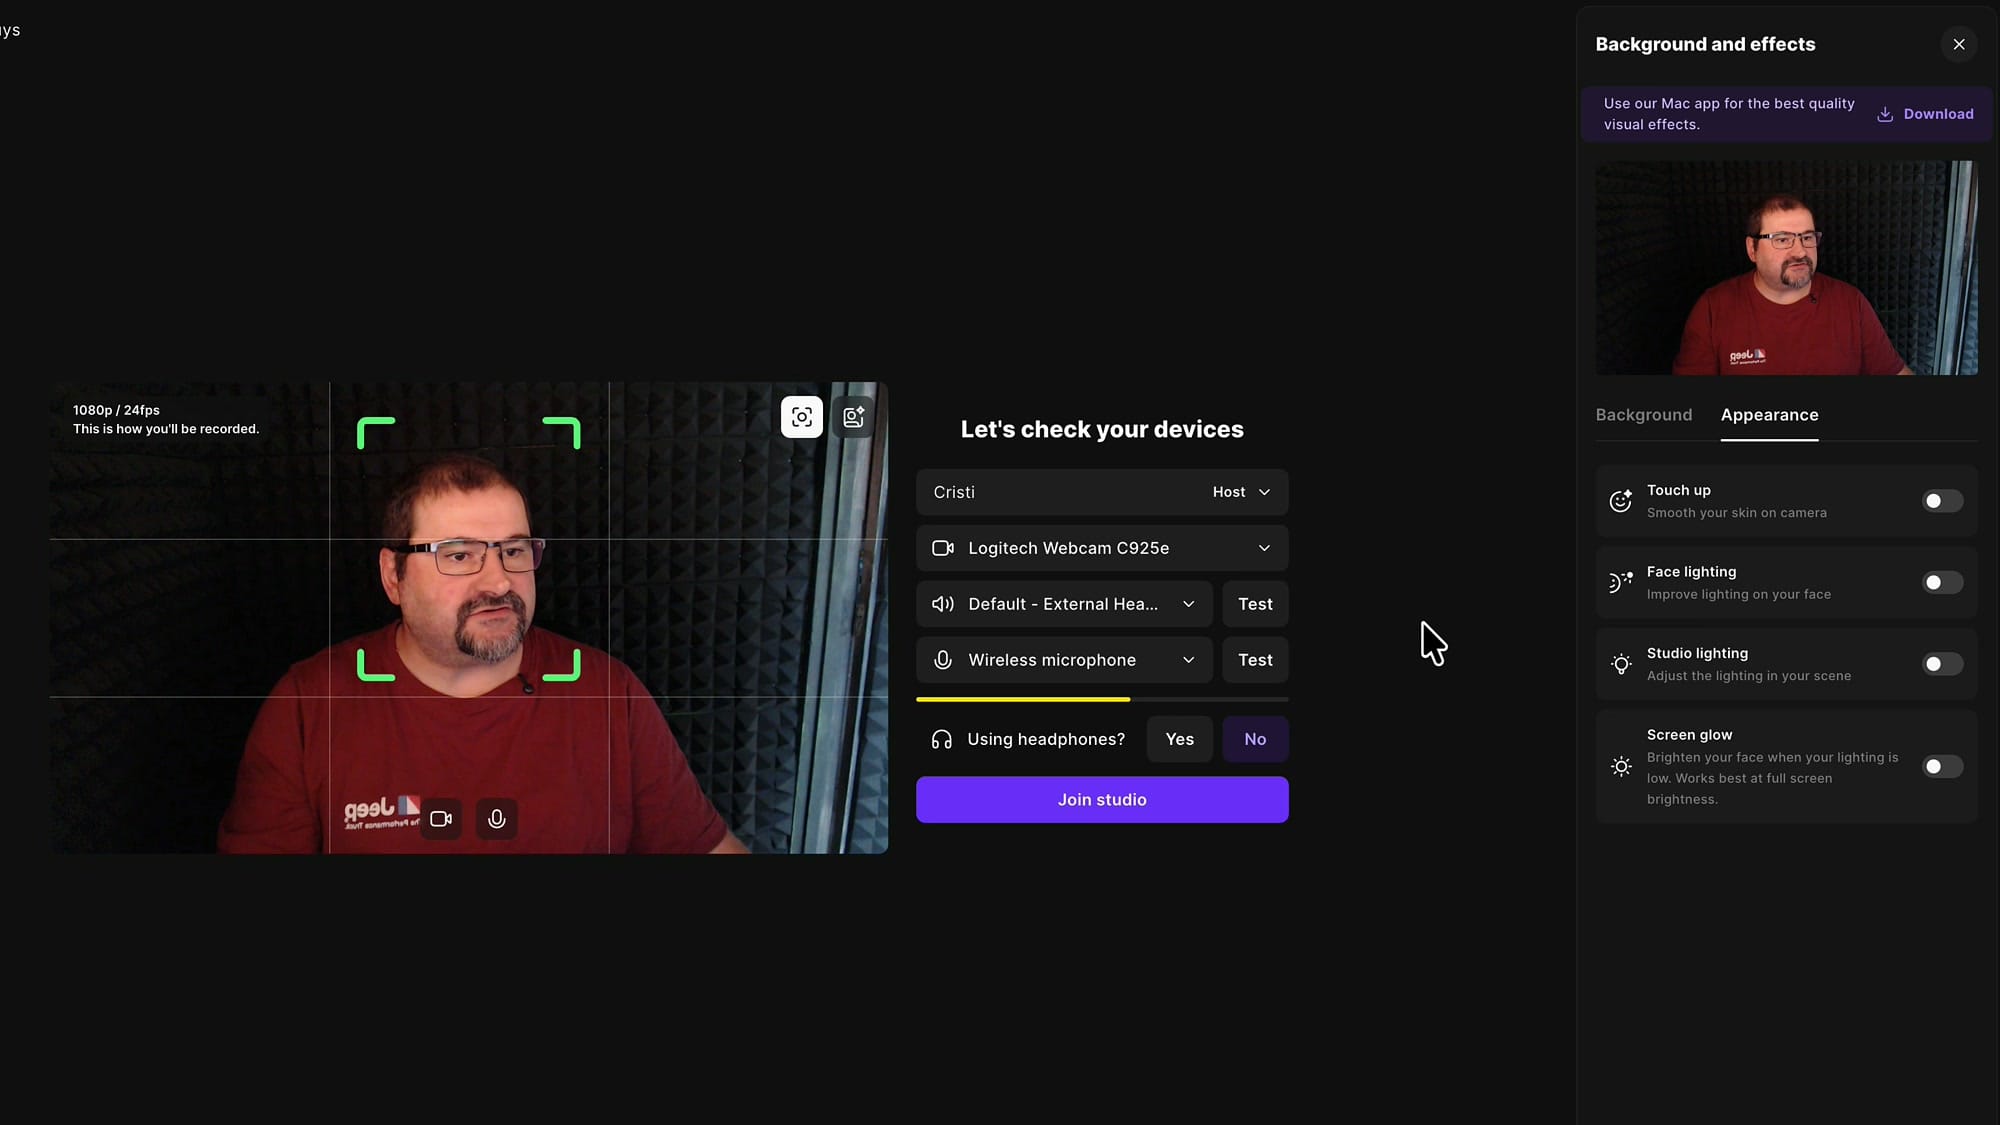
They stack, so you can run all four at once. In practice you won't want to — I'll come back to that.
Touch up: skin smoothing
Toggle Touch up on and a dropdown appears underneath it with two strengths: Subtle and Smooth. Subtle is the default and Smooth is the more pronounced of the two.
This is AI processing running in real time on your camera feed, so the preview may hesitate for a moment when you switch it on or change the strength. That's normal — let it settle before you judge the result.
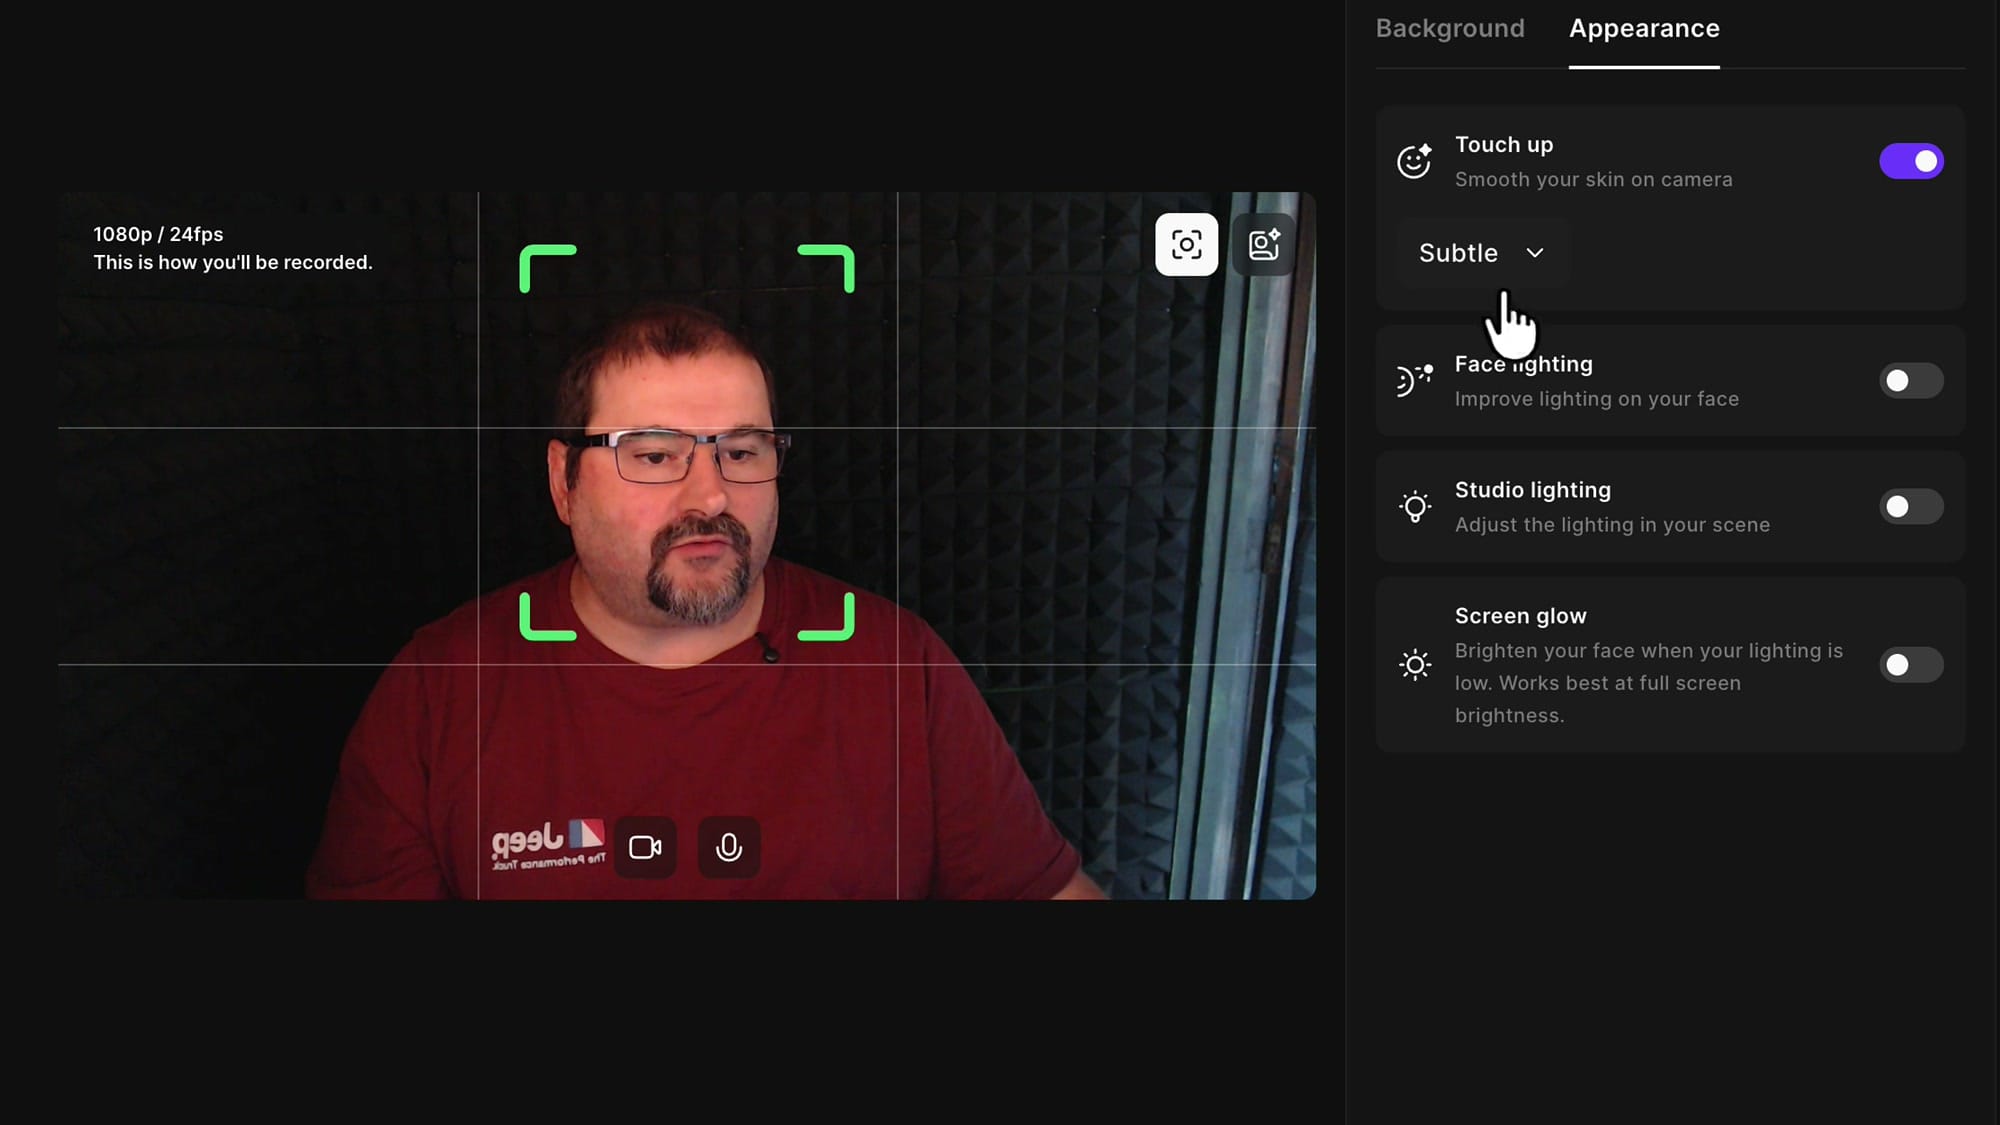
My advice: stay on Subtle. The point of a touch-up is that nobody can tell you used one. Smooth is there if you want it, but it starts to look like a filter rather than good lighting.
Face lighting: brighten just your face
Face lighting is a single toggle with no slider. It detects your face and relights it specifically, so your features come up while the rest of the frame stays where it was. In a dark room the difference is immediate — my face lifts noticeably while the acoustic panels behind me stay dark.
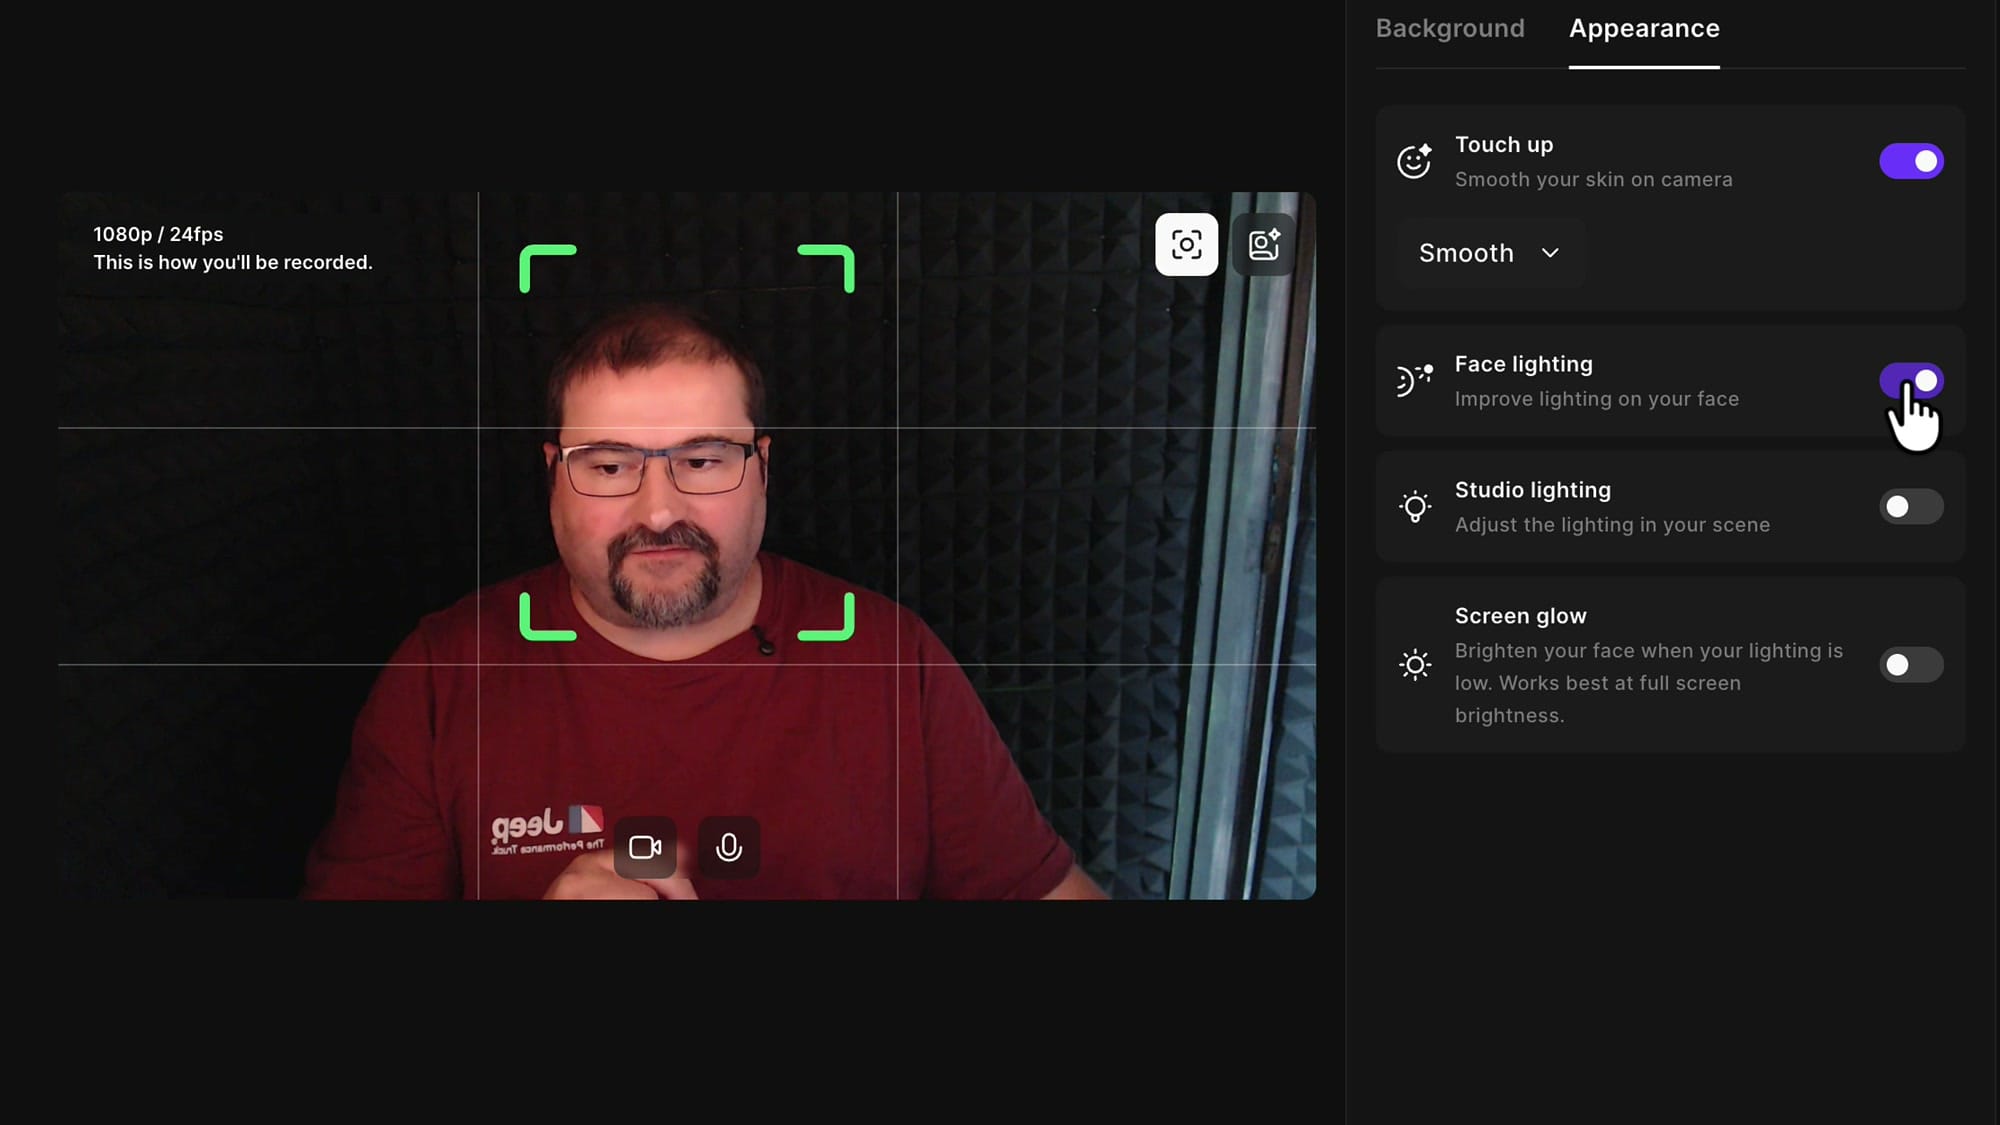
This is so helpful when you're recording in bad conditions — a hotel room at night, a corner of the office with one overhead lamp.
Studio lighting: brighten the whole scene
Studio lighting is a toggle plus a slider, labelled Reduce light on the left and Increase light on the right. Unlike Face lighting, this one works on the entire image. Push it up and the whole scene lifts, including the room behind you; pull it down and everything dims.
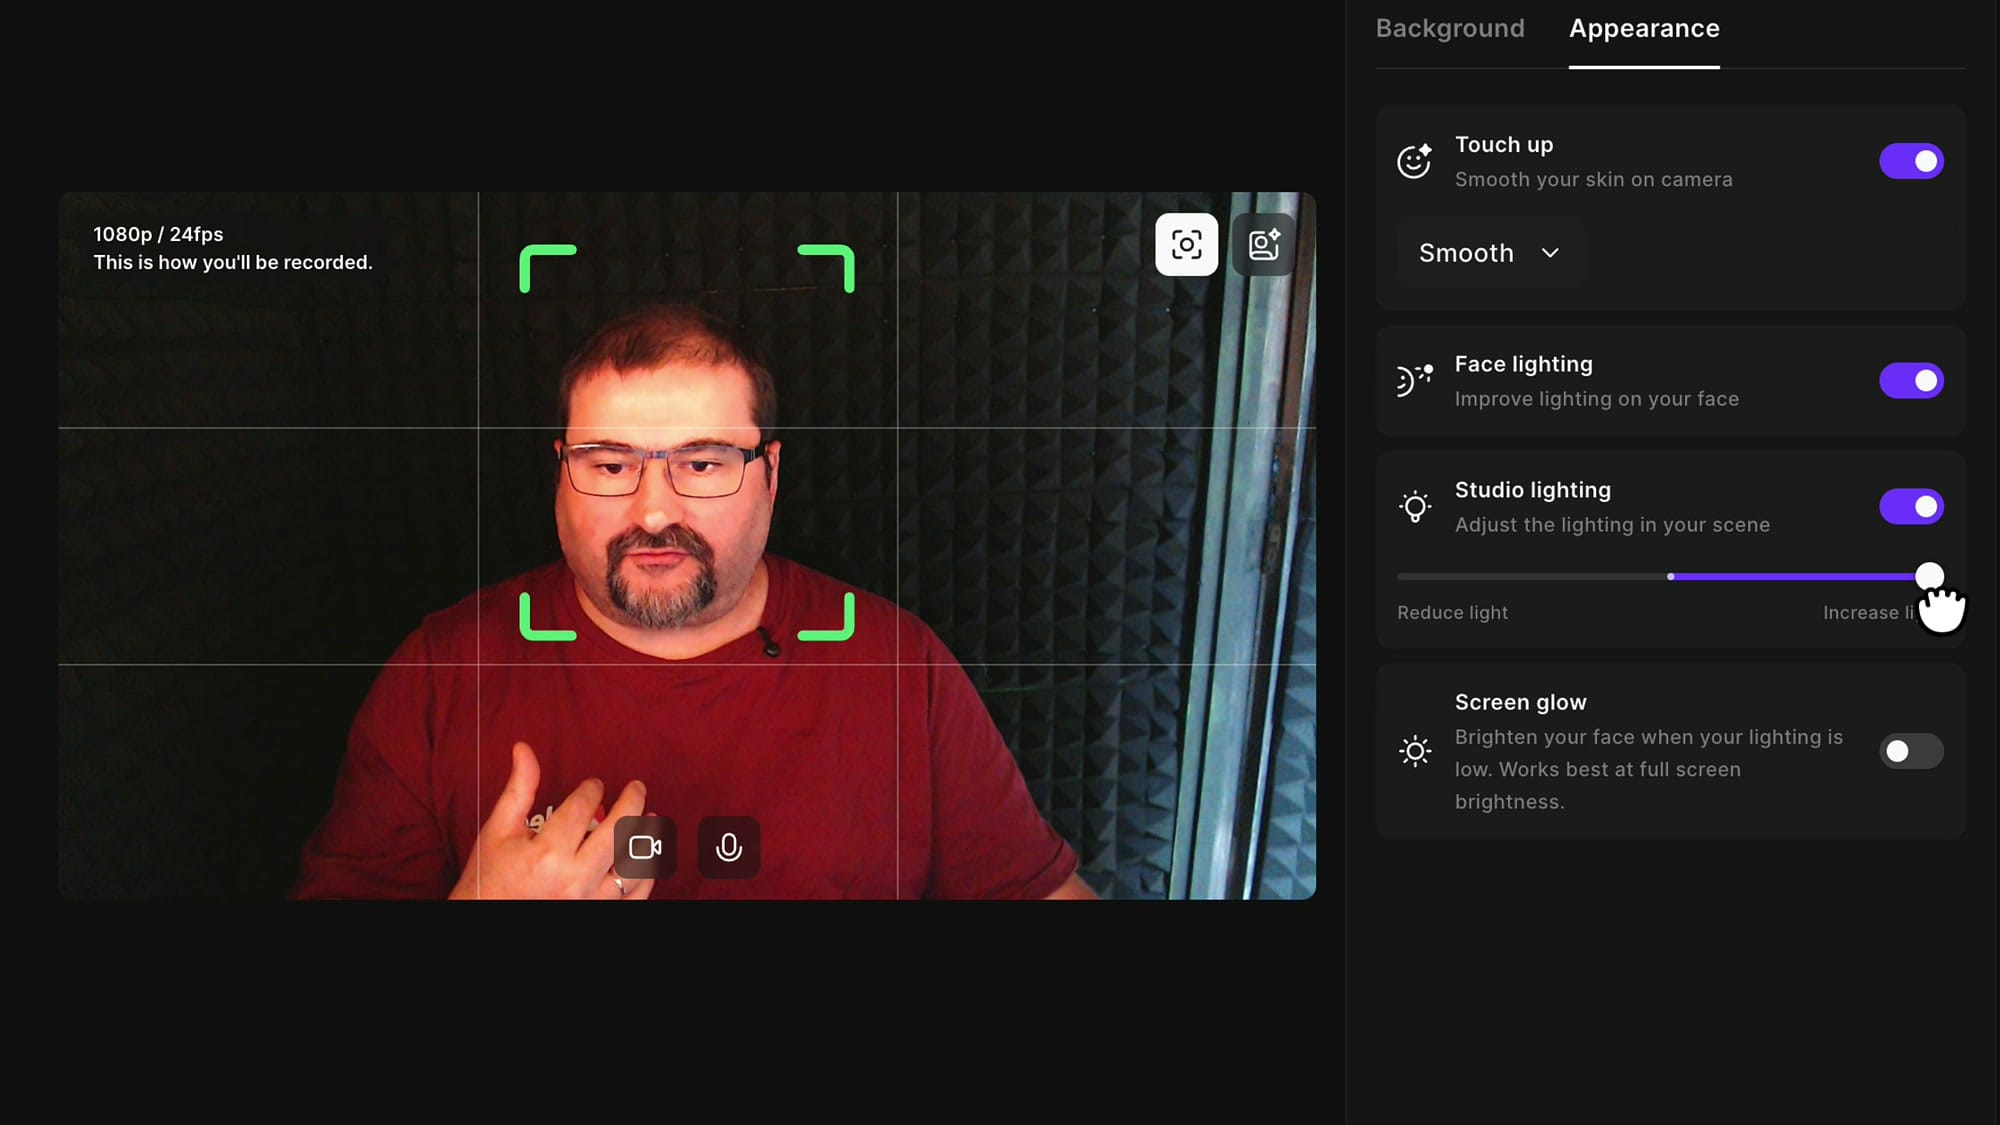
Use it sparingly. Brightening a dark image in software also amplifies whatever noise your camera sensor produced in the shadows, so if you crank it you'll trade darkness for grain — and you'll reveal the background clutter the darkness was hiding. I sit just past the middle and leave it there.
Screen glow: a ring light made of your own screen
This is my favourite of the four, and it's the one I want to explain properly because it works differently from the others.
Screen glow doesn't process your camera feed at all. It paints a bright border around the Riverside window on your display. Because you're looking at that screen while you record, the light bounces off it and onto your face. It's a real, physical light source — your monitor — being used as a fill light, and your camera captures the result exactly as it would capture a lamp.
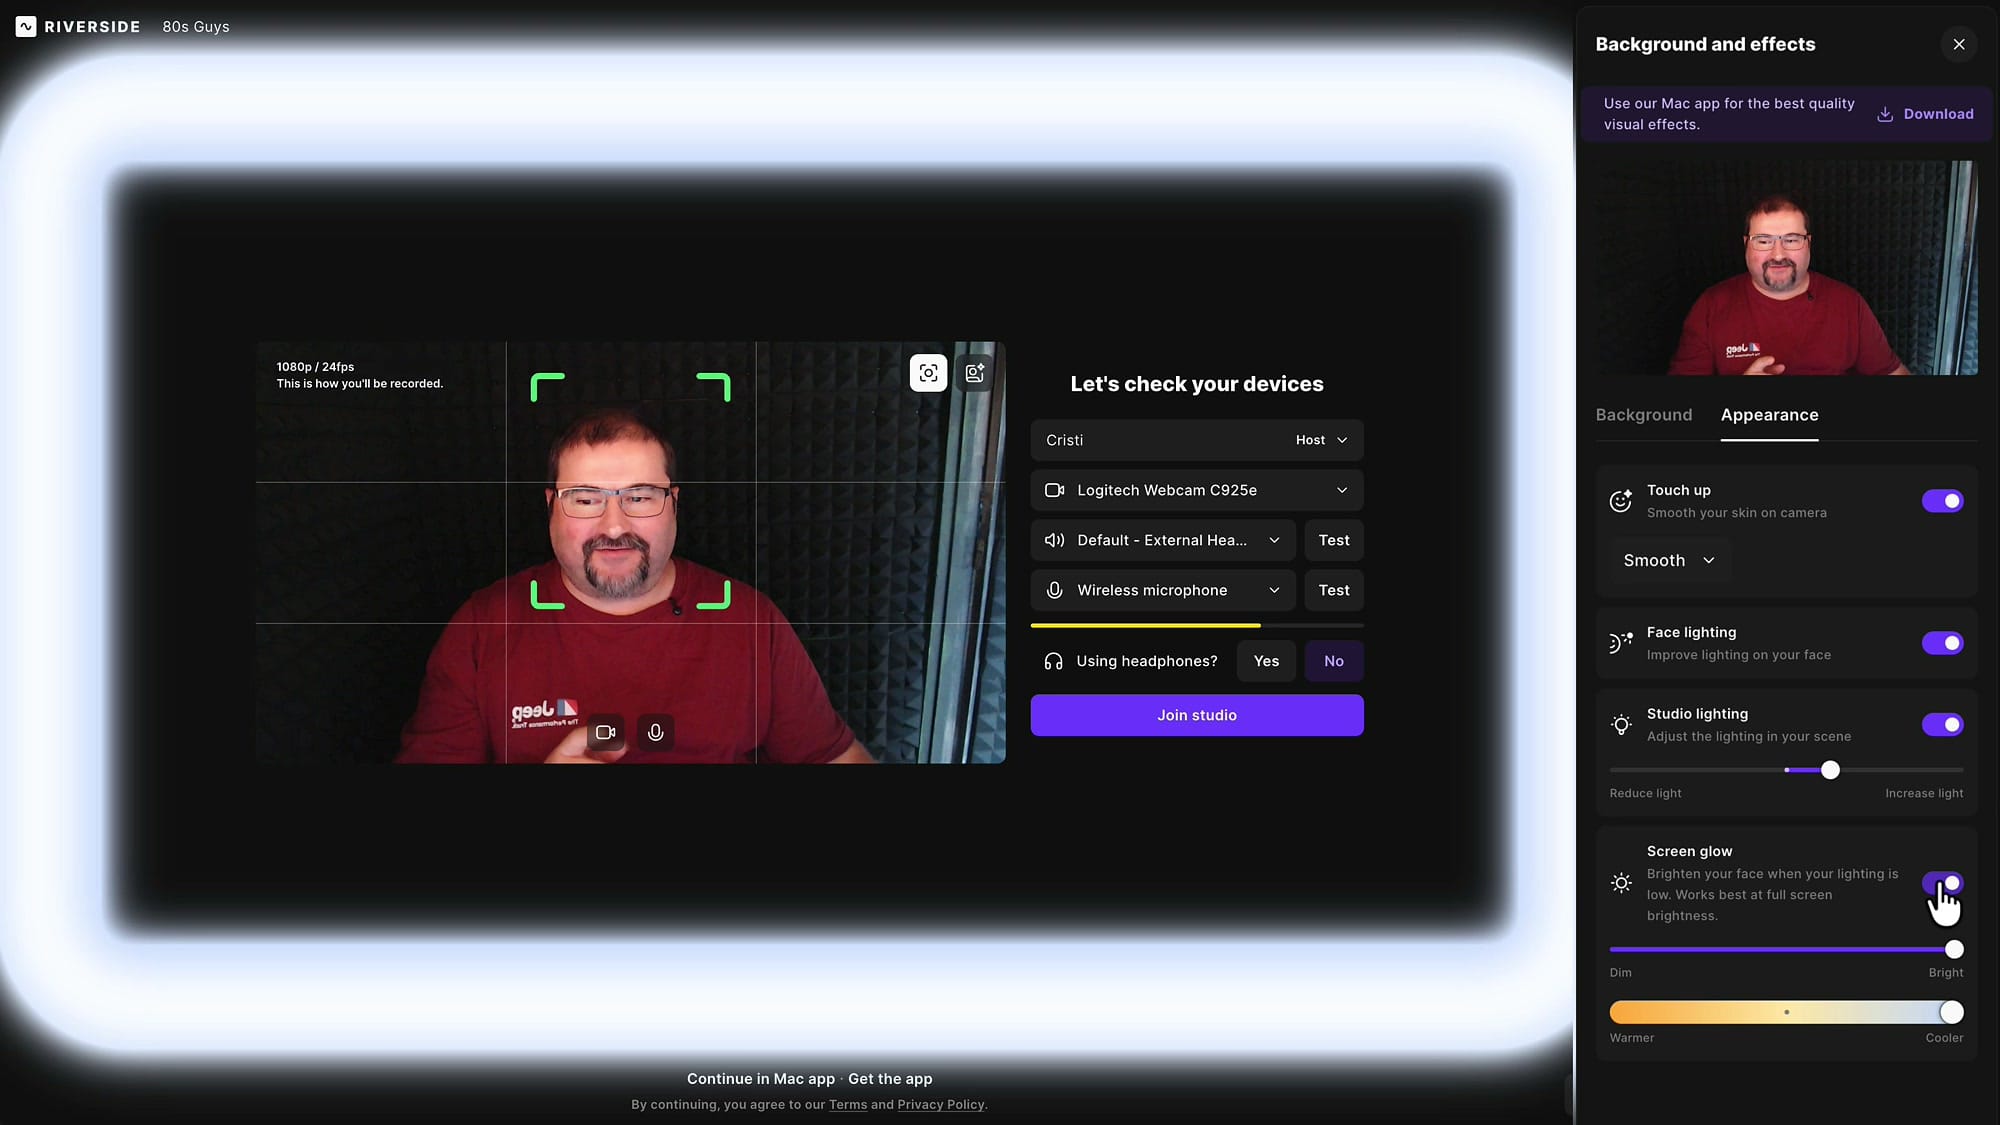
Two sliders come with it. The first is brightness, from Dim to Bright, for when you only need a touch of fill. The second is colour temperature, from Warmer to Cooler, and I love it!
My face always reads slightly too warm on camera, and being able to dial a cooler light onto it fixes that at the source instead of in a colour grade. Slide it toward Warmer and you get that orange, tungsten-lamp look; slide it toward Cooler and you get something closer to daylight. I keep mine slightly cool.
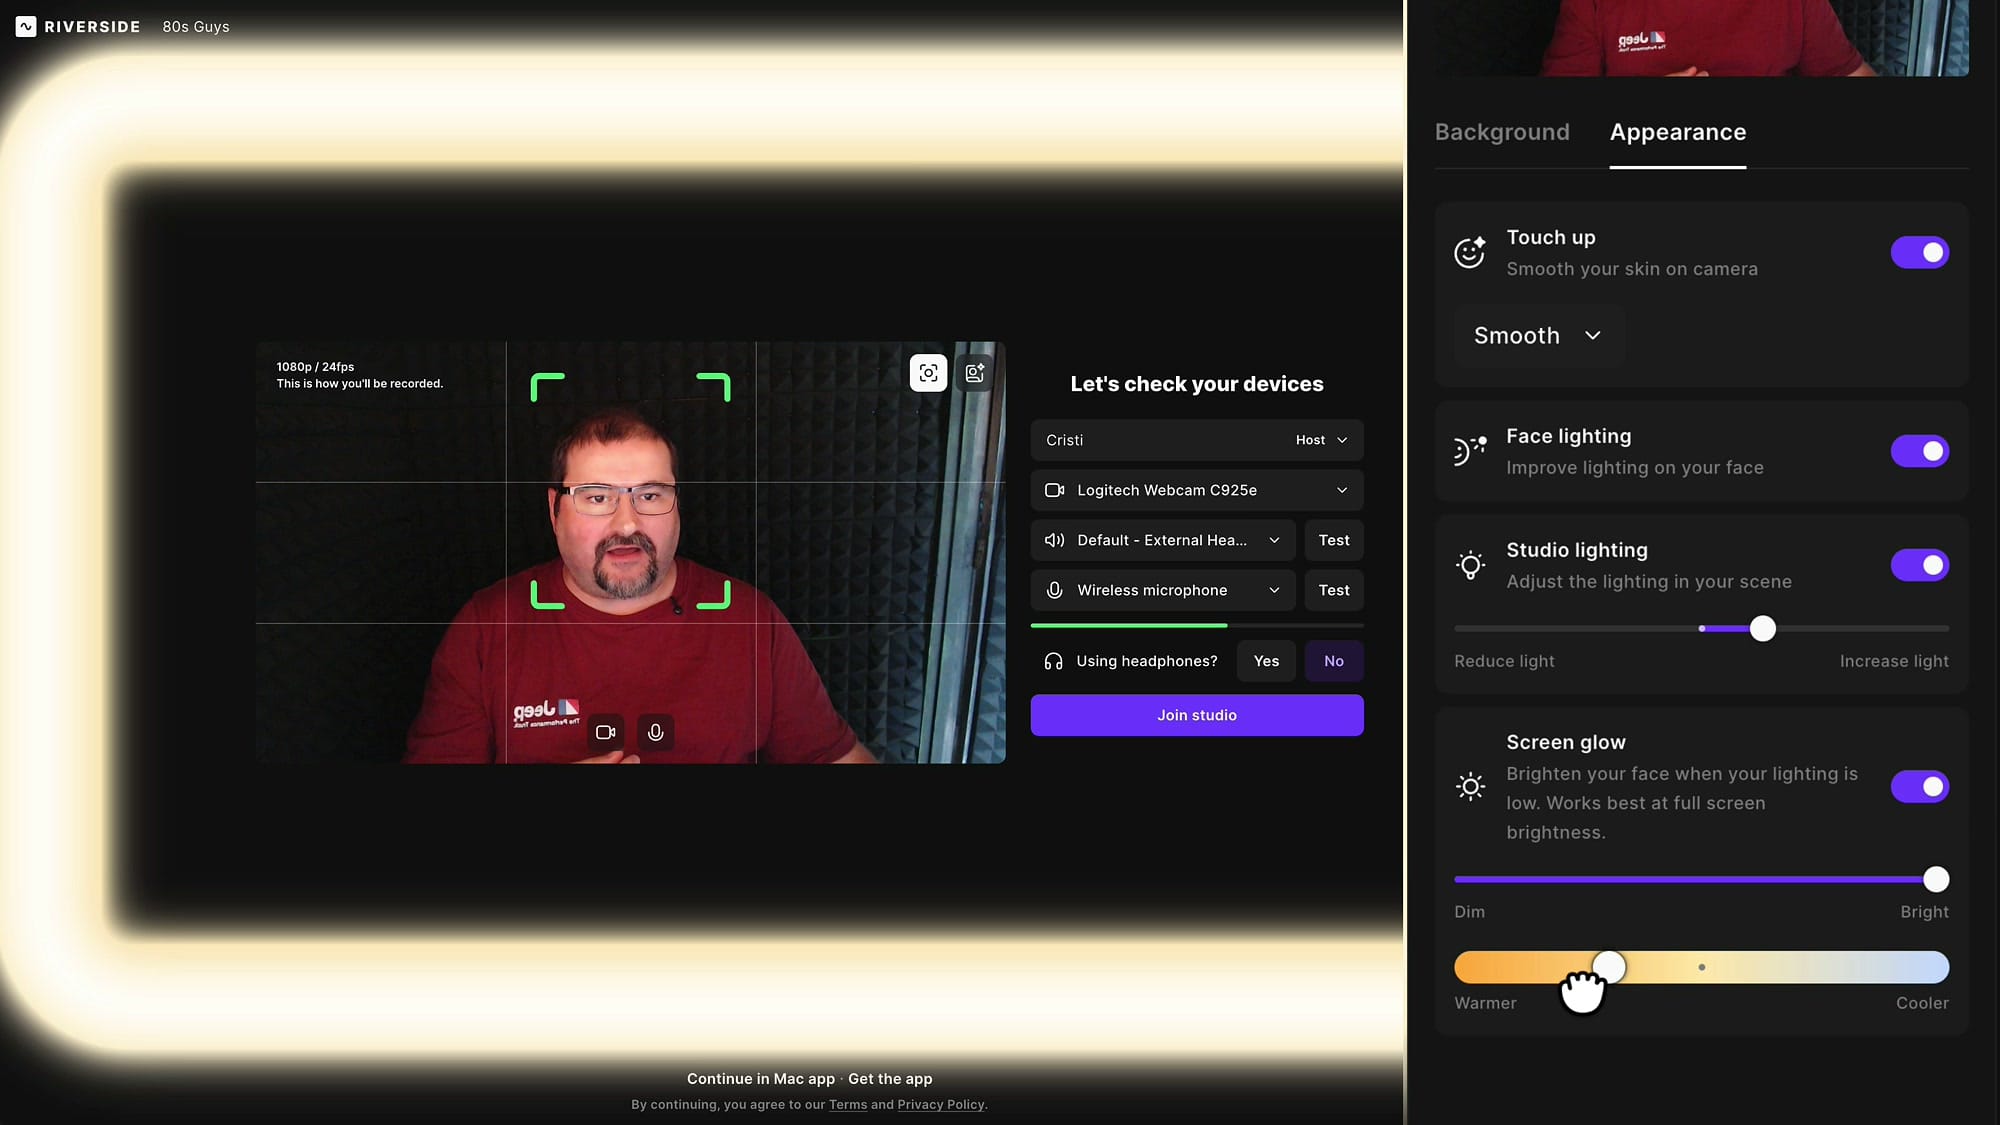
The panel also notes that Screen glow works best at full screen brightness, and it means it. A software ring light can only put out as much light as your display can, so turn your monitor up before you judge whether it's doing anything.
One more thing worth knowing: once Screen glow is doing the work, you often don't need Face lighting any more. I turned mine back off — the real light on my face had made the software version redundant.
If you’re eager to learn more about Riverside and wish to have a one-on-one Riverside coaching session, feel free to book a call with me.
I’m here to help you with any questions you have and to guide you through the best workflows, tips, workarounds, or just answer any questions you may have!
Your settings follow you into the studio
Set all this up in the lobby, click Join studio, and everything carries over already applied. The glow stays on screen, the touch-up stays on your feed.
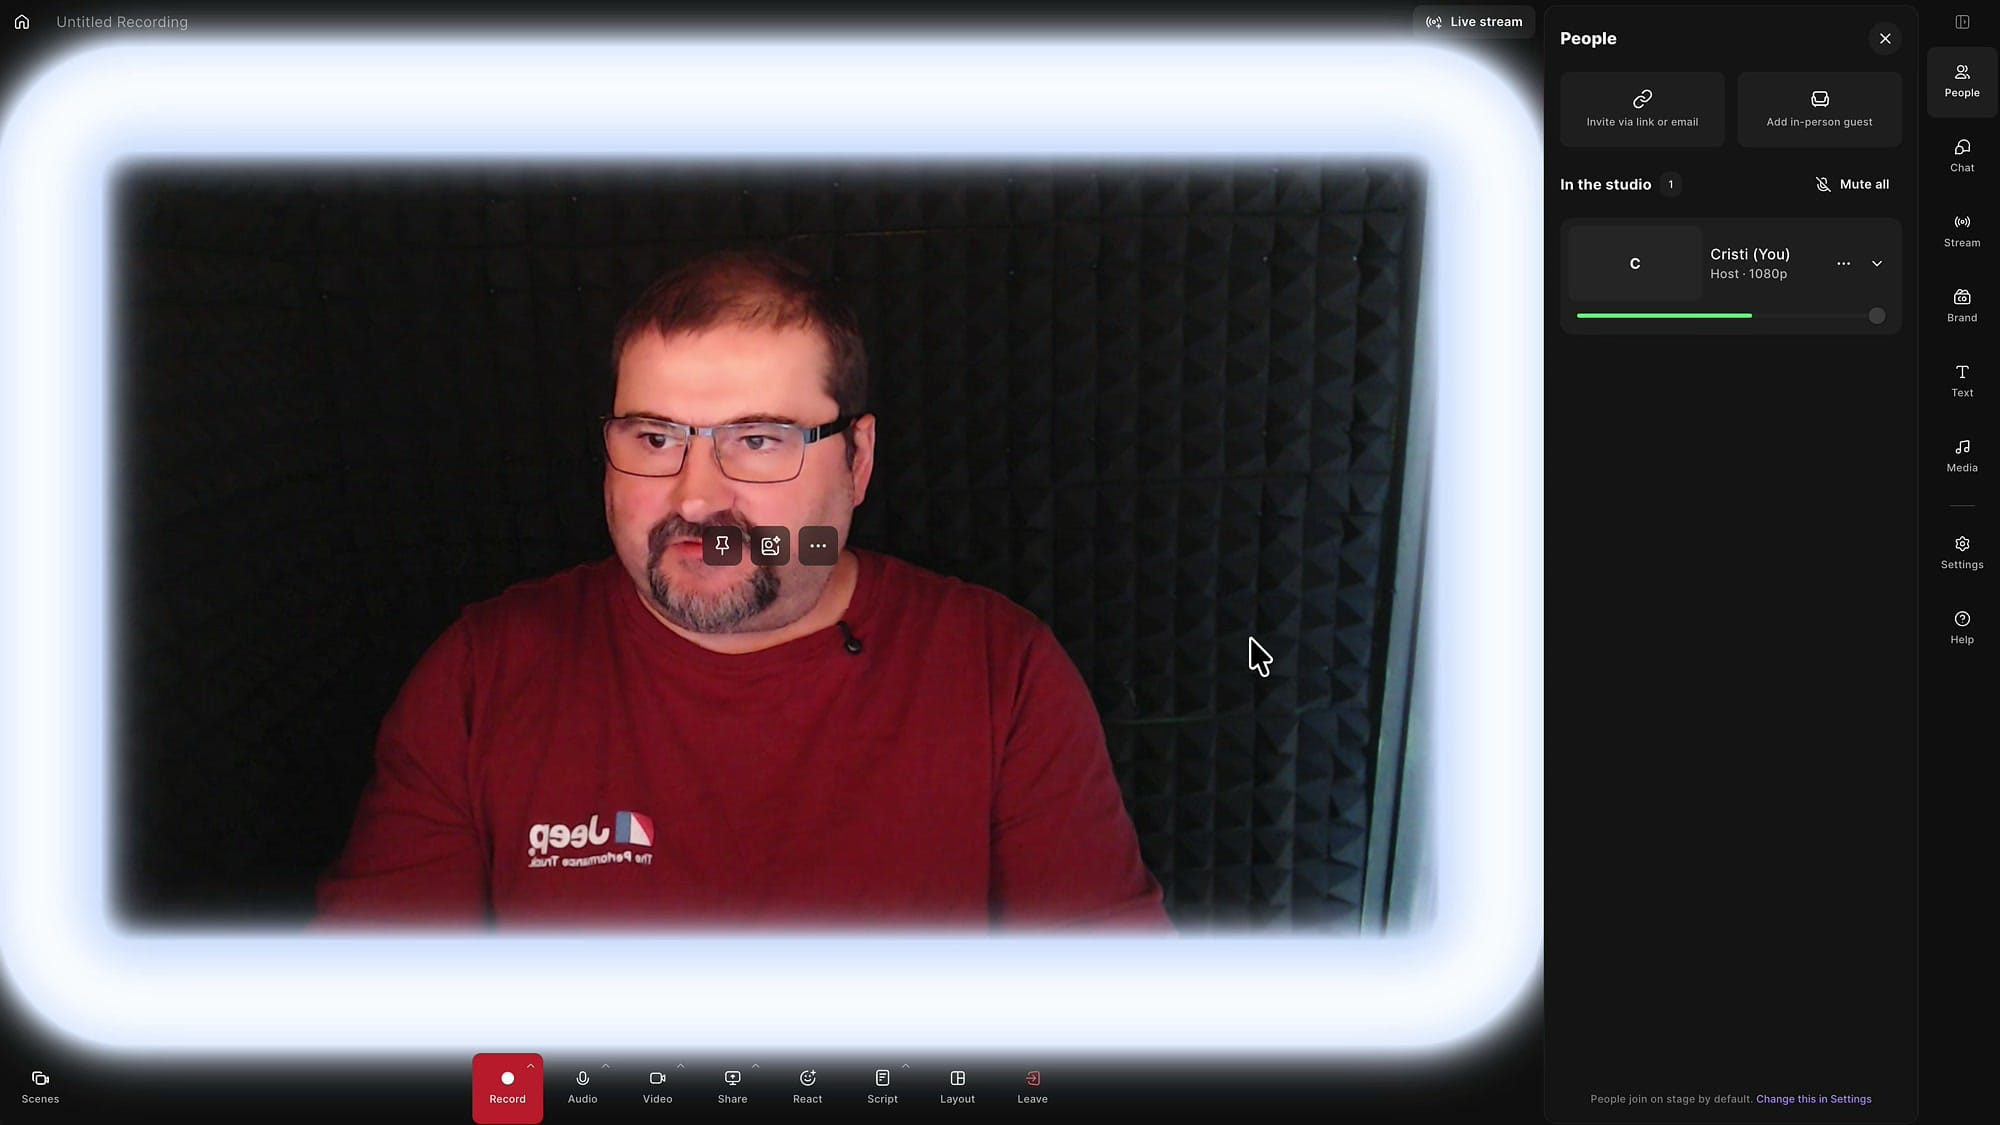
Two details to note in there. First, the glow is not recorded. It exists on your screen, not in your video track, so your viewers never see the border — they only see the better-lit version of you. Second, because the glow takes up the edges of the window, you see a little less of the studio interface while it's on. That's the trade, and for me it's an easy one.
You can also reach these controls mid-session: hover your own video tile and open the effects button there, and the Appearance tab is right where you left it.
Why it's worth fixing at the source
This is what I tell every client I coach. When you record in Riverside, try to get good light, good framing, and a decent camera. Every problem you solve before you press record is a problem nobody has to solve afterwards — no colour correction pass, no exporting to another tool, no rescuing a dark face in the grade.
Riverside can help after the fact — its colour adjustment tools will lift dark or off-colour footage in the editor. But recovering a bad image is always more work and always a worse result than capturing a good one. If the recording is right up front, it's easier on everybody.
These controls are in the browser studio now. The effects panel points you toward the Mac app for the best-quality visual effects, and I'd expect this full set of appearance controls to land in the Mac recording app before long, along with other improvements.
The settings I'd start with
- Touch up: on, set to Subtle
- Face lighting: on only if Screen glow isn't giving you enough
- Studio lighting: on, slider just past the middle — not maxed
- Screen glow: on, brightness high, temperature slightly cool
- Your display: turned up to full brightness
- Your face: inside the green brackets
Dial that in once and it takes about thirty seconds before every session. If you're setting up your workflow from scratch, you can try Riverside here.
If you’re eager to learn more about Riverside and wish to have a one-on-one Riverside coaching session, feel free to book a call with me.
I’m here to help you with any questions you have and to guide you through the best workflows, tips, workarounds, or just answer any questions you may have!
Related guides
 Cristi Cotovan
 Cristi Cotovan
 Cristi Cotovan
 Cristi Cotovan
 Cristi Cotovan
If you're eager to learn more about Riverside and wish to have a one-on-one Riverside coaching session, feel free to book a call with me. I'm here to help you with any questions you have and to guide you through the best workflows, tips, workarounds, or just answer any questions you may have!