How to Export Edited Separate Tracks in Riverside for Multitrack Post-Production

You've finished editing an interview in Riverside. You've removed the filler words, closed gaps, applied Magic Audio. Now you want to send each speaker's track to a separate piece of software for further mixing or video work — but you want those tracks to carry all of your edits, not the raw, untouched recordings.
If you head to the Recordings tab, that's exactly what you'll get: raw, unedited files. None of your edits exist there — the Recordings tab only stores the original captures, and downloading from it skips your entire post-production pass.
The right place to do this is the edit itself, using the Tracks panel. Here's the full workflow.
Why not the Recordings tab?
From the project page, the Recordings tab is tempting. Each speaker's track is right there, with a Download button next to it. But these are the raw uploads — nothing you did in the edit is reflected here. No filler word removal, no Magic Audio, no trims. If you bring these files into Logic, Premiere, or Auphonic, you're starting from scratch.
Open the edit and find the Tracks panel
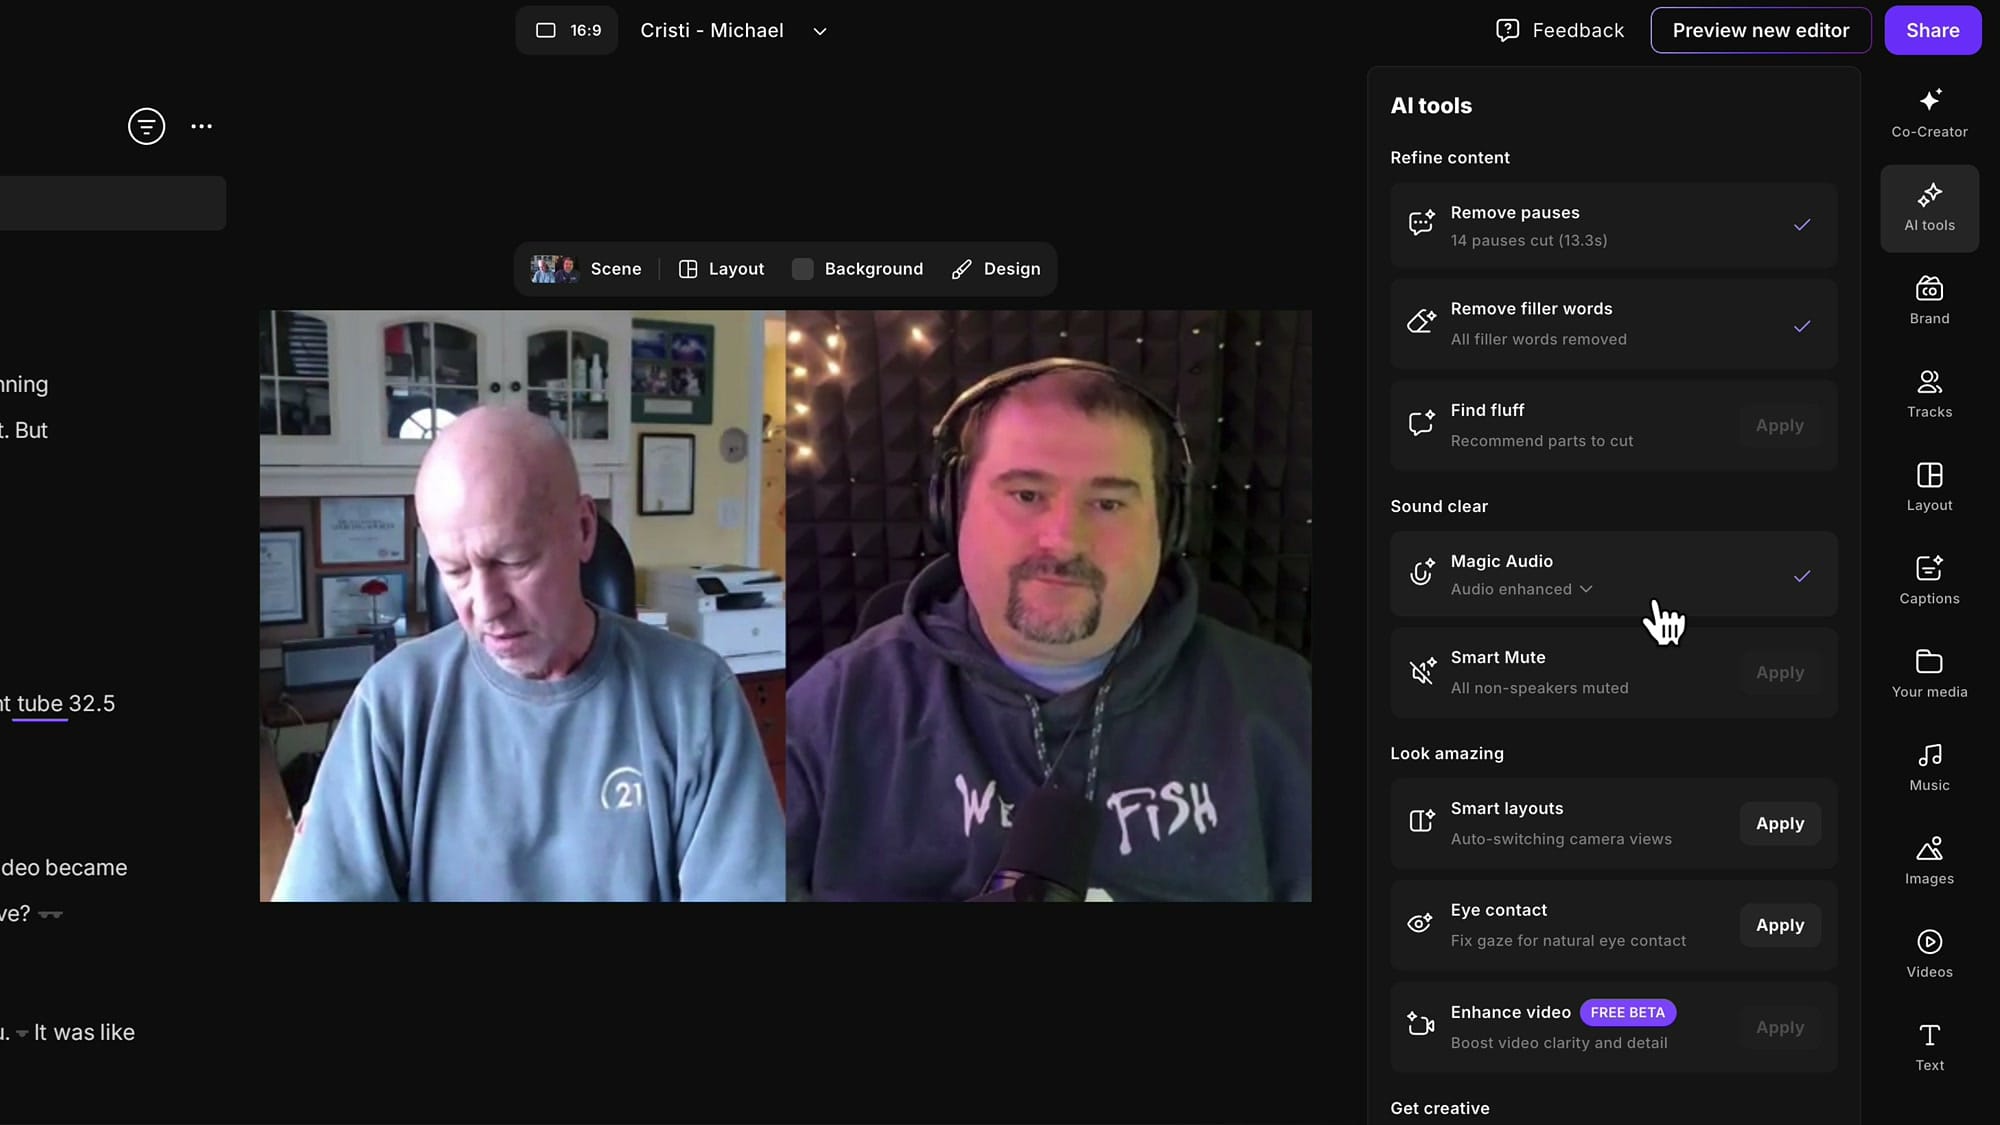
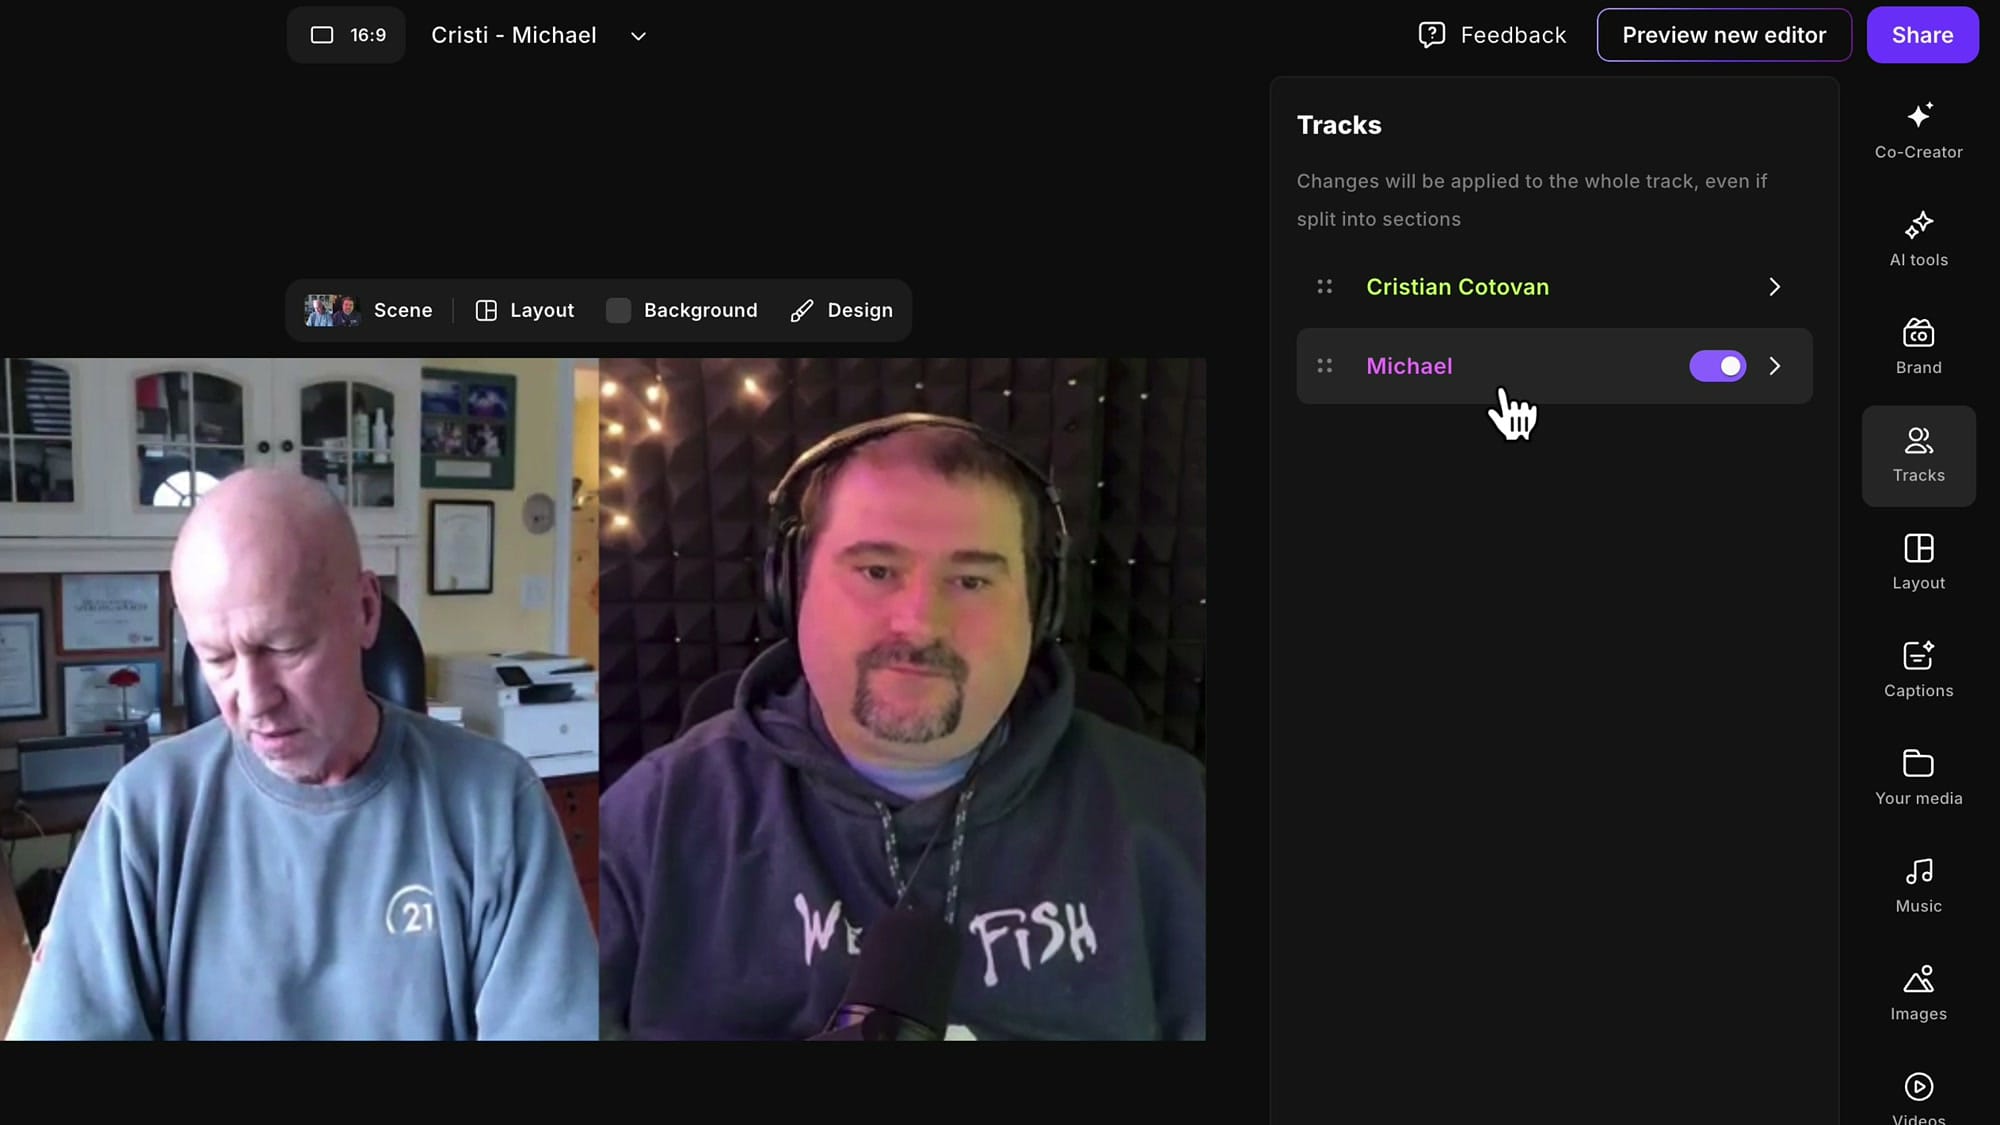
Open the actual edit you've been working on — the one where you've already done your filler word removal, gap removal, and Magic Audio. In the right-hand sidebar, look for the Tracks tab (the icon with two stacked rectangles). This is the panel that drives separate-track exports.
Inside the Tracks panel, every speaker in the session shows up as a row with a toggle. Toggle off the speakers you don't want to export, leaving only the one you want.
Notice what happens on the timeline: the parts where the muted speaker was talking go silent, but the timeline does not collapse. Your edit's overall length stays the same — you're just removing the muted speaker from the mix, not rebuilding the timing. That's exactly what you want for multitrack work, because all the tracks need to line up when you load them into your DAW or video editor.
Rename the edit before you export
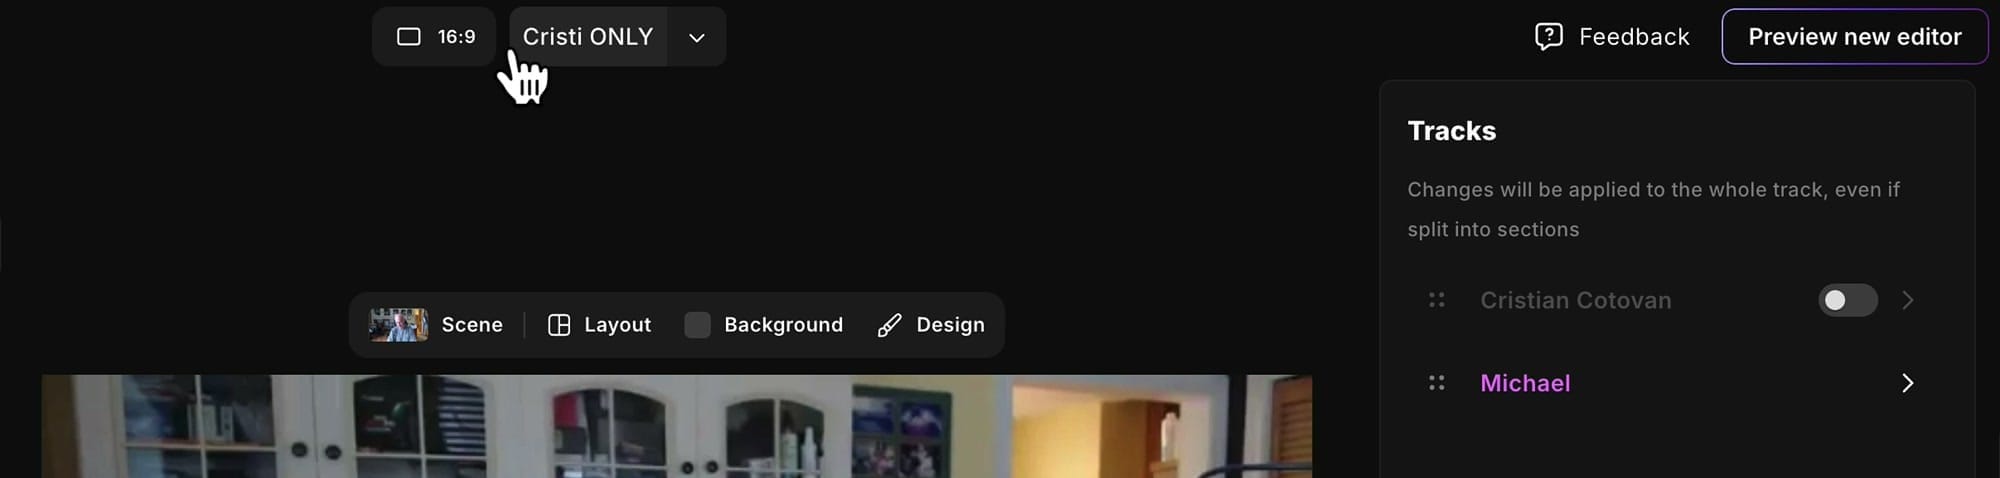
Before clicking Share, rename the edit to match the track you're exporting. Click the edit's name at the top of the editor and change it to something like Michael Only. Whatever you name the edit becomes the file name in the Exports tab — and when you're back-to-back exporting two or three speaker tracks, those names are the only thing keeping them straight.

Export via Share → Video
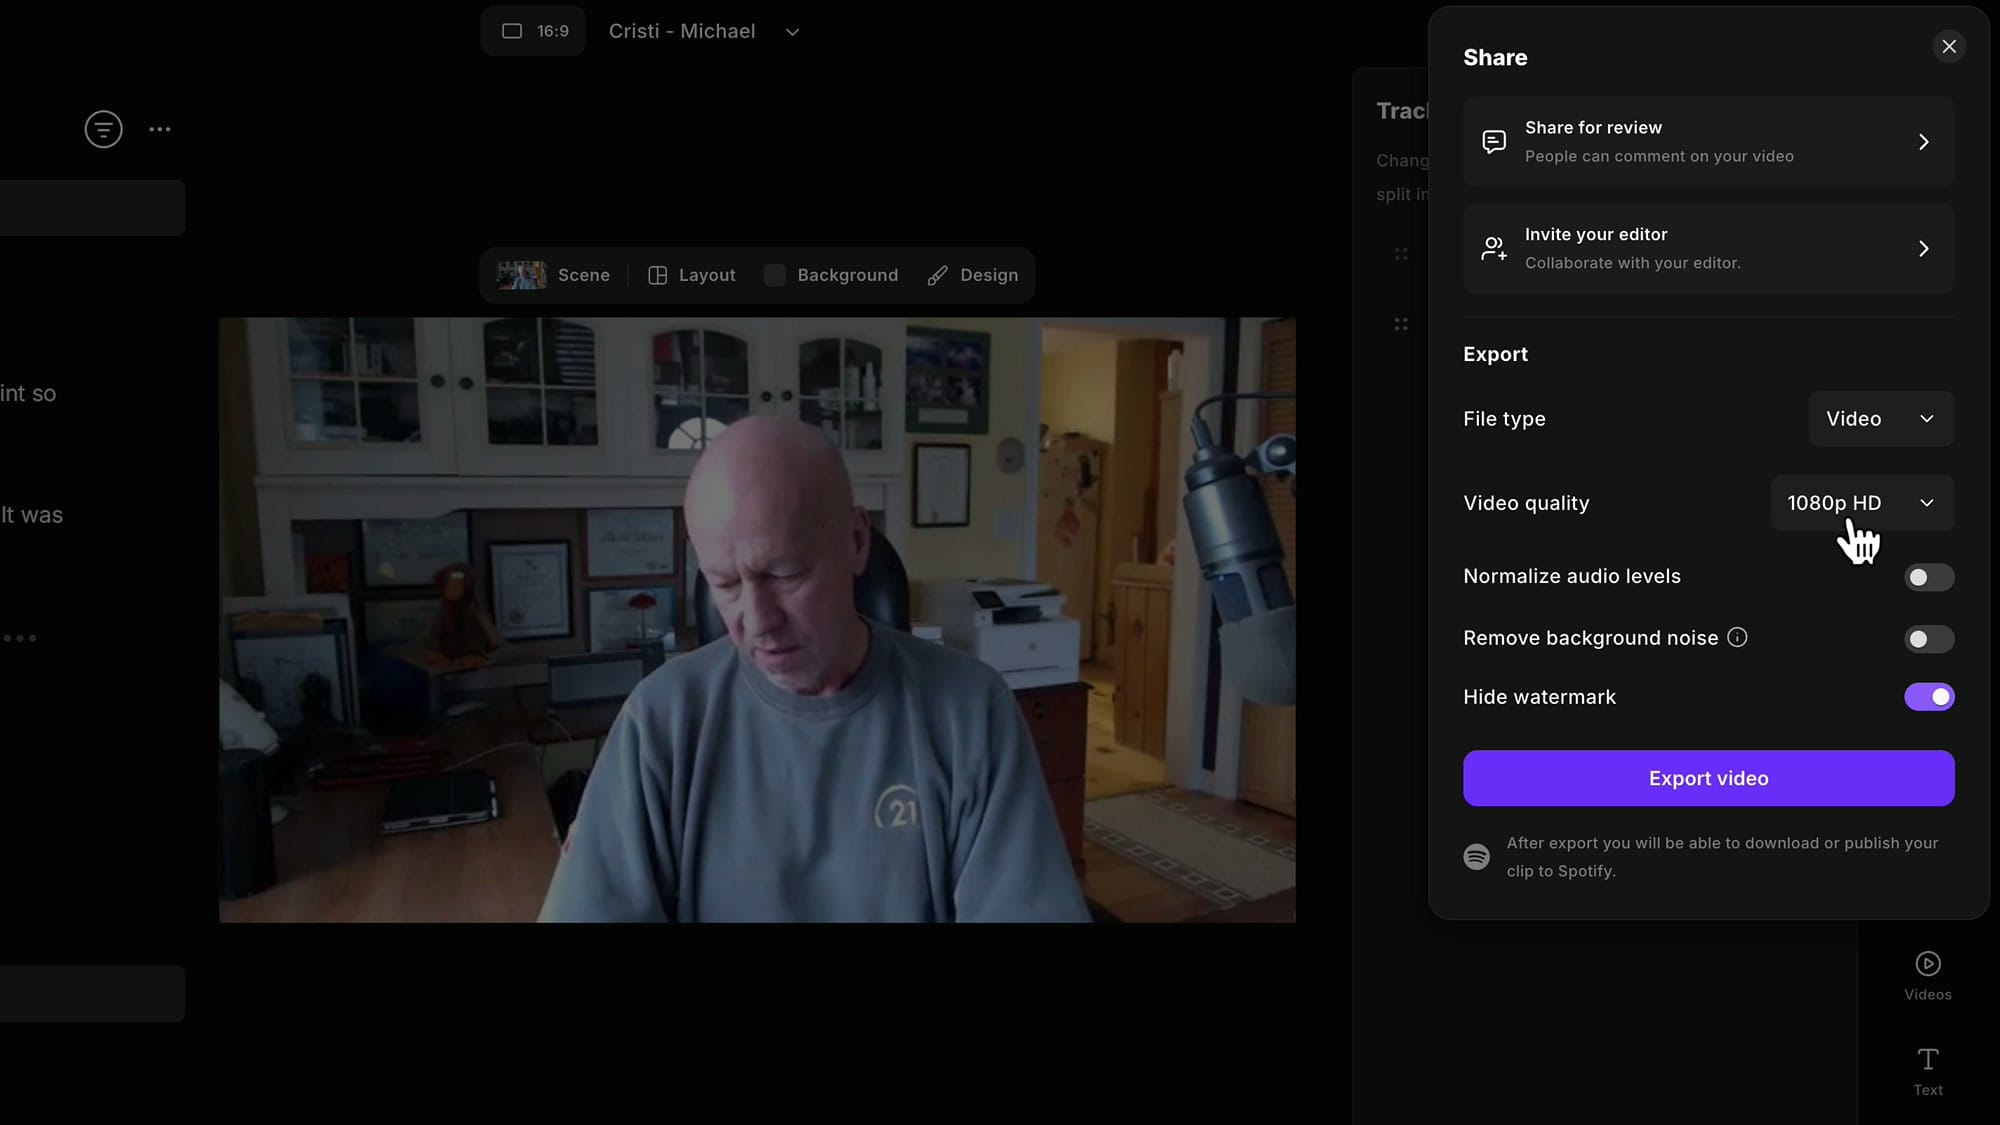
Click Share in the top-right and choose Video. Pick your quality — 1080p HD is what I use. You can normalize audio levels and remove background noise here too, but if you've already applied Magic Audio you can leave both off. Click Export Video.
Riverside will ask if you want to jump to the Exports tab. Say No if you have another track to export — let the export run in the background and queue up the next one.
Switch tracks and export the next speaker
Back in the Tracks panel, flip the toggles: turn the speaker you just exported off, and turn the next speaker on. Rename the edit again — for me, that meant changing Michael Only to Cristi Only. Then Share → Video → Export Video again.
What the video layout actually looks like
One thing to be aware of: when you mute one speaker, Riverside doesn't preserve the original side-by-side layout. With one speaker muted, the video reverts to whatever is left — usually a single full-screen view of the remaining person.
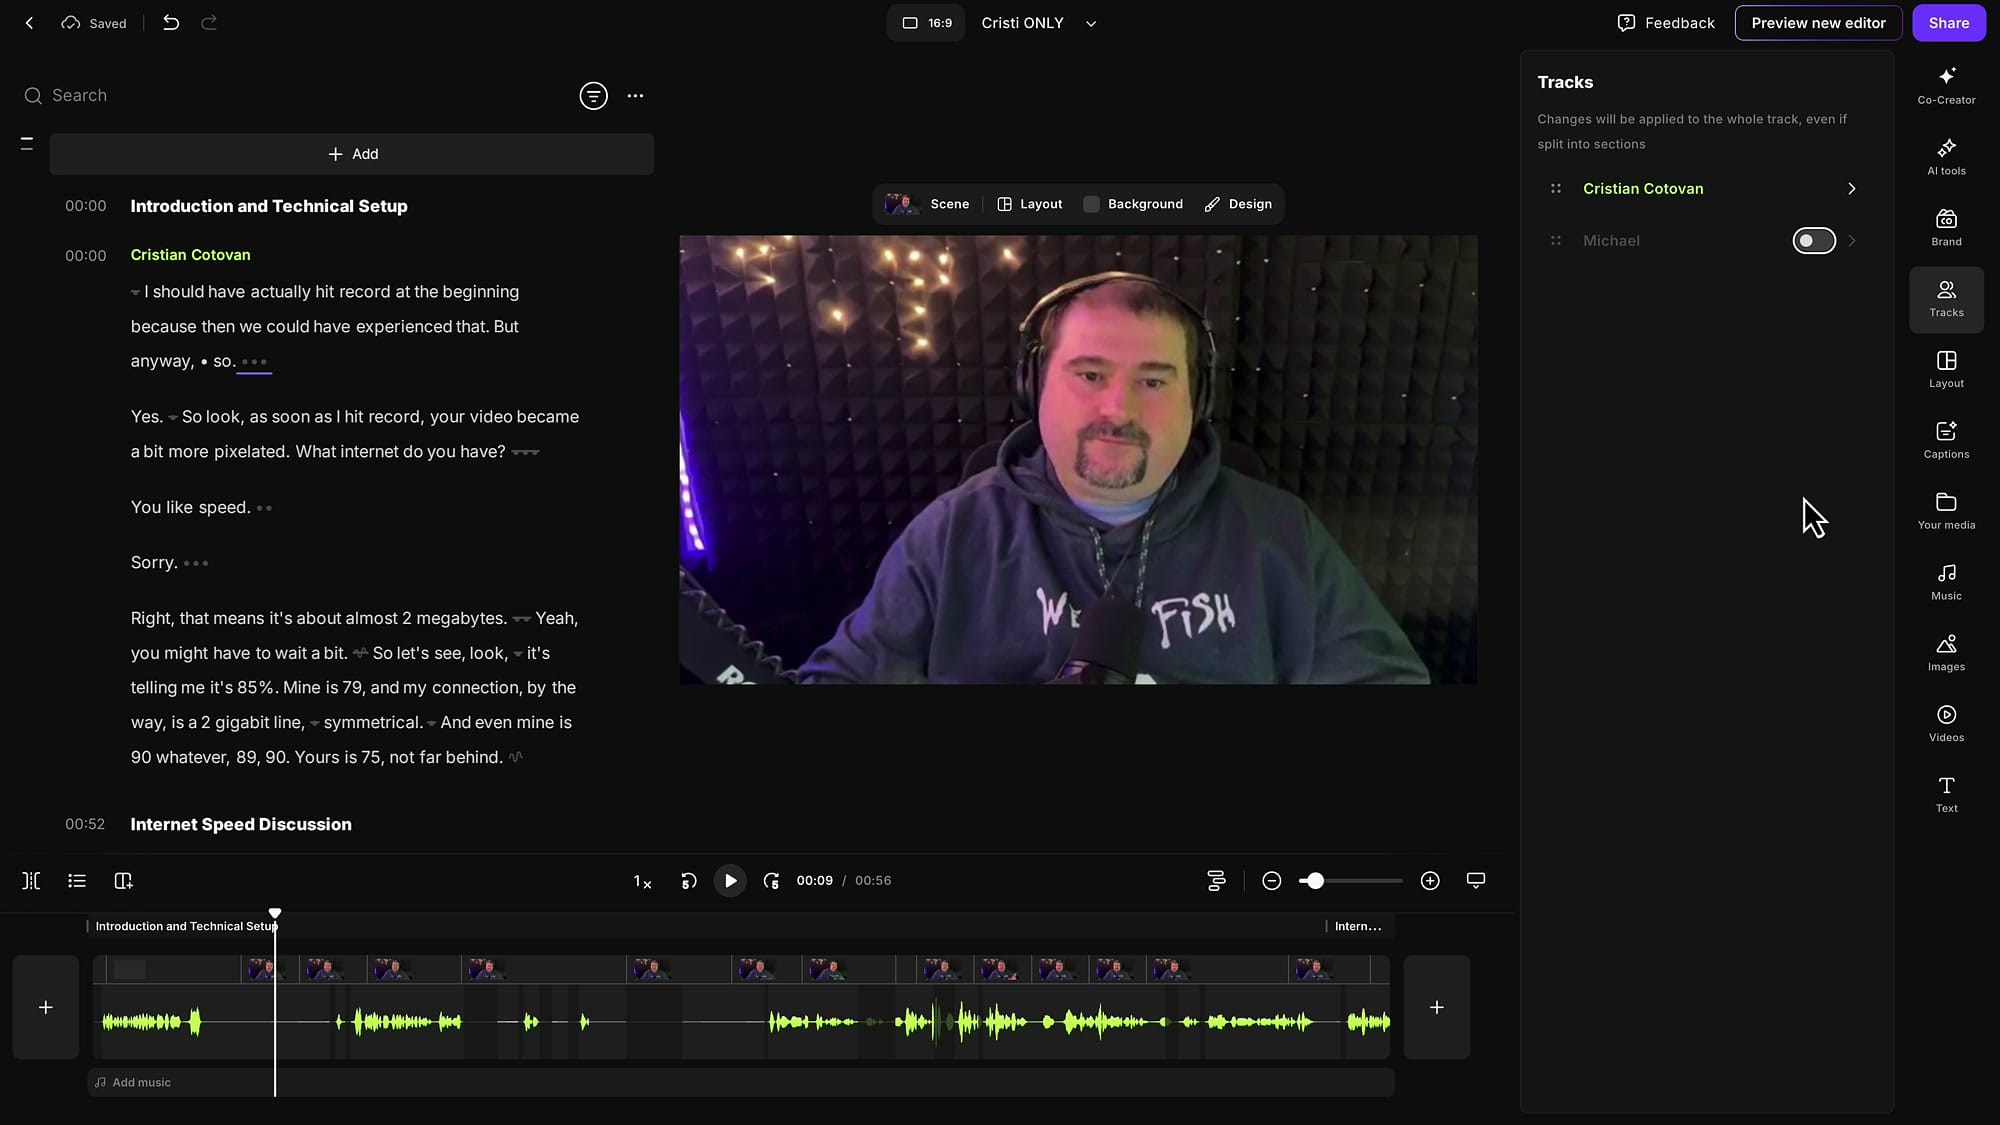
For pure audio work this is a non-issue — the audio tracks line up perfectly. For video, plan to rebuild your side-by-side scene in your destination editor (Premiere, Final Cut, DaVinci, Camtasia) once the separate tracks are imported.
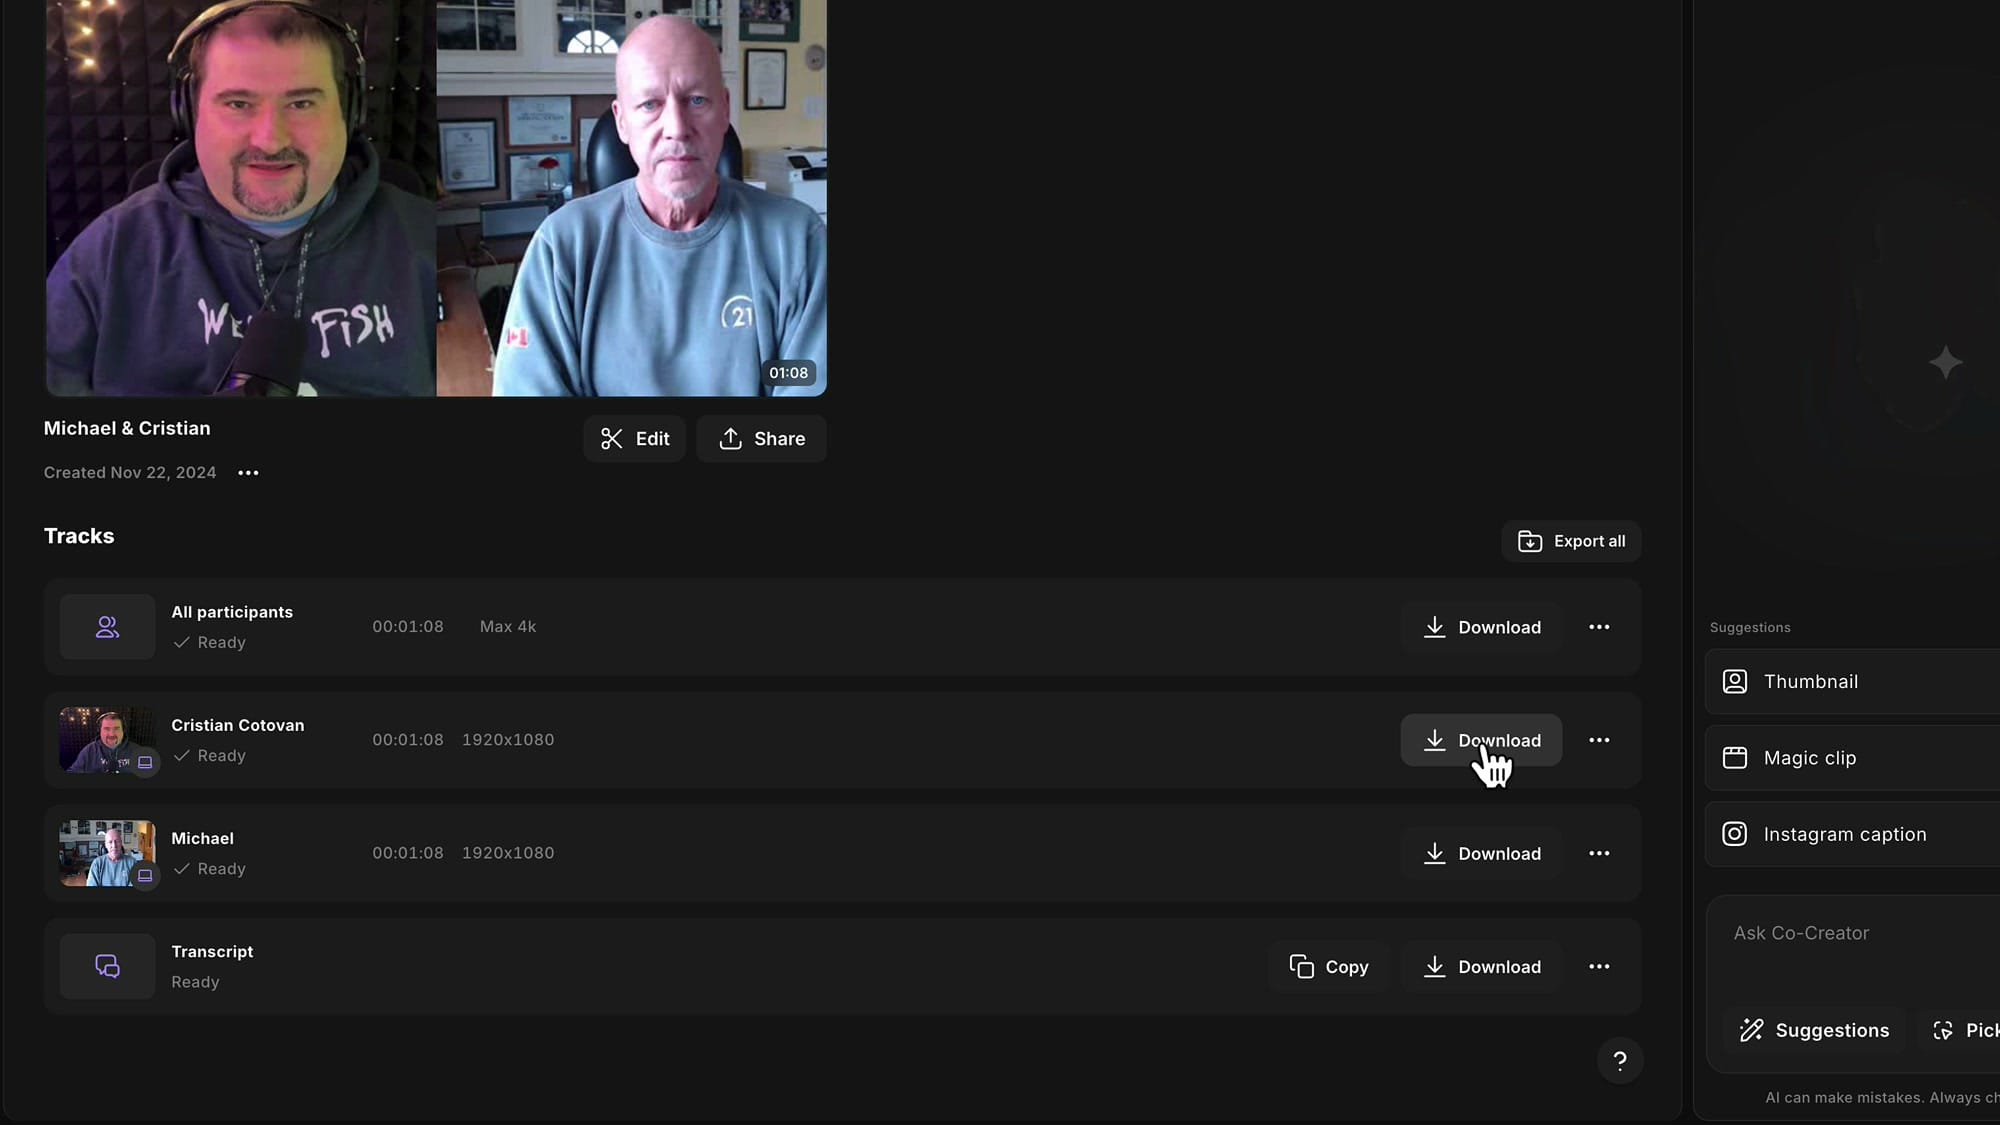
Check Exports and download
Open the Exports tab and you'll see your two queued exports, named exactly what you renamed them to: Cristi Only and Michael Only. Once each one finishes processing, the Download button activates.
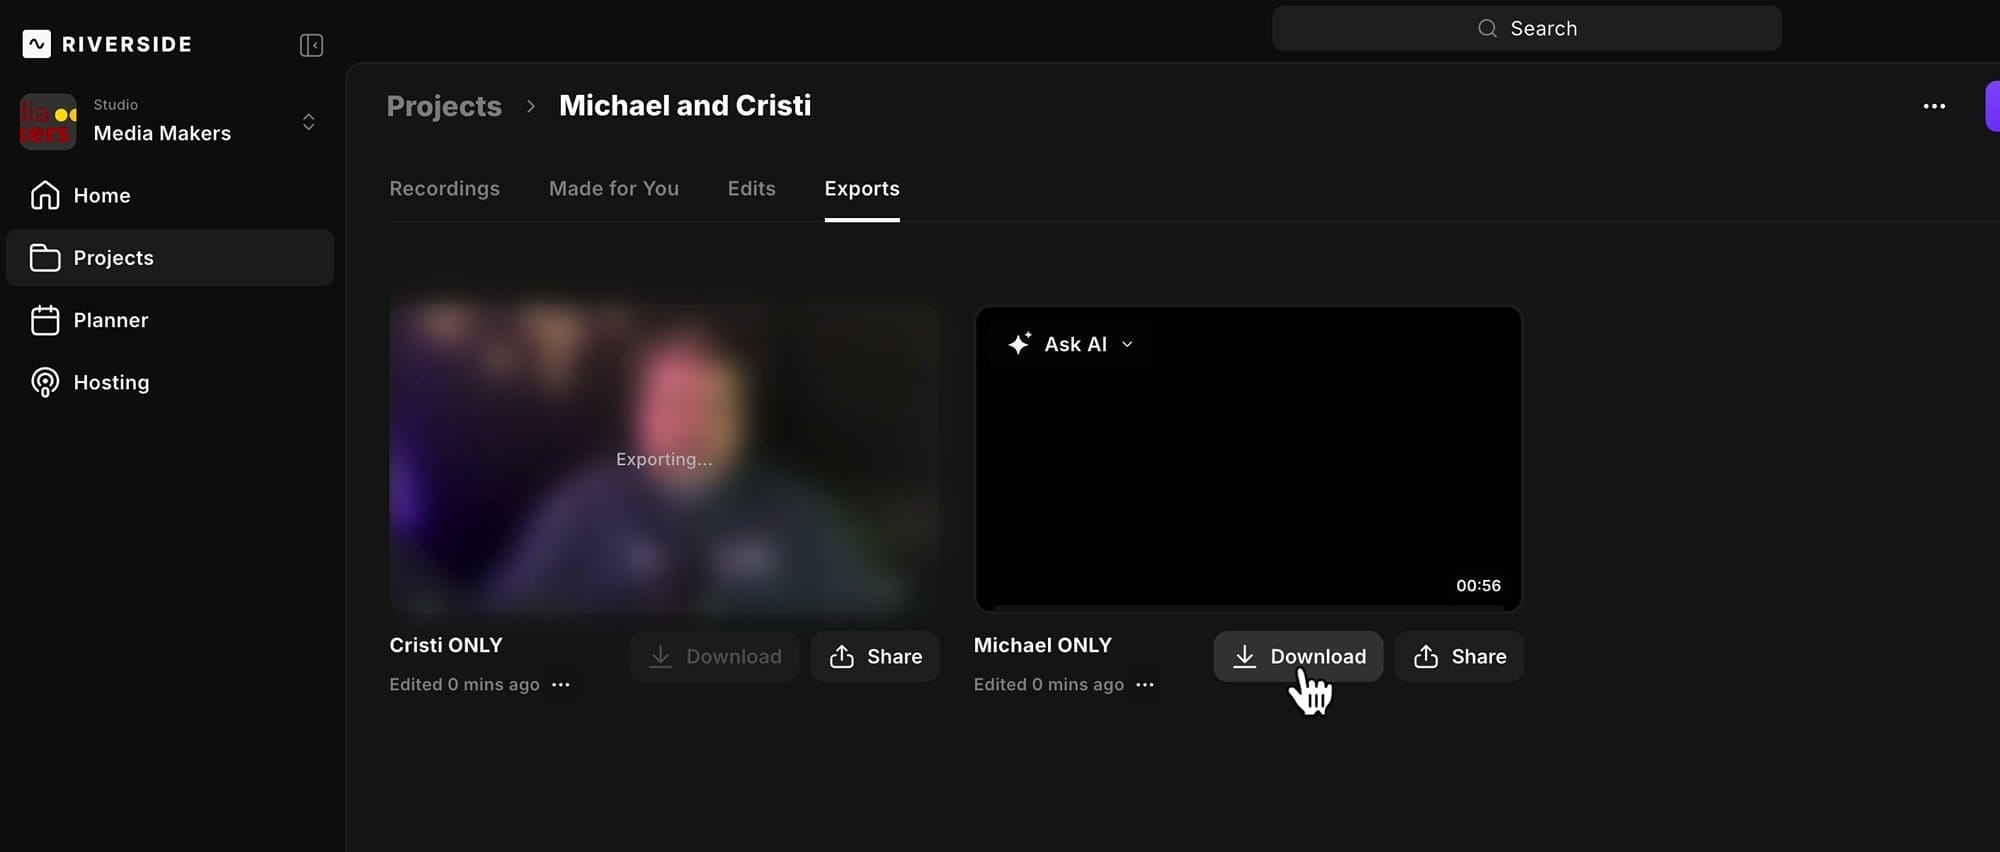
Download both, drop them into your DAW or video editor, and you've got fully edited speaker stems ready for the next stage of post-production — color grading, mixing, mastering, sound design, whatever the project calls for.
If you're heading deeper into multitrack post-production, the multi-track editing guide covers the rest of what Riverside's track tools can do, and creating multiple edits and exports from one recording walks through the variant workflows.
If you have other Riverside questions, leave them in the comments and I'll cover them in a future video.
Related guides

If you're eager to learn more about Riverside and wish to have a one-on-one Riverside coaching session, feel free to book a call with me. I'm here to help you with any questions you have and to guide you through the best workflows, tips, workarounds, or just answer any questions you may have!