
Upload Separate Recordings in Riverside and Edit as Multi-Track
If you record one-on-one sessions in a studio or use a different recorder, you can still bring those files into Riverside and treat them like native multi-track sessions.

I discovered how to edit separate recordings in Riverside as multi-track recently, and it now enables me to handle interviews recorded outside the platform.
In this tutorial I’ll show the exact steps I use to upload separate files, synchronize them, and use Riverside’s editing and AI tools to finish an episode.
Step 1: Create a new project
Start in your Riverside studio and choose Projects → New Project. Give the project a name - it doesn’t matter much since you can rename later. Creating a project is required before you upload files so Riverside has a container to process and store the synchronized multi-track session.
Step 2: Upload the separate recordings
Click Upload instead of Record. Riverside supports uploading files from your local drive or importing from Google Drive. Select the video (or audio) files you recorded separately. I usually select each participant’s camera feed or clean audio track. Hold your modifier key to pick multiple files at once, then click Open.
When you upload, Riverside will detect multiple files and ask if these are different participants from the same recording session. If they are part of the same conversation and already time-aligned, check that box. That is the key step to tell Riverside to combine the files as a synchronized multi-track.
If you’re eager to learn more about Riverside and wish to have a one-on-one Riverside coaching session, feel free to book a call with me.
I’m here to help you with any questions you have and to guide you through the best workflows, tips, workarounds, or just answer any questions you may have!
If the files are unrelated, don’t check the box - Riverside will keep them as separate recordings.
Step 3: Ensure tracks are time-aligned before upload
Riverside only assembles the files into a multi-track edit if each track starts at the same time and is in sync. Before you upload, verify the recordings start and end at the same time. If they’re offset by a few seconds, adjust them in your local editor or add silent padding so each file begins at the same timestamp, to prevent unexpected results. This small prep step prevents sync issues and saves editing time later.
Step 4: Let Riverside process and create the project
After upload, Riverside will process the files. This step includes free transcription and audio/video processing. Depending on file size, this may take a few minutes. When processing finishes, Riverside will list the recordings inside the project exactly like native Riverside sessions.
You’ll see the files available to download, edit, and use in the editor.
Riverside also creates a “magic episode” automatically. It applies your brand kit (logo, caption presets), generates show notes with AI, and starts producing social clips and longer “magic segments.” This automated output gives you a head start if you want quick promotional assets.
Step 5: Open the edit and verify the multi-track assembly
Go to Recordings inside the project and click Edit to open the Riverside editor. You’ll notice a few things immediately:
- Transcripts are already generated and aligned to the timeline.
- Chapters are created automatically and appear in the left navigation.
- The separate tracks are already aligned and accessible as discrete participant tracks.
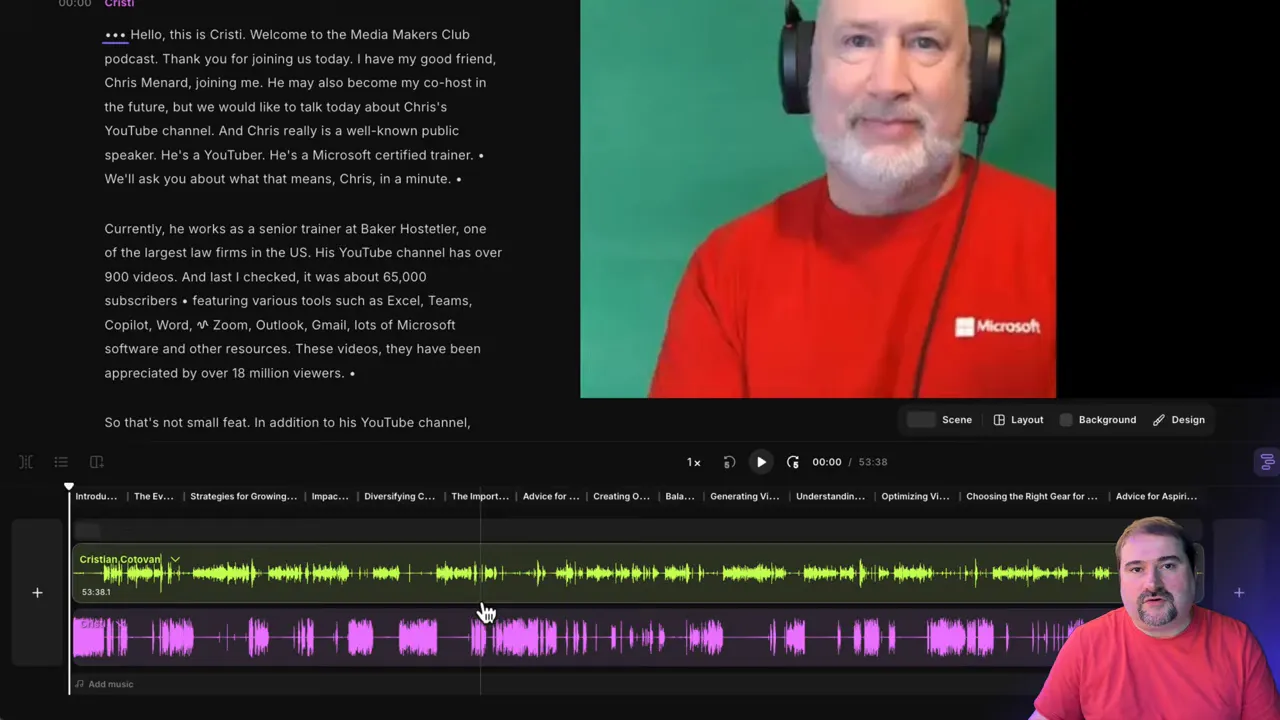
At this point you can switch camera angles, hide or show tracks, and treat the session exactly like a recording made inside Riverside. All the Riverside editor features are available to you because Riverside assembled the files as a multi-track project.
Step 6: Use Riverside’s AI tools to speed up post-production
Riverside exposes the full AI toolset for uploaded multi-track sessions. From the AI Tools menu you can:
- Remove pauses and filler words (ums, ahs).
- Apply Magic Audio to clean noise and balance levels.
- Use Smart Mute to silence non-speaking tracks automatically.
- Adjust eye contact on video tracks where available.
These features let you polish separate recordings in Riverside as multi-track sessions without switching platforms. I often run automatic cleanup first, then fine-tune manually for pacing and emphasis.
Step 7: Create clips, show notes, and export
Once your edit is ready, use Riverside’s publishing tools. You can:
- Generate social clips using the AI-created hooks and magic segments.
- Export a branded episode video that uses your layout and caption presets.
- Download individual tracks for further local processing, or publish directly to a supported podcast host (or publish to Riverside, if you use Riverside hosting).
Because Riverside treated the upload as a multi-track session, switching layouts and camera angles will be a breeze.
When to use this workflow
I use the ability to edit separate recordings in Riverside as multi-track when:
- I record interviews in a professional studio that provides clean video and audio but want Riverside’s AI and publishing tools.
- I have existing episodes recorded elsewhere and want to migrate them into Riverside for centralized editing and hosting.
- I record locally with separate recorders and need smart mutes, filler removal, or branded clip generation without manual multi-track assembly.
I hope this clear, step-by-step guide helps you confidently start and edit separate recordings in Riverside as multi-track projects.


