How to Record a Reaction or Commentary Segment in Riverside (Screen + Camera)
Drop a reaction or commentary segment into any Riverside edit: split your timeline, record yourself with your screen shared, capture the audio, and style it with layouts and scenes.

Sooner or later you'll want to drop a reaction or commentary moment into something you're editing — a spot where you watch a clip, pause it, and talk about what's on screen.
This is one of the questions I get from my students: "How do I record myself watching a video, capture both the video and my camera, and slot that into an edit I'm already working on?" The good news is that Riverside handles this beautifully, and you don't need any extra software to do it.
Below I'll walk you through the whole workflow — splitting your timeline at the right spot, recording yourself with your screen shared, capturing the audio of whatever you're reacting to, and then styling the result with layouts and scenes.
Choose where to insert your reaction segment
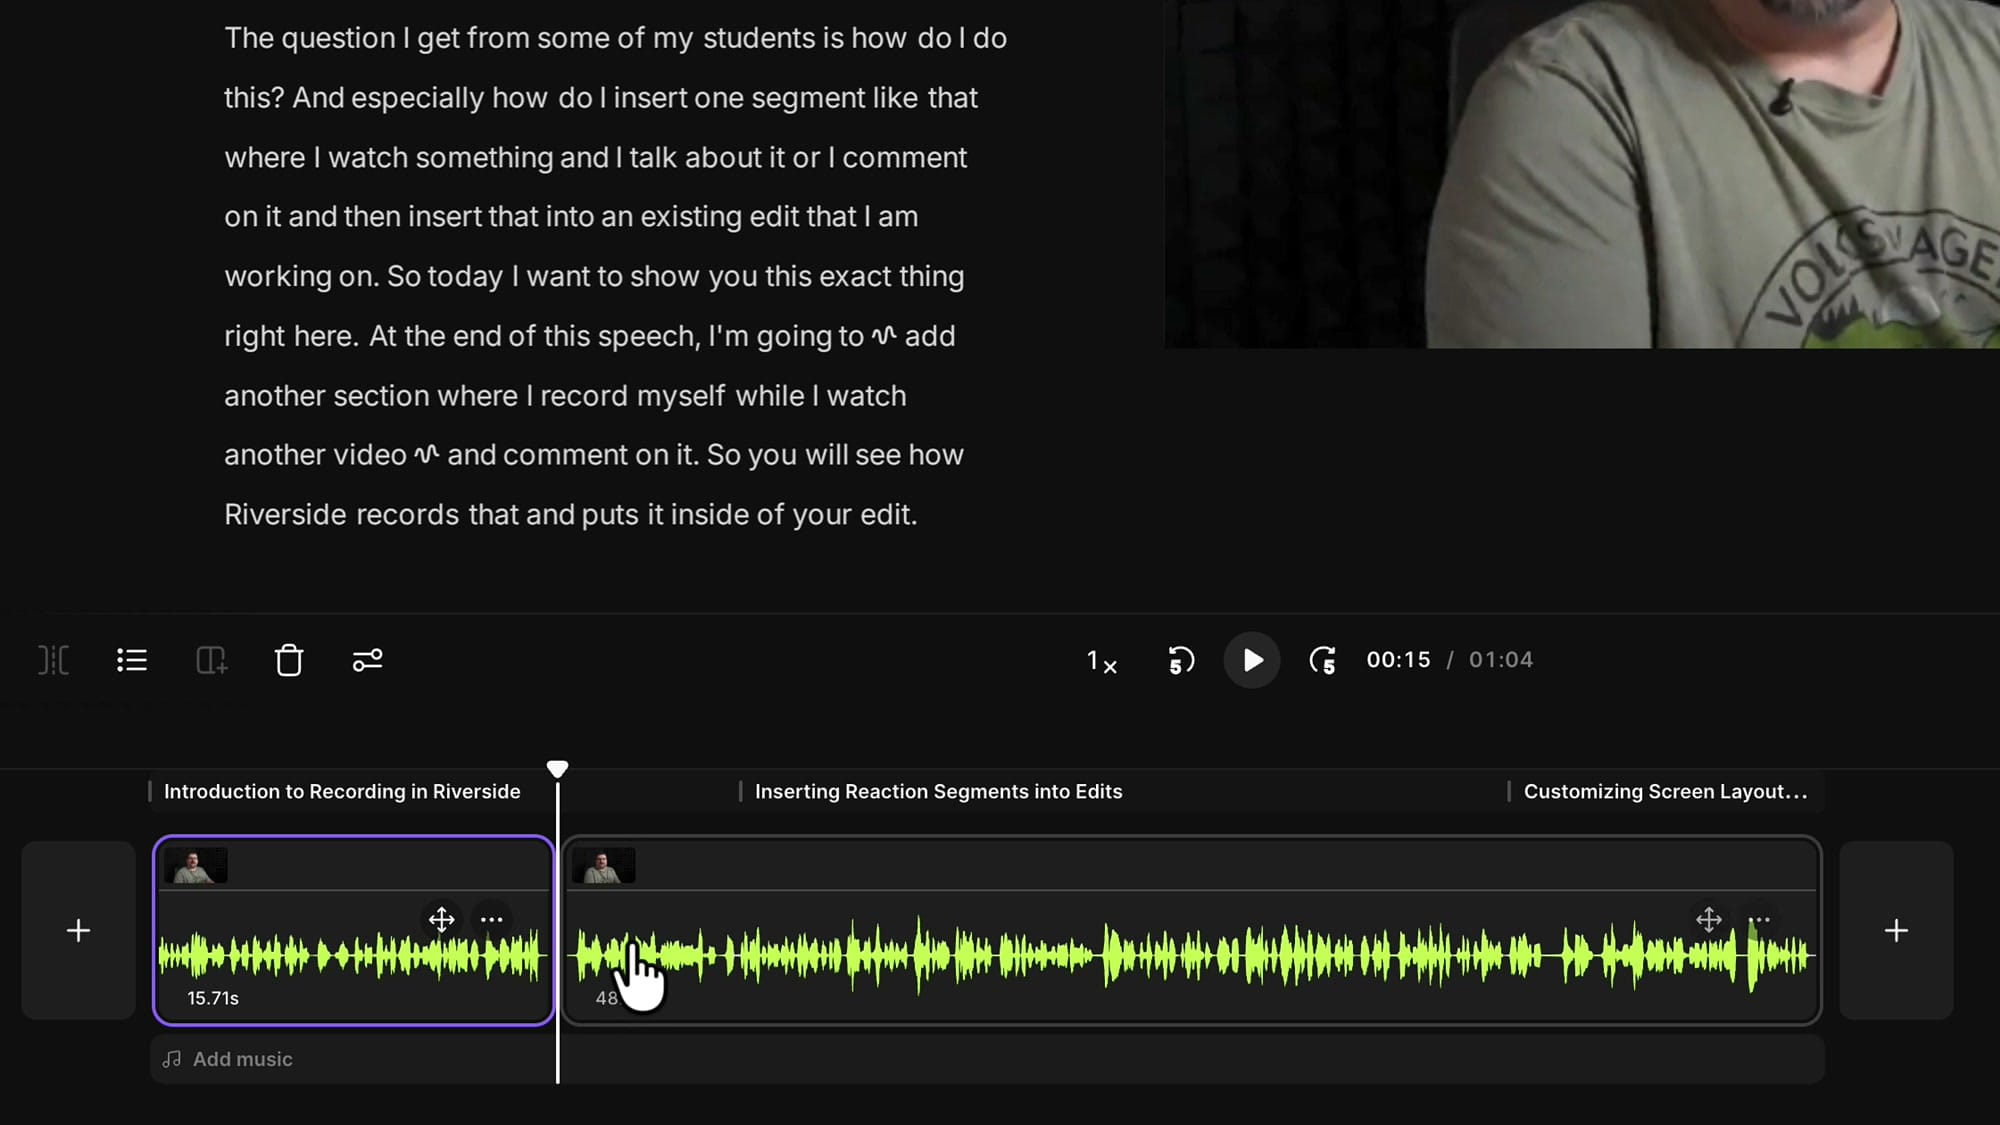
Start in the editor and decide where the new segment should go. You can add it at the very beginning or the very end using the plus buttons on either side of your timeline — but most of the time you'll want it somewhere in the middle.
To do that, move your play head to the exact point where the new segment should begin, then click the split button. That cuts your clip in two and opens up a gap you can drop something into.
Once the clip is split, zoom in on the timeline with Command and your mouse wheel (Control and the mouse wheel on Windows) so you can clearly see the little plus button that appears between the two sections.
That plus button is where you'll insert your recording.
Open the insert menu and choose Record
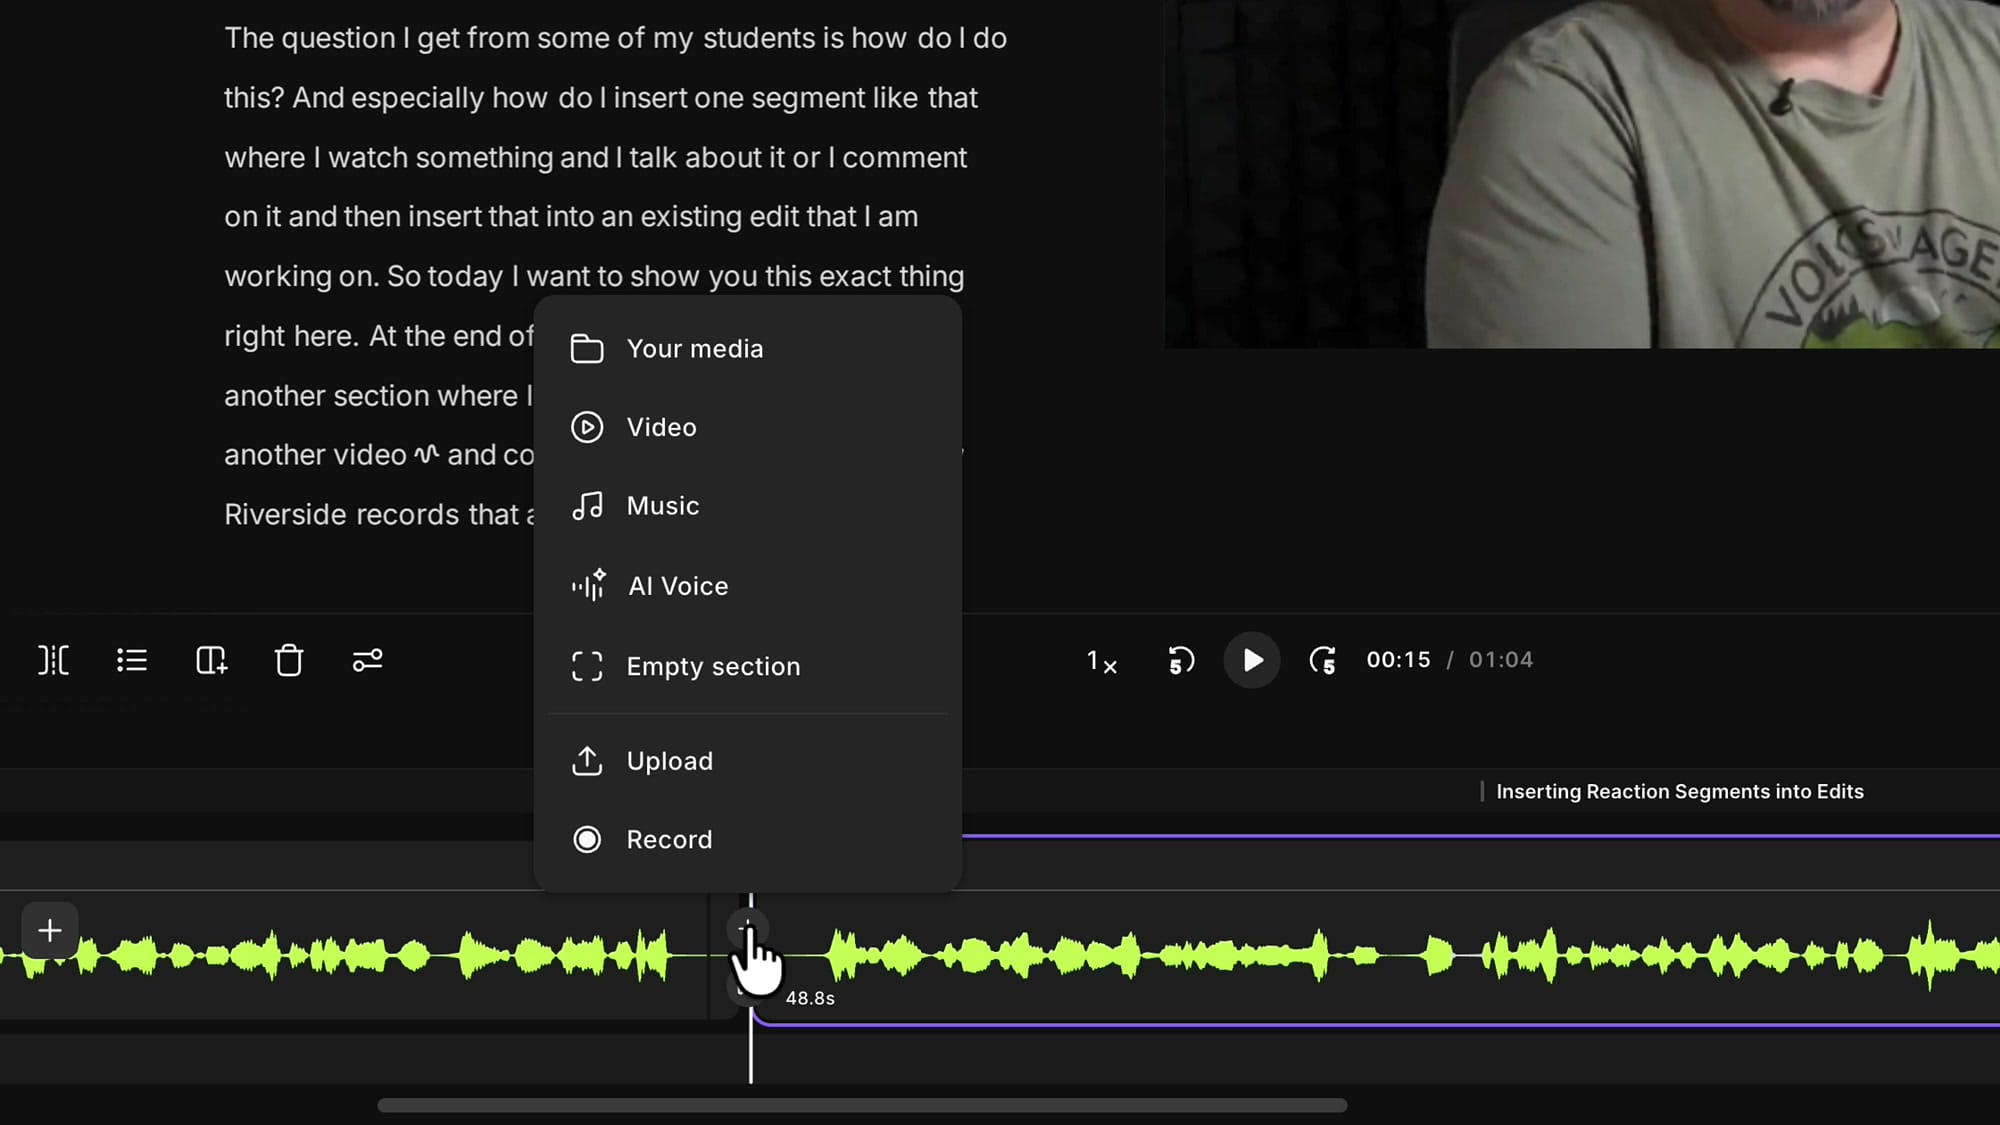
Click the plus button between the two sections and the insert menu opens, asking what you'd like to add. You can pull in a file from your media, another edit from your Riverside account, a video, a music file, an empty section, or an upload.
For a reaction segment, choose Record. That takes you straight into the Riverside recording studio so you can capture yourself fresh.
Share your screen and capture the audio
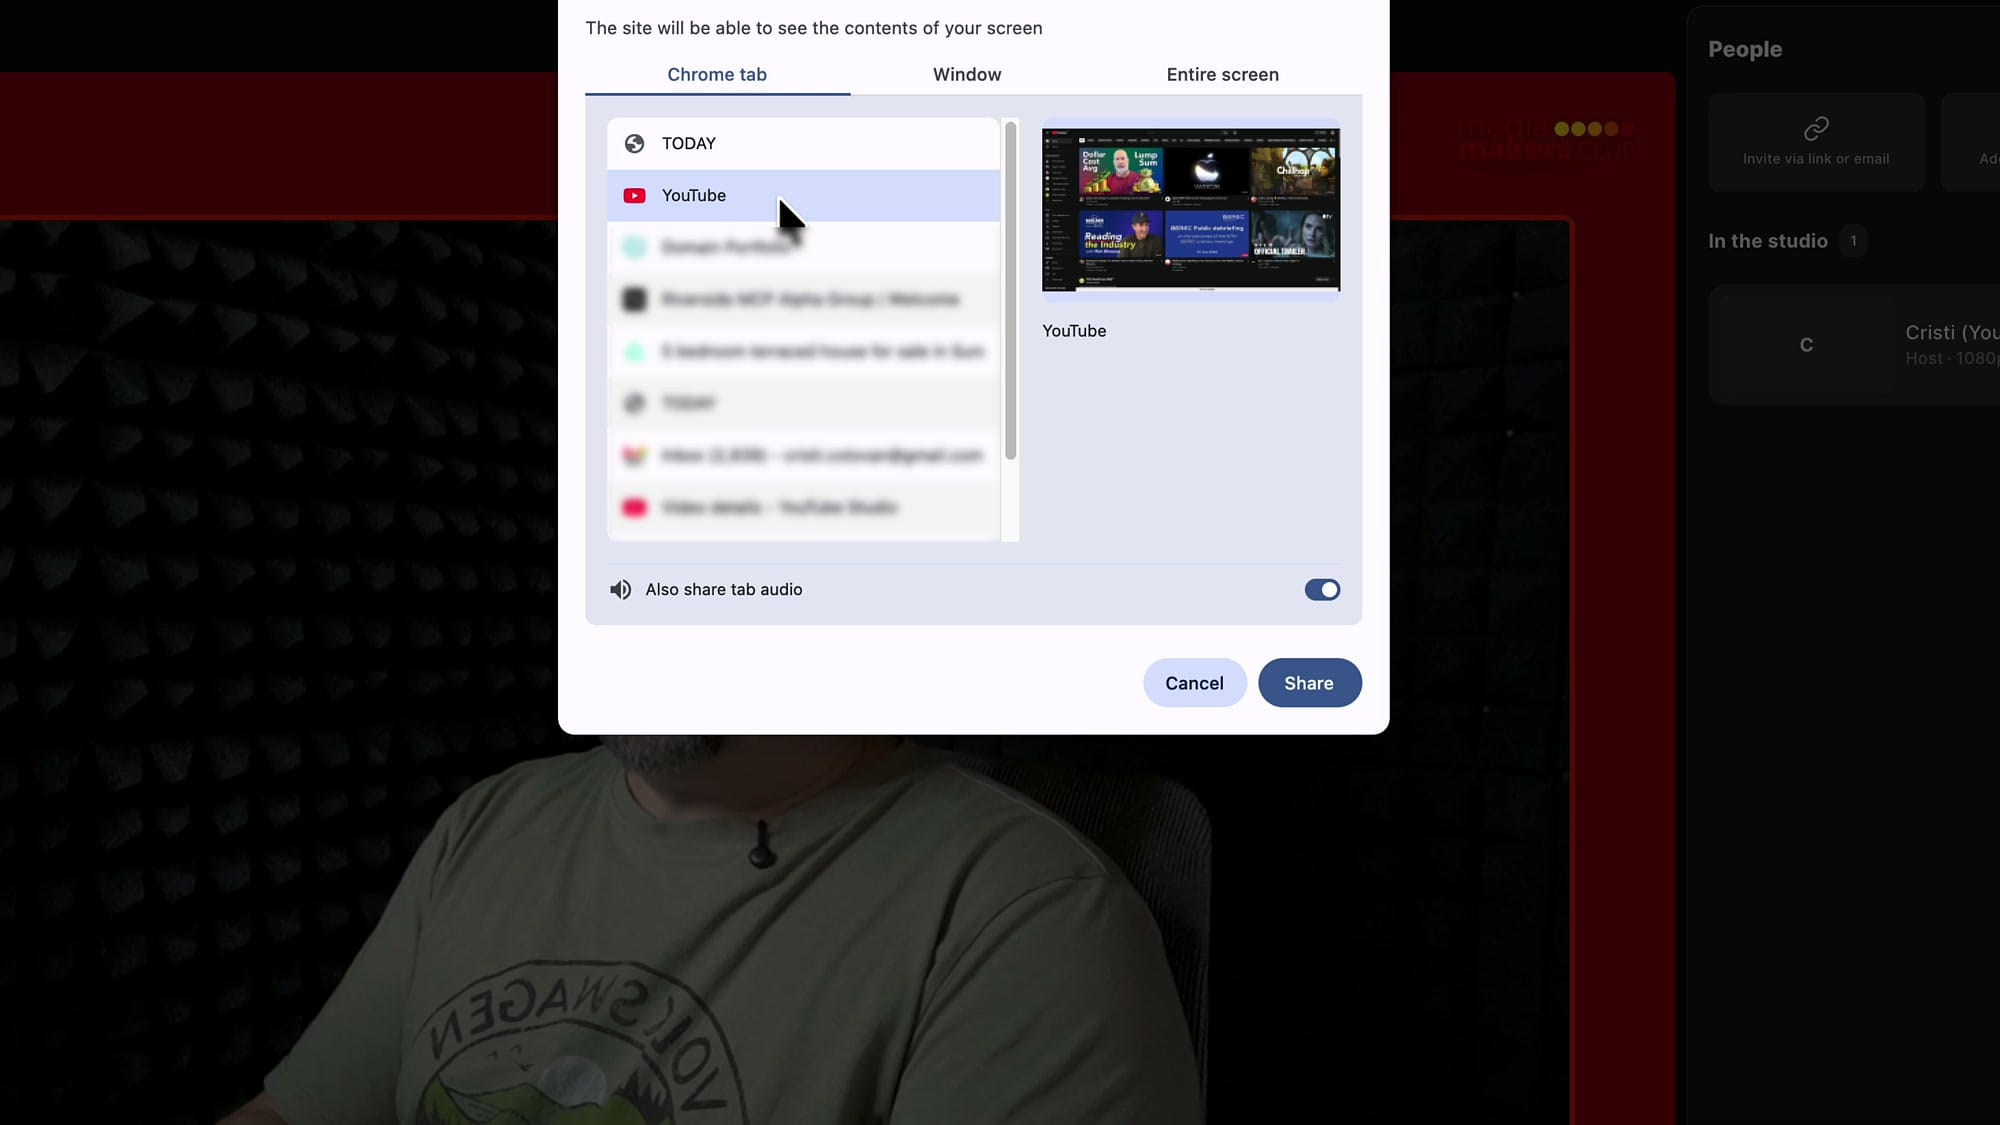
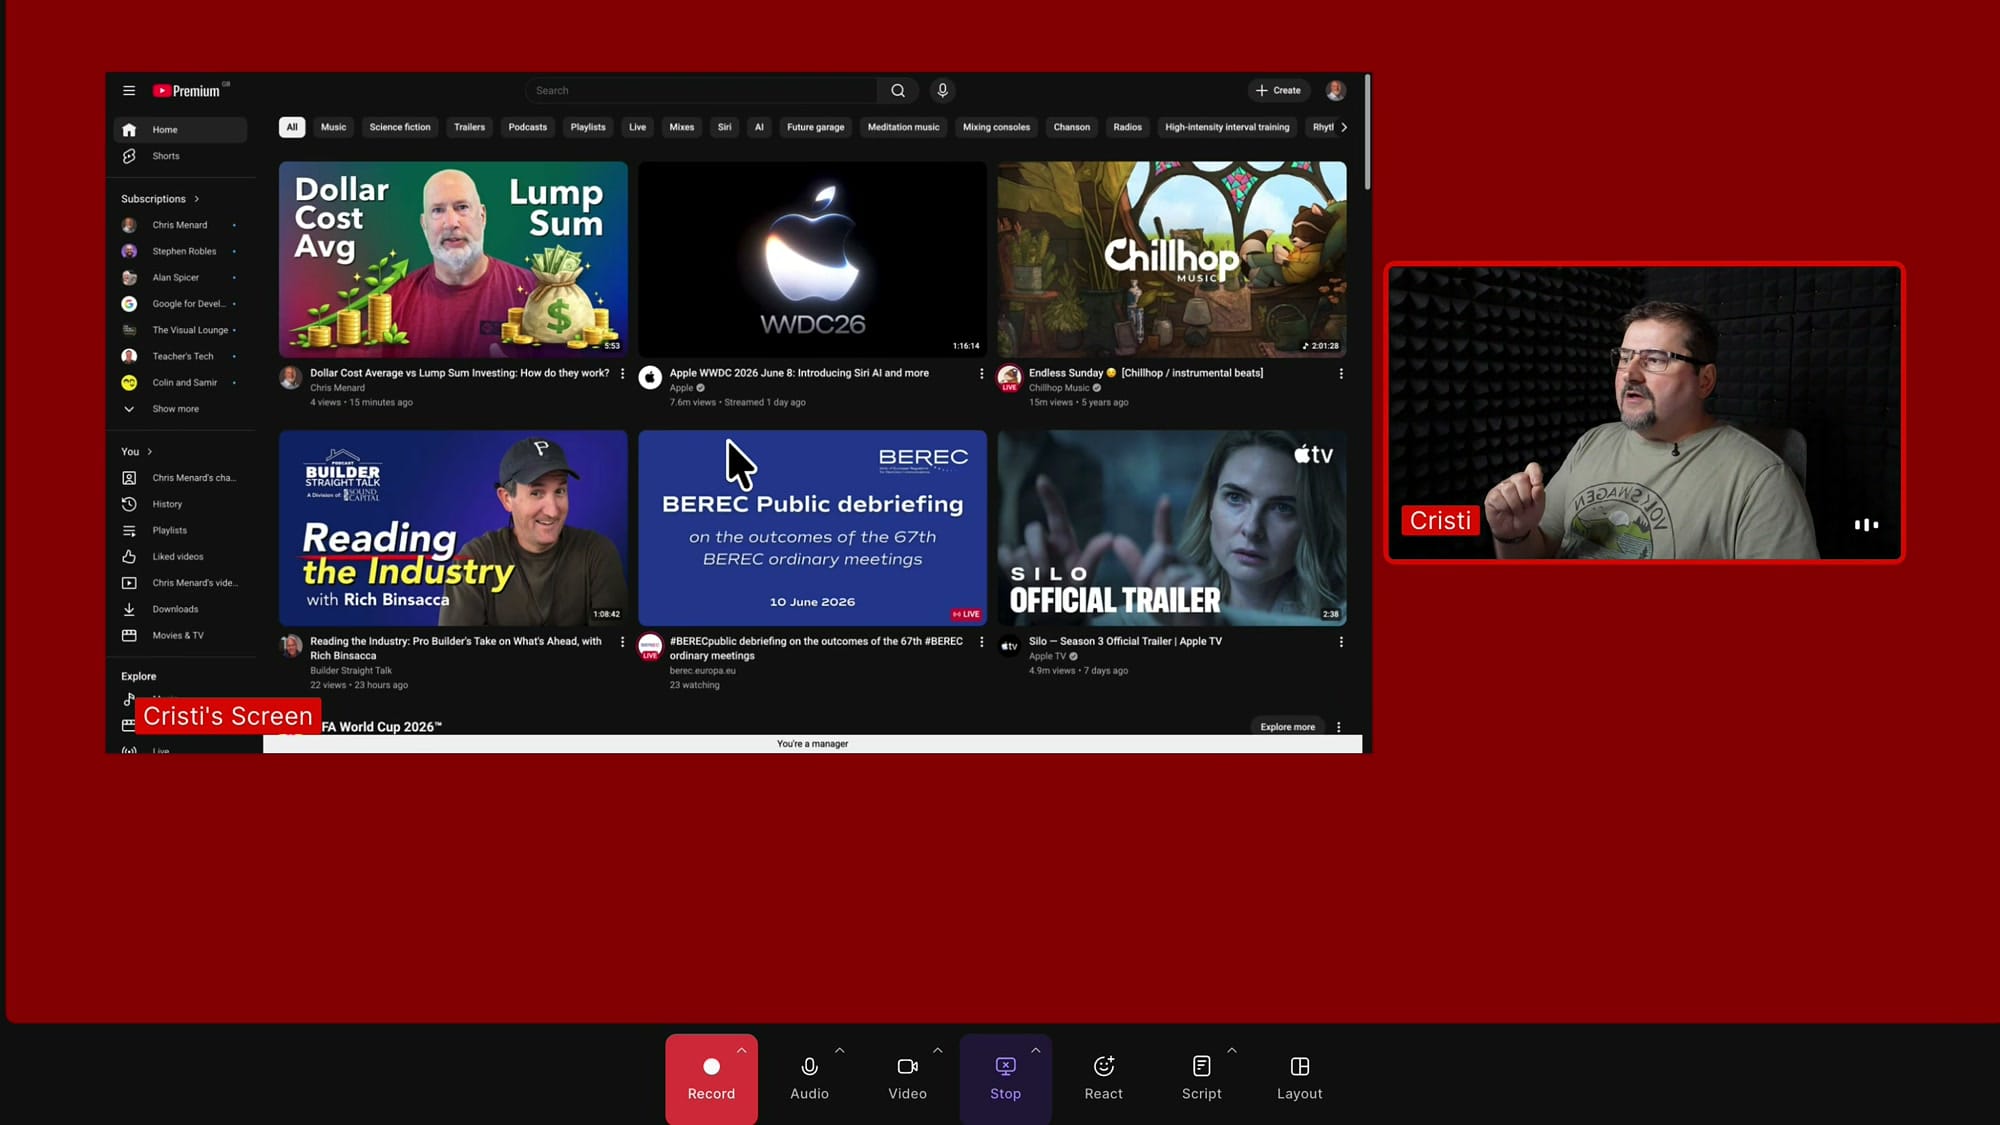
Inside the studio, the trick to a reaction segment is sharing your screen. Click the share button — you can do this before you start recording or while you're already recording, it's up to you. Your browser asks what you want to share.
Pick the Chrome tab that has your video open (in my case, a YouTube tab).
This next part is the one people forget: turn on Also share tab audio. If you skip it, Riverside captures the picture but none of the sound, so the video you're reacting to will be silent in your recording. Flip that toggle on, then click Share.
Sharing an entire screen or a window instead
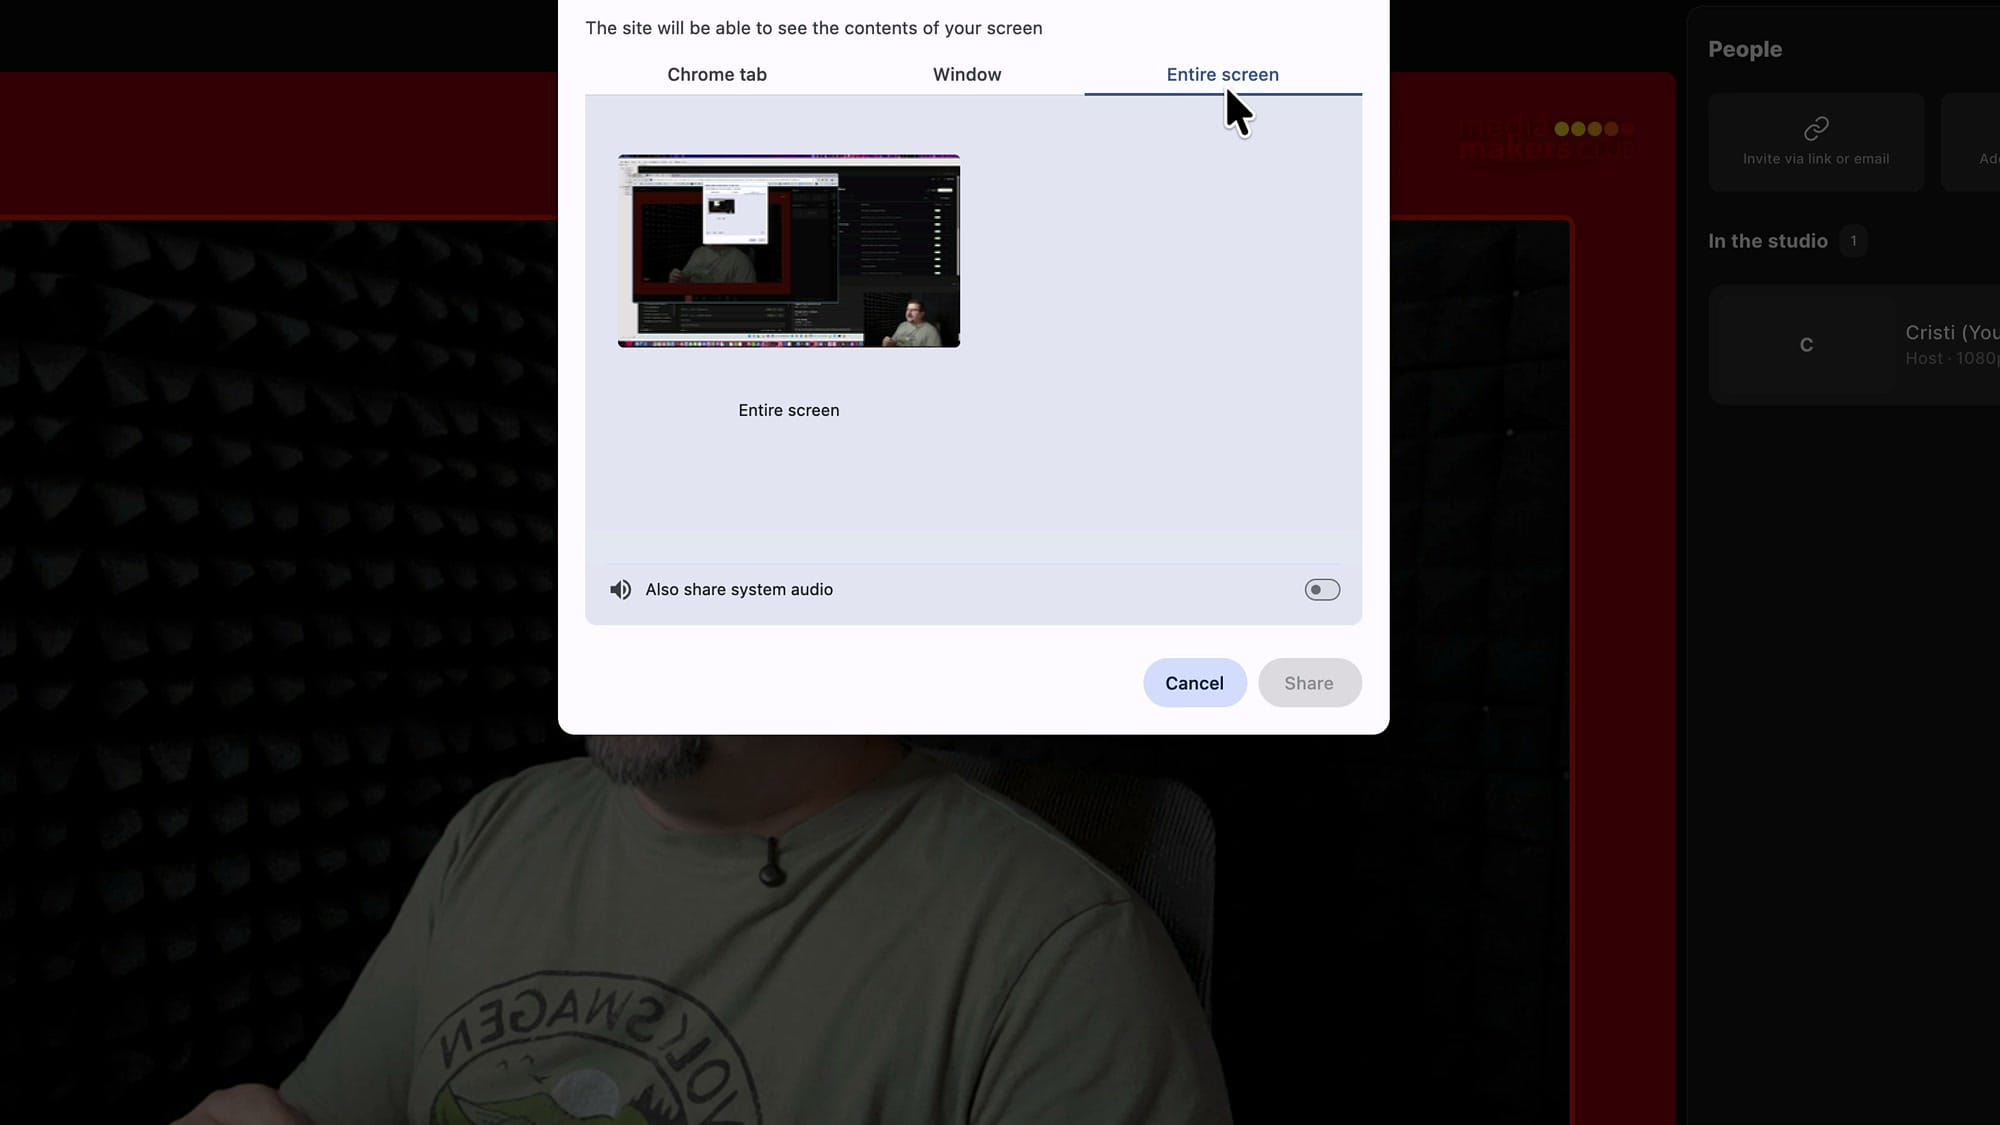
You don't have to share a single tab. You can share a specific window, or your entire screen. If you choose Entire screen, you'll see a slightly different option called Also share system audio — turn that on and Riverside captures every sound playing on your computer, not just one tab. That's handy when you're presenting something that isn't in a browser but still has sound.
Check your preview, then hit record
Back in the studio you'll see two things side by side: the tab you're sharing and your camera. Riverside records your camera and the shared screen as two separate, clean tracks and drops both into your edit.
When everything looks right, click record. I keep the countdown on, so I get five seconds before recording actually starts.
If you’re eager to learn more about Riverside and wish to have a one-on-one Riverside coaching session, feel free to book a call with me.
I’m here to help you with any questions you have and to guide you through the best workflows, tips, workarounds, or just answer any questions you may have!
Record your reaction
Once you're recording, switch over to the tab you're sharing and play your video. You'll see it playing and hear the sound, and you can talk over it, pause it, and comment as much as you like — your voice and the video audio are captured at the same time.
One thing worth knowing: if you click full screen on the video, it goes full screen inside the browser tab rather than taking over your whole monitor. That's normal for tab sharing (the behavior may differ on Windows). You can still play, pause, and react exactly as you would.
You also don't have to stop recording to change what you're sharing. If you want to switch tabs or windows, just click Stop sharing — that ends the screen share but keeps recording your camera. So your reaction can continue on camera even after the shared clip is gone.

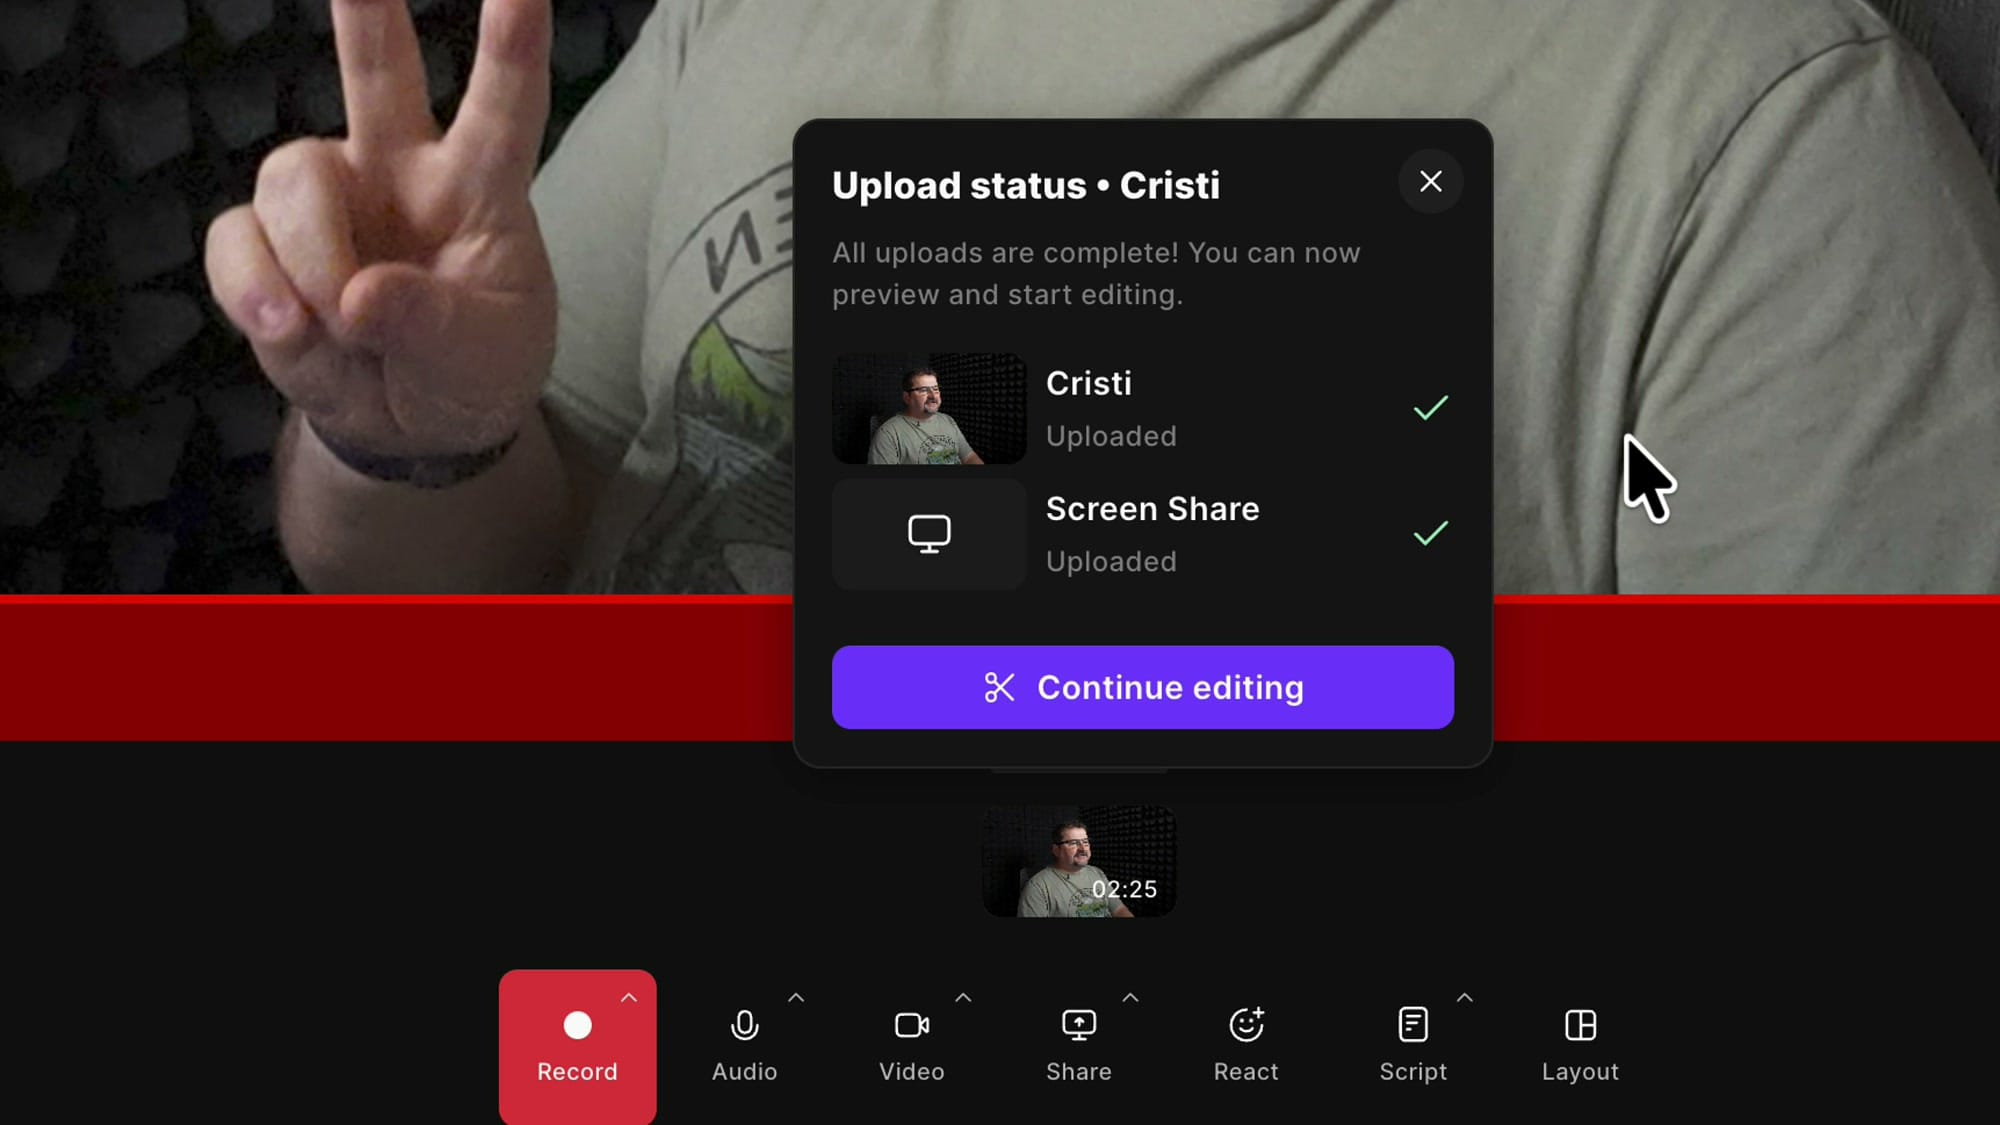
Stop recording and let both tracks upload
When you're done, click stop and stay in the studio while everything uploads. On a fast connection this only takes a few seconds. You'll notice two tracks finish uploading — your camera and your screen share — because Riverside recorded them separately. Once both show as complete, click Continue editing to head back to the editor.
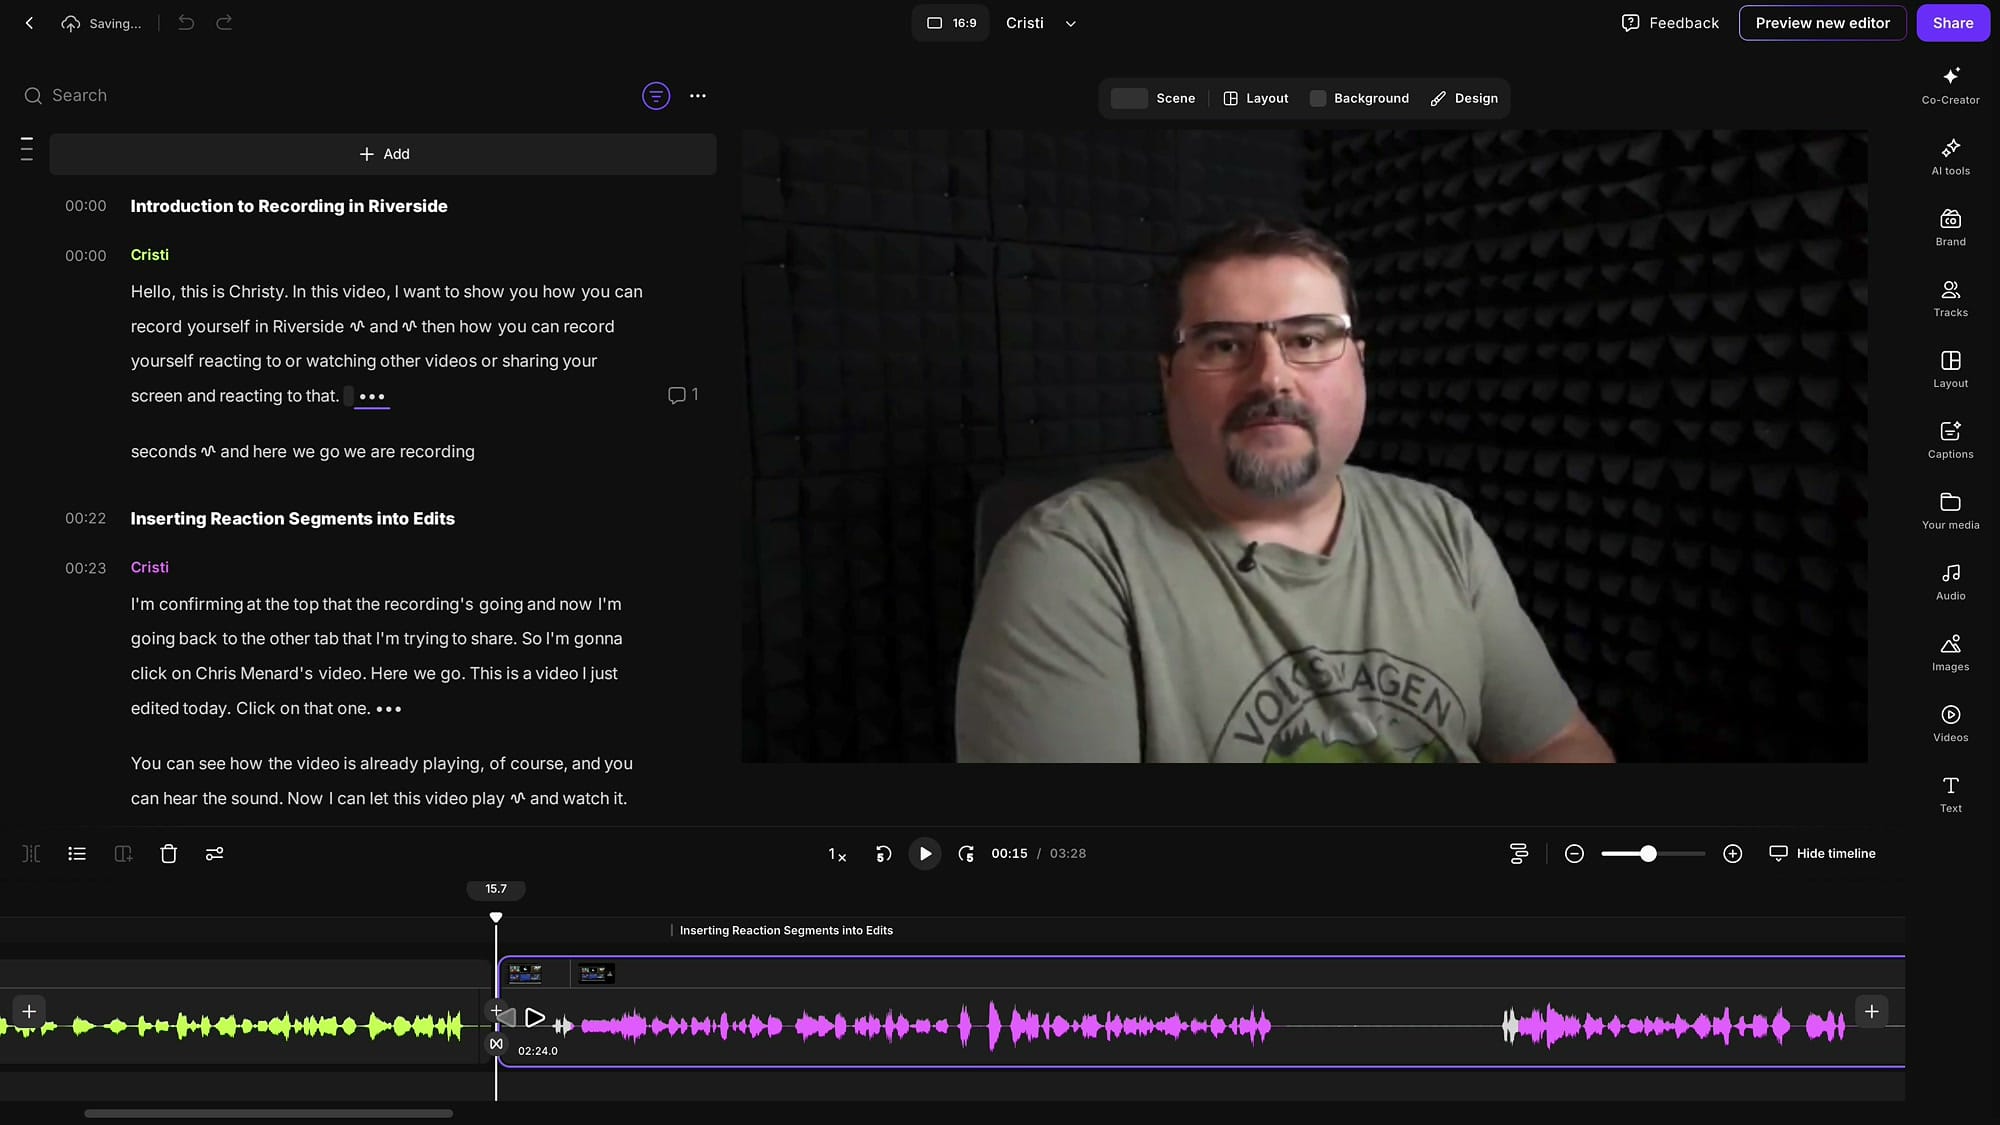
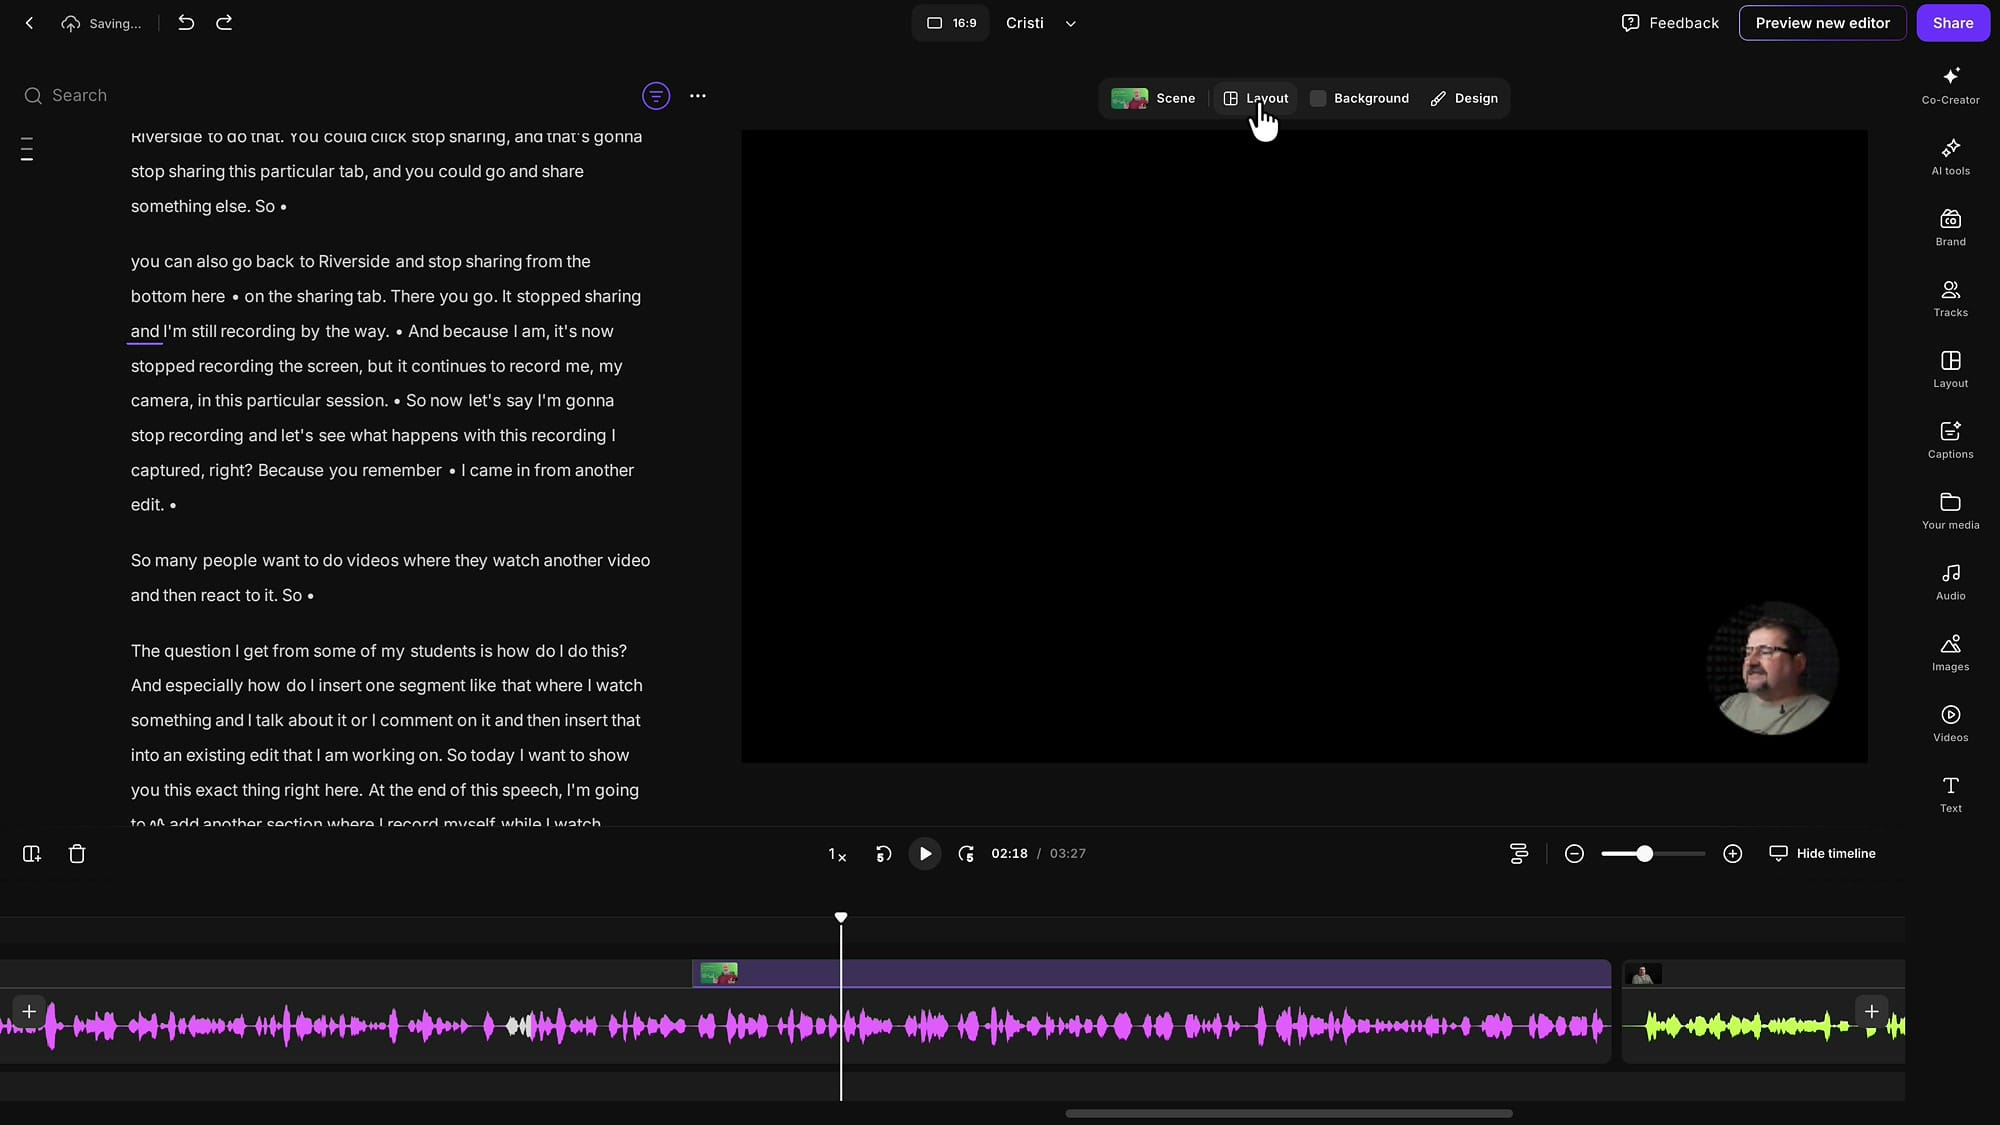
Back in the editor: your recording drops into the edit
The spot where you split your timeline will show as still processing for a moment, with a default five-second placeholder while Riverside finishes your files. Wait a minute or two and that section expands to fit everything you just captured.
Because it came in as a separate recording, it shows up in a different color on the timeline — which actually helps, since you can instantly see where the new segment starts and stops. You can trim the beginning and end just like any other clip by grabbing the edges.
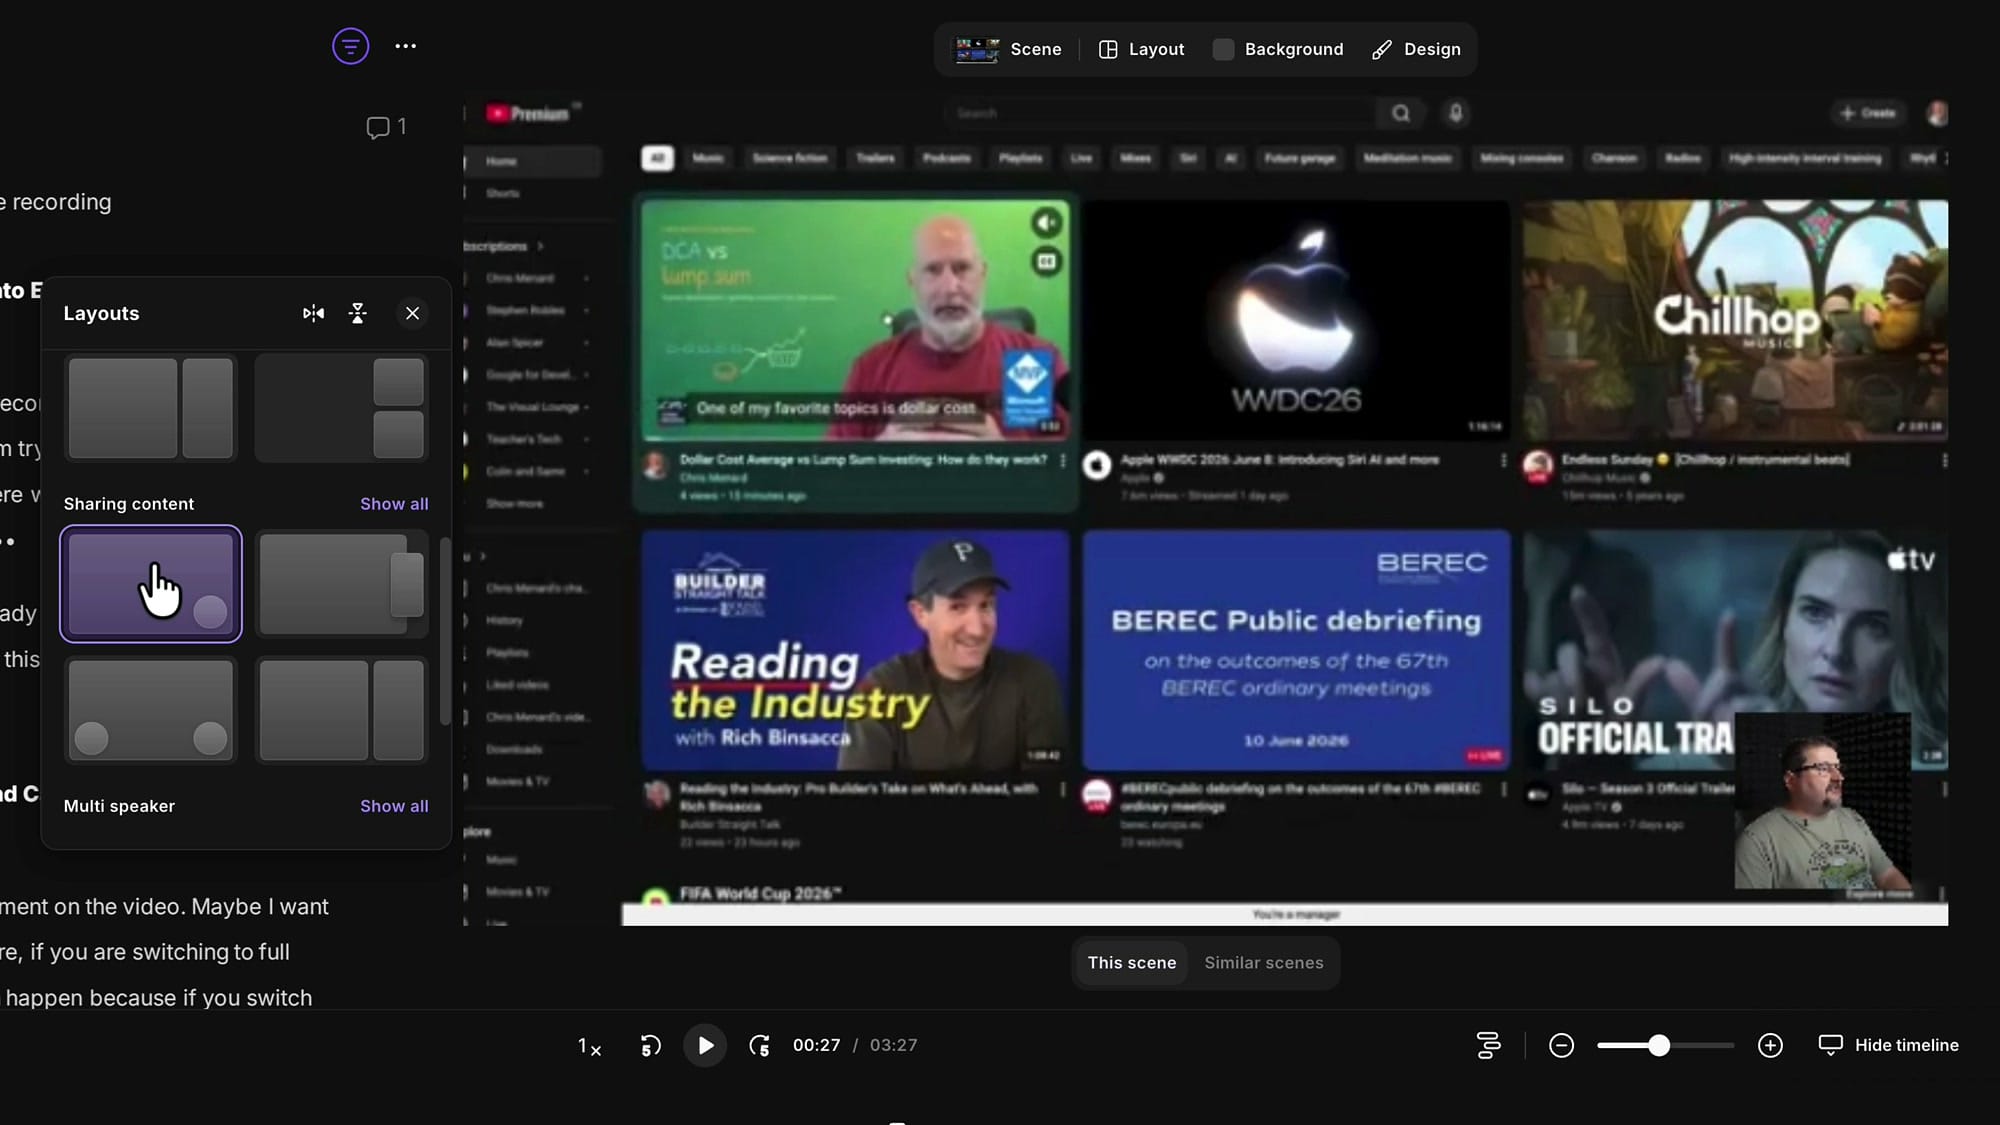
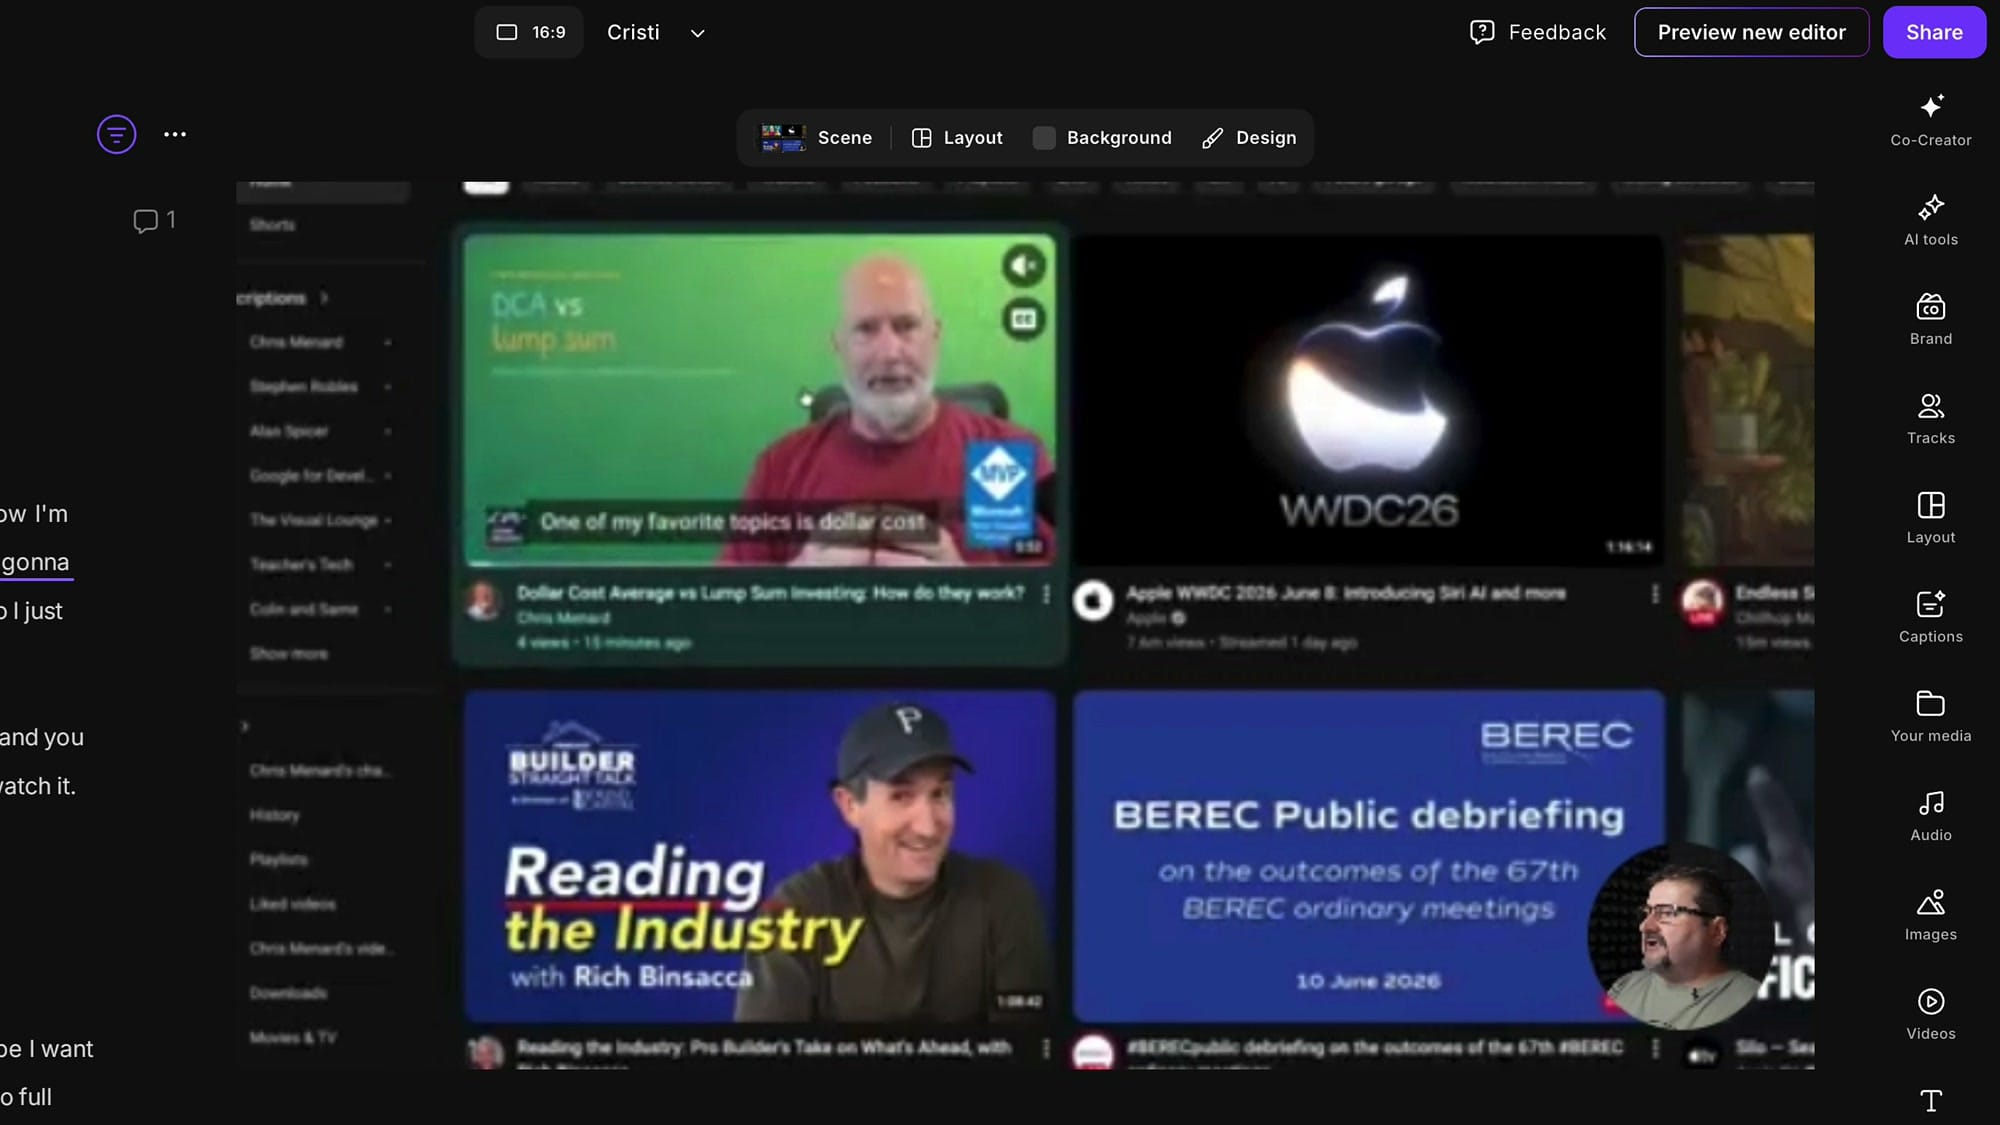
Change the layout for your reaction segment
Because this came in as a real Riverside recording, you get the full editing experience — your voice is transcribed, you show up as a speaker, and you can create scenes and change layouts for it.
Click outside the canvas, go to Layout at the top, and scroll down to the "Sharing content" styles. From there you can put the video full screen with yourself tucked in a corner, sit yourself on the side, and more.
A few refinements I reach for: if you're facing the wrong way relative to the screen, use the mirror option so you appear to be looking at the content.
You can drop your camera into the corner, click it and switch its shape to a circle, and double-click to zoom and reposition so your face is framed nicely.
You can even crop the shared video — go into crop mode, zoom in, and place the video neatly on screen so you're not showing the browser chrome around it. And if you want to draw attention to one spot, zoom into a particular part of the screen.
Add a scene when the screen share ends
If you stopped sharing your screen before you stopped recording, the tail end of your clip is just you on camera with no screen behind it. Scrub along the timeline to find the exact point where the share ended, then press the scene button to insert a scene break right there.
In that new scene, switch the layout to Solo speaker so it's just you full screen — no empty screen-share area. Before the break you're shown alongside the screen; after it, you're on your own. Clean and intentional.
That's the whole workflow
That's how you record yourself, share your screen, capture the audio, and insert the whole thing into an existing edit — then style it with layouts and scenes. You can record from scratch the same way, too. I love how flexible this is: pick exactly what you want to insert and where, pop into the recording studio, and come right back out. If you'd like to go deeper, take a look at the related guides below, and feel free to book a one-on-one Riverside coaching call with me.
Related guides

If you're eager to learn more about Riverside and wish to have a one-on-one Riverside coaching session, feel free to book a call with me. I'm here to help you with any questions you have and to guide you through the best workflows, tips, workarounds, or just answer any questions you may have!