How to Zoom and Pan in Riverside: Videos, Screen Shares, and Images

"Can we zoom and pan? Can we move the screen left or right? Can we create those little camera dolly moves in and out?" I have heard these questions from Riverside users for a long time, and the answer is finally yes. Riverside now has a Zoom & pan animation that works on your camera video, your screen share, and any image or B-roll you add on top.
It is easy to use. There are only a few buttons, and everything happens between the timeline and the canvas. I will go through three ways I use it: a slow zoom on a talking head, zooming into a screen share for tutorials, and animating B-roll and images.
Create a Slow Camera Zoom
The first use case is the classic one: the video slowly zooms in while you are talking. Zoom and pan is applied per video, so if you have several guests, you can animate each one differently.
Start by opening the timeline so you can see what is going on. Then move the playhead to the exact point where you want the zoom to begin. This matters, because when you add a zoom and pan animation, Riverside creates the first keyframe wherever the playhead is. Having the words displayed along the bottom of the timeline helps a lot here — I park the playhead in the little gap right before the word where I want the movement to start.
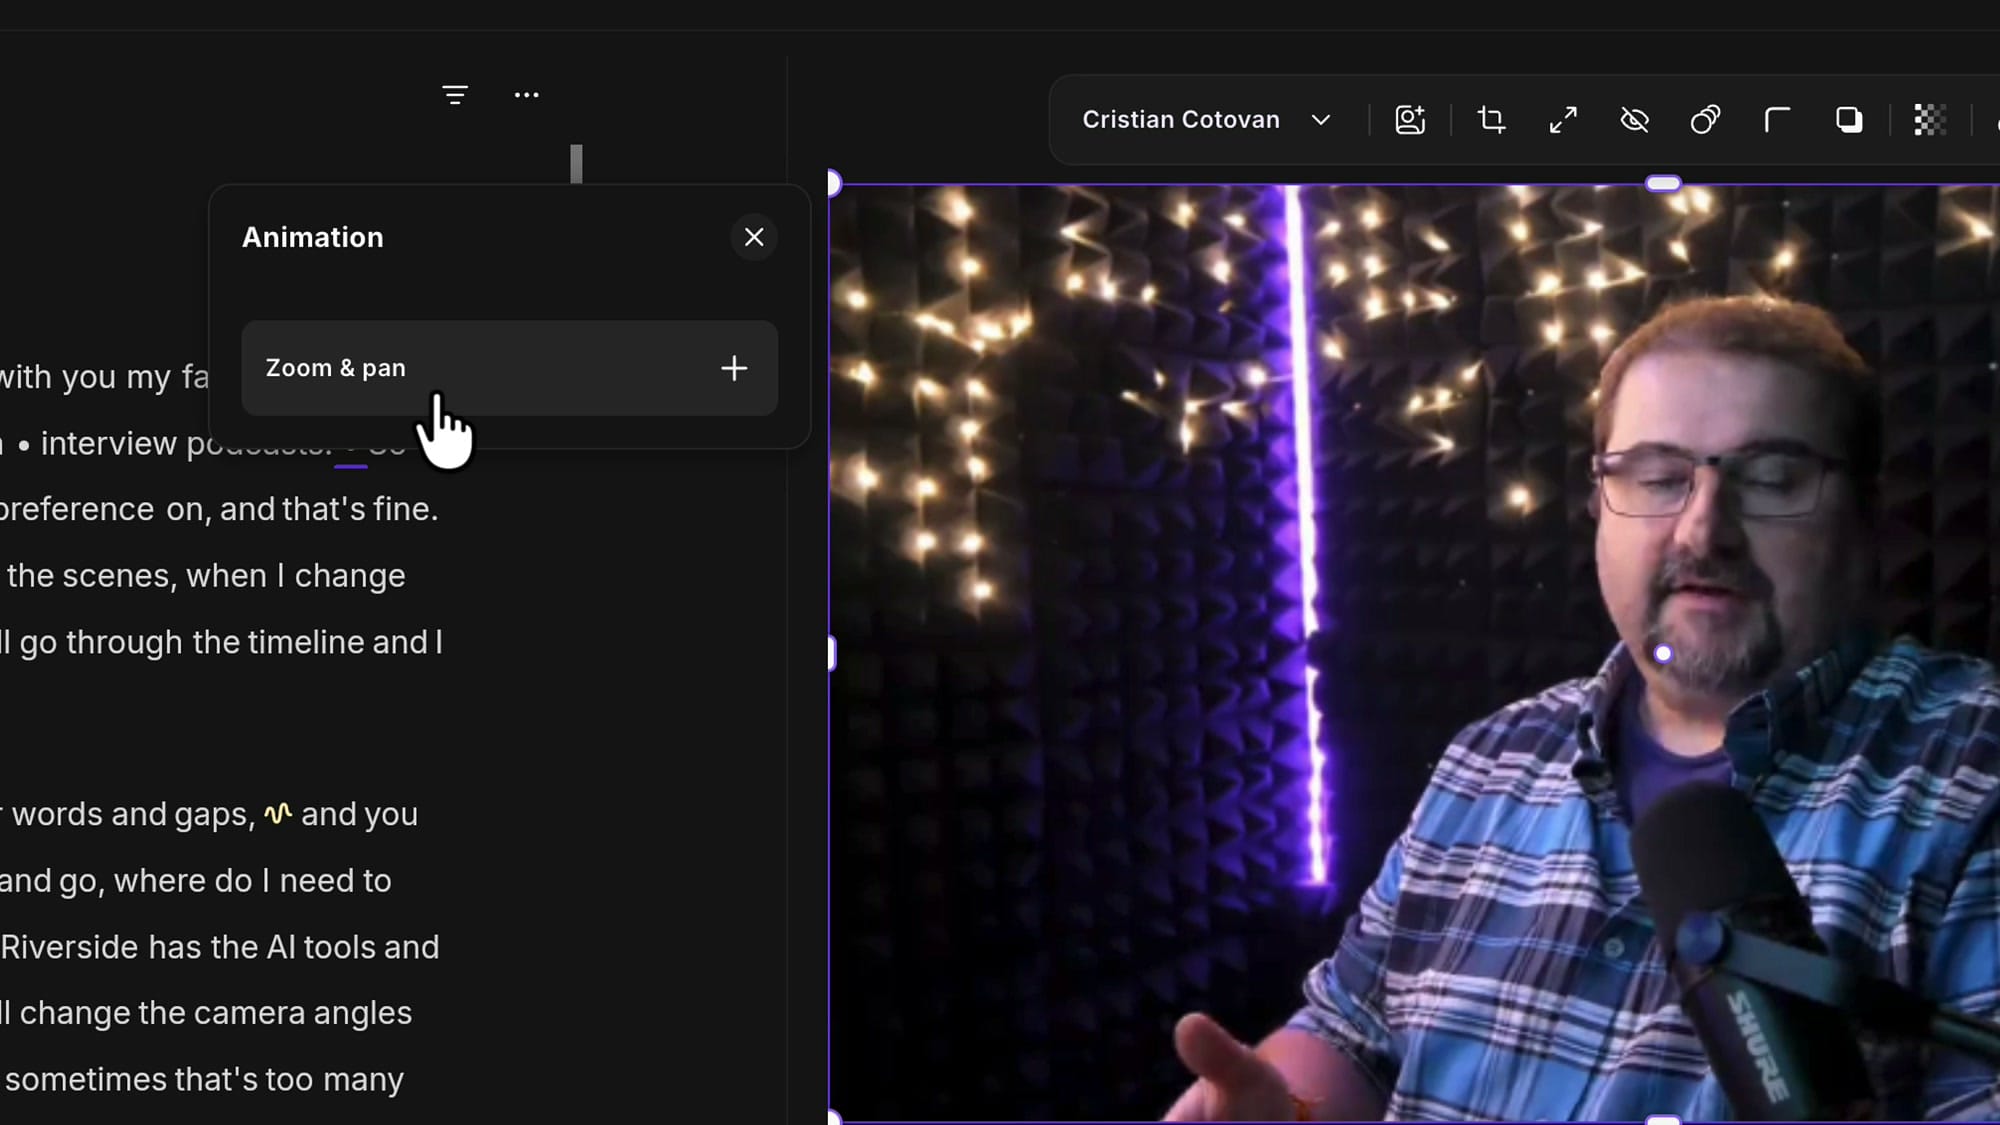
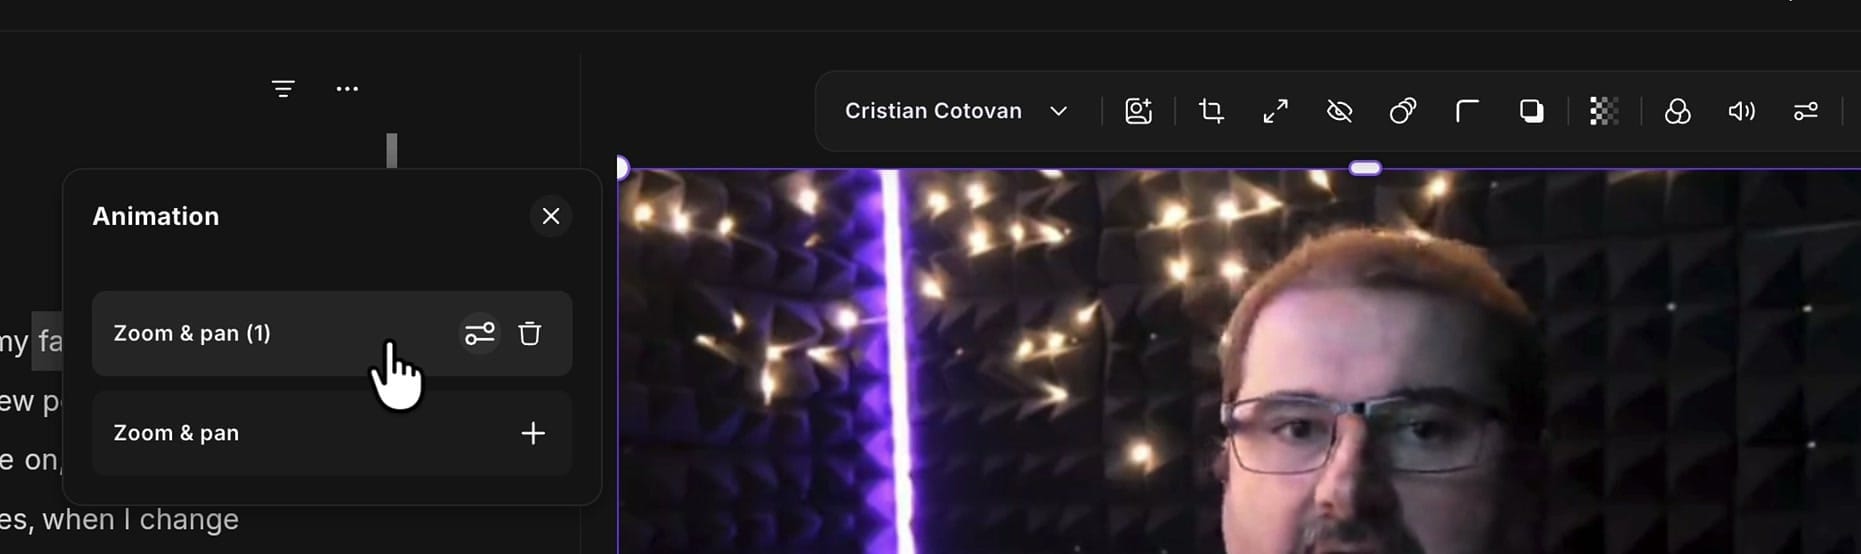
Now select the video on the canvas and click the Animation button in the toolbar above it.
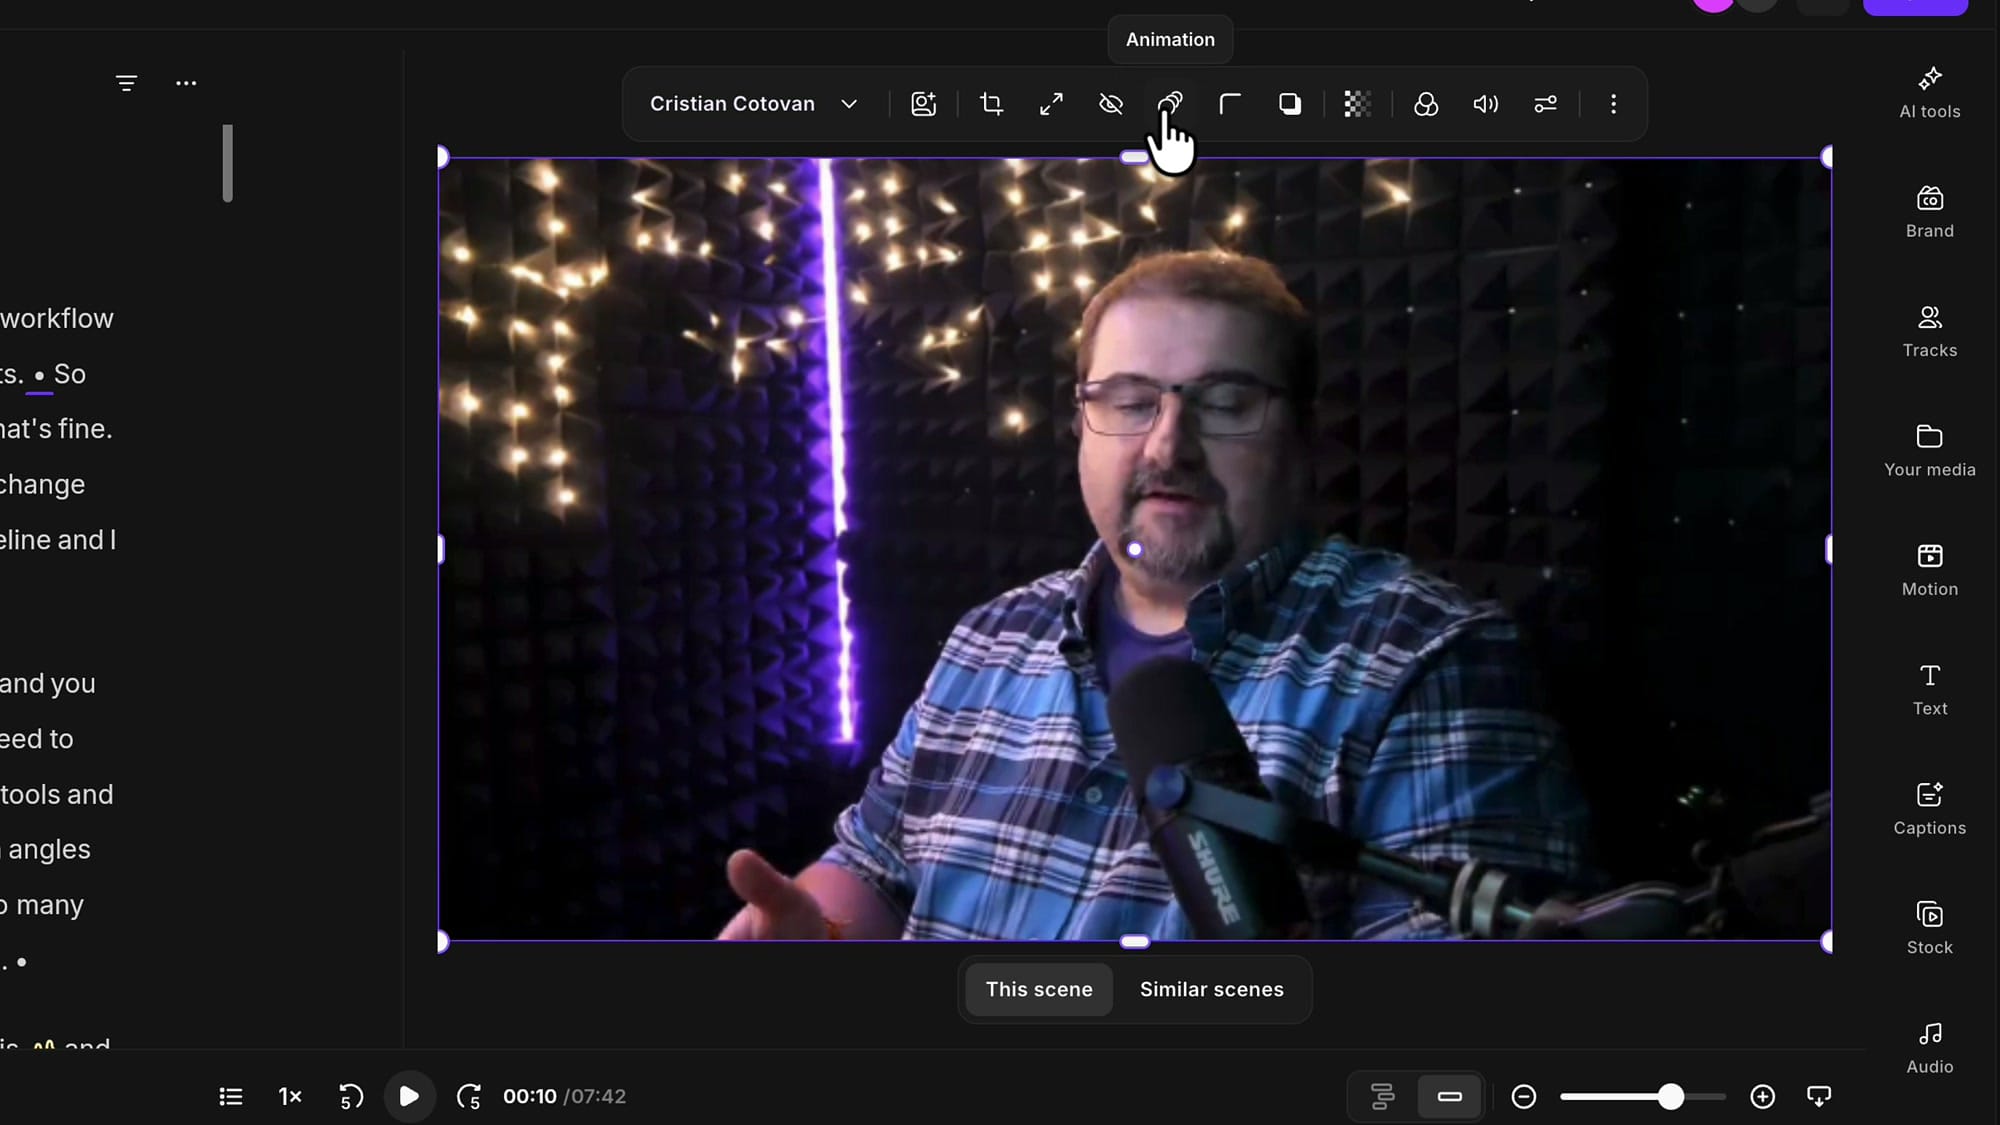
That button was already there for other kinds of animation, but the panel now includes Zoom & pan. Click the plus sign to add one. You can add more than one to the same clip.
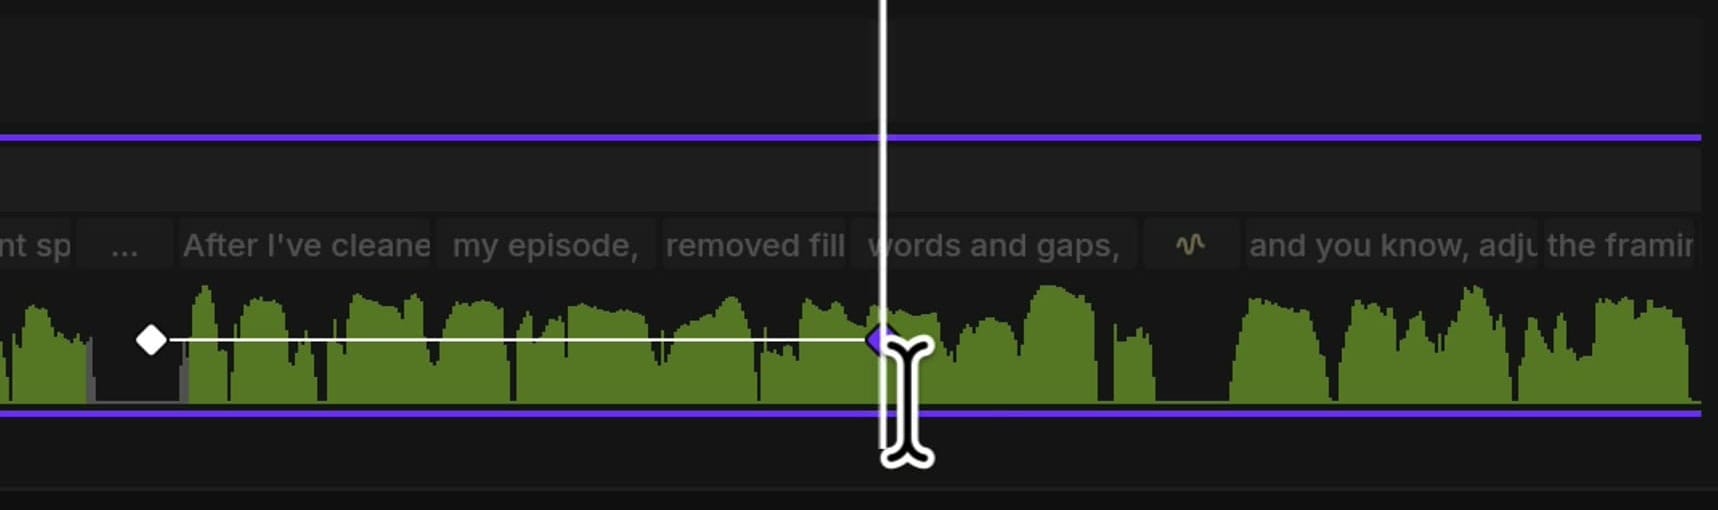
A thin line appears on the clip in the timeline. That line is the animation: it shows where the movement begins and where it ends. To make the animation longer, grab the end point and drag it to the right. A longer line means a slower move, because the same change is spread over more time. Riverside shows the duration as you drag, down to the frame — mine read 5 seconds and 9 frames, and I kept going to about 9 seconds for a very slow zoom.
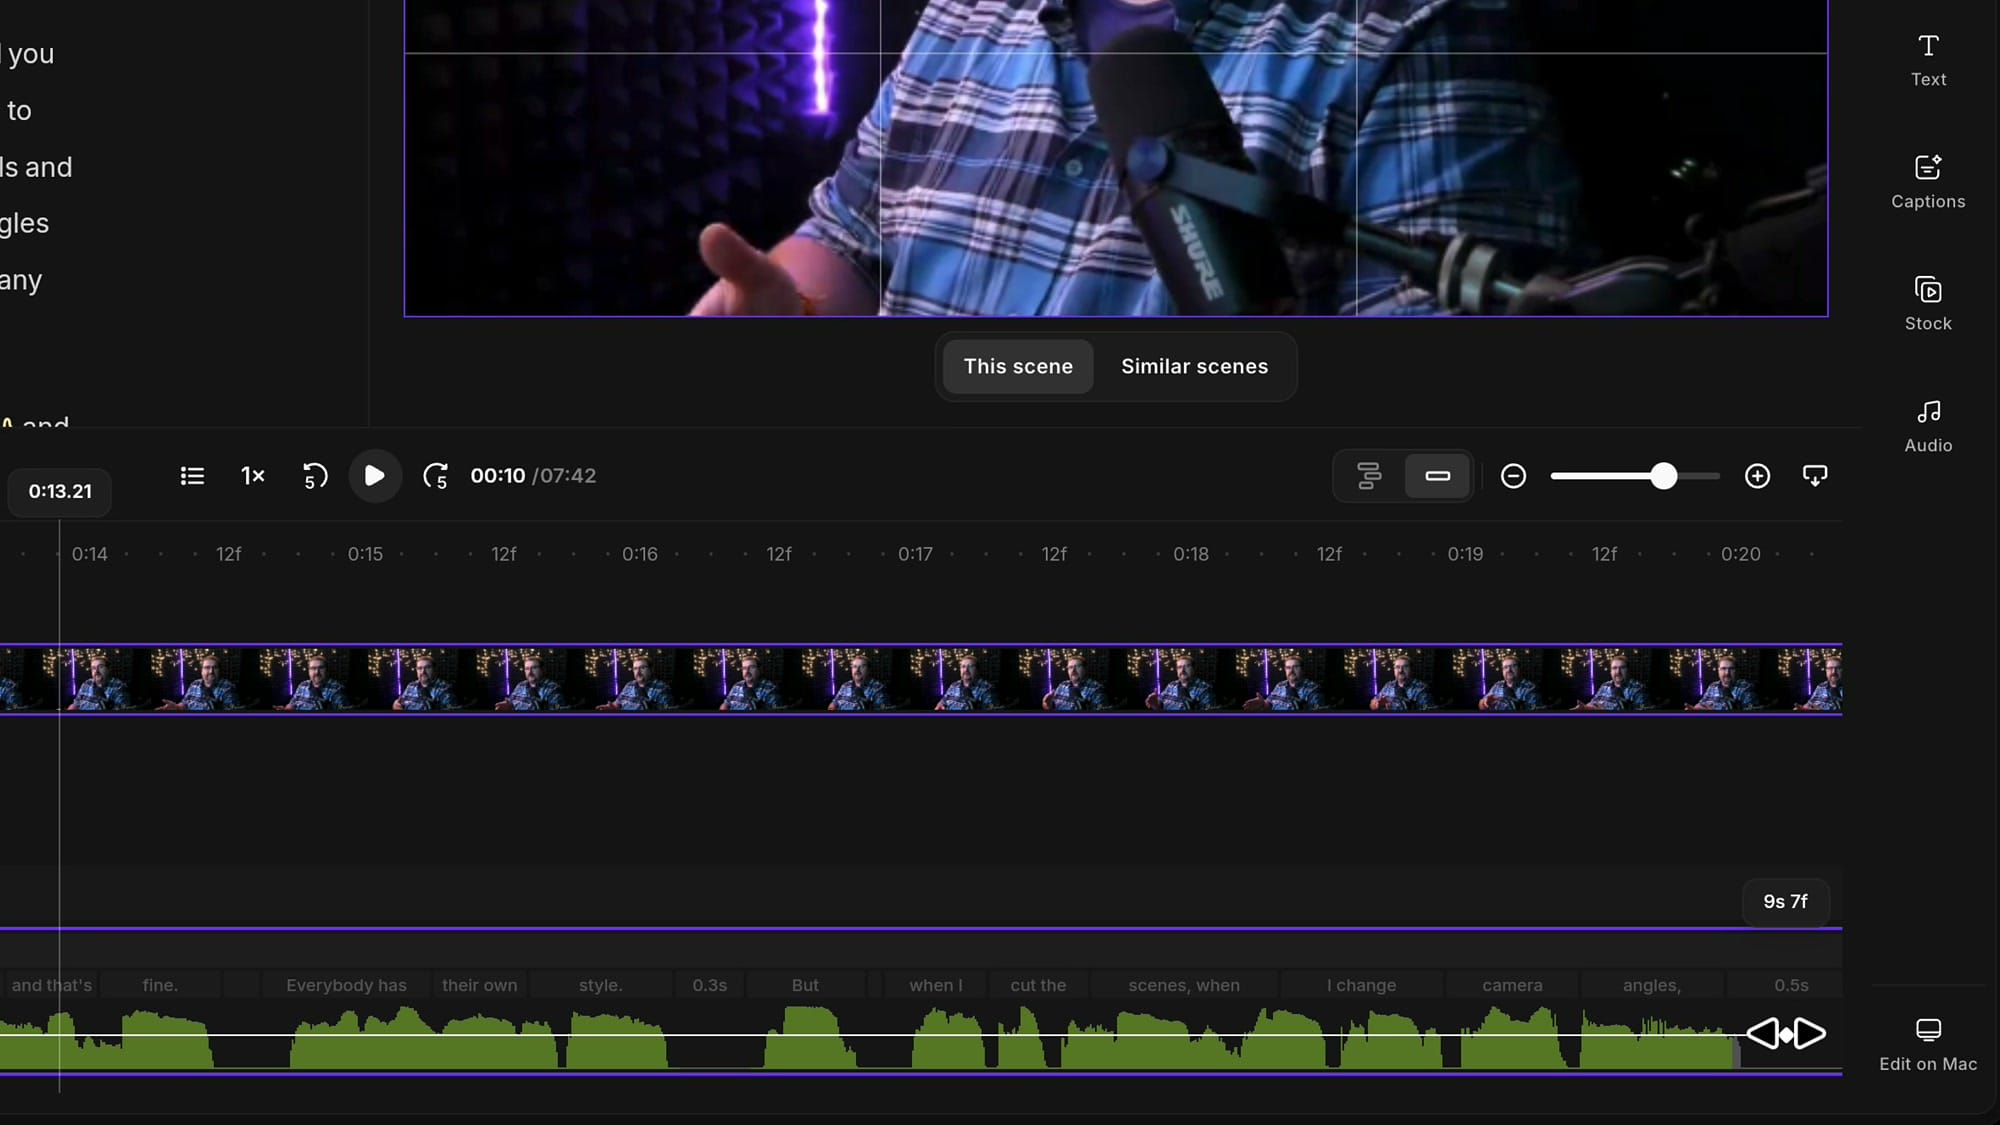
Notice that the playhead stays where you added the animation. You do not have to move it to work on the end of the move.
Set the Start and End Keyframes
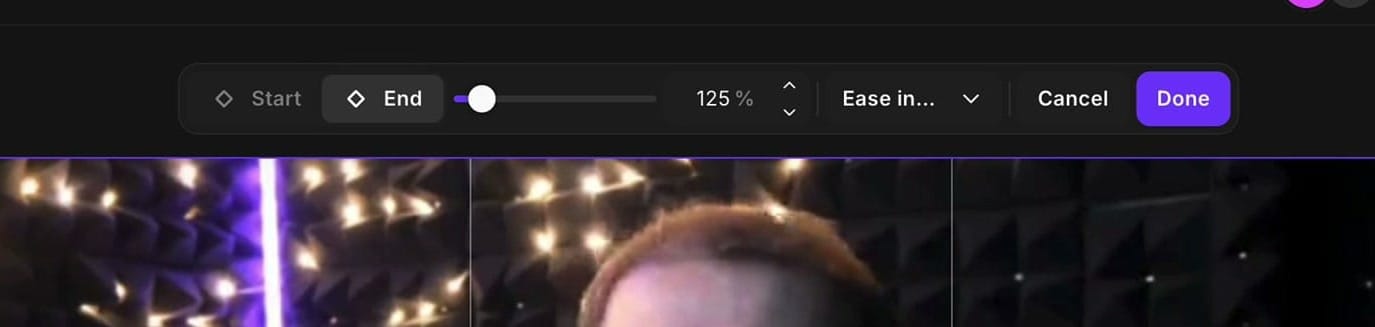
While you are editing the animation, a bar above the canvas gives you two buttons: Start and End. In video editing we call these keyframes. Click one or the other to choose which point you are setting.
For the start, I do not want anything to change. The video stays zoomed out at 100%. For the end, I want to be closer, so I click End and raise the zoom. You can drag the slider or type a number into the percentage field. I went with 125%.
While you are on the End keyframe, you can also reframe the video. Drag it on the canvas until it sits exactly where you want it when the animation finishes. That is the pan part of zoom and pan.
Choose the Easing
Next to the zoom value there is an easing menu. Easing decides how the speed of the move changes over time — the curve of the animation. There are four options:
- Ease in — starts slowly and picks up speed.
- Ease out — starts at speed and slows down at the end.
- Ease in & out — starts slowly, speeds up in the middle, and slows down toward the end.
- Linear — constant speed. The animation starts, moves at exactly the same rate, and stops.
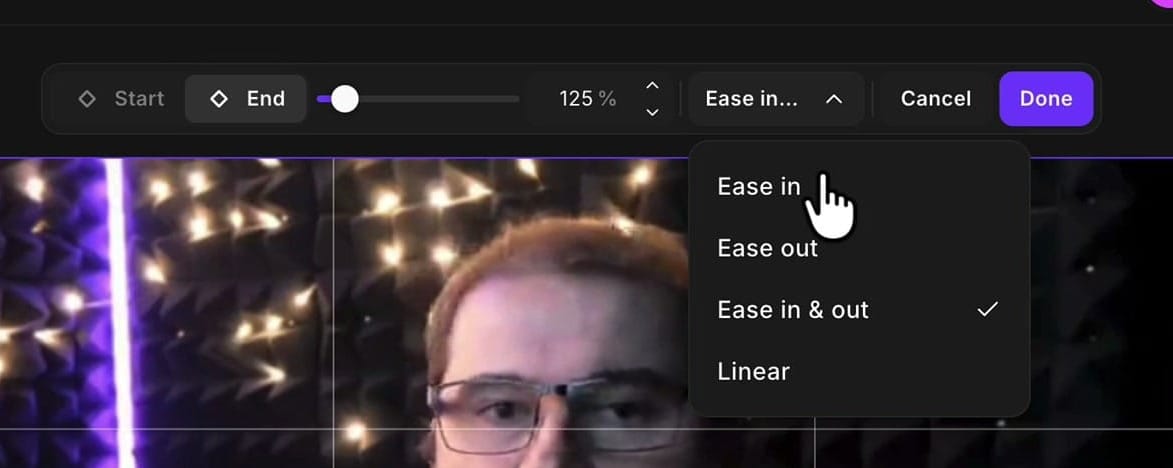
Ease in & out is the default, and it is the one I like. It gives you a more natural, human-looking move than a constant-speed zoom. I leave it on.
Click Done, and the animation is added. It now shows in the Animation panel as Zoom & pan (1), with the option to add another one below it.
One note: when you deselect the clip, the keyframe line disappears from the timeline. You have not lost it, but you cannot see it either. I wish it stayed visible so I could tell at a glance where my animations are. For now, select the clip and open Animation to bring the keyframes back.
If you’re eager to learn more about Riverside and wish to have a one-on-one Riverside coaching session, feel free to book a call with me.
I’m here to help you with any questions you have and to guide you through the best workflows, tips, workarounds, or just answer any questions you may have!
Change the Speed of an Animation
Play it back. If the move feels too slow, you do not need to touch the zoom values. Change the distance between the start and end points instead. Bring them closer together and the animation still travels the same amount of zoom, just in less time.
Select the video, click Animation, and the keyframes show up in the timeline again. Click the existing Zoom & pan (1) entry to edit it. You can change Start and End, or drag the points in the timeline. I dragged the end point back to roughly half the length, which makes the zoom about twice as fast.
Work Around the Done Button Quirk
There is one quirk you should know about, because it will cost you your edit if you miss it. When I reopen an existing animation and only drag the keyframes in the timeline to make it longer or shorter, the Done button stays greyed out. Hover over it and Riverside tells you that you need to edit the animation before saving. Moving the keyframes does not count.
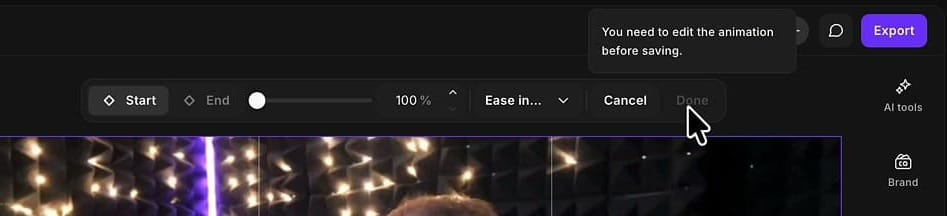
If you click Cancel or click away at this point, the change is thrown out. Open the animation again and it is back to its old length.
The workaround is simple. After you drag the keyframes, nudge the zoom value up by one and back down again — 125 to 126 and back to 125. That activates the Done button. Click it, and the new timing is applied. You will see the line in the timeline at its new length.
I call this a UI quirk, or a bug, and I expect it to be addressed. Until then, remember the nudge every time you retime an animation or change only its easing.
Zoom Into a Screen Share for Tutorials
This is the use case I wanted zoom and pan for. I make a lot of tutorials, and now I can zoom in and out on my screen share right inside Riverside.
First I set up a tutorial layout. After my introduction, I insert a new scene with the scene button or by pressing S. Then I change the layout so the screen share is full screen and I am in the corner, and I make my camera bubble a bit larger.
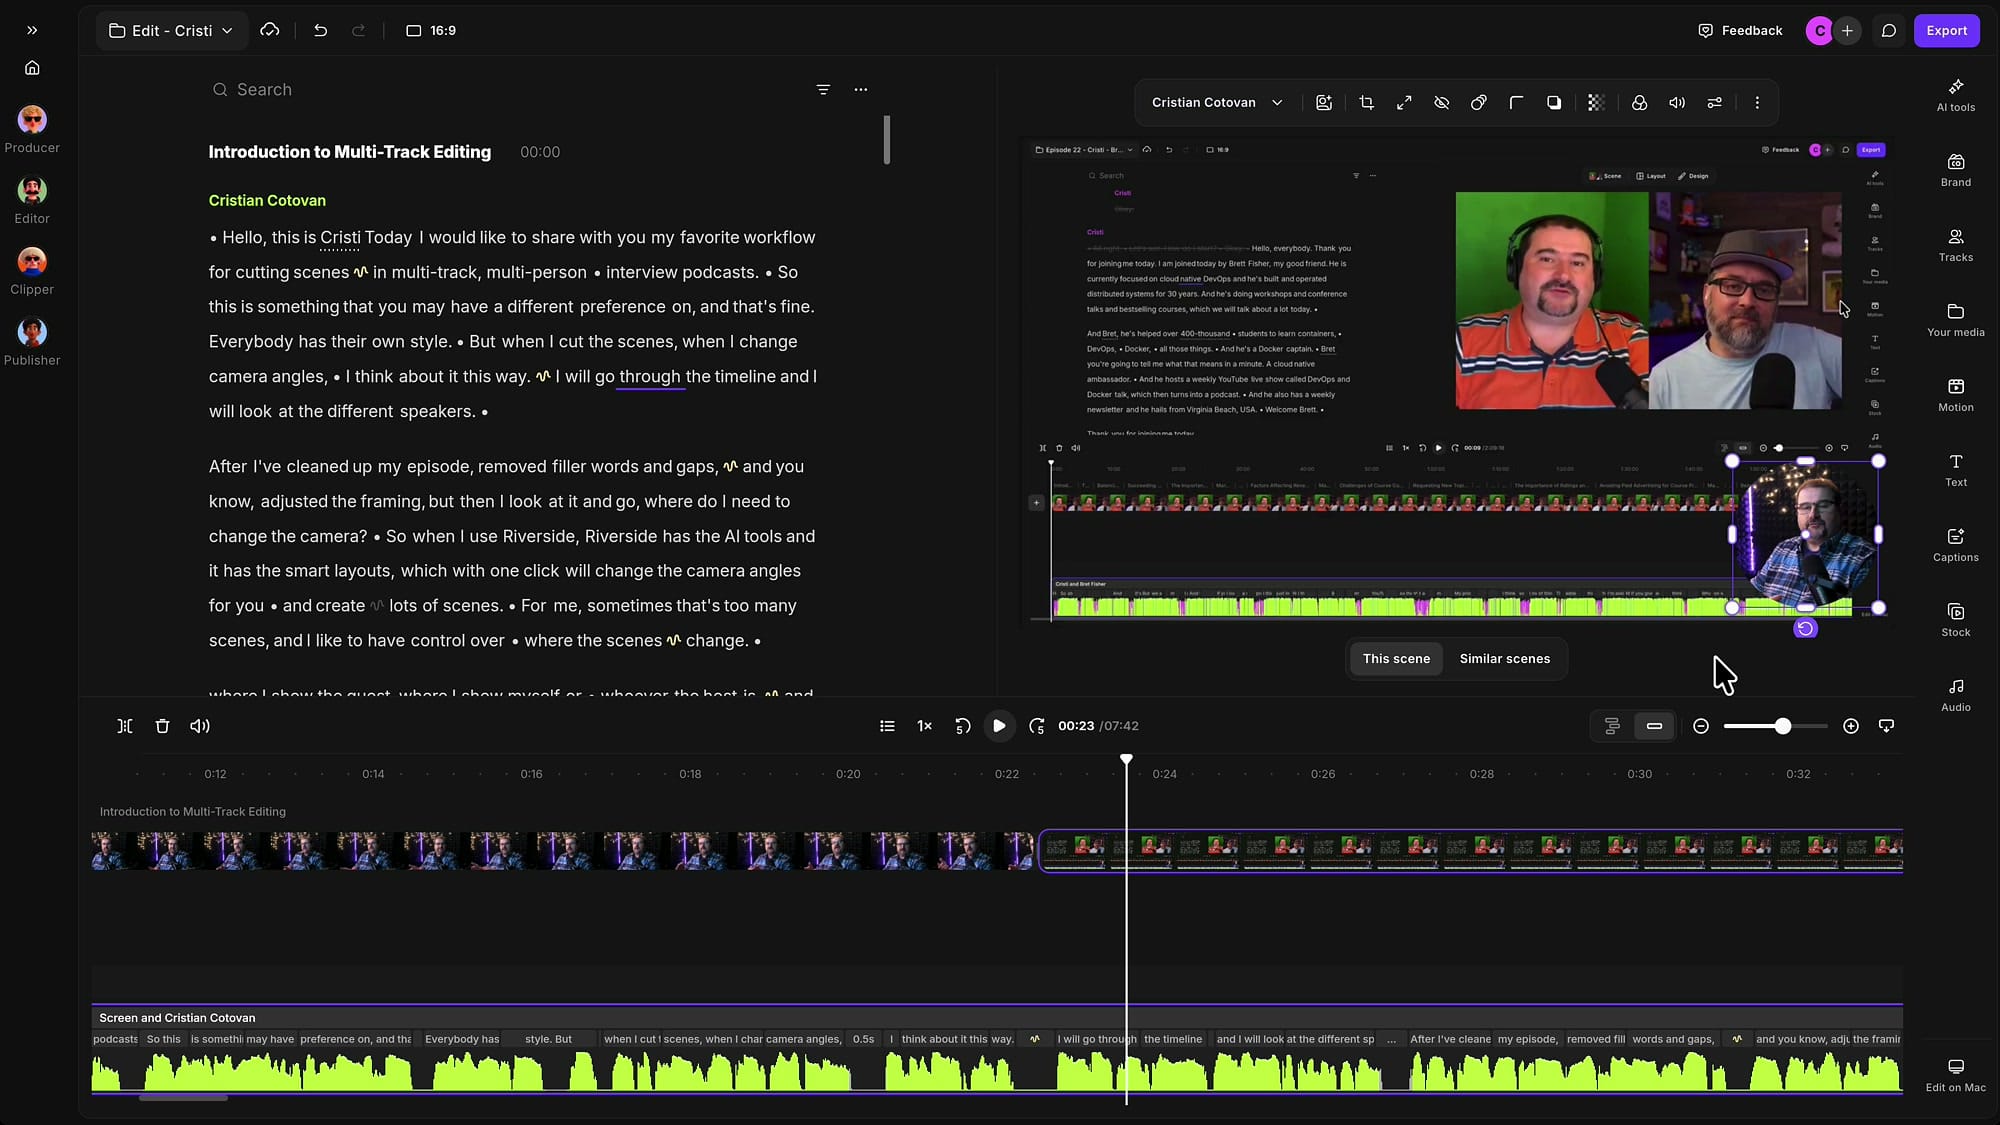
From here the steps are the same as before, only this time you select the screen instead of the camera:
- Put the playhead where you want the animation to start.
- Click the screen share on the canvas.
- Click Animation and add Zoom & pan.
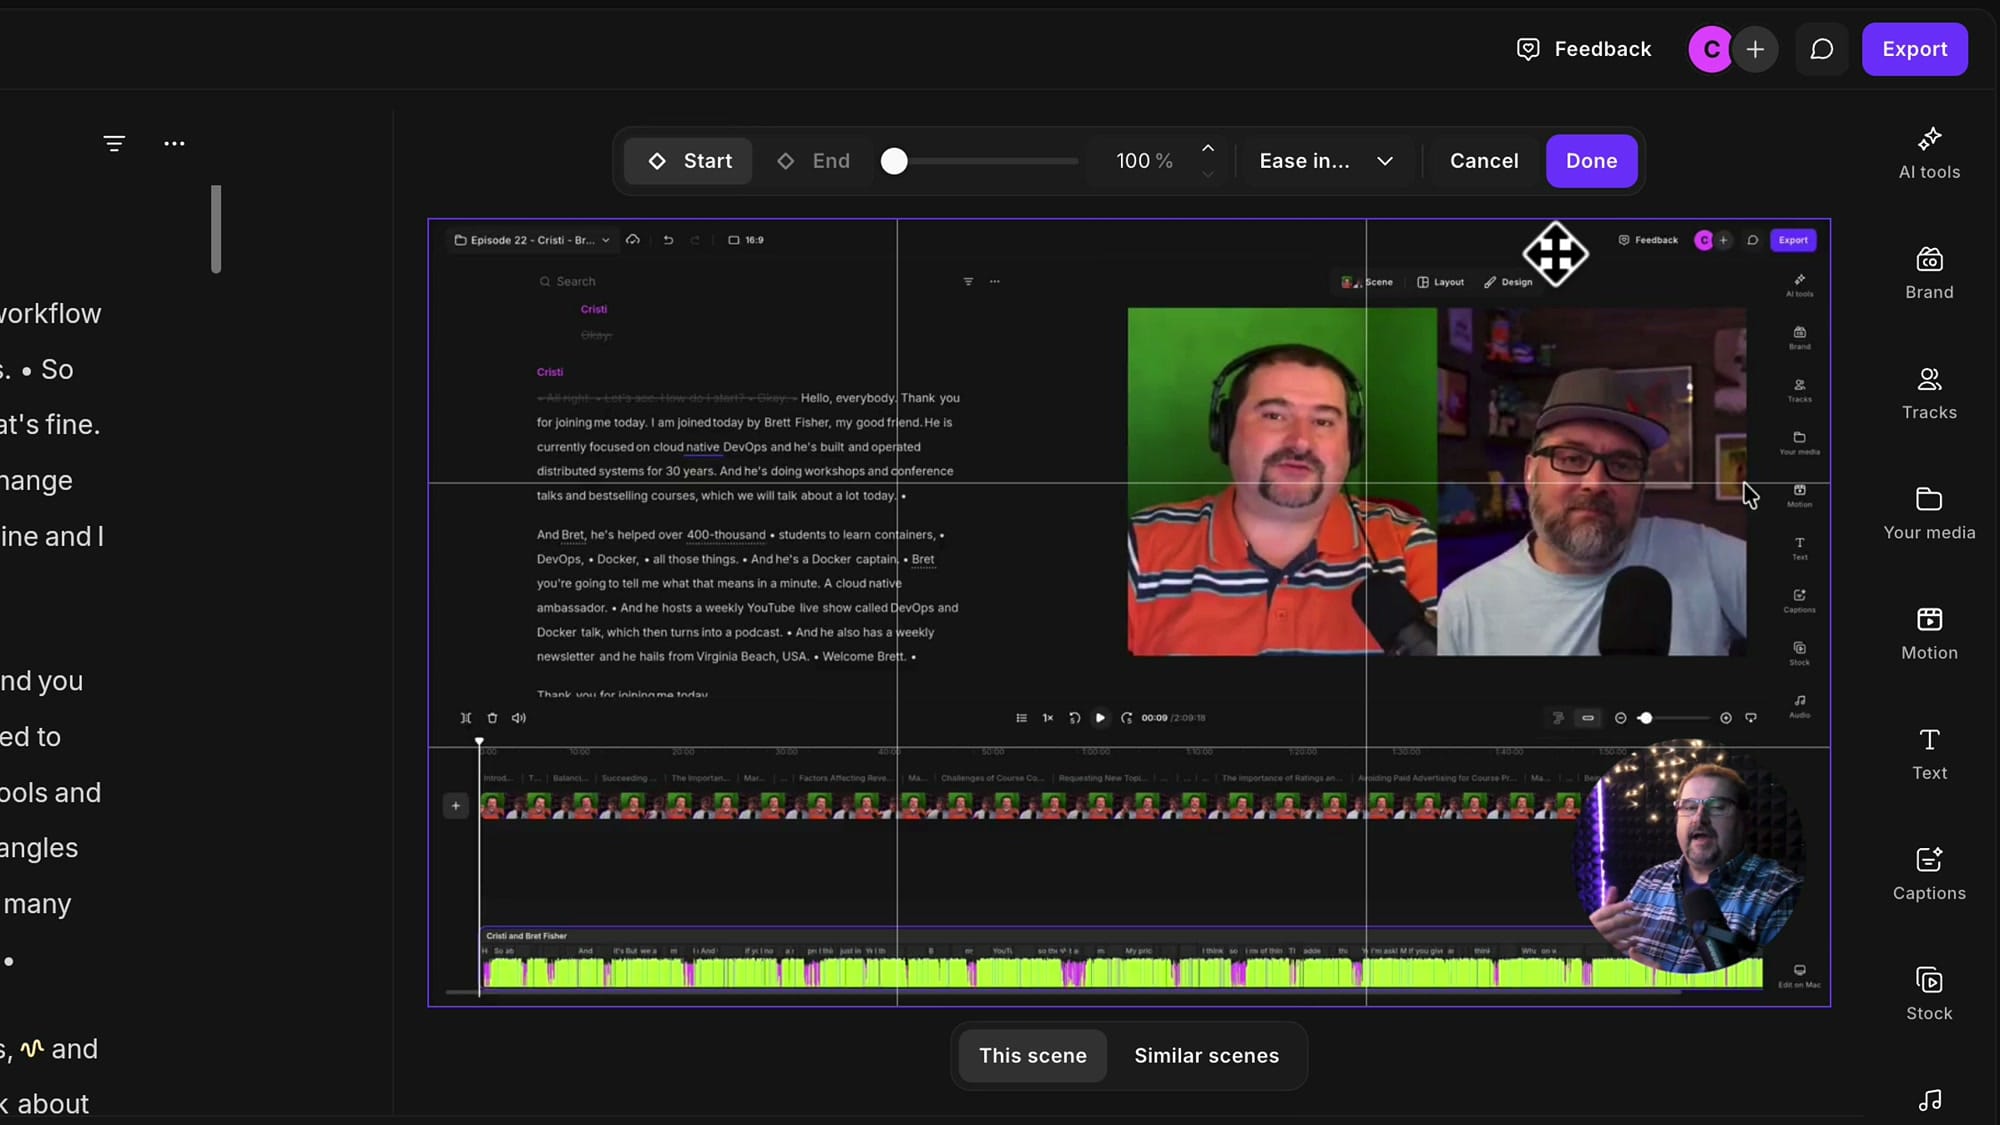
- Click End, zoom in, and drag the screen so the part you want to show fills the frame.
I wanted to highlight the top-left part of the screen, so I zoomed to 178% and dragged the recording until that area was in view.
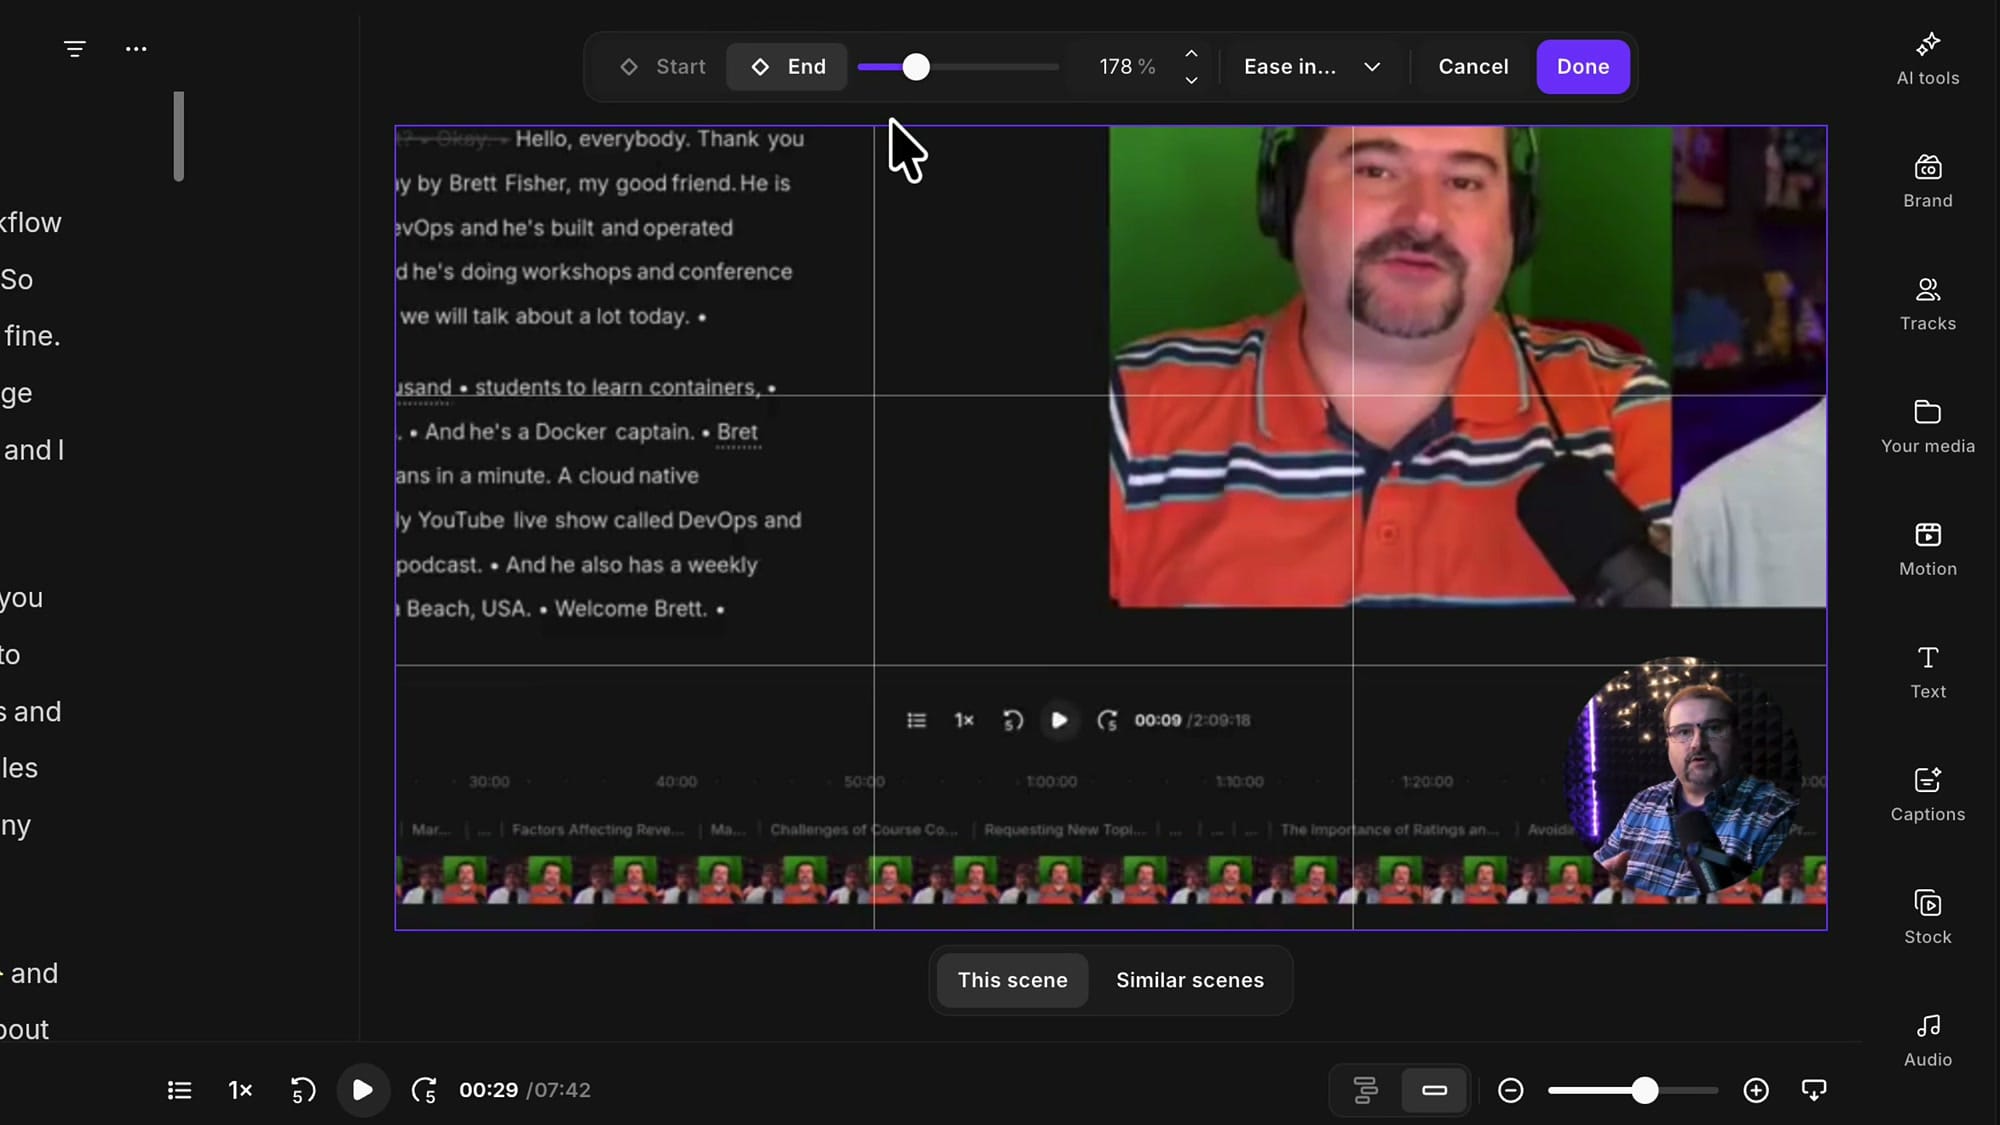
There is a helpful detail in the timeline while you do this. The keyframe you are currently editing is highlighted in purple. I do not really need it, since the bar above the canvas already says whether I am on Start or End, but it is a good confirmation.
Click back to Start and check that it is at 100% and visually in the right place, then click Done.
Press play and the screen glides into the area you framed. To change the easing later, select the screen, open Animation, edit the animation, and pick a different option. Remember the quirk: nudge the zoom up and down to activate Done, or the change will not take effect.
There are still a few bugs and quirks, but this opens up a lot of possibilities for tutorials. You can zoom in and out and point your viewer at different parts of the screen without leaving Riverside.
Animate B-Roll and Images
Zoom and pan is not limited to what you recorded in Riverside. It also works with B-roll, images, and other videos you add on top of your main timeline.
I opened Stock and pulled in a stock video. Riverside adds it on its own track above the main one. Select that clip, click Animation, and you will see three options this time. In and Out are the animations that were there before. They decide how the item comes onto the screen and how it leaves, which is handy for titles, bits of text, and icons. Below them is Zoom & pan.
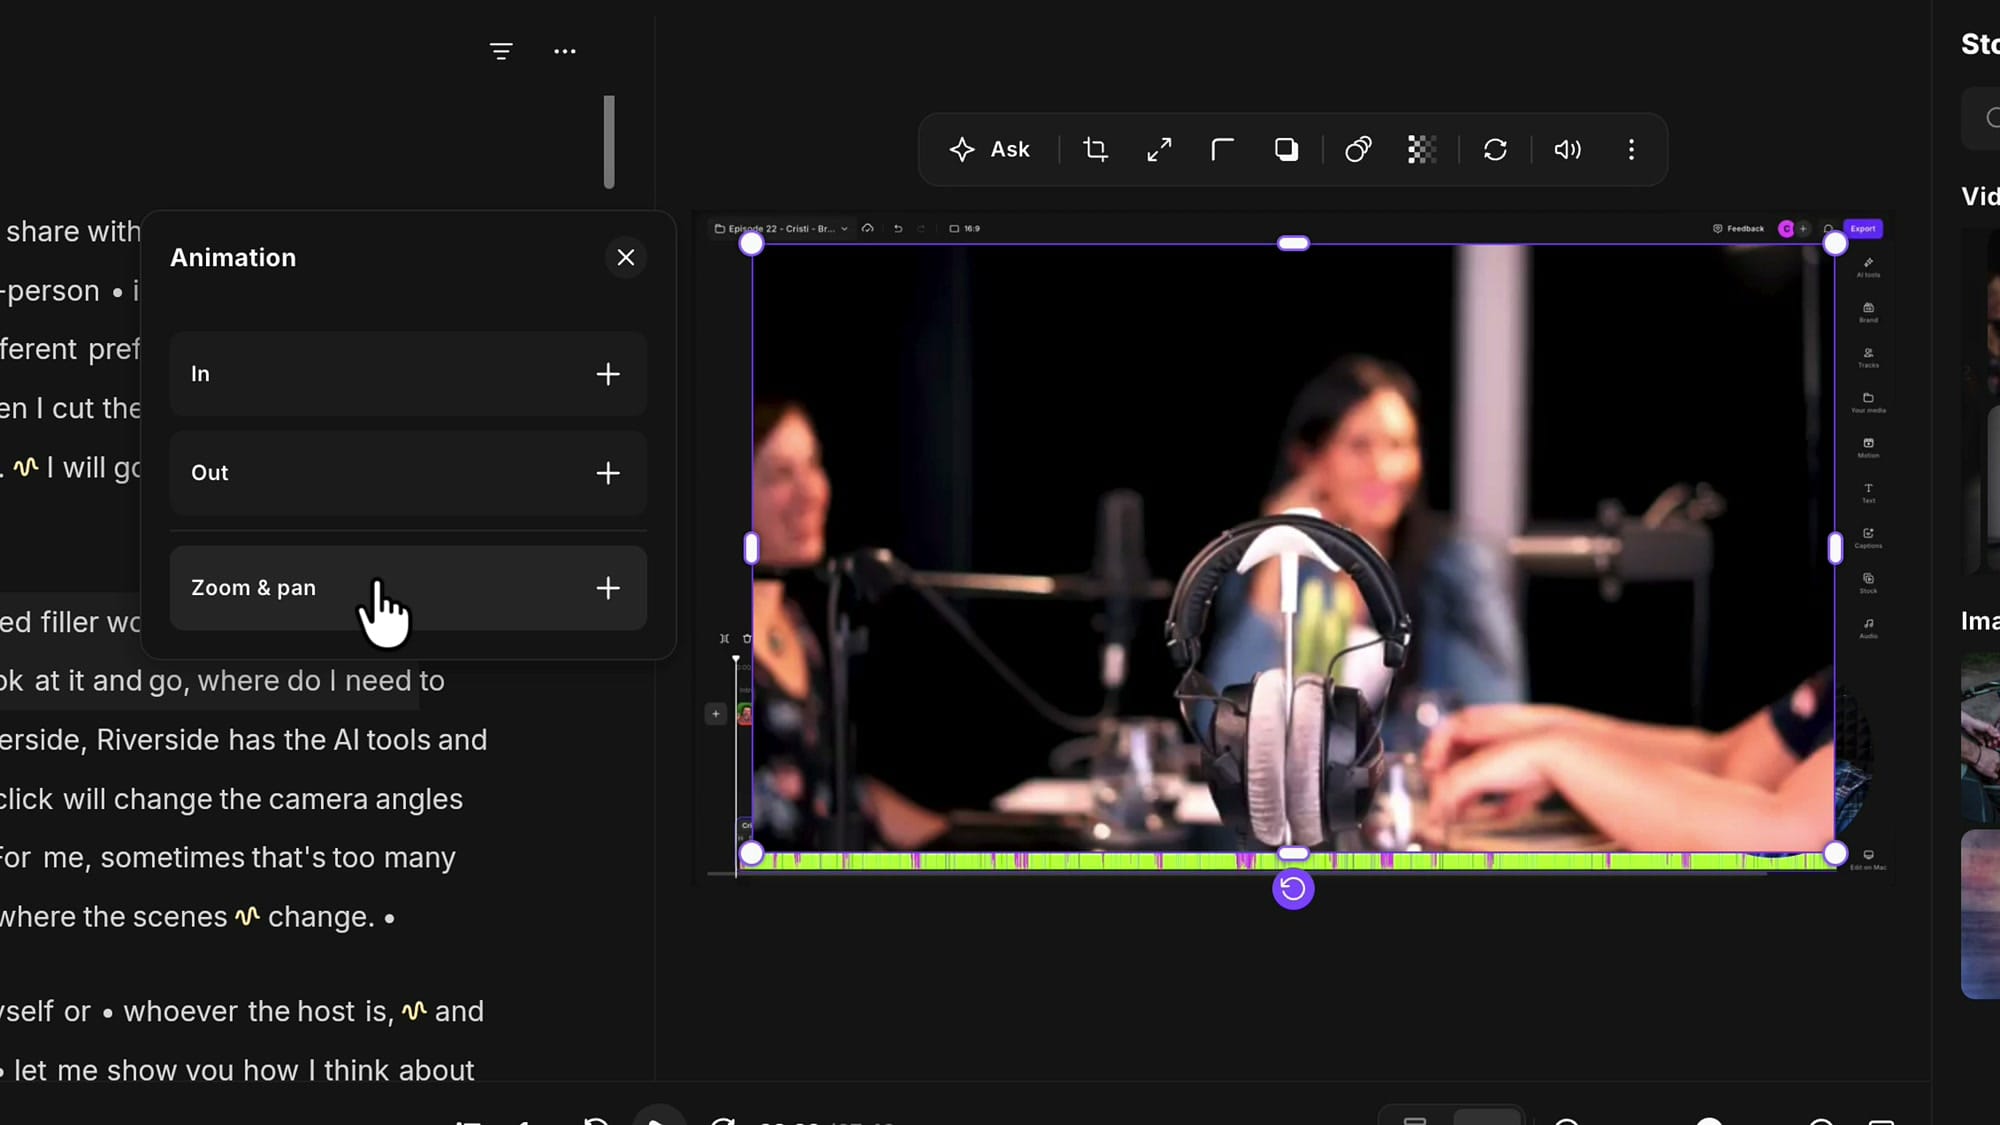
Add it, and the same keyframe line shows up on the B-roll clip in the timeline. I went to End, zoomed in on a pair of headphones in the shot, reframed them, went back to Start to check the position, and pulled the first keyframe along the timeline a little to adjust where the move begins. Then Done.
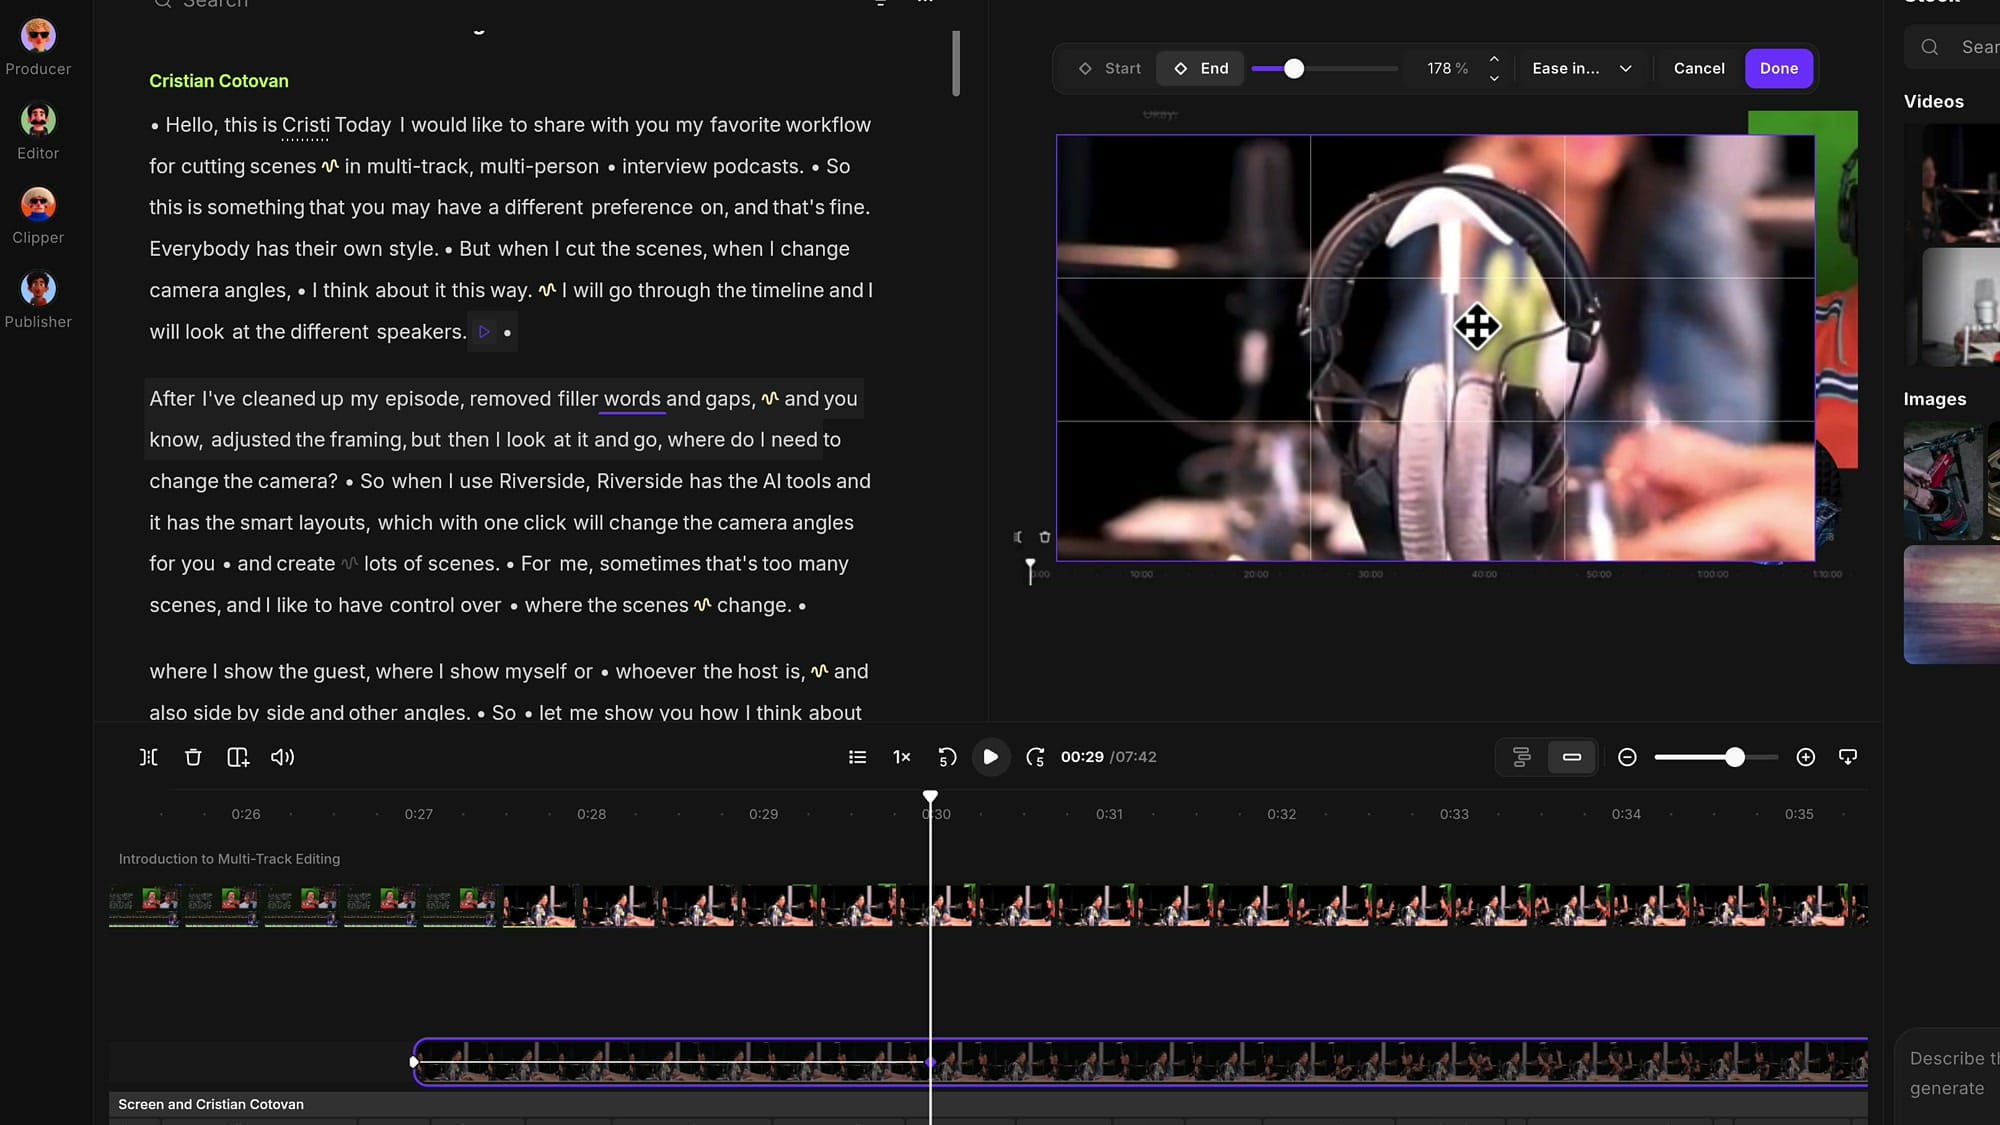
The picture now animates on its own. When I played it back, my screen-share animation was still running underneath at the same time. Each item keeps its own zoom and pan, so you can layer several moves in one scene.
Quick Recap
- Park the playhead where the move should start, select the item, and choose Animation → Zoom & pan.
- Drag the end of the line in the timeline to set the duration. Longer is slower.
- Leave Start as is, then set the zoom and framing on End.
- Keep Ease in & out for a natural move, or switch to Linear for constant speed.
- When you edit an existing animation, nudge the zoom up and down so Done becomes active.
- It works on camera video, screen shares, B-roll, and images, each with its own animation.
Zoom and pan gives you a lot more flexibility in how you lay things out on screen. If you have questions about it, leave them in the comments on the video.
Related guides
 Cristi Cotovan
 Cristi Cotovan
 Cristi Cotovan
 Cristi Cotovan
 Cristi Cotovan
If you're eager to learn more about Riverside and wish to have a one-on-one Riverside coaching session, feel free to book a call with me. I'm here to help you with any questions you have and to guide you through the best workflows, tips, workarounds, or just answer any questions you may have!